check engine TOYOTA HILUX 2023 Owner's Guide
[x] Cancel search | Manufacturer: TOYOTA, Model Year: 2023, Model line: HILUX, Model: TOYOTA HILUX 2023Pages: 810, PDF Size: 131.54 MB
Page 345 of 810
3434-5. Using the driving support systems
4
Driving
HILUX_OM_OM0K789E_(EE)
■Locking the rear differential
The following systems do not operate w hen the rear differential is locked.
It is normal operation for the ABS warning light, VSC OFF indicator (if
equipped) and “TRC OFF” indicator (if equipped) to be on or for “TRC turned
off” to be displayed on the multi-information display (if equipped) at this time.
•ABS
• Brake assist (if equipped)
• VSC (if equipped)
• TRC/A-TRC (if equipped)
• Trailer Sway Control (if equipped)
• Hill-start assist control (if equipped)
• Downhill assist control (if equipped)
■ Unlocking the rear differential
If the rear differential lock indicator still flashes even after unlocking the rear
differential, check the safety of the surrounding area and slightly turn the
steering wheel in either direction while the vehicle is in motion.
■ Automatic system cancelation of the rear differential lock system
The rear differential lock is also unlocked in any of the following situations:
● The front-wheel drive control switch is turned to H2 or H4 (4WD models)
● The engine switch is turned to the “ACC” or “LOCK” position (vehicles with-
out smart entry & start system) or A CCESSORY or off (vehicles with smart
entry & start system)
■ After unlocking the rear differential
Check that the indicator goes off.
WARNING
■ To avoid an accident
Failure to observe the following precautions may result in an accident.
● Do not use the rear differential lock system except when wheel spinning
occurs in a ditch or on a slippery or rugged surface. Large steering effort
and careful cornering control will be required.
● Do not lock the rear differential until the wheels have stopped spinning.
Otherwise, the vehicle may move in an unexpected direction when the dif-
ferential lock is engaged, resulting in an accident. This may also lead to
possible damage to rear differential lock component parts.
● Do not drive over 8 km/h (5 mph) when the differential is locked.
● Do not keep driving with the rear differential lock switch on.
Page 367 of 810
3654-5. Using the driving support systems
4
Driving
HILUX_OM_OM0K789E_(EE)
■ System malfunction
In the following cases, have your vehicle checked by any authorized Toyota
retailer or Toyota authorized repairer, or any reliable repairer.
● The downhill assist control system indicator does not come on when the
engine switch is turned to the “ON” position (vehicles without smart entry &
start system) or IGNITION ON mode (vehicles with smart entry & start sys-
tem).
● The downhill assist control system indicator does not come on when the
“DAC” switch is pressed.
● The slip indicator comes on.
WARNING
■When using downhill assist control system
● Do not rely overmuch on the downhill assist control system. This function
does not extend the vehicle’s performance limitations. Always thoroughly
check the road conditions, and drive safely.
● Vehicles with manual transmission: Drive in a low gear. Driving in a high
gear when using downhill assist control system may cause the engine to
stall, which may lose the brake effectiveness and lock the tires, resulting in
an accident.
● Vehicles with manual transmission: On a steep slope, use the engine brak-
ing efficiently. If the vehicle is driven in N or with the clutch pedal
depressed on a steep slope, the load on the brake increases and con-
trolling the vehicle speed may be impossible, resulting in an accident.
■ The system may not operate on the following surfaces, which may lead
to an accident causing death or serious injury
● Slippery surfaces such as wet or muddy roads
● Icy surface
● Unpaved roads
Page 372 of 810
3704-5. Using the driving support systems
HILUX_OM_OM0K789E_(EE)
●If the DPF system warning message “DPF full See owner’s manual”
appears on the multi-information display, follow the procedure
below to regenerate.
When regenerating the filter during driving the vehicle
To regenerate the filter, the following driving methods are recom-
mended.*1
• By driving continuously (for example, at around 60 km/h [37 mph]
for 20 to 30 minutes).
• By avoiding short trips, or by driving continuously (leaving the
engine running for long periods of time).
Check the engine is warmed up before driving the vehicle to regenerate
the filter. If the engine is cold, warm up the engine by driving the vehicle
downshifting to increase the engine speed.*2
The warning message will disappear on the multi-information display when
regeneration is complete. However, depending on the driving condition
such as heavy traffic, the amount of accumulated deposit increases and
the warning message may not disappear on the multi-information display.
If the warning message does not disappear on the multi-information dis-
play after driving, press the DPF system switch to manually regenerate the
filter.
Regeneration during driving cannot be performed when the vehicle is
higher than 4000 m (13124 ft.) above sea level.
*1: When driving, pay sufficient attention to weather, road conditions, ter-
rain and traffic conditions, and drive according to traffic laws.
*2: Depending on the situation, it may be necessary to downshift until the
engine speed is increased to 3000 rpm. If the engine coolant tempera-
ture or exhaust gas temperature is low, it may take a long time to
regenerate, or regeneration may be impossible.
DPF system failure warning
Page 373 of 810
3714-5. Using the driving support systems
4
Driving
HILUX_OM_OM0K789E_(EE)
When regenerating the filter by pressing the DPF system switch
Stop the vehicle in a safe place.
Shift the shift lever to P (automatic transmission) or N (manual
transmission), and firmly set the parking brake.
Do not stop the engine.
Also, make sure that there are no flammable materials near the exhaust
pipe. ( P. 368)
Check the engine is warmed up. If the engine is cold, warm up the engine
by depressing the accelerator pedal.*1
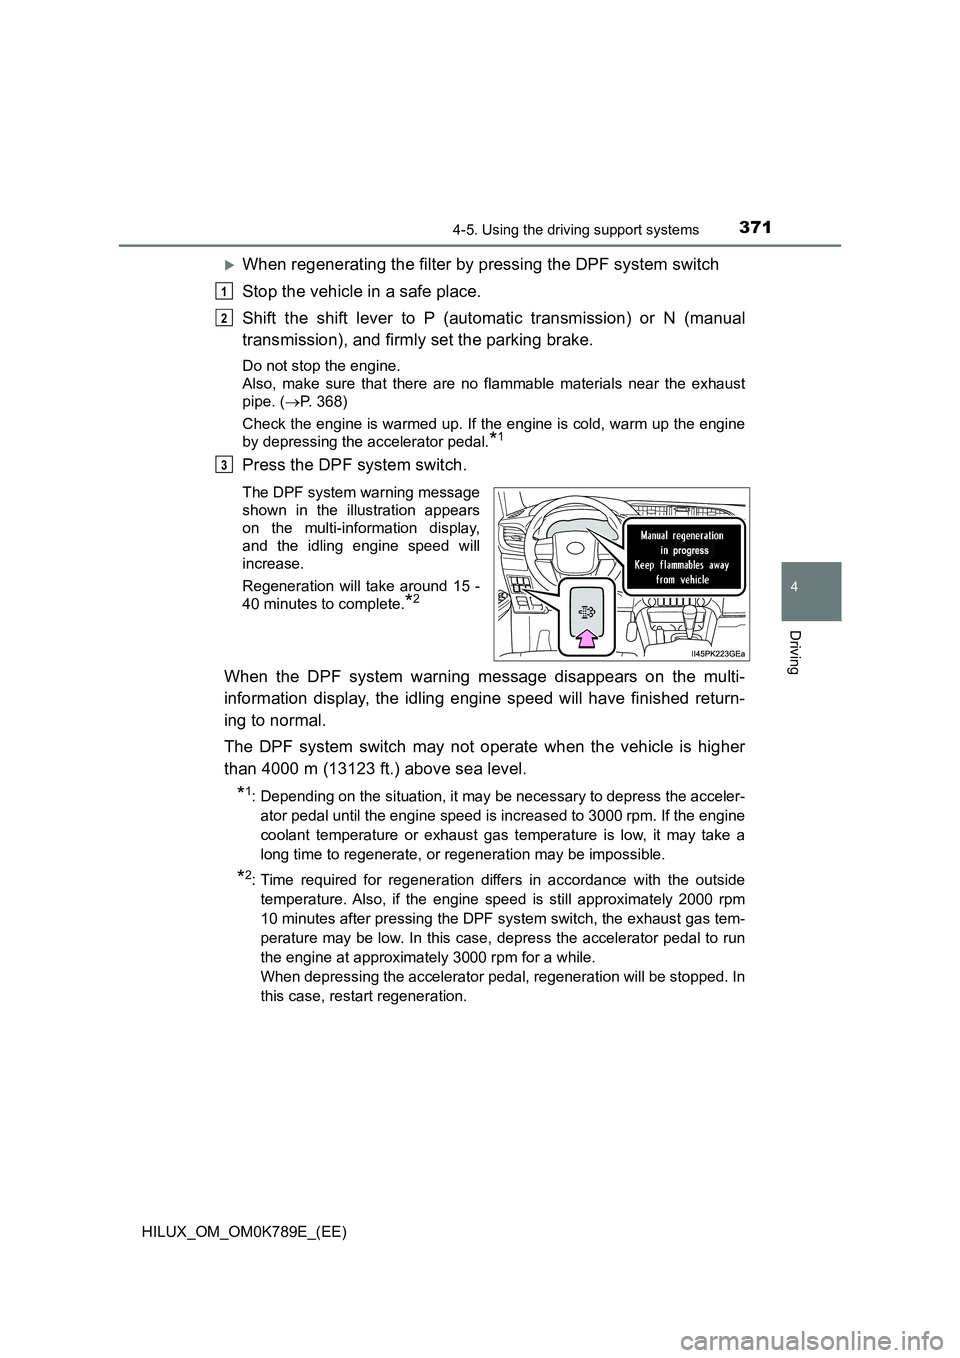
Press the DPF system switch.
The DPF system warning message
shown in the illustration appears
on the multi-information display,
and the idling engine speed will
increase.
Regeneration will take around 15 -
40 minutes to complete.*2
When the DPF system warning message disappears on the multi-
information display, the idling engine speed will have finished return-
ing to normal.
The DPF system switch may not operate when the vehicle is higher
than 4000 m (13123 ft.) above sea level.
*1: Depending on the situation, it may be necessary to depress the acceler-
ator pedal until the engine speed is increased to 3000 rpm. If the engine
coolant temperature or exhaust gas temperature is low, it may take a
long time to regenerate, or regeneration may be impossible.
*2: Time required for regeneration differs in accordance with the outside
temperature. Also, if the engine speed is still approximately 2000 rpm
10 minutes after pressing the DPF system switch, the exhaust gas tem-
perature may be low. In this case, depress the accelerator pedal to run
the engine at approximately 3000 rpm for a while.
When depressing the accelerator pedal, regeneration will be stopped. In
this case, restart regeneration.
1
2
3
Page 375 of 810
373
4
4-6. Driving tips
Driving
HILUX_OM_OM0K789E_(EE)
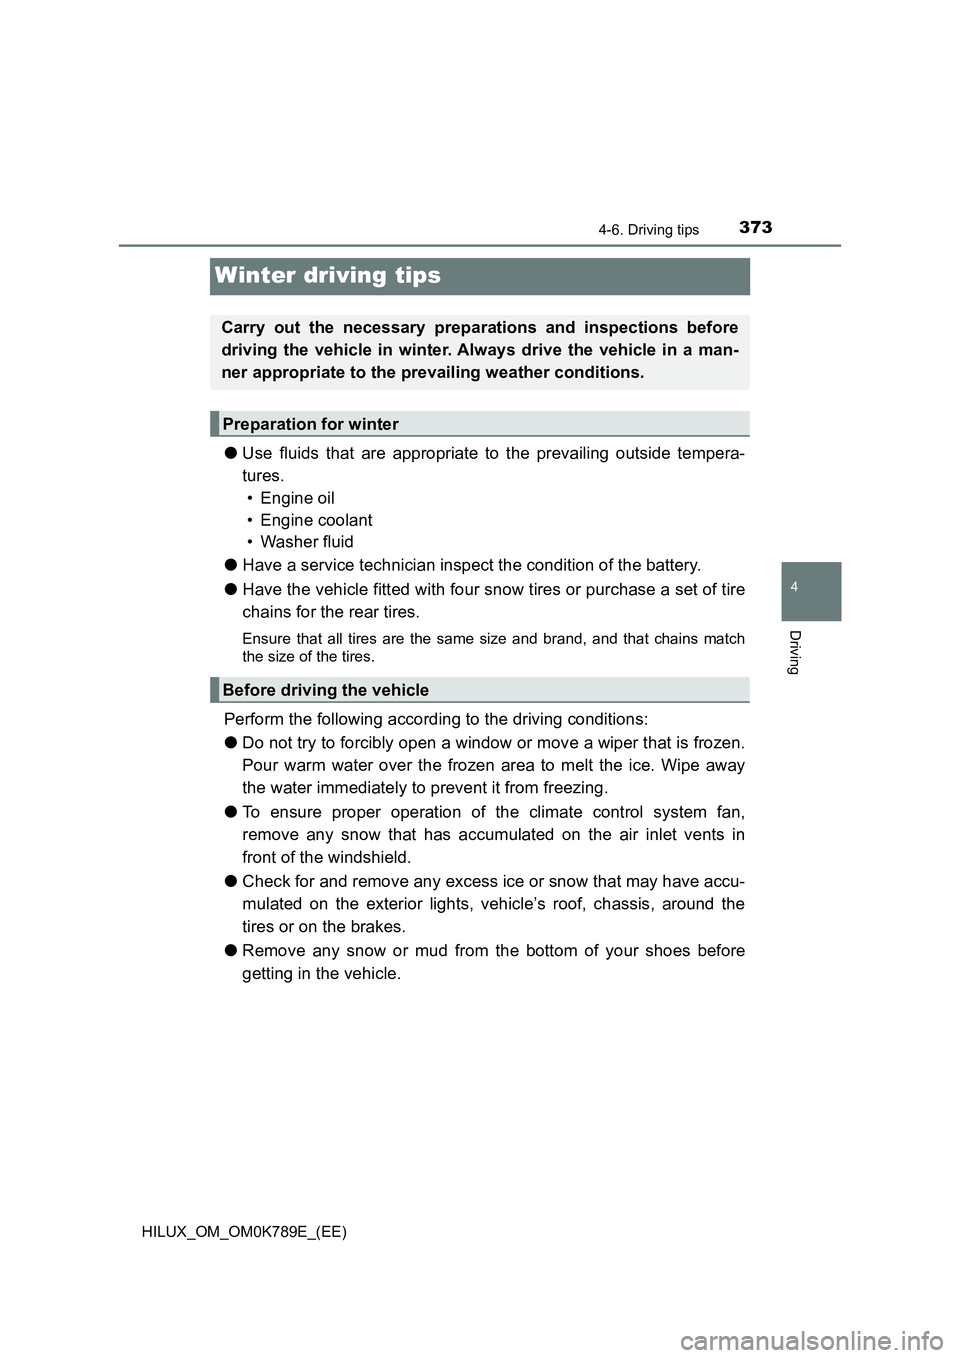
Winter driving tips
●Use fluids that are appropriate to the prevailing outside tempera-
tures.
• Engine oil
• Engine coolant
• Washer fluid
● Have a service technician inspect the condition of the battery.
● Have the vehicle fitted with four snow tires or purchase a set of tire
chains for the rear tires.
Ensure that all tires are the same size and brand, and that chains match
the size of the tires.
Perform the following according to the driving conditions:
● Do not try to forcibly open a window or move a wiper that is frozen.
Pour warm water over the frozen area to melt the ice. Wipe away
the water immediately to prevent it from freezing.
● To ensure proper operation of the climate control system fan,
remove any snow that has accumulated on the air inlet vents in
front of the windshield.
● Check for and remove any excess ice or snow that may have accu-
mulated on the exterior lights, vehicle’s roof, chassis, around the
tires or on the brakes.
● Remove any snow or mud from the bottom of your shoes before
getting in the vehicle.
Carry out the necessary preparations and inspections before
driving the vehicle in winter. Always drive the vehicle in a man-
ner appropriate to the prevailing weather conditions.
Preparation for winter
Before driving the vehicle
Page 392 of 810
3905-4. Playing an audio CD and MP3/WMA/AAC discs
HILUX_OM_OM0K789E_(EE)
■Display
Depending on the contents recorded, the characters may not be displayed
properly or may not be displayed at all.
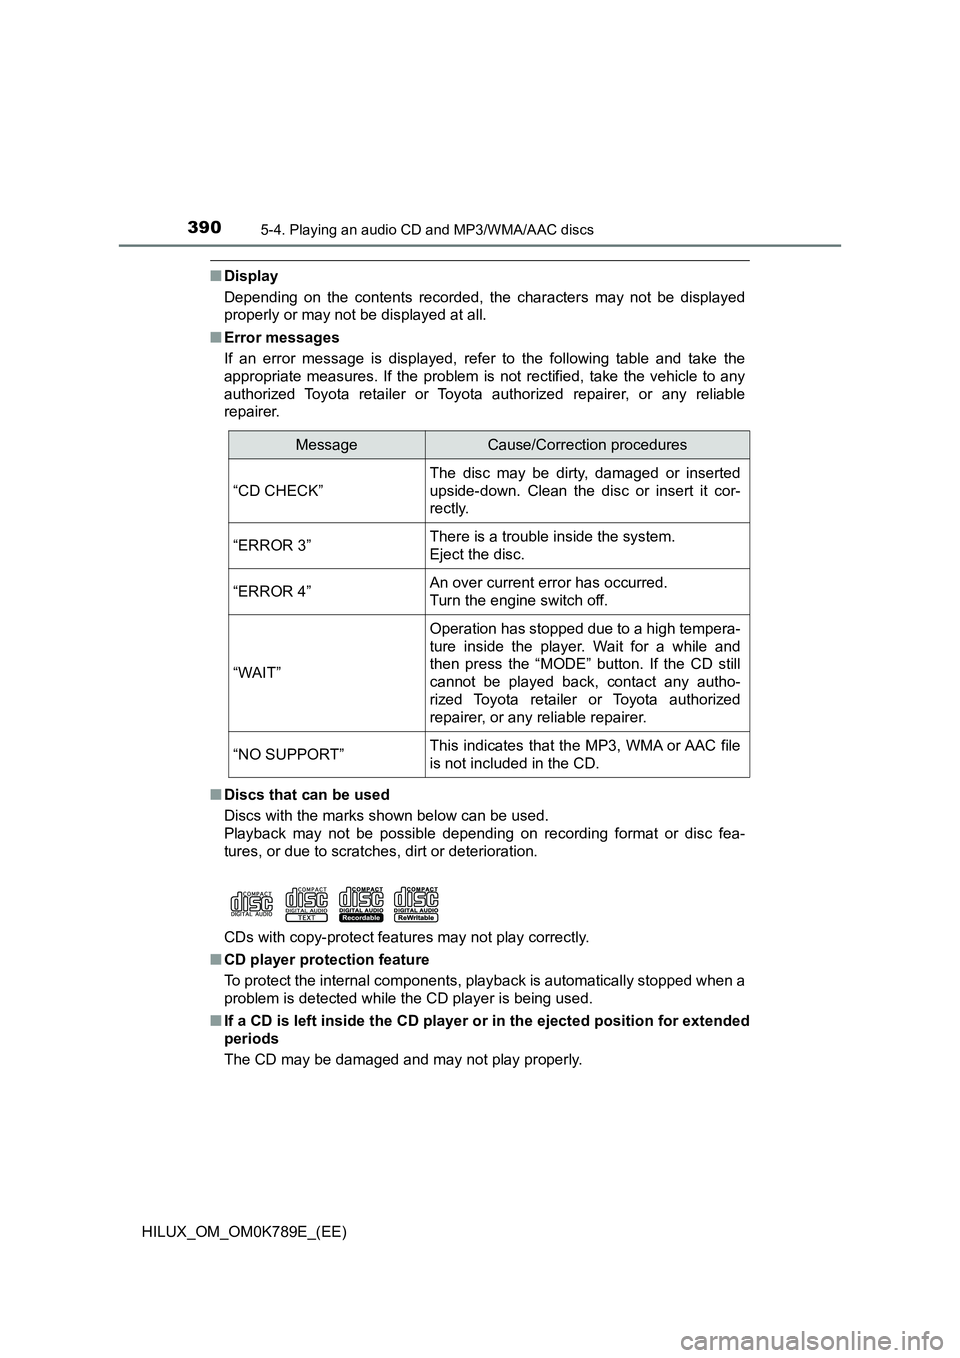
■ Error messages
If an error message is displayed, refer to the following table and take the
appropriate measures. If the problem is not rectified, take the vehicle to any
authorized Toyota retailer or Toyota authorized repairer, or any reliable
repairer.
■ Discs that can be used
Discs with the marks shown below can be used.
Playback may not be possible depending on recording format or disc fea-
tures, or due to scratches, dirt or deterioration.
CDs with copy-protect features may not play correctly.
■ CD player protection feature
To protect the internal components, playback is automatically stopped when a
problem is detected while the CD player is being used.
■ If a CD is left inside the CD player or in the ejected position for extended
periods
The CD may be damaged and may not play properly.
MessageCause/Correction procedures
“CD CHECK”
The disc may be dirty, damaged or inserted
upside-down. Clean the disc or insert it cor-
rectly.
“ERROR 3”There is a trouble inside the system.
Eject the disc.
“ERROR 4”An over current error has occurred.
Turn the engine switch off.
“WAIT”
Operation has stopped due to a high tempera-
ture inside the player. Wait for a while and
then press the “MODE” button. If the CD still
cannot be played back, contact any autho-
rized Toyota retailer or Toyota authorized
repairer, or any reliable repairer.
“NO SUPPORT”This indicates that the MP3, WMA or AAC file
is not included in the CD.
Page 473 of 810
471
7Maintenance and care
HILUX_OM_OM0K789E_(EE)
7-1. Maintenance and care
Cleaning and protecting
the vehicle exterior .......... 472
Cleaning and protecting
the vehicle interior ........... 476
7-2. Maintenance
Maintenance
requirements.................... 479
7-3. Do-it-yourself maintenance
Do-it-yourself service
precautions ...................... 482
Hood .................................. 484
Engine compartment.......... 486
Tires ................................... 507
Tire inflation pressure ........ 510
Wheels ............................... 512
Air conditioning filter .......... 514
Wireless remote control/
electronic key battery....... 516
Checking and
replacing fuses ................ 520
Light bulbs ......................... 525
Page 482 of 810
4807-2. Maintenance
HILUX_OM_OM0K789E_(EE)
■Where to go for maintenance service?
In order to maintain your vehicle in the best possible condition, Toyota recom-
mends that maintenance service operations as well as other inspections and
repairs be carried out by authorized Toyota retailers or Toyota authorized
repairers, or any reliable repairers. For repairs and services covered by your
warranty, please visit an authorized Toyota retailer or repairer, who will use
genuine Toyota parts in repairing any difficulties you may encounter. There
can also be advantages in utilizing authorized Toyota retailers or repairers for
non-warranty repairs and services, as members of the Toyota network will be
able to expertly assist you with any difficulties you may encounter.
Your Toyota retailer or Toyota authoriz ed repairer, or any reliable repairer will
perform all of the scheduled maintenance on your vehicle reliably and eco-
nomically due to their experience with Toyota vehicles.
■ Does your vehicle need repairs?
Be on the alert for changes in performance and sounds, and visual tip-offs
that indicate service is needed. Some important clues are:
● Engine missing, stumbling or pinging
● Appreciable loss of power
● Strange engine noises
● A fluid leak under the vehicle (However, water dripping from the air condi-
tioning system after use is normal.)
● Change in exhaust sound (This may indicate a dangerous carbon monoxide
leak. Drive with the windows open and have the exhaust system checked
immediately.)
● Flat-looking tires, excessive tire squeal when cornering, uneven tire wear
● Vehicle pulls to one side when driven straight on a level road
● Strange noises related to suspension movement
● Loss of brake effectiveness, spongy feeling brake pedal or clutch pedal,
pedal almost touches the floor, vehicle pulls to one side when braking
● Engine coolant temperature continually higher than normal
If you notice any of these clues, take your vehicle to any authorized Toyota
retailer or Toyota authorized repairer, or any reliable repairer as soon as pos-
sible. Your vehicle may need adjustment or repair.
Page 491 of 810
4897-3. Do-it-yourself maintenance
HILUX_OM_OM0K789E_(EE)
7
Maintenance and care
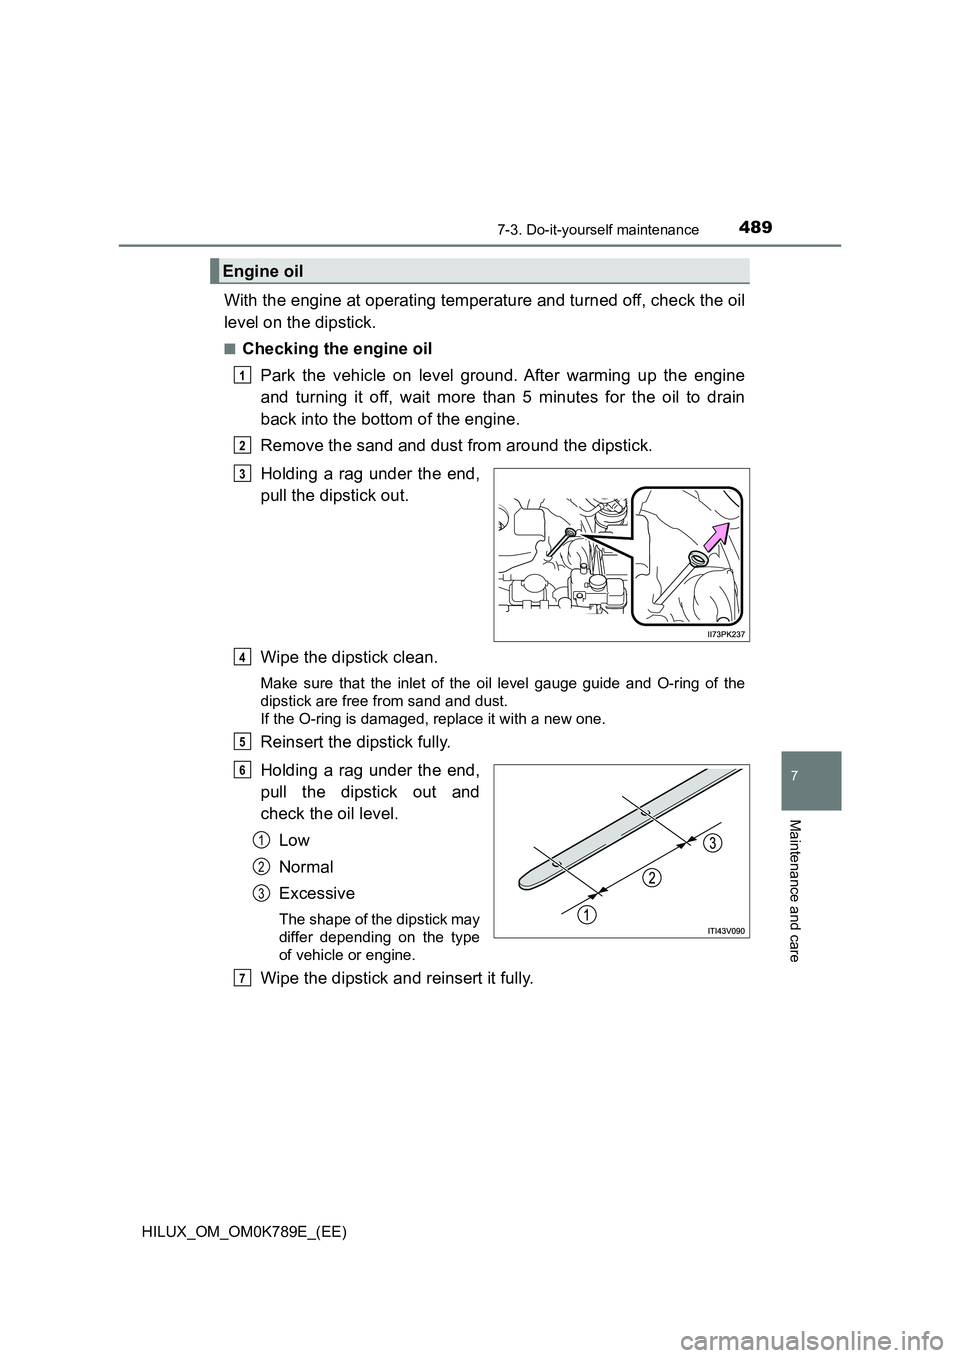
With the engine at operating temperature and turned off, check the oil
level on the dipstick.
■Checking the engine oil
Park the vehicle on level ground. After warming up the engine
and turning it off, wait more than 5 minutes for the oil to drain
back into the bottom of the engine.
Remove the sand and dust from around the dipstick.
Holding a rag under the end,
pull the dipstick out.
Wipe the dipstick clean.
Make sure that the inlet of the oil level gauge guide and O-ring of the
dipstick are free from sand and dust.
If the O-ring is damaged, replace it with a new one.
Reinsert the dipstick fully.
Holding a rag under the end,
pull the dipstick out and
check the oil level.
Low
Normal
Excessive
The shape of the dipstick may
differ depending on the type
of vehicle or engine.
Wipe the dipstick and reinsert it fully.
Engine oil
1
2
3
4
5
6
1
2
3
7
Page 492 of 810
4907-3. Do-it-yourself maintenance
HILUX_OM_OM0K789E_(EE)
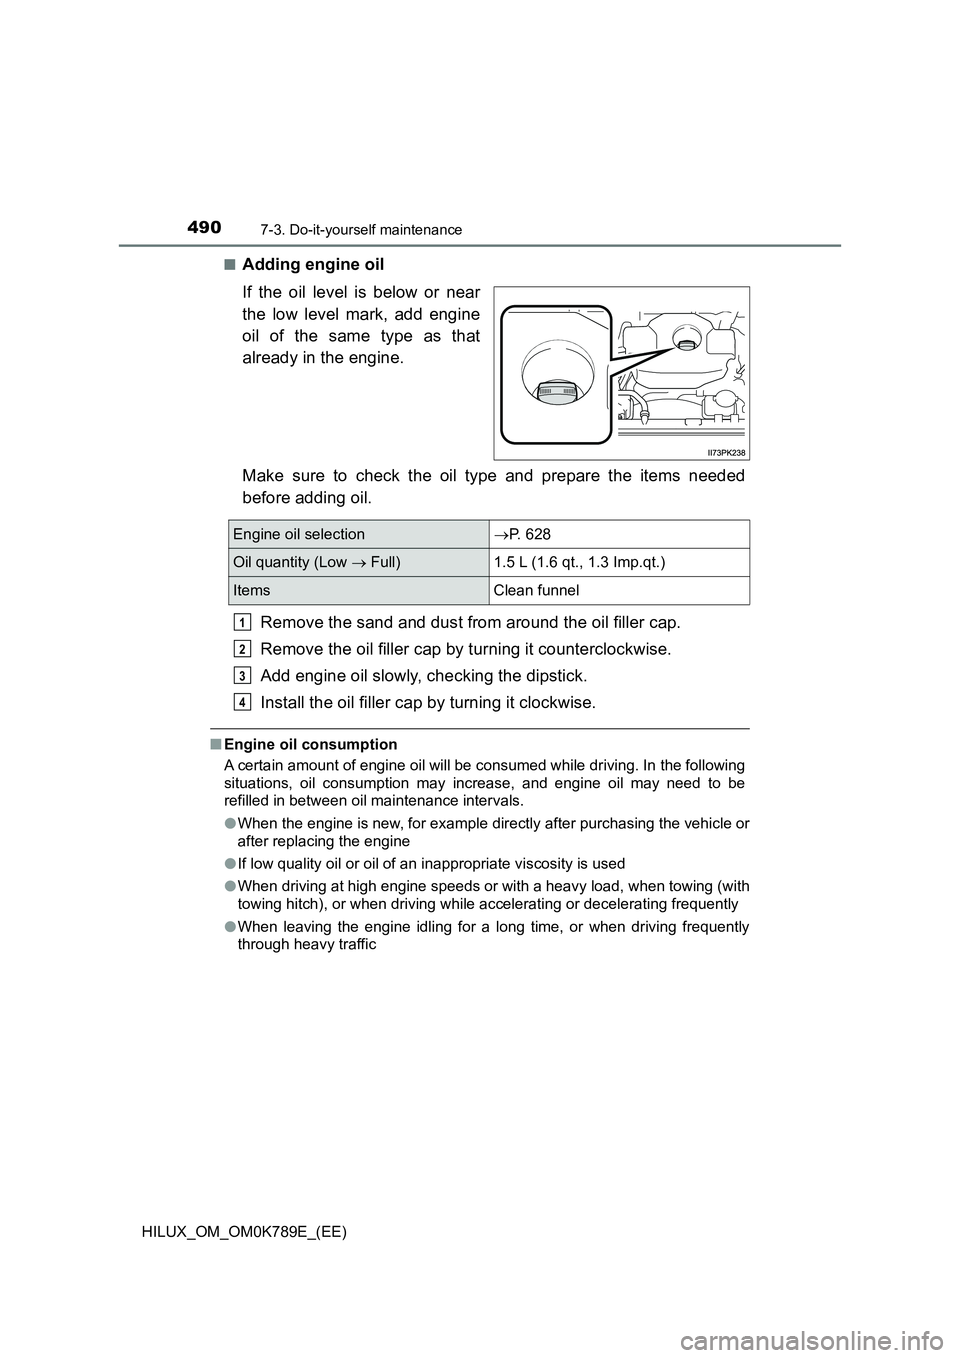
■Adding engine oil
If the oil level is below or near
the low level mark, add engine
oil of the same type as that
already in the engine.
Make sure to check the oil type and prepare the items needed
before adding oil.
Remove the sand and dust from around the oil filler cap.
Remove the oil filler cap by turning it counterclockwise.
Add engine oil slowly, checking the dipstick.
Install the oil filler cap by turning it clockwise.
■ Engine oil consumption
A certain amount of engine oil will be consumed while driving. In the following
situations, oil consumption may increase, and engine oil may need to be
refilled in between oil maintenance intervals.
● When the engine is new, for example directly after purchasing the vehicle or
after replacing the engine
● If low quality oil or oil of an inappropriate viscosity is used
● When driving at high engine speeds or with a heavy load, when towing (with
towing hitch), or when driving while accelerating or decelerating frequently
● When leaving the engine idling for a long time, or when driving frequently
through heavy traffic
Engine oil selection P. 628
Oil quantity (Low Full) 1.5 L (1.6 qt., 1.3 Imp.qt.)
Items Clean funnel
1
2
3
4