TOYOTA MATRIX 2009 E140 / 2.G Owner's Guide
MATRIX 2009 E140 / 2.G
TOYOTA
TOYOTA
https://www.carmanualsonline.info/img/14/6531/w960_6531-0.png
TOYOTA MATRIX 2009 E140 / 2.G Owner's Guide
Trending: deactivate passenger airbag, belt, snow chains, cruise control, steering, washer fluid, brake sensor
Page 31 of 440
31 1-2. Opening, closing and locking the doors
1
Before driving
■Setting and canceling the functions
To switch between set and canceled, follow the procedure below:
Close all the doors and switch the engine switch to the “ON”
position. (Perform step 2 within 10 seconds.)
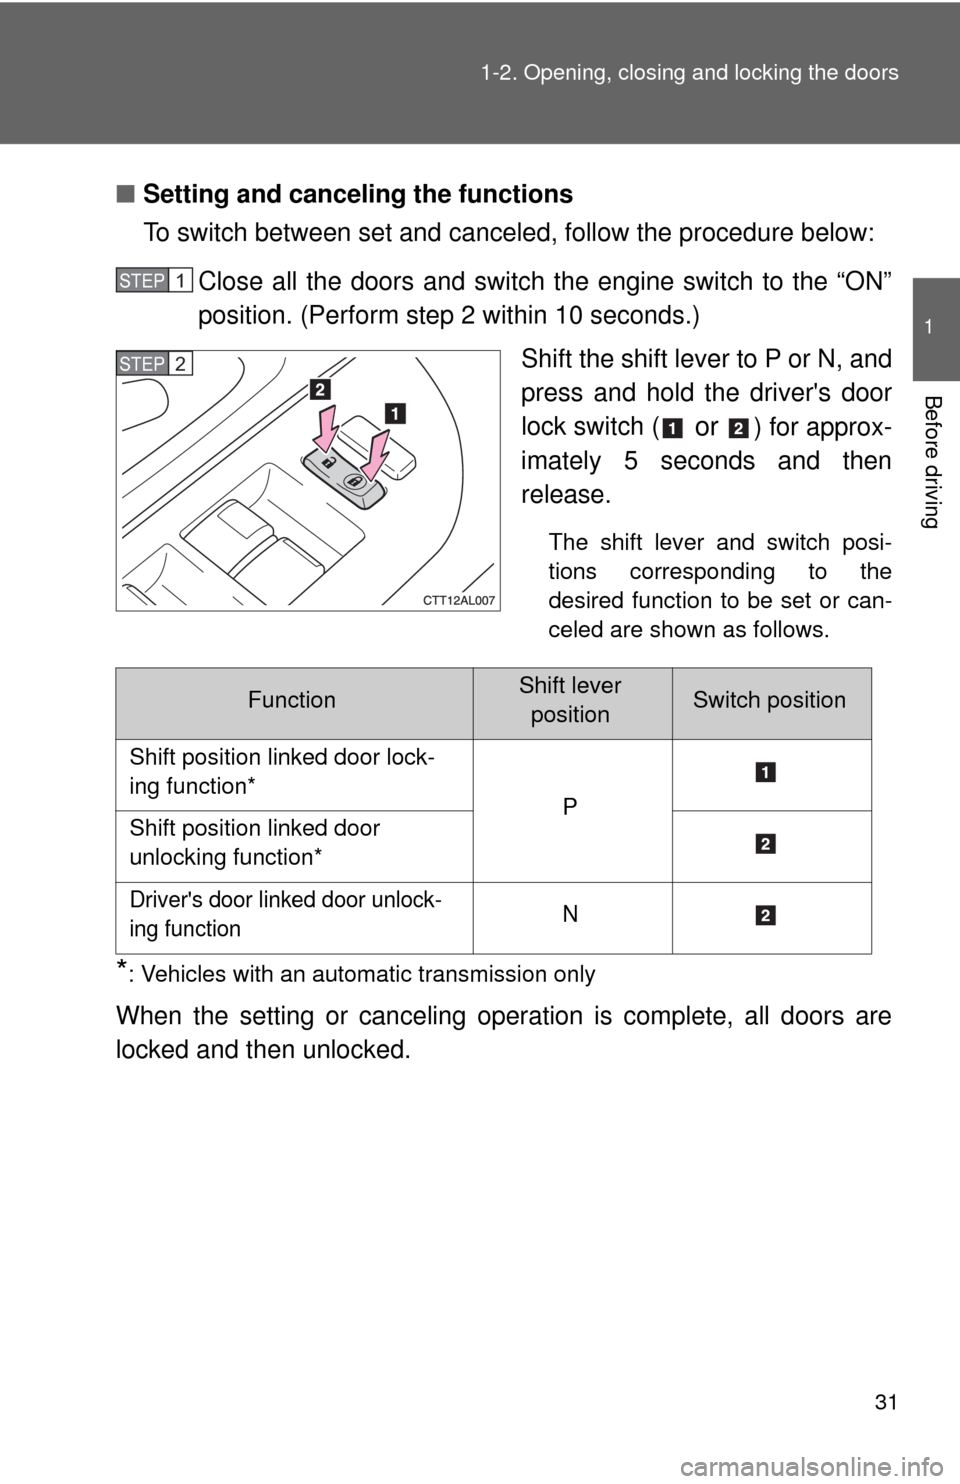
Shift the shift lever to P or N, and
press and hold the driver's door
lock switch (
or ) for approx-
imately 5 seconds and then
release.
The shift lever and switch posi-
tions corresponding to the
desired function to be set or can-
celed are shown as follows.
*: Vehicles with an automatic transmission only
When the setting or canceling operation is complete, all doors are
locked and then unlocked.
STEP1
STEP2
FunctionShift lever
positionSwitch position
Shift position linked door lock-
ing function*
P
Shift position linked door
unlocking function*
Driver's door linked door unlock-
ing functionN
Page 32 of 440
32 1-2. Opening, closing and locking the doors
■When all the doors are locked with the wireless remote control or key
The doors cannot be unlocked with the door lock switch.
The door lock switch can be reset by unlocking all the doors with the wire-
less remote control or key.
■The doors cannot be locked when
The key is in the engine switch and either of the front door is open.
■Customization that can be configured at Toyota dealer
Settings (e.g. unlocking function using a key) can be changed. (Customiz-
able features →P. 420)
CAUTION
■To prevent an accident
Observe the following precautions while driving the vehicle.
Failing to do so may result in a door opening and an occupant falling out,
resulting in death or serious injury.
●Always use a seat belt.
●Always lock the doors.
●Ensure that all doors are properly closed.
●Do not pull the inside handle of either of the front doors while driving.
●Set the rear door child protector locks when children are seated in the rear
seat.
Page 33 of 440
33
1
1-2. Opening, closing and locking the doors
Before driving
Back door
■Back door handle
The back door can be locked and unlocked using the wireless
remote control or key.
■Wireless remote control (if equipped)
→P. 2 6
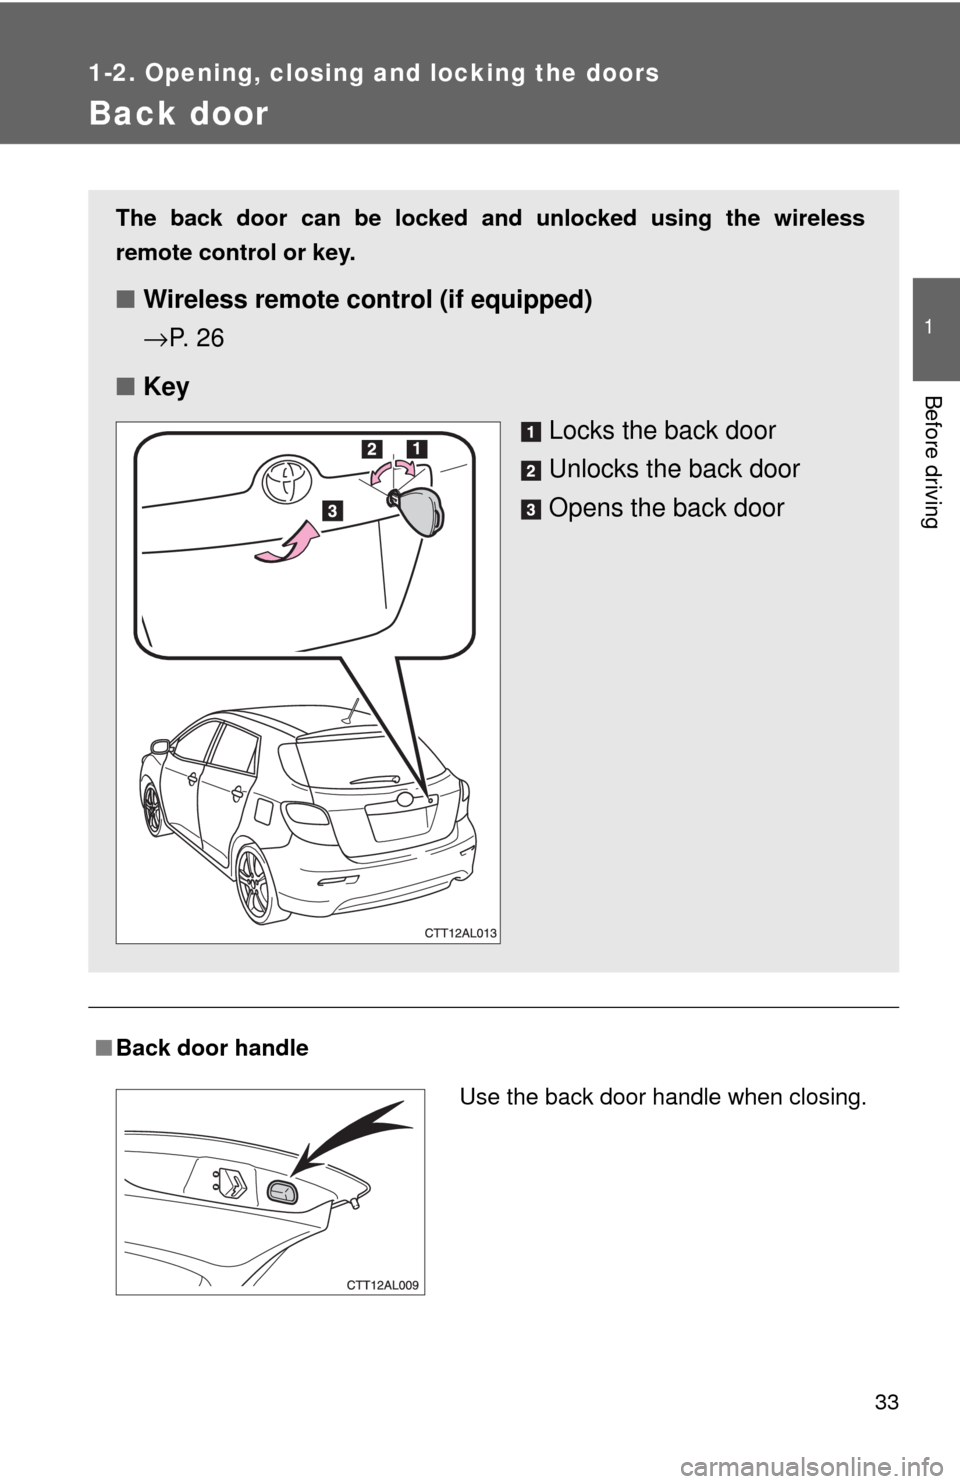
■Key
Locks the back door
Unlocks the back door
Opens the back door
Use the back door handle when closing.
Page 34 of 440
34 1-2. Opening, closing and locking the doors
CAUTION
■Caution while driving
Keep the back door closed.
This not only keeps personal belongings from being thrown out, but also pre-
vents exhaust gases from entering the vehicle.
NOTICE
■To prevent damage to the back door components
Do not apply any force, paint or let any other foreign matter on the damper.
Page 35 of 440
35
1
Before driving
1-3. Adjustable components (seats, mirrors, steering wheel)
Front seats
Folding down the front passenger's seat (vehicles with seatback table)
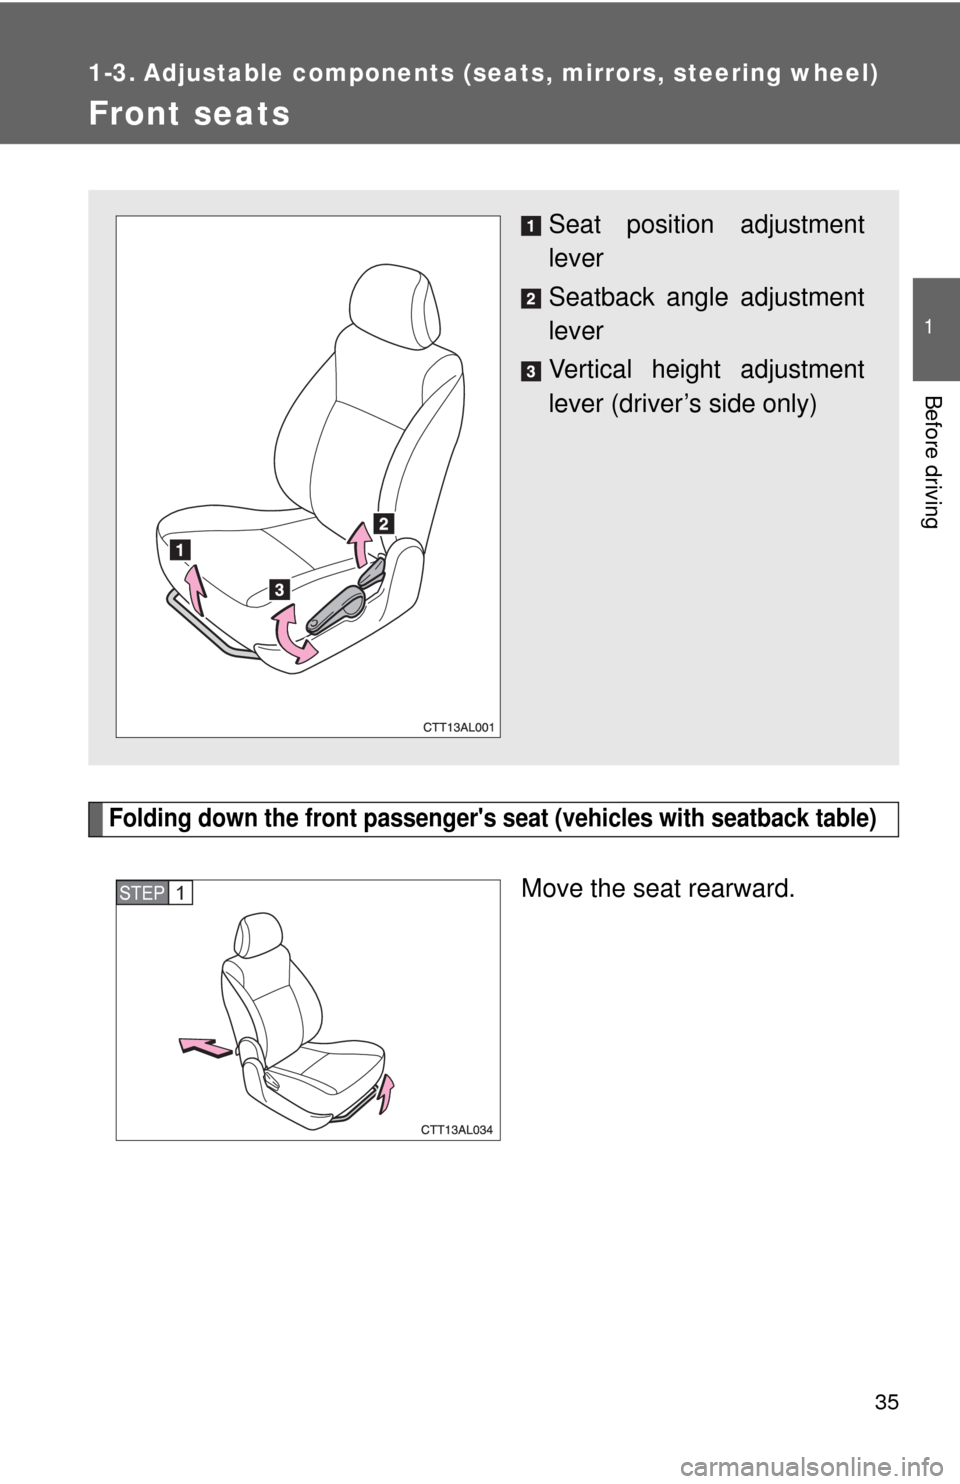
Move the seat rearward.
Seat position adjustment
lever
Seatback angle adjustment
lever
Vertical height adjustment
lever (driver’s side only)
STEP1
Page 36 of 440
36 1-3. Adjustable components (seats, mirrors, steering wheel)
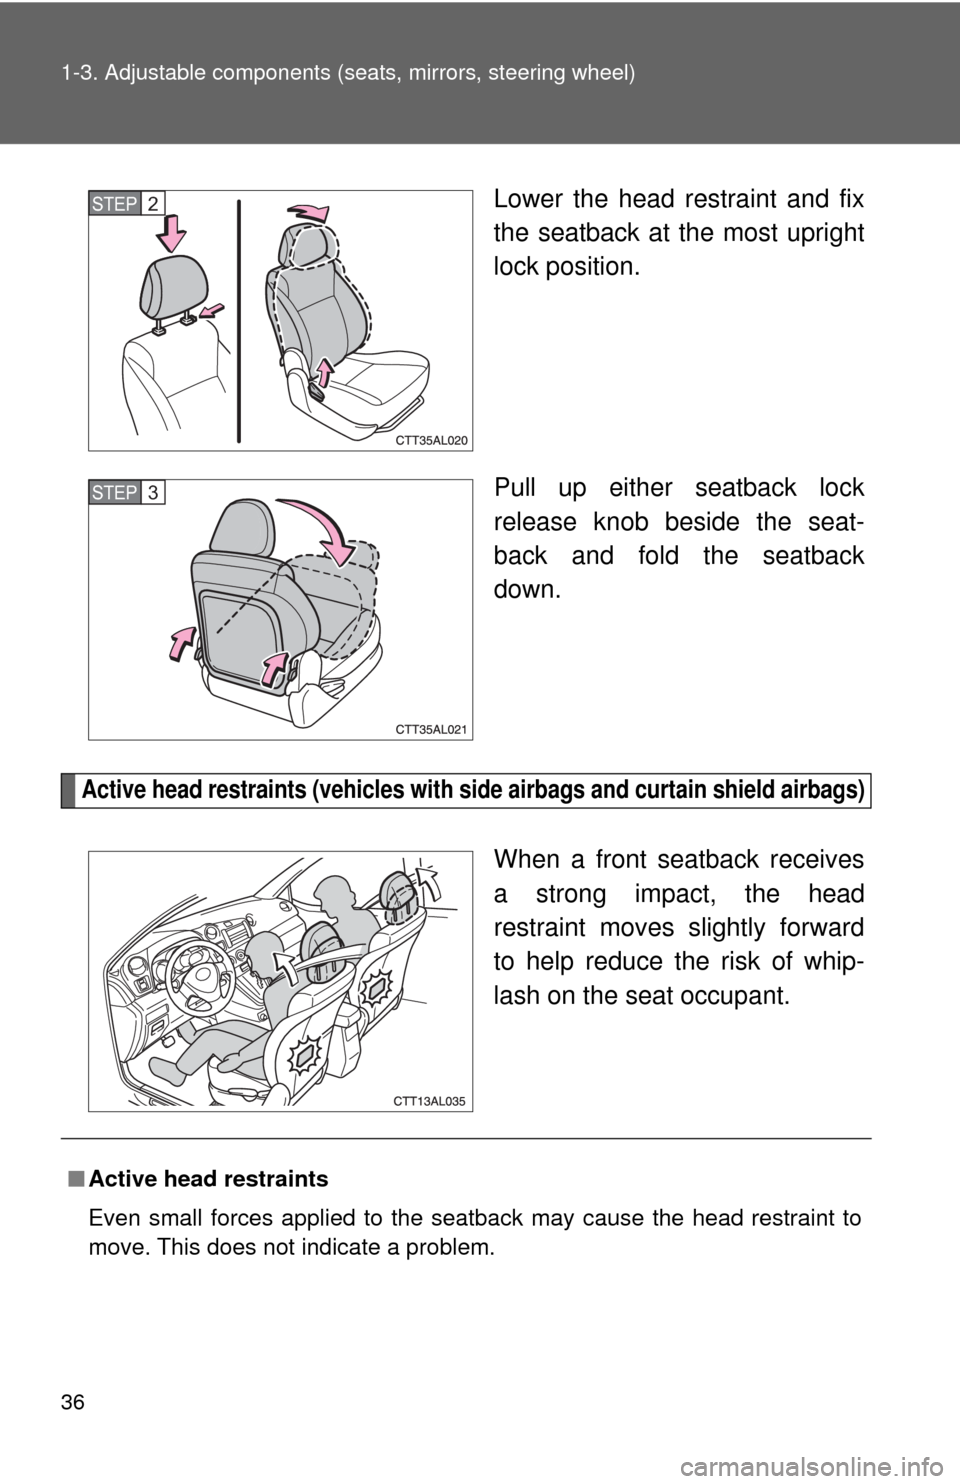
Lower the head restraint and fix
the seatback at the most upright
lock position.
Pull up either seatback lock
release knob beside the seat-
back and fold the seatback
down.
Active head restraints (vehicles with side airbags and curtain shield airbags)
When a front seatback receives
a strong impact, the head
restraint moves slightly forward
to help reduce the risk of whip-
lash on the seat occupant.
STEP2
STEP3
■Active head restraints
Even small forces applied to the seatback may cause the head restraint to
move. This does not indicate a problem.
Page 37 of 440
37 1-3. Adjustable components (seats, mirrors, steering wheel)
1
Before driving
CAUTION
■Seat adjustment
●Be careful that the seat does not hit passengers or luggage.
●Do not recline the seat more than necessary when the vehicle is in motion
to reduce the risk of sliding under the lap belt.
If the seat is too reclined, the lap belt may slide past the hips and apply
restraint forces directly to the abdomen or your neck may contact the
shoulder belt, increasing the risk of death or serious injury in the event of
an accident.
●After adjusting the seat, make sure that the seat is locked in position.
■After returning the seatback to the upright position (vehicles with seat-
back table)
Make sure the seatback is securely locked by pressing forward and rear-
ward on the top of the seatback. Failure to do so will prevent seat belt from
operating properly.
■Caution while driving (vehicles with seatback table)
Do not sit on or place anything on the folded seatback.
Page 38 of 440
38
1-3. Adjustable components (seats, mirrors, steering wheel)
Rear seats
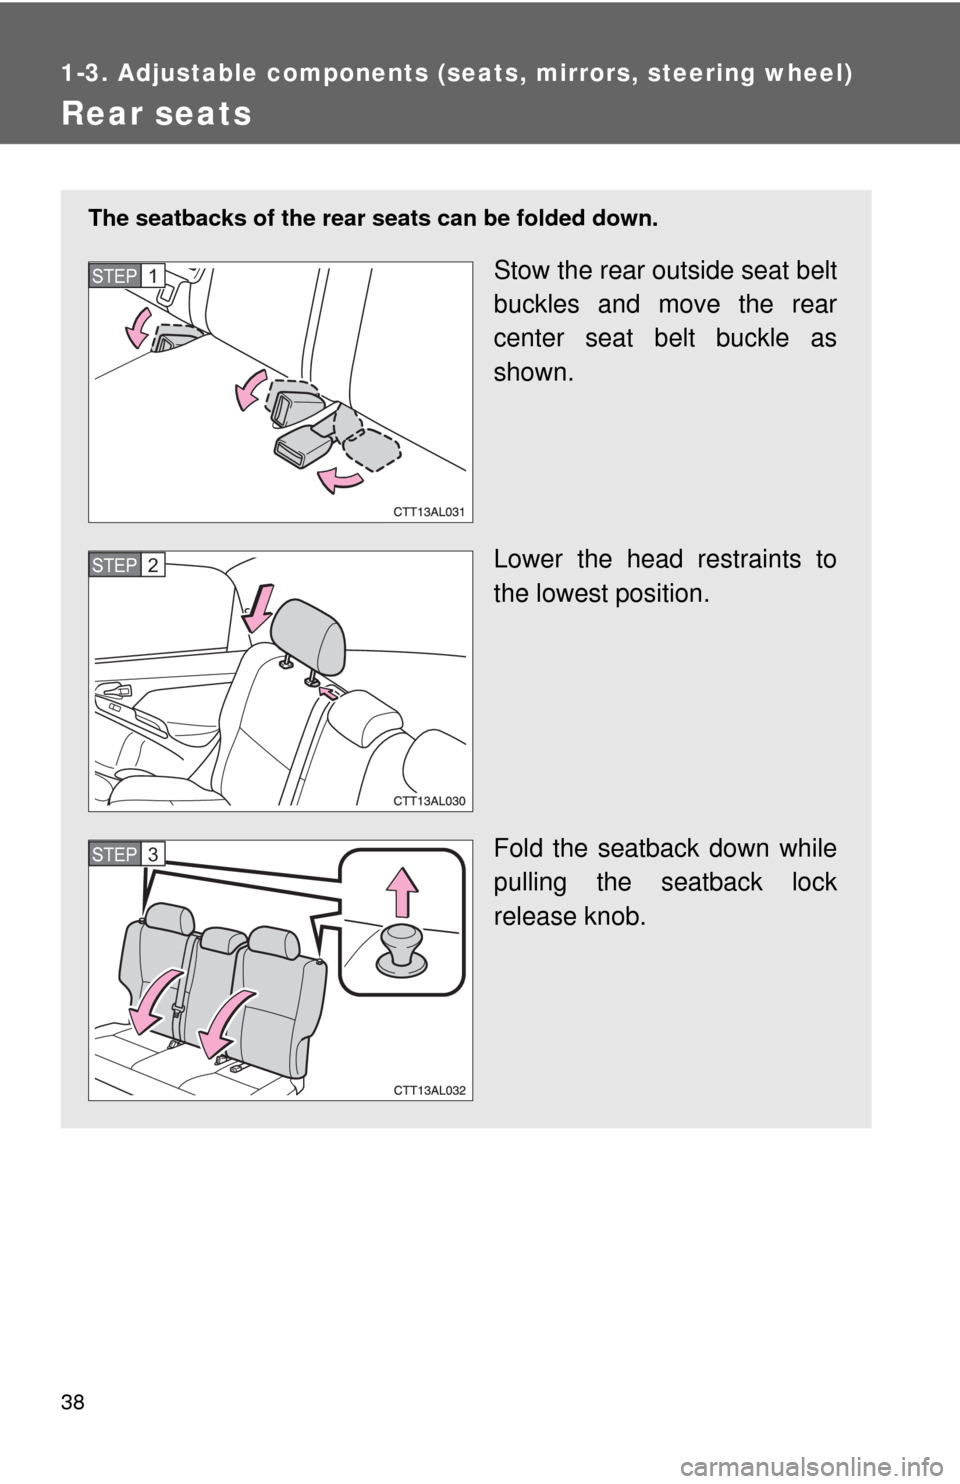
The seatbacks of the rear seats can be folded down.
Stow the rear outside seat belt
buckles and move the rear
center seat belt buckle as
shown.
Lower the head restraints to
the lowest position.
Fold the seatback down while
pulling the seatback lock
release knob.STEP1
STEP2
STEP3
Page 39 of 440
39 1-3. Adjustable components (seats, mirrors, steering wheel)
1
Before driving
CAUTION
■After returning the seatback to the upright position
Observe the following precautions. Failure to do so may result in death or
serious injury.
●Check that the seat belts are not twisted or caught in the seatback.
■Caution while driving
Do not sit on the folded seatback.
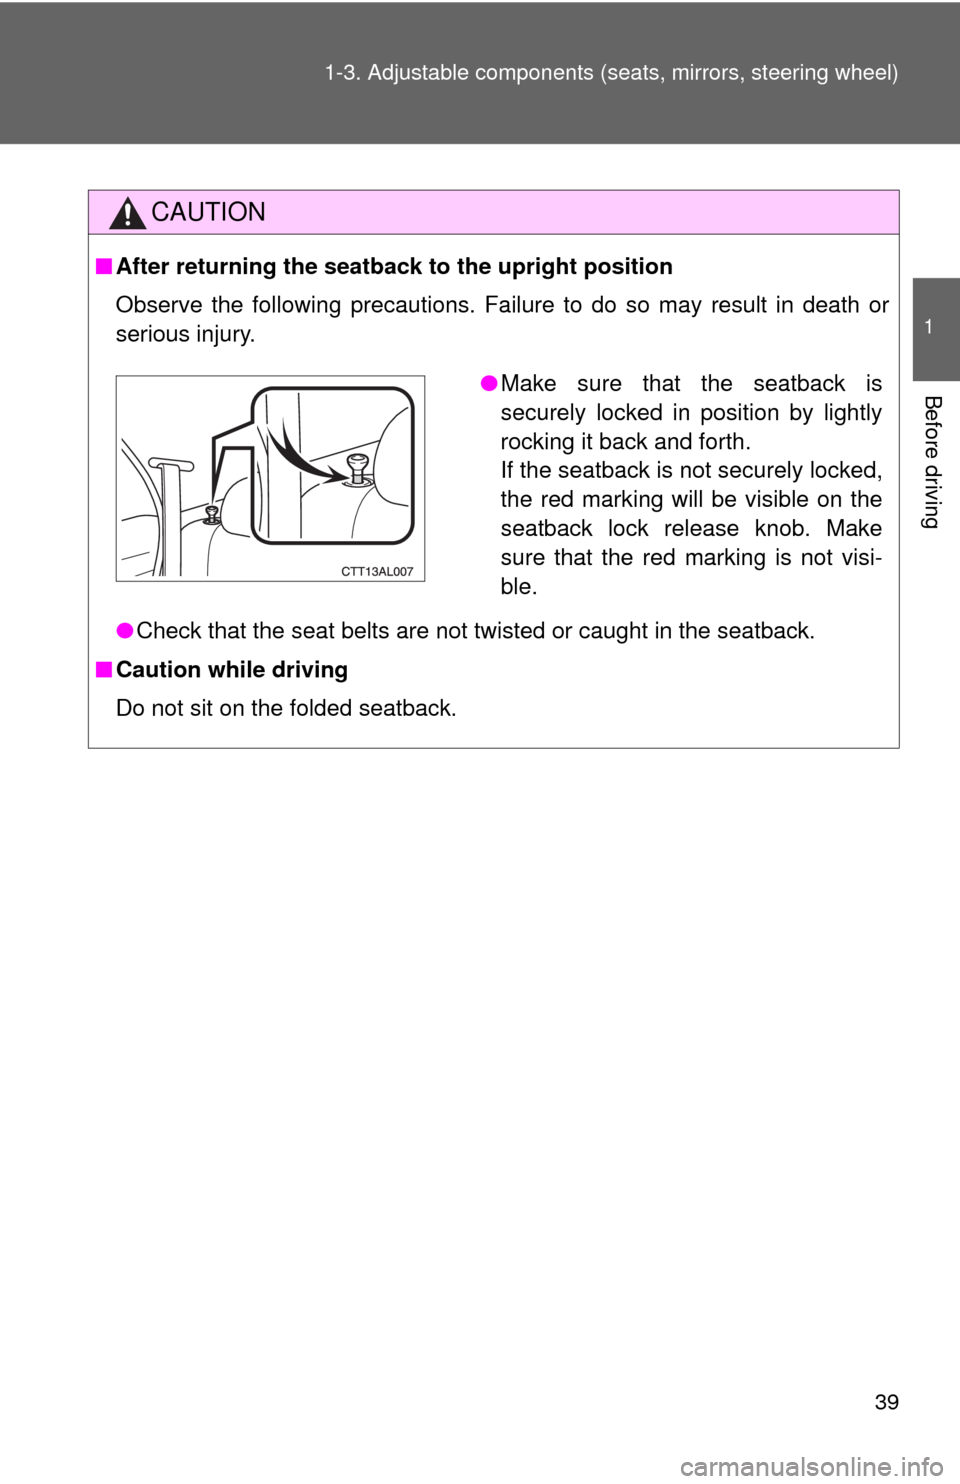
●Make sure that the seatback is
securely locked in position by lightly
rocking it back and forth.
If the seatback is not securely locked,
the red marking will be visible on the
seatback lock release knob. Make
sure that the red marking is not visi-
ble.
Page 40 of 440
40
1-3. Adjustable components (seats, mirrors, steering wheel)
Head restraints
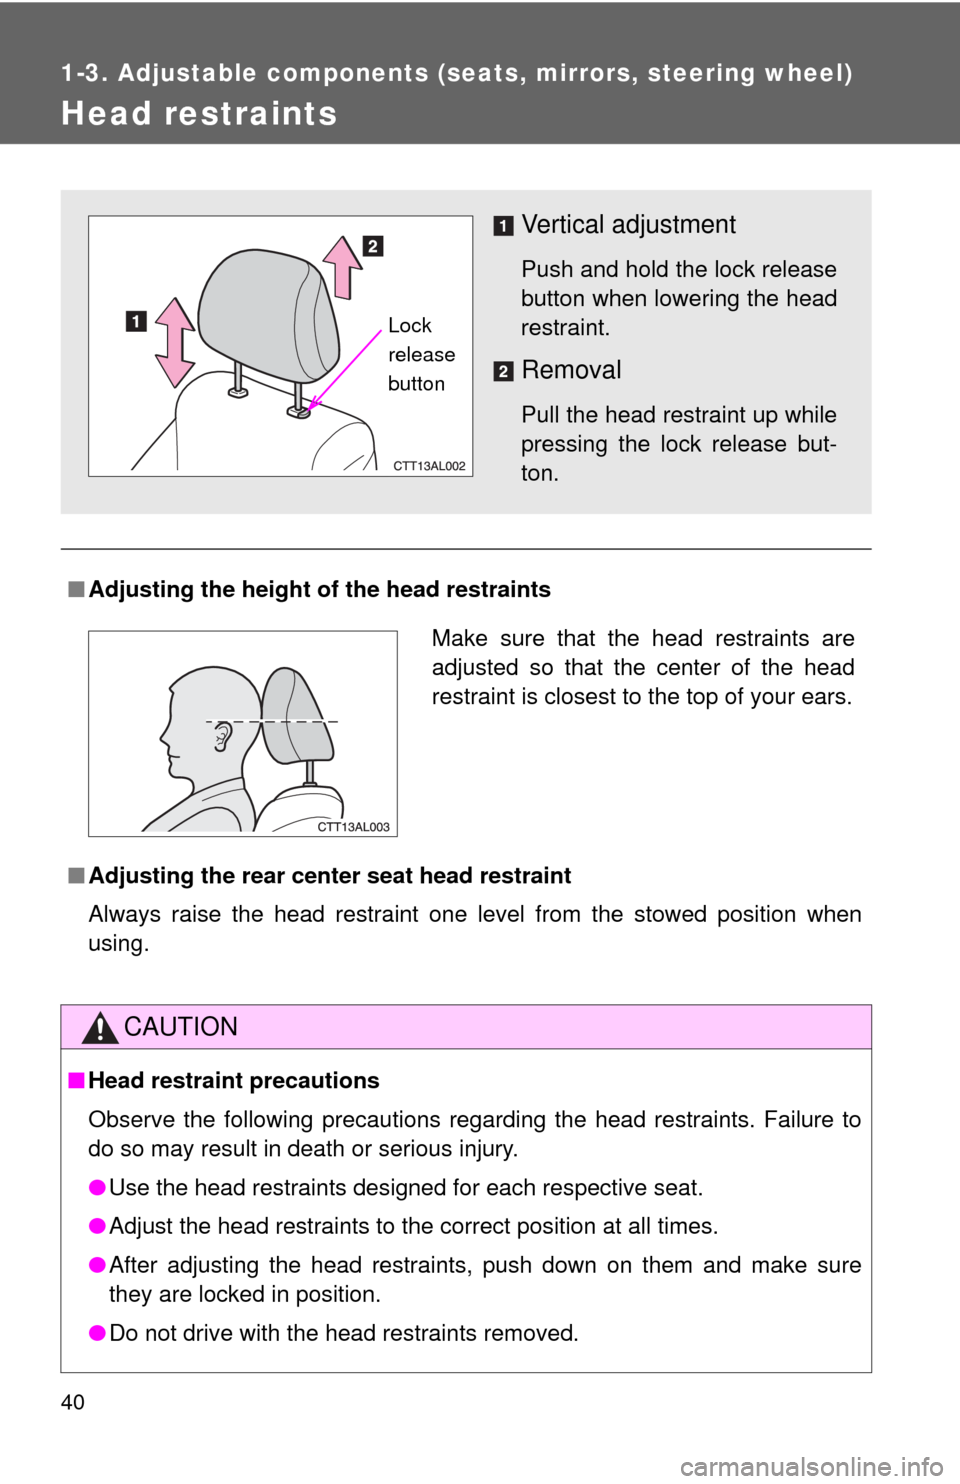
■Adjusting the height of the head restraints
■Adjusting the rear center seat head restraint
Always raise the head restraint one level from the stowed position when
using.
CAUTION
■Head restraint precautions
Observe the following precautions regarding the head restraints. Failure to
do so may result in death or serious injury.
●Use the head restraints designed for each respective seat.
●Adjust the head restraints to the correct position at all times.
●After adjusting the head restraints, push down on them and make sure
they are locked in position.
●Do not drive with the head restraints removed.
Vertical adjustment
Push and hold the lock release
button when lowering the head
restraint.
Removal
Pull the head restraint up while
pressing the lock release but-
ton.
Lock
release
button
Make sure that the head restraints are
adjusted so that the center of the head
restraint is closest to the top of your ears.
Trending: navigation, check transmission fluid, snow chains, check oil, fuel pump, wiring, window
