TOYOTA MATRIX 2010 E140 / 2.G Owners Manual
Manufacturer: TOYOTA, Model Year: 2010, Model line: MATRIX, Model: TOYOTA MATRIX 2010 E140 / 2.GPages: 448, PDF Size: 9.74 MB
Page 301 of 448
301 4-3. Do-it-yourself maintenance
4
Maintenance and care
Radiator and condenser
Check the radiator and condenser and remove any foreign objects.
If any of the above parts are extremely dirty or you are not sure of
their condition, have your vehicle checked by your Toyota dealer.
NOTICE
■When adding engine coolant
Coolant is neither plain water nor straight antifreeze. The correct mixture of
water and antifreeze must be used to provide proper lubrication, corrosion
protection and cooling. Be sure to read the antifreeze or coolant label.
■If you spill coolant
Be sure to wash it off with water to prevent damage to parts or paint.
CAUTION
■When the engine is hot
Do not touch the radiator or condenser, as they may be hot and may cause
burns.
Page 302 of 448
302 4-3. Do-it-yourself maintenance
Brake fluid
■Checking fluid level
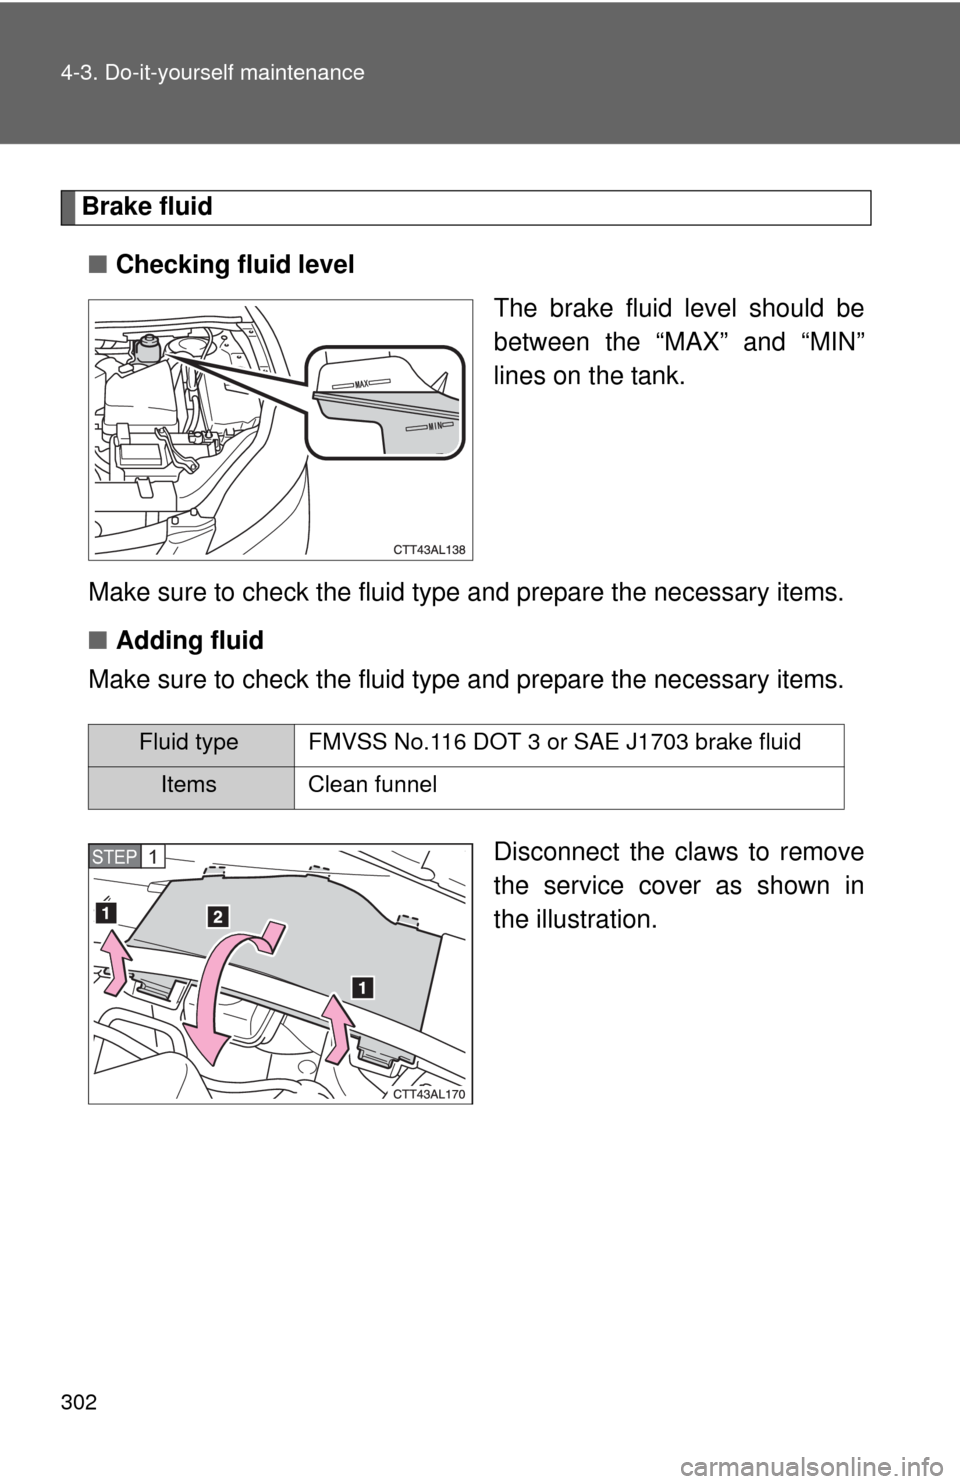
The brake fluid level should be
between the “MAX” and “MIN”
lines on the tank.
Make sure to check the fluid type and prepare the necessary items.
■Adding fluid
Make sure to check the fluid type and prepare the necessary items.
Disconnect the claws to remove
the service cover as shown in
the illustration.
Fluid type FMVSS No.116 DOT 3 or SAE J1703 brake fluid
Items Clean funnel
STEP1
Page 303 of 448
303 4-3. Do-it-yourself maintenance
4
Maintenance and care
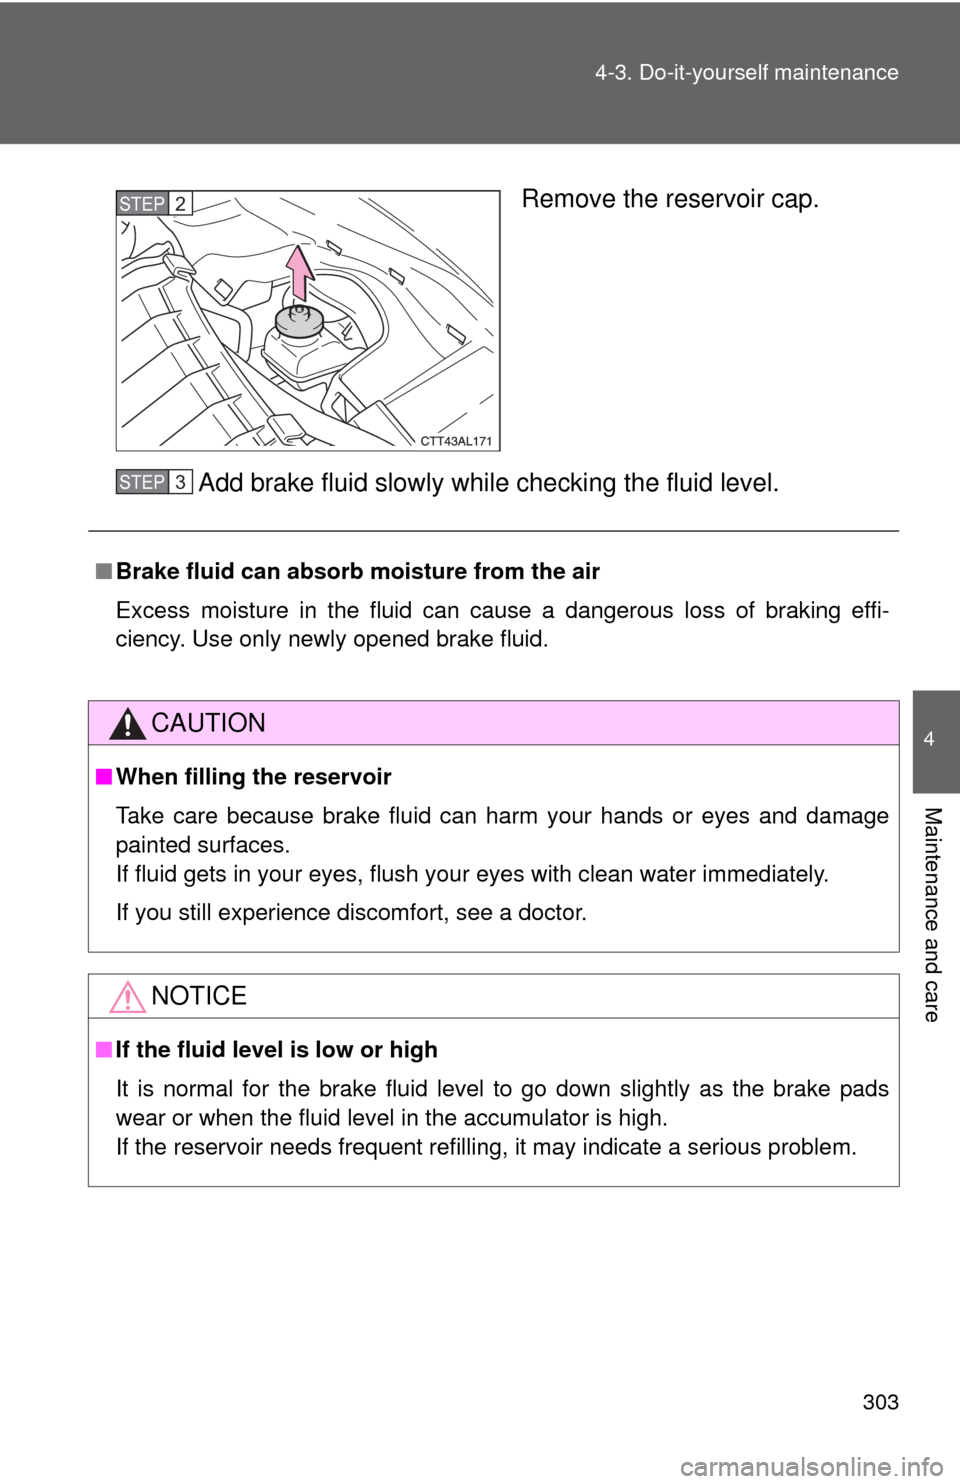
Remove the reservoir cap.
Add brake fluid slowly while checking the fluid level.STEP2
■Brake fluid can absorb moisture from the air
Excess moisture in the fluid can cause a dangerous loss of braking effi-
ciency. Use only newly opened brake fluid.
CAUTION
■When filling the reservoir
Take care because brake fluid can harm your hands or eyes and damage
painted surfaces.
If fluid gets in your eyes, flush your eyes with clean water immediately.
If you still experience discomfort, see a doctor.
NOTICE
■If the fluid level is low or high
It is normal for the brake fluid level to go down slightly as the brake pads
wear or when the fluid level in the accumulator is high.
If the reservoir needs frequent refilling, it may indicate a serious problem.
STEP3
Page 304 of 448
304 4-3. Do-it-yourself maintenance
Battery
Check the battery as follows.
■Battery exterior
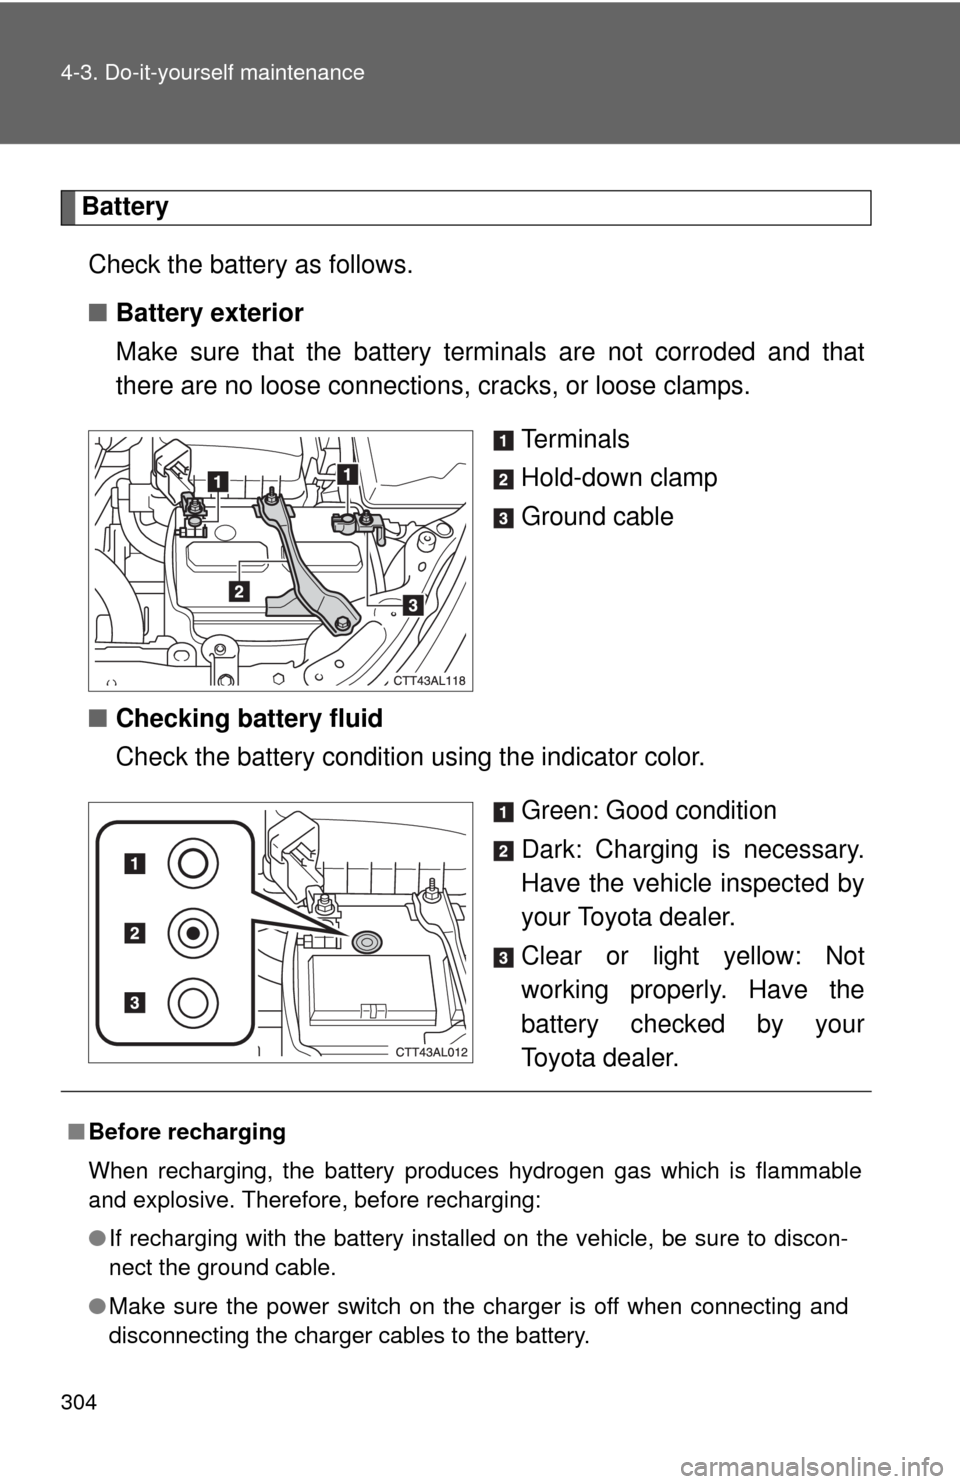
Make sure that the battery terminals are not corroded and that
there are no loose connections, cracks, or loose clamps.
Te r m i n a l s
Hold-down clamp
Ground cable
■Checking battery fluid
Check the battery condition using the indicator color.
Green: Good condition
Dark: Charging is necessary.
Have the vehicle inspected by
your Toyota dealer.
Clear or light yellow: Not
working properly. Have the
battery checked by your
Toyota dealer.
■Before recharging
When recharging, the battery produces hydrogen gas which is flammable
and explosive. Therefore, before recharging:
●If recharging with the battery installed on the vehicle, be sure to discon-
nect the ground cable.
●Make sure the power switch on the charger is off when connecting and
disconnecting the charger cables to the battery.
Page 305 of 448
305 4-3. Do-it-yourself maintenance
4
Maintenance and care
CAUTION
■Chemicals in the battery
A battery contains poisonous and corrosive sulfuric acid and may produce
hydrogen gas which is flammable and explosive. To reduce the risk of death
or serious injury, take the following precautions while working on or near the
battery:
●Do not cause sparks by touching the battery terminals with tools.
●Do not smoke or light a match near the battery.
●Avoid contact with eyes, skin and clothes.
●Never inhale or
● electrolyte.
●Wear protective safety glasses when working near the battery.
●Keep children away from the battery.
■Where to safely charge the battery
Always charge the battery in an open area. Do not charge the battery in a
garage or closed room where there is not sufficient ventilation.
■How to recharge the battery
Only perform a slow charge (5 A or less). The battery may explode if
charged at a quicker rate.
■Emergency measures regarding electrolyte
●If electrolyte gets in your eyes
Flush your eyes with clean water for at least 15 minutes and get immedi-
ate medical attention. If possible, continue to apply water with a sponge or
cloth while traveling to the nearest medical facility.
●If electrolyte gets on your skin
Wash the affected area thoroughly. If you feel pain or burning, get medical
attention immediately.
●If electrolyte gets on your clothes
It can soak through clothing on to your skin. Immediately take off the cloth-
ing and follow the procedure above if necessary.
●If you accidentally swallow electrolyte
Drink a large quantity of water or milk. Get emergency medical attention
immediately.
Page 306 of 448
306 4-3. Do-it-yourself maintenance
Washer fluid
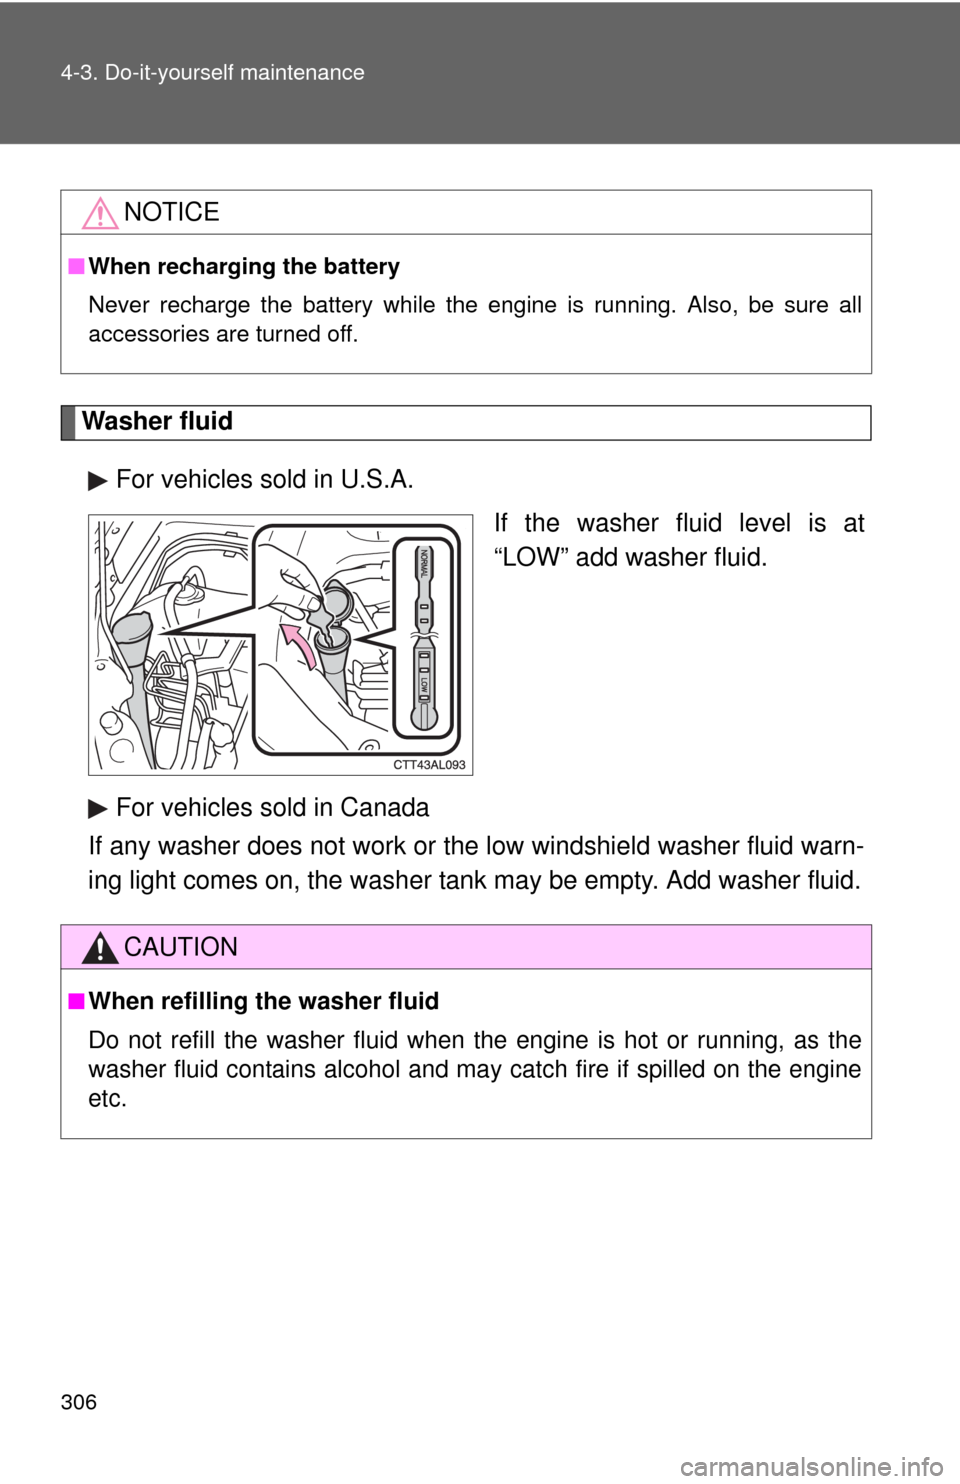
For vehicles sold in U.S.A.
If the washer fluid level is at
“LOW” add washer fluid.
For vehicles sold in Canada
If any washer does not work or the low windshield washer fluid warn-
ing light comes on, the washer tank may be empty. Add washer fluid.
NOTICE
■When recharging the battery
Never recharge the battery while the engine is running. Also, be sure all
accessories are turned off.
CAUTION
■When refilling the washer fluid
Do not refill the washer fluid when the engine is hot or running, as the
washer fluid contains alcohol and may catch fire if spilled on the engine
etc.
Page 307 of 448

307 4-3. Do-it-yourself maintenance
4
Maintenance and care
NOTICE
■Do not use any fluid other than washer fluid
Do not use soapy water or engine antifreeze instead of washer fluid.
Doing so may cause streaking on the vehicle’s painted surfaces.
■Diluting washer fluid
Dilute washer fluid with water as necessary.
Refer to the freezing temperatures listed on the washer fluid tank.
Page 308 of 448
308
4-3. Do-it-yourself maintenance
Tires
Replace or rotate tires in accordance with maintenance sched-
ules and treadwear.
■Checking tires
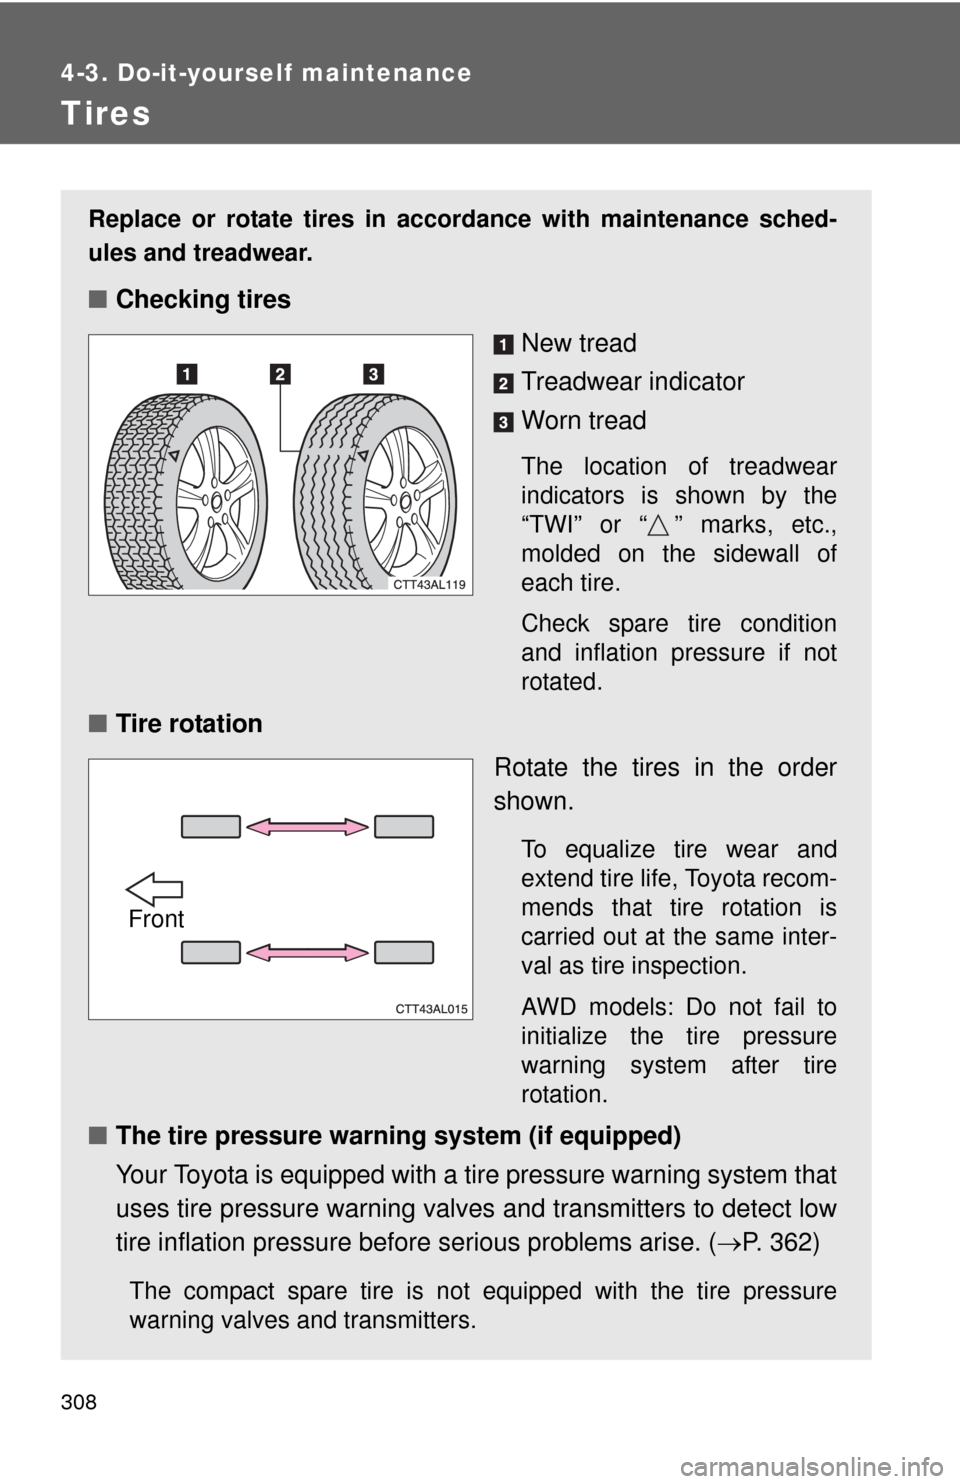
New tread
Treadwear indicator
Worn tread
The location of treadwear
indicators is shown by the
“TWI” or “ ” marks, etc.,
molded on the sidewall of
each tire.
Check spare tire condition
and inflation pressure if not
rotated.
■Tire rotation
Rotate the tires in the order
shown.
To equalize tire wear and
extend tire life, Toyota recom-
mends that tire rotation is
carried out at the same inter-
val as tire inspection.
AWD models: Do not fail to
initialize the tire pressure
warning system after tire
rotation.
■The tire pressure warning system (if equipped)
Your Toyota is equipped with a tire pressure warning system that
uses tire pressure warning valves and transmitters to detect low
tire inflation pressure before serious problems arise. (P. 362)
The compact spare tire is not equipped with the tire pressure
warning valves and transmitters.
Front
Page 309 of 448

309 4-3. Do-it-yourself maintenance
4
Maintenance and care
Installing tire pressure warning valves and transmitters
When replacing tires or wheels, tire pressure warning valves and
transmitters must also be installed.
When new tire pressure warning valves and transmitters are
installed, new tire pressure warning valve and transmitter ID codes
must be registered in the tire pressure warning computer and the tire
pressure warning system must be initialized. Have tire pressure
warning valve and transmitter ID codes registered by your Toyota
dealer
. (P. 311)
Initializing the tire pressure warning system
■The tire pressure warning system must be initialized in the fol-
lowing circumstances:
●When rotating the tires on vehicles differing with front and rear tire
inflation pressure.
●When changing the tire size.
When the tire pressure warning system is initialized, the current tire
inflation pressure is set as the pressure benchmark.
Page 310 of 448
310 4-3. Do-it-yourself maintenance
■How to initialize the tire pressure warning system
Park the vehicle in a safe place and turn the engine switch
OFF.
While the vehicle is moving, initialization is not performed.
Adjust the tire inflation pressure to the specified cold tire infla-
tion pressure level. (P. 407)
Make sure to adjust the tire pressure to the specified cold tire
inflation pressure level. The tire pressure warning system will
operate based on this pressure level.
Turn the engine switch to the “ON” position.
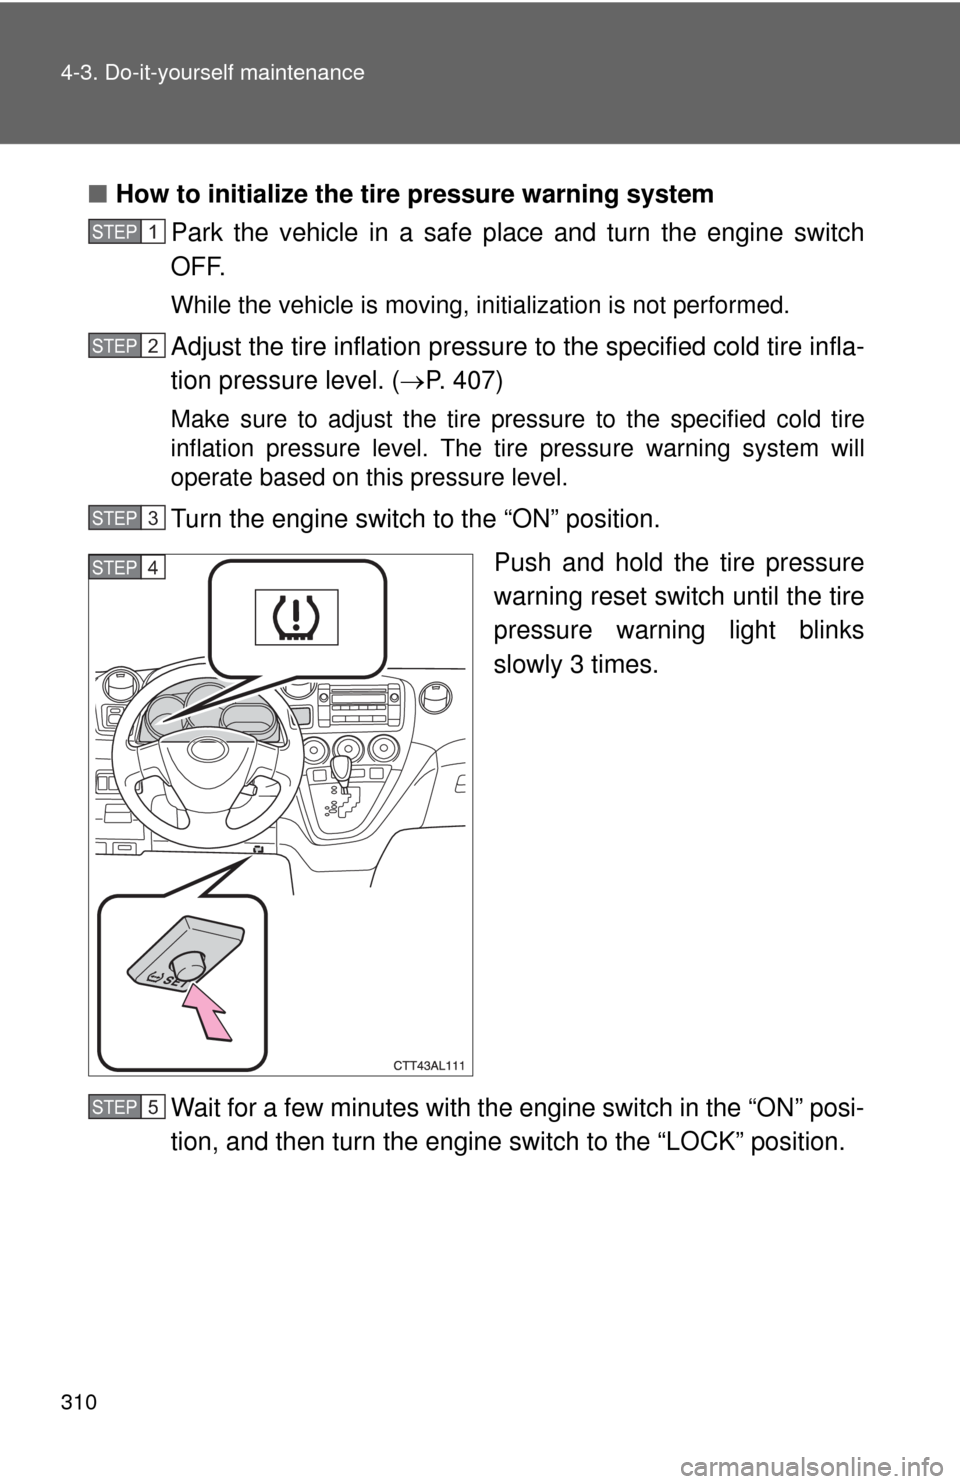
Push and hold the tire pressure
warning reset switch until the tire
pressure warning light blinks
slowly 3 times.
Wait for a few minutes with the engine switch in the “ON” posi-
tion, and then turn the engine switch to the “LOCK” position.
STEP1
STEP2
STEP3
STEP4
STEP5