buttons TOYOTA MIRAI 2020 Accessories, Audio & Navigation (in English)
[x] Cancel search | Manufacturer: TOYOTA, Model Year: 2020, Model line: MIRAI, Model: TOYOTA MIRAI 2020Pages: 288, PDF Size: 7.9 MB
Page 6 of 288
6
MIRAI_Navi_USA_OM62074U_20MY
To use this system in the safest possible
manner, follow all the safety tips shown
below.
This system is intended to assist in reach-
ing the destination and, if used properly,
can do so. The driver i s solely responsible
for the safe operation of your vehicle and
the safety of your passengers.
Do not use any feature of this system to
the extent it becomes a distraction and
prevents safe drivin g. The first priority
while driving should always be the safe op-
eration of the vehicle. While driving, be
sure to observe all traffic regulations.
Prior to the actual use of this system, learn
how to use it and become thoroughly famil-
iar with it. Read the entire manual to make
sure you understand the system. Do not
allow other people to use this system until
they have read and understood the in-
structions in this manual.
For your safety, some functions may be-
come inoperable when driving. Unavail-
able screen buttons are dimmed.
SAFETY INSTRUCTIONWA R N I N G
● For safety, the driver should not operate
the system while he/she is driving. Insuf-
ficient attention to the road and traffic
may cause an accident.
● While driving, be sure to obey the traffic
regulations and maintain awareness of
the road conditions. If a traffic sign on
the road has been changed, route guid-
ance may not have the updated informa-
tion such as the direction of a one way
street.
Page 8 of 288

TABLE OF CONTENTS
8
MIRAI_Navi_USA_OM62074U_20MY
1. BASIC FUNCTION........................... 12
BUTTONS OVERVIEW ......................... 12
“Menu” SCREEN.................................... 14
HOME SCREEN .................................... 16
2. QUICK REFERENCE....................... 20
“Setup” SCREEN ................................... 20
3. NAVIGATION OPERATION ............ 22
REGISTERING HOME .......................... 22
REGISTERING FAVORITE DESTINATIONS .................................. 23
OPERATION FLOW: ROUTE GUIDANCE ............................ 24
SETTING HOME AS THE DESTINATION ............................ 25
4. FUNCTION INDEX ..... ...................... 26
FUNCTION INDEX ................................ 26
1. BASIC INFORMATION BEFORE
OPERATION .................................. 30
INITIAL SCREEN ................................... 30
TOUCH SCREEN GESTURES ............. 31
TOUCH SCREEN OPERATION ............ 32
HOME SCREEN OPERATION .............. 34
ENTERING LETTERS AND
NUMBERS/LIST SCREEN
OPERATION ....................................... 35
SCREEN ADJUSTMENT ....................... 39
LINKING MULTI-INFORMATION DISPLAY AND THE SYSTEM............. 41
2. CONNECTIVITY SETTINGS ........... 42
REGISTERING/CONNECTING A
Bluetooth® DEVICE ............................. 42
SETTING Bluetooth® DETAILS ............. 47
Wi-Fi® HOTSPOT .................................. 56
3. OTHER SETTINGS ......................... 60
GENERAL SETTINGS ........................... 60
VOICE SETTINGS ................................. 64
VEHICLE SETTINGS ............................. 65
1. BASIC OPERATION ....................... 72
QUICK REFERENCE ............................. 72
SOME BASICS....................................... 74
2. RADIO OPERATION ....................... 80
AM/FM/SiriusXM (SXM) RADIO ............. 80
3. MEDIA OPERATION ....................... 91
CD .......................................................... 91
USB MEMORY ....................................... 94
iPod/iPhone ............................................ 97
Bluetooth
® AUDIO................................ 100
AUX ...................................................... 105
4. AUDIO/VISUAL REMOTE CONTROLS ................................. 107
STEERING SWITCHES ....................... 107
5. SETUP ........................................... 109
AUDIO SETTINGS ............................... 109
6. TIPS FOR OPERATING THE AUDIO/VISUAL SYSTEM ... 111
OPERATING INFORMATION .............. 111
1QUICK GUIDE
2BASIC FUNCTION
3AUDIO/VISUAL SYSTEM
Page 11 of 288
1
11
1
2
3
4
5
6
7
8
9
MIRAI_Navi_USA_OM62074U_20MY
1. BUTTONS OVERVIEW .................. 12
2. “Menu” SCREEN ........................... 14
3. HOME SCREEN ............................. 16
STATUS DISPLAY................................. 18
1. “Setup” SCREEN .......................... 20
1. REGISTERING HOME ................... 22
2. REGISTERING FAVORITE DESTINATIONS ........................... 23
3. OPERATION FLOW: ROUTE GUIDANCE............... .................... 24
4. SETTING HOME AS THE DESTINATION ............................. 25
1. FUNCTION INDEX ......................... 26
1BASIC FUNCTION
2QUICK REFERENCE
3NAVIGATION OPERATION
4FUNCTION INDEX
QUICK GUIDE
Page 12 of 288
12
MIRAI_Navi_USA_OM62074U_20MY
1. BASIC FUNCTION
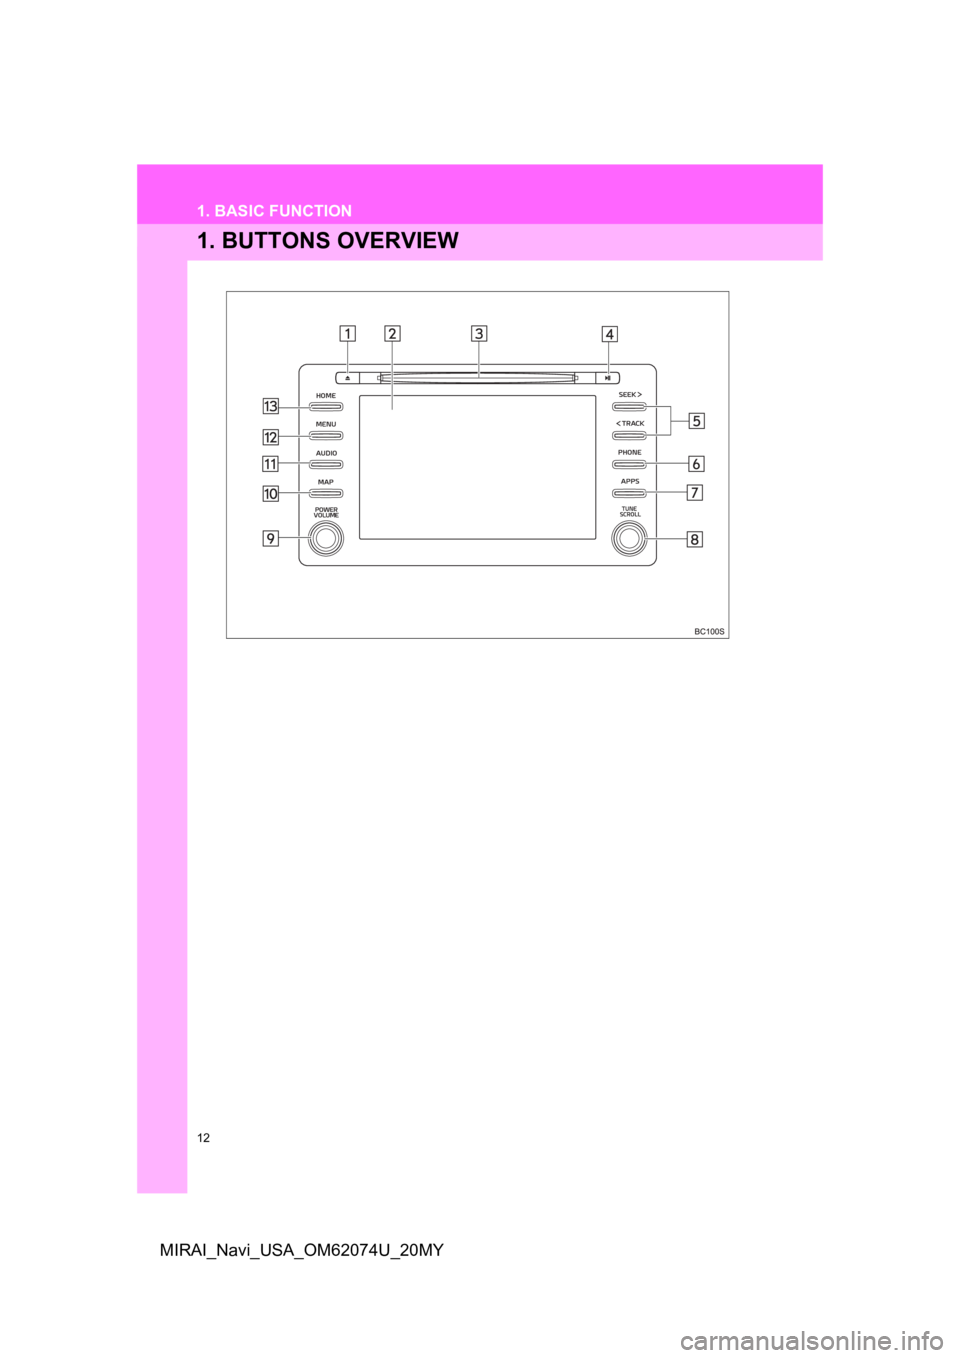
1. BUTTONS OVERVIEW
Page 16 of 288
16
1. BASIC FUNCTION
MIRAI_Navi_USA_OM62074U_20MY
3. HOME SCREEN
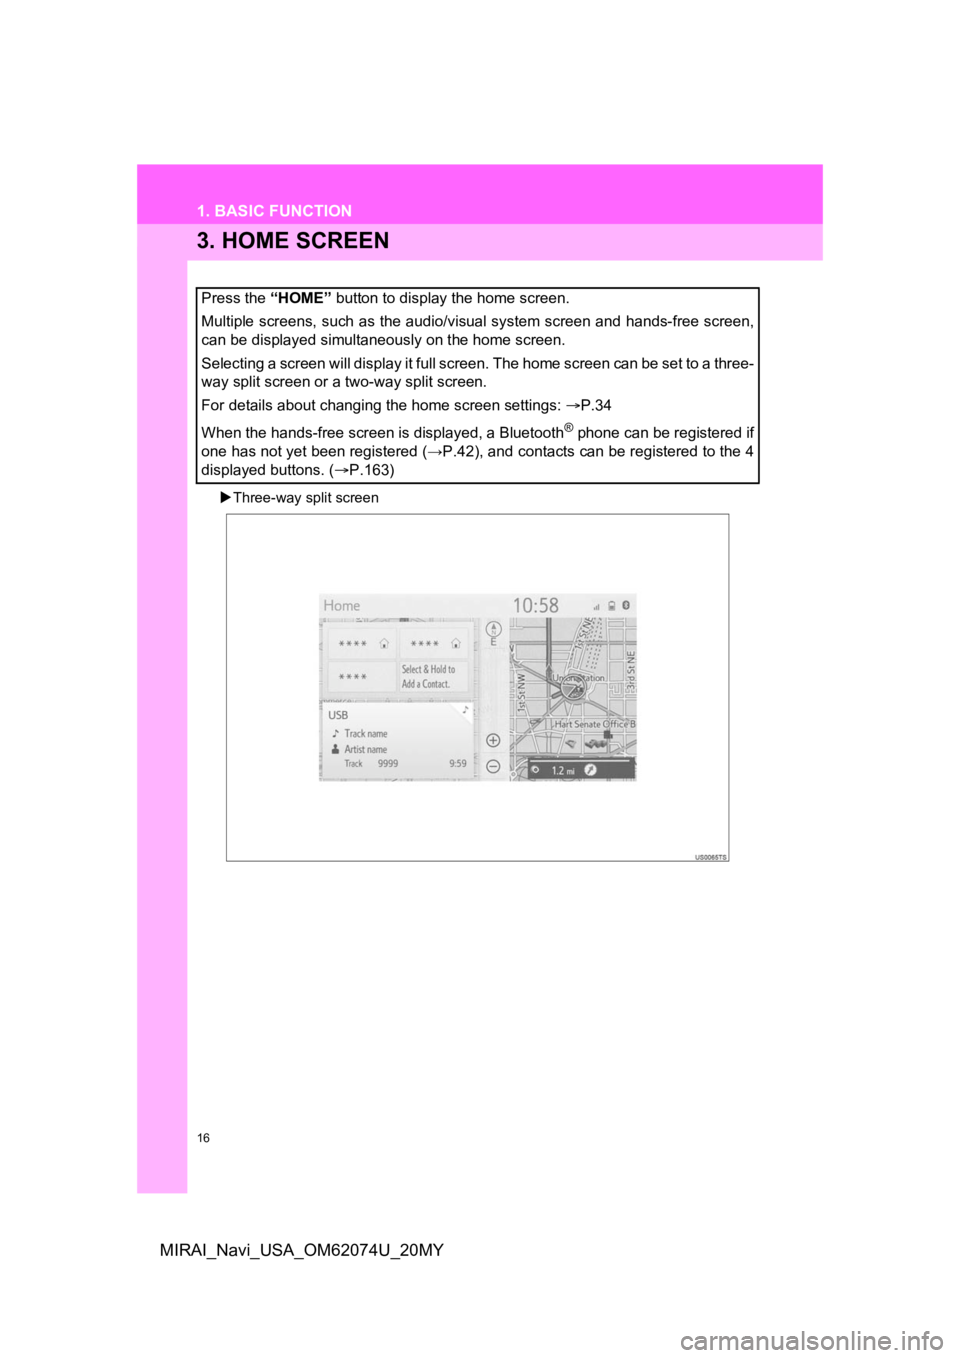
Three-way split screen
Press the “HOME” button to display the home screen.
Multiple screens, such as the audio/visual system screen and hands-free screen,
can be displayed simultaneously on the home screen.
Selecting a screen will display it full screen. The home screen can be set to a three-
way split screen or a two-way split screen.
For details about changing the home screen settings: P.34
When the hands-free screen is displayed, a Bluetooth
® phone can be registered if
one has not yet been registered (→P.42), and contacts can be re gistered to the 4
displayed buttons. ( P.163)
Page 32 of 288
32
1. BASIC INFORMATION BEFORE OPERATION
MIRAI_Navi_USA_OM62074U_20MY
3. TOUCH SCREEN OPERATION
This system is operated mainly by the
buttons on the screen. (Referred to as
screen buttons in this manual.)
When a screen button is touched, a
beep sounds. (To set the beep sound:
P. 6 0 )
NOTICE
● To prevent damaging the screen, lightly
touch the screen buttons with your fin-
ger.
● Do not use objects other than your finger
to touch the screen.
● Wipe off fingerprints using a glass clean-
ing cloth. Do not use chemical cleaners
to clean the screen, as they may dam-
age the touch screen.
INFORMATION
●If the system does n ot respond to touch-
ing a screen button, move your finger
away from the screen and then touch it
again.
● Dimmed screen buttons cannot be oper-
ated.
● The displayed image may become
darker and moving images may be
slightly distorted when the screen is
cold.
● In extremely cold conditions, the screen
may not be displayed and the data input
by a user may be deleted. Also, the
screen buttons may be harder than
usual to depress.
● When you look at the screen through
polarized material such as polarized
sunglasses, the screen may be dark and
hard to see. If so, look at the screen
from different angles, adjust the screen
settings on the display settings screen
or take off your sunglasses.
● When is displayed on the screen,
select to return to the previous
screen.
Page 33 of 288

33
1. BASIC INFORMATION BEFORE OPERATION
BASIC FUNCTION
2
MIRAI_Navi_USA_OM62074U_20MY
If the screen is dirty or wet
If a source of strong electromagnetic
waves is brought near the screen
If a glove is worn during operation
If the screen is touched by a fingernail
If a stylus is used to operate the buttons
If your palm touches the operable area of
another button during operation
If a button is touched quickly
If the operable part of a capacitive touch
screen button is touched by or covered
with a metal object, such as the following,
it may not operate properly:
• Magnetic isolation cards
• Metallic foil, such as the inner packaging
of a cigarette box
• Metallic wallets or bags
•Coins
• Discs, such as a CD or DVD
If the operable part of a capacitive touch
screen button is wiped, it may operate
unintentionally.
If the capacitive touch screen button is
being touched when the power switch is
changed to ACCESSORY or ON mode,
the button may not operate properly. In
this case, remove anything touching the
button, turn the power switch to OFF and
again to ACCESSORY or ON mode or
restart the system by keeping pressing
POWER/VOLUME button for more than 3
sec. See page 30 for restarting the sys-
tem.
CAPACITIVE TOUCH SCREEN
BUTTONS
The operable areas of the capacitive
touch screen buttons use capacitive
touch sensors and may not operate
properly in the following situations: Capacitive touch screen button sensor
sensitivity can be adjusted. ( P. 6 0 )
Page 75 of 288
75
1. BASIC OPERATION
AUDIO/VISUAL SYSTEM
3
MIRAI_Navi_USA_OM62074U_20MY
1Display the audio source selection
screen. (P.74)
2Select “Reorder” .
3Select the desired audio source then
or to reorder.
4Select “OK”.
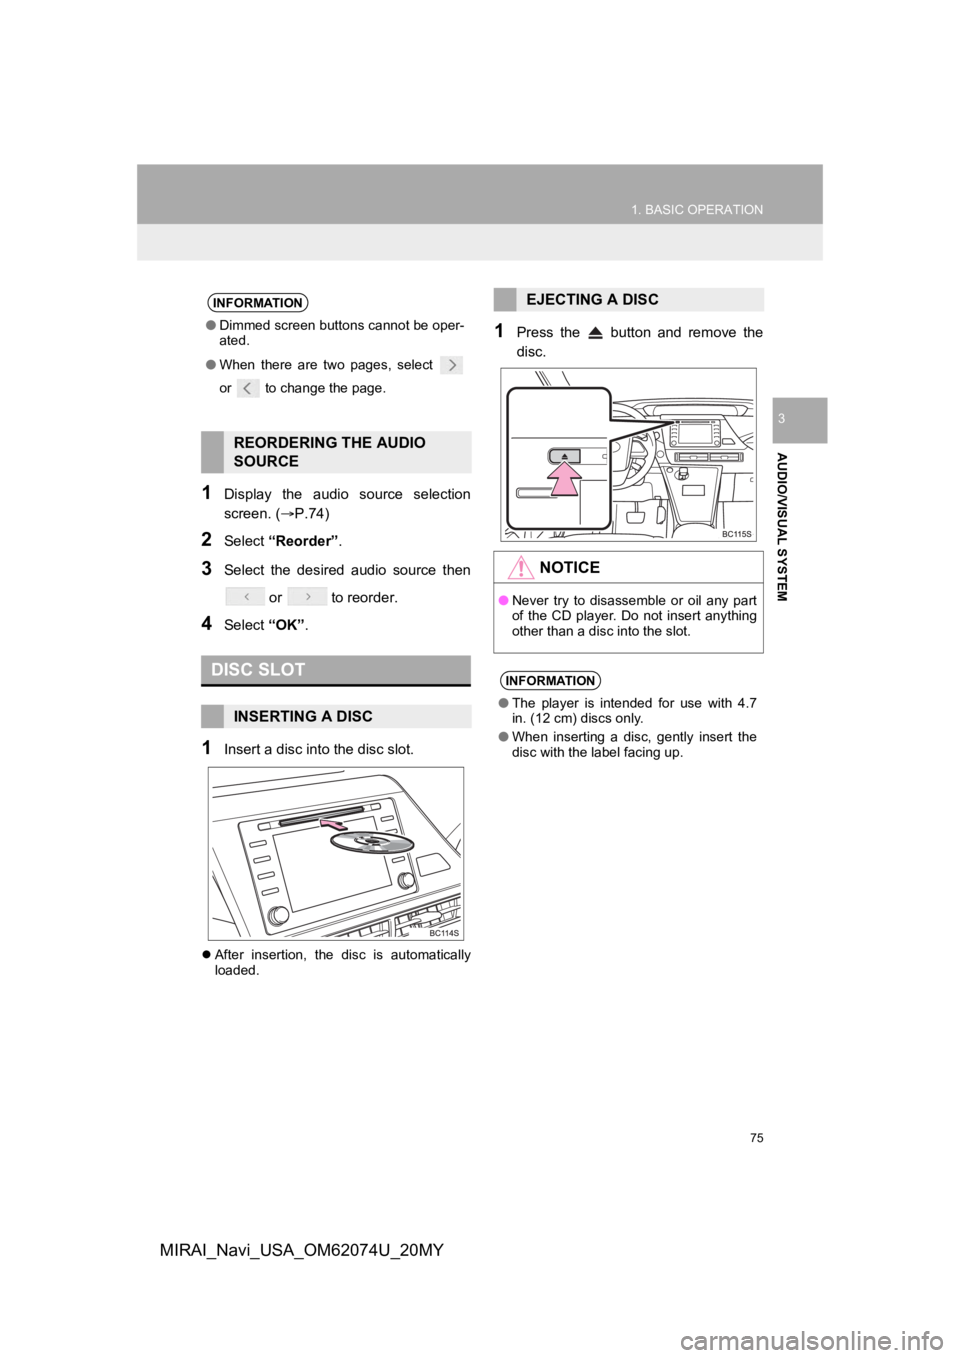
1Insert a disc into the disc slot.
After insertion, the disc is automatically
loaded.
1Press the button and remove the
disc.
INFORMATION
●Dimmed screen buttons cannot be oper-
ated.
● When there are two pages, select
or to change the page.
REORDERING THE AUDIO
SOURCE
DISC SLOT
INSERTING A DISC
EJECTING A DISC
NOTICE
●Never try to disassemble or oil any part
of the CD player. Do not insert anything
other than a disc into the slot.
INFORMATION
●The player is intended for use with 4.7
in. (12 cm) discs only.
● When inserting a disc, gently insert the
disc with the label facing up.
Page 192 of 288
192
MIRAI_Navi_USA_OM62074U_20MY
1. BASIC OPERATION
1. QUICK REFERENCE
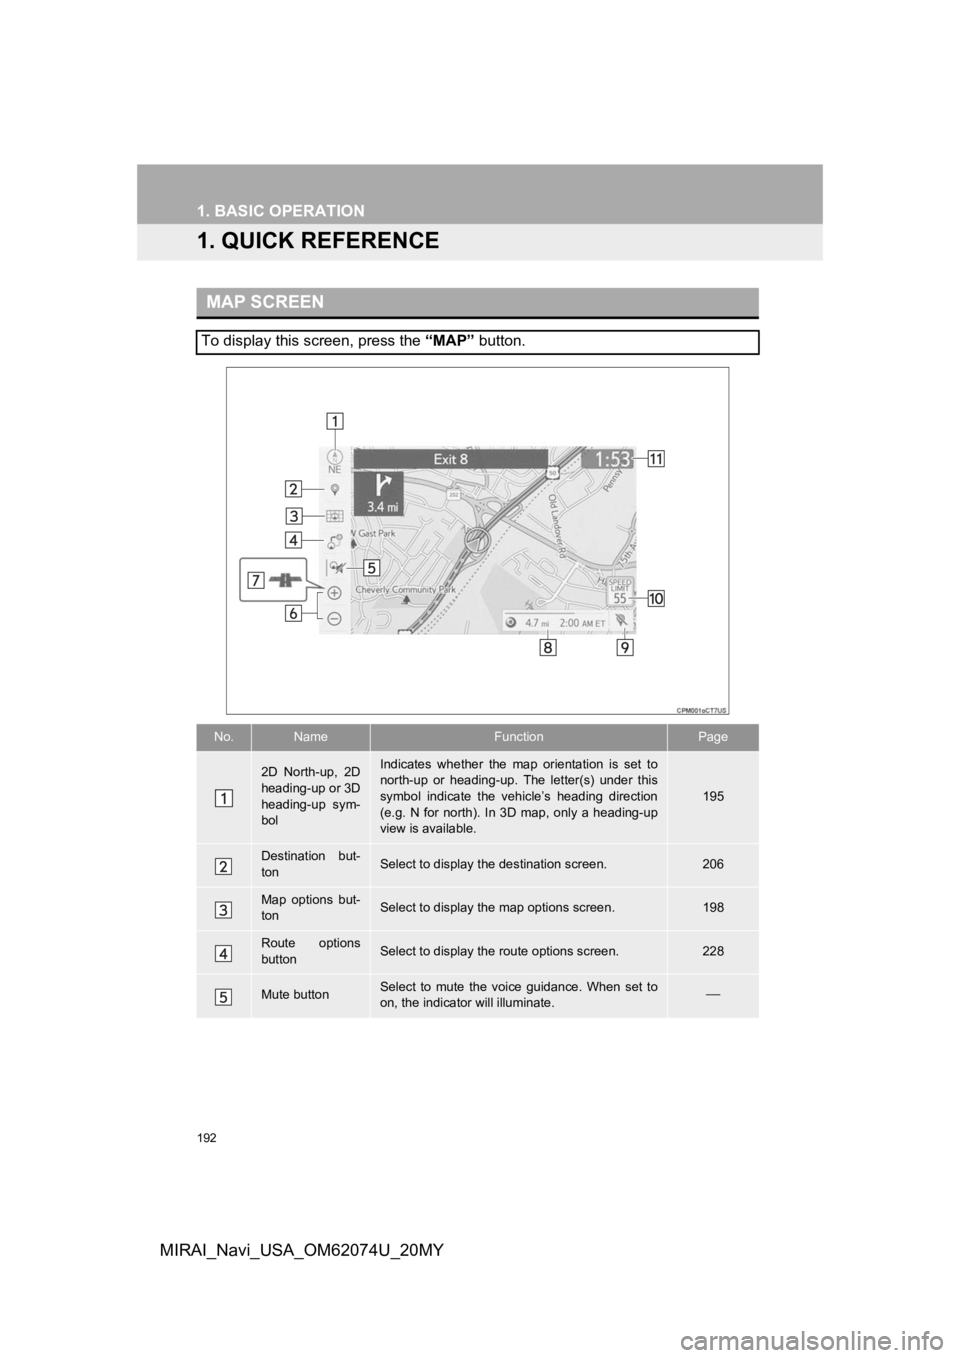
MAP SCREEN
To display this screen, press the “MAP” button.
No.NameFunctionPage
2D North-up, 2D
heading-up or 3D
heading-up sym-
bolIndicates whether the map orientation is set to
north-up or heading-up. The letter(s) under this
symbol indicate the vehicle’s heading direction
(e.g. N for north). In 3D map, only a heading-up
view is available.
195
Destination but-
tonSelect to display the destination screen.206
Map options but-
tonSelect to display th e map options screen.198
Route options
buttonSelect to display the route options screen.228
Mute buttonSelect to mute the voice guidance. When set to
on, the indicator will illuminate.
Page 193 of 288
193
1. BASIC OPERATION
NAVIGATION SYSTEM
8
MIRAI_Navi_USA_OM62074U_20MY
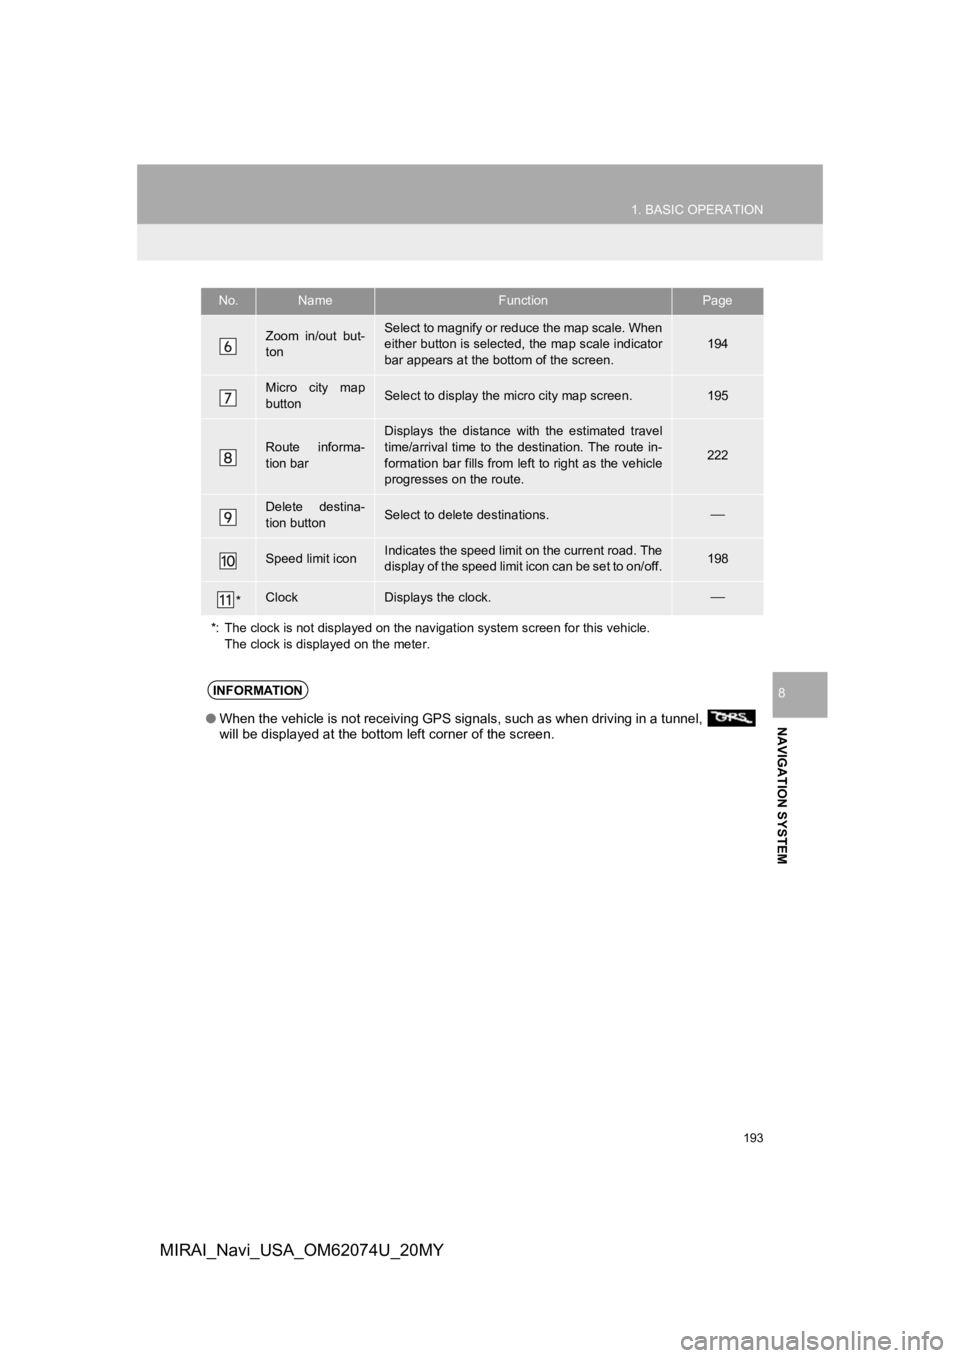
Zoom in/out but-
tonSelect to magnify or reduce the map scale. When
either button is selected, the map scale indicator
bar appears at the bottom of the screen.194
Micro city map
buttonSelect to display the micro city map screen.195
Route informa-
tion bar
Displays the distance with the estimated travel
time/arrival time to the destination. The route in-
formation bar fills from le ft to right as the vehicle
progresses on the route.
222
Delete destina-
tion buttonSelect to delete destinations.
Speed limit iconIndicates the speed limit on the current road. The
display of the speed limit icon can be set to on/off.198
*ClockDisplays the clock.
*: The clock is not displayed on the navigation system screen fo r this vehicle.
The clock is displayed on the meter.
No.NameFunctionPage
INFORMATION
● When the vehicle is not receiving GPS signals, such as when dri ving in a tunnel,
will be displayed at the bottom left corner of the screen.