steering wheel TOYOTA MIRAI 2023 Owners Manual
[x] Cancel search | Manufacturer: TOYOTA, Model Year: 2023, Model line: MIRAI, Model: TOYOTA MIRAI 2023Pages: 572, PDF Size: 17.71 MB
Page 3 of 572
3TABLE OF CONTENTS
Owners Manual_USA_M62064_en
1
2
3
4
5
6
8 7
9
10
4-4. Adjusting the steering wheel and mirrors
Steering wheel .............. 147
Inside rear view mirror .. 149
Digital Rear-view Mirror 150
Outside rear view mirrors .................................... 160
4-5. Opening, closing the win- dows
Power windows ............. 162
4-6. Favorite settings My Settings ................... 165
5-1. Before driving Driving the vehicle......... 169
Cargo and luggage ....... 175
Vehicle load limits ......... 178
Trailer towing................. 179
Dinghy towing ............... 179
5-2. Driving procedures Power switch ................. 180
Shift position ................. 185
Turn signal lever............ 190
Parking brake ................ 191
Brake Hold .................... 194
ASC (Active Sound Control) .................................... 196
Water release (H
2O switch)
.................................... 1965-3. Operating the lights and
wipers
Headlight switch ............ 198
AHB (Automatic High Beam) .................................... 200
Windshield wipers and washer ......................... 204
5-4. Refueling Opening the fuel door .... 210
5-5. Using the driving support systems
Toyota Safety Sense 2.5 +
.................................... 214
PCS (Pre-Collision System) .................................... 219
LTA (Lane Tracing Assist) .................................... 230
RSA (Road Sign Assist). 241
Dynamic radar cruise control with full-speed range ... 244
BSM (Blind Spot Monitor) .................................... 256
Intuitive parking assist ... 261
RCTA (Rear Cross Traffic Alert) ............................ 272
RCD (Rear Camera Detec- tion) ............................. 277
PKSB (Parking Support Brake) .......................... 281
Parking Support Brake func- tion (static obj ects front and
rear of the vehicle/static
objects around the vehicle) .................................... 286
Parking Support Brake func- tion (moving vehicle rear of
the vehicle) .................. 290
5Driving
Page 4 of 572

4TABLE OF CONTENTS
Owners Manual_USA_M62064_en
Parking Support Brake func-tion (pedestrians rear of the
vehicle) ........................ 291
Toyota Teammate Advanced Park ............................. 293
Driving mode select switch .................................... 320
Snow mode ................... 321
Driving assist systems .. 322
5-6. Driving tips Winter driving tips ......... 327
6-1. Using the air conditioning
system and defogger
ALL AUTO control ......... 332
Automatic air conditioning system (Type A) .......... 333
Automatic air conditioning system (Type B) .......... 340
Rear automatic air condition- ing system ................... 349
Heated steering wheel/seat heaters/seat ventilators 351
6-2. Using the interior lights Interior lights list ............ 355
6-3. Using the storage features List of storage features . 358
Trunk features ............... 361
6-4. Using the other interior fea- tures
Electronic sunshade...... 363
Other interior features ... 364
Garage door opener...... 3827-1. Maintenance and care
Cleaning and protecting the vehicle exterior ............ 392
Cleaning and protecting the vehicle interior ............. 396
7-2. Maintenance Maintenance requirements.................................... 400
General maintenance .... 401
7-3. Do-it-yourself maintenance Do-it-yourself service precau-tions ............................. 404
Hood .............................. 406
Positioning a floor jack .. 406
Fuel cell unit compartment .................................... 408
12-volt battery................ 413
Tires .............................. 416
Replacing the tire .......... 424
Tire inflation pressure .... 428
Wheels .......................... 430
Air conditioning filter ...... 432
Cleaning the traction battery air intake vents ............ 433
Electronic key battery .... 436
Checking and replacing fuses .................................... 438
Headlight aim ................ 442
Light bulbs ..................... 443
6Interior features
7Maintenance and care
Page 27 of 572

271-1. For safe use
Owners Manual_USA_M62064_en
1
For safety and security
Adjust the angle of the seat-
back so that you are sitting
straight up and so that you do
not have to lean forward to
steer. ( P.141)
Adjust the seat so that you
can depress the pedals fully
and so that your arms bend
slightly at the elbow when
gripping the steering wheel.
( P.141)
Lock the head restraint in
place with the center of the
head restraint closest to the
top of your ears. ( P.145)
Wear the seat belt correctly.
( P.29)
WARNING
■Before driving
●Check that the floor mat is
securely fixed in the correct
place with all the provided
retaining hooks (clips). Be espe-
cially careful to perform this
check after cleaning the floor.
●With the fuel cell system
stopped and the shift position in
P, fully depress each pedal to
the floor to make sure it does
not interfere with the floor mat.
For safe driving
For safe driving, adjust the
seat and mirror to an appro-
priate position before driv-
ing.
Correct driving posture
Page 39 of 572
391-1. For safe use
Owners Manual_USA_M62064_en
1
For safety and security
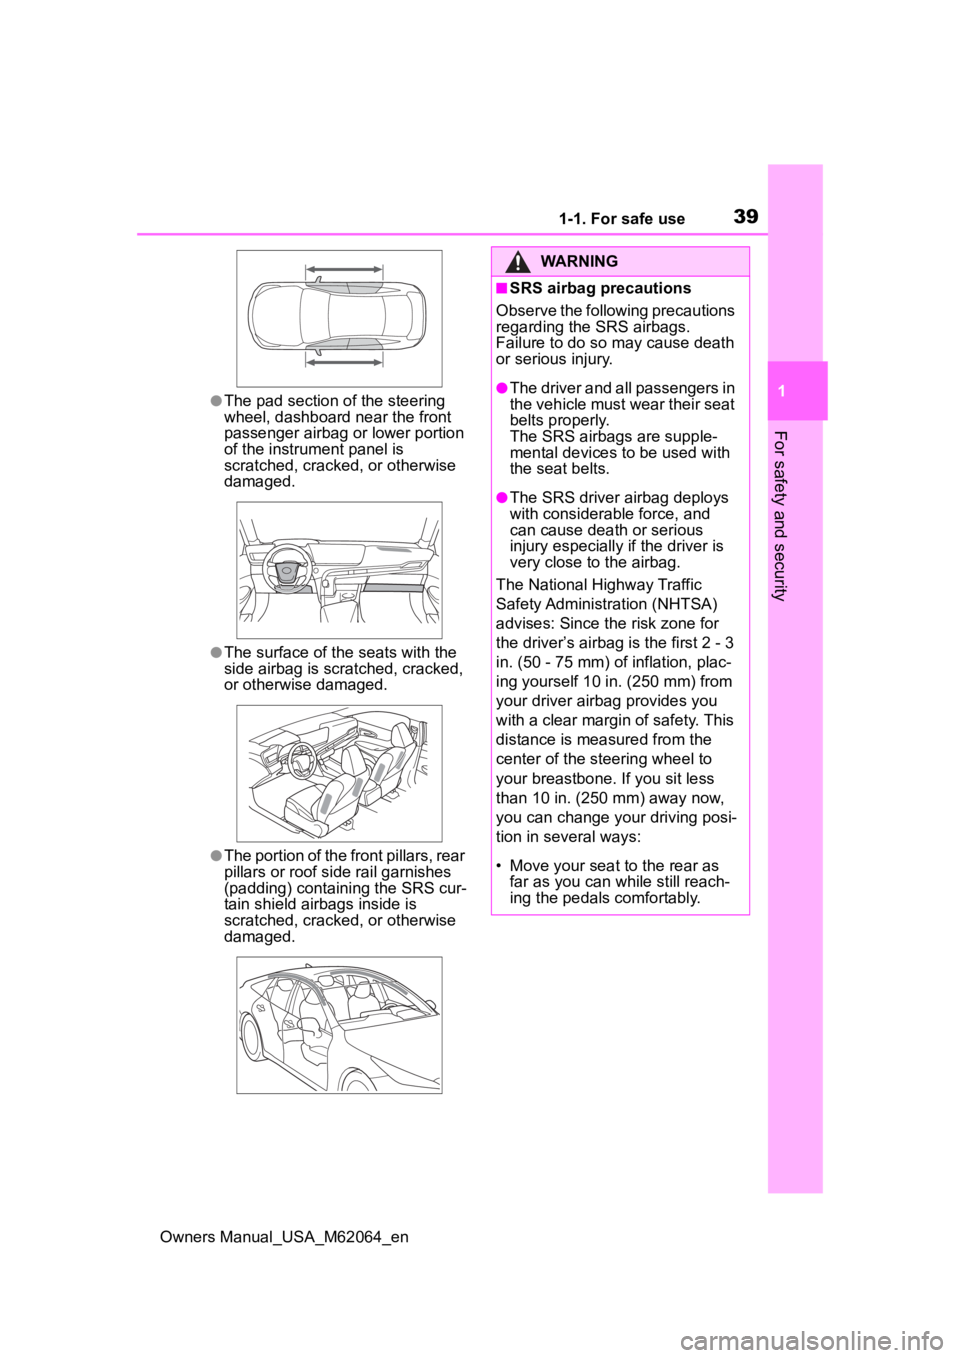
●The pad section of the steering
wheel, dashboard near the front
passenger airbag o r lower portion
of the instrument panel is
scratched, cracked, or otherwise
damaged.
●The surface of the seats with the
side airbag is scratched, cracked,
or otherwise damaged.
●The portion of the front pillars, rear
pillars or roof side rail garnishes
(padding) containing the SRS cur-
tain shield airbags inside is
scratched, cracked, or otherwise
damaged.
WARNING
■SRS airbag precautions
Observe the following precautions
regarding the SRS airbags.
Failure to do so may cause death
or serious injury.
●The driver and all passengers in
the vehicle must wear their seat
belts properly.
The SRS airbags are supple-
mental devices to be used with
the seat belts.
●The SRS driver airbag deploys
with considerable force, and
can cause death or serious
injury especially if the driver is
very close to the airbag.
The National Highway Traffic
Safety Administr ation (NHTSA)
advises: Since the risk zone for
the driver’s airbag is the first 2 - 3
in. (50 - 75 mm) of inflation, plac-
ing yourself 10 in. (250 mm) from
your driver airbag provides you
with a clear margin of safety. This
distance is measured from the
center of the steering wheel to
your breastbone. If you sit less
than 10 in. (250 mm) away now,
you can change you r driving posi-
tion in several ways:
• Move your seat to the rear as far as you can while still reach-
ing the pedals comfortably.
Page 41 of 572
411-1. For safe use
Owners Manual_USA_M62064_en
1
For safety and security
WARNING
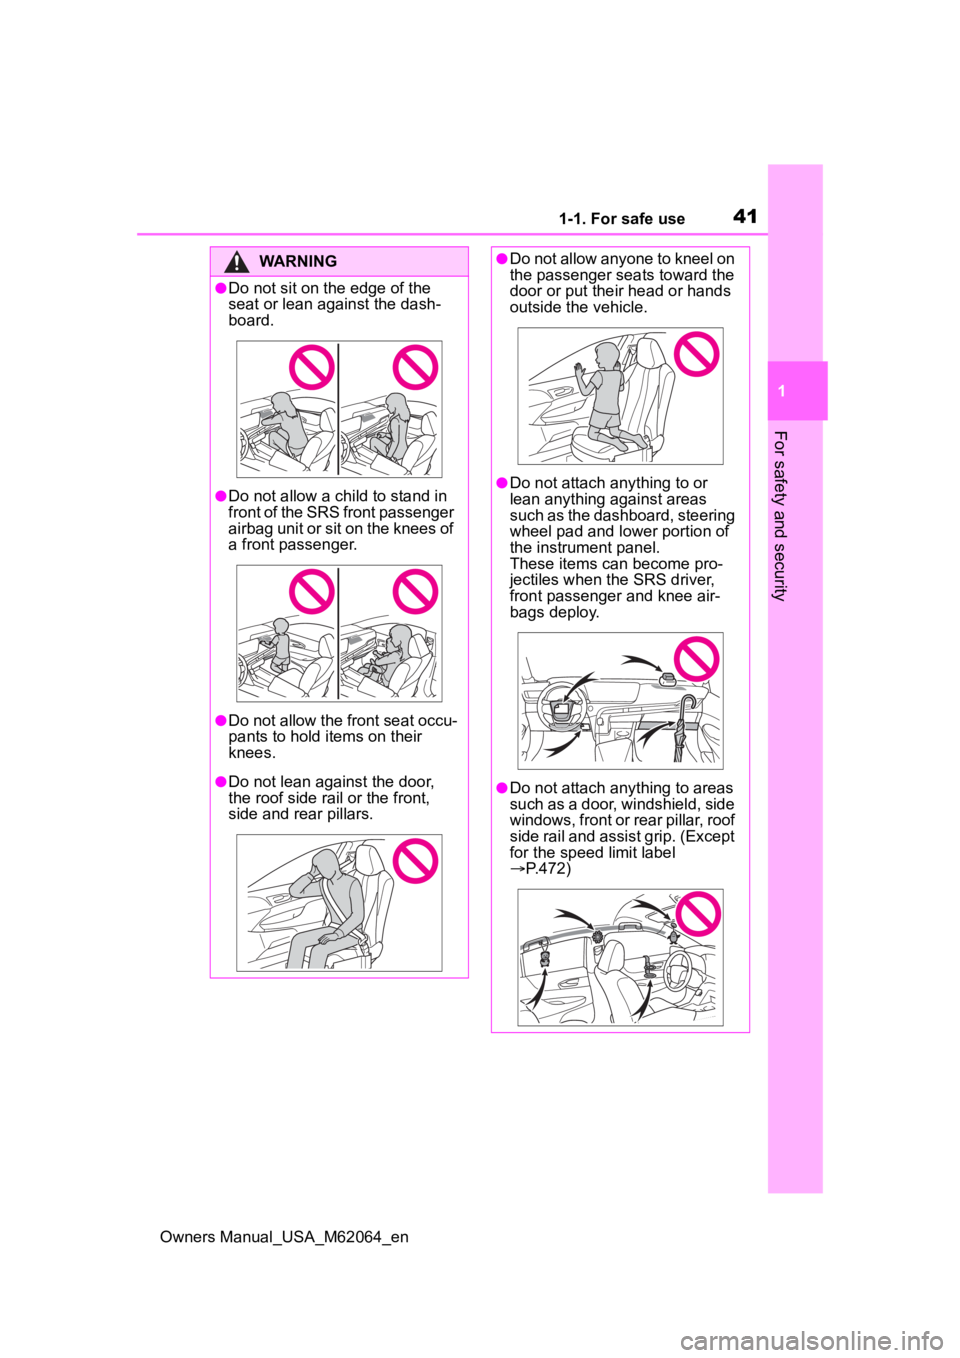
●Do not sit on the edge of the
seat or lean against the dash-
board.
●Do not allow a child to stand in
front of the SRS front passenger
airbag unit or sit on the knees of
a front passenger.
●Do not allow the front seat occu-
pants to hold items on their
knees.
●Do not lean against the door,
the roof side rail or the front,
side and rear pillars.
●Do not allow anyone to kneel on
the passenger seats toward the
door or put their head or hands
outside the vehicle.
●Do not attach anything to or
lean anything against areas
such as the dashboard, steering
wheel pad and lower portion of
the instrument panel.
These items can become pro-
jectiles when th e SRS driver,
front passenger and knee air-
bags deploy.
●Do not attach anything to areas
such as a door, windshield, side
windows, front or rear pillar, roof
side rail and assist grip. (Except
for the speed limit label
P.472)
Page 42 of 572
421-1. For safe use
Owners Manual_USA_M62064_en
WARNING
●Do not hang coat hangers or
hard objects on the coat hooks.
All of these items could become
projectiles and may cause
death or serious injury, should
the SRS curtain shield airbags
deploy.
●If a vinyl cover is put on the area
where the SRS knee airbag will
deploy, be sure to remove it.
●Do not use seat accessories
which cover the parts where the
SRS side airbags inflate as they
may interfere with inflation of
the SRS airbags. Such acces-
sories may prevent the SRS
side airbags from activating cor-
rectly, disable the system or
cause the SRS side airbags to
inflate accidentally, resulting in
death or serious injury.
●Do not strike or apply significant
levels of force to the area of the
SRS airbag components or the
front doors. Doing so can cause
the SRS airbags to malfunction.
●Do not touch any of the compo-
nent parts immediately after the
SRS airbags have deployed
(inflated) as they may be hot.
●If breathing becomes difficult
after the SRS airbags have
deployed, open a door or win-
dow to allow fresh air in, or
leave the vehicle if it is safe to
do so. Wash off any residue as
soon as possible to prevent skin
irritation.
●If the areas where the SRS air-
bags are stored, such as the
steering wheel pad and front
and rear pillar garnishes are
damaged or cracked, have
them replaced by your Toyota
dealer.
●Do not place anything, such as
a cushion, on the front passen-
ger’s seat. Doing so will
disperse the passenger’s
weight, which prevents the sen-
sor from detecting the passen-
ger’s weight properly. As a
result, the SRS front airbags for
the front passenger may not
deploy in the event of a colli-
sion.
■Modification and disposal of
SRS airbag system compo-
nents
Do not dispose of your vehicle or
perform any of the following modi-
fications without consulting your
Toyota dealer. The SRS airbags
may malfunction or deploy
(inflate) accidentally, causing
death or serious injury.
●Installation, re moval, disassem-
bly and repair of the SRS air-
bags
●Repairs, modific ations, removal
or replacement of the steering
wheel, instrument panel, dash-
board, seats or seat upholstery,
front, side and rear pillars, roof
side rails, front door panels,
front door trims or front door
speakers
●Modifications to the front door
panel (such as making a hole in
it)
●Repairs or modifications of the
front fender, front bumper, or
side of the occupant compart-
ment
●Installation of a grille guard (bull
bars, kangaroo bar, etc.), snow
plows or winches
●Modifications to the vehicle’s
suspension system
Page 107 of 572
1073-1. Instrument cluster
Owners Manual_USA_M62064_en
3
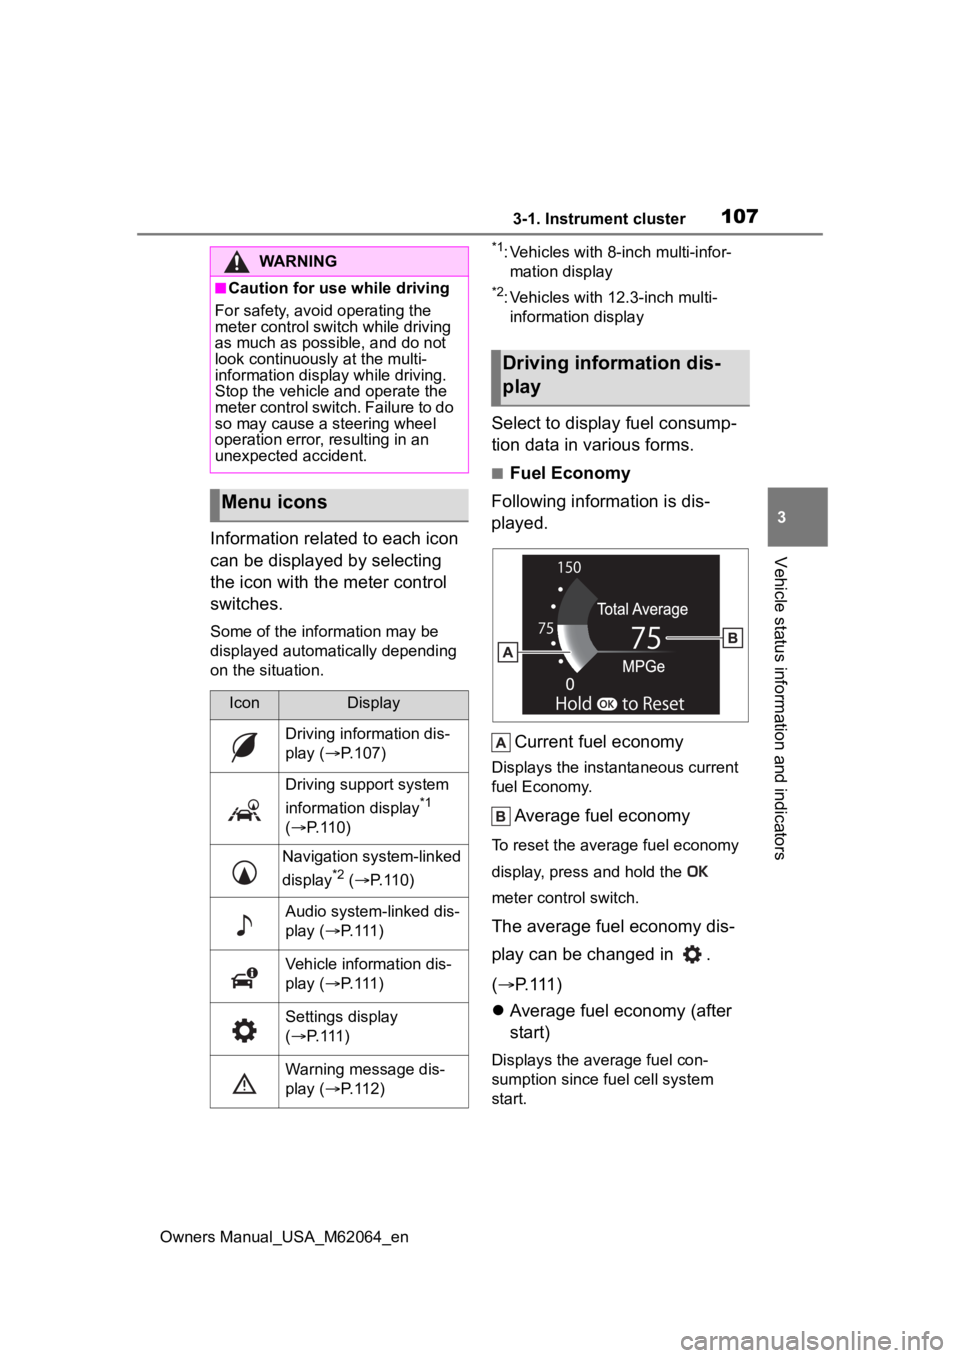
Vehicle status information and indicatorsInformation related to each icon
can be displayed by selecting
the icon with the meter control
switches.
Some of the information may be
displayed automatically depending
on the situation.
*1: Vehicles with 8-inch multi-infor- mation display
*2: Vehicles with 12.3-inch multi-information display
Select to display fuel consump-
tion data in various forms.
■Fuel Economy
Following information is dis-
played.
Current fuel economy
Displays the instantaneous current
fuel Economy.
Average fuel economy
To reset the average fuel economy
display, press and hold the
meter control switch.
The average fuel economy dis-
play can be changed in .
( P.111)
Average fuel economy (after
start)
Displays the average fuel con-
sumption since fuel cell system
start.
WARNING
■Caution for use while driving
For safety, avoid operating the
meter control swit ch while driving
as much as possible, and do not
look continuously at the multi-
information display while driving.
Stop the vehicle and operate the
meter control switch. Failure to do
so may cause a steering wheel
operation error, resulting in an
unexpected accident.
Menu icons
IconDisplay
Driving information dis-
play ( P.107)
Driving support system
information display
*1
( P. 1 1 0 )
Navigation system-linked
display
*2 ( P. 1 1 0 )
Audio system-linked dis-
play ( P. 1 1 1 )
Vehicle information dis-
play ( P. 1 1 1 )
Settings display
( P. 1 1 1 )
Warning message dis-
play ( P. 1 1 2 )
Driving information dis-
play
Page 118 of 572
1183-1. Instrument cluster
Owners Manual_USA_M62064_eninformation display.
■Warning message
Some warning messages are
displayed when necessary,
according to certain conditions.
Details of content displayed on the
head-up display may differ from
that displayed on the multi-informa-
tion display.
■Audio system operation
status
Displayed when an audio
remote control switch on the
steering wheel is operated.
■Hands-free system status
Displayed when the hands-free
system is operated.
■When a pop-up display is dis-
played
When a pop-up display is displayed,
a current display may no longer be
displayed. In this case, the display
will return after the pop-up display
disappears.
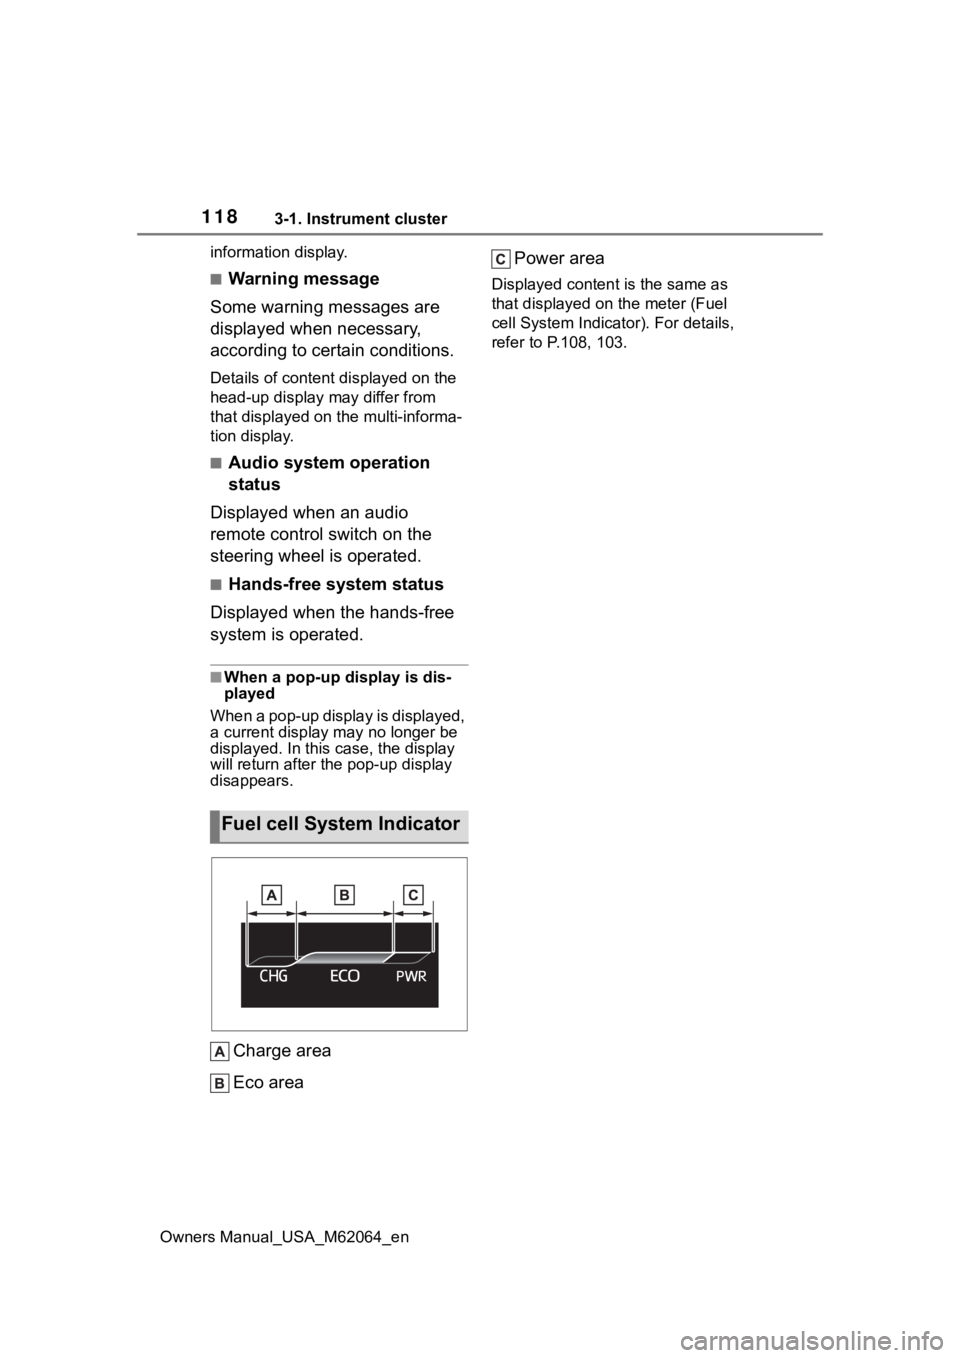
Charge area
Eco area Power area
Displayed content is the same as
that displayed on
the meter (Fuel
cell System Indicator). For details,
refer to P .108, 103.
Fuel cell System Indicator
Page 119 of 572
1193-1. Instrument cluster
Owners Manual_USA_M62064_en
3
Vehicle status information and indicators
Multi-information display
Multimedia display
Meter control switches
The energy monitor can be used
to check the vehicle drive status,
fuel cell system operation status
and energy regeneration status.
■Display procedure
Multi-information display
Press or of the meter
control switches on the steering
wheel and select , press
or of the meter control switches and select the energy
monitor.
Multimedia display
1 Select on the main
menu.
2 Select “Energy flow”.
■Display
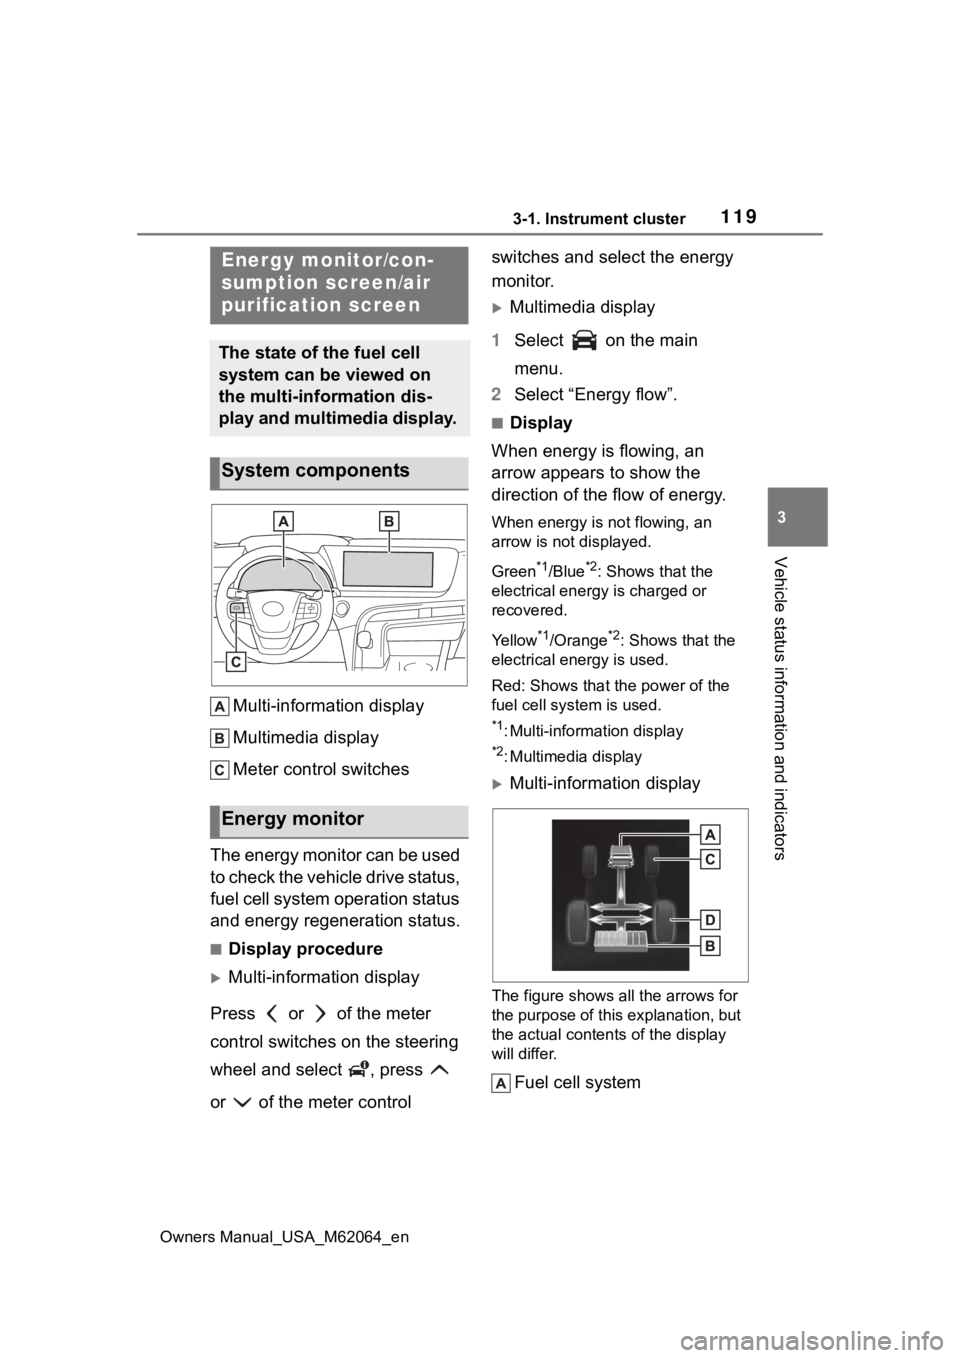
When energy is flowing, an
arrow appears to show the
direction of the flow of energy.
When energy is not flowing, an
arrow is not displayed.
Green
*1/Blue*2: Shows that the
electrical energy is charged or
recovered.
Yellow
*1/Orange*2: Shows that the
electrical energy is used.
Red: Shows that the power of the
fuel cell system is used.
*1: Multi-information display
*2: Multimedia display
Multi-information display
The figure shows all the arrows for
the purpose of this explanation, but
the actual contents of the display
will differ.
Fuel cell system
Energy monitor/con-
sumption screen/air
purification screen
The state of the fuel cell
system can be viewed on
the multi-information dis-
play and multimedia display.
System components
Energy monitor
Page 123 of 572

123
Owners Manual_USA_M62064_en
4
4
Before driving
Before driving
4-1. Key informationKeys ............................ 124
4-2. Opening, closing and locking the doors and
trunk
Doors .......................... 127
Trunk ........................... 132
Smart key system ....... 136
4-3. Adjusting the seats Front seats .................. 141
Driving position memory .................................. 142
Head restraints............ 145
4-4. Adjusting the steering wheel and mirrors
Steering wheel ............ 147
Inside rear view mirror 149
Digital Rear-view Mirror 150
Outside rear view mirrors .................................. 160
4-5. Opening, closing the win- dows
Power windows ........... 162
4-6. Favorite settings My Settings ................. 165