phone TOYOTA PROACE 2022 Owners Manual
[x] Cancel search | Manufacturer: TOYOTA, Model Year: 2022, Model line: PROACE, Model: TOYOTA PROACE 2022Pages: 360, PDF Size: 70.79 MB
Page 3 of 360
3
Contents
Driving and manoeuvring aids - General recommendations 171Head-up display 173Memorising speeds 174Speed Limit Recognition and Recommendation 175Speed limiter 177Cruise control - particular recommendations 179Cruise control 180Adaptive Cruise Control 182Active Safety Brake with Collision Risk Alert and Intelligent emergency braking assistance 186Lane departure warning system 188Distraction detection 189Blind Spot Monitoring System 191Parking sensors 192VisioPark Light 194Top Rear Vision 194
7Practical information
Compatibility of fuels 198Refuelling 198Misfuel prevention (Diesel) 200Charging system (Electric) 200Charging the traction battery (Electric) 208Energy economy mode 212Snow chains 212Towing device 213Roof bars / Roof rack 214Bonnet 215Engine compartment 216Checking levels 217Speed checks 219AdBlue® (Diesel engines) 222Free-wheeling 225
Advice on care and maintenance 226
8In the event of a breakdown
Warning triangle 229Running out of fuel (Diesel) 229Tool box 230Temporary puncture repair kit 231Spare wheel 235Changing a bulb 239Changing a fuse 24512 V battery / Accessory battery 248Towing 252
9Technical data
Engine technical data and towed loads 254Diesel engines 255Electric motor 259Dimensions 261Identification markings 264
10Bluetooth® audio system
First steps 265Steering mounted controls 266Menus 267Radio 267DAB (Digital Audio Broadcasting) radio 269Media 270Telephone 273Frequently asked questions 276
11TOYOTA Pro Touch
First steps 278Steering mounted controls 279Menus 280Applications 281
Radio 282DAB (Digital Audio Broadcasting) radio 284Media 284Telephone 286Settings 289Frequently asked questions 291
12 TOYOTA Pro Touch with navigation system
First steps 293Steering mounted controls 294Menus 295Voice commands 296Navigation 300Connected navigation 303Applications 305Radio 308DAB (Digital Audio Broadcasting) radio 310Media 310Telephone 312Settings 315Frequently asked questions 317
13Event data recorders
■Alphabetical index
Page 26 of 360
26
Touch screen
This system gives access to the following elements:– Permanent display of the time and outside temperature (a blue warning lamp appears if there is a risk of ice).– Vehicle functions and equipment setting menus.
– Audio system and telephone controls and display of related information.– Display of visual manoeuvring aid functions– Internet services and display of related information.– Navigation system controls and display of related information (depending on version).
WARNI NG
For safety reasons, always stop the vehicle before performing operations that require sustained attention.Some functions are not accessible while driving.
Recommendations
This screen is of the capacitive type.– Do not use pointed objects on the touch screen.– Do not touch the touch screen with wet hands.– Use a soft, clean cloth to clean the touch screen.
Principles
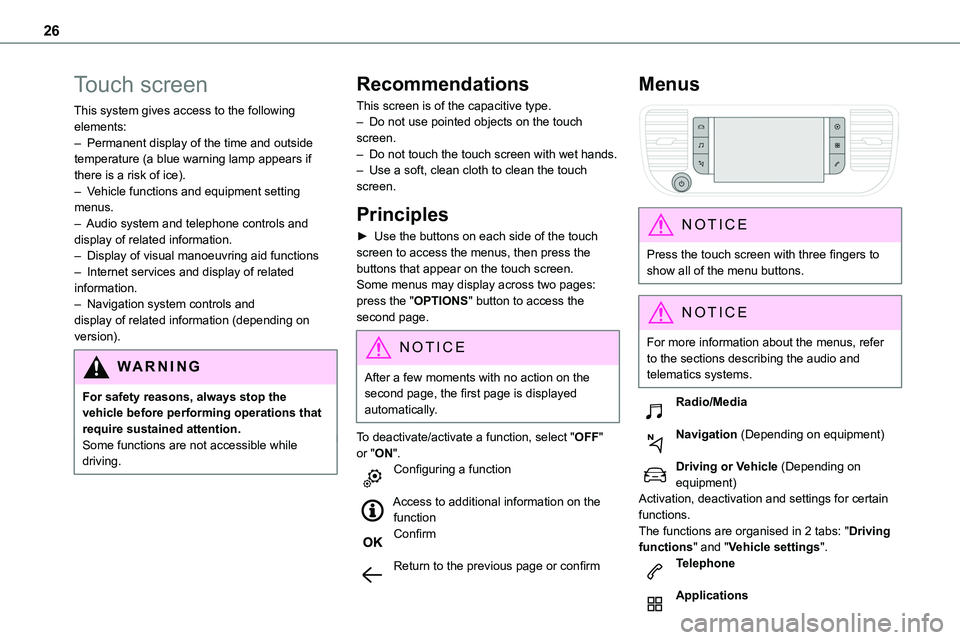
► Use the buttons on each side of the touch screen to access the menus, then press the buttons that appear on the touch screen.Some menus may display across two pages: press the "OPTIONS" button to access the second page.
NOTIC E
After a few moments with no action on the second page, the first page is displayed automatically.
To deactivate/activate a function, select "OFF" or "ON".Configuring a function
Access to additional information on the function
Confirm
Return to the previous page or confirm
Menus
NOTIC E
Press the touch screen with three fingers to show all of the menu buttons.
NOTIC E
For more information about the menus, refer to the sections describing the audio and telematics systems.
Radio/Media
Navigation (Depending on equipment)
Driving or Vehicle (Depending on equipment)Activation, deactivation and settings for certain functions.The functions are organised in 2 tabs: "Driving functions" and "Vehicle settings".Telephone
Applications
Page 27 of 360
27
Instruments
1
Display of available connected services.EnergyAccess the specific Electric functions (energy flow, consumption statistics, deferred charge) organised in the corresponding 3 tabs.orSettingsMain settings for the audio system and touch screen.
Audio system on/off.Volume adjustment/mute.
Upper bar
Certain information is displayed permanently in the upper bar of the touch screen:– Time and outside temperature (a blue warning lamp appears if there is a risk of ice).– Reminder of information from the Radio Media and Telephone menus and navigation instructions (depending on equipment).– Notifications.– Access to the Settings.
Energy menu
Depending on version, this is accessible either:– directly, by pressing the button near the touch screen.– via the Applications menu.
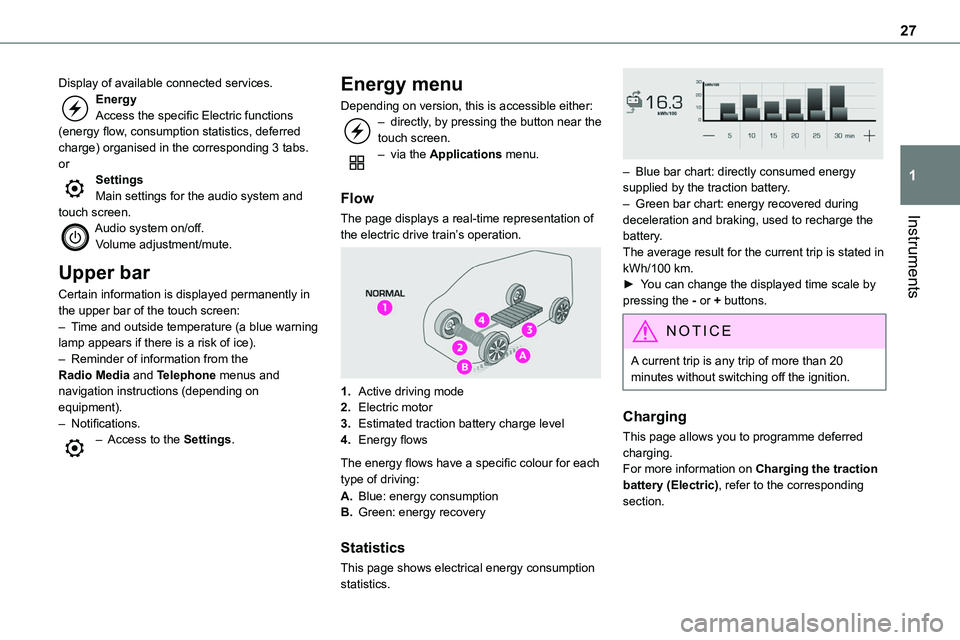
Flow
The page displays a real-time representation of
the electric drive train’s operation.
1.Active driving mode
2.Electric motor
3.Estimated traction battery charge level
4.Energy flows
The energy flows have a specific colour for each type of driving:
A.Blue: energy consumption
B.Green: energy recovery
Statistics
This page shows electrical energy consumption statistics.
– Blue bar chart: directly consumed energy supplied by the traction battery.– Green bar chart: energy recovered during deceleration and braking, used to recharge the battery.The average result for the current trip is stated in kWh/100 km.► You can change the displayed time scale by pressing the - or + buttons.
NOTIC E
A current trip is any trip of more than 20 minutes without switching off the ignition.
Charging
This page allows you to programme deferred charging.For more information on Charging the traction battery (Electric), refer to the corresponding section.
Page 28 of 360
28
Remotely-operable
functions (Electric)
(Available soon)
In addition to all the functions of the MyToyota application that you can access from a smartphone, you can access the following functions:– Battery charge management (Deferred charging).– Temperature pre-conditioning management.– Consultation of the state of charge and range of the vehicle.
Installation procedure
► Download the MyToyota app from the appropriate online store for your smartphone.► Create an account.► Enter the vehicle’s V.I.N. (code beginning with "VF" on the vehicle registration document).For more information on Identification markings, refer to the corresponding section.
NOTIC E
Network coverageIn order to be able to use the various remotely operable features, ensure that your vehicle is located in an area covered by the mobile network.A lack of network coverage may prevent communication with the vehicle (for example,
if it is in an underground car park). In such cases, the application will display a message indicating that the connection with the vehicle could not be established.
Setting the date and time
Without Bluetooth® audio
system
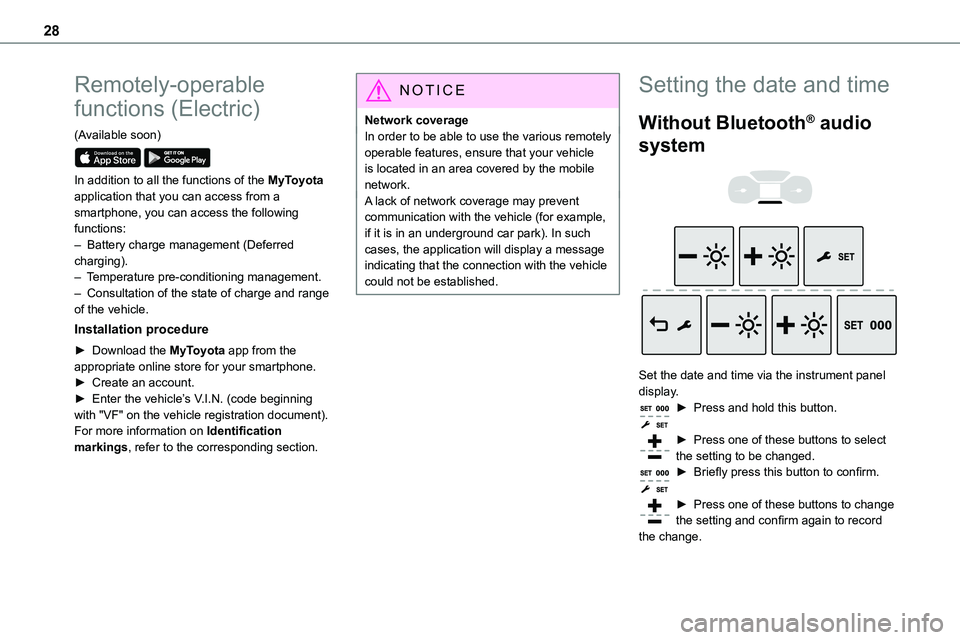
Set the date and time via the instrument panel display.► Press and hold this button.
► Press one of these buttons to select the setting to be changed.► Briefly press this button to confirm.
► Press one of these buttons to change the setting and confirm again to record
the change.
Page 32 of 360
32
inoperative. It would then be necessary to reset it.The remote control does not work when the key is in the ignition switch, even when the ignition is switched off.
WARNI NG
Anti-theft protectionDo not modify the electronic vehicle immobiliser, as this might result in malfunctions.For vehicles with a key ignition switch, remember to remove the key and turn the steering wheel to engage the steering lock.
WARNI NG
Locking the vehicleDriving with the doors locked could make it more difficult for the emergency services to enter the passenger compartment in an emergency.As a safety precaution, remove the key from the ignition or take the electronic key with you when leaving the vehicle, even for a short time.
NOTIC E
Purchasing a second-hand vehicleHave the key codes memorised by any authorized Toyota retailer or Toyota authorized repairer, or any reliable repairer, to ensure that the keys in your possession are the only ones able to start the vehicle.
WARNI NG
To preserve the battery charge in the electronic key and the vehicle's battery, the "hands-free" functions are set to hibernation mode after 21 days without use. To restore these functions, press one of the remote control buttons or start the engine with the electronic key in the reader.For more information on starting with the Smart Entry & Start system, refer to the corresponding section.
NOTIC E
Electrical interferenceThe electronic key may not operate if close to certain electronic devices such as telephones (switched on or on standby) or laptop computers, strong magnetic fields, etc. If this happens, remove the electronic key from the electronic device.
WARNI NG
Accumulations (water, dust, grime, salt, etc.) on the inner surface of the door handle may affect detection.If cleaning the inner surface of the door handle using a cloth does not restore detection, contact any authorized Toyota retailer or Toyota authorized repairer, or any reliable repairer.A sudden splash of water (stream of water, high pressure jet washer, etc.) may be identified by the system as the desire to open the vehicle.
Page 47 of 360
47
Access
2
NOTIC E
Make the movement without interruption and do not repeat it immediately afterwards or several times.If the door does not open, wait about 2 seconds before trying again.Do not keep the foot in the air.
NOTIC E
Confirmation that the door is going to open or close is signalled by the direction indicators flashing for a few seconds, accompanied by an audible signal.The movement of the door is reversed if the movement of the foot takes place during the manoeuvre.If the vehicle is so equipped, the electric door mirrors fold/unfold on locking/unlocking the vehicle.
Automatic locking
The vehicle locks itself following the hands-free closing of the sliding door.
NOTIC E
If your vehicle is not fitted with an alarm, locking is signalled by the fixed illumination of the direction indicators for about two seconds.Depending on your version, the door mirrors fold at the same time.
Activation/Deactivation
With audio system or touch screen
By default, hands-free access is activated.The "Hands-Free Tailgate Access" function or automatic vehicle locking when the sliding door is closed is activated and deactivated via the vehicle configuration menu.
Malfunction
An audible signal repeated three times while using the function indicates a fault with the system.Contact any authorized Toyota retailer or Toyota authorized repairer, or any reliable repairer to have the system checked.
NOTIC E
If the "Hands-free tailgate access self-locking" option is selected in the vehicle menu and after closing the door, check that the vehicle is properly locked.Locking will not take place:– if the ignition is on,– if one of the doors or the tailgate is open,
– if a "Smart Entry & Start" remote control is inside the vehicle. If a number of gestures with your foot have no effect, wait a few seconds before starting again.The system is automatically deactivated in heavy rain or with accumulations of snow.If it does not work, make sure that the remote control is not exposed to a source of electromagnetic interference (smartphone, etc.).Operation may be affected if using a prosthetic leg.This system may not work correctly if your vehicle is fitted with a towbar.
NOTIC E
The side door may open or close without
warning if: – Your vehicle is fitted with a towbar.– A trailer is coupled or decoupled.– A bicycle carrier is installed or removed.
Page 79 of 360
79
Ease of use and comfort
3
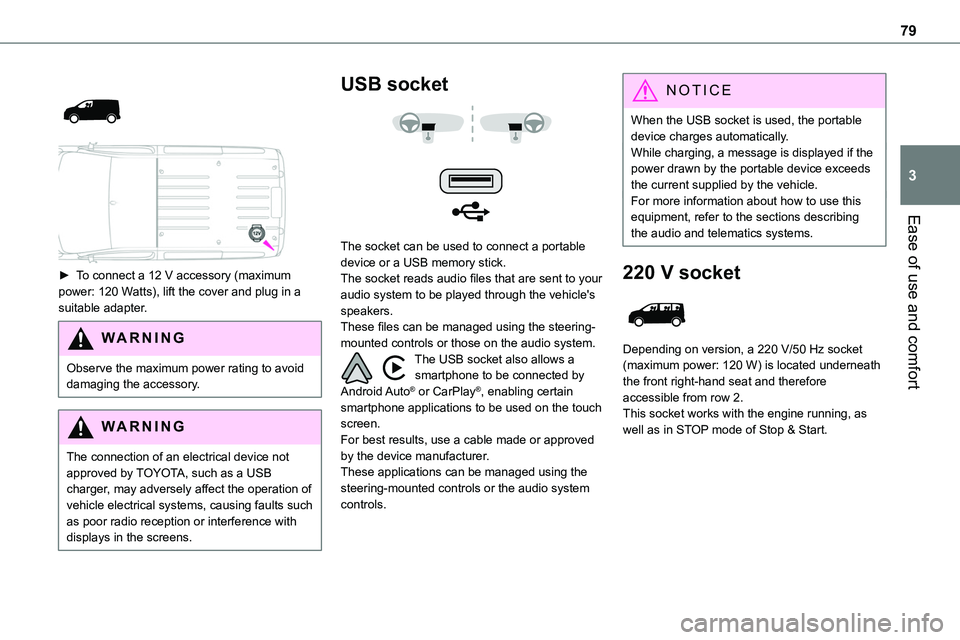
► To connect a 12 V accessory (maximum power: 120 Watts), lift the cover and plug in a suitable adapter.
WARNI NG
Observe the maximum power rating to avoid damaging the accessory.
WARNI NG
The connection of an electrical device not approved by TOYOTA, such as a USB charger, may adversely affect the operation of vehicle electrical systems, causing faults such as poor radio reception or interference with
displays in the screens.
USB socket
The socket can be used to connect a portable device or a USB memory stick.The socket reads audio files that are sent to your audio system to be played through the vehicle's speakers.These files can be managed using the steering-mounted controls or those on the audio system.The USB socket also allows a smartphone to be connected by Android Auto® or CarPlay®, enabling certain smartphone applications to be used on the touch screen.For best results, use a cable made or approved by the device manufacturer.These applications can be managed using the steering-mounted controls or the audio system controls.
NOTIC E
When the USB socket is used, the portable device charges automatically.While charging, a message is displayed if the power drawn by the portable device exceeds the current supplied by the vehicle.For more information about how to use this equipment, refer to the sections describing
the audio and telematics systems.
220 V socket
Depending on version, a 220 V/50 Hz socket (maximum power: 120 W) is located underneath the front right-hand seat and therefore accessible from row 2.This socket works with the engine running, as well as in STOP mode of Stop & Start.
Page 80 of 360
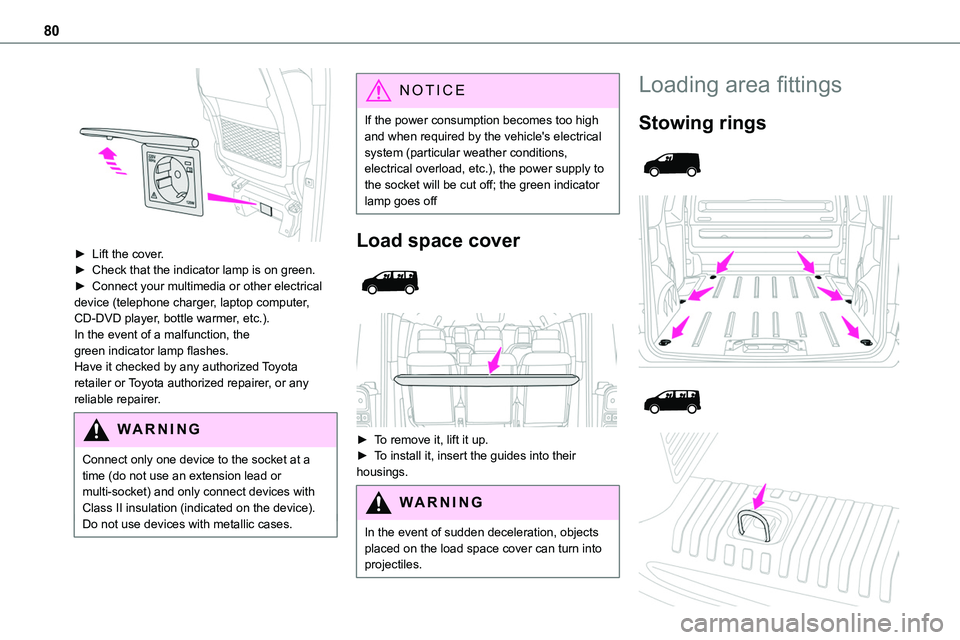
80
► Lift the cover.► Check that the indicator lamp is on green.► Connect your multimedia or other electrical device (telephone charger, laptop computer, CD-DVD player, bottle warmer, etc.).In the event of a malfunction, the green indicator lamp flashes.Have it checked by any authorized Toyota retailer or Toyota authorized repairer, or any reliable repairer.
WARNI NG
Connect only one device to the socket at a time (do not use an extension lead or multi-socket) and only connect devices with Class II insulation (indicated on the device).Do not use devices with metallic cases.
NOTIC E
If the power consumption becomes too high and when required by the vehicle's electrical system (particular weather conditions, electrical overload, etc.), the power supply to the socket will be cut off; the green indicator lamp goes off
Load space cover
► To remove it, lift it up.► To install it, insert the guides into their housings.
WARNI NG
In the event of sudden deceleration, objects placed on the load space cover can turn into projectiles.
Loading area fittings
Stowing rings
Page 98 of 360
98
A/C preconditioning
(Electric)
This function allows you to programme the temperature in the passenger compartment to reach a pre-defined, non-modifiable temperature (approx. 21°C) before you enter the vehicle, on the days and at the times of your choice.This function is available when the vehicle is
connected or not connected.
Programming
With Bluetooth® audio system
Temperature pre-conditioning is not available with the Bluetooth® audio system.
With TOYOTA Pro Touch or TOYOTA Pro Touch with navigation system
Programming can be carried out from a smartphone using the MyToyota application (Available soon).For more information on the Remotely-operable functions, refer to the corresponding section.
With TOYOTA Pro Touch with navigation system
In the Applications menu:
Press "Car Apps" to display the applications home page.
Select Temperature conditioning.
► Press + to add a programme.► Select the time of entry into the vehicle and the desired days. Press OK.► Press ON to activate this programme.The temperature pre-conditioning sequence begins approximately 45 minutes before the programmed time when the vehicle is connected
(20 minutes when it is not connected) and is maintained for 10 minutes after.
NOTIC E
You can set multiple programmes.Each one is saved in the system.To optimise the driving range, we recommend starting a programme while the vehicle is connected.
NOTIC E
The fan noise that occurs during temperature pre-conditioning is perfectly normal.
Operating conditions
– The function is only activated when the ignition is switched off and the vehicle locked.– When the vehicle is not connected, the function is only activated if the battery charge level is greater than 50%.– When the vehicle is not connected and a recurring programme is active (e.g. from Monday
to Friday), if two temperature pre-conditioning sequences are run without the vehicle being used, the programme will be deactivated.
Page 210 of 360
210
► Connect the charging cable from the control unit to the domestic socket.When the connection is made, all of the indicator lamps on the control unit light up, then only the POWER indicator lamp remains on in green.► Remove the protective cover from the charging nozzle.► Insert the nozzle into the charging connector.The start of charging is confirmed by the flashing
green CHARGE indicator lamps in the flap, then those on the control unit.If this is not the case, charging has not started; restart the procedure, ensuring that all connections are properly established.The red indicator lamp in the flap comes on to indicate that the nozzle is locked.
NOTIC E
When charging is complete and while the charging cable is still connected, opening the driver's door will display the charge level on the instrument panel for about 20 seconds.
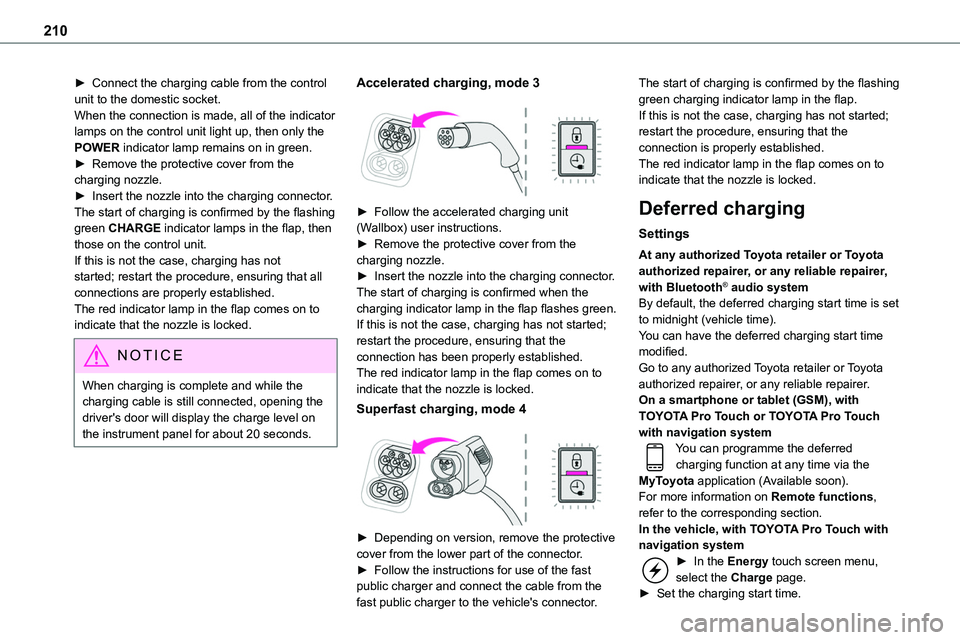
Accelerated charging, mode 3
► Follow the accelerated charging unit (Wallbox) user instructions.► Remove the protective cover from the charging nozzle.► Insert the nozzle into the charging connector.The start of charging is confirmed when the charging indicator lamp in the flap flashes green.If this is not the case, charging has not started; restart the procedure, ensuring that the connection has been properly established.The red indicator lamp in the flap comes on to indicate that the nozzle is locked.
Superfast charging, mode 4
► Depending on version, remove the protective cover from the lower part of the connector.► Follow the instructions for use of the fast public charger and connect the cable from the fast public charger to the vehicle's connector.
The start of charging is confirmed by the flashing green charging indicator lamp in the flap.If this is not the case, charging has not started; restart the procedure, ensuring that the connection is properly established.The red indicator lamp in the flap comes on to indicate that the nozzle is locked.
Deferred charging
Settings
At any authorized Toyota retailer or Toyota authorized repairer, or any reliable repairer, with Bluetooth® audio systemBy default, the deferred charging start time is set to midnight (vehicle time).You can have the deferred charging start time modified.Go to any authorized Toyota retailer or Toyota authorized repairer, or any reliable repairer.On a smartphone or tablet (GSM), with TOYOTA Pro Touch or TOYOTA Pro Touch with navigation systemYou can programme the deferred charging function at any time via the MyToyota application (Available soon).For more information on Remote functions, refer to the corresponding section.In the vehicle, with TOYOTA Pro Touch with navigation system► In the Energy touch screen menu, select the Charge page.► Set the charging start time.