glove box TOYOTA PROACE CITY 2020 Owners Manual
[x] Cancel search | Manufacturer: TOYOTA, Model Year: 2020, Model line: PROACE CITY, Model: TOYOTA PROACE CITY 2020Pages: 272, PDF Size: 61.18 MB
Page 5 of 272
5
Overview
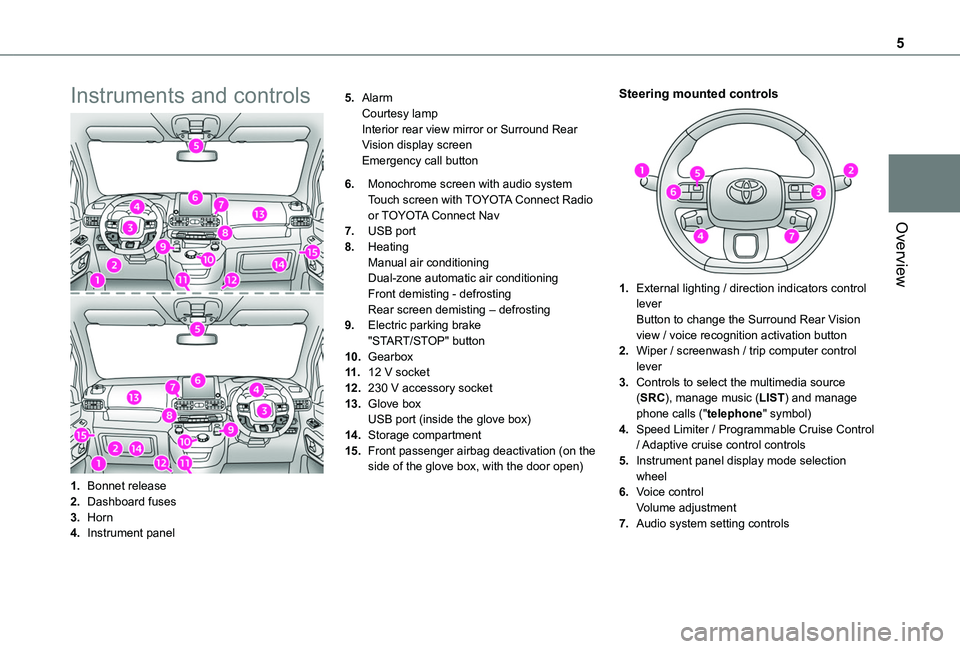
Instruments and controls
1.Bonnet release
2.Dashboard fuses
3.Horn
4.Instrument panel
5.AlarmCourtesy lampInterior rear view mirror or Surround Rear Vision display screenEmergency call button
6.Monochrome screen with audio systemTouch screen with TOYOTA Connect Radio or TOYOTA Connect Nav
7.USB port
8.HeatingManual air conditioningDual-zone automatic air conditioningFront demisting - defrostingRear screen demisting – defrosting
9.Electric parking brake"START/STOP" button
10.Gearbox
11 .12 V socket
12.230 V accessory socket
13.Glove boxUSB port (inside the glove box)
14.Storage compartment
15.Front passenger airbag deactivation (on the side of the glove box, with the door open)
Steering mounted controls
1.External lighting / direction indicators control leverButton to change the Surround Rear Vision view / voice recognition activation button
2.Wiper / screenwash / trip computer control lever
3.Controls to select the multimedia source (SRC), manage music (LIST) and manage phone calls ("telephone" symbol)
4.Speed Limiter / Programmable Cruise Control
/ Adaptive cruise control controls
5.Instrument panel display mode selection wheel
6.Voice controlVolume adjustment
7.Audio system setting controls
Page 57 of 272
57
Ease of use and comfort
3
seat located behind them in row 2 is lowered and the hatch is open.In row 2, no passengers must be allowed to sit in the central seat if the backrest of the outer seat is lowered and the hatch is open.
WARNI NG
When loading long objects, take care to install the protective cover correctly.
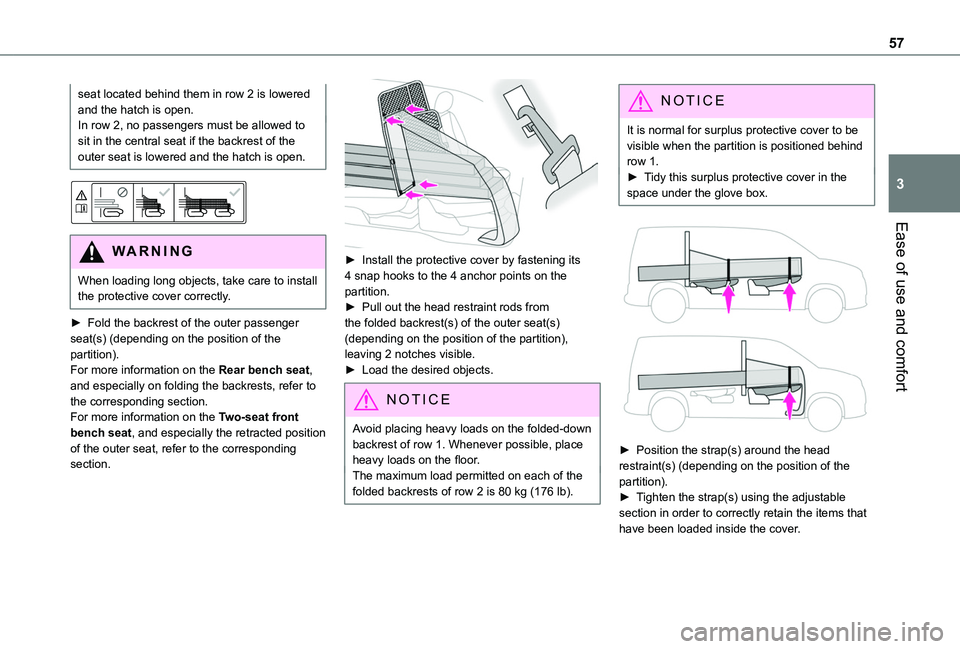
► Fold the backrest of the outer passenger seat(s) (depending on the position of the partition).For more information on the Rear bench seat, and especially on folding the backrests, refer to the corresponding section.For more information on the Two-seat front bench seat, and especially the retracted position of the outer seat, refer to the corresponding section.
► Install the protective cover by fastening its 4 snap hooks to the 4 anchor points on the partition.► Pull out the head restraint rods from the folded backrest(s) of the outer seat(s) (depending on the position of the partition), leaving 2 notches visible.► Load the desired objects.
NOTIC E
Avoid placing heavy loads on the folded-down
backrest of row 1. Whenever possible, place heavy loads on the floor.The maximum load permitted on each of the folded backrests of row 2 is 80 kg (176 lb).
NOTIC E
It is normal for surplus protective cover to be visible when the partition is positioned behind row 1.► Tidy this surplus protective cover in the space under the glove box.
► Position the strap(s) around the head restraint(s) (depending on the position of the partition).► Tighten the strap(s) using the adjustable section in order to correctly retain the items that have been loaded inside the cover.
Page 86 of 272
86
Deployment
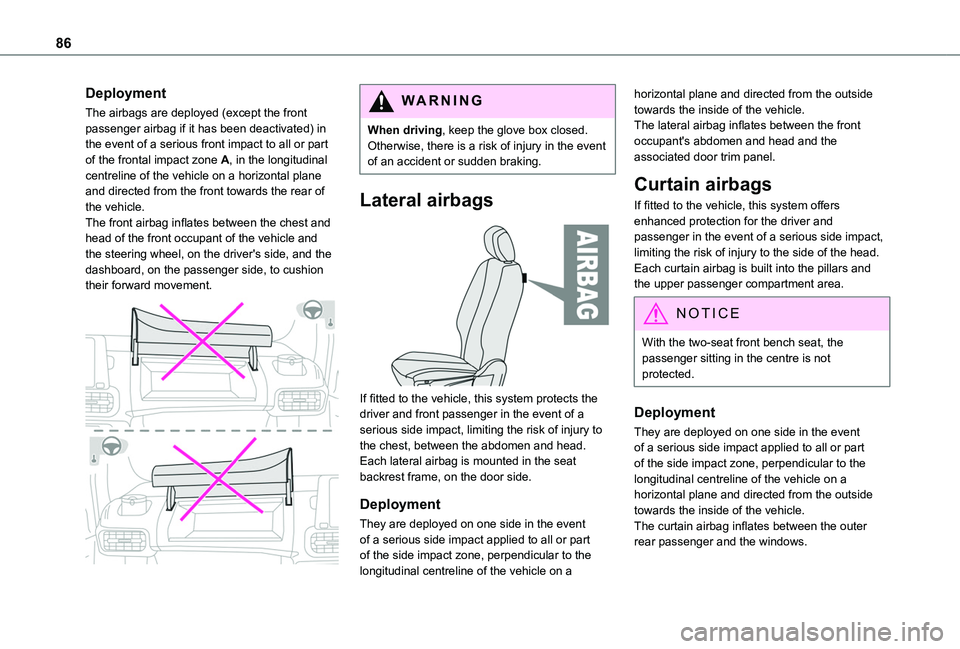
The airbags are deployed (except the front passenger airbag if it has been deactivated) in the event of a serious front impact to all or part of the frontal impact zone A, in the longitudinal centreline of the vehicle on a horizontal plane and directed from the front towards the rear of the vehicle.The front airbag inflates between the chest and head of the front occupant of the vehicle and the steering wheel, on the driver's side, and the dashboard, on the passenger side, to cushion their forward movement.
WARNI NG
When driving, keep the glove box closed. Otherwise, there is a risk of injury in the event of an accident or sudden braking.
Lateral airbags
If fitted to the vehicle, this system protects the driver and front passenger in the event of a serious side impact, limiting the risk of injury to
the chest, between the abdomen and head.Each lateral airbag is mounted in the seat backrest frame, on the door side.
Deployment
They are deployed on one side in the event of a serious side impact applied to all or part of the side impact zone, perpendicular to the longitudinal centreline of the vehicle on a
horizontal plane and directed from the outside towards the inside of the vehicle.The lateral airbag inflates between the front occupant's abdomen and head and the associated door trim panel.
Curtain airbags
If fitted to the vehicle, this system offers enhanced protection for the driver and passenger in the event of a serious side impact, limiting the risk of injury to the side of the head.Each curtain airbag is built into the pillars and the upper passenger compartment area.
NOTIC E
With the two-seat front bench seat, the passenger sitting in the centre is not protected.
Deployment
They are deployed on one side in the event of a serious side impact applied to all or part of the side impact zone, perpendicular to the longitudinal centreline of the vehicle on a horizontal plane and directed from the outside towards the inside of the vehicle.The curtain airbag inflates between the outer rear passenger and the windows.
Page 91 of 272
91
Safety
5
Deactivating/Reactivating the front
passenger airbag
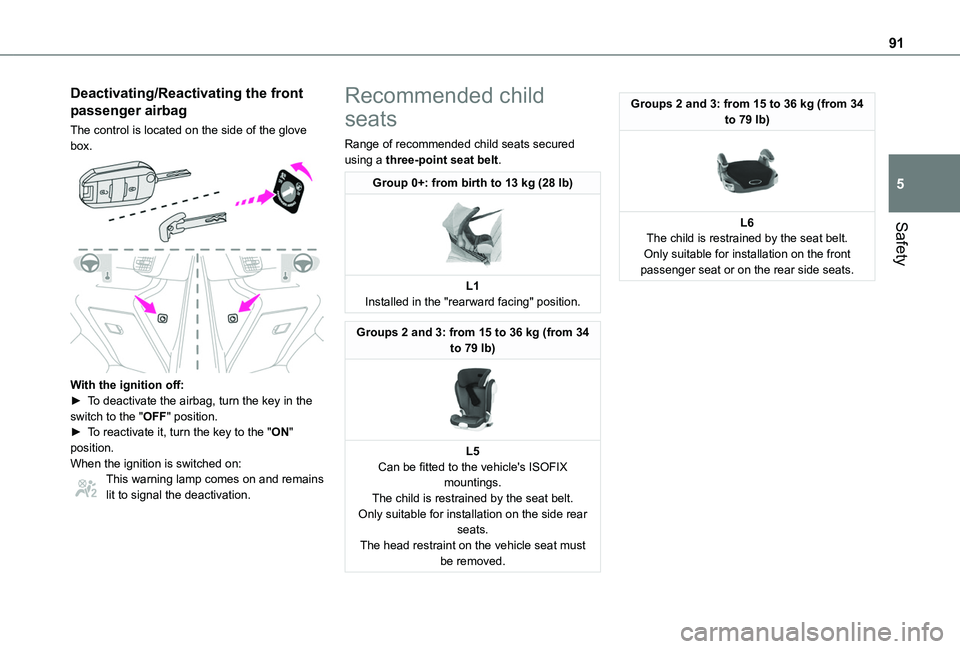
The control is located on the side of the glove box.
With the ignition off:► To deactivate the airbag, turn the key in the switch to the "OFF" position. ► To reactivate it, turn the key to the "ON" position.When the ignition is switched on:This warning lamp comes on and remains lit to signal the deactivation.
Recommended child
seats
Range of recommended child seats secured using a three-point seat belt.
Group 0+: from birth to 13 kg (28 lb)
L1Installed in the "rearward facing" position.
Groups 2 and 3: from 15 to 36 kg (from 34 to 79 lb)
L5Can be fitted to the vehicle's ISOFIX mountings.The child is restrained by the seat belt.Only suitable for installation on the side rear seats.The head restraint on the vehicle seat must be removed.
Groups 2 and 3: from 15 to 36 kg (from 34 to 79 lb)
L6The child is restrained by the seat belt.Only suitable for installation on the front passenger seat or on the rear side seats.
Page 247 of 272
247
Alphabetical index
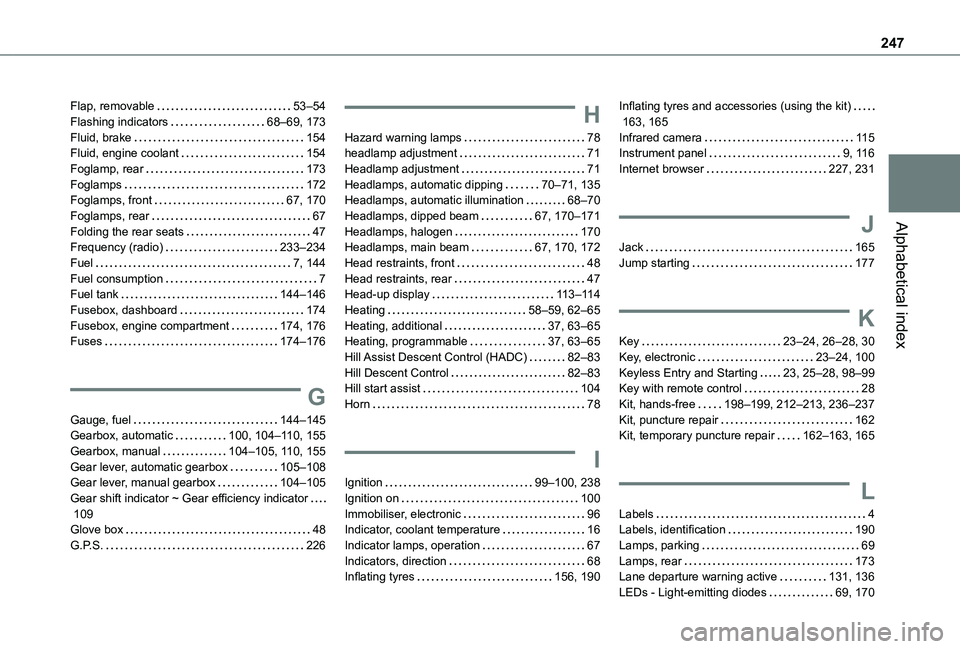
Flap, removable 53–54Flashing indicators 68–69, 173Fluid, brake 154Fluid, engine coolant 154Foglamp, rear 173Foglamps 172Foglamps, front 67, 170Foglamps, rear 67Folding the rear seats 47Frequency (radio) 233–234Fuel 7, 144Fuel consumption 7Fuel tank 144–146Fusebox, dashboard 174Fusebox, engine compartment 174, 176Fuses 174–176
G
Gauge, fuel 144–145Gearbox, automatic 100, 104–11 0, 155
Gearbox, manual 104–105, 11 0, 155Gear lever, automatic gearbox 105–108Gear lever, manual gearbox 104–105Gear shift indicator ~ Gear efficiency indicator 109Glove box 48G.P.S. 226
H
Hazard warning lamps 78headlamp adjustment 71Headlamp adjustment 71Headlamps, automatic dipping 70–71, 135Headlamps, automatic illumination 68–70Headlamps, dipped beam 67, 170–171Headlamps, halogen 170Headlamps, main beam 67, 170, 172Head restraints, front 48Head restraints, rear 47Head-up display 11 3–11 4Heating 58–59, 62–65Heating, additional 37, 63–65Heating, programmable 37, 63–65Hill Assist Descent Control (HADC) 82–83Hill Descent Control 82–83Hill start assist 104Horn 78
I
Ignition 99–100, 238Ignition on 100Immobiliser, electronic 96Indicator, coolant temperature 16Indicator lamps, operation 67Indicators, direction 68Inflating tyres 156, 190
Inflating tyres and accessories (using the kit) 163, 165Infrared camera 11 5Instrument panel 9, 11 6Internet browser 227, 231
J
Jack 165Jump starting 177
K
Key 23–24, 26–28, 30Key, electronic 23–24, 100Keyless Entry and Starting 23, 25–28, 98–99Key with remote control 28Kit, hands-free 198–199, 212–213, 236–237Kit, puncture repair 162Kit, temporary puncture repair 162–163, 165
L
Labels 4Labels, identification 190Lamps, parking 69Lamps, rear 173Lane departure warning active 131, 136LEDs - Light-emitting diodes 69, 170