Crew TOYOTA PROACE CITY 2021 Owners Manual
[x] Cancel search | Manufacturer: TOYOTA, Model Year: 2021, Model line: PROACE CITY, Model: TOYOTA PROACE CITY 2021Pages: 272, PDF Size: 60.75 MB
Page 1 of 272
Welcome
Thank you for choosing a Toyota Proace City.This document presents the key information and recommendations required for you to be able to explore your vehicle in complete safety. We strongly recommend familiarising yourself with this document and the Warranty and Maintenance Record.003C00470052004600580050004800510057country in which it was sold.The descriptions and illustrations are for guidance only.
0024005800570052005000520045004C004F004800560003equipment and accessories without having to update this guide.If ownership of your vehicle is transferred, please ensure this Han is passed on to the new owner.
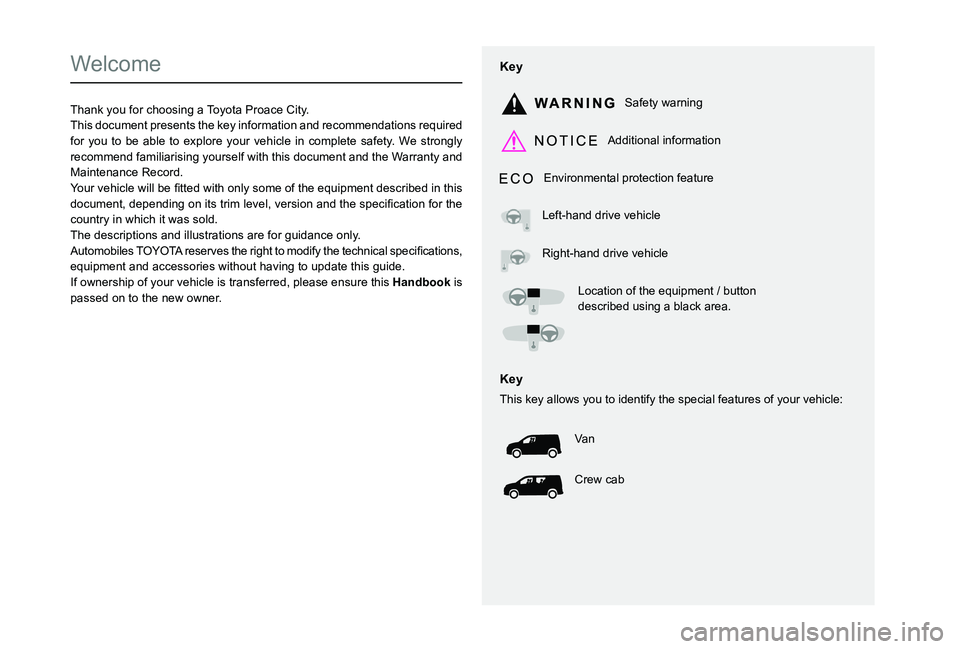
Key
Safety warning
Additional information
Environmental protection feature
Left-hand drive vehicle
Right-hand drive vehicle
Location of the equipment / button described using a black area.
Key
This key allows you to identify the special features of your vehicle:
Va n
Crew cab
Page 2 of 272
2
■Overview
Labels 4
■Eco-driving
Eco-coaching 8
1Instruments
Instrument Panel 9Warning and indicator lamps 11Indicators 16Trip computer 21Setting the date and time 22
2Access
Electronic key with remote control function and built-in key, 23Back-up procedures 30Central locking / unlocking 33Doors 35General recommendations for
the sliding side doors 36Rear roof flap 37Alarm 38Electric windows 40Tilting rear door windows 41
3Ease of use and comfort
General recommendations for the seats 42Front seats 42
Steering wheel adjustment 45
Mirrors 452-seat front bench seat 46Rear bench seat 48Interior fittings 49Extenso cabin 54Crew cab 56Heating and Ventilation 60Heating 61Manual air conditioning 61Dual-zone automatic air conditioning 62Front demisting - defrosting 64Rear screen and/or door mirrors demisting - defrosting 66Additional heating/ventilation system 66
4Lighting and visibility
Lighting control lever 70Direction indicators 71Automatic illumination of headlamps 71Daytime running lamps / Sidelamps 72Parking lamps 72Automatic headlamp dipping 73
Headlamp beam height adjustment 74Wiper control lever 75Changing a wiper blade 77Automatic wiping 77
5Safety
General safety recommendations 79Emergency or assistance call 80Hazard warning lamps 82
Horn 82Electronic stability control (ESC) 82Advanced Grip Control 85Hill Assist Descent Control 86Seat belts 87Airbags 90Child seats 93Deactivating the front passenger airbag 95Manual child lock 98Electric child lock 98
6Driving
Driving recommendations 99Starting/switching off the engine 101Manual parking brake 105Electric parking brake 105Hill start assist 1085-speed manual gearbox 1096-speed manual gearbox 109Automatic gearbox 11 0Gear efficiency indicator 11 4Stop & Start 11 4
Under-inflation detection 11 6Head-up display 11 8Driving and manoeuvring aids - General recommendations 11 9Speed Limit Recognition and Recommendation 121Speed limiter 124Cruise control - particular recommendations 126Programmable cruise control 127
Adaptive Cruise Control 129
Page 4 of 272
4
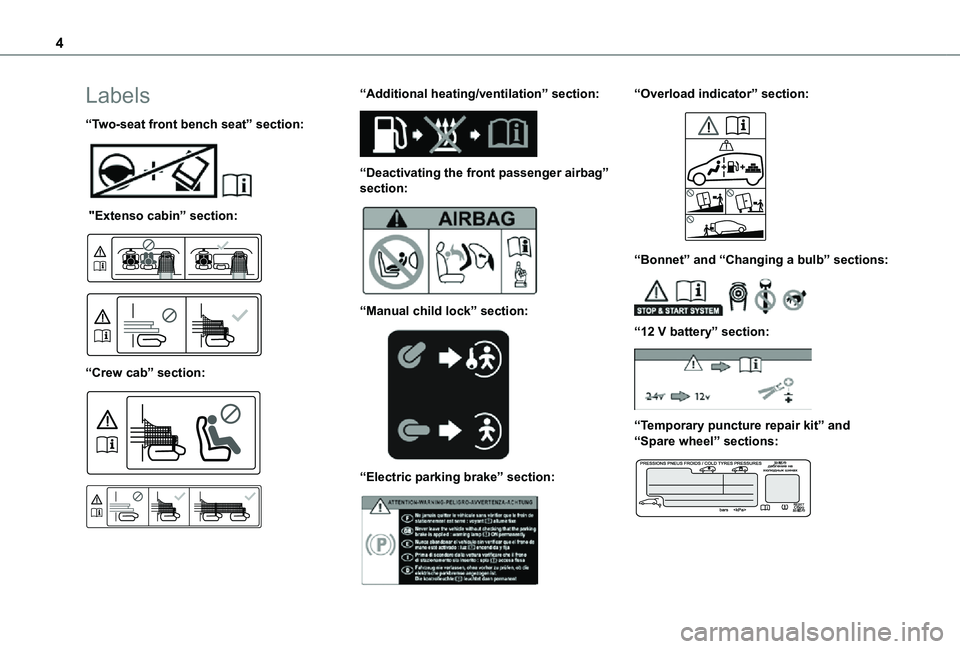
Labels
“Two-seat front bench seat” section:
"Extenso cabin” section:
“Crew cab” section:
“Additional heating/ventilation” section:
“Deactivating the front passenger airbag” section:
“Manual child lock” section:
“Electric parking brake” section:
“Overload indicator” section:
“Bonnet” and “Changing a bulb” sections:
“12 V battery” section:
“Temporary puncture repair kit” and “Spare wheel” sections:
Page 18 of 272
18
Trip distance recorder
This recorder measures the distance travelled since it was last reset by the driver.Resetting the trip recorder
► With the ignition on, press the button until zeros appear.
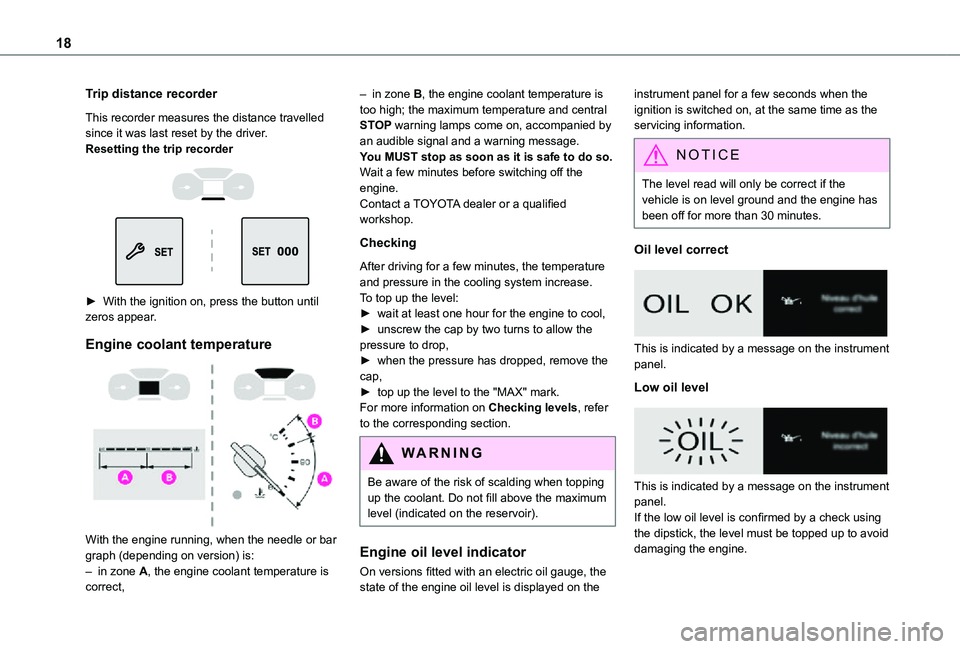
Engine coolant temperature
With the engine running, when the needle or bar graph (depending on version) is:– in zone A, the engine coolant temperature is correct,
– in zone B, the engine coolant temperature is too high; the maximum temperature and central STOP warning lamps come on, accompanied by an audible signal and a warning message.You MUST stop as soon as it is safe to do so.Wait a few minutes before switching off the engine.Contact a TOYOTA dealer or a qualified workshop.
Checking
After driving for a few minutes, the temperature and pressure in the cooling system increase.To top up the level:► wait at least one hour for the engine to cool,► unscrew the cap by two turns to allow the pressure to drop,► when the pressure has dropped, remove the cap,► top up the level to the "MAX" mark.For more information on Checking levels, refer to the corresponding section.
WARNI NG
Be aware of the risk of scalding when topping up the coolant. Do not fill above the maximum level (indicated on the reservoir).
Engine oil level indicator
On versions fitted with an electric oil gauge, the state of the engine oil level is displayed on the
instrument panel for a few seconds when the ignition is switched on, at the same time as the servicing information.
NOTIC E
The level read will only be correct if the vehicle is on level ground and the engine has been off for more than 30 minutes.
Oil level correct
This is indicated by a message on the instrument panel.
Low oil level
This is indicated by a message on the instrument panel.If the low oil level is confirmed by a check using the dipstick, the level must be topped up to avoid
damaging the engine.
Page 31 of 272
31
Access
2
► Insert the key in the door lock.► Turn the key towards the front/rear to unlock/lock the vehicle.► Turn the key rearwards again within 5 seconds to deadlock the vehicle.
NOTIC E
If the vehicle is fitted with an alarm, it will not be activated when locking with the key.
If the alarm is activated, the siren sounds when the door is opened; switch on the ignition to stop it.
Central locking not
functioning
Use these procedures in the following cases:– Central locking malfunction.– Battery disconnected or discharged.
WARNI NG
In the event of a malfunction of the central locking system, the battery must be disconnected to ensure that the vehicle is locked fully.
Locking part of the vehicle (front
passenger door/sliding side door/
side-hinged doors)
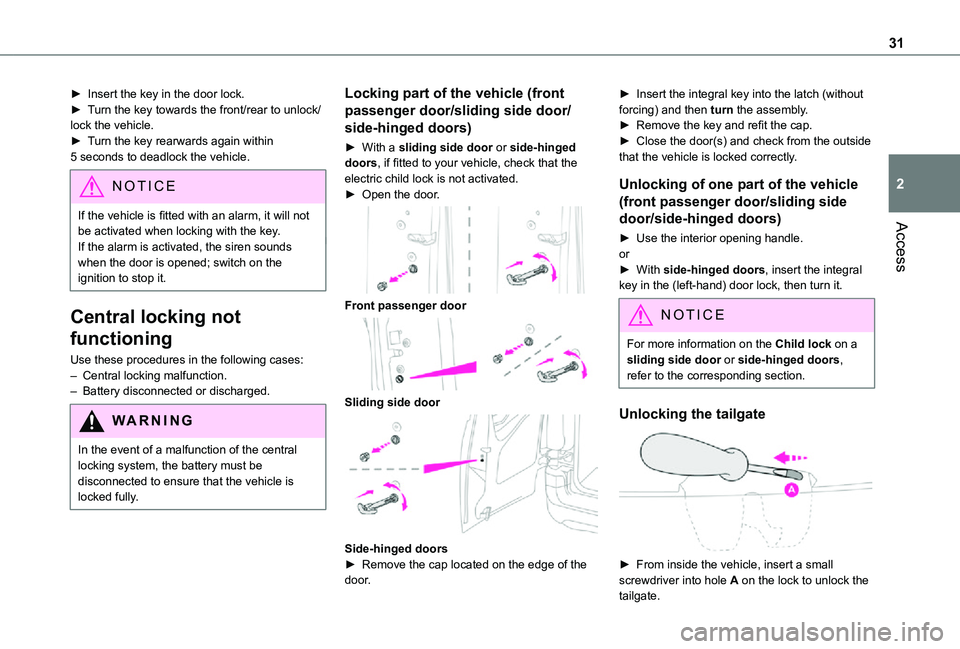
► With a sliding side door or side-hinged doors, if fitted to your vehicle, check that the electric child lock is not activated.► Open the door.
Front passenger door
Sliding side door
Side-hinged doors► Remove the cap located on the edge of the door.
► Insert the integral key into the latch (without forcing) and then turn the assembly.► Remove the key and refit the cap. ► Close the door(s) and check from the outside that the vehicle is locked correctly.
Unlocking of one part of the vehicle
(front passenger door/sliding side
door/side-hinged doors)
► Use the interior opening handle.or► With side-hinged doors, insert the integral key in the (left-hand) door lock, then turn it.
NOTIC E
For more information on the Child lock on a sliding side door or side-hinged doors, refer to the corresponding section.
Unlocking the tailgate
► From inside the vehicle, insert a small screwdriver into hole A on the lock to unlock the tailgate.
Page 32 of 272
32
► Move the latch to the left.
NOTIC E
If the battery is discharged and your vehicle is equipped with a tailgate and an Extenso cabin, you will not be able to access the loading area.Replace the battery to regain access.For more information on the 12 V battery,
refer to the corresponding section.
WARNI NG
In the event of a malfunction or if you experience difficulty opening or closing the tailgate, have it checked by a TOYOTA dealer or a qualified workshop without delay, to avoid the issue deteriorating and prevent any risk of the tailgate dropping, potentially causing serious injury.
Changing the battery
If the battery is discharged, this warning lamp comes on, accompanied by an audible signal and an onscreen message.
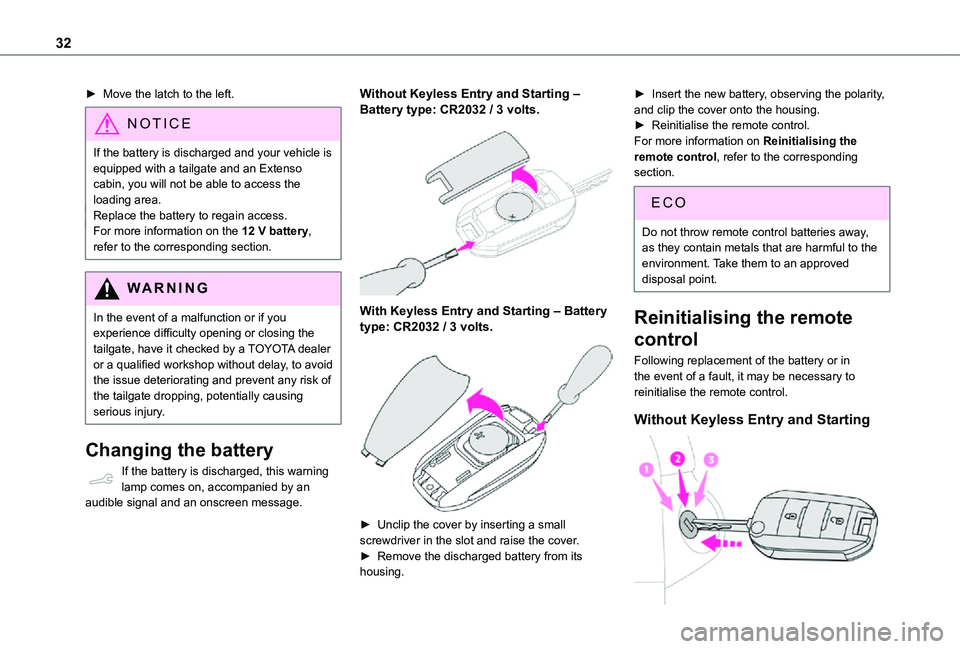
Without Keyless Entry and Starting ‒ Battery type: CR2032 / 3 volts.
With Keyless Entry and Starting ‒ Battery type: CR2032 / 3 volts.
► Unclip the cover by inserting a small screwdriver in the slot and raise the cover.
► Remove the discharged battery from its housing.
► Insert the new battery, observing the polarity, and clip the cover onto the housing.► Reinitialise the remote control.For more information on Reinitialising the remote control, refer to the corresponding section.
EC O
Do not throw remote control batteries away, as they contain metals that are harmful to the environment. Take them to an approved disposal point.
Reinitialising the remote
control
Following replacement of the battery or in the event of a fault, it may be necessary to reinitialise the remote control.
Without Keyless Entry and Starting
Page 54 of 272
54
WARNI NG
To avoid the risk of injury or accident, the load must be made stable so that it cannot slide, tip over, fall or be thrown. To do this, use only retaining straps that conform to current standards (DIN for example).For more information on putting straps in place, refer to the manufacturer’s user guide.There must not be any empty space between the components of the load.To prevent the load sliding, there must not be any empty space between the load and the panels of the vehicle.As well as the straps, optimise the stability of the load with stable handling equipment (wedges, rigid blocks of wood or padding).
WARNI NG
When washing your vehicle, never clean the inside directly using a water jet.
For the Extenso cabin and
the Crew cab
WARNI NG
Do not place sharp or pointed objects in the protective cover to avoid damaging it.
WARNI NG
Do not place objects on the dashboard.Deactivate the front passenger airbag when carrying long objects.For more information on Deactivating the front passenger airbag, refer to the corresponding section.
WARNI NG
Avoid placing short or heavy loads in the protective cover; use the loading area whenever possible.
WARNI NG
Avoid anchoring loads or hanging items on the wall of the partition.For safety reasons, ensure that small objects do not slip through the gaps of about 3 cm (0 ft 1") between the partition and the vehicle's bodywork.
Extenso cabin
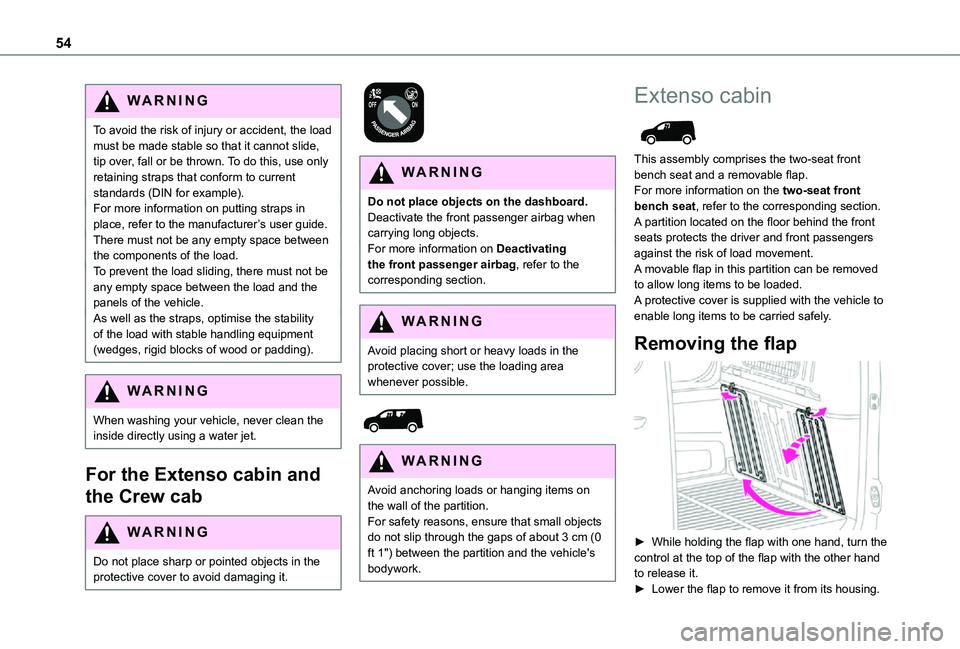
This assembly comprises the two-seat front bench seat and a removable flap.For more information on the two-seat front bench seat, refer to the corresponding section.A partition located on the floor behind the front seats protects the driver and front passengers against the risk of load movement.A movable flap in this partition can be removed to allow long items to be loaded.A protective cover is supplied with the vehicle to enable long items to be carried safely.
Removing the flap
► While holding the flap with one hand, turn the control at the top of the flap with the other hand to release it.► Lower the flap to remove it from its housing.
Page 56 of 272
56
► Tighten the strap using the adjustable section in order to correctly retain the items that have been loaded inside the cover.
NOTIC E
The protective cover may be left in place after use.
NOTIC E
Regularly check the condition of the protective cover.When signs of wear and tear appear, contact a TOYOTA dealer to have it replaced by a protective cover that meets the specifications and qualities required by TOYOTA and your vehicle.
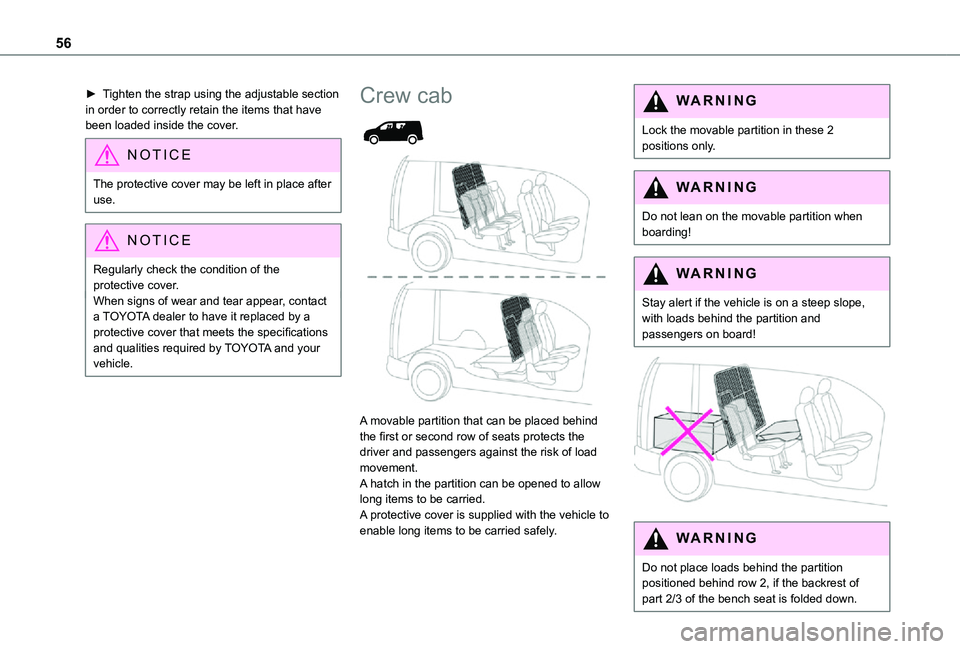
Crew cab
A movable partition that can be placed behind the first or second row of seats protects the
driver and passengers against the risk of load movement.A hatch in the partition can be opened to allow long items to be carried.A protective cover is supplied with the vehicle to enable long items to be carried safely.
WARNI NG
Lock the movable partition in these 2 positions only.
WARNI NG
Do not lean on the movable partition when boarding!
WARNI NG
Stay alert if the vehicle is on a steep slope, with loads behind the partition and passengers on board!
WARNI NG
Do not place loads behind the partition positioned behind row 2, if the backrest of part 2/3 of the bench seat is folded down.
Page 68 of 272
68
NOTIC E
The indicator lamp in the remote control flashes for about 2 seconds if the vehicle has not received the signal, in which caseyou should move to a different location and repeat the command.
Changing the battery
The indicator lamp in the remote control will change to orange if the battery charge is low.If the indicator lamp is not on, the battery is discharged.
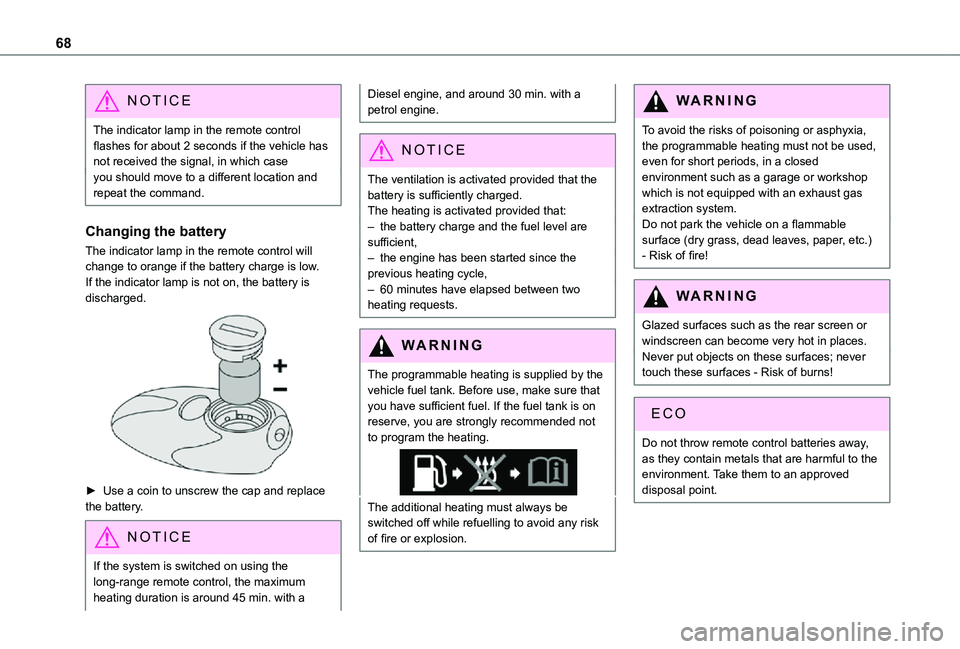
► Use a coin to unscrew the cap and replace the battery.
NOTIC E
If the system is switched on using the long-range remote control, the maximum heating duration is around 45 min. with a
Diesel engine, and around 30 min. with a petrol engine.
NOTIC E
The ventilation is activated provided that the battery is sufficiently charged. The heating is activated provided that: – the battery charge and the fuel level are sufficient,
– the engine has been started since the previous heating cycle,– 60 minutes have elapsed between two heating requests.
WARNI NG
The programmable heating is supplied by the vehicle fuel tank. Before use, make sure that you have sufficient fuel. If the fuel tank is on reserve, you are strongly recommended not to program the heating.
The additional heating must always be switched off while refuelling to avoid any risk of fire or explosion.
WARNI NG
To avoid the risks of poisoning or asphyxia, the programmable heating must not be used, even for short periods, in a closed environment such as a garage or workshop which is not equipped with an exhaust gas extraction system.Do not park the vehicle on a flammable surface (dry grass, dead leaves, paper, etc.) - Risk of fire!
WARNI NG
Glazed surfaces such as the rear screen or windscreen can become very hot in places.Never put objects on these surfaces; never touch these surfaces - Risk of burns!
Do not throw remote control batteries away, as they contain metals that are harmful to the environment. Take them to an approved disposal point.
Page 95 of 272
95
Safety
5
WARNI NG
You must leave the front passenger airbag active.
"Rearward facing"
WARNI NG
The front passenger airbag must be deactivated before installing a rearward facing child seat. Otherwise, the child risks being seriously injured or killed if the airbag deploys.
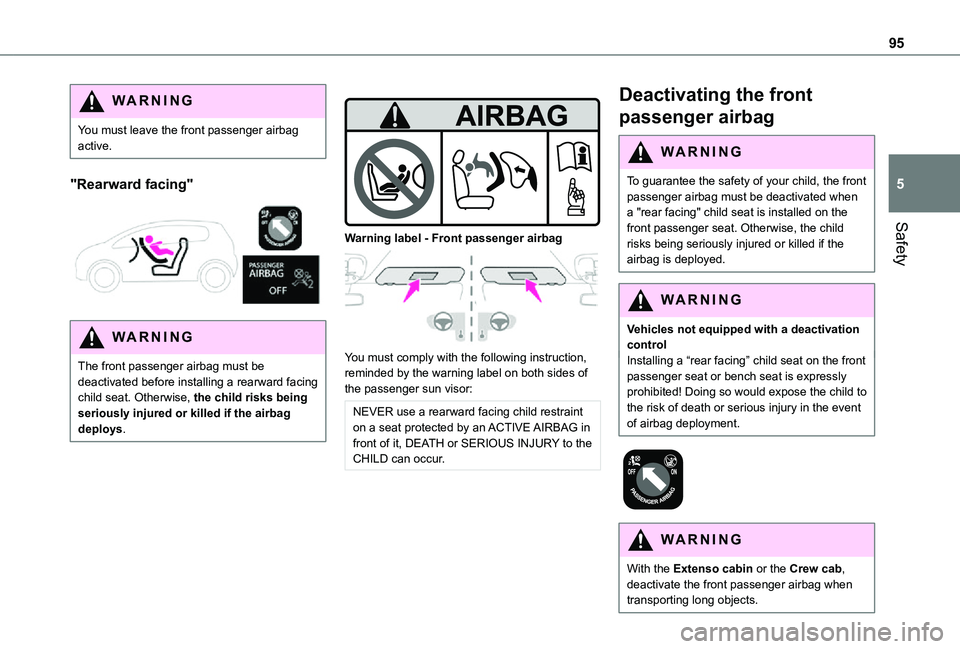
Warning label - Front passenger airbag
You must comply with the following instruction, reminded by the warning label on both sides of the passenger sun visor:
NEVER use a rearward facing child restraint on a seat protected by an ACTIVE AIRBAG in front of it, DEATH or SERIOUS INJURY to the CHILD can occur.
Deactivating the front
passenger airbag
WARNI NG
To guarantee the safety of your child, the front passenger airbag must be deactivated when a "rear facing" child seat is installed on the front passenger seat. Otherwise, the child
risks being seriously injured or killed if the airbag is deployed.
WARNI NG
Vehicles not equipped with a deactivation controlInstalling a “rear facing” child seat on the front passenger seat or bench seat is expressly prohibited! Doing so would expose the child to the risk of death or serious injury in the event of airbag deployment.
WARNI NG
With the Extenso cabin or the Crew cab, deactivate the front passenger airbag when transporting long objects.