limit TOYOTA PROACE CITY VERSO 2021 Owners Manual
[x] Cancel search | Manufacturer: TOYOTA, Model Year: 2021, Model line: PROACE CITY VERSO, Model: TOYOTA PROACE CITY VERSO 2021Pages: 272, PDF Size: 57.64 MB
Page 2 of 272
2
■Overview
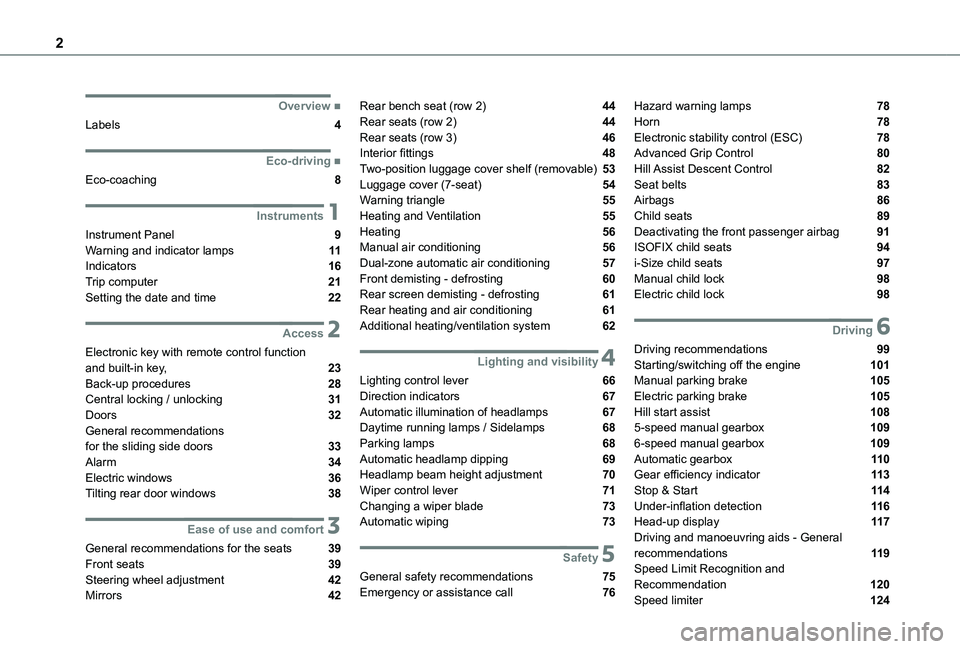
Labels 4
■Eco-driving
Eco-coaching 8
1Instruments
Instrument Panel 9Warning and indicator lamps 11Indicators 16Trip computer 21Setting the date and time 22
2Access
Electronic key with remote control function and built-in key, 23Back-up procedures 28Central locking / unlocking 31Doors 32General recommendations
for the sliding side doors 33Alarm 34Electric windows 36Tilting rear door windows 38
3Ease of use and comfort
General recommendations for the seats 39Front seats 39Steering wheel adjustment 42
Mirrors 42
Rear bench seat (row 2) 44Rear seats (row 2) 44Rear seats (row 3) 46Interior fittings 48Two-position luggage cover shelf (removable) 53Luggage cover (7-seat) 54Warning triangle 55Heating and Ventilation 55Heating 56Manual air conditioning 56Dual-zone automatic air conditioning 57Front demisting - defrosting 60Rear screen demisting - defrosting 61Rear heating and air conditioning 61Additional heating/ventilation system 62
4Lighting and visibility
Lighting control lever 66Direction indicators 67Automatic illumination of headlamps 67Daytime running lamps / Sidelamps 68Parking lamps 68
Automatic headlamp dipping 69Headlamp beam height adjustment 70Wiper control lever 71Changing a wiper blade 73Automatic wiping 73
5Safety
General safety recommendations 75Emergency or assistance call 76
Hazard warning lamps 78Horn 78Electronic stability control (ESC) 78Advanced Grip Control 80Hill Assist Descent Control 82Seat belts 83Airbags 86Child seats 89Deactivating the front passenger airbag 91ISOFIX child seats 94i-Size child seats 97Manual child lock 98Electric child lock 98
6Driving
Driving recommendations 99Starting/switching off the engine 101Manual parking brake 105Electric parking brake 105Hill start assist 1085-speed manual gearbox 1096-speed manual gearbox 109
Automatic gearbox 11 0Gear efficiency indicator 11 3Stop & Start 11 4Under-inflation detection 11 6Head-up display 11 7Driving and manoeuvring aids - General recommendations 11 9Speed Limit Recognition and Recommendation 120
Speed limiter 124
Page 5 of 272
5
Overview
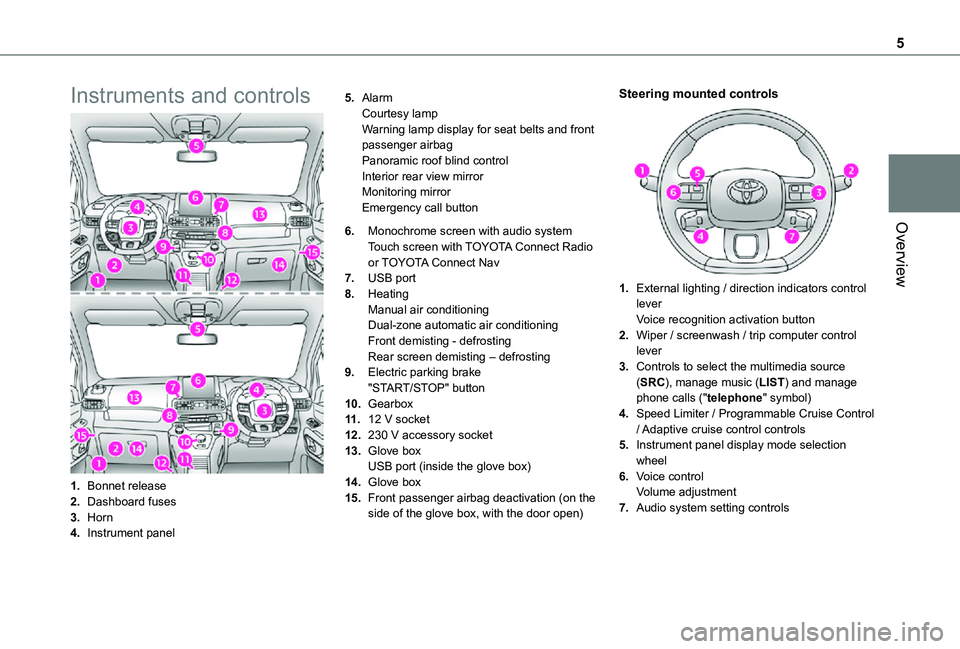
Instruments and controls
1.Bonnet release
2.Dashboard fuses
3.Horn
4.Instrument panel
5.AlarmCourtesy lampWarning lamp display for seat belts and front passenger airbagPanoramic roof blind controlInterior rear view mirrorMonitoring mirrorEmergency call button
6.Monochrome screen with audio system
Touch screen with TOYOTA Connect Radio or TOYOTA Connect Nav
7.USB port
8.HeatingManual air conditioningDual-zone automatic air conditioningFront demisting - defrostingRear screen demisting – defrosting
9.Electric parking brake"START/STOP" button
10.Gearbox
11 .12 V socket
12.230 V accessory socket
13.Glove boxUSB port (inside the glove box)
14.Glove box
15.Front passenger airbag deactivation (on the side of the glove box, with the door open)
Steering mounted controls
1.External lighting / direction indicators control leverVoice recognition activation button
2.Wiper / screenwash / trip computer control lever
3.Controls to select the multimedia source (SRC), manage music (LIST) and manage phone calls ("telephone" symbol)
4.Speed Limiter / Programmable Cruise Control / Adaptive cruise control controls
5.Instrument panel display mode selection wheel
6.Voice controlVolume adjustment
7.Audio system setting controls
Page 7 of 272
7
Eco-driving
Eco-driving
Eco-driving refers to a range of everyday practices that allow the motorist to optimise their fuel consumption and CO2emissions.
Optimise your use of the gearbox
With a manual gearbox, move off gently and change up promptly. While accelerating, change up early.With an automatic gearbox, favour automatic mode and avoid pressing the accelerator pedal heavily or suddenly.The gear efficiency indicator prompts you to engage the most suitable gear: whenever this indication is displayed on the instrument panel, follow it straight away.With an automatic gearbox, this indicator appears only in manual mode.
Drive smoothly
Maintain a safe distance between vehicles, use engine braking rather than the brake pedal and press the accelerator gradually. These attitudes
help to save fuel, reduce CO2 emissions and decrease general traffic noise.If the vehicle has the steering-mounted "CRUISE" control, use cruise control at speeds above 40 km/h (25 mph) when the traffic is flowing well.
Use electrical equipment wisely
Before moving off, if the passenger compartment is too warm, ventilate it by opening the windows and air vents before using the air conditioning.At speeds above 50 km/h (31 mph), close the windows and leave the air vents open.Consider using equipment that can help keep the temperature in the passenger compartment down (sunroof blind and window blinds, etc.).Unless automatically regulated, switch off the air conditioning as soon as the desired temperature has been reached.Switch off the demisting and defrosting functions, if they are not managed automatically.Switch off the heated seat as soon as possible.Switch off the headlamps and foglamps when the visibility conditions do not require their use.Avoid running the engine before moving off, particularly in winter; your vehicle will warm up much faster while driving.As a passenger, avoid connecting your multimedia devices (film, music, video game, etc.) to help reduce consumption of electrical
energy, and hence fuel.Disconnect all portable devices before leaving the vehicle.
Limit the causes of excess consumption
Spread loads throughout the vehicle; place the heaviest items in the boot, as close as possible to the rear seats.Limit the loads carried in the vehicle and minimise wind resistance (roof bars, roof rack,
bicycle carrier, trailer, etc.). Preferably, use a roof box.Remove roof bars and roof racks after use.At the end of winter, remove snow tyres and refit summer tyres.
Comply with servicing instructions
Check tyre pressures regularly, with the tyres cold, referring to the label in the door aperture on the driver's side.Carry out this check in particular:– before a long journey.– at each change of season.– after a long period out of use.Do not overlook the spare wheel and, where applicable, the tyres on your trailer or caravan.Have your vehicle serviced regularly (engine oil, oil filter, air filter, passenger compartment filter, etc.) and observe the schedule of operations in the manufacturer's service schedule.With a Diesel engine, if the SCR system is faulty, your vehicle will emit pollution. Visit a TOYOTA dealer or a qualified workshop as soon as
possible to restore your vehicle’s nitrogen oxide emissions to regulatory compliance.When filling the fuel tank, do not continue after the third nozzle cut-out, to avoid overflow.You will only see the fuel consumption of your new vehicle settle down to a consistent average after the first 3,000 kilometres (1,900 miles).
Page 10 of 272
10
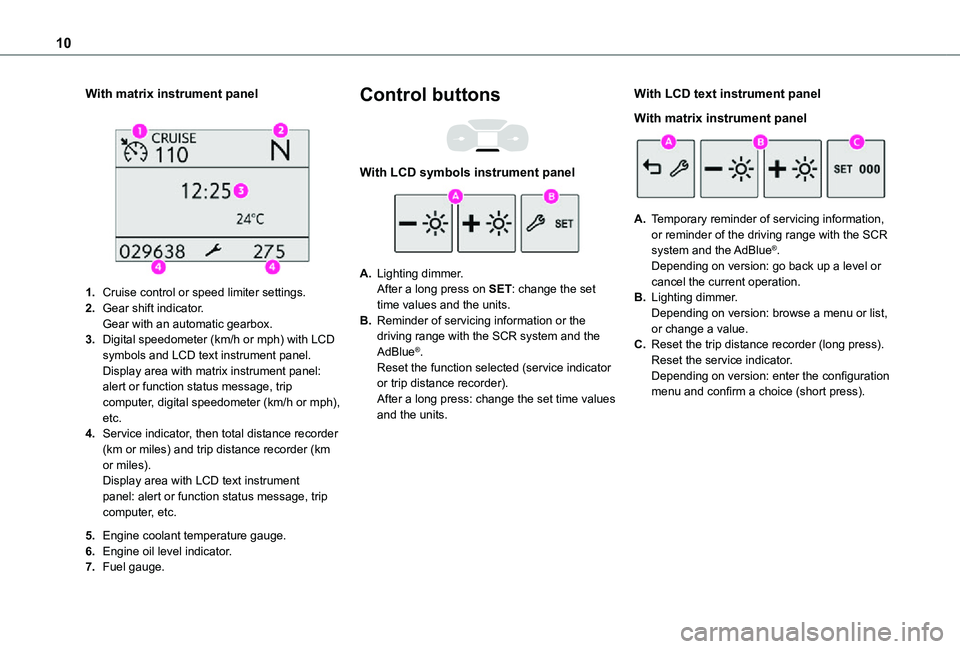
With matrix instrument panel
1.Cruise control or speed limiter settings.
2.Gear shift indicator.Gear with an automatic gearbox.
3.Digital speedometer (km/h or mph) with LCD symbols and LCD text instrument panel.Display area with matrix instrument panel: alert or function status message, trip computer, digital speedometer (km/h or mph), etc.
4.Service indicator, then total distance recorder (km or miles) and trip distance recorder (km or miles).Display area with LCD text instrument panel: alert or function status message, trip computer, etc.
5.Engine coolant temperature gauge.
6.Engine oil level indicator.
7.Fuel gauge.
Control buttons
With LCD symbols instrument panel
A.Lighting dimmer.After a long press on SET: change the set time values and the units.
B.Reminder of servicing information or the driving range with the SCR system and the AdBlue®.Reset the function selected (service indicator or trip distance recorder).After a long press: change the set time values and the units.
With LCD text instrument panel
With matrix instrument panel
A.Temporary reminder of servicing information, or reminder of the driving range with the SCR
system and the AdBlue®.Depending on version: go back up a level or cancel the current operation.
B.Lighting dimmer.Depending on version: browse a menu or list, or change a value.
C.Reset the trip distance recorder (long press).Reset the service indicator.Depending on version: enter the configuration menu and confirm a choice (short press).
Page 15 of 272
15
Instruments
1
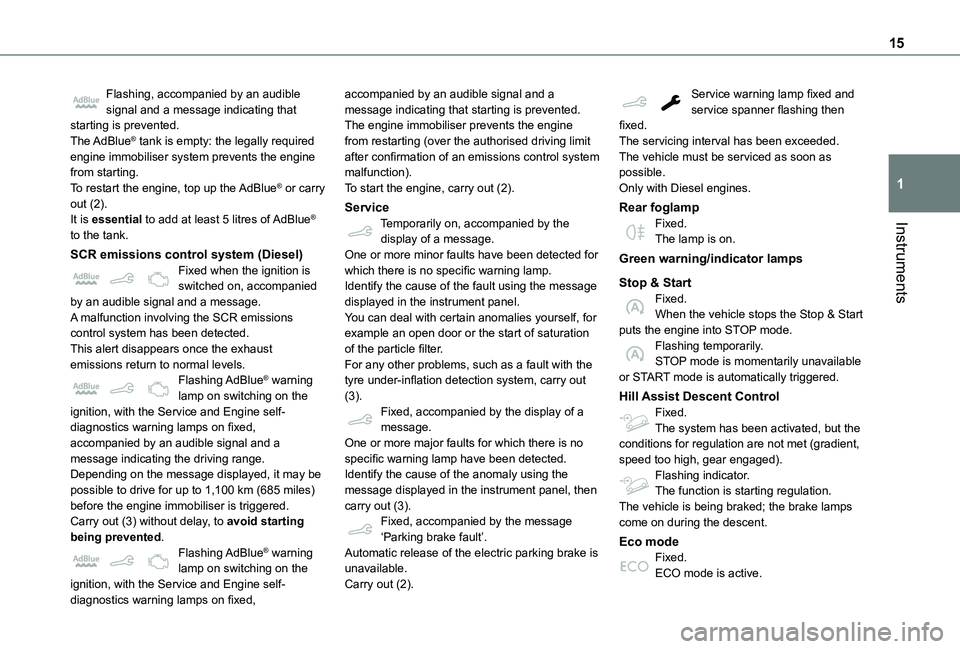
Flashing, accompanied by an audible signal and a message indicating that starting is prevented.The AdBlue® tank is empty: the legally required engine immobiliser system prevents the engine from starting.To restart the engine, top up the AdBlue® or carry out (2).It is essential to add at least 5 litres of AdBlue® to the tank.
SCR emissions control system (Diesel)Fixed when the ignition is switched on, accompanied by an audible signal and a message.A malfunction involving the SCR emissions control system has been detected.This alert disappears once the exhaust emissions return to normal levels.Flashing AdBlue® warning lamp on switching on the ignition, with the Service and Engine self-diagnostics warning lamps on fixed, accompanied by an audible signal and a
message indicating the driving range.Depending on the message displayed, it may be possible to drive for up to 1,100 km (685 miles) before the engine immobiliser is triggered.Carry out (3) without delay, to avoid starting being prevented.Flashing AdBlue® warning lamp on switching on the ignition, with the Service and Engine self-
diagnostics warning lamps on fixed,
accompanied by an audible signal and a message indicating that starting is prevented.The engine immobiliser prevents the engine from restarting (over the authorised driving limit after confirmation of an emissions control system malfunction).To start the engine, carry out (2).
ServiceTemporarily on, accompanied by the display of a message.One or more minor faults have been detected for which there is no specific warning lamp.Identify the cause of the fault using the message displayed in the instrument panel.You can deal with certain anomalies yourself, for example an open door or the start of saturation of the particle filter.For any other problems, such as a fault with the tyre under-inflation detection system, carry out (3).Fixed, accompanied by the display of a message.One or more major faults for which there is no
specific warning lamp have been detected.Identify the cause of the anomaly using the message displayed in the instrument panel, then carry out (3).Fixed, accompanied by the message ‘Parking brake fault’.Automatic release of the electric parking brake is unavailable.Carry out (2).
Service warning lamp fixed and service spanner flashing then fixed.The servicing interval has been exceeded.The vehicle must be serviced as soon as possible.Only with Diesel engines.
Rear foglampFixed.The lamp is on.
Green warning/indicator lamps
Stop & StartFixed.When the vehicle stops the Stop & Start puts the engine into STOP mode.Flashing temporarily.STOP mode is momentarily unavailable or START mode is automatically triggered.
Hill Assist Descent ControlFixed.The system has been activated, but the conditions for regulation are not met (gradient,
speed too high, gear engaged).Flashing indicator.The function is starting regulation.The vehicle is being braked; the brake lamps come on during the descent.
Eco modeFixed.ECO mode is active.
Page 21 of 272
21
Instruments
1
► In the Settings menu, select "Brightness".
Or select "OPTIONS", "Screen configuration" then "Brightness".► Adjust the brightness by pressing the arrows or moving the slider.
NOTIC E
The brightness can be set differently for day
mode and night mode.
Trip computer
Information displayed about the current journey (range, fuel consumption, average speed, etc.).
Information display
Details are displayed successively.– Trip mileage.– Range.– Current fuel consumption.– Average speed.– Stop & Start time counter.– Information from the speed limit recognition system.
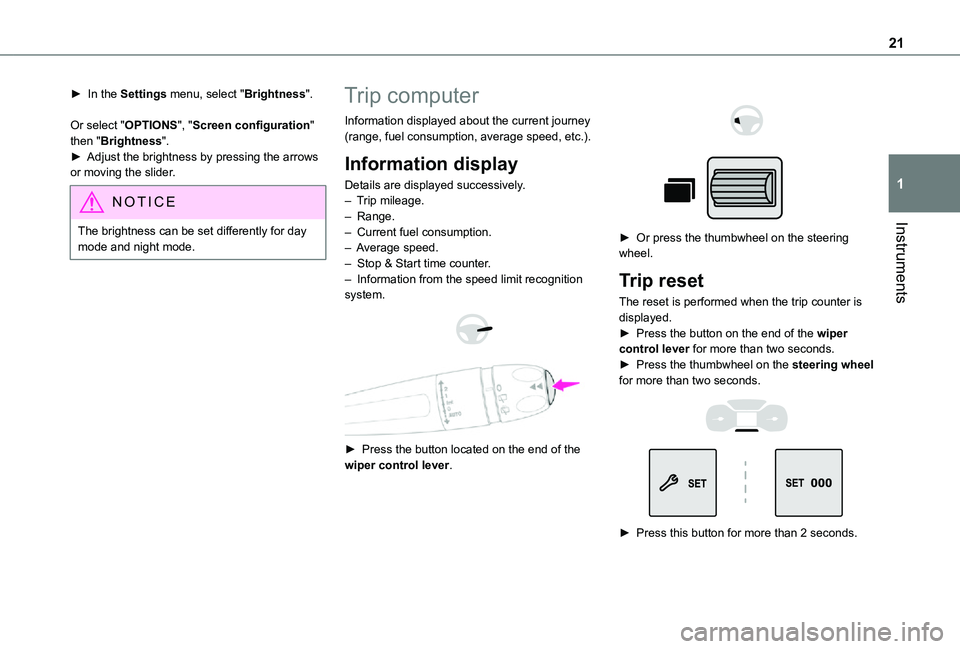
► Press the button located on the end of the wiper control lever.
► Or press the thumbwheel on the steering wheel.
Trip reset
The reset is performed when the trip counter is displayed.► Press the button on the end of the wiper control lever for more than two seconds.► Press the thumbwheel on the steering wheel for more than two seconds.
► Press this button for more than 2 seconds.
Page 48 of 272
48
WARNI NG
The head restraint has a frame with notches which prevents it from lowering; this is a safety device in case of impact.The adjustment is correct when the upper edge of the head restraint is level with the top of the head.Never drive with the head restraints removed; they must be fitted and correctly adjusted.
WARNI NG
Never drive with passengers seated at the rear when the head restraints are removed or not in the high position; the head restraints must be in place and in the high position.
NOTIC E
For more information on the Seat belts, refer to the corresponding section.
Interior fittings
Mats
Fitting
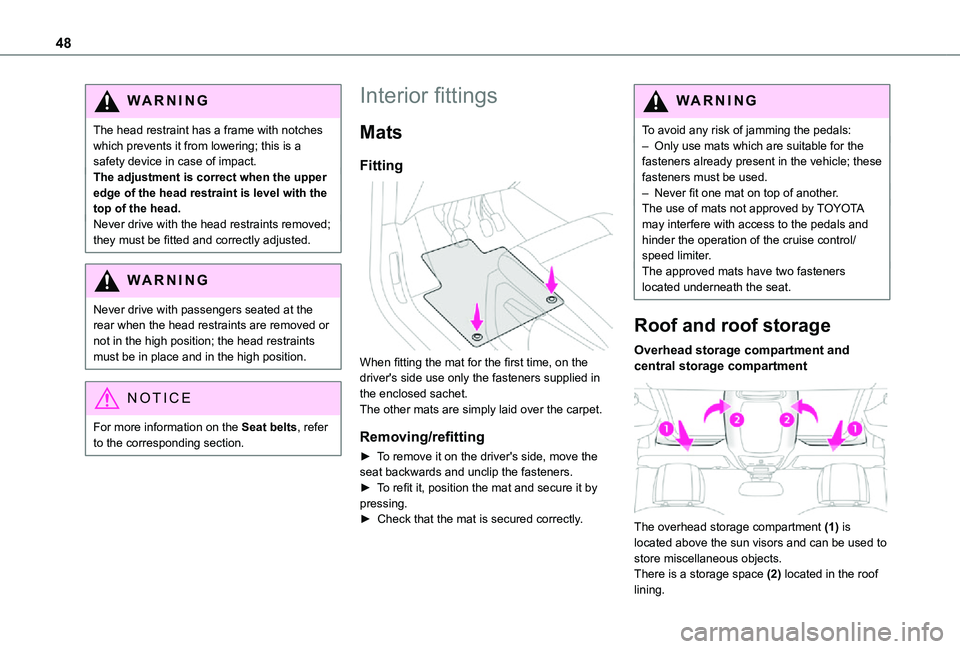
When fitting the mat for the first time, on the driver's side use only the fasteners supplied in the enclosed sachet.The other mats are simply laid over the carpet.
Removing/refitting
► To remove it on the driver's side, move the seat backwards and unclip the fasteners.► To refit it, position the mat and secure it by pressing.► Check that the mat is secured correctly.
WARNI NG
To avoid any risk of jamming the pedals:– Only use mats which are suitable for the fasteners already present in the vehicle; these fasteners must be used.– Never fit one mat on top of another.The use of mats not approved by TOYOTA may interfere with access to the pedals and hinder the operation of the cruise control/speed limiter.The approved mats have two fasteners located underneath the seat.
Roof and roof storage
Overhead storage compartment and central storage compartment
The overhead storage compartment (1) is located above the sun visors and can be used to
store miscellaneous objects.There is a storage space (2) located in the roof lining.
Page 57 of 272
57
Ease of use and comfort
3
NOTIC E
On entering the vehicle, if the interior temperature is significantly colder or warmer than the comfort value setting, there is no need to alter the value displayed in order to reach the required level of comfort. The system compensates automatically and corrects the temperature difference as quickly as possible.
NOTIC E
For maximum cooling or heating of the passenger compartment, it is possible to exceed the minimum value 14 or the maximum value 28.► Turn the thumbwheel 1 to the left until "LO" or to the right until "HI".
Air distribution
Windscreen and side windows (3a).
Central and side air vents (3b).
Footwells (3c).
The air distribution can be adapted by combining the corresponding buttons.
WARNI NG
For optimum comfort (depending on the outside temperature)< 15°C: press buttons 3a and 3c.15°C - 25°C: press buttons 3b and 3c.> 25°C: press button 3b.
Air conditioning
With the engine running, the air conditioning is designed to operate effectively in all seasons, with the windows closed.It enables you to:– lower the temperature in summer,– enhance the effectiveness of the demisting function in winter, above 3°C.
On/Off
► Press button 5 to activate/deactivate the air conditioning system.When the air conditioning is in operation, to cool the air more quickly, you can use interior
air recirculation for a few moments by pressing button 4. Then restore the intake of exterior air.
NOTIC E
The air conditioning does not operate when the air flow adjustment is set to off.
WARNI NG
Switching the system off could result in discomfort (humidity, misting).
Dual-zone automatic air
conditioning
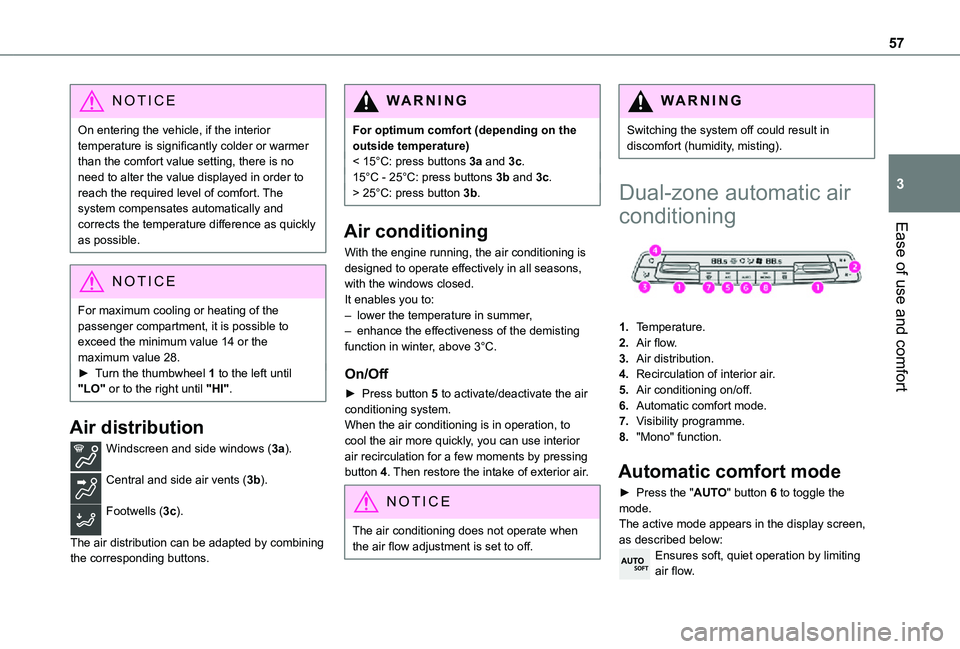
1.Temperature.
2.Air flow.
3.Air distribution.
4.Recirculation of interior air.
5.Air conditioning on/off.
6.Automatic comfort mode.
7.Visibility programme.
8."Mono" function.
Automatic comfort mode
► Press the "AUTO" button 6 to toggle the mode.The active mode appears in the display screen, as described below:
Ensures soft, quiet operation by limiting air flow.
Page 76 of 272
76
Emergency or assistance
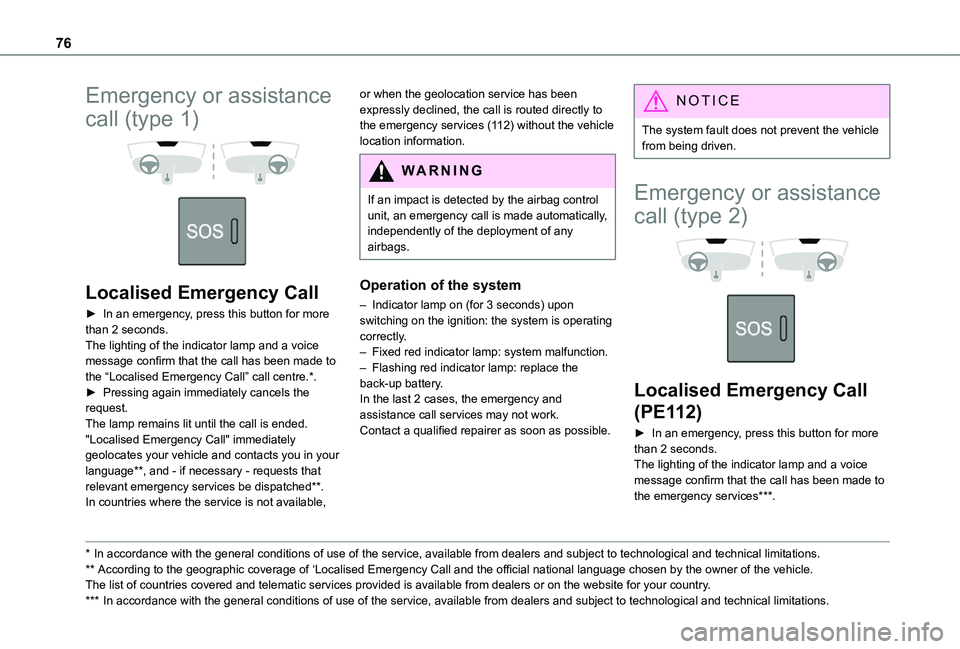
call (type 1)
Localised Emergency Call
► In an emergency, press this button for more than 2 seconds.The lighting of the indicator lamp and a voice message confirm that the call has been made to the “Localised Emergency Call” call centre.*.► Pressing again immediately cancels the request.The lamp remains lit until the call is ended."Localised Emergency Call" immediately geolocates your vehicle and contacts you in your language**, and - if necessary - requests that relevant emergency services be dispatched**. In countries where the service is not available,
* In accordance with the general conditions of use of the service, available from dealers an\
d subject to technological and technical limitations.
** According to the geographic coverage of ‘Localised Emergency Call and the official national language chosen by the owner of the vehicle.The list of countries covered and telematic services provided is availab\
le from dealers or on the website for your country.
*** In accordance with the general conditions of use of the service, available from dealers\
and subject to technological and technical limitations.
or when the geolocation service has been expressly declined, the call is routed directly to the emergency services (112) without the vehicle location information.
WARNI NG
If an impact is detected by the airbag control unit, an emergency call is made automatically, independently of the deployment of any
airbags.
Operation of the system
– Indicator lamp on (for 3 seconds) upon switching on the ignition: the system is operating correctly.– Fixed red indicator lamp: system malfunction.– Flashing red indicator lamp: replace the back-up battery.In the last 2 cases, the emergency and assistance call services may not work.Contact a qualified repairer as soon as possible.
NOTIC E
The system fault does not prevent the vehicle from being driven.
Emergency or assistance
call (type 2)
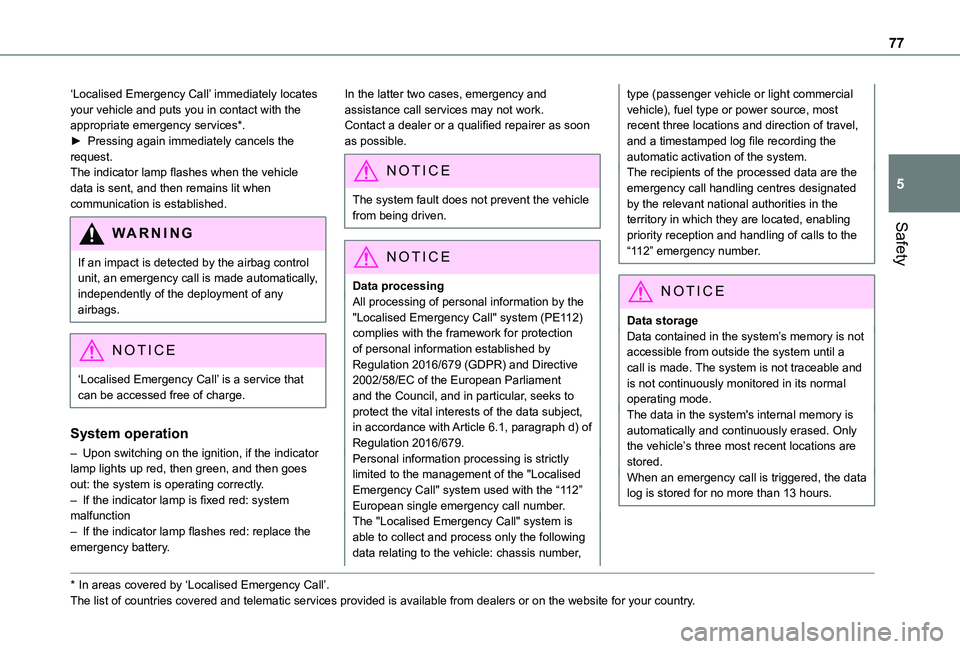
Localised Emergency Call
(PE112)
► In an emergency, press this button for more than 2 seconds.The lighting of the indicator lamp and a voice message confirm that the call has been made to the emergency services***.
Page 77 of 272
77
Safety
5
‘Localised Emergency Call’ immediately locates your vehicle and puts you in contact with the appropriate emergency services*.► Pressing again immediately cancels the request.The indicator lamp flashes when the vehicle data is sent, and then remains lit when communication is established.
WARNI NG
If an impact is detected by the airbag control unit, an emergency call is made automatically, independently of the deployment of any airbags.
NOTIC E
‘Localised Emergency Call’ is a service that can be accessed free of charge.
System operation
– Upon switching on the ignition, if the indicator lamp lights up red, then green, and then goes out: the system is operating correctly.– If the indicator lamp is fixed red: system malfunction– If the indicator lamp flashes red: replace the
emergency battery.
* In areas covered by ‘Localised Emergency Call’. The list of countries covered and telematic services provided is availab\
le from dealers or on the website for your country.
In the latter two cases, emergency and assistance call services may not work.Contact a dealer or a qualified repairer as soon as possible.
N OTIC E
The system fault does not prevent the vehicle from being driven.
NOTIC E
Data processingAll processing of personal information by the "Localised Emergency Call" system (PE112) complies with the framework for protection of personal information established by Regulation 2016/679 (GDPR) and Directive 2002/58/EC of the European Parliament and the Council, and in particular, seeks to protect the vital interests of the data subject, in accordance with Article 6.1, paragraph d) of Regulation 2016/679.Personal information processing is strictly limited to the management of the "Localised Emergency Call" system used with the “112” European single emergency call number.The "Localised Emergency Call" system is able to collect and process only the following data relating to the vehicle: chassis number,
type (passenger vehicle or light commercial vehicle), fuel type or power source, most recent three locations and direction of travel, and a timestamped log file recording the automatic activation of the system.The recipients of the processed data are the emergency call handling centres designated by the relevant national authorities in the territory in which they are located, enabling priority reception and handling of calls to the “112” emergency number.
NOTIC E
Data storageData contained in the system’s memory is not accessible from outside the system until a call is made. The system is not traceable and is not continuously monitored in its normal operating mode. The data in the system's internal memory is automatically and continuously erased. Only the vehicle’s three most recent locations are stored.When an emergency call is triggered, the data log is stored for no more than 13 hours.