service TOYOTA PROACE CITY VERSO EV 2022 Owners Manual
[x] Cancel search | Manufacturer: TOYOTA, Model Year: 2022, Model line: PROACE CITY VERSO EV, Model: TOYOTA PROACE CITY VERSO EV 2022Pages: 320, PDF Size: 75.81 MB
Page 8 of 320
8
Eco-driving
Eco-driving refers to a range of everyday practices that allow the motorist to optimise the vehicle's energy consumption (fuel and/or electricity) and CO2 emissions.
Optimise your use of the gearbox
With a manual gearbox, move off gently and change up promptly. While accelerating, change up early.With an automatic gearbox, favour automatic mode. Do not depress the accelerator pedal heavily or suddenly.The gear shift indicator prompts you to engage the most suitable gear. Whenever this indication is displayed on the instrument panel, follow it straight away.With an automatic gearbox, this indicator appears only in manual mode.
Drive smoothly
Maintain a safe distance between vehicles, use engine braking rather than the brake pedal and
press the accelerator gradually. These practices help to save on energy consumption, reduce CO2 emissions and decrease general traffic noise.Favour the use of the "Eco" driving mode.With an EAT8 gearbox, with the gear selector in D mode, favour "freewheeling" by progressively and completely lifting your foot off the accelerator pedal in order to save fuel.
When the traffic is flowing smoothly, select the cruise control.
Control the use of electrical equipment
Before moving off, if the passenger compartment is too warm, ventilate it by opening the windows and air vents before using the air conditioning.At speeds above 31 mph (50 km/h), close the windows and leave the air vents open.Consider using equipment that can help keep the temperature in the passenger compartment down (e.g. sunroof blind, window blinds).Unless automatically regulated, switch off the air conditioning as soon as the desired temperature has been reached.Switch off the demisting and defrosting functions, if they are not managed automatically.Switch off the heated seat as soon as possible.Adapt the use of headlamps and/or foglamps to the level of visibility, in accordance with current legislation in the country in which you are driving.Avoid running the engine before moving off, particularly in winter (other than in severe wintry
conditions: temperature below -23°C). The vehicle will warm up much faster while driving.As a passenger, avoid connecting your multimedia devices (e.g. film, music, video game) to help reduce the consumption of energy.Disconnect all portable devices before leaving the vehicle.
Limit the causes of excess consumption
Spread loads throughout the vehicle. Place the heaviest items in the boot as close as possible to the rear seats.Limit the loads carried in the vehicle and minimise wind resistance (e.g. roof bars, roof rack, bicycle carrier, trailer). Preferably, use a roof box.Remove roof bars and roof racks after use.At the end of winter, remove snow tyres and refit summer tyres.
Comply with the servicing instructions
Check tyre pressures regularly, with the tyres cold, referring to the label in the door aperture on the driver's side.Carry out this check in particular:– before a long journey.– at each change of season.– after a long period out of use.Do not forget the spare wheel and, where applicable, the tyres on your trailer or caravan.Have your vehicle serviced regularly (e.g. engine
oil, oil filter, air filter, passenger compartment filter, etc.). Observe the schedule of operations in the manufacturer's service schedule.With a Diesel engine, if the SCR system is faulty, your vehicle will emit pollution. Check with any authorized Toyota retailer or Toyota authorized repairer, or any reliable repairer as soon as possible to restore your vehicle's nitrogen oxide emissions to legal levels.
Page 10 of 320
10
Instrument panels
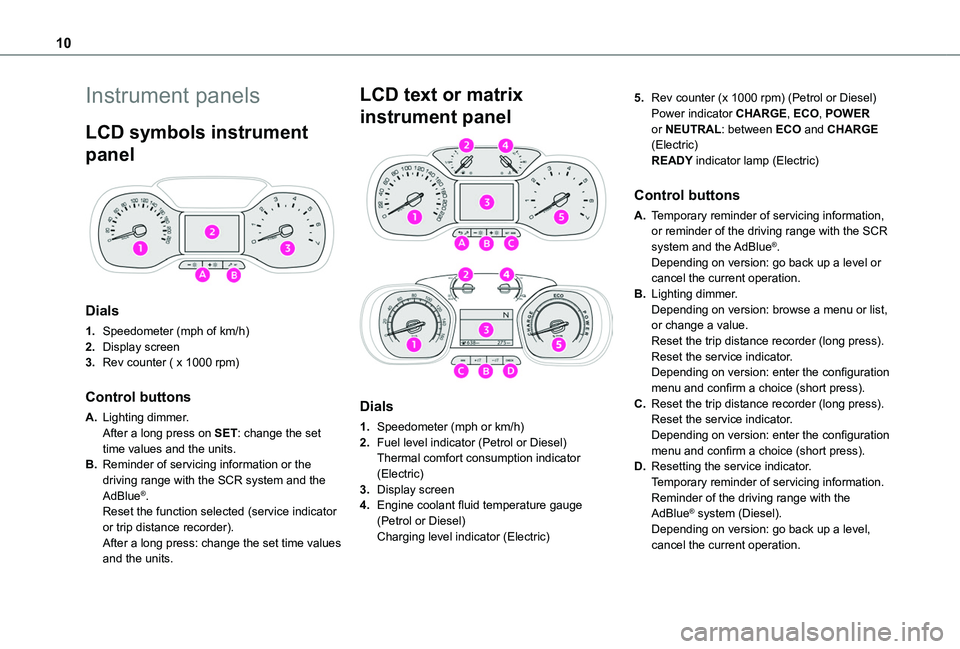
LCD symbols instrument
panel
Dials
1.Speedometer (mph of km/h)
2.Display screen
3.Rev counter ( x 1000 rpm)
Control buttons
A.Lighting dimmer.After a long press on SET: change the set time values and the units.
B.Reminder of servicing information or the driving range with the SCR system and the AdBlue®.Reset the function selected (service indicator or trip distance recorder).After a long press: change the set time values and the units.
LCD text or matrix
instrument panel
Dials
1.Speedometer (mph or km/h)
2.Fuel level indicator (Petrol or Diesel)Thermal comfort consumption indicator (Electric)
3.Display screen
4.Engine coolant fluid temperature gauge (Petrol or Diesel)Charging level indicator (Electric)
5.Rev counter (x 1000 rpm) (Petrol or Diesel)Power indicator CHARGE, ECO, POWER or NEUTRAL: between ECO and CHARGE (Electric)READY indicator lamp (Electric)
Control buttons
A.Temporary reminder of servicing information, or reminder of the driving range with the SCR
system and the AdBlue®.Depending on version: go back up a level or cancel the current operation.
B.Lighting dimmer.Depending on version: browse a menu or list, or change a value.Reset the trip distance recorder (long press).Reset the service indicator.Depending on version: enter the configuration menu and confirm a choice (short press).
C.Reset the trip distance recorder (long press).Reset the service indicator.Depending on version: enter the configuration menu and confirm a choice (short press).
D.Resetting the service indicator.Temporary reminder of servicing information.Reminder of the driving range with the AdBlue® system (Diesel).Depending on version: go back up a level, cancel the current operation.
Page 11 of 320
11
Instruments
1
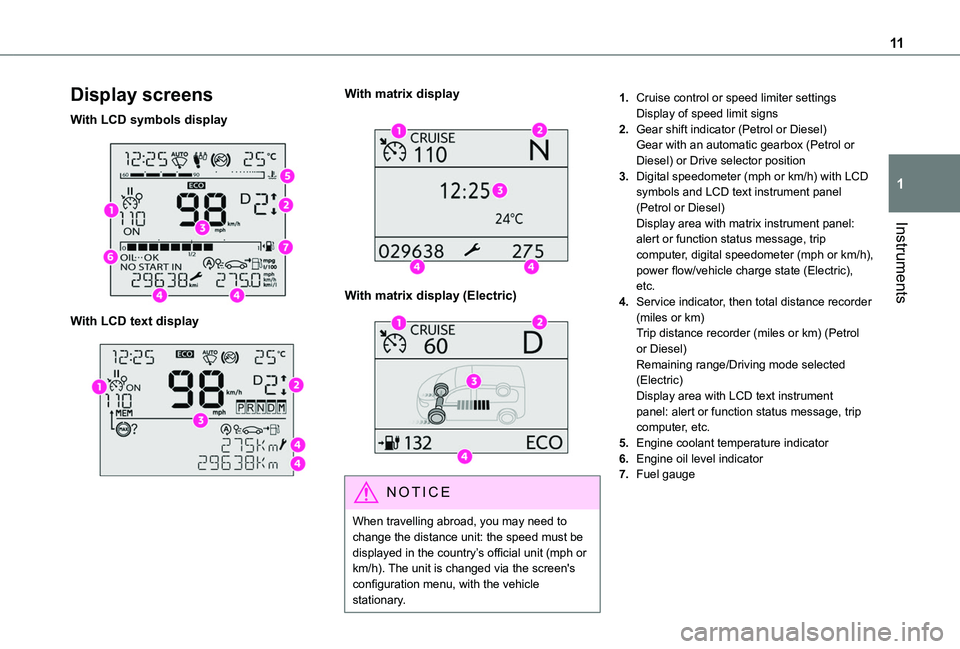
Display screens
With LCD symbols display
With LCD text display
With matrix display
With matrix display (Electric)
NOTIC E
When travelling abroad, you may need to change the distance unit: the speed must be displayed in the country’s official unit (mph or km/h). The unit is changed via the screen's configuration menu, with the vehicle stationary.
1.Cruise control or speed limiter settingsDisplay of speed limit signs
2.Gear shift indicator (Petrol or Diesel)Gear with an automatic gearbox (Petrol or Diesel) or Drive selector position
3.Digital speedometer (mph or km/h) with LCD symbols and LCD text instrument panel (Petrol or Diesel)Display area with matrix instrument panel: alert or function status message, trip computer, digital speedometer (mph or km/h), power flow/vehicle charge state (Electric), etc.
4.Service indicator, then total distance recorder (miles or km)Trip distance recorder (miles or km) (Petrol or Diesel)Remaining range/Driving mode selected (Electric)Display area with LCD text instrument panel: alert or function status message, trip computer, etc.
5.Engine coolant temperature indicator
6.Engine oil level indicator
7.Fuel gauge
Page 17 of 320
17
Instruments
1
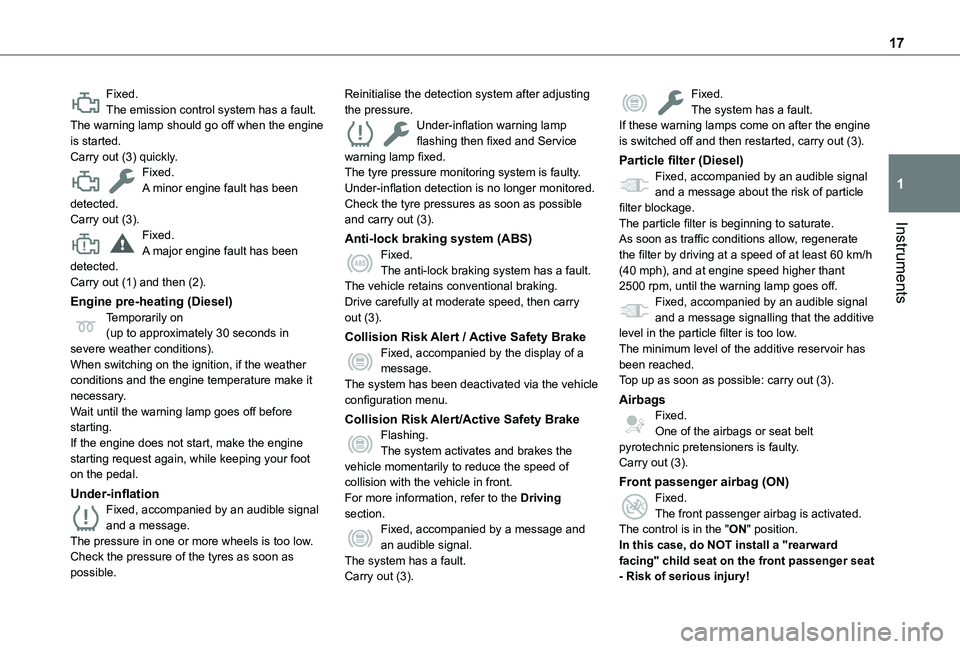
Fixed.The emission control system has a fault.The warning lamp should go off when the engine is started.Carry out (3) quickly.Fixed.A minor engine fault has been detected.Carry out (3).Fixed.A major engine fault has been detected.Carry out (1) and then (2).
Engine pre-heating (Diesel)Temporarily on(up to approximately 30 seconds in severe weather conditions).When switching on the ignition, if the weather conditions and the engine temperature make it necessary.Wait until the warning lamp goes off before starting.If the engine does not start, make the engine
starting request again, while keeping your foot on the pedal.
Under-inflationFixed, accompanied by an audible signal and a message.The pressure in one or more wheels is too low.Check the pressure of the tyres as soon as possible.
Reinitialise the detection system after adjusting the pressure.Under-inflation warning lamp flashing then fixed and Service warning lamp fixed.The tyre pressure monitoring system is faulty.Under-inflation detection is no longer monitored.Check the tyre pressures as soon as possible and carry out (3).
Anti-lock braking system (ABS)Fixed.The anti-lock braking system has a fault.The vehicle retains conventional braking.Drive carefully at moderate speed, then carry out (3).
Collision Risk Alert / Active Safety BrakeFixed, accompanied by the display of a message.The system has been deactivated via the vehicle configuration menu.
Collision Risk Alert/Active Safety BrakeFlashing.
The system activates and brakes the vehicle momentarily to reduce the speed of collision with the vehicle in front.For more information, refer to the Driving section.Fixed, accompanied by a message and an audible signal.The system has a fault.Carry out (3).
Fixed.The system has a fault.If these warning lamps come on after the engine is switched off and then restarted, carry out (3).
Particle filter (Diesel)Fixed, accompanied by an audible signal and a message about the risk of particle filter blockage.The particle filter is beginning to saturate.As soon as traffic conditions allow, regenerate the filter by driving at a speed of at least 60 km/h (40 mph), and at engine speed higher thant 2500 rpm, until the warning lamp goes off.Fixed, accompanied by an audible signal and a message signalling that the additive level in the particle filter is too low.The minimum level of the additive reservoir has been reached.Top up as soon as possible: carry out (3).
AirbagsFixed.One of the airbags or seat belt
pyrotechnic pretensioners is faulty.Carry out (3).
Front passenger airbag (ON)Fixed.The front passenger airbag is activated.The control is in the "ON" position.In this case, do NOT install a "rearward facing" child seat on the front passenger seat - Risk of serious injury!
Page 19 of 320
19
Instruments
1
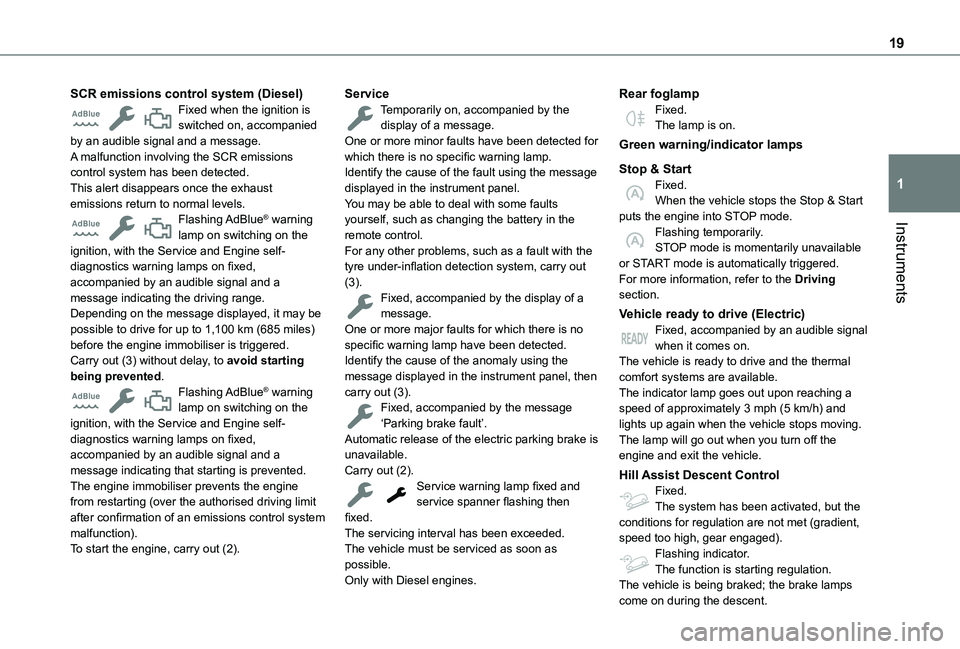
SCR emissions control system (Diesel)Fixed when the ignition is switched on, accompanied by an audible signal and a message.A malfunction involving the SCR emissions control system has been detected.This alert disappears once the exhaust emissions return to normal levels.Flashing AdBlue® warning lamp on switching on the ignition, with the Service and Engine self-diagnostics warning lamps on fixed, accompanied by an audible signal and a message indicating the driving range.Depending on the message displayed, it may be possible to drive for up to 1,100 km (685 miles) before the engine immobiliser is triggered.Carry out (3) without delay, to avoid starting being prevented.Flashing AdBlue® warning lamp on switching on the ignition, with the Service and Engine self-diagnostics warning lamps on fixed,
accompanied by an audible signal and a message indicating that starting is prevented.The engine immobiliser prevents the engine from restarting (over the authorised driving limit after confirmation of an emissions control system malfunction).To start the engine, carry out (2).
ServiceTemporarily on, accompanied by the display of a message.One or more minor faults have been detected for which there is no specific warning lamp.Identify the cause of the fault using the message displayed in the instrument panel.You may be able to deal with some faults yourself, such as changing the battery in the remote control.For any other problems, such as a fault with the tyre under-inflation detection system, carry out (3).Fixed, accompanied by the display of a message.One or more major faults for which there is no specific warning lamp have been detected.Identify the cause of the anomaly using the message displayed in the instrument panel, then carry out (3).Fixed, accompanied by the message ‘Parking brake fault’.Automatic release of the electric parking brake is
unavailable.Carry out (2).Service warning lamp fixed and service spanner flashing then fixed.The servicing interval has been exceeded.The vehicle must be serviced as soon as possible.Only with Diesel engines.
Rear foglampFixed.The lamp is on.
Green warning/indicator lamps
Stop & StartFixed.When the vehicle stops the Stop & Start puts the engine into STOP mode.Flashing temporarily.STOP mode is momentarily unavailable or START mode is automatically triggered.For more information, refer to the Driving section.
Vehicle ready to drive (Electric)Fixed, accompanied by an audible signal when it comes on.The vehicle is ready to drive and the thermal comfort systems are available.The indicator lamp goes out upon reaching a speed of approximately 3 mph (5 km/h) and lights up again when the vehicle stops moving.The lamp will go out when you turn off the
engine and exit the vehicle.
Hill Assist Descent ControlFixed.The system has been activated, but the conditions for regulation are not met (gradient, speed too high, gear engaged).Flashing indicator.The function is starting regulation.The vehicle is being braked; the brake lamps
come on during the descent.
Page 20 of 320
20
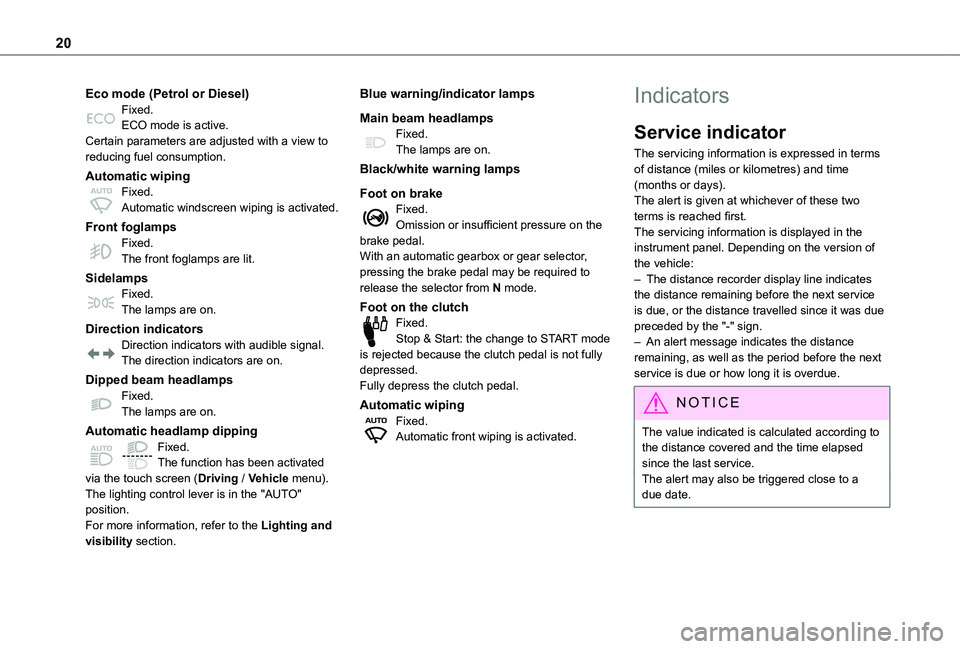
Eco mode (Petrol or Diesel)Fixed.ECO mode is active.Certain parameters are adjusted with a view to reducing fuel consumption.
Automatic wipingFixed.Automatic windscreen wiping is activated.
Front foglampsFixed.The front foglamps are lit.
SidelampsFixed.The lamps are on.
Direction indicatorsDirection indicators with audible signal.The direction indicators are on.
Dipped beam headlampsFixed.The lamps are on.
Automatic headlamp dipping
Fixed.The function has been activated via the touch screen (Driving / Vehicle menu).The lighting control lever is in the "AUTO" position.For more information, refer to the Lighting and visibility section.
Blue warning/indicator lamps
Main beam headlampsFixed.The lamps are on.
Black/white warning lamps
Foot on brakeFixed.Omission or insufficient pressure on the brake pedal.With an automatic gearbox or gear selector, pressing the brake pedal may be required to release the selector from N mode.
Foot on the clutchFixed.Stop & Start: the change to START mode is rejected because the clutch pedal is not fully depressed.Fully depress the clutch pedal.
Automatic wipingFixed.Automatic front wiping is activated.
Indicators
Service indicator
The servicing information is expressed in terms of distance (miles or kilometres) and time (months or days).The alert is given at whichever of these two terms is reached first.The servicing information is displayed in the instrument panel. Depending on the version of the vehicle:– The distance recorder display line indicates the distance remaining before the next service is due, or the distance travelled since it was due preceded by the "-" sign.– An alert message indicates the distance remaining, as well as the period before the next service is due or how long it is overdue.
NOTIC E
The value indicated is calculated according to the distance covered and the time elapsed since the last service.The alert may also be triggered close to a due date.
Page 21 of 320
21
Instruments
1
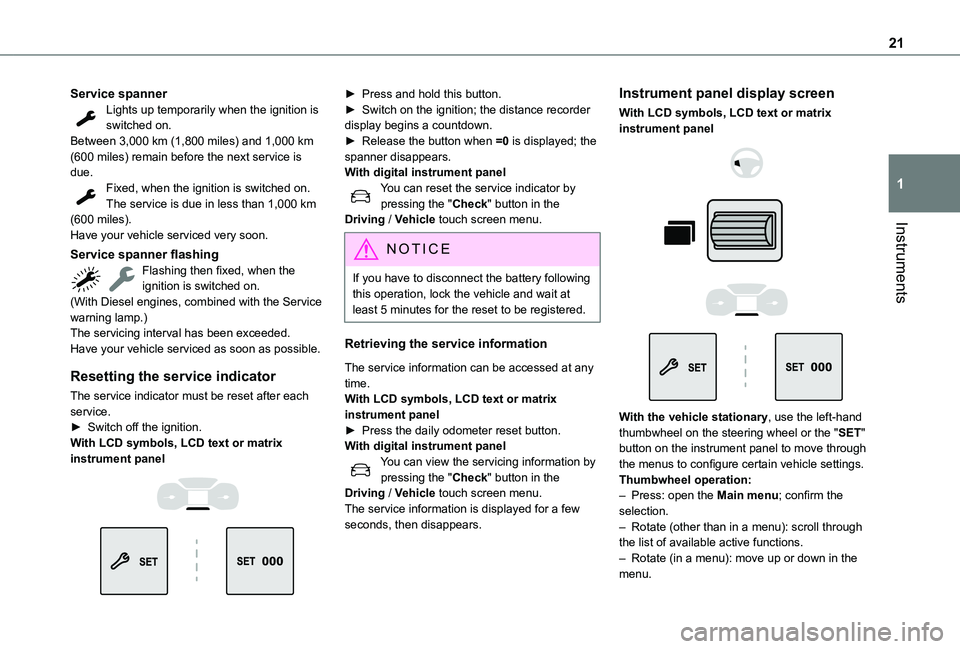
Service spannerLights up temporarily when the ignition is switched on.Between 3,000 km (1,800 miles) and 1,000 km (600 miles) remain before the next service is due.Fixed, when the ignition is switched on.The service is due in less than 1,000 km (600 miles).Have your vehicle serviced very soon.
Service spanner flashingFlashing then fixed, when the ignition is switched on.(With Diesel engines, combined with the Service warning lamp.)The servicing interval has been exceeded.Have your vehicle serviced as soon as possible.
Resetting the service indicator
The service indicator must be reset after each service.► Switch off the ignition.With LCD symbols, LCD text or matrix
instrument panel
► Press and hold this button.► Switch on the ignition; the distance recorder display begins a countdown.► Release the button when =0 is displayed; the spanner disappears.With digital instrument panelYou can reset the service indicator by pressing the "Check" button in the Driving / Vehicle touch screen menu.
NOTIC E
If you have to disconnect the battery following this operation, lock the vehicle and wait at least 5 minutes for the reset to be registered.
Retrieving the service information
The service information can be accessed at any time.With LCD symbols, LCD text or matrix instrument panel► Press the daily odometer reset button.With digital instrument panelYou can view the servicing information by pressing the "Check" button in the Driving / Vehicle touch screen menu.The service information is displayed for a few seconds, then disappears.
Instrument panel display screen
With LCD symbols, LCD text or matrix instrument panel
With the vehicle stationary, use the left-hand thumbwheel on the steering wheel or the "SET" button on the instrument panel to move through the menus to configure certain vehicle settings.
Thumbwheel operation:– Press: open the Main menu; confirm the selection.– Rotate (other than in a menu): scroll through the list of available active functions.– Rotate (in a menu): move up or down in the menu.
Page 30 of 320
30
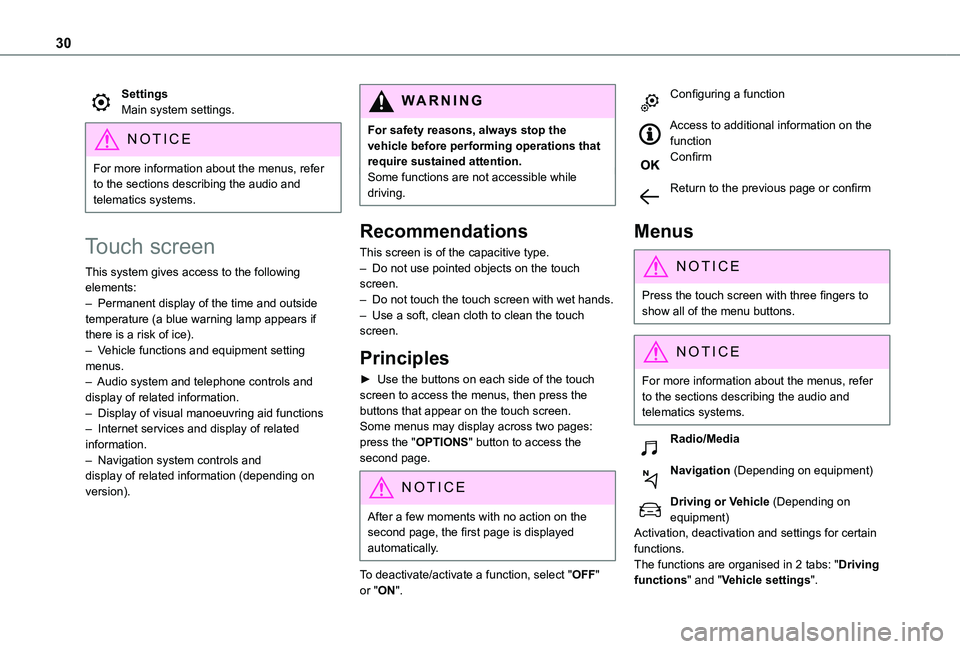
SettingsMain system settings.
NOTIC E
For more information about the menus, refer to the sections describing the audio and telematics systems.
Touch screen
This system gives access to the following elements:– Permanent display of the time and outside temperature (a blue warning lamp appears if there is a risk of ice).– Vehicle functions and equipment setting menus.– Audio system and telephone controls and display of related information.– Display of visual manoeuvring aid functions– Internet services and display of related information.– Navigation system controls and display of related information (depending on version).
WARNI NG
For safety reasons, always stop the vehicle before performing operations that require sustained attention.Some functions are not accessible while driving.
Recommendations
This screen is of the capacitive type.– Do not use pointed objects on the touch screen.– Do not touch the touch screen with wet hands.– Use a soft, clean cloth to clean the touch screen.
Principles
► Use the buttons on each side of the touch screen to access the menus, then press the buttons that appear on the touch screen.Some menus may display across two pages: press the "OPTIONS" button to access the
second page.
NOTIC E
After a few moments with no action on the second page, the first page is displayed automatically.
To deactivate/activate a function, select "OFF" or "ON".
Configuring a function
Access to additional information on the functionConfirm
Return to the previous page or confirm
Menus
NOTIC E
Press the touch screen with three fingers to show all of the menu buttons.
NOTIC E
For more information about the menus, refer to the sections describing the audio and telematics systems.
Radio/Media
Navigation (Depending on equipment)
Driving or Vehicle (Depending on equipment)Activation, deactivation and settings for certain
functions.The functions are organised in 2 tabs: "Driving functions" and "Vehicle settings".
Page 31 of 320
31
Instruments
1
Telephone
ApplicationsDisplay of available connected services.Energy (with TOYOTA Connect Nav)Access the specific Electric functions (energy flow, consumption statistics, deferred charge) organised in the corresponding 3 tabs.orSettingsMain settings for the audio system and touch screen.Audio system on/off.Volume adjustment/mute.
Upper bar
Certain information is displayed permanently in the upper bar of the touch screen:– Time and outside temperature (a blue warning lamp appears if there is a risk of ice).– Reminder of information from the Radio Media and Telephone menus and navigation instructions (depending on
equipment).– Notifications.– Access to the Settings.
Energy menu
This menu is only accessible with a TOYOTA Connect Nav:Depending on version, this is accessible either:– directly, by pressing the button near the touch screen.– via the Applications menu.
Flow
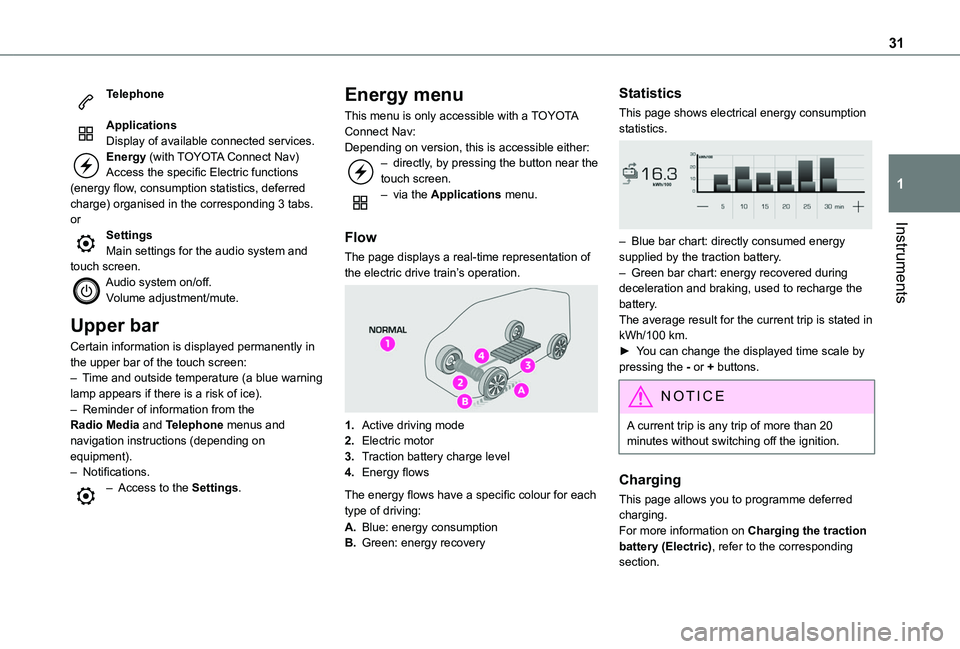
The page displays a real-time representation of the electric drive train’s operation.
1.Active driving mode
2.Electric motor
3.Traction battery charge level
4.Energy flows
The energy flows have a specific colour for each type of driving:
A.Blue: energy consumption
B.Green: energy recovery
Statistics
This page shows electrical energy consumption statistics.
– Blue bar chart: directly consumed energy supplied by the traction battery.– Green bar chart: energy recovered during deceleration and braking, used to recharge the battery.The average result for the current trip is stated in kWh/100 km.► You can change the displayed time scale by pressing the - or + buttons.
NOTIC E
A current trip is any trip of more than 20 minutes without switching off the ignition.
Charging
This page allows you to programme deferred charging.For more information on Charging the traction battery (Electric), refer to the corresponding section.
Page 35 of 320
35
Access
2
Advice
WARNI NG
Remote controlThe remote control is a sensitive, high-frequency device; avoid handling it in your pocket, due to the risk of unintentionally unlocking the vehicle.Avoid pressing the remote control buttons
while out of range of the vehicle, due to the risk of rendering the remote control inoperative. It would then be necessary to reset it.The remote control does not work when the key is in the ignition switch, even when the ignition is switched off.
WARNI NG
Anti-theft protectionDo not modify the electronic vehicle immobiliser, as this might result in malfunctions.For vehicles with a key ignition switch, remember to remove the key and turn the steering wheel to engage the steering lock.
WARNI NG
Locking the vehicleDriving with the doors locked could make it more difficult for the emergency services to enter the vehicle in an emergency.As a safety precaution, remove the key from the ignition or take the electronic key with you when leaving the vehicle, even for a short time.
NOTIC E
Purchasing a second-hand vehicleHave the key codes memorised by a TOYOTA dealer, to ensure that the keys in your possession are the only ones able to start the vehicle.
WARNI NG
Accumulations (water, dust, grime, salt, etc.) on the inner surface of the door handle may affect detection.If cleaning the inner surface of the door handle using a cloth does not restore detection, contact a TOYOTA dealer or a qualified workshop.A sudden splash of water (stream of water, high pressure jet washer, etc.) may be identified by the system as the desire to open the vehicle.
Total or selective
unlocking
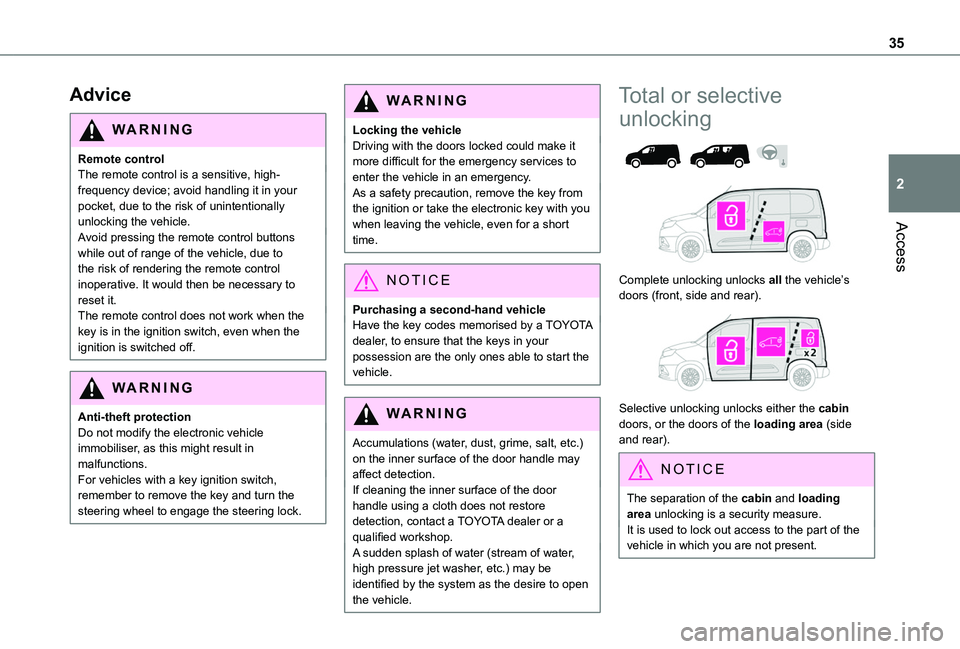
Complete unlocking unlocks all the vehicle’s doors (front, side and rear).
Selective unlocking unlocks either the cabin doors, or the doors of the loading area (side and rear).
NOTIC E
The separation of the cabin and loading area unlocking is a security measure.It is used to lock out access to the part of the vehicle in which you are not present.