Tyre pressure button TOYOTA PROACE VERSO 2022 Owners Manual
[x] Cancel search | Manufacturer: TOYOTA, Model Year: 2022, Model line: PROACE VERSO, Model: TOYOTA PROACE VERSO 2022Pages: 360, PDF Size: 70.79 MB
Page 15 of 360
15
Instruments
1
► Hold the control lever pressed in the release direction for between 10 and 15 seconds.► Release the control lever.► Depress and hold the brake pedal.► Hold the control lever in the “Application” direction for 2 seconds.► Release the control lever and the brake pedal.
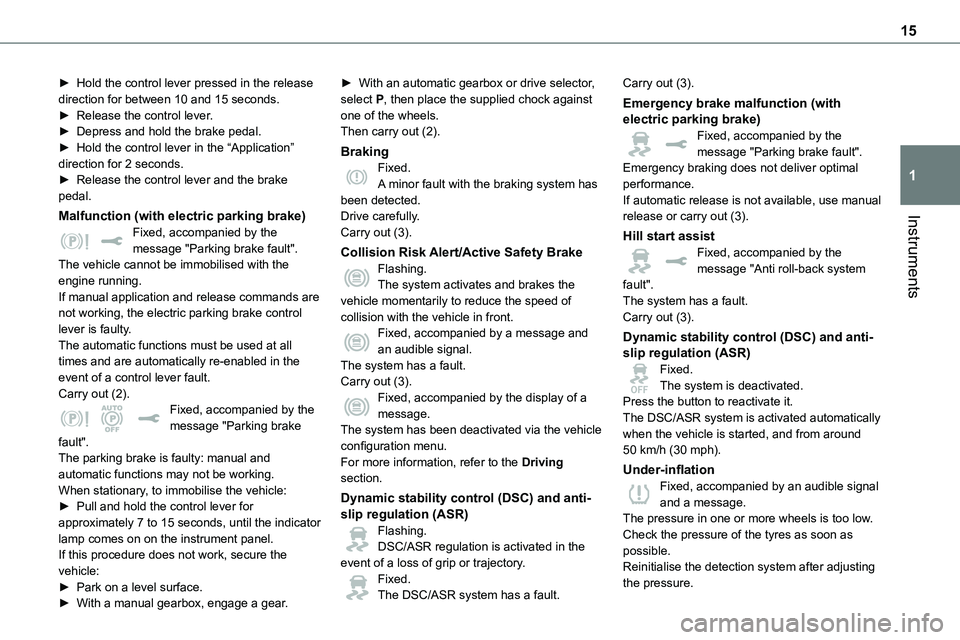
Malfunction (with electric parking brake)
Fixed, accompanied by the message "Parking brake fault".The vehicle cannot be immobilised with the engine running.If manual application and release commands are not working, the electric parking brake control lever is faulty.The automatic functions must be used at all times and are automatically re-enabled in the event of a control lever fault.Carry out (2).Fixed, accompanied by the message "Parking brake fault".The parking brake is faulty: manual and automatic functions may not be working.When stationary, to immobilise the vehicle:► Pull and hold the control lever for approximately 7 to 15 seconds, until the indicator lamp comes on on the instrument panel.If this procedure does not work, secure the vehicle:► Park on a level surface.► With a manual gearbox, engage a gear.
► With an automatic gearbox or drive selector, select P, then place the supplied chock against one of the wheels.Then carry out (2).
BrakingFixed.A minor fault with the braking system has been detected.Drive carefully.
Carry out (3).
Collision Risk Alert/Active Safety BrakeFlashing.The system activates and brakes the vehicle momentarily to reduce the speed of collision with the vehicle in front.Fixed, accompanied by a message and an audible signal.The system has a fault.Carry out (3).Fixed, accompanied by the display of a message.The system has been deactivated via the vehicle configuration menu.For more information, refer to the Driving section.
Dynamic stability control (DSC) and anti-slip regulation (ASR)Flashing.DSC/ASR regulation is activated in the event of a loss of grip or trajectory.Fixed.The DSC/ASR system has a fault.
Carry out (3).
Emergency brake malfunction (with electric parking brake)Fixed, accompanied by the message "Parking brake fault".Emergency braking does not deliver optimal performance.If automatic release is not available, use manual release or carry out (3).
Hill start assistFixed, accompanied by the message "Anti roll-back system fault".The system has a fault.Carry out (3).
Dynamic stability control (DSC) and anti-slip regulation (ASR)Fixed.The system is deactivated.Press the button to reactivate it.The DSC/ASR system is activated automatically when the vehicle is started, and from around 50 km/h (30 mph).
Under-inflationFixed, accompanied by an audible signal and a message.The pressure in one or more wheels is too low.Check the pressure of the tyres as soon as possible.Reinitialise the detection system after adjusting the pressure.
Page 115 of 360
11 5
Safety
5
NOTIC E
The normal operation of the ABS may result in slight vibrations in the brake pedal.
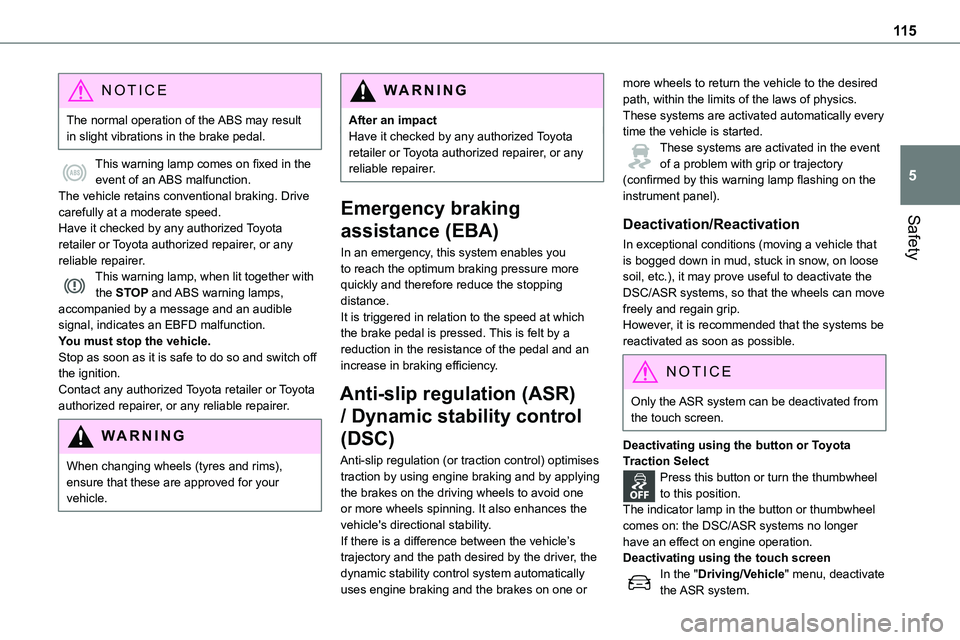
This warning lamp comes on fixed in the event of an ABS malfunction.The vehicle retains conventional braking. Drive carefully at a moderate speed.
Have it checked by any authorized Toyota retailer or Toyota authorized repairer, or any reliable repairer.This warning lamp, when lit together with the STOP and ABS warning lamps, accompanied by a message and an audible signal, indicates an EBFD malfunction.You must stop the vehicle.Stop as soon as it is safe to do so and switch off the ignition.Contact any authorized Toyota retailer or Toyota authorized repairer, or any reliable repairer.
WARNI NG
When changing wheels (tyres and rims), ensure that these are approved for your vehicle.
WARNI NG
After an impactHave it checked by any authorized Toyota retailer or Toyota authorized repairer, or any reliable repairer.
Emergency braking
assistance (EBA)
In an emergency, this system enables you to reach the optimum braking pressure more quickly and therefore reduce the stopping distance.It is triggered in relation to the speed at which the brake pedal is pressed. This is felt by a reduction in the resistance of the pedal and an increase in braking efficiency.
Anti-slip regulation (ASR)
/ Dynamic stability control
(DSC)
Anti-slip regulation (or traction control) optimises traction by using engine braking and by applying the brakes on the driving wheels to avoid one or more wheels spinning. It also enhances the vehicle's directional stability.If there is a difference between the vehicle’s trajectory and the path desired by the driver, the dynamic stability control system automatically uses engine braking and the brakes on one or
more wheels to return the vehicle to the desired path, within the limits of the laws of physics.These systems are activated automatically every time the vehicle is started.These systems are activated in the event of a problem with grip or trajectory (confirmed by this warning lamp flashing on the instrument panel).
Deactivation/Reactivation
In exceptional conditions (moving a vehicle that is bogged down in mud, stuck in snow, on loose soil, etc.), it may prove useful to deactivate the DSC/ASR systems, so that the wheels can move freely and regain grip.However, it is recommended that the systems be reactivated as soon as possible.
NOTIC E
Only the ASR system can be deactivated from the touch screen.
Deactivating using the button or Toyota Traction SelectPress this button or turn the thumbwheel to this position.The indicator lamp in the button or thumbwheel comes on: the DSC/ASR systems no longer
have an effect on engine operation.Deactivating using the touch screenIn the "Driving/Vehicle" menu, deactivate the ASR system.
Page 171 of 360
171
Driving
6
values read by the wheel's speed sensors can take several minutes.The alert may be delayed at speeds below 25 mph (40 km/h), or when adopting a sporty driving mode.
NOTIC E
The alert is kept active until the system is reinitialised.
Reinitialisation
Reinitialise the system after adjusting one or more tyre pressures and after changing one or more wheels.
WARNI NG
Before reinitialising the system, make sure that the pressures of the four tyres are correct for the conditions of use of the vehicle and conform to the values written on the tyre pressure label.Check the pressures of the four tyres before performing the reinitialisation.The system does not advise if a pressure is incorrect at the time of reinitialisation.
With button
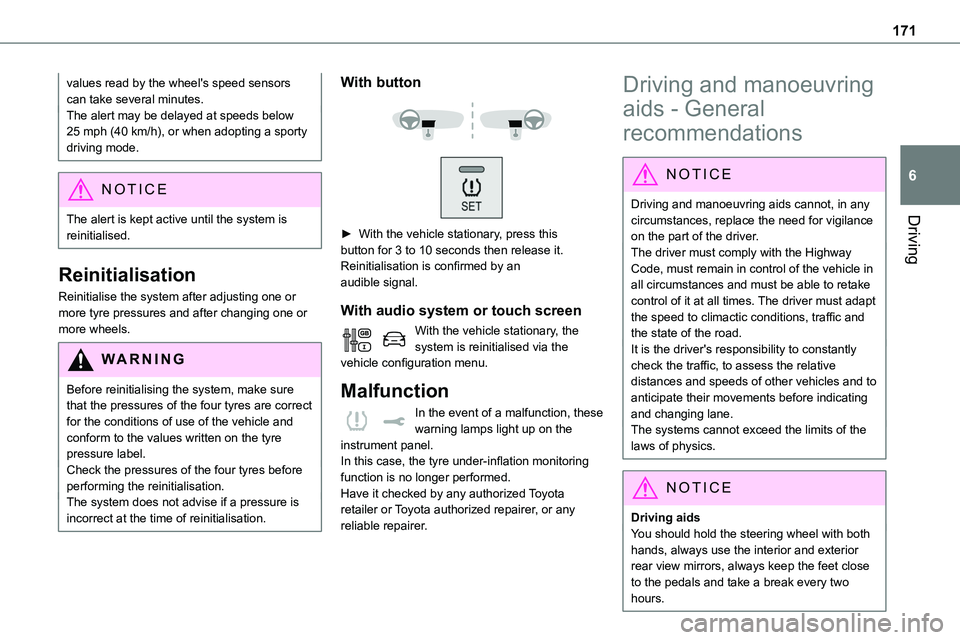
► With the vehicle stationary, press this button for 3 to 10 seconds then release it. Reinitialisation is confirmed by anaudible signal.
With audio system or touch screen
With the vehicle stationary, the system is reinitialised via the vehicle configuration menu.
Malfunction
In the event of a malfunction, these warning lamps light up on the
instrument panel.In this case, the tyre under-inflation monitoring function is no longer performed.Have it checked by any authorized Toyota retailer or Toyota authorized repairer, or any reliable repairer.
Driving and manoeuvring
aids - General
recommendations
NOTIC E
Driving and manoeuvring aids cannot, in any circumstances, replace the need for vigilance
on the part of the driver.The driver must comply with the Highway Code, must remain in control of the vehicle in all circumstances and must be able to retake control of it at all times. The driver must adapt the speed to climactic conditions, traffic and the state of the road.It is the driver's responsibility to constantly check the traffic, to assess the relative distances and speeds of other vehicles and to anticipate their movements before indicating and changing lane.The systems cannot exceed the limits of the laws of physics.
NOTIC E
Driving aids
You should hold the steering wheel with both hands, always use the interior and exterior rear view mirrors, always keep the feet close to the pedals and take a break every two hours.
Page 232 of 360
232
NOTIC E
Tyre inflation pressures are indicated on this label.For more information on Identification markings, particularly this label, refer to the corresponding section.
Composition of the kit
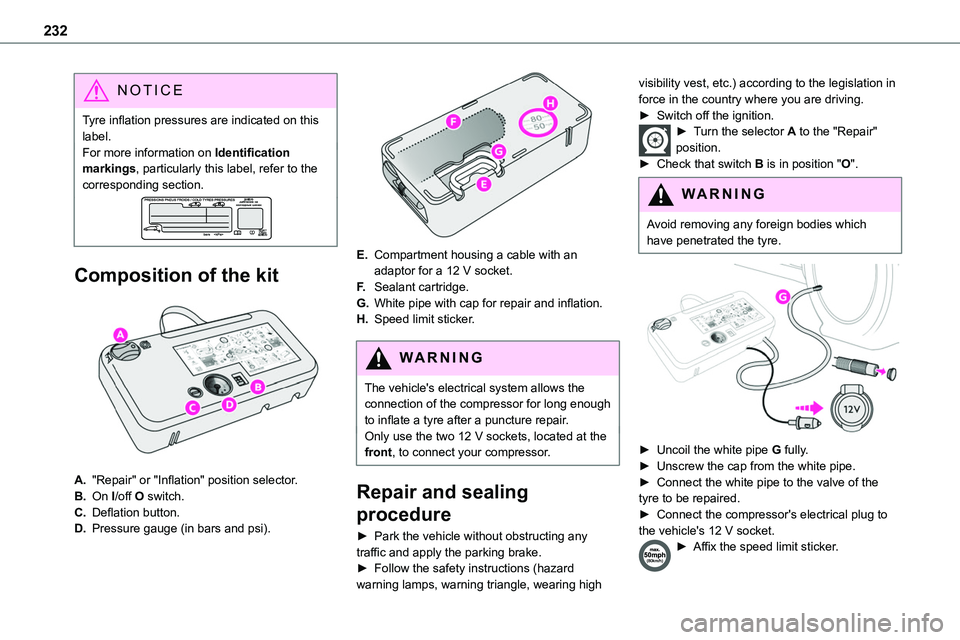
A."Repair" or "Inflation" position selector.
B.On I/off O switch.
C.Deflation button.
D.Pressure gauge (in bars and psi).
E.Compartment housing a cable with an adaptor for a 12 V socket.
F.Sealant cartridge.
G.White pipe with cap for repair and inflation.
H.Speed limit sticker.
WARNI NG
The vehicle's electrical system allows the connection of the compressor for long enough to inflate a tyre after a puncture repair.
Only use the two 12 V sockets, located at the front, to connect your compressor.
Repair and sealing
procedure
► Park the vehicle without obstructing any traffic and apply the parking brake.► Follow the safety instructions (hazard warning lamps, warning triangle, wearing high
visibility vest, etc.) according to the legislation in force in the country where you are driving.► Switch off the ignition.► Turn the selector A to the "Repair" position.► Check that switch B is in position "O".
WARNI NG
Avoid removing any foreign bodies which have penetrated the tyre.
► Uncoil the white pipe G fully.► Unscrew the cap from the white pipe.► Connect the white pipe to the valve of the tyre to be repaired.► Connect the compressor's electrical plug to the vehicle's 12 V socket.► Affix the speed limit sticker.
Page 234 of 360
234
WARNI NG
Go to any authorized Toyota retailer or Toyota authorized repairer, or any reliable repairer as soon as possible.You must tell the technician that the kit has been used. After inspection, the technician will advise you on whether the tyre can be repaired or if it must be replaced.
► Adjust the tyre pressure using the compressor (to inflate: set switch B to position "I"; to deflate: set switch B to position "O" and press button C), according to the vehicle's tyre pressure label located by the driver's door.A subsequent loss of pressure indicates that the puncture has not been fully sealed; contact any authorized Toyota retailer or Toyota authorized repairer, or any reliable repairer to have your vehicle repaired.► Remove the kit and stow it.► Drive at reduced speed (50 mph (80 km/h) max.), limiting the distance travelled to approximately 125 miles (200 km).
NOTIC E
The compressor can also be used, without injecting sealant, to check and adjust the tyre pressures.
NOTIC E
If after approximately 7 minutes the required pressure is not reached, this indicates that the tyre is irreparably damaged; contact any authorized Toyota retailer or Toyota authorized repairer, or any reliable repairer for assistance.
WARNI NG
Do not drive more than 125 miles (200 km) with a repaired tyre; see any authorized Toyota retailer or Toyota authorized repairer, or any reliable repairer to have the tyre changed.
WARNI NG
Should the pressure of one or more tyres be adjusted, it is necessary to reinitialise the under-inflation detection system.For more information on Tyre under-inflation detection, refer to the corresponding section.
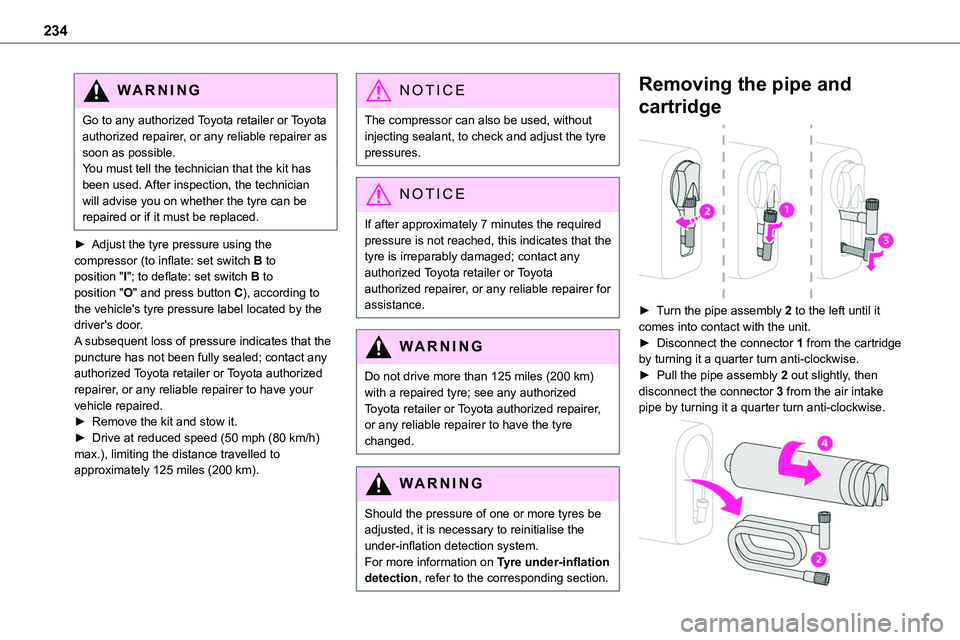
Removing the pipe and
cartridge
► Turn the pipe assembly 2 to the left until it comes into contact with the unit.► Disconnect the connector 1 from the cartridge by turning it a quarter turn anti-clockwise.► Pull the pipe assembly 2 out slightly, then disconnect the connector 3 from the air intake pipe by turning it a quarter turn anti-clockwise.