service TOYOTA PROACE VERSO EV 2020 User Guide
[x] Cancel search | Manufacturer: TOYOTA, Model Year: 2020, Model line: PROACE VERSO EV, Model: TOYOTA PROACE VERSO EV 2020Pages: 360, PDF Size: 68.91 MB
Page 41 of 360
41
Access
2
NOTIC E
To deactivate this automatic locking, go to any authorized Toyota retailer or Toyota authorized repairer, or any reliable repairer.
Manual
► With complete unlocking activated, press this button to lock (indicator lamp comes on)/unlock (indicator lamp goes off) the vehicle.► With selective unlocking activated, press this button to lock (indicator lamp comes on)/unlock (indicator lamp goes off) the loading area.
WARNI NG
Driving with the doors locked could make it more difficult for the emergency services to enter the vehicle in an emergency.
NOTIC E
The indicator lamp goes off when unlocking one or more doors of the loading area.With the ignition off and the vehicle fully locked, the indicator lamp goes off for energy economy reasons.
Electric sliding side
door(s)
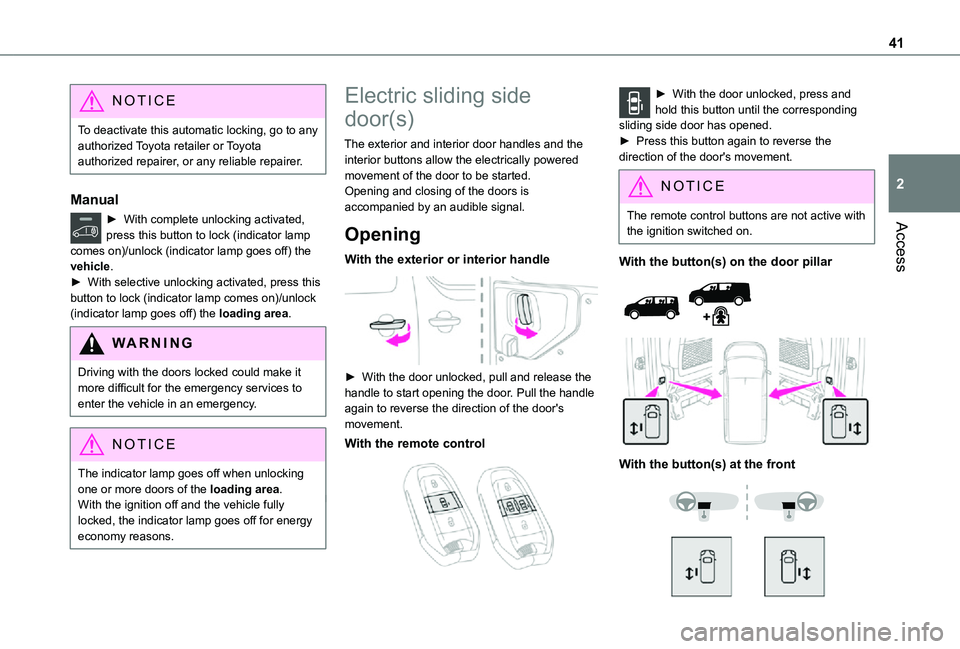
The exterior and interior door handles and the interior buttons allow the electrically powered movement of the door to be started.Opening and closing of the doors is accompanied by an audible signal.
Opening
With the exterior or interior handle
► With the door unlocked, pull and release the handle to start opening the door. Pull the handle again to reverse the direction of the door's movement.
With the remote control
► With the door unlocked, press and hold this button until the corresponding sliding side door has opened. ► Press this button again to reverse the direction of the door's movement.
NOTIC E
The remote control buttons are not active with the ignition switched on.
With the button(s) on the door pillar
With the button(s) at the front
Page 47 of 360
47
Access
2
NOTIC E
The side door may open or close without warning if: – Your vehicle is fitted with a towbar.– A trailer is coupled or decoupled.– A bicycle carrier is installed or removed.– Bicycles are loaded on to or unloaded from the bicycle carrier.– Something is deposited or lifted behind the vehicle.– An animal approaches the bumper,– The vehicle is washed.– The vehicle is being serviced.– A wheel is changed. To avoid any sudden operation, keep the key away from the detection zone (also from the boot’s interior sides) or deactivate the function in the vehicle configuration menu.
W ARNI NG
Ensure that no person or object might prevent the correct opening or closing of the doors.Be aware of children when operating the doors.
Side-hinged rear doors
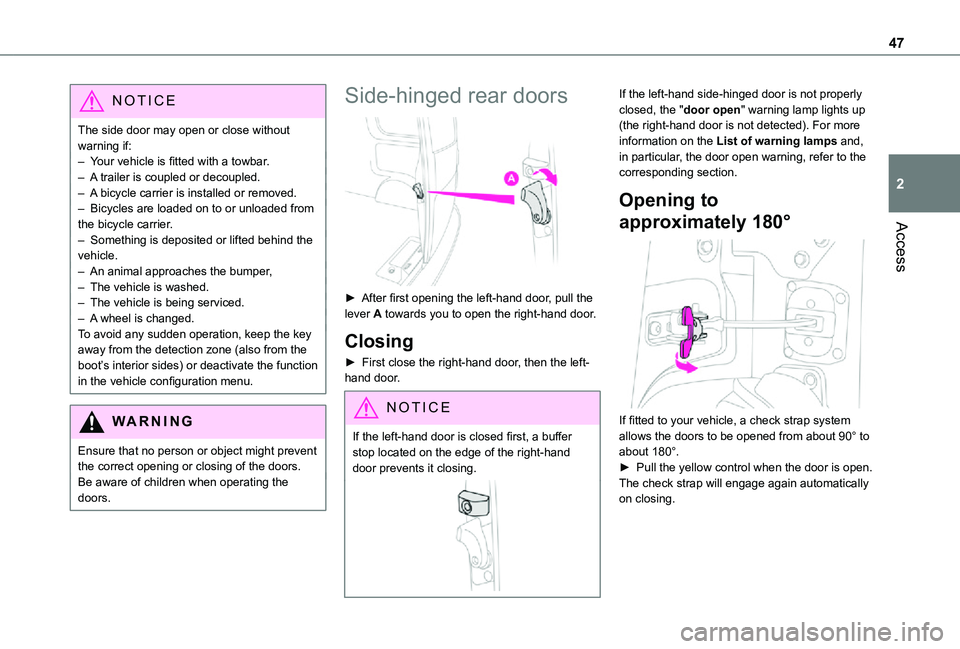
► After first opening the left-hand door, pull the lever A towards you to open the right-hand door.
Closing
► First close the right-hand door, then the left-hand door.
NOTIC E
If the left-hand door is closed first, a buffer stop located on the edge of the right-hand door prevents it closing.
If the left-hand side-hinged door is not properly closed, the "door open" warning lamp lights up (the right-hand door is not detected). For more information on the List of warning lamps and, in particular, the door open warning, refer to the corresponding section.
Opening to
approximately 180°
If fitted to your vehicle, a check strap system allows the doors to be opened from about 90° to
about 180°.► Pull the yellow control when the door is open.The check strap will engage again automatically on closing.
Page 49 of 360
49
Access
2
Alarm
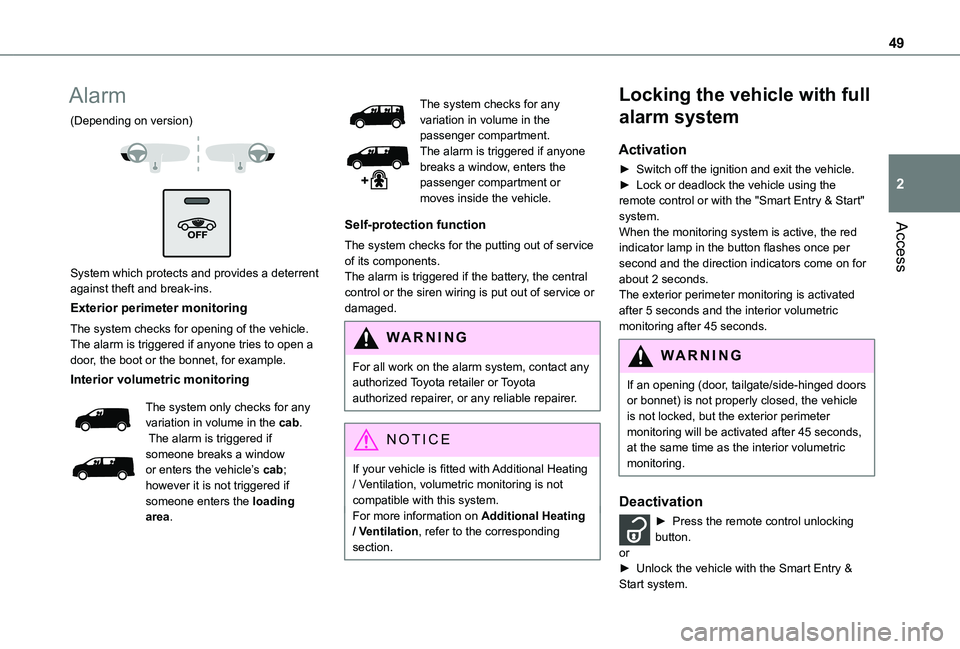
(Depending on version)
System which protects and provides a deterrent against theft and break-ins.
Exterior perimeter monitoring
The system checks for opening of the vehicle.The alarm is triggered if anyone tries to open a door, the boot or the bonnet, for example.
Interior volumetric monitoring
The system only checks for any variation in volume in the cab. The alarm is triggered if
someone breaks a window or enters the vehicle’s cab; however it is not triggered if someone enters the loading area.
The system checks for any variation in volume in the passenger compartment.The alarm is triggered if anyone breaks a window, enters the passenger compartment or moves inside the vehicle.
Self-protection function
The system checks for the putting out of service of its components.The alarm is triggered if the battery, the central control or the siren wiring is put out of service or damaged.
WARNI NG
For all work on the alarm system, contact any authorized Toyota retailer or Toyota authorized repairer, or any reliable repairer.
NOTIC E
If your vehicle is fitted with Additional Heating / Ventilation, volumetric monitoring is not compatible with this system.For more information on Additional Heating / Ventilation, refer to the corresponding section.
Locking the vehicle with full
alarm system
Activation
► Switch off the ignition and exit the vehicle.► Lock or deadlock the vehicle using the remote control or with the "Smart Entry & Start" system.When the monitoring system is active, the red indicator lamp in the button flashes once per second and the direction indicators come on for about 2 seconds.The exterior perimeter monitoring is activated after 5 seconds and the interior volumetric monitoring after 45 seconds.
WARNI NG
If an opening (door, tailgate/side-hinged doors or bonnet) is not properly closed, the vehicle is not locked, but the exterior perimeter monitoring will be activated after 45 seconds, at the same time as the interior volumetric monitoring.
Deactivation
► Press the remote control unlocking button.or► Unlock the vehicle with the Smart Entry & Start system.
Page 53 of 360
53
Ease of use and comfort
1
Table position of the driver's
and/or the front passenger
seat backrest
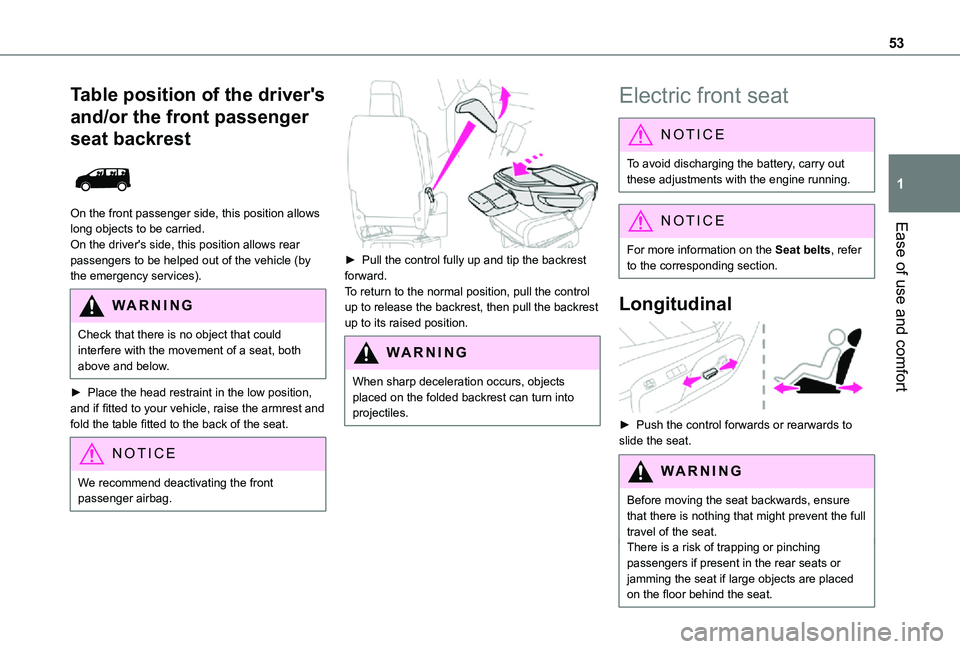
On the front passenger side, this position allows long objects to be carried.On the driver's side, this position allows rear passengers to be helped out of the vehicle (by the emergency services).
WARNI NG
Check that there is no object that could interfere with the movement of a seat, both above and below.
► Place the head restraint in the low position, and if fitted to your vehicle, raise the armrest and fold the table fitted to the back of the seat.
NOTIC E
We recommend deactivating the front passenger airbag.
► Pull the control fully up and tip the backrest forward.To return to the normal position, pull the control up to release the backrest, then pull the backrest up to its raised position.
WARNI NG
When sharp deceleration occurs, objects placed on the folded backrest can turn into projectiles.
Electric front seat
NOTIC E
To avoid discharging the battery, carry out these adjustments with the engine running.
NOTIC E
For more information on the Seat belts, refer to the corresponding section.
Longitudinal
► Push the control forwards or rearwards to slide the seat.
WARNI NG
Before moving the seat backwards, ensure that there is nothing that might prevent the full travel of the seat.There is a risk of trapping or pinching passengers if present in the rear seats or jamming the seat if large objects are placed on the floor behind the seat.
Page 110 of 360
11 0
Hazard warning lamps
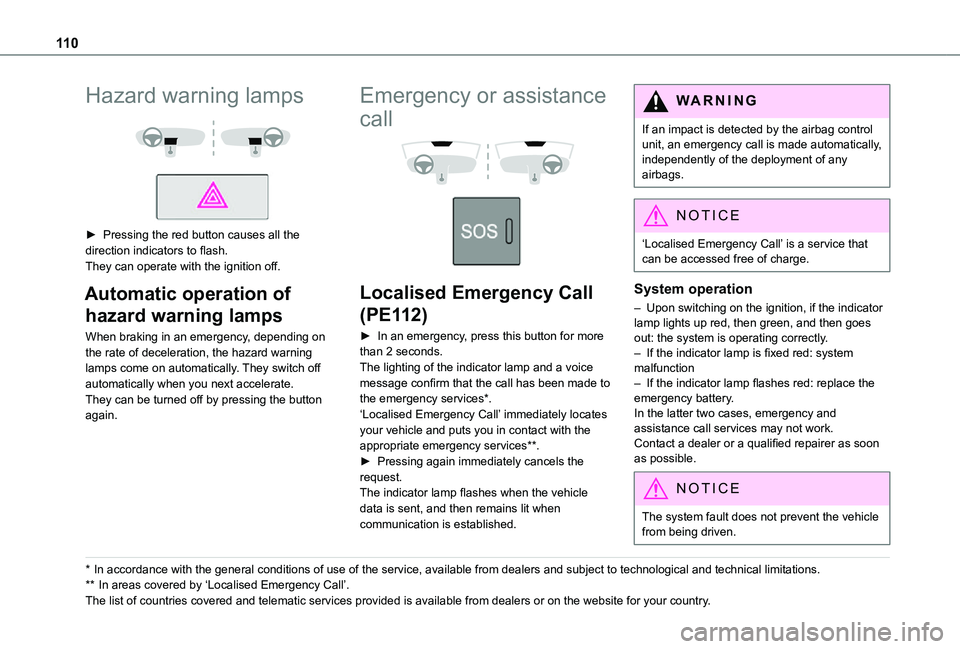
► Pressing the red button causes all the direction indicators to flash.They can operate with the ignition off.
Automatic operation of
hazard warning lamps
When braking in an emergency, depending on the rate of deceleration, the hazard warning lamps come on automatically. They switch off automatically when you next accelerate.They can be turned off by pressing the button again.
* In accordance with the general conditions of use of the service, available from dealers an\
d subject to technological and technical limitations.
** In areas covered by ‘Localised Emergency Call’.
The list of countries covered and telematic services provided is availab\
le from dealers or on the website for your country.
Emergency or assistance
call
Localised Emergency Call
(PE112)
► In an emergency, press this button for more than 2 seconds.The lighting of the indicator lamp and a voice message confirm that the call has been made to the emergency services*.‘Localised Emergency Call’ immediately locates your vehicle and puts you in contact with the appropriate emergency services**.► Pressing again immediately cancels the request.The indicator lamp flashes when the vehicle data is sent, and then remains lit when communication is established.
WARNI NG
If an impact is detected by the airbag control unit, an emergency call is made automatically, independently of the deployment of any airbags.
NOTIC E
‘Localised Emergency Call’ is a service that can be accessed free of charge.
System operation
– Upon switching on the ignition, if the indicator lamp lights up red, then green, and then goes out: the system is operating correctly.– If the indicator lamp is fixed red: system malfunction– If the indicator lamp flashes red: replace the emergency battery. In the latter two cases, emergency and assistance call services may not work.Contact a dealer or a qualified repairer as soon as possible.
NOTIC E
The system fault does not prevent the vehicle from being driven.
Page 200 of 360
200
WARNI NG
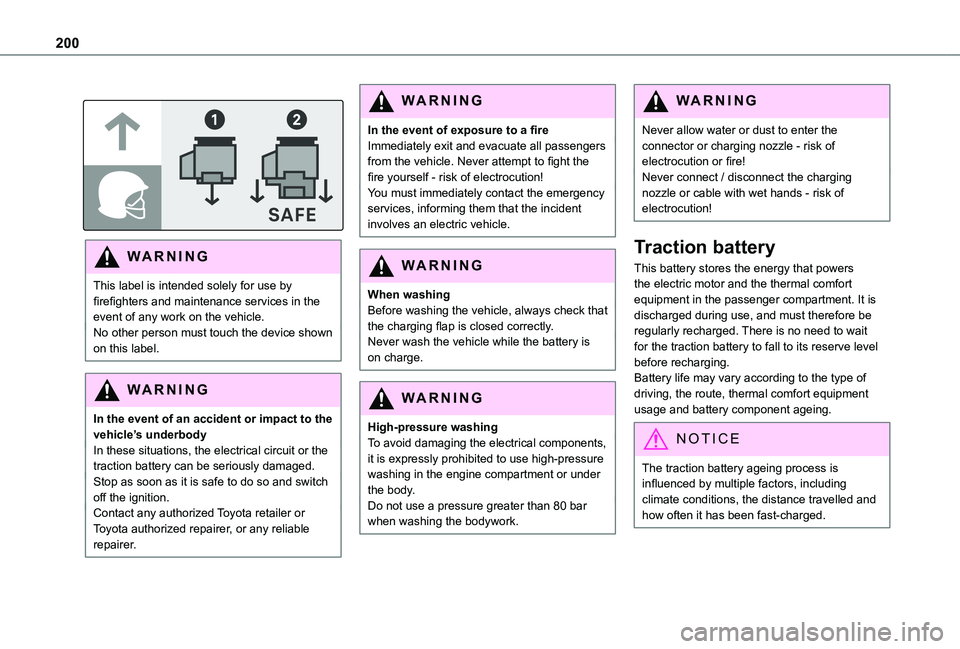
This label is intended solely for use by firefighters and maintenance services in the event of any work on the vehicle.No other person must touch the device shown on this label.
WARNI NG
In the event of an accident or impact to the vehicle’s underbodyIn these situations, the electrical circuit or the traction battery can be seriously damaged.Stop as soon as it is safe to do so and switch off the ignition.Contact any authorized Toyota retailer or Toyota authorized repairer, or any reliable repairer.
WARNI NG
In the event of exposure to a fireImmediately exit and evacuate all passengers from the vehicle. Never attempt to fight the fire yourself - risk of electrocution!You must immediately contact the emergency services, informing them that the incident involves an electric vehicle.
WARNI NG
When washingBefore washing the vehicle, always check that the charging flap is closed correctly.Never wash the vehicle while the battery is on charge.
WARNI NG
High-pressure washingTo avoid damaging the electrical components, it is expressly prohibited to use high-pressure washing in the engine compartment or under the body.Do not use a pressure greater than 80 bar when washing the bodywork.
WARNI NG
Never allow water or dust to enter the connector or charging nozzle - risk of electrocution or fire!Never connect / disconnect the charging nozzle or cable with wet hands - risk of electrocution!
Traction battery
This battery stores the energy that powers the electric motor and the thermal comfort equipment in the passenger compartment. It is discharged during use, and must therefore be regularly recharged. There is no need to wait for the traction battery to fall to its reserve level before recharging.Battery life may vary according to the type of driving, the route, thermal comfort equipment usage and battery component ageing.
NOTIC E
The traction battery ageing process is influenced by multiple factors, including climate conditions, the distance travelled and how often it has been fast-charged.
Page 215 of 360
215
Practical information
7
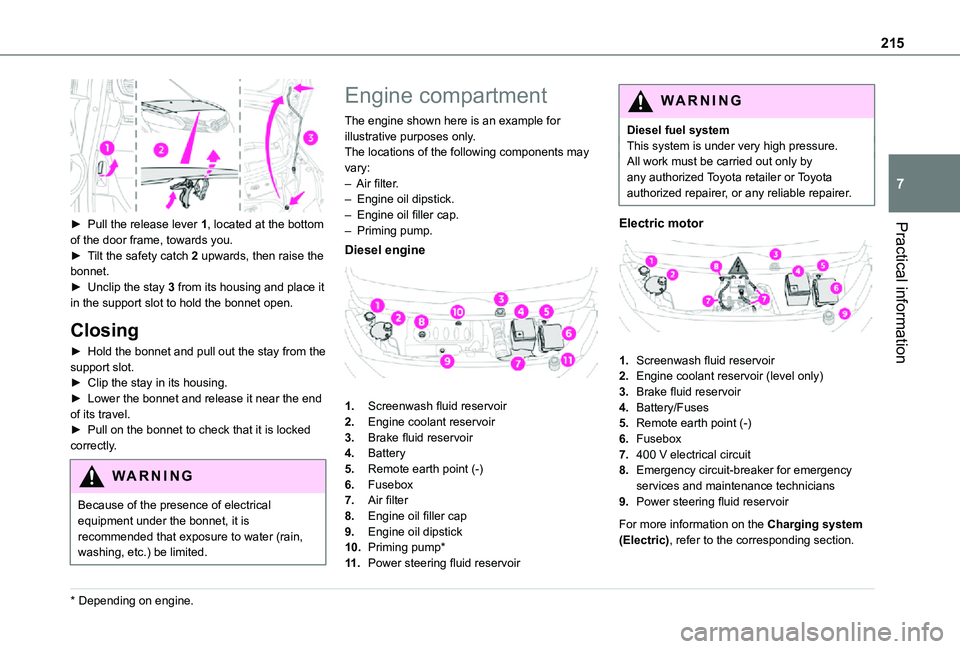
► Pull the release lever 1, located at the bottom of the door frame, towards you.► Tilt the safety catch 2 upwards, then raise the bonnet.► Unclip the stay 3 from its housing and place it in the support slot to hold the bonnet open.
Closing
► Hold the bonnet and pull out the stay from the support slot.► Clip the stay in its housing.► Lower the bonnet and release it near the end of its travel.► Pull on the bonnet to check that it is locked
correctly.
WARNI NG
Because of the presence of electrical equipment under the bonnet, it is recommended that exposure to water (rain, washing, etc.) be limited.
* Depending on engine.
Engine compartment
The engine shown here is an example for illustrative purposes only.The locations of the following components may vary:– Air filter.– Engine oil dipstick.– Engine oil filler cap.– Priming pump.
Diesel engine
1.Screenwash fluid reservoir
2.Engine coolant reservoir
3.Brake fluid reservoir
4.Battery
5.Remote earth point (-)
6.Fusebox
7.Air filter
8.Engine oil filler cap
9.Engine oil dipstick
10.Priming pump*
11 .Power steering fluid reservoir
WARNI NG
Diesel fuel systemThis system is under very high pressure.All work must be carried out only by any authorized Toyota retailer or Toyota authorized repairer, or any reliable repairer.
Electric motor
1.Screenwash fluid reservoir
2.Engine coolant reservoir (level only)
3.Brake fluid reservoir
4.Battery/Fuses
5.Remote earth point (-)
6.Fusebox
7.400 V electrical circuit
8.Emergency circuit-breaker for emergency services and maintenance technicians
9.Power steering fluid reservoir
For more information on the Charging system (Electric), refer to the corresponding section.
Page 216 of 360
216
Checking levels
Check all of the following levels regularly in accordance with the manufacturer's service schedule. Top them up if required, unless otherwise indicated.If a level drops significantly, have the corresponding system checked by any authorized Toyota retailer or Toyota authorized repairer, or any reliable repairer.
WARNI NG
The fluids must comply with the manufacturer's requirements and with the vehicle's engine.
WARNI NG
Take care when working under the bonnet, as certain areas of the engine may be extremely hot (risk of burns) and the cooling fan could start at any time (even with the ignition off).
Used products
WARNI NG
Avoid prolonged contact of used oil or fluids with the skin.Most of these fluids are harmful to health and very corrosive.
ECO
Do not discard used oil or fluids into sewers or onto the ground.Empty used oil into the containers reserved for this purpose at any authorized Toyota retailer or Toyota authorized repairer, or any reliable repairer.
Engine oil
The level is checked, with the engine having been switched off for at least 30 minutes and on level ground, either using the oil level indicator in the instrument panel when the ignition is switched on (for vehicles equipped with an electric gauge), or using the dipstick.It is normal to top up the oil level between two services (or oil changes). It is recommended that you check the level, and top up if necessary, every 5,000 km (3,000 miles).
WARNI NG
In order to maintain the reliability of the engine and emissions control system, never use additives in the engine oil.
Checking using the dipstick
For the location of the dipstick, please refer to the illustration of the corresponding engine compartment.
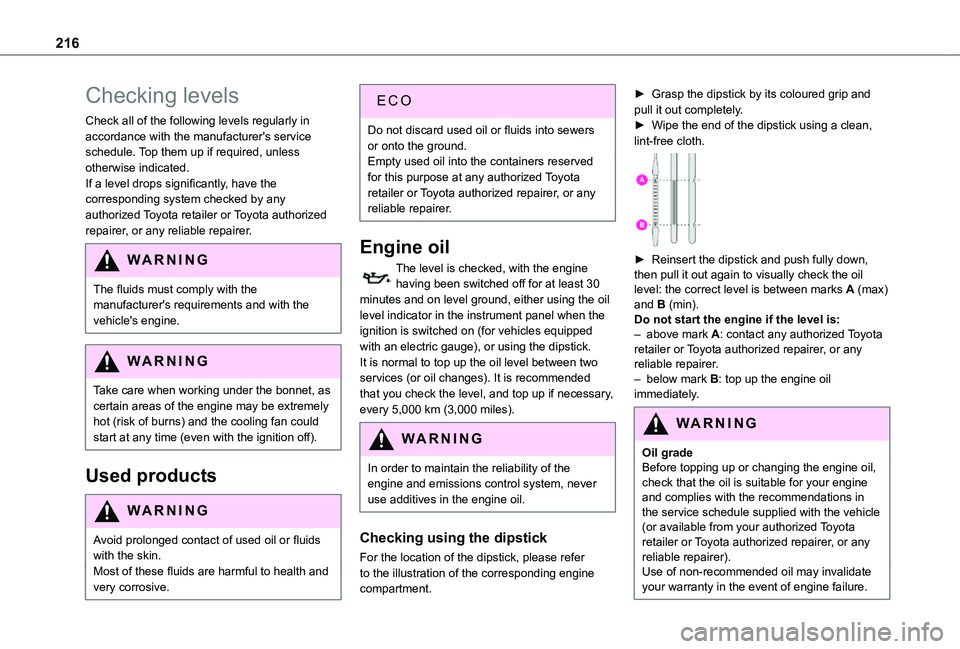
► Grasp the dipstick by its coloured grip and pull it out completely.► Wipe the end of the dipstick using a clean, lint-free cloth.
► Reinsert the dipstick and push fully down, then pull it out again to visually check the oil level: the correct level is between marks A (max) and B (min). Do not start the engine if the level is:– above mark A: contact any authorized Toyota retailer or Toyota authorized repairer, or any reliable repairer.– below mark B: top up the engine oil immediately.
WARNI NG
Oil gradeBefore topping up or changing the engine oil, check that the oil is suitable for your engine and complies with the recommendations in the service schedule supplied with the vehicle (or available from your authorized Toyota retailer or Toyota authorized repairer, or any reliable repairer).Use of non-recommended oil may invalidate your warranty in the event of engine failure.
Page 217 of 360
217
Practical information
7
Topping up the engine oil level
For the location of the engine oil filler cap, please refer to the corresponding engine compartment illustration.► Add oil in small quantities, avoiding any spills on engine components (risk of fire).► Wait a few minutes before checking the level again using the dipstick.► Top up the level if necessary.► After checking the level, carefully screw the oil filler cap back on and replace the dipstick in its tube.
NOTIC E
The oil level indication displayed on the instrument panel when the ignition is switched on is not valid for 30 minutes following an addition of oil.
Brake fluid
The level of this fluid should be close to the "MAX" mark. If not, check the brake pad wear.To know how often the brake fluid should be replaced, refer to the manufacturer's servicing schedule.
WARNI NG
If topping up, clean the cap before replacing it. Use only DOT4 brake fluid from a sealed canister.
Power steering fluid
The level of this fluid should be close to the "MAX" mark. Check it, with the vehicle parked on level ground and with the engine cold, by reading the level on the filler neck.
Engine coolant
(Diesel)
It is normal to top up this fluid between two services.The check and top-up must only be done with the engine cold.A level of coolant that is too low risks causing major damage to the engine; the coolant level must be close to the "MAX" mark without ever
going above it.If the level is close to or below the "MIN" mark, it is essential to top it up.When the engine is hot, the temperature of the coolant is regulated by the fan.As the cooling system is pressurised, wait at least one hour after switching off the engine before carrying out any work.In order to avoid the risk of scalding if you need to top up in an emergency, wrap a cloth around
the cap and unscrew the cap by two turns to allow the pressure to drop.Once the pressure has dropped, remove the cap and top up to the required level.
(Electric)
WARNI NG
Do not top up the coolant.
If the level is close to or below the "MIN" mark, it is essential to contact any authorized Toyota retailer or Toyota authorized repairer, or any reliable repairer.
Screenwash fluid
Top up to the required level when necessary.
Fluid specification
The fluid must be topped up with a ready-to-use mixture.In winter (temperatures below zero), a liquid
containing an agent to prevent freezing must be used which is appropriate for the prevailing conditions, in order to protect the elements of the system (pump, tank, ducts, jets, etc.).
Page 218 of 360
218
WARNI NG
Filling with pure water is prohibited under all circumstances (risk of freezing, limestone deposits, etc.).
Diesel fuel additive (Diesel
with particle filter)
or On reaching the minimum level in the particle filter additive tank, this warning lamp comes on fixed, accompanied by an audible warning and a message warning that the additive level is too low.
Topping up
The topping up of this additive must be carried out quickly.Go to any authorized Toyota retailer or Toyota authorized repairer, or any reliable repairer.
AdBlue (Diesel engines)
An alert is triggered when the reserve level is reached.For more information on the Indicators and in particular the AdBlue range indicators, refer to the corresponding section.To avoid the vehicle being immobilised in accordance with regulations, you must top up the AdBlue tank.
For more information on AdBlue, and in particular the supply of AdBlue, refer to the corresponding section.
Checks
Unless otherwise indicated, check these components in accordance with the manufacturer's service schedule and according to your engine.Otherwise, have them checked by any authorized Toyota retailer or Toyota authorized repairer, or any reliable repairer.
WARNI NG
Only use products recommended by TOYOTA or products of equivalent quality and specification.In order to optimise the operation of components as important as those in the braking system, TOYOTA selects and offers very specific products.
12 V battery
The battery does not require any maintenance.However, check regularly that the terminals are correctly tightened (versions without quick release terminals) and that the connections are clean.
NOTIC E
For more information on the precautions to take before any work on the 12 V battery, refer to the corresponding section.
WARNI NG
Versions equipped with Stop & Start are fitted with a 12 V lead-acid battery of specific technology and specification.Its replacement should be carried out only by any authorized Toyota retailer or Toyota authorized repairer, or any reliable repairer.
Passenger compartment
filter
Depending on the environment and the use of the vehicle (e.g. dusty atmosphere, city driving), change it twice as often, if necessary.
NOTIC E
A clogged passenger compartment filter can adversely affect air conditioning system performance and generate undesirable odours.