warning light TOYOTA RAV4 2019 (in English) Owner's Manual
[x] Cancel search | Manufacturer: TOYOTA, Model Year: 2019, Model line: RAV4, Model: TOYOTA RAV4 2019Pages: 728, PDF Size: 21.09 MB
Page 113 of 728
1133-2. Opening, closing and locking the doors
3
Before driving
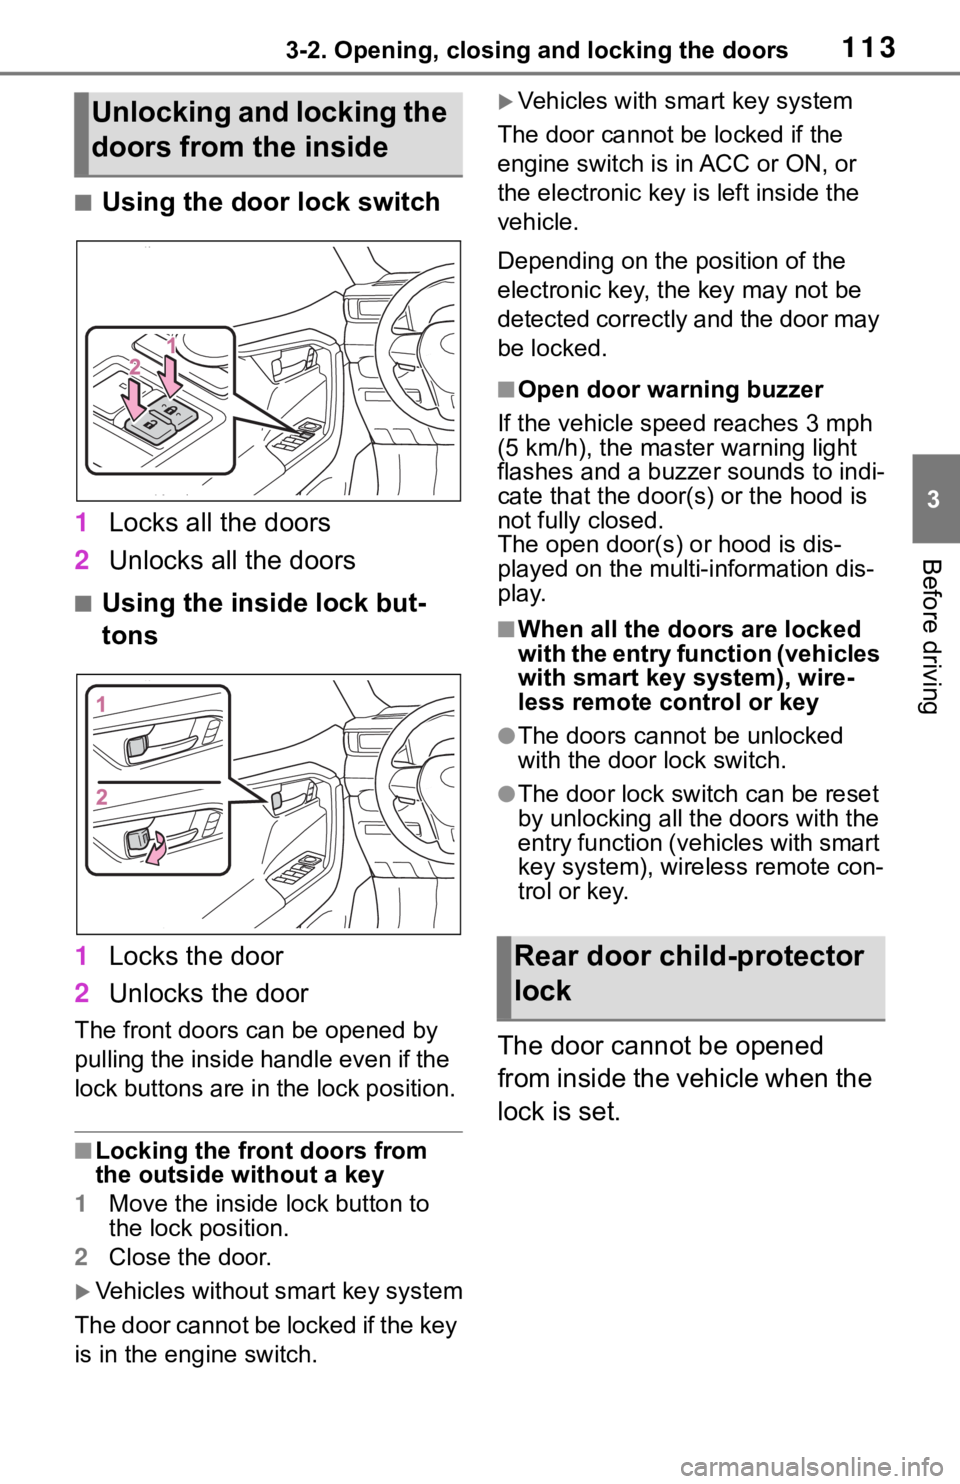
■Using the door lock switch
1 Locks all the doors
2 Unlocks all the doors
■Using the inside lock but-
tons
1 Locks the door
2 Unlocks the door
The front doors can be opened by
pulling the inside ha ndle even if the
lock buttons are in the lock position.
■Locking the front doors from
the outside without a key
1 Move the inside lock button to
the lock position.
2 Close the door.
Vehicles without smart key system
The door cannot be locked if the key
is in the engine switch.
Vehicles with smart key system
The door cannot be locked if the
engine switch is in ACC or ON, or
the electronic key is left inside the
vehicle.
Depending on the position of the
electronic key, the key may not be
detected correctly and the door may
be locked.
■Open door warning buzzer
If the vehicle speed reaches 3 mph
(5 km/h), the master warning light
flashes and a buzzer sounds to indi-
cate that the door( s) or the hood is
not fully closed.
The open door(s) or hood is dis-
played on the multi-information dis-
play.
■When all the doors are locked
with the entry function (vehicles
with smart key system), wire-
less remote control or key
●The doors cannot be unlocked
with the door lock switch.
●The door lock switch can be reset
by unlocking all the doors with the
entry function (vehicles with smart
key system), wireless remote con-
trol or key.
The door cannot be opened
from inside the vehicle when the
lock is set.
Unlocking and locking the
doors from the inside
Rear door child-protector
lock
Page 198 of 728
1984-2. Driving procedures
1Stop the vehicle completely.
2 If the parking brake is in man-
ual mode, set the parking
brake. ( P.204)
Check the parking brake indicator
is illuminated.
3 Shift the shift lever to P.
4 Press the engine switch
shortly and firmly.
The engine will stop, and the meter
display will be extinguished.
5Release the brake pedal and
check that “ACCESSORY” or
“IGNITION ON” is not shown
on the multi-information dis-
play.
WA R N I N G
■When starting the engine
Always start the e ngine while sit-
ting in the driver’s seat. Do not
depress the accelerator pedal
while starting the engine under
any circumstances.
Doing so may cause an accident
resulting in death or serious injury.
■Caution while driving
If engine failure o ccurs while the
vehicle is moving, do not lock or
open the doors until the vehicle
reaches a safe and complete
stop. Activation of the steering
lock in this circumstance may lead
to an accident, resulting in death
or serious injury.
NOTICE
■When starting the engine
●Do not race a cold engine.
●If the engine becomes difficult to
start or stalls frequently, have
your vehicle checked by your
Toyota dealer immediately.
■Symptoms indicating a mal-
function with the engine
switch
If the engine switch seems to be
operating somewh at differently
than usual, such as the switch
sticking slightly, there may be a
malfunction. Contact your Toyota
dealer immediately.
Stopping the engine
WA R N I N G
■Stopping the engine in an
emergency
●If you want to stop the engine in
an emergency while driving the
vehicle, press and hold the
engine switch for more than 2
seconds, or press it briefly 3
times or more in succession.
( P.612)
However, do not touch the
engine switch while driving
except in an emergency. Turn-
ing the engine off while driving
will not cause loss of steering or
braking control, but the power
assist to these s ystems will be
lost. This will make it more diffi-
cult to steer and brake, so you
should pull over and stop the
vehicle as soon as it is safe to
do so.
●If the engine switch is operated
while the vehicle is running, a
warning message will be shown
on the multi-information display
and a buzzer sounds.
●When restarting the engine after
an emergency shutdown, press
the engine switch shortly and
firmly.
Page 206 of 728
2064-2. Driving procedures
brake will be released, and
the parking brake indicator
light and parking brake lamp
will turn off.
When the shift position is
shifted to P, the parking brake
will be set, and the parking
brake indicator light and park-
ing brake lamp will turn on.
Operate the shift lever with the
vehicle stopped and the brake
pedal depressed.
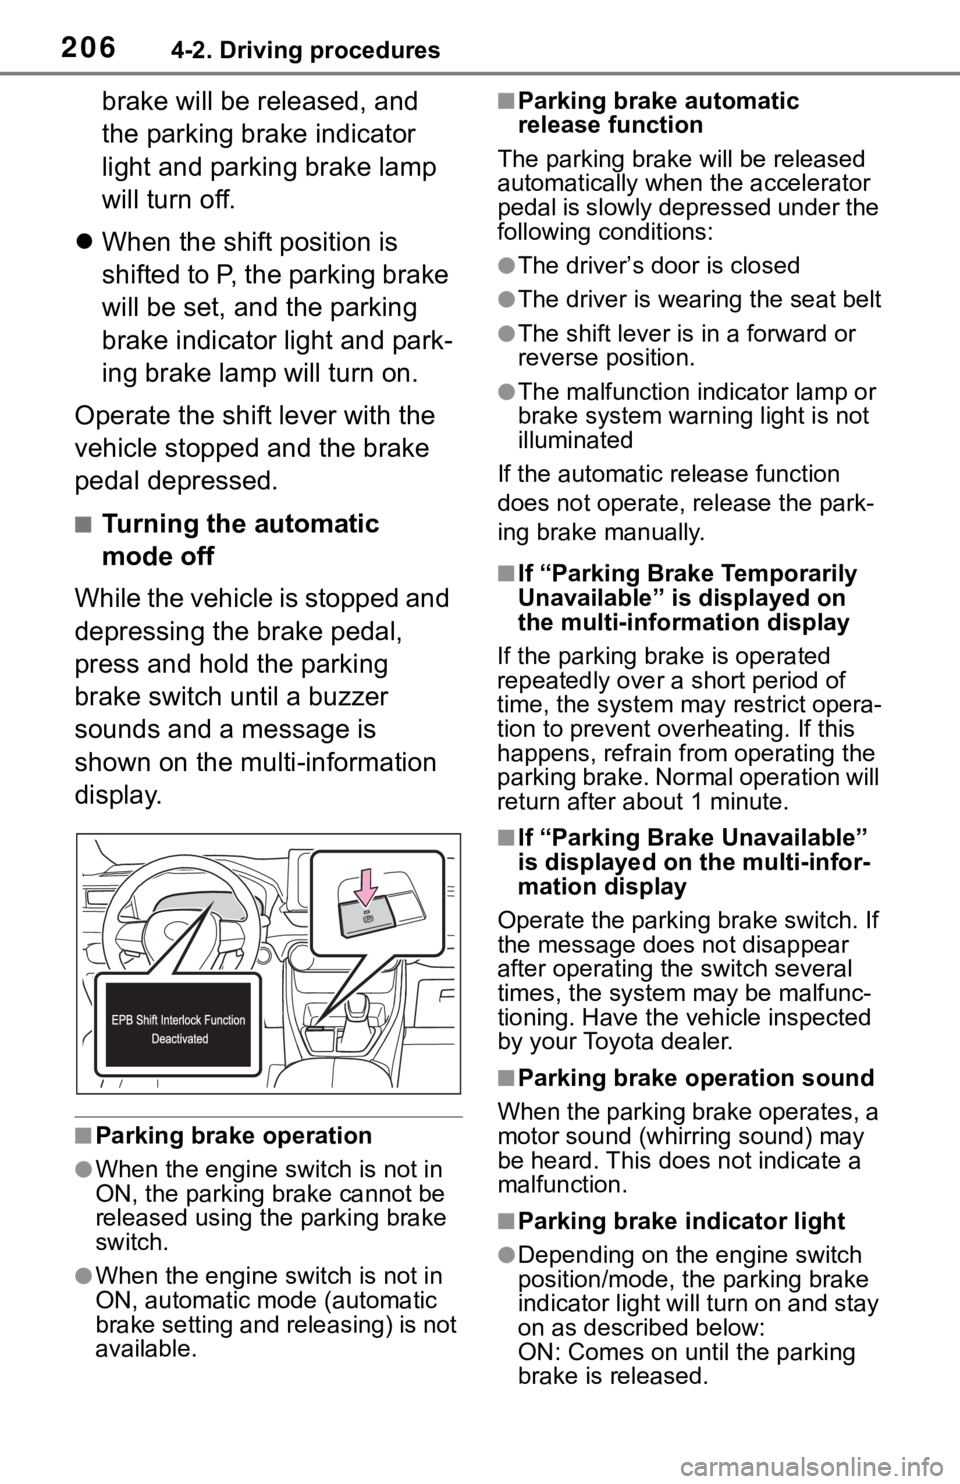
■Turning the automatic
mode off
While the vehicle is stopped and
depressing the brake pedal,
press and hold the parking
brake switch until a buzzer
sounds and a message is
shown on the multi-information
display.
■Parking brake operation
●When the engine switch is not in
ON, the parking brake cannot be
released using the parking brake
switch.
●When the engine switch is not in
ON, automatic mode (automatic
brake setting and releasing) is not
available.
■Parking brake automatic
release function
The parking brake will be released
automatically when the accelerator
pedal is slowly depressed under the
following conditions:
●The driver’s door is closed
●The driver is wearing the seat belt
●The shift lever is in a forward or
reverse position.
●The malfunction in dicator lamp or
brake system warning light is not
illuminated
If the automatic release function
does not operate, release the park-
ing brake manually.
■If “Parking Brake Temporarily
Unavailable” is displayed on
the multi-info rmation display
If the parking brake is operated
repeatedly over a short period of
time, the system may restrict opera-
tion to prevent ove rheating. If this
happens, refrain from operating the
parking brake. Normal operation will
return after about 1 minute.
■If “Parking Brake Unavailable”
is displayed on the multi-infor-
mation display
Operate the parking brake switch. If
the message does not disappear
after operating the switch several
times, the system may be malfunc-
tioning. Have the vehicle inspected
by your Toyota dealer.
■Parking brake operation sound
When the parking brake operates, a
motor sound (whirr ing sound) may
be heard. This does not indicate a
malfunction.
■Parking brake indicator light
●Depending on the engine switch
position/mode, the parking brake
indicator light will turn on and stay
on as described below:
ON: Comes on until the parking
brake is released.
Page 207 of 728
2074-2. Driving procedures
4
Driving
Not in ON: Stays on for approxi-
mately 15 seconds.
●When the engine switch is turned
off with the parking brake set, the
parking brake indicator light will
stay on for about 15 seconds. This
does not indicate a malfunction.
■When the parking brake switch
malfunctions
Automatic mode (automatic brake
setting and releas ing) will be turned
on automatically.
■Parking the vehicle
P. 1 7 1
■Parking brake engaged warning
buzzer
A buzzer will sound if the vehicle is
driven with the parking brake
engaged. “Parking Brake ON” is dis-
played on the multi-information dis-
play (with the v ehicle reaching a
speed of 5 km/h [3 mph]).
■If the brake system warning
light comes on
P. 6 2 2
■Usage in winter time
P. 3 6 8
WA R N I N G
■When parking the vehicle
Do not leave a child in the vehicle
alone. The parking brake may be
released unintentionally and there
is the danger of the vehicle mov-
ing that may lead to an accident
resulting in death or serious injury.
■Parking brake switch
Do not set any o bjects near the
parking brake switch. Objects
may interfere with the switch and
may lead the parking brake to
unexpectedly operate.
NOTICE
■When parking the vehicle
Before you leave the vehicle, shift
the shift position to P, set the park-
ing brake and make sure that the
vehicle does not move.
■When the system malfunc-
tions
Stop the vehicle in a safe place
and check the warning messages.
■When the parking brake can-
not be released due to a mal-
function
Driving the vehicle with the park-
ing brake set will lead to brake
components overheating, which
may affect braking performance
and increase brake wear. Have
the vehicle inspected by your Toy-
ota dealer immediately if this
occurs.
Page 208 of 728
2084-2. Driving procedures
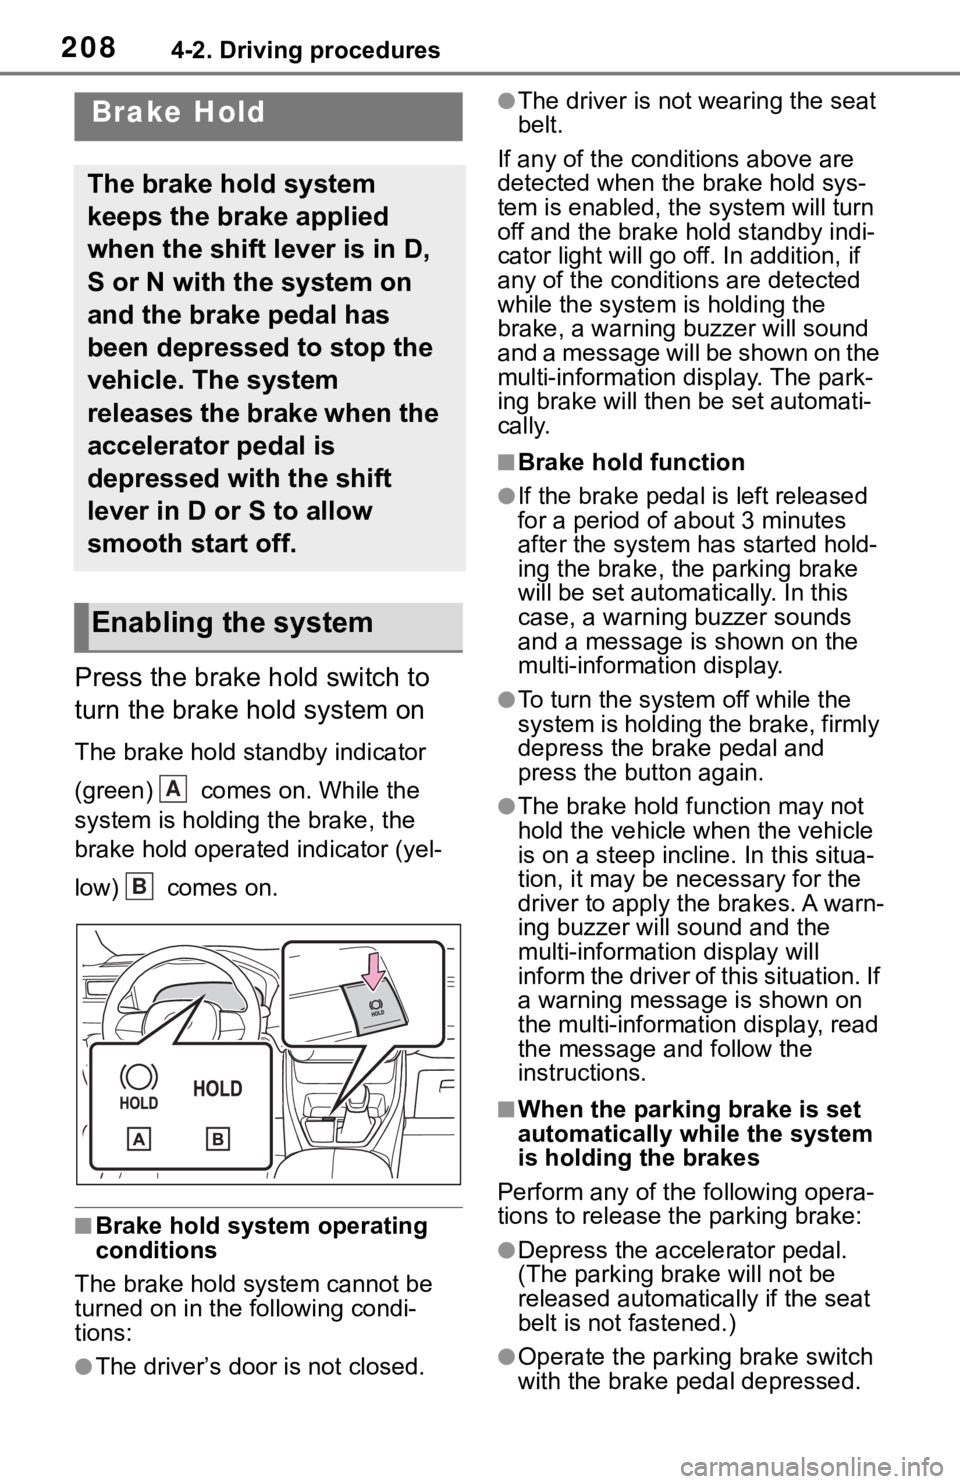
Press the brake hold switch to
turn the brake hold system on
The brake hold standby indicator
(green) comes on. While the
system is holding the brake, the
brake hold operated indicator (yel-
low) comes on.
■Brake hold system operating
conditions
The brake hold system cannot be
turned on in the following condi-
tions:
●The driver’s doo r is not closed.
●The driver is not wearing the seat
belt.
If any of the cond itions above are
detected when the brake hold sys-
tem is enabled, the system will turn
off and the brake hold standby indi-
cator light will go off. In addition, if
any of the conditions are detected
while the system is holding the
brake, a warning buzzer will sound
and a message will be shown on the
multi-information display. The park-
ing brake will then be set automati-
cally.
■Brake hold function
●If the brake pedal is left released
for a period of about 3 minutes
after the system has started hold-
ing the brake, the parking brake
will be set automatically. In this
case, a warning buzzer sounds
and a message is shown on the
multi-information display.
●To turn the system off while the
system is holding the brake, firmly
depress the brake pedal and
press the button again.
●The brake hold function may not
hold the vehicle when the vehicle
is on a steep incline. In this situa-
tion, it may be ne cessary for the
driver to apply the brakes. A warn-
ing buzzer will sound and the
multi-information display will
inform the driver of this situation. If
a warning message is shown on
the multi-information display, read
the message and follow the
instructions.
■When the parking brake is set
automatically while the system
is holding the brakes
Perform any of the following opera-
tions to release the parking brake:
●Depress the accelerator pedal.
(The parking brake will not be
released automatically if the seat
belt is not fastened.)
●Operate the parkin g brake switch
with the brake pedal depressed.
Brake Hold
The brake hold system
keeps the brake applied
when the shift lever is in D,
S or N with the system on
and the brake pedal has
been depressed to stop the
vehicle. The system
releases the brake when the
accelerator pedal is
depressed with the shift
lever in D or S to allow
smooth start off.
Enabling the system
A
B
Page 209 of 728
2094-2. Driving procedures
4
Driving
Make sure that the parking brake
indicator light goes off. ( P.204)
■When an inspection at your
Toyota dealer is necessary
When the brake hold standby indi-
cator (green ) does not illuminate
even when the brake hold switch is
pressed with the brake hold system
operating conditions met, the sys-
tem may be malfunctioning. Have
the vehicle inspected at your Toyota
dealer.
■If “Brake Hold Malfunction
Press Brake to Deactivate Visit
Your Dealer” or “Brake Hold
Malfunction Visit Your Dealer”
is displayed on the multi-infor-
mation display
The system may be malfunctioning.
Have the vehicle inspected by your
Toyota dealer.
■Warning messages and buzzers
Warning messages and buzzers are
used to indicate a system malfunc-
tion or to inform the driver of the
need for caution. If a warning mes-
sage is shown on th e multi-informa-
tion display, read the message and
follow the instructions.
■If the brake hold operated indi-
cator flashes
P. 6 2 7
WA R N I N G
■When the vehicle is on a
steep incline
When using the brake hold sys-
tem on a steep in cline, exercise
caution. The brake hold function
may not hold the vehicle in such a
situation.
■When stopped on a slippery
road
The system cannot stop the vehi-
cle when the gripping ability of the
tires has been exceeded. Do not
use the system w hen stopped on
a slippery road.
NOTICE
■When parking the vehicle
The brake hold system is not
designed for use when parking
the vehicle for a long period of
time. Turning the engine switch off
while the system is holding the
brake may release the brake,
which would cause the vehicle to
move. When operating the engine
switch, depress the brake pedal,
shift the shift lever to P and set
the parking brake.
Page 229 of 728
2294-5. Using the driving support systems
4
Driving
■If a warning message is dis-
played on the multi-information
display
A system may be temporarily
unavailable or there may be a mal-
function in the system.
●In the following situations, perform
the actions specif ied in the table.
When the normal operating condi-
tions are detecte d, the message
will disappear and the system will
become operational.
If the message does not disappear,
contact your Toyota dealer.
SituationActions
When the area
around a sensor
is covered with
dirt, moisture
(fogged up, cov-
ered with con-
densation, ice,
etc.), or other
foreign matter
To clean the part
of the wind-
shield in front of
the front camera,
use the wind-
shield wipers or
the windshield
defogger of the
air conditioning
system ( P.505,
512).When the tem-
perature around
the front camera
is outside of the
operational
range, such as
when the vehi-
cle is in the sun
or in an
extremely cold
environment
If the front cam-
era is hot, such
as after the vehi-
cle had been
parked in the
sun, use the air
conditioning sys-
tem to decrease
the temperature
around the front
camera.
If a sunshade
was used when
the vehicle was
parked, depend-
ing on its type,
the sunlight
reflected from
the surface of
the sunshade
may cause the
temperature of
the front camera
to become
excessively high.
If the front cam-
era is cold, such
as after the vehi-
cle is parked in
an extremely
cold environ-
ment, use the air
conditioning sys-
tem to increase
the temperature
around the front
camera.
SituationActions
Page 230 of 728
2304-5. Using the driving support systems
●In the following situations, if the
situation has changed (or the
vehicle has been driven for some
time) and the normal operating
conditions are detected, the mes-
sage will disappea r and the sys-
tem will become o perational.
If the message does not disappear,
contact your Toyota dealer.
• When the temperature around the radar sensor is outside of the
operational range, such as when
the vehicle is in the sun or in an
extremely cold environment
• When the front camera cannot
detect objects in front of the vehi-
cle, such as when driving in the
dark, snow, or fog, or when bright
lights are shinin g into the front
camera
The system can detect the fol-
lowing:
Vehicles
Bicyclists
Pedestrians
The area in front
of the front cam-
era is
obstructed, such
as when the
hood is open or
a sticker is
attached to the
part of the wind-
shield in front of
the front camera.
Close the hood,
remove the
sticker, etc. to
clear the
obstruction.
SituationActionsPCS (Pre-Collision Sys-
tem)
The pre-collision system
uses a radar sensor and
front camera to detect
objects ( P.229) in front of
the vehicle. When the sys-
tem determines that the
possibility of a frontal colli-
sion with an object is high,
a warning operates to urge
the driver to take evasive
action and the potential
brake pressure is increased
to help the driver avoid the
collision. If the system
determines that the possi-
bility of a frontal collision
with an object is extremely
high, the brakes are auto-
matically applied to help
avoid the collision or help
reduce the impact of the
collision.
The pre-collision system can
be disabled/enabled and the
warning timing can be
changed. ( P.232)
Detectable objects
Page 233 of 728
2334-5. Using the driving support systems
4
Driving
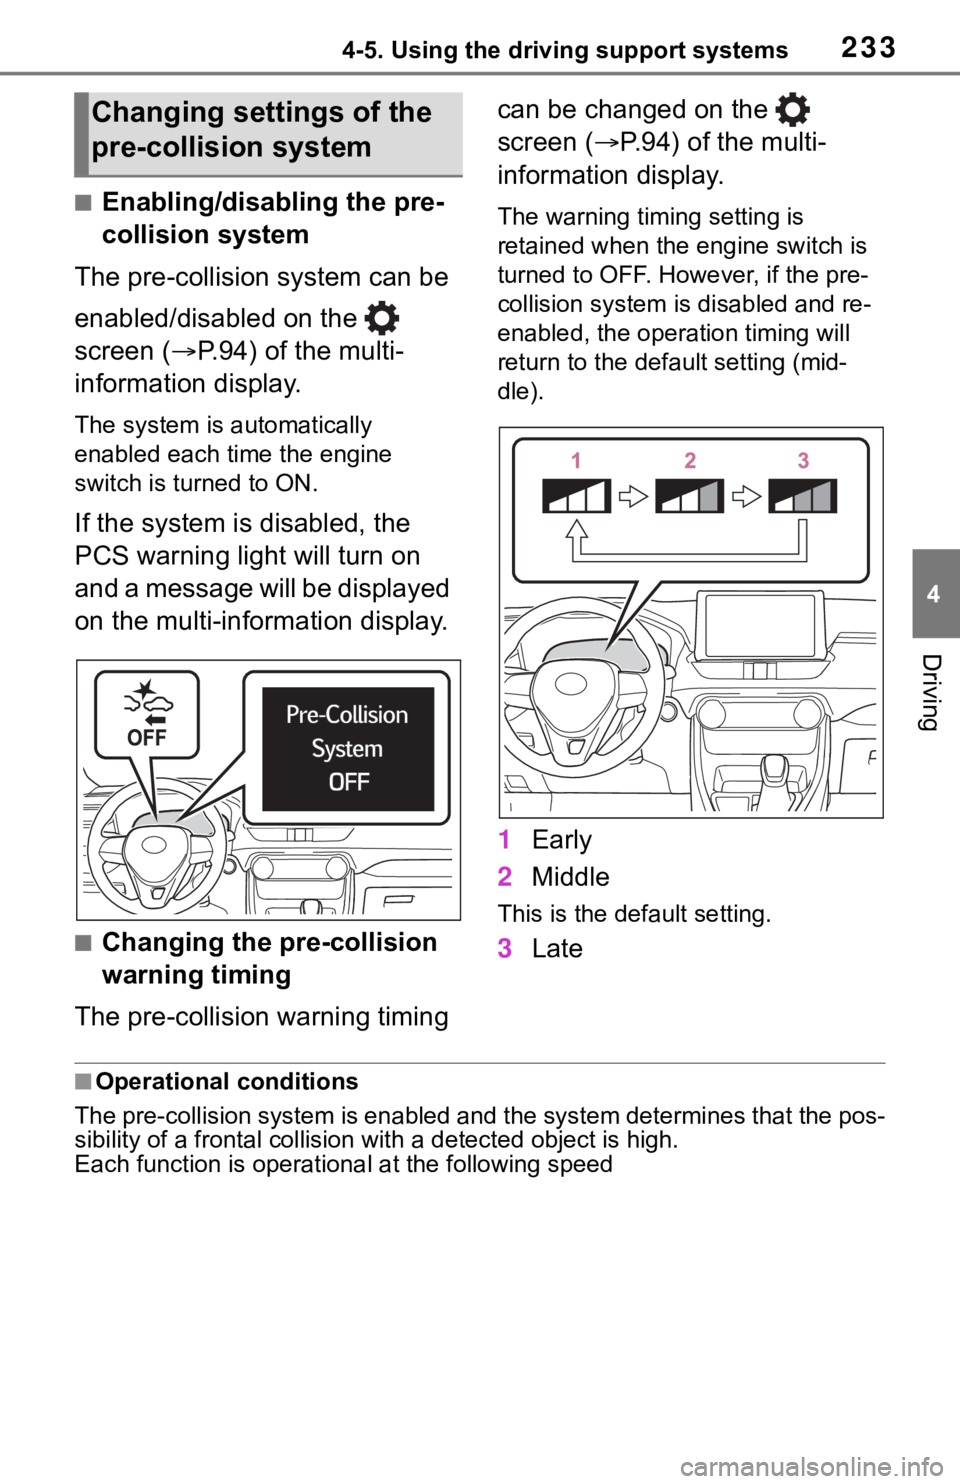
■Enabling/disabling the pre-
collision system
The pre-collision system can be
enabled/disabled on the
screen ( P.94) of the multi-
information display.
The system is a utomatically
enabled each time the engine
switch is turned to ON.
If the system is disabled, the
PCS warning light will turn on
and a message will be displayed
on the multi-information display.
■Changing the pre-collision
warning timing
The pre-collision warning timing can be changed on the
screen (
P.94) of the multi-
information display.
The warning timing setting is
retained when the engine switch is
turned to OFF. However, if the pre-
collision system is disabled and re-
enabled, the operation timing will
return to the default setting (mid-
dle).
1 Early
2 Middle
This is the default setting.
3Late
■Operational conditions
The pre-collision syst em is enabled and the system determines t hat the pos-
sibility of a frontal c ollision with a detected object is high.
Each function is operatio nal at the following speed
Changing settings of the
pre-collision system
Page 250 of 728
2504-5. Using the driving support systems
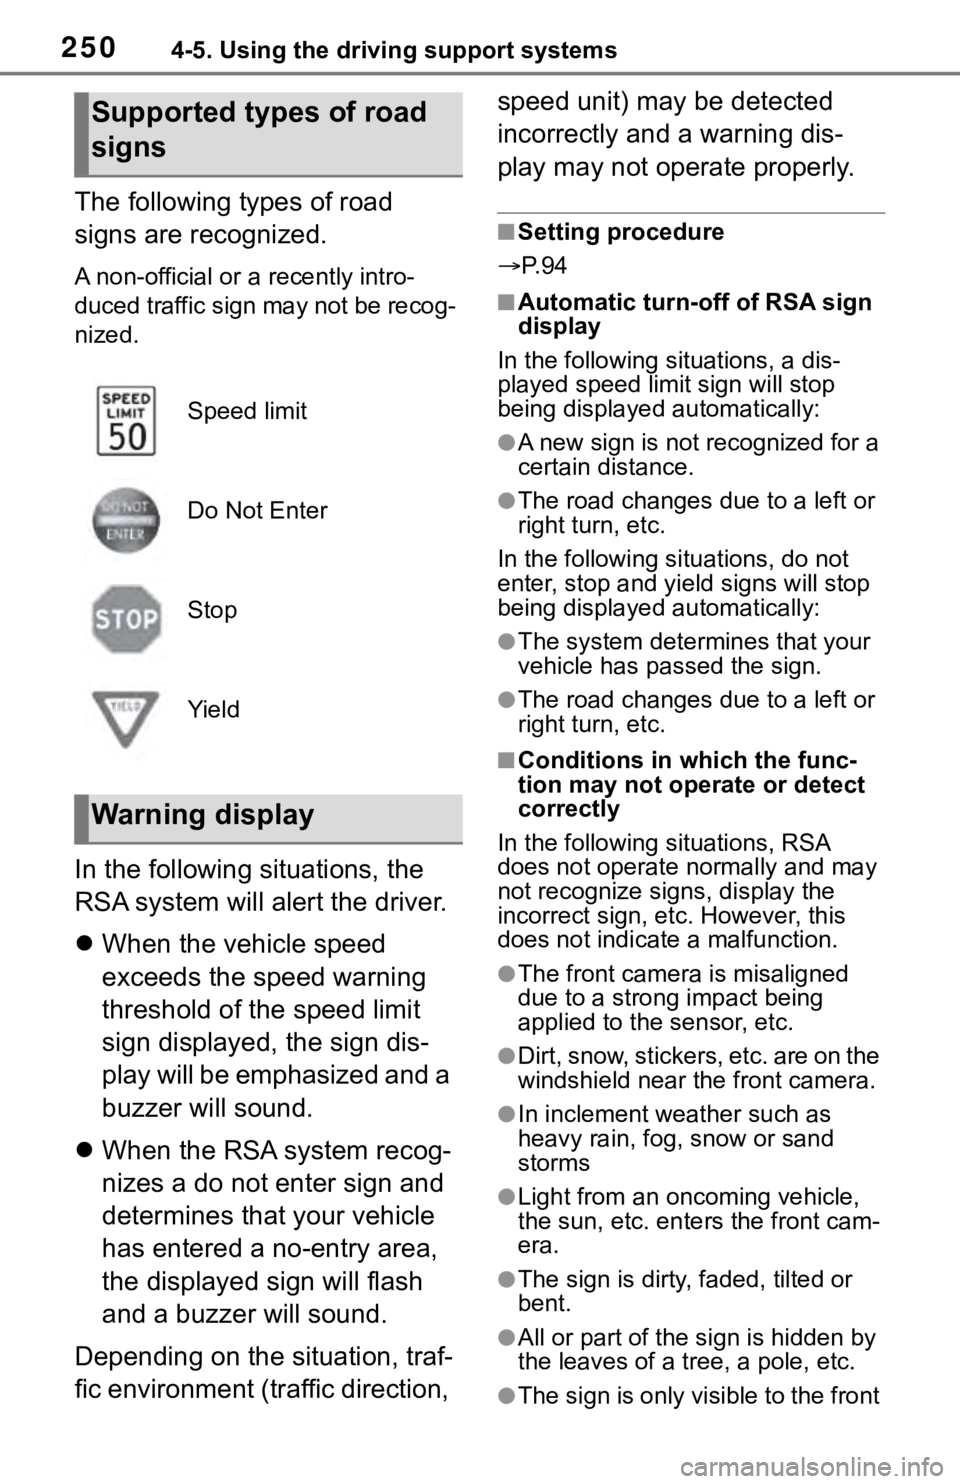
The following types of road
signs are recognized.
A non-official or a recently intro-
duced traffic sign may not be recog-
nized.
In the following situations, the
RSA system will alert the driver.
When the vehicle speed
exceeds the speed warning
threshold of the speed limit
sign displayed, the sign dis-
play will be emphasized and a
buzzer will sound.
When the RSA system recog-
nizes a do not enter sign and
determines that your vehicle
has entered a no-entry area,
the displayed sign will flash
and a buzzer will sound.
Depending on the situation, traf-
fic environment (traffic direction, speed unit) may be detected
incorrectly and a warning dis-
play may not operate properly.
■Setting procedure
P. 9 4
■Automatic turn-off of RSA sign
display
In the following si tuations, a dis-
played speed limit sign will stop
being displayed automatically:
●A new sign is not recognized for a
certain distance.
●The road changes due to a left or
right turn, etc.
In the following situ ations, do not
enter, stop and yie ld signs will stop
being displayed automatically:
●The system determines that your
vehicle has passed the sign.
●The road changes due to a left or
right turn, etc.
■Conditions in which the func-
tion may not operate or detect
correctly
In the following si tuations, RSA
does not operate normally and may
not recognize signs, display the
incorrect sign, etc. However, this
does not indicate a malfunction.
●The front camera is misaligned
due to a strong impact being
applied to the sensor, etc.
●Dirt, snow, stickers, etc. are on the
windshield near the front camera.
●In inclement weather such as
heavy rain, fog, snow or sand
storms
●Light from an oncoming vehicle,
the sun, etc. ente rs the front cam-
era.
●The sign is dirty, faded, tilted or
bent.
●All or part of the sign is hidden by
the leaves of a tree, a pole, etc.
●The sign is only visible to the front
Supported types of road
signs
Speed limit
Do Not Enter
Stop
Yield
Warning display