engine TOYOTA RAV4 2022 Owners Manual
[x] Cancel search | Manufacturer: TOYOTA, Model Year: 2022, Model line: RAV4, Model: TOYOTA RAV4 2022Pages: 748, PDF Size: 22.93 MB
Page 209 of 748
2094-3. Operating the lights and wipers
4
Driving
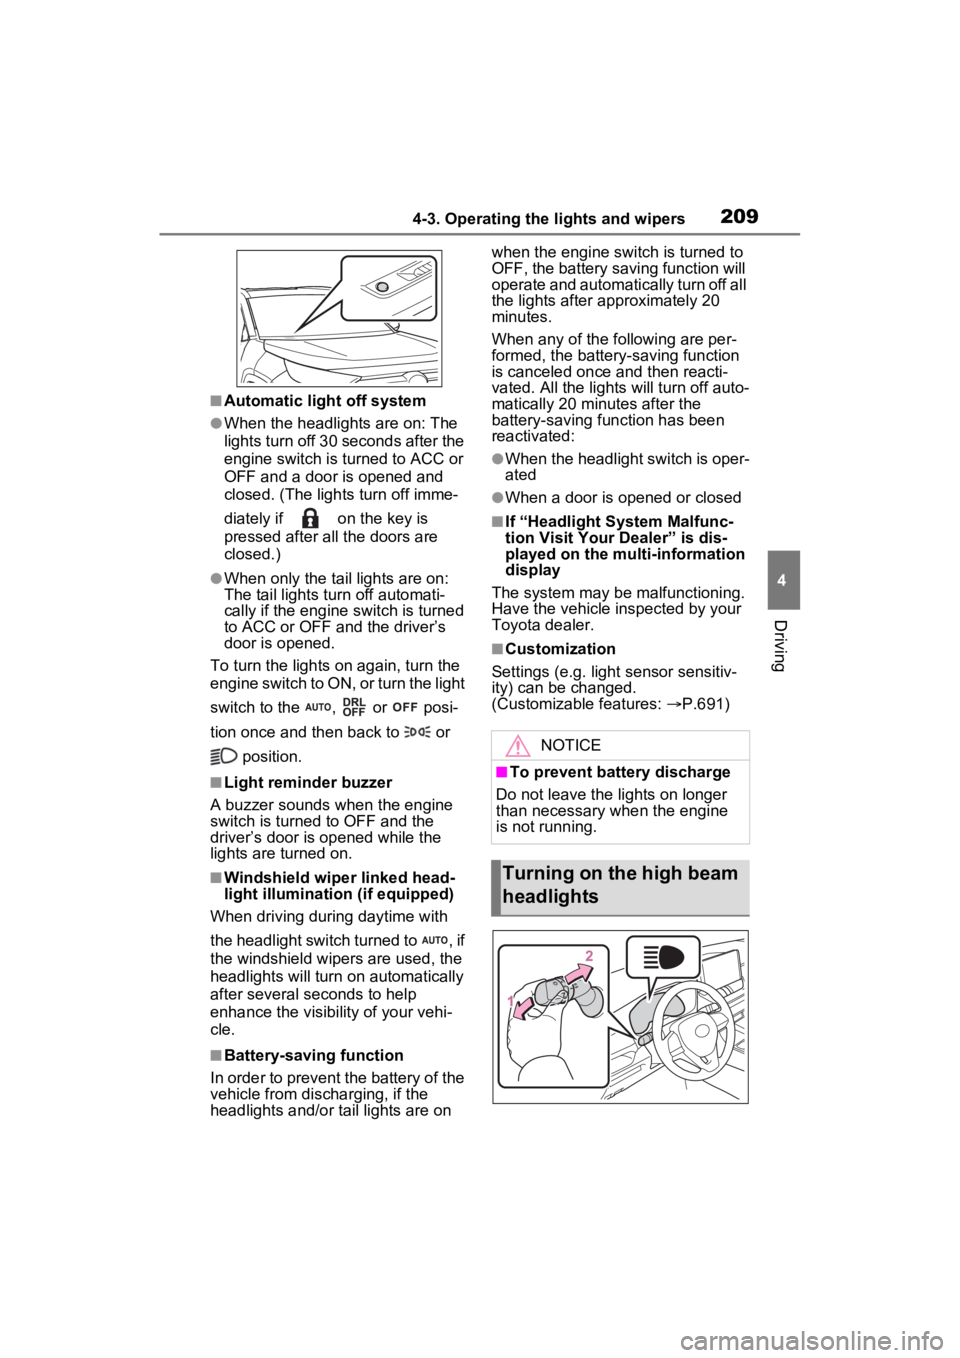
■Automatic light off system
●When the headlights are on: The
lights turn off 30 seconds after the
engine switch is turned to ACC or
OFF and a door is opened and
closed. (The lights turn off imme-
diately if on the key is
pressed after all the doors are
closed.)
●When only the tail lights are on:
The tail lights turn off automati-
cally if the engine switch is turned
to ACC or OFF and the driver’s
door is opened.
To turn the lights on again, turn the
engine switch to ON, or turn the light
switch to the , or posi-
tion once and then back to or
position.
■Light reminder buzzer
A buzzer sounds when the engine
switch is turned to OFF and the
driver’s door is opened while the
lights are turned on.
■Windshield wiper linked head-
light illumination (if equipped)
When driving during daytime with
the headlight switch turned to , if
the windshield wipers are used, the
headlights will turn on automatically
after several seconds to help
enhance the visibility of your vehi-
cle.
■Battery-saving function
In order to prevent the battery of the
vehicle from discharging, if the
headlights and/or t ail lights are on when the engine switch is turned to
OFF, the battery saving function will
operate and automatically turn off all
the lights after approximately 20
minutes.
When any of the following are per-
formed, the battery-saving function
is canceled once and then reacti-
vated. All the light
s will turn off auto-
matically 20 minutes after the
battery-saving function has been
reactivated:
●When the headlight switch is oper-
ated
●When a door is opened or closed
■If “Headlight System Malfunc-
tion Visit Your Dealer” is dis-
played on the multi-information
display
The system may be malfunctioning.
Have the vehicle inspected by your
Toyota dealer.
■Customization
Settings (e.g. light sensor sensitiv-
ity) can be changed.
(Customizable features: P.691)
NOTICE
■To prevent battery discharge
Do not leave the lights on longer
than necessary w hen the engine
is not running.
Turning on the high beam
headlights
Page 212 of 748
2124-3. Operating the lights and wipers
fog, mist, ice, dirt, etc.
• The windshield is cracked or dam- aged
• The front camera is deformed or
dirty
• When the temperature of the front
camera is extremely high
• Surrounding brightness levels are equal to those of h eadlights, tail
lights or fog lights
• When headlights or tail lights of vehicles ahead are turned off,
dirty, changing color, or not aimed
properly
• When the vehicle is hit by water,
snow, dust, etc. fr om a preceding
vehicle
• When driving thr ough an area of
intermittently changing brightness
and darkness
• When frequently and repeatedly
driving ascending/descending
roads, or roads with rough, bumpy
or uneven surfaces (such as
stone-paved roads, gravel roads,
etc.)
• When frequently and repeatedly
taking curves or driving on a wind-
ing road
• There is a highly reflective object
ahead of the vehicle, such as a
sign or mirror
• The back of a vehicle ahead is
highly reflective, such as a con-
tainer on a truck
• The vehicle’s headlights are dam-
aged or dirty, or are not aimed
properly
• The vehicle is listing or titling due
to a flat tire, a trailer being towed,
etc.
• The high beams and low beams
are repeatedly being switched
between in an abnormal manner
• The driver believes that the high
beams may be causing problems
or distress to other drivers or
pedestrians nearby
■If “Headlight System Malfunc-
tion Visit Your D ealer” is dis-
played on the multi-information
display
The system may be malfunctioning. Have the vehicle inspected by your
Toyota dealer.
■Temporarily lowering sensor
sensitivity
The sensitivity of the sensor can be
temporarily lowered.
1 Turn the engine switch to OFF
while the following conditions are
met.
●The headlight switch is in or
position.
●The headlight switch lever is in
high beam position.
●Automatic High Beam switch is
on.
2 Turn the engine switch to ON.
3 Within 60 second s after step 2,
repeat pulling the headlight
switch lever to the original posi-
tion then pushing it to the high
beam position qui ckly 10 times,
then leave the lever in the origi-
nal position.
4 If the sensitivity is changed, the
Automatic High Beam indicator
is turn on and off 3 times.
Automatic High Beam (headlights)
may turn on even when the vehicle
is stopped.
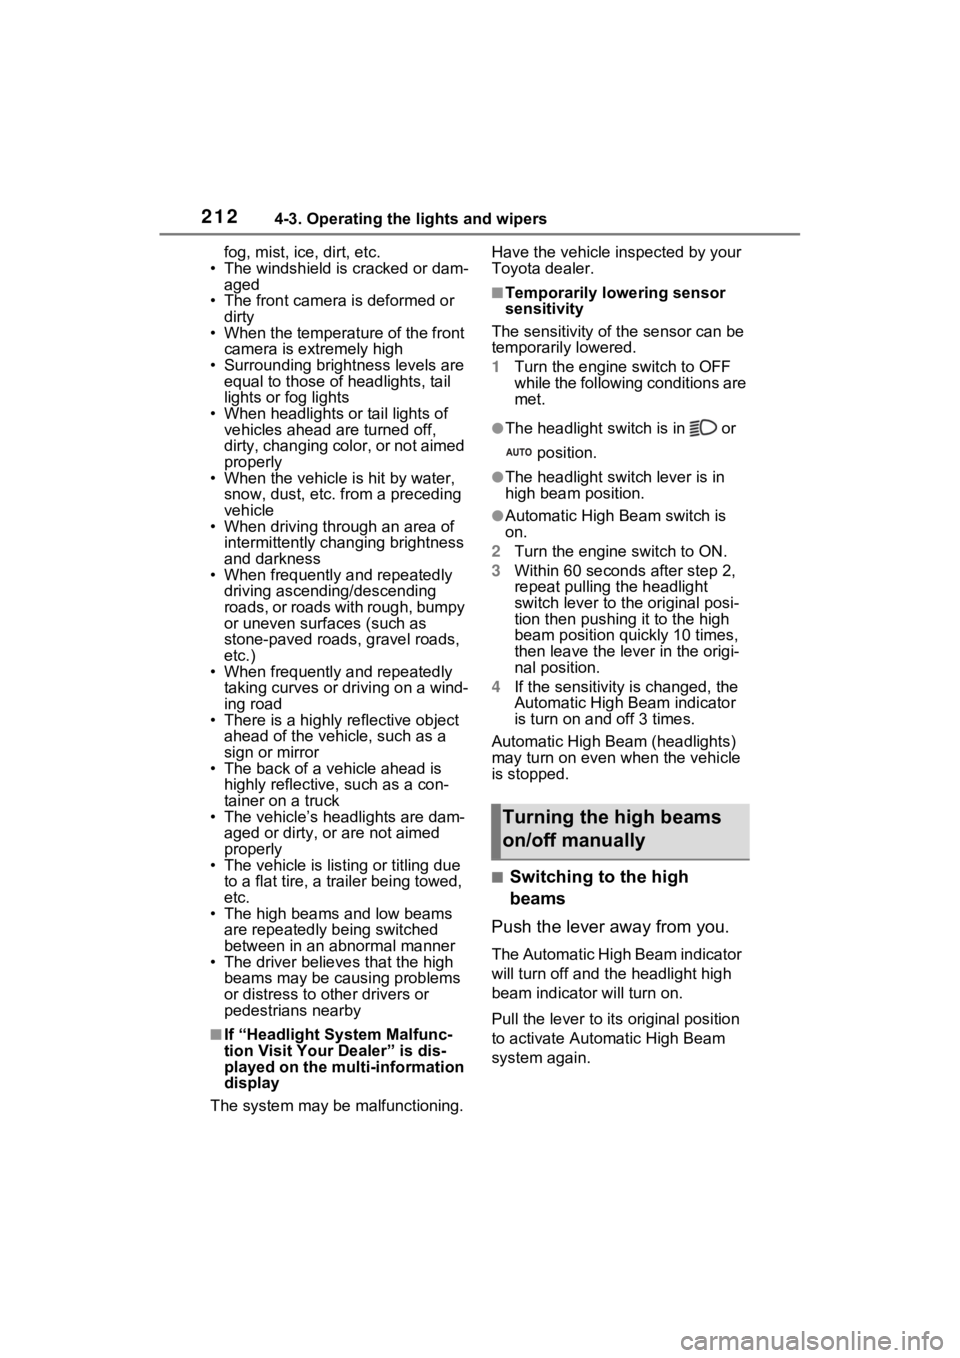
■Switching to the high
beams
Push the lever away from you.
The Automatic High Beam indicator
will turn off and the headlight high
beam indicator will turn on.
Pull the lever to its original position
to activate Automatic High Beam
system again.
Turning the high beams
on/off manually
Page 216 of 748
2164-3. Operating the lights and wipers
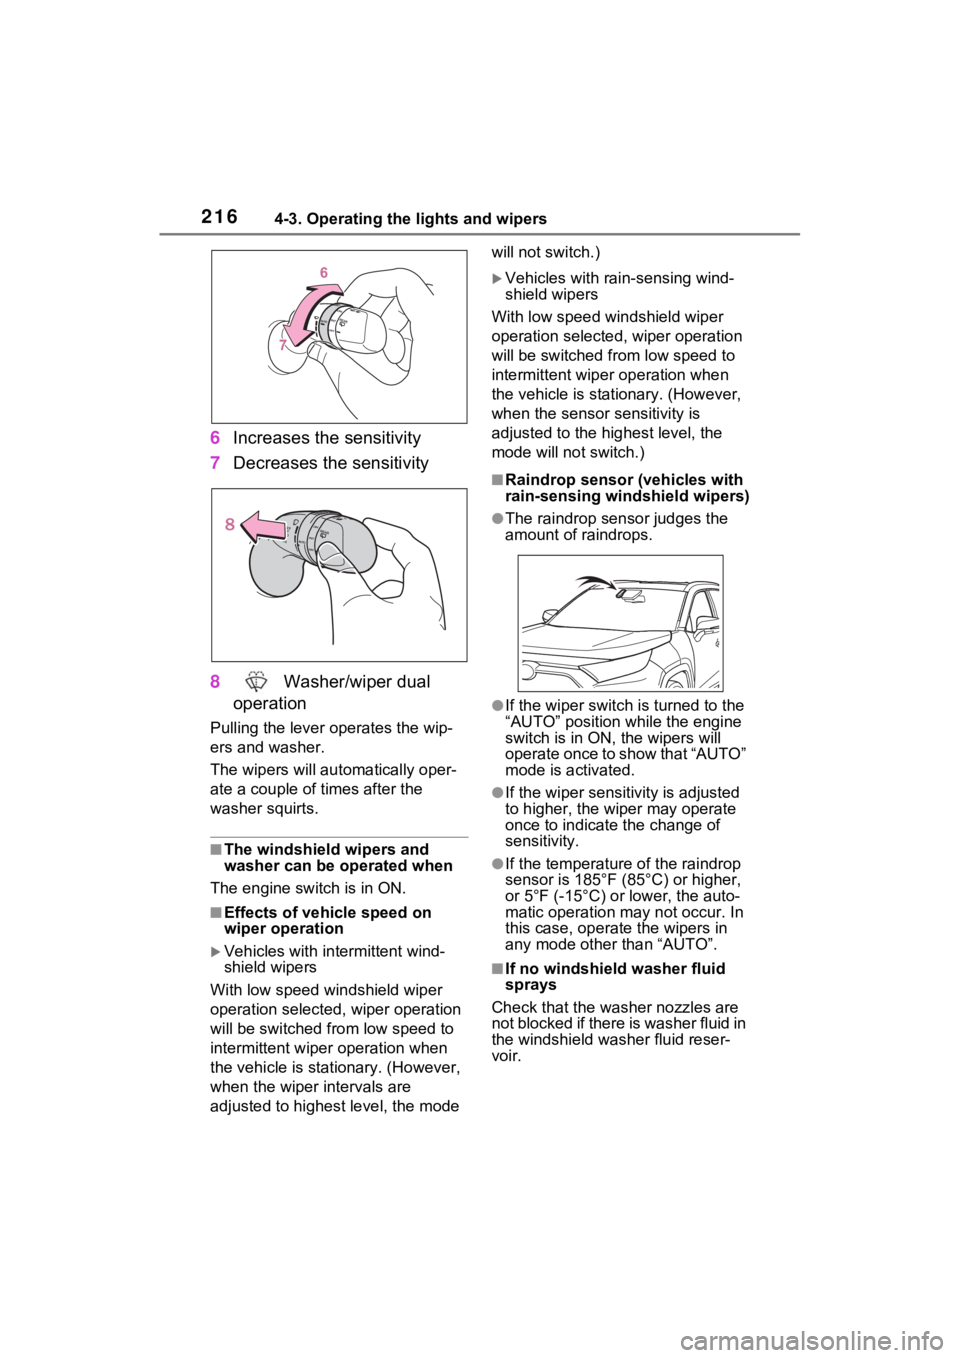
6Increases the sensitivity
7 Decreases the sensitivity
8 Washer/wiper dual
operation
Pulling the lever o perates the wip-
ers and washer.
The wipers will au tomatically oper-
ate a couple of times after the
washer squirts.
■The windshield wipers and
washer can be operated when
The engine switch is in ON.
■Effects of vehicle speed on
wiper operation
Vehicles with in termittent wind-
shield wipers
With low speed windshield wiper
operation selected, wiper operation
will be switched from low speed to
intermittent wiper operation when
the vehicle is stationary. (However,
when the wiper intervals are
adjusted to highest level, the mode will not switch.)
Vehicles with ra
in-sensing wind-
shield wipers
With low speed windshield wiper
operation selected, wiper operation
will be switched fro m low speed to
intermittent wiper operation when
the vehicle is stationary. (However,
when the sensor sensitivity is
adjusted to the highest level, the
mode will not switch.)
■Raindrop sensor (vehicles with
rain-sensing windshield wipers)
●The raindrop sensor judges the
amount of raindrops.
●If the wiper switch i s turned to the
“AUTO” position while the engine
switch is in ON, the wipers will
operate once to show that “AUTO”
mode is activated.
●If the wiper sensitivity is adjusted
to higher, the wiper may operate
once to indicate the change of
sensitivity.
●If the temperature of the raindrop
sensor is 185°F (85°C) or higher,
or 5°F (-15°C) or lower, the auto-
matic operation ma y not occur. In
this case, operate the wipers in
any mode other than “AUTO”.
■If no windshield washer fluid
sprays
Check that the washer nozzles are
not blocked if there is washer fluid in
the windshield washer fluid reser-
voir.
Page 217 of 748
2174-3. Operating the lights and wipers
4
Driving
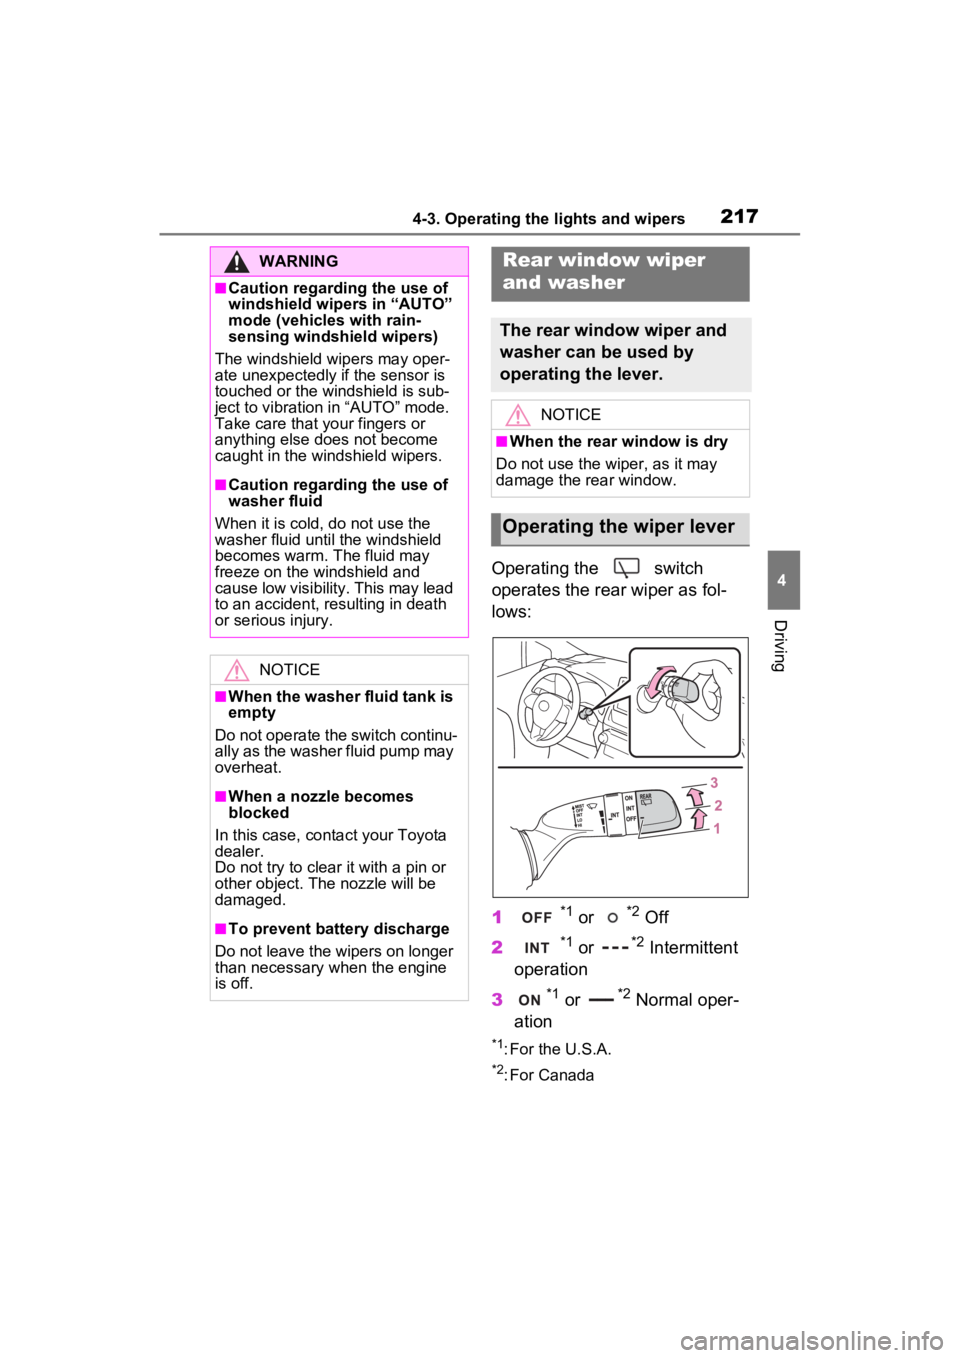
Operating the switch
operates the rear wiper as fol-
lows:
1
*1 or *2 Off
2
*1 or *2 Intermittent
operation
3
*1 or *2 Normal oper-
ation
*1: For the U.S.A.
*2: For Canada
WARNING
■Caution regarding the use of
windshield wipers in “AUTO”
mode (vehicles with rain-
sensing windshield wipers)
The windshield wipers may oper-
ate unexpectedly if the sensor is
touched or the windshield is sub-
ject to vibration in “AUTO” mode.
Take care that y our fingers or
anything else does not become
caught in the windshield wipers.
■Caution regarding the use of
washer fluid
When it is cold, do not use the
washer fluid until the windshield
becomes warm. The fluid may
freeze on the windshield and
cause low visibility. This may lead
to an accident, resulting in death
or serious injury.
NOTICE
■When the washer fluid tank is
empty
Do not operate the switch continu-
ally as the washer fluid pump may
overheat.
■When a nozzle becomes
blocked
In this case, conta ct your Toyota
dealer.
Do not try to clear it with a pin or
other object. The nozzle will be
damaged.
■To prevent battery discharge
Do not leave the wipers on longer
than necessary when the engine
is off.
Rear window wiper
and washer
The rear window wiper and
washer can be used by
operating the lever.
NOTICE
■When the rear window is dry
Do not use the wiper, as it may
damage the rear window.
Operating the wiper lever
Page 218 of 748
2184-3. Operating the lights and wipers
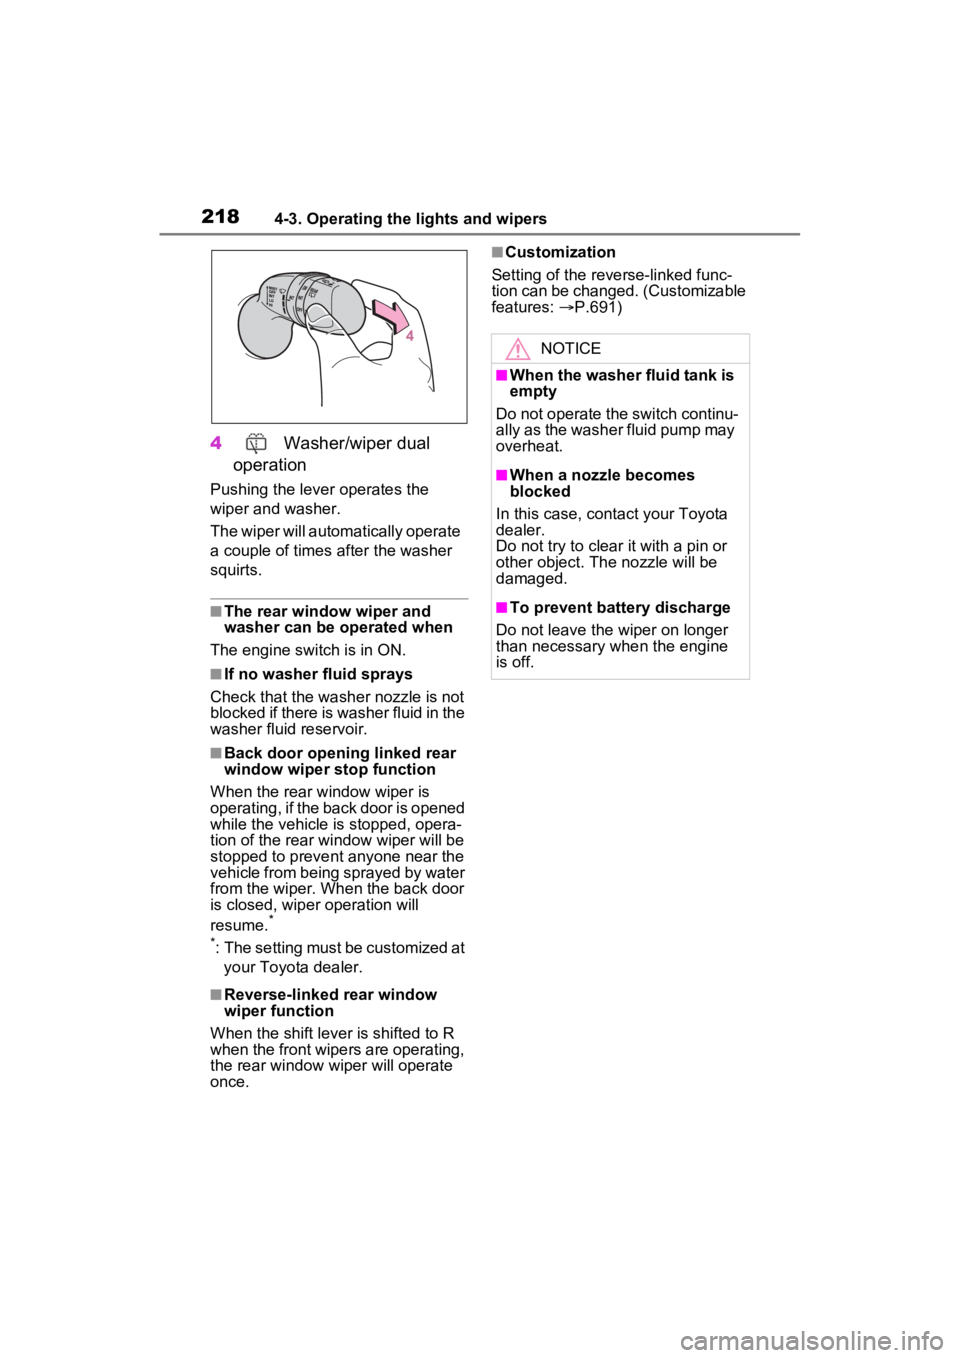
4 Washer/wiper dual
operation
Pushing the lever operates the
wiper and washer.
The wiper will automatically operate
a couple of times after the washer
squirts.
■The rear window wiper and
washer can be operated when
The engine switch is in ON.
■If no washer fluid sprays
Check that the washer nozzle is not
blocked if there is washer fluid in the
washer fluid reservoir.
■Back door opening linked rear
window wiper stop function
When the rear w indow wiper is
operating, if the back door is opened
while the vehicle is stopped, opera-
tion of the rear window wiper will be
stopped to prevent anyone near the
vehicle from being sprayed by water
from the wiper. When the back door
is closed, wiper operation will
resume.
*
*
: The setting must be customized at your Toyota dealer.
■Reverse-linked rear window
wiper function
When the shift lever is shifted to R
when the front wipers are operating,
the rear window wiper will operate
once.
■Customization
Setting of the reverse-linked func-
tion can be changed. (Customizable
features: P.691)
NOTICE
■When the washer fluid tank is
empty
Do not operate the switch continu-
ally as the washer fluid pump may
overheat.
■When a nozzle becomes
blocked
In this case, contact your Toyota
dealer.
Do not try to clear it with a pin or
other object. The nozzle will be
damaged.
■To prevent battery discharge
Do not leave the wiper on longer
than necessary w hen the engine
is off.
Page 219 of 748
2194-4. Refueling
4
Driving
4-4.Refueling
Close all the doors and win-
dows, and turn the engine
switch to OFF.
Confirm the type of fuel.
■Fuel types
P.672
■Fuel tank opening for unleaded
gasoline
To help prevent incorrect fueling,
your vehicle has a fuel tank opening
that only accommodates the spe-
cial nozzle on unle aded fuel pumps.
■If the malfunction indicator
lamp illuminates
The malfunction indicator lamp may
illuminate erroneous ly if refueling is
performed repeatedly when the fuel
tank is nearly full.
Opening the fuel tank
cap
Perform the following steps
to open the fuel tank cap:
Before refueling the vehi-
cle
WARNING
■When refueling the vehicle
Observe the following precautions
while refueling the vehicle. Failure
to do so may result in death or
serious injury.
●After exiting the vehicle and
before opening the fuel door,
touch an unpainted metal sur-
face to discharge any static
electricity. It is important to dis-
charge static electricity before
refueling because sparks result-
ing from static electricity can
cause fuel vapors to ignite while
refueling.
●Always hold the grips on the
fuel tank cap and turn it slowly
to remove it.
A whooshing sound may be
heard when the f uel tank cap is
loosened. Wait until the sound
cannot be heard before fully
removing the cap. In hot
weather, pressurized fuel may
spray out of the filler neck and
cause injury.
●Do not allow anyone that has
not discharged static electricity
from their body to come close to
an open fuel tank.
●Do not inhale vaporized fuel.
Fuel contains substances that
are harmful if inhaled.
●Do not smoke while refueling
the vehicle.
Doing so may cause the fuel to
ignite and cause a fire.
●Do not return to the vehicle or
touch any person or object that
is statically charged. This may
cause static electricity to build
up, resulting in a possible igni-
tion hazard.
Page 220 of 748
2204-4. Refueling
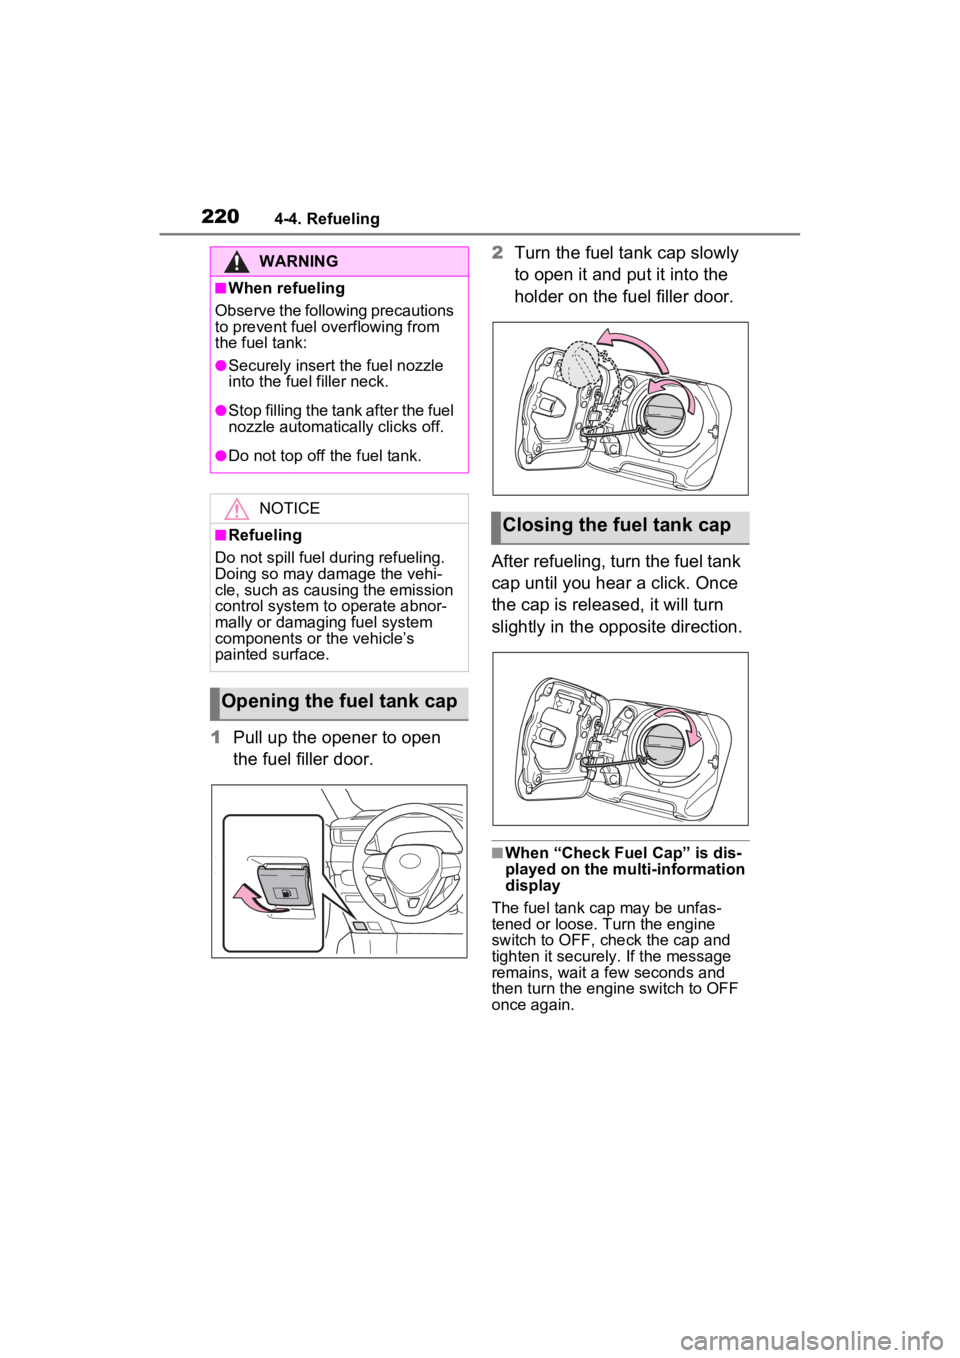
1Pull up the opener to open
the fuel filler door. 2
Turn the fuel tank cap slowly
to open it and put it into the
holder on the fuel filler door.
After refueling, turn the fuel tank
cap until you hear a click. Once
the cap is released, it will turn
slightly in the opposite direction.
■When “Check Fuel Cap” is dis-
played on the multi-information
display
The fuel tank cap may be unfas-
tened or loose. Turn the engine
switch to OFF, check the cap and
tighten it securely. If the message
remains, wait a few seconds and
then turn the engine switch to OFF
once again.
WARNING
■When refueling
Observe the following precautions
to prevent fuel overflowing from
the fuel tank:
●Securely insert the fuel nozzle
into the fuel filler neck.
●Stop filling the tank after the fuel
nozzle automatically clicks off.
●Do not top off the fuel tank.
NOTICE
■Refueling
Do not spill fuel during refueling.
Doing so may damage the vehi-
cle, such as causing the emission
control system to operate abnor-
mally or damaging fuel system
components or the vehicle’s
painted surface.
Opening the fuel tank cap
Closing the fuel tank cap
Page 229 of 748
2294-5. Using the driving support systems
4
Driving
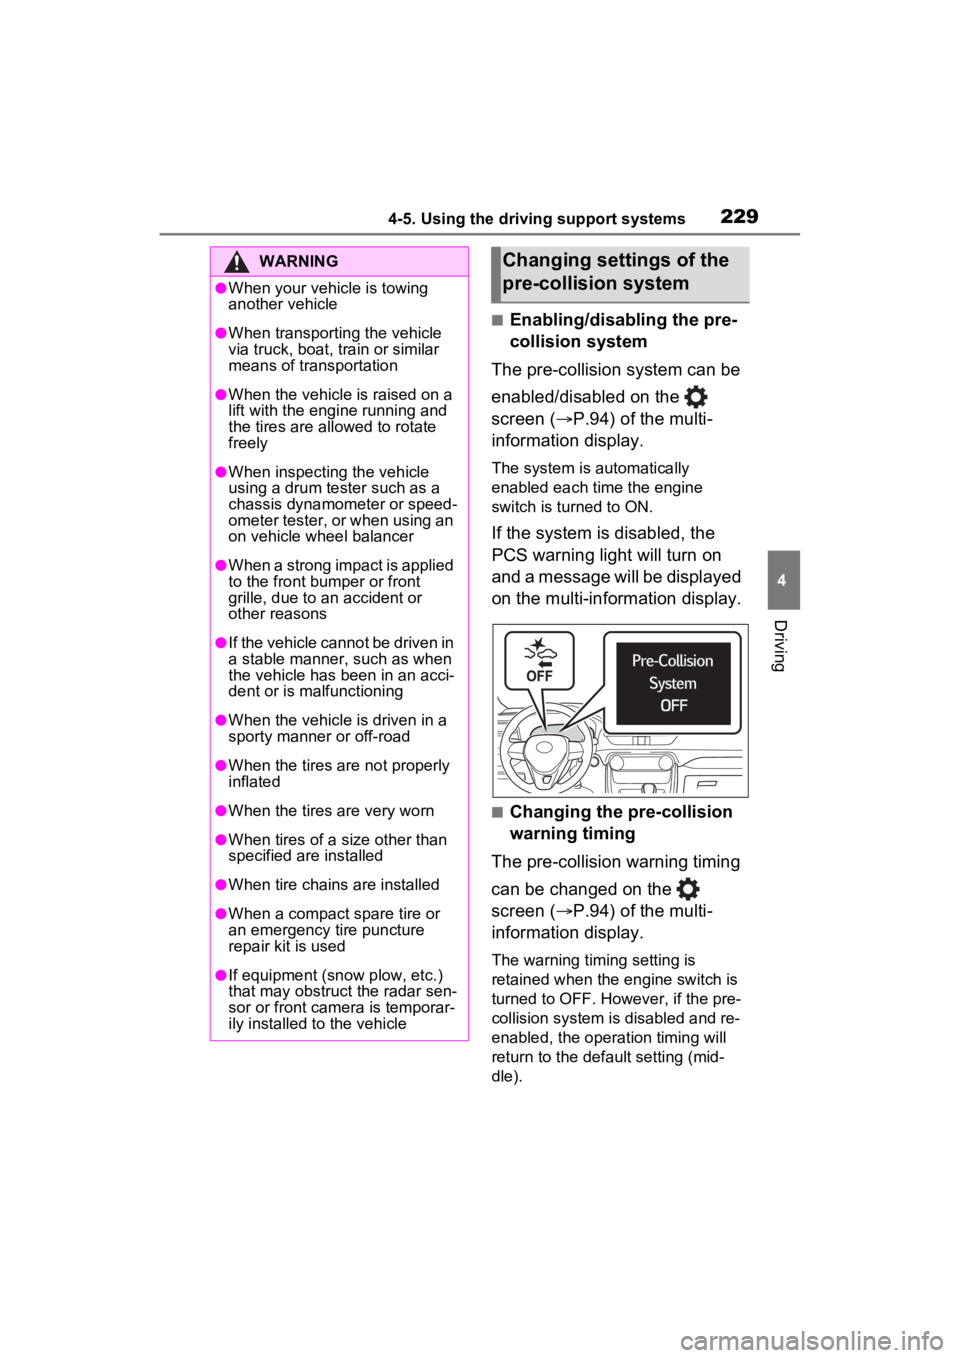
■Enabling/disabling the pre-
collision system
The pre-collision system can be
enabled/disabled on the
screen ( P.94) of the multi-
information display.
The system is automatically
enabled each time the engine
switch is turned to ON.
If the system is disabled, the
PCS warning light will turn on
and a message will be displayed
on the multi-information display.
■Changing the pre-collision
warning timing
The pre-collision warning timing
can be changed on the
screen ( P.94) of the multi-
information display.
The warning timing setting is
retained when the engine switch is
turned to OFF. However, if the pre-
collision system is disabled and re-
enabled, the operation timing will
return to the default setting (mid-
dle).
WARNING
●When your vehicle is towing
another vehicle
●When transporting the vehicle
via truck, boat, train or similar
means of transportation
●When the vehicle is raised on a
lift with the engine running and
the tires are allowed to rotate
freely
●When inspecting the vehicle
using a drum tester such as a
chassis dynamometer or speed-
ometer tester, or when using an
on vehicle wheel balancer
●When a strong impact is applied
to the front bumper or front
grille, due to a n accident or
other reasons
●If the vehicle cannot be driven in
a stable manner, such as when
the vehicle has been in an acci-
dent or is malfunctioning
●When the vehicle is driven in a
sporty manner or off-road
●When the tires are not properly
inflated
●When the tires are very worn
●When tires of a size other than
specified are installed
●When tire chains are installed
●When a compact spare tire or
an emergency tire puncture
repair kit is used
●If equipment (snow plow, etc.)
that may obstruct the radar sen-
sor or front camera is temporar-
ily installed to the vehicle
Changing settings of the
pre-collision system
Page 234 of 748
2344-5. Using the driving support systems
such as heavy rain, fog, snow or a
sandstorm
• When driving through steam or
smoke
• When the surrounding area is dim, such as at dawn or dusk, or while
at night or in a t unnel, making a
detectable object appear to be
nearly the same color as its sur-
roundings
• When driving in a place where the surrounding brightness changes
suddenly, such as at the entrance
or exit of a tunnel
• After the engine has started the
vehicle has not been driven for a
certain amount of time
• While making a left/right turn and
for a few seconds after making a
left/right turn
• While driving on a curve and for a
few seconds after driving on a
curve
• If your vehicle is skidding
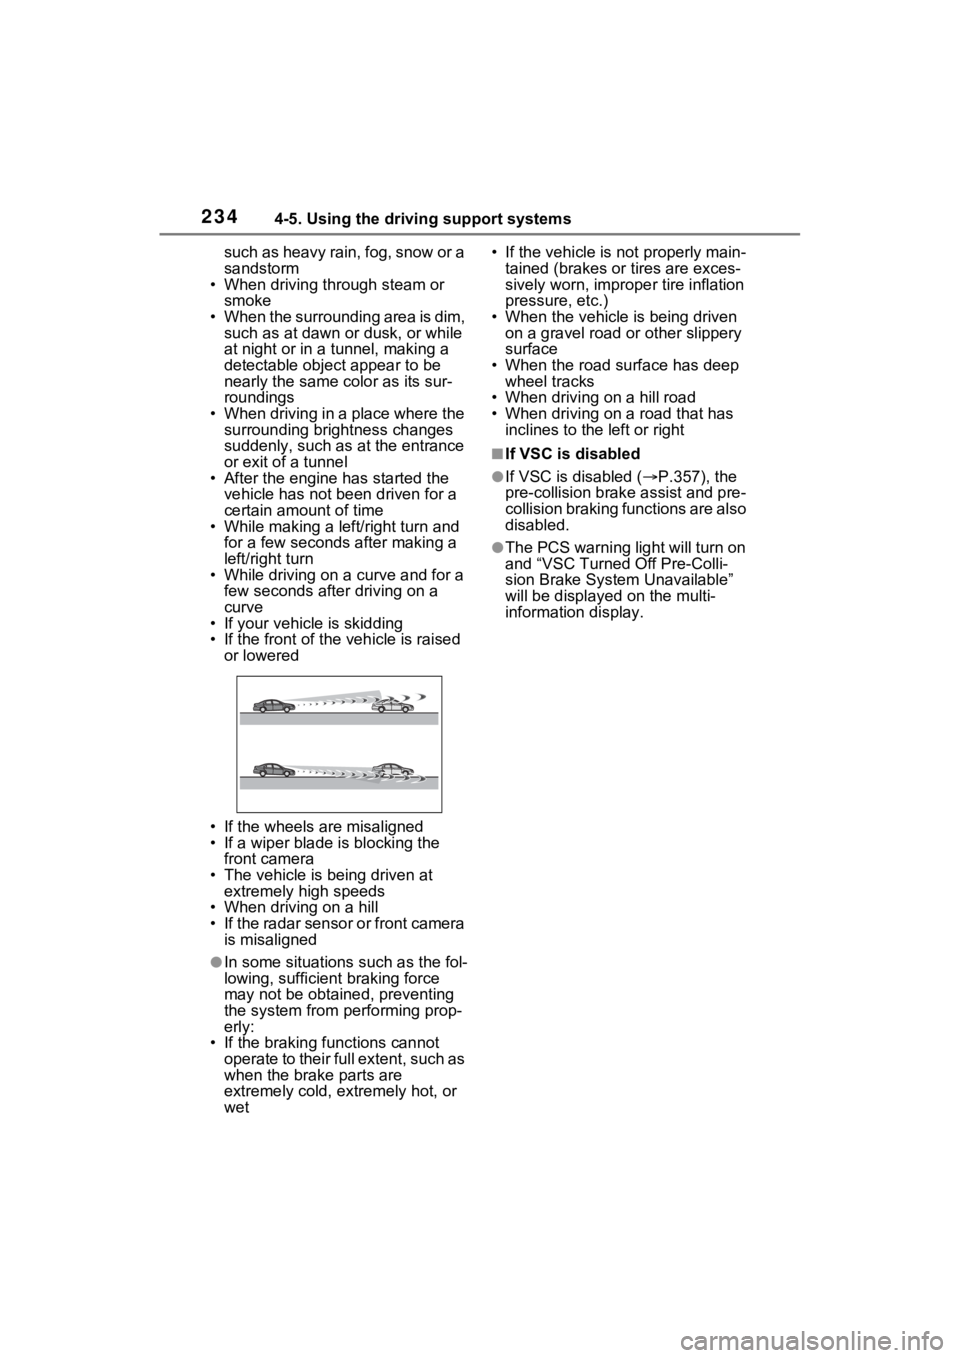
• If the front of the vehicle is raised
or lowered
• If the wheels are misaligned
• If a wiper blade is blocking the front camera
• The vehicle is being driven at extremely high speeds
• When driving on a hill
• If the radar sensor or front camera
is misaligned
●In some situations such as the fol-
lowing, sufficien t braking force
may not be obtained, preventing
the system from performing prop-
erly:
• If the braking functions cannot operate to their full extent, such as
when the brake parts are
extremely cold, extremely hot, or
wet • If the vehicle is not properly main-
tained (brakes or tires are exces-
sively worn, imprope r tire inflation
pressure, etc.)
• When the vehicle is being driven on a gravel road or other slippery
surface
• When the road surface has deep wheel tracks
• When driving on a hill road
• When driving on a road that has inclines to the left or right
■If VSC is disabled
●If VSC is disabled ( P.357), the
pre-collision brak e assist and pre-
collision braking functions are also
disabled.
●The PCS warning light will turn on
and “VSC Turned Off Pre-Colli-
sion Brake System Unavailable”
will be displayed on the multi-
information display.
Page 240 of 748
2404-5. Using the driving support systems
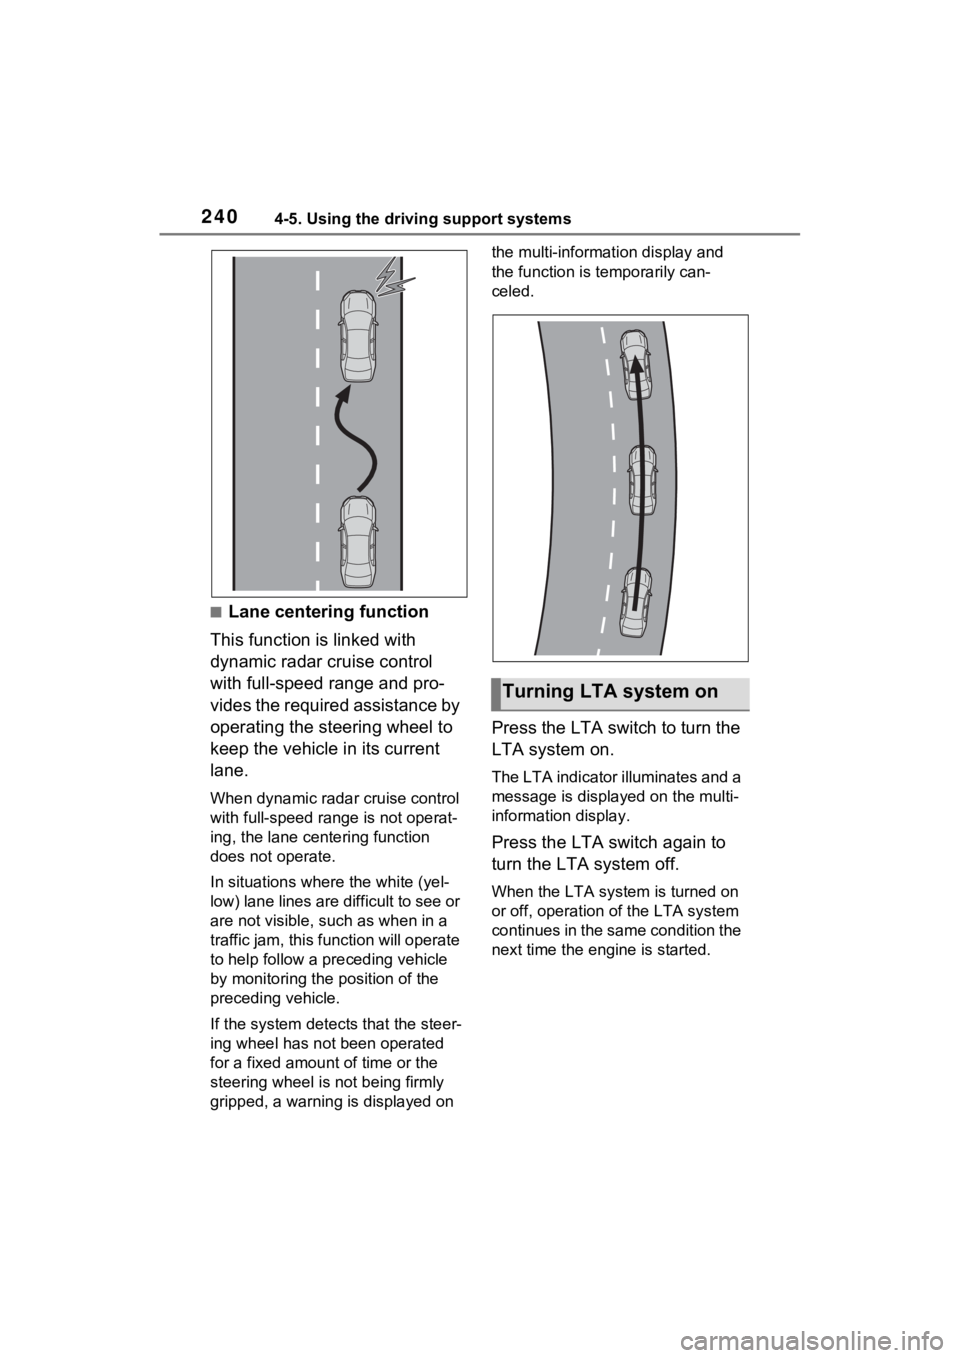
■Lane centering function
This function is linked with
dynamic radar cruise control
with full-speed range and pro-
vides the required assistance by
operating the steering wheel to
keep the vehicle in its current
lane.
When dynamic radar cruise control
with full-speed range is not operat-
ing, the lane centering function
does not operate.
In situations where the white (yel-
low) lane lines are difficult to see or
are not visible, such as when in a
traffic jam, this fu nction will operate
to help follow a preceding vehicle
by monitoring the position of the
preceding vehicle.
If the system detects that the steer-
ing wheel has not been operated
for a fixed amount of time or the
steering wheel is not being firmly
gripped, a warning is displayed on the multi-information display and
the function is temporarily can-
celed.
Press the LTA switch to turn the
LTA system on.
The LTA indicator illuminates and a
message is display
ed on the multi-
information display.
Press the LTA switch again to
turn the LTA system off.
When the LTA syste m is turned on
or off, operation of the LTA system
continues in the same condition the
next time the engine is started.
Turning LTA system on