check engine TOYOTA RAV4 2022 Service Manual
[x] Cancel search | Manufacturer: TOYOTA, Model Year: 2022, Model line: RAV4, Model: TOYOTA RAV4 2022Pages: 748, PDF Size: 22.93 MB
Page 297 of 748
2974-5. Using the driving support systems
4
Driving
The parking assist monitor
screen will be displayed if the
shift lever is shifted to the “R”
while the engine switch is in ON.
Each time the display mode
switching button is selected, the
mode will change as follows:
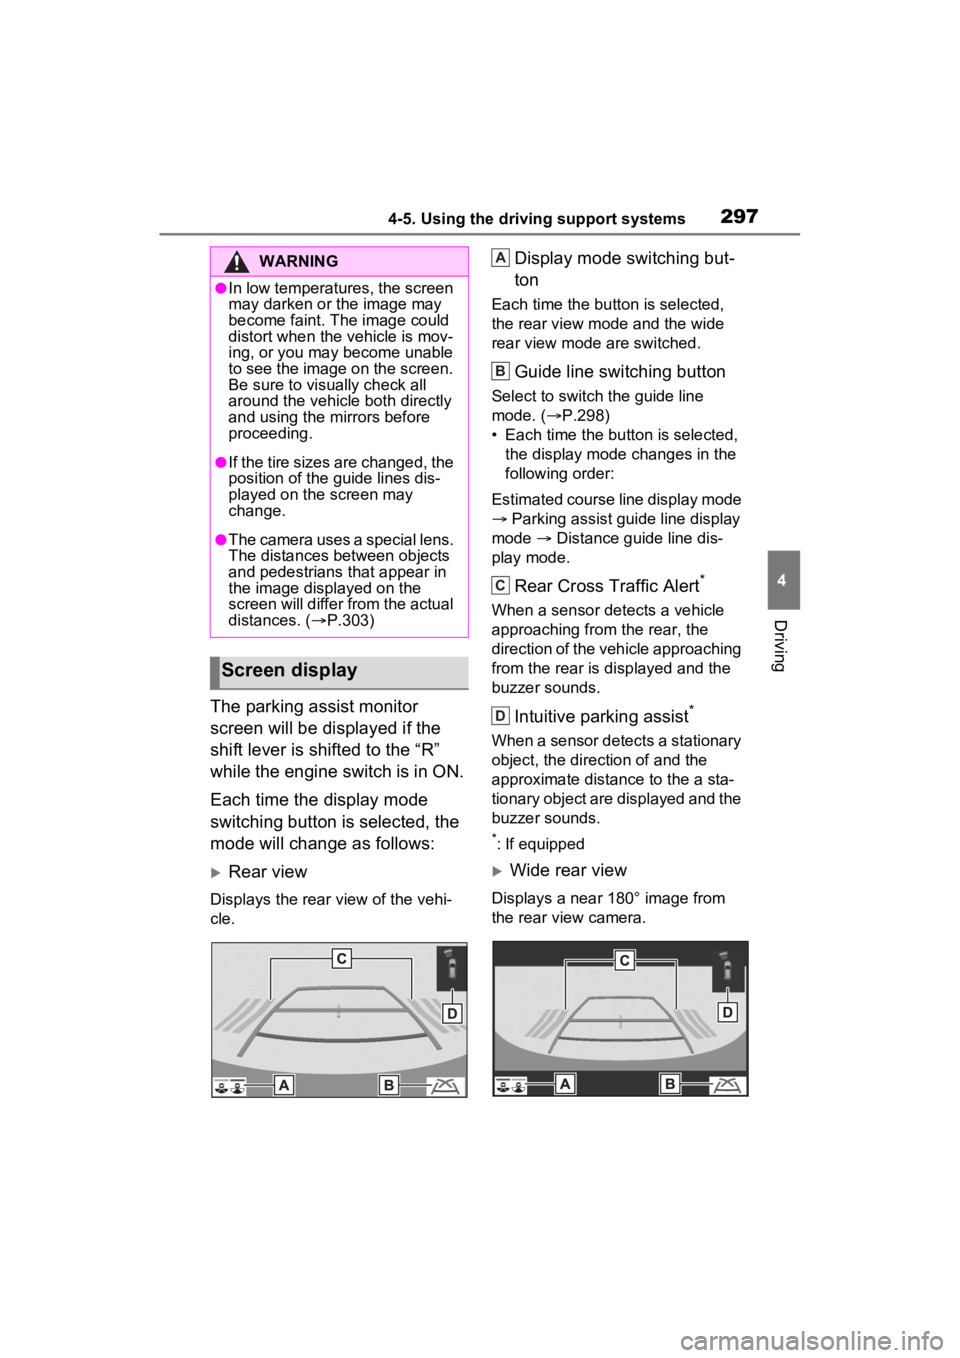
Rear view
Displays the rear view of the vehi-
cle.
Display mode switching but-
ton
Each time the button is selected,
the rear view mode and the wide
rear view mode are switched.
Guide line switching button
Select to switch the guide line
mode. (P.298)
• Each time the bu tton is selected,
the display mode changes in the
following order:
Estimated course line display mode
Parking assist guide line display
mode Distance guide line dis-
play mode.
Rear Cross Traffic Alert*
When a sensor detects a vehicle
approaching from the rear, the
direction of the vehicle approaching
from the rear is d isplayed and the
buzzer sounds.
Intuitive parking assist*
When a sensor detects a stationary
object, the direction of and the
approximate distance to the a sta-
tionary object are displayed and the
buzzer sounds.
*: If equipped
Wide rear view
Displays a near 180° image from
the rear view camera.
WARNING
●In low temperatures, the screen
may darken or the image may
become faint. The image could
distort when the vehicle is mov-
ing, or you may become unable
to see the image on the screen.
Be sure to visually check all
around the vehicle both directly
and using the mirrors before
proceeding.
●If the tire sizes are changed, the
position of the guide lines dis-
played on the screen may
change.
●The camera uses a special lens.
The distances between objects
and pedestrians that appear in
the image displayed on the
screen will differ f rom the actual
distances. ( P.303)
Screen display
A
B
C
D
Page 309 of 748
3094-5. Using the driving support systems
4
Driving
*: If equipped
●The screen illustrations used in
this text are intended as exam-
ples, and may differ from the
image that is actually displayed on
the screen.
The panoramic view monitor is a
supplemental device intended to
assist the driver when checking
around the vehicle. When using,
be sure to visually check all
around the vehicle both directly
and using the mirrors before
proceeding. If you do not, you may hit another vehicle or possi-
bly cause an accident.
Pay attention to the following
precautions when using the
panoramic view monitor.
Panoramic view moni-
tor*
Panoramic view monitor
assists the driver in view-
ing the surroundings, when
operating at low speeds, by
combining the front, side
and rear cameras and dis-
playing a complete vehicle
overhead image on the
screen.
When you press the camera
switch or shift the shift lever
to the “R” position while the
engine switch is in ON, the
panoramic view monitor
operates.
The monitor displays vari-
ous views of the position
and surroundings of the
vehicle.
Driving precautions
WARNING
●Never depend on the panoramic
view monitor entirely. The
image and the position of the
guide lines displayed on the
screen may differ from the
actual state. Use caution just as
you would when driving any
other vehicle.
●Always make sure to check all
around the vehicle with your
own eyes when driving.
●Never drive while looking only at
the screen as the image on the
screen is different from actual
conditions. If you are driving
while looking only at the screen,
you may hit a
person or an
object, resulting in an accident.
When driving, be sure to check
the vehicle’s surroundings with
your own eyes and the vehicle’s
mirrors.
●Depending on the circum-
stances of the vehicle (number
of passengers, amount of lug-
gage, etc.), the position of the
guide lines displayed on the
screen may change. Be sure to
check visually around the vehi-
cle before proceeding.
Page 312 of 748
3124-5. Using the driving support systems
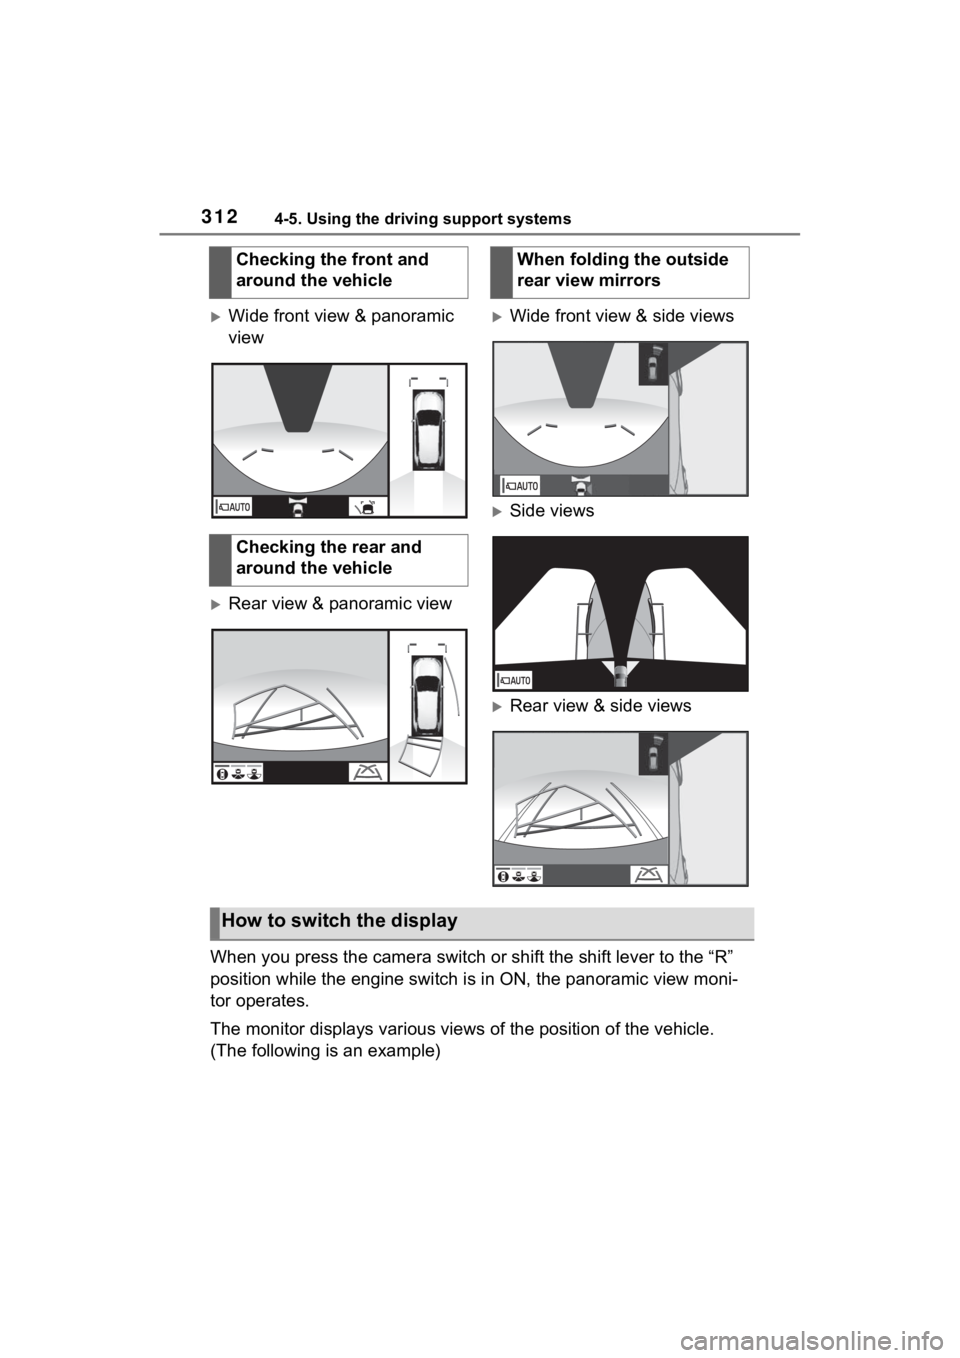
Wide front view & panoramic
view
Rear view & panoramic view
Wide front view & side views
Side views
Rear view & side views
When you press the camera switch or shift the shift lever to th e “R”
position while the engine switch is in ON, the panoramic view m oni-
tor operates.
The monitor displays various views of the position of the vehicle.
(The following is an example) Checking the front and
around the vehicle
Checking the rear and
around the vehicle
When folding the outside
rear view mirrors
How to switch the display
Page 349 of 748
3494-5. Using the driving support systems
4
Driving
■Air conditioning system opera-
tion in Eco drive mode
In Eco drive mode, heating/cooling
operations and the fan speed is con-
trolled to improve fuel efficiency.
Perform the following procedures to
increase the air conditioning perfor-
mance.
●Vehicles with automatic air condi-
tioning system: Turn eco air condi-
tioning mode off ( P.515)
●Adjust the fan speed ( P.508,
515)
●Cancel Eco drive mode
■Canceling a driving mode
●Sport mode is automatically can-
celed and the driving mode
returns to normal mode when the
engine switch is turned off.
●Normal mode and Eco drive mode
are not canceled until another
driving mode is sel ected. (Even if
the engine switch is turned off,
normal mode and Eco drive mode
will not be automatically can-
celed.)
Select a mode that is appropri-
ate for the road condition.
■Mud & Sand mode
Suitable for driving on roads
with increased driving resis-
tance in which tires could
become stuck, such as sandy
roads, muddy roads, etc.
Multi-terrain Select
(AWD vehicles)
Multi-terrain Select is
designed to control AWD,
brake and driving force sys-
tems in accordance with the
road condition. Use the sys-
tem when driving over
muddy, sandy or rough road
surfaces.
WARNING
■Before using Multi-terrain
Select
Make sure to observe the follow-
ing precautions. Failure to
observe these precautions may
result in an unexp ected accident.
●Check that the Mud & Sand and
Rock & Dirt indicators are illumi-
nated before driving.
●Multi-terrain Select is not
intended to expand the limit per-
formance of the vehicle. Thor-
oughly check the road
conditions and driving route
before driving, and drive with
caution.
Control in each mode
Page 353 of 748
3534-5. Using the driving support systems
4
Driving
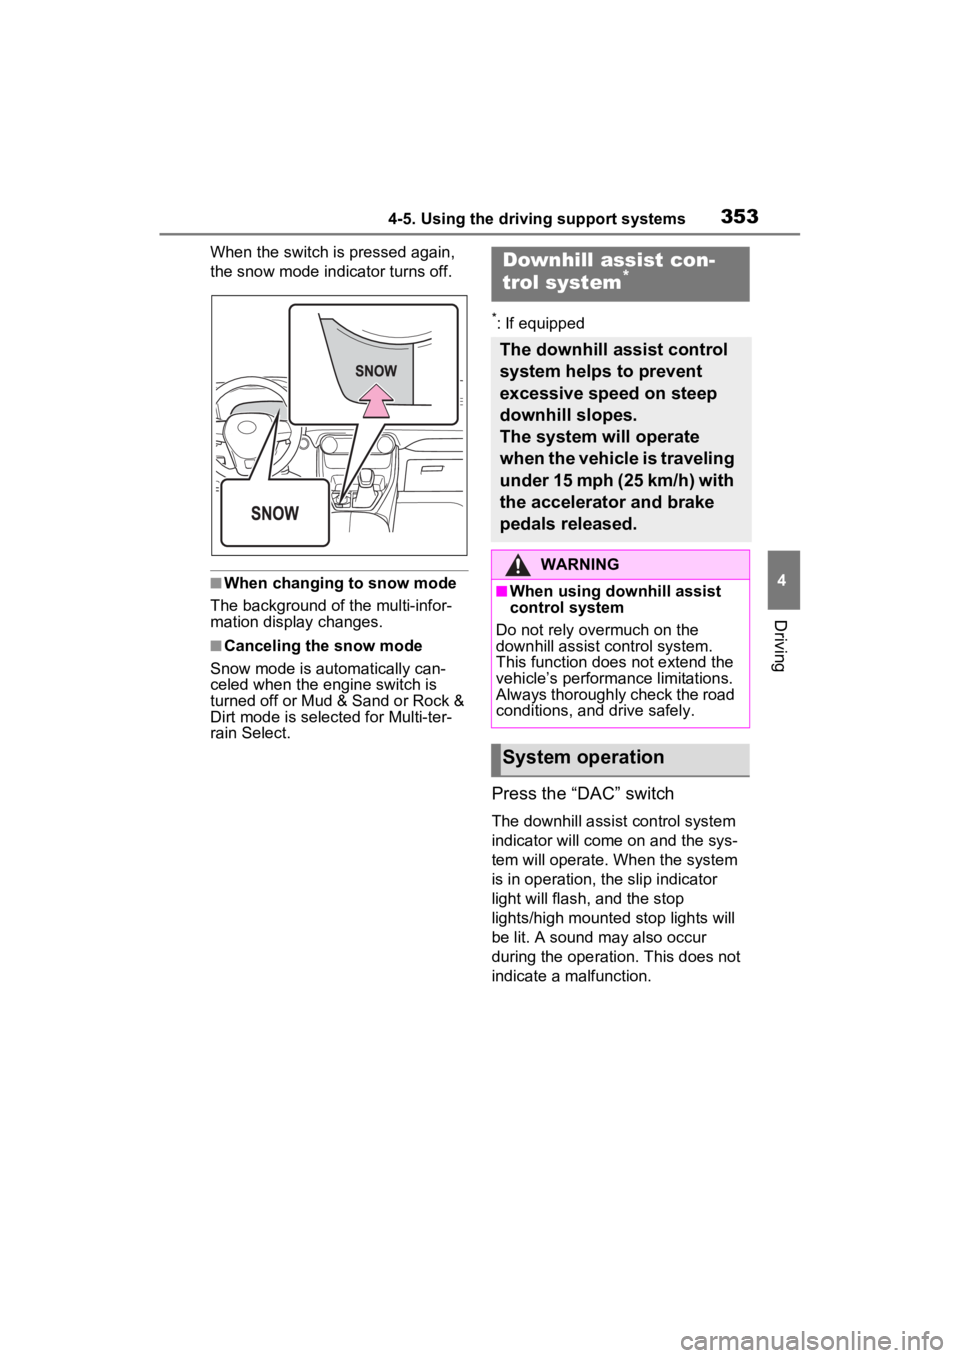
When the switch is pressed again,
the snow mode indicator turns off.
■When changing to snow mode
The background of the multi-infor-
mation display changes.
■Canceling the snow mode
Snow mode is automatically can-
celed when the engine switch is
turned off or Mud & Sand or Rock &
Dirt mode is selec ted for Multi-ter-
rain Select.
*: If equipped
Press the “DAC” switch
The downhill assist control system
indicator will come on and the sys-
tem will operate. When the system
is in operation, the slip indicator
light will flash, and the stop
lights/high mounted stop lights will
be lit. A sound may also occur
during the operati on. This does not
indicate a malfunction.
Downhill assist con-
trol system*
The downhill assist control
system helps to prevent
excessive speed on steep
downhill slopes.
The system will operate
when the vehicle is traveling
under 15 mph (25 km/h) with
the accelerator and brake
pedals released.
WARNING
■When using downhill assist
control system
Do not rely overmuch on the
downhill assist control system.
This function does not extend the
vehicle’s performance limitations.
Always thoroughly check the road
conditions, and drive safely.
System operation
Page 354 of 748
3544-5. Using the driving support systems
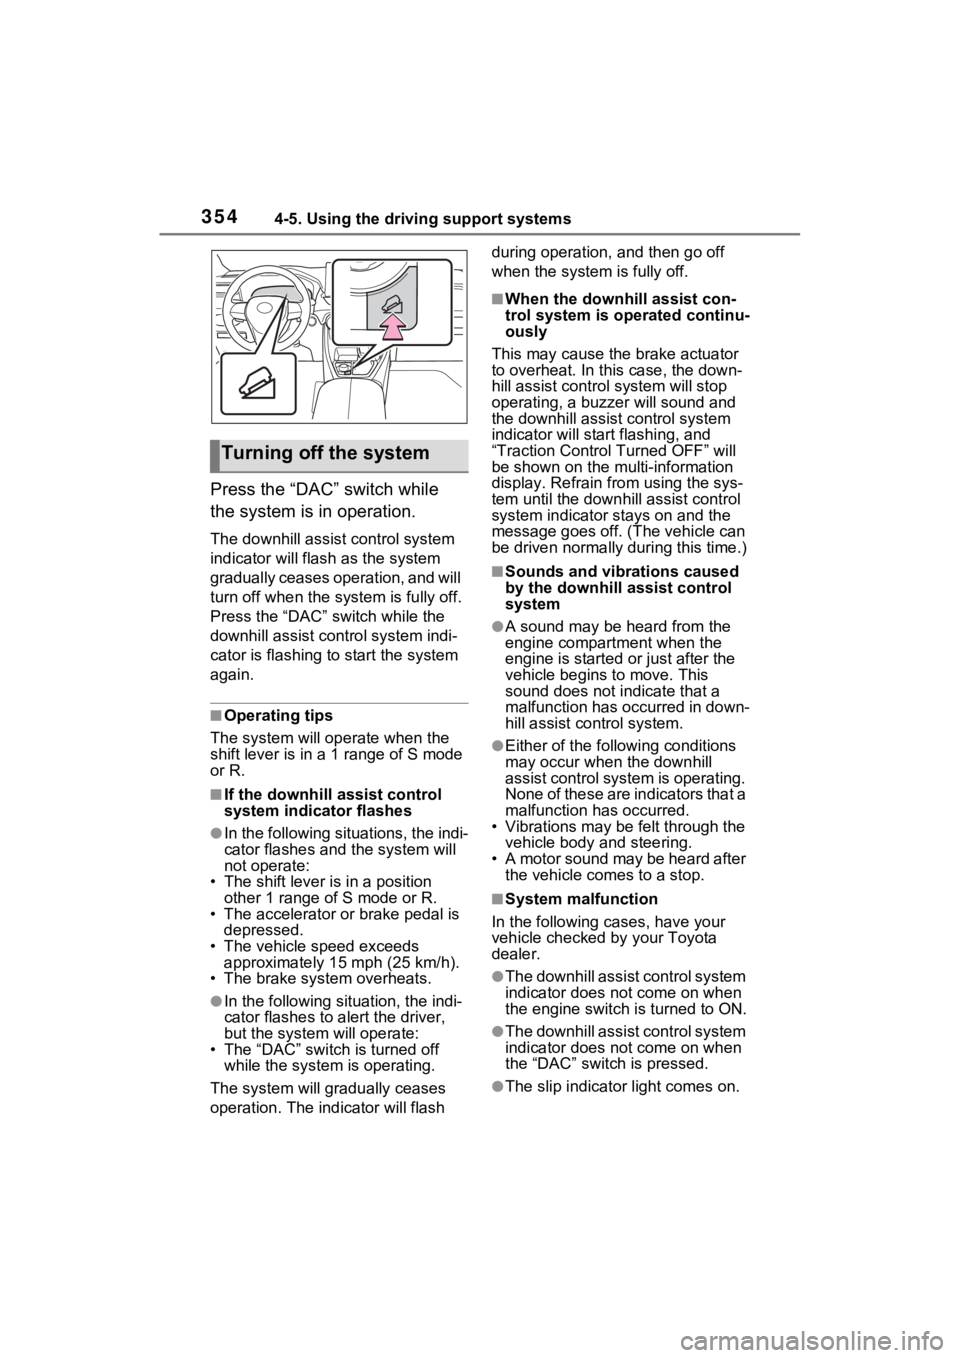
Press the “DAC” switch while
the system is in operation.
The downhill assist control system
indicator will flash as the system
gradually ceases operation, and will
turn off when the system is fully off.
Press the “DAC” switch while the
downhill assist control system indi-
cator is flashing to start the system
again.
■Operating tips
The system will op erate when the
shift lever is in a 1 range of S mode
or R.
■If the downhill assist control
system indicator flashes
●In the following situations, the indi-
cator flashes and the system will
not operate:
• The shift lever is in a position other 1 range of S mode or R.
• The accelerator or brake pedal is depressed.
• The vehicle speed exceeds
approximately 15 mph (25 km/h).
• The brake system overheats.
●In the following si tuation, the indi-
cator flashes to a lert the driver,
but the system will operate:
• The “DAC” switch is turned off
while the system is operating.
The system will gr adually ceases
operation. The indicator will flash during operation,
and then go off
when the system is fully off.
■When the downhill assist con-
trol system is operated continu-
ously
This may cause the brake actuator
to overheat. In thi s case, the down-
hill assist control system will stop
operating, a buzze r will sound and
the downhill assist control system
indicator will start flashing, and
“Traction Contro l Turned OFF” will
be shown on the mu lti-information
display. Refrain from using the sys-
tem until the downhill assist control
system indicator stays on and the
message goes off. (The vehicle can
be driven normally during this time.)
■Sounds and vibrations caused
by the downhill assist control
system
●A sound may be heard from the
engine compartment when the
engine is started or just after the
vehicle begins to move. This
sound does not indicate that a
malfunction has occurred in down-
hill assist control system.
●Either of the following conditions
may occur when the downhill
assist control system is operating.
None of these are indicators that a
malfunction has occurred.
• Vibrations may be felt through the
vehicle body and steering.
• A motor sound may be heard after the vehicle comes to a stop.
■System malfunction
In the following ca ses, have your
vehicle checked by your Toyota
dealer.
●The downhill assist control system
indicator does not come on when
the engine switch is turned to ON.
●The downhill assist control system
indicator does not come on when
the “DAC” switch is pressed.
●The slip indicator light comes on.
Turning off the system
Page 367 of 748
3674-6. Driving tips
4
Driving
WARNING
●When driving off-road or in rug-
ged terrain, do not drive at
excessive speeds, jump, make
sharp turns, strike objects, etc.
This may cause loss of control
or vehicle rollover causing
death or serious injury. You are
also risking expensive damage
to your vehicle’s suspension
and chassis.
NOTICE
■To prevent the water damage
Take all necessary safety mea-
sures to ensure that water dam-
age to the engine or other
components does not occur.
●Water entering the engine air
intake will cause severe engine
damage.
●Water entering the automatic
transmission will cause deterio-
ration in shift quality, locking up
of your transmission accompa-
nied by vibration, and ultimately
damage.
●Water can wash the grease
from wheel bearings, causing
rusting and premature failure,
and may also enter the differen-
tials, transmission and transfer
case (AWD models), reducing
the gear oil’s lub ricating quali-
ties.
■When you drive through
water
If driving through water, such as
when crossing shallow streams,
first check the depth of the water
and the bottom of the riverbed for
firmness. Drive slowly and avoid
deep water.
■Inspection after off-road driv-
ing
●Sand and mud that has accu-
mulated around brake discs
may affect braking efficiency
and may damage brake system
components.
●Always perform a maintenance
inspection after each day of off-
road driving that has taken you
through rough terrain, sand,
mud, or water. For scheduled
maintenance information, refer
to the “Scheduled Maintenance
Guide” or “Owner’s Manual
Supplement”.
Page 380 of 748
3805-2. Basic information before operation
with a metal object, such as
the following, it may not oper-
ate properly:
• Magnetic isolation cards
• Metallic foil, such as the inner
packaging of a cigarette box
• Metallic wallets or bags
• Coins
• Discs, such as a CD or DVD
If the operable part of a
capacitive touch screen but-
ton is wiped, it may operate
unintentionally.
If the capacitive touch screen
button is being touched when
the engine switch is changed
to ACC or ON, the button may
not operate properly. In this
case, remove anything touch-
ing the button, turn the engine
switch to OFF and then turn it
to ACC or ON, or restart the
system by press and hold the
“POWER VOLUME” knob for
3 seconds or more.
●Capacitive touch screen button
sensor sensitivity can be adjusted.
( P.410)
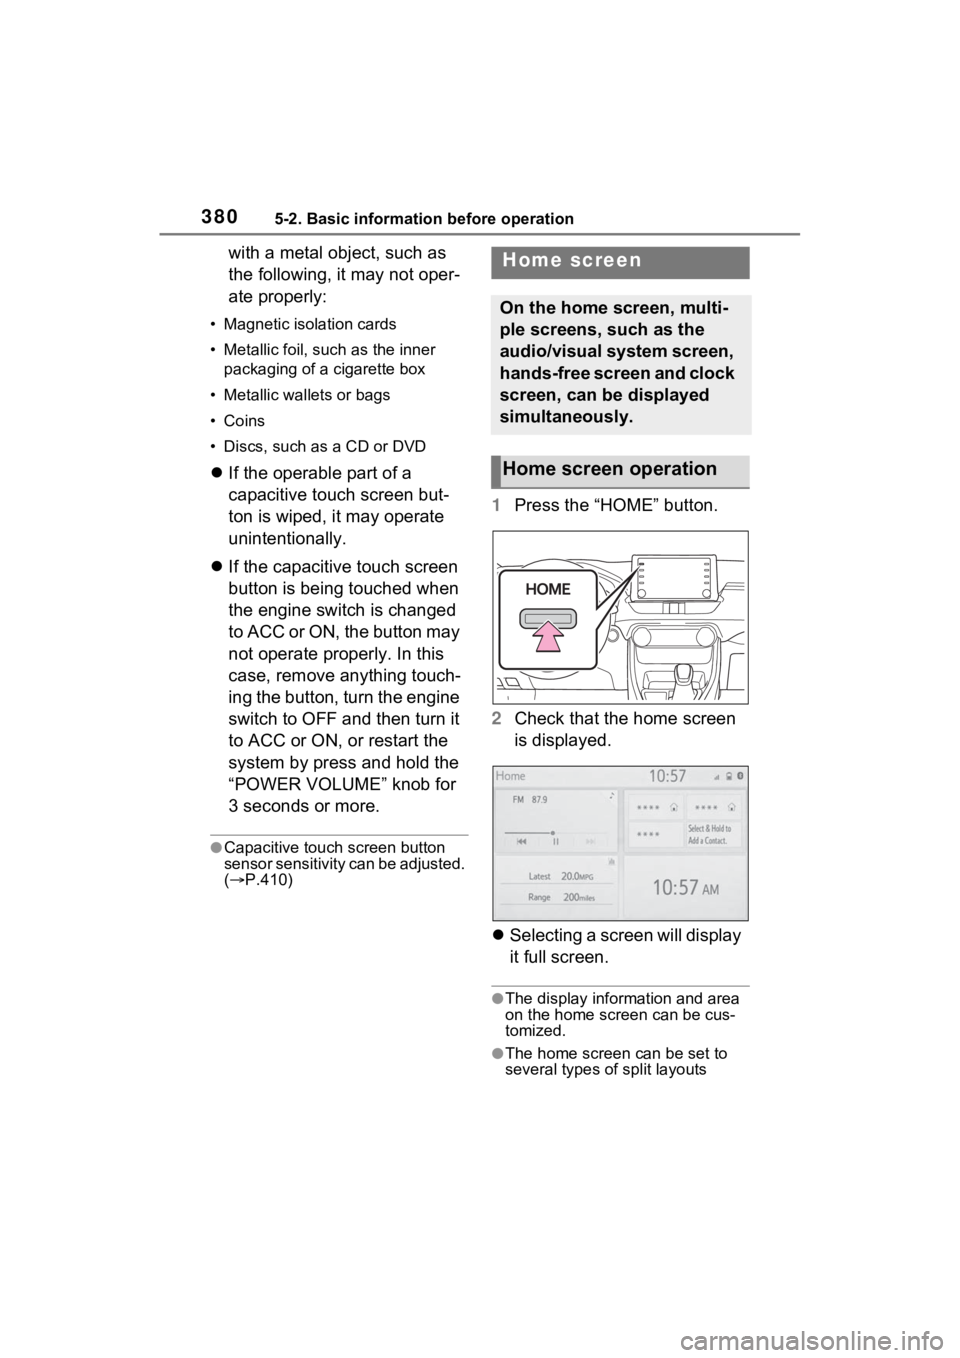
1 Press the “HOME” button.
2 Check that the home screen
is displayed.
Selecting a screen will display
it full screen.
●The display information and area
on the home screen can be cus-
tomized.
●The home screen can be set to
several types of split layouts
Home screen
On the home screen, multi-
ple screens, such as the
audio/visual system screen,
hands-free screen and clock
screen, can be displayed
simultaneously.
Home screen operation
Page 392 of 748
3925-3. Connectivity settings
is not currently connected will
switch the connection to the
function.
If the desired Bluetooth
®
device is not on the list, select
“Add New Device” to register
the device. ( P.393)
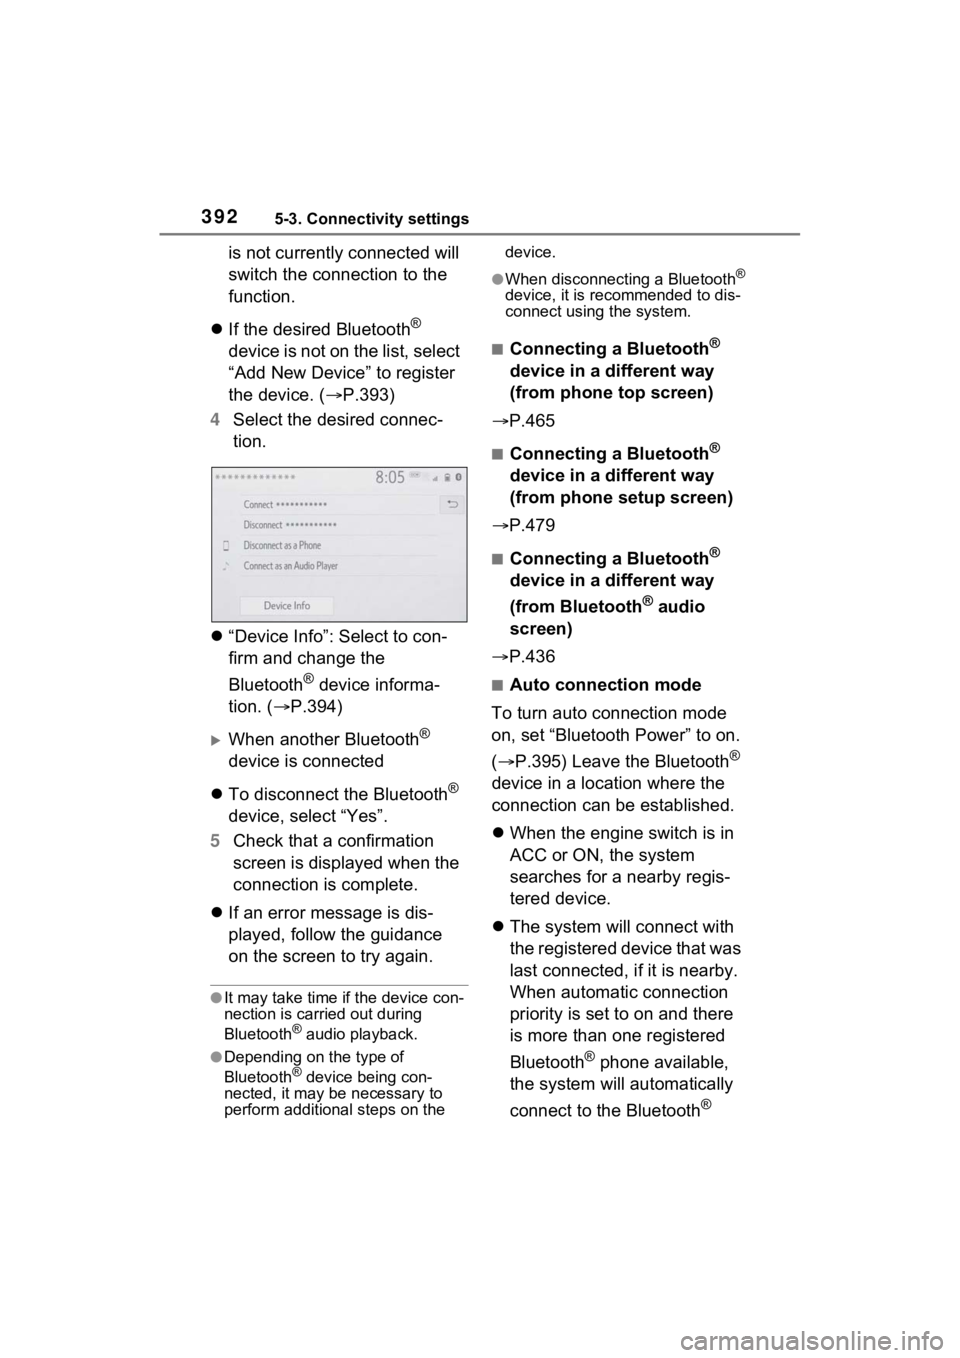
4 Select the desired connec-
tion.
“Device Info”: Select to con-
firm and change the
Bluetooth
® device informa-
tion. ( P.394)
When another Bluetooth®
device is connected
To disconnect the Bluetooth
®
device, select “Yes”.
5 Check that a confirmation
screen is displayed when the
connection is complete.
If an error message is dis-
played, follow the guidance
on the screen to try again.
●It may take time if the device con-
nection is carried out during
Bluetooth
® audio playback.
●Depending on the type of
Bluetooth® device being con-
nected, it may be necessary to
perform additional steps on the device.
●When disconnecting a Bluetooth®
device, it is recommended to dis-
connect using the system.
■Connecting a Bluetooth®
device in a different way
(from phone top screen)
P.465
■Connecting a Bluetooth®
device in a different way
(from phone setup screen)
P.479
■Connecting a Bluetooth®
device in a different way
(from Bluetooth
® audio
screen)
P.436
■Auto connection mode
To turn auto connection mode
on, set “Bluetooth Power” to on.
( P.395) Leave the Bluetooth
®
device in a location where the
connection can be established.
When the engine switch is in
ACC or ON, the system
searches for a nearby regis-
tered device.
The system will connect with
the registered device that was
last connected, i f it is nearby.
When automatic connection
priority is set to on and there
is more than one registered
Bluetooth
® phone available,
the system will automatically
connect to the Bluetooth
®
Page 484 of 748

4845-15. Phone settings
4Transfer the contact data to
the system using a
Bluetooth
® phone.
This operation may be unnec-
essary depending on the type
of Bluetooth
® phone.
To cancel this function, select
“Cancel”.
5 Check that a confirmation
screen is displayed when the
operation is complete.
Backed-up contact data
(“vCard” formatted) can be
transferred from USB device or
Bluetooth
® phone to this sys-
tem.
1 Connect a USB device.
( P.418)
2 Select “Transfer Contacts
from Device”.
3 Select “From USB”.
4 Select “USB 1” or “USB 2”
when the multiple USB
devices are connected. If a
USB device is connected,
skip this procedure.
5 Select “Replace Contacts” or
“Add Contact”. If the contact
is already registered, skip
this procedure.
“Replace Contacts”: Select to trans-
fer the contact fro m the connected
USB device or Bluetooth
® phone
and replace the current one.
“Add Contact”: Select to transfer the desired contact data from the
connected USB device or
Bluetooth
® phone to add to the cur-
rent one.
6 Select a desired file from
vCard file list.
7 Check that a confirmation
screen is displayed when the
operation is complete.
●Depending on the type of
Bluetooth® phone used and num-
ber of files, it may take time to dis-
play vCard file lists and download
contacts.
●Downloading may not complete
correctly in the following cases:
• If the engine switch is turned off during downloading.
• If the USB device or Bluetooth
®
phone is removed before down-
loading is complete.
New contact data can be regis-
tered.
Up to 4 numbers per person can
be registered. For PBAP com-
patible Bluetooth
® phones, this
function is available when “Auto-
matic Transfer” is set to off.
( P.481)
1 Select “New Contact”.
2 Enter the name and select
“OK”.
3 Enter the phone number and
select “OK”.
4 Select the phone type for the
phone number.
From USB device
Registering a new contact
to the contacts list