turn signal TOYOTA RAV4 PRIME 2021 Owners Manual (in English)
[x] Cancel search | Manufacturer: TOYOTA, Model Year: 2021, Model line: RAV4 PRIME, Model: TOYOTA RAV4 PRIME 2021Pages: 616, PDF Size: 34.66 MB
Page 3 of 616
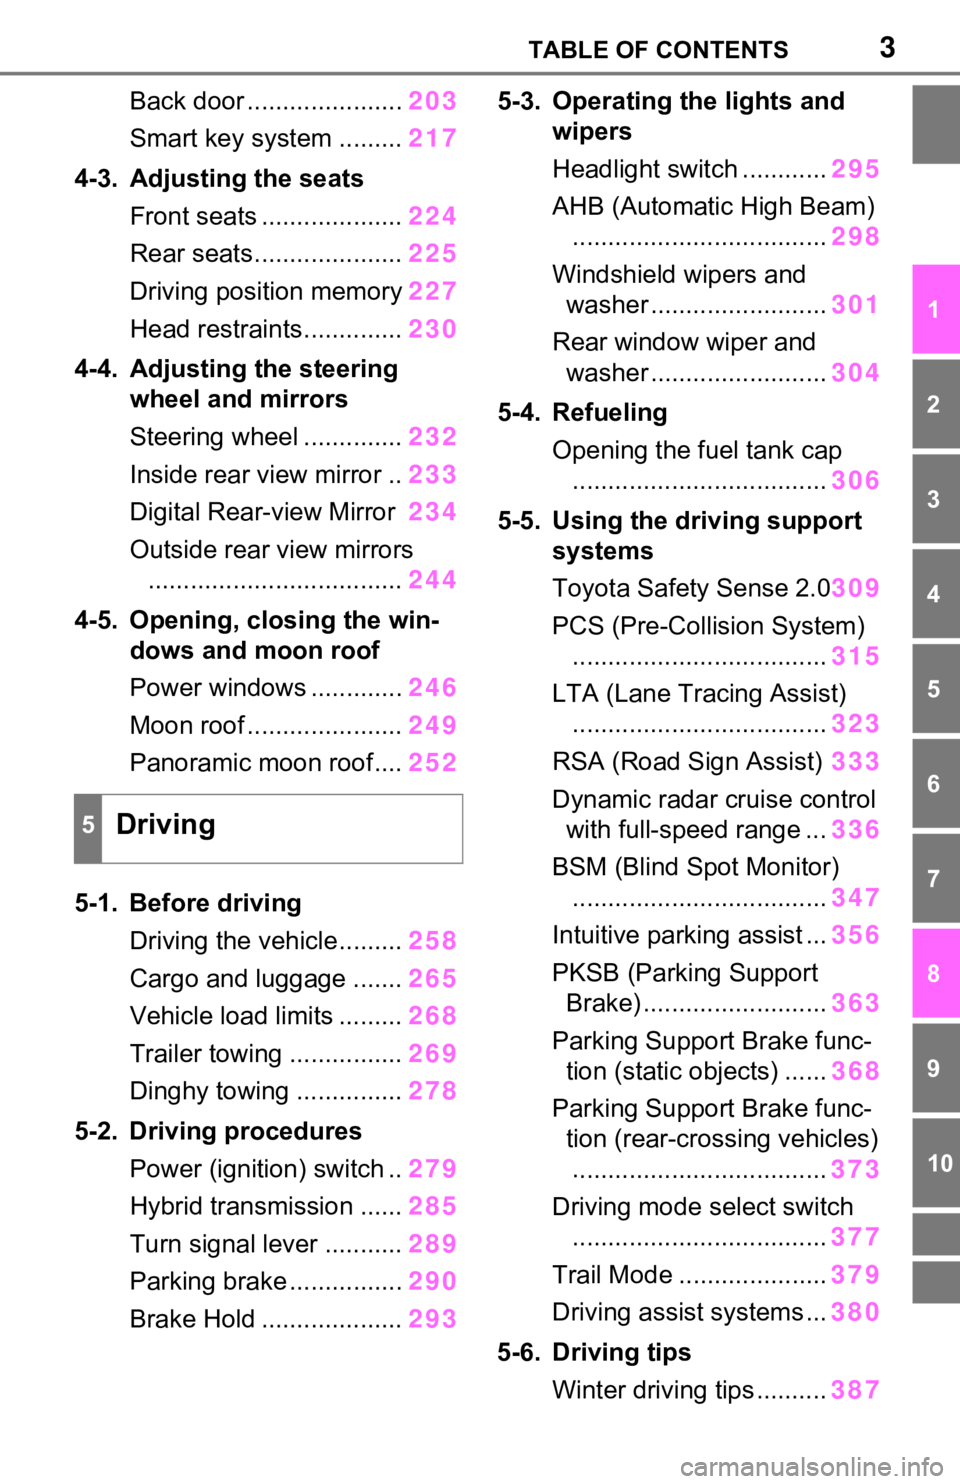
3TABLE OF CONTENTS
1
2
3
4
5
6
7
8
9
10
Back door ......................203
Smart key system ......... 217
4-3. Adjusting the seats Front seats .................... 224
Rear seats..................... 225
Driving position memory 227
Head restraints.............. 230
4-4. Adjusting the steering wheel and mirrors
Steering wheel .............. 232
Inside rear view mirror .. 233
Digital Rear-view Mirror 234
Outside rear view mirrors .................................... 244
4-5. Opening, closing the win- dows and moon roof
Power windows ............. 246
Moon roof ...................... 249
Panoramic moon roof.... 252
5-1. Before driving Driving the vehicle......... 258
Cargo and luggage ....... 265
Vehicle load limits ......... 268
Trailer towing ................ 269
Dinghy towing ............... 278
5-2. Driving procedures Power (ignition) switch .. 279
Hybrid transmission ...... 285
Turn signal lever ........... 289
Parking brake ................ 290
Brake Hold .................... 2935-3. Operating the lights and
wipers
Headlight switch ............ 295
AHB (Automatic High Beam) .................................... 298
Windshield wipers and washer ......................... 301
Rear window wiper and washer ......................... 304
5-4. Refueling Opening the fuel tank cap.................................... 306
5-5. Using the driving support systems
Toyota Safety Sense 2.0 309
PCS (Pre-Collision System) .................................... 315
LTA (Lane Tracing Assist) .................................... 323
RSA (Road Sign Assist) 333
Dynamic radar cruise control with full-speed range ... 336
BSM (Blind Spot Monitor) .................................... 347
Intuitive parking assist ... 356
PKSB (Parking Support Brake) .......................... 363
Parking Support Brake func- tion (static objects) ...... 368
Parking Support Brake func- tion (rear-crossing vehicles). ... ...
............................. 373
Driving mode s elect switch
.................................... 377
Trail Mode ..................... 379
Driving assist systems ... 380
5-6. Driving tips Winter driving tips .......... 387
5Driving
Page 15 of 616
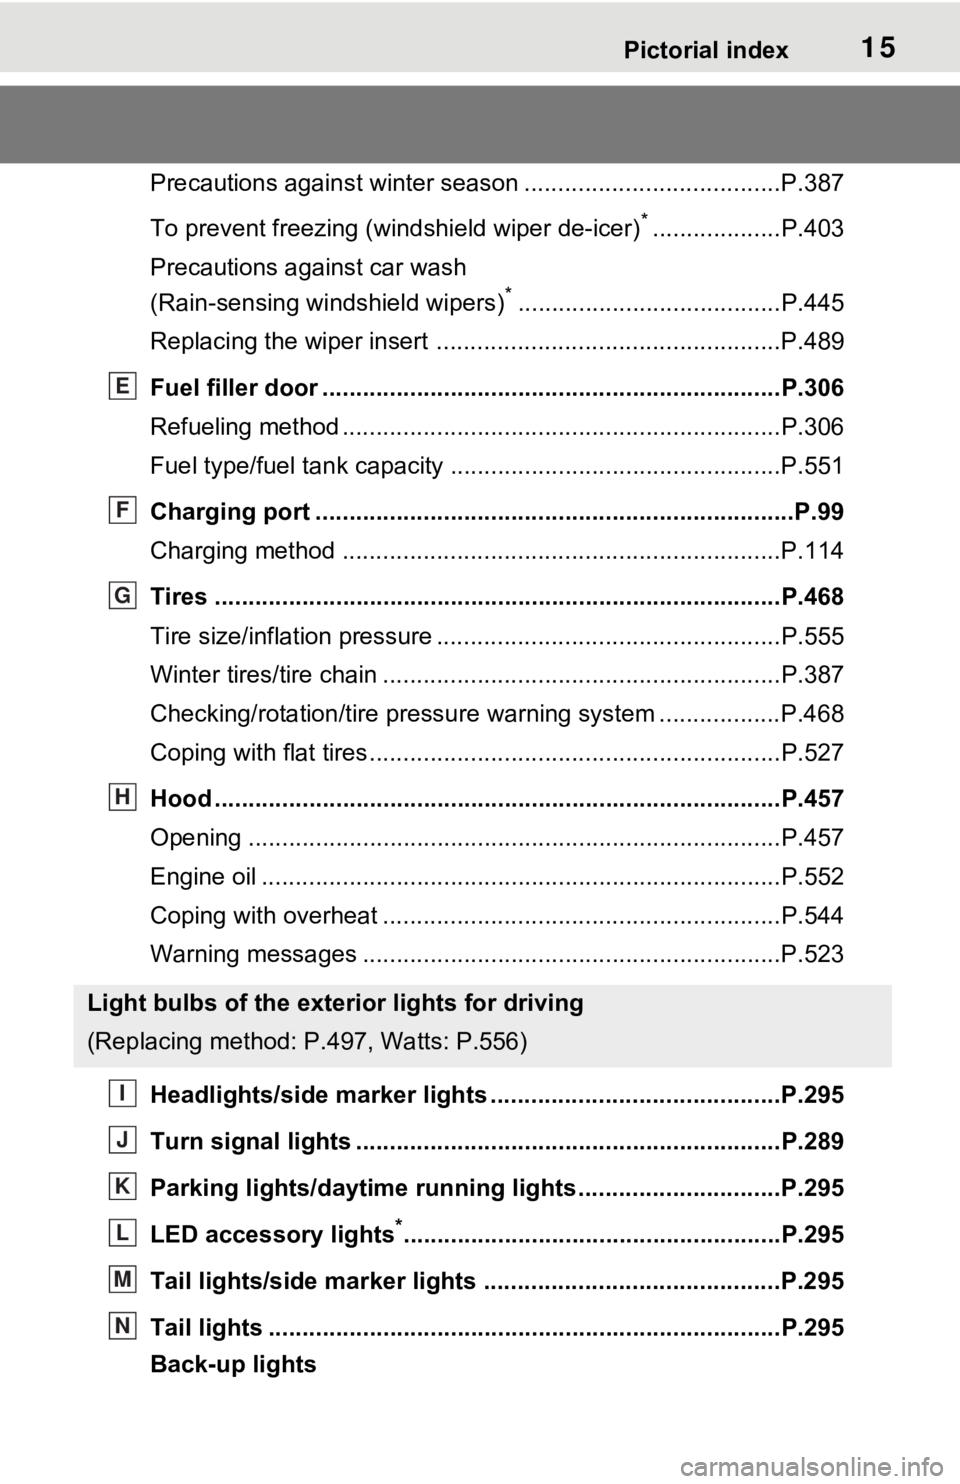
15Pictorial index
Precautions against winter season ......................................P.387
To prevent freezing (windshield wiper de-icer)
*...................P.403
Precautions against car wash
(Rain-sensing windshield wipers)
*.......................................P.445
Replacing the wiper insert .................................... ...............P.489
Fuel filler door ............................................... .....................P.306
Refueling method ............................................... ..................P.306
Fuel type/fuel tan k capacity .................................................P.551
Charging port .................................................. .....................P.99
Charging method ................................................ .................P.114
Tires ....................................................................................P.468
Tire size/inflation pressure ................................... ................P.555
Winter tires/tire chain ........................................ ...................P.387
Checking/rotation/tire pressur e warning system ..................P.468
Coping with flat tires......................................... ....................P.527
Hood ....................................................................................P.457
Opening ........................................................ .......................P.457
Engine oil ..................................................... ........................P.552
Coping with overheat ........................................... ................P.544
Warning messages ..............................................................P.523
Headlights/side marker lights .................................. .........P.295
Turn signal lights ...............................................................P.289
Parking lights/dayt ime running lights .......................... ....P.295
LED accessory lights
*........................................................P.295
Tail lights/side marker lights ............................................P.295
Tail lights .................................................... ........................P.295
Back-up lights
Light bulbs of the exterior lights for driving
(Replacing method: P .497, Watts: P.556)
E
F
G
H
I
J
K
L
M
N
Page 18 of 616
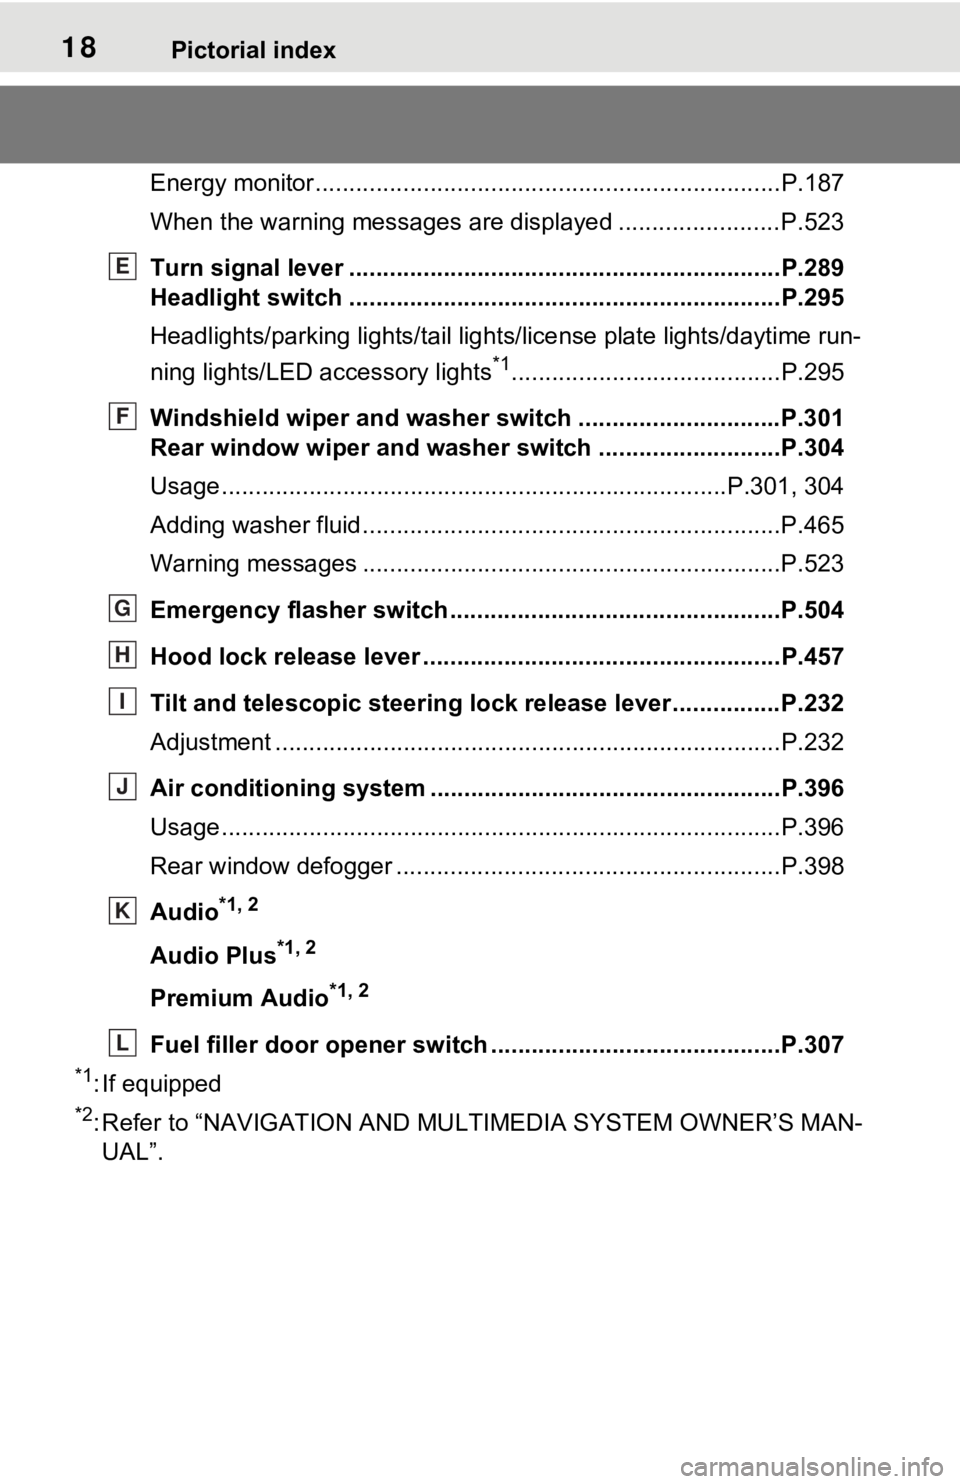
18Pictorial index
Energy monitor.....................................................................P.187
When the warning messages are displayed ........................ P.523
Turn signal lever ................................................................P.289
Headlight switch ................................................................P.295
Headlights/parking lights/tail lig hts/license plate lights/daytime run-
ning lights/LED accessory lights
*1........................................P.295
Windshield wiper and washer switch ..............................P.301
Rear window wiper and washer switch ...........................P.304
Usage.......................................................... .................P.301, 304
Adding washer fluid ..............................................................P.465
Warning messages ..............................................................P.523
Emergency flasher switch ....................................... ..........P.504
Hood lock release lever ........................................ .............P.457
Tilt and telescopic steering lock release lever ................P.232
Adjustment ..................................................... ......................P.232
Air conditioning system ............................. .......................P.396
Usage.......................................................... .........................P.396
Rear window defogger ........................................... ..............P.398
Audio
*1, 2
Audio Plus*1, 2
Premium Audio*1, 2
Fuel filler door opener swi tch ...........................................P.307
*1: If equipped
*2: Refer to “NAVIGATION AND MULTIMEDIA SYSTEM OWNER’S MAN-
UAL”.
E
F
G
H
I
J
K
L
Page 69 of 616
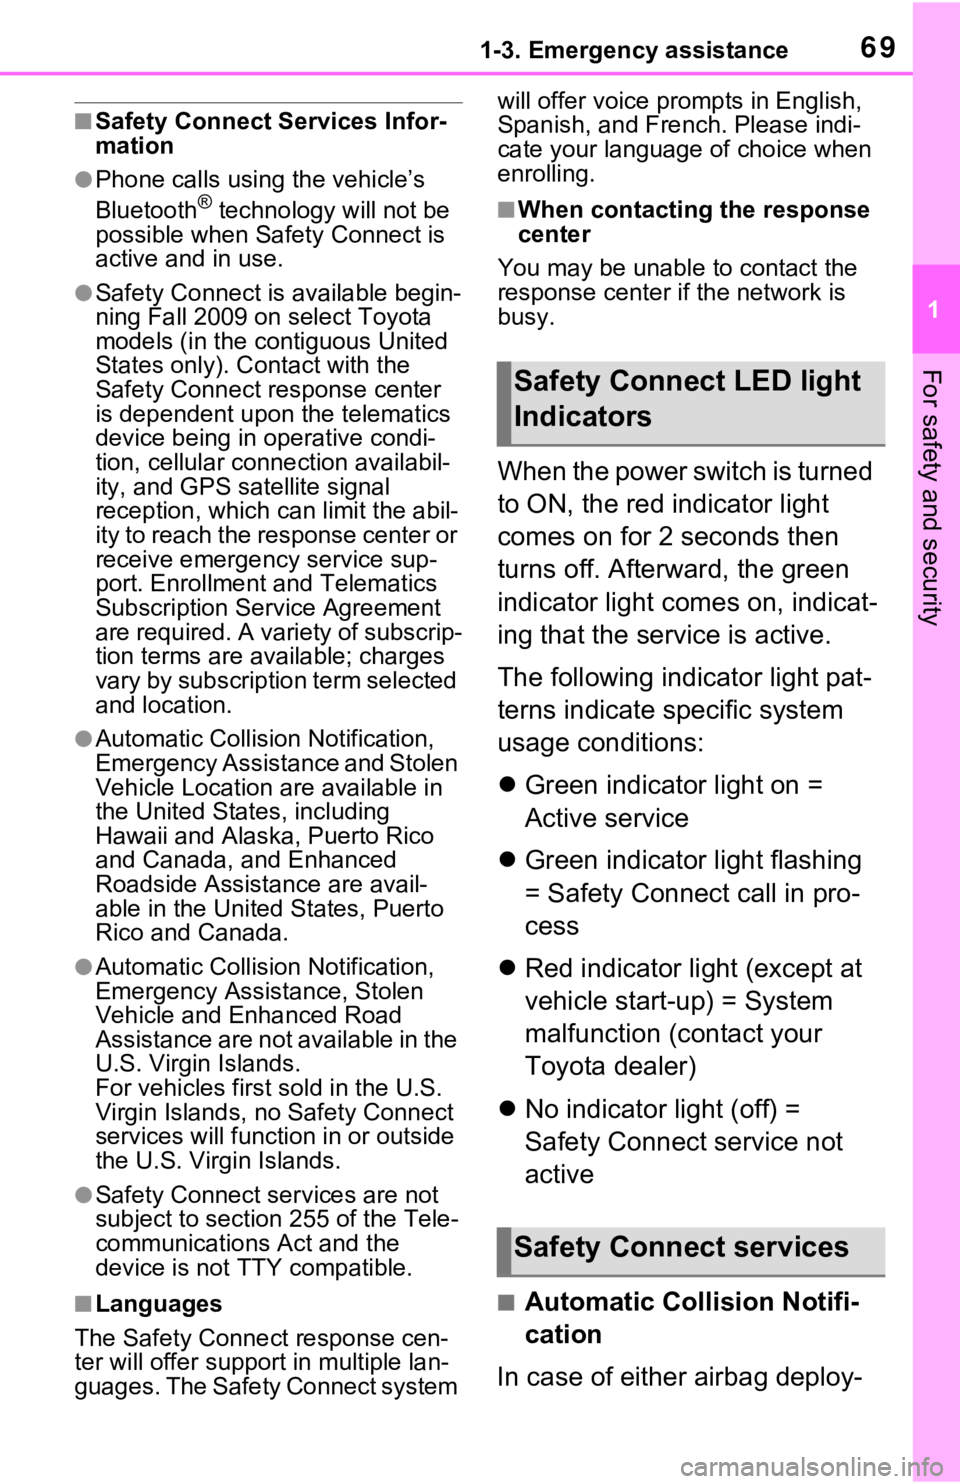
691-3. Emergency assistance
1
For safety and security
■Safety Connect Services Infor-
mation
●Phone calls using the vehicle’s
Bluetooth® technology will not be
possible when Safety Connect is
active and in use.
●Safety Connect is available begin-
ning Fall 2009 on select Toyota
models (in the contiguous United
States only). Contact with the
Safety Connect response center
is dependent upon the telematics
device being in operative condi-
tion, cellular connection availabil-
ity, and GPS satellite signal
reception, which can limit the abil-
ity to reach the response center or
receive emergency service sup-
port. Enrollment and Telematics
Subscription Service Agreement
are required. A variety of subscrip-
tion terms are available; charges
vary by subscription term selected
and location.
●Automatic Collision Notification,
Emergency Assistance and Stolen
Vehicle Location are available in
the United States, including
Hawaii and Alaska, Puerto Rico
and Canada, and Enhanced
Roadside Assistance are avail-
able in the United States, Puerto
Rico and Canada.
●Automatic Collision Notification,
Emergency Assist ance, Stolen
Vehicle and Enhanced Road
Assistance are not available in the
U.S. Virgin Islands.
For vehicles first sold in the U.S.
Virgin Islands, no Safety Connect
services will function in or outside
the U.S. Virgin Islands.
●Safety Connect ser vices are not
subject to section 255 of the Tele-
communications Act and the
device is not TTY compatible.
■Languages
The Safety Connect response cen-
ter will offer support in multiple lan-
guages. The Safety Connect system will offer voice prompts in English,
Spanish, and French. Please indi-
cate your language of choice when
enrolling.
■When contacting the response
center
You may be unable to contact the
response center if the network is
busy.
When the power switch is turned
to ON, the red indicator light
comes on for 2 seconds then
turns off. Afterward, the green
indicator light comes on, indicat-
ing that the service is active.
The following indicator light pat-
terns indicate specific system
usage conditions:
Green indicator light on =
Active service
Green indicator light flashing
= Safety Connect call in pro-
cess
Red indicator light (except at
vehicle start-up) = System
malfunction (contact your
Toyota dealer)
No indicator light (off) =
Safety Connect service not
active
■Automatic Collision Notifi-
cation
In case of either airbag deploy-
Safety Connect LED light
Indicators
Safety Connect services
Page 163 of 616
1633-1. Instrument cluster
3
Vehicle status information and indicators
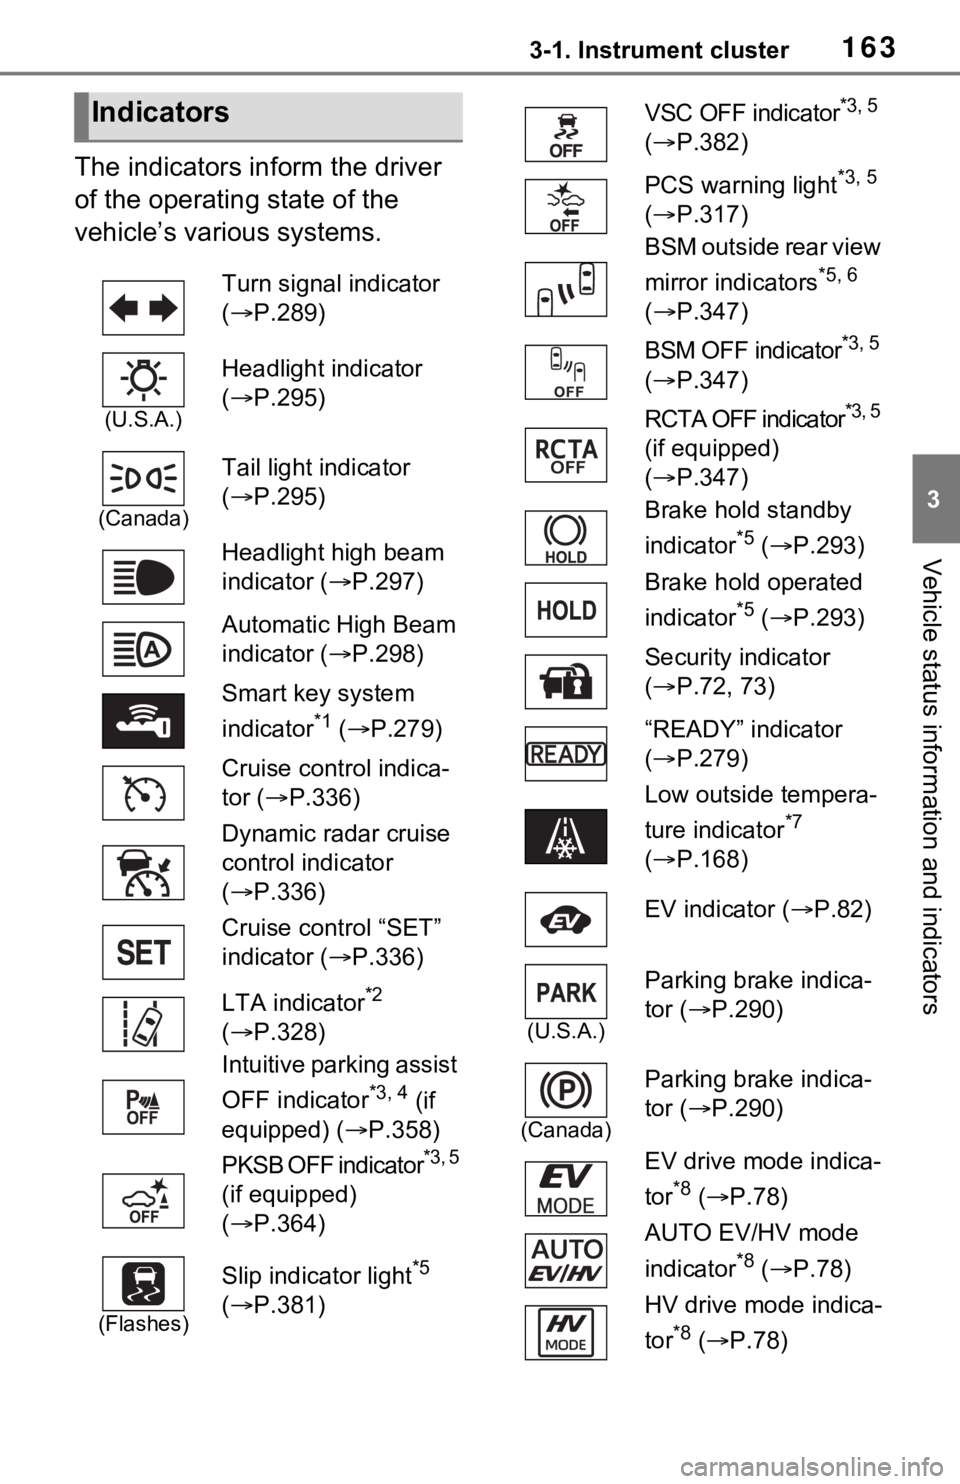
The indicators inform the driver
of the operating state of the
vehicle’s various systems.
Indicators
Turn signal indicator
( P.289)
(U.S.A.)
Headlight indicator
( P.295)
(Canada)
Tail light indicator
( P.295)
Headlight high beam
indicator ( P.297)
Automatic High Beam
indicator ( P.298)
Smart key system
indicator
*1 ( P.279)
Cruise control indica-
tor ( P.336)
Dynamic radar cruise
control indicator
( P.336)
Cruise control “SET”
indicator ( P.336)
LTA indicator
*2
( P.328)
Intuitive parking assist
OFF indicator
*3, 4 (if
equipped) ( P.358)
PKSB OFF indicator
*3, 5
(if equipped)
( P.364)
(Flashes)
Slip indicator light*5
( P.381)
VSC OFF indicator*3, 5
( P.382)
PCS warning light
*3, 5
( P.317)
BSM outside rear view
mirror indicators
*5, 6
( P.347)
BSM OFF indicator
*3, 5
( P.347)
RCTA OFF indicator
*3, 5
(if equipped)
( P.347)
Brake hold standby
indicator
*5 ( P.293)
Brake hold operated
indicator
*5 ( P.293)
Security indicator
( P.72, 73)
“READY” indicator
( P.279)
Low outside tempera-
ture indicator
*7
( P.168)
EV indicator ( P.82)
(U.S.A.)
Parking brake indica-
tor ( P.290)
(Canada)
Parking brake indica-
tor (P.290)
EV drive mode indica-
tor
*8 ( P.78)
AUTO EV/HV mode
indicator
*8 ( P.78)
HV drive mode indica-
tor
*8 ( P.78)
Page 199 of 616
1994-2. Opening, closing and locking the doors
4
Before driving
within approximately 3.2 ft. (1 m) of
the vehicle.
1Turn the power switch to OFF.
2 When the indicator light on the
key surface is not on, press and
hold , or for
approximately 5 seconds while
pressing and holding .
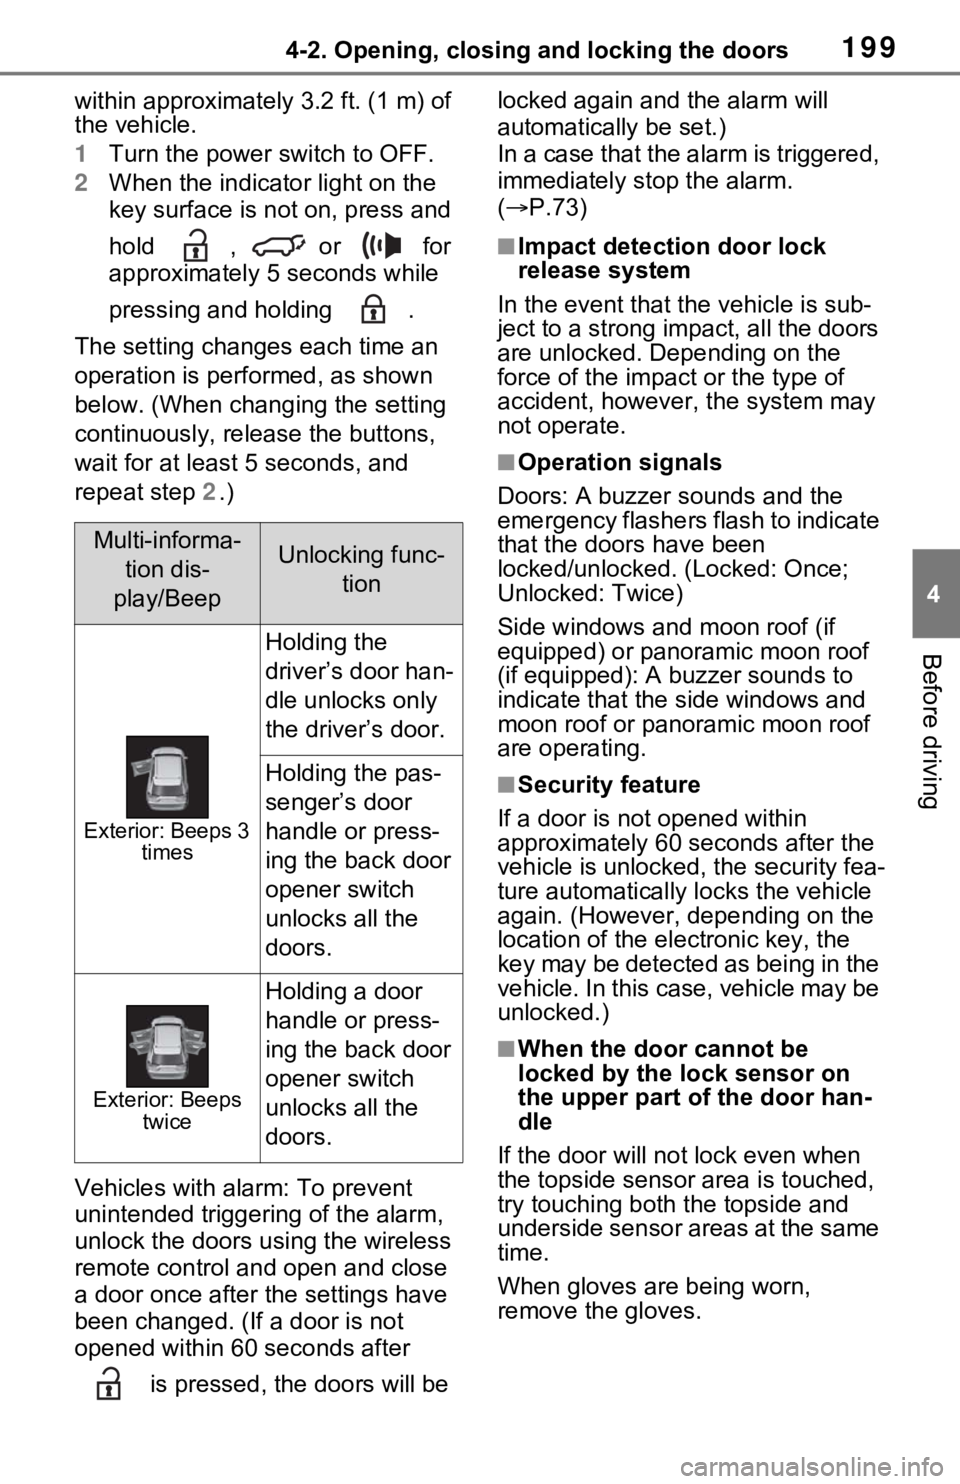
The setting changes each time an
operation is performed, as shown
below. (When changing the setting
continuously, release the buttons,
wait for at least 5 seconds, and
repeat step 2.)
Vehicles with alarm: To prevent
unintended triggering of the alarm,
unlock the doors us ing the wireless
remote control and open and close
a door once after t he settings have
been changed. (If a door is not
opened within 60 seconds after
is pressed, the doors will be locked again and the alarm will
automatically be set.)
In a case that the alarm is triggered,
immediately stop the alarm.
(
P.73)
■Impact detection door lock
release system
In the event that t he vehicle is sub-
ject to a strong impact, all the doors
are unlocked. Depending on the
force of the impact or the type of
accident, however, the system may
not operate.
■Operation signals
Doors: A buzzer sounds and the
emergency flashers flash to indicate
that the doors have been
locked/unlocked. (Locked: Once;
Unlocked: Twice)
Side windows and moon roof (if
equipped) or panoramic moon roof
(if equipped): A buzzer sounds to
indicate that the side windows and
moon roof or panoramic moon roof
are operating.
■Security feature
If a door is not opened within
approximately 60 s econds after the
vehicle is unlocked, the security fea-
ture automatically locks the vehicle
again. (However, depending on the
location of the el ectronic key, the
key may be detected as being in the
vehicle. In this case, vehicle may be
unlocked.)
■When the door cannot be
locked by the lock sensor on
the upper part of the door han-
dle
If the door will not lock even when
the topside sensor area is touched,
try touching both the topside and
underside sensor areas at the same
time.
When gloves are being worn,
remove the gloves.
Multi-informa-
tion dis-
play/BeepUnlocking func- tion
Exterior: Beeps 3 times
Holding the
driver’s door han-
dle unlocks only
the driver’s door.
Holding the pas-
senger’s door
handle or press-
ing the back door
opener switch
unlocks all the
doors.
Exterior: Beeps twice
Holding a door
handle or press-
ing the back door
opener switch
unlocks all the
doors.
Page 205 of 616
2054-2. Opening, closing and locking the doors
4
Before driving
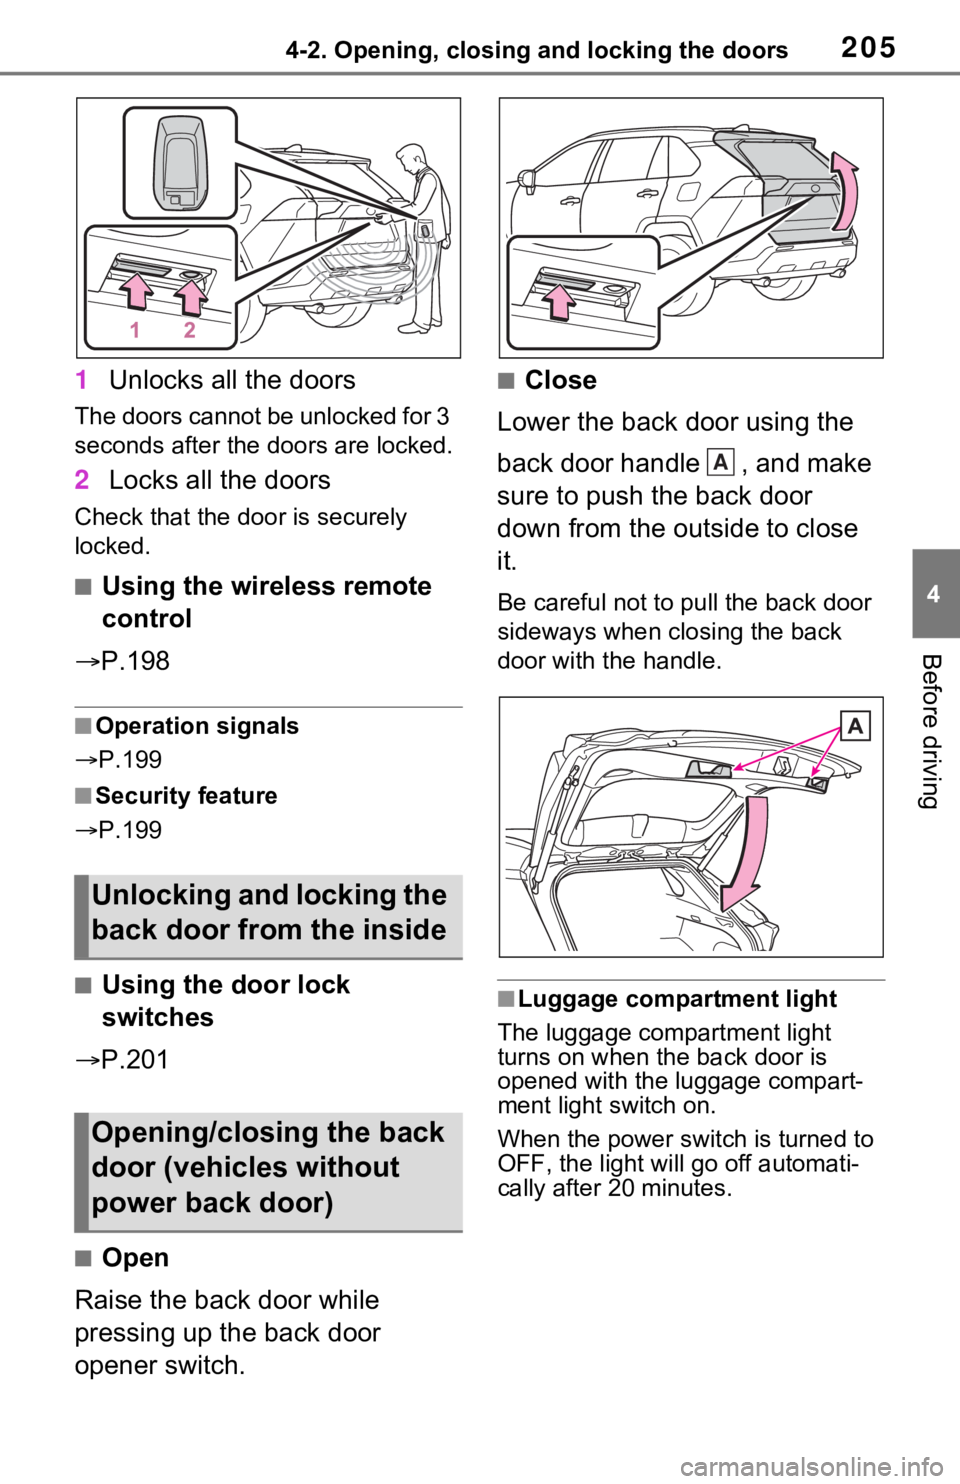
1Unlocks all the doors
The doors cannot be unlocked for 3
seconds after the doors are locked.
2Locks all the doors
Check that the door is securely
locked.
■Using the wireless remote
control
P.198
■Operation signals
P.199
■Security feature
P.199
■Using the door lock
switches
P.201
■Open
Raise the back door while
pressing up the back door
opener switch.
■Close
Lower the back door using the
back door handle , and make
sure to push the back door
down from the outside to close
it.
Be careful not to pull the back door
sideways when closing the back
door with the handle.
■Luggage compartment light
The luggage compartment light
turns on when the back door is
opened with the luggage compart-
ment light switch on.
When the power switch is turned to
OFF, the light will go off automati-
cally after 20 minutes.
Unlocking and locking the
back door from the inside
Opening/closing the back
door (vehicles without
power back door)
A
Page 220 of 616

2204-2. Opening, closing and locking the doors
●If the wireless remote control is
used to lock the doors when the
electronic key is near the vehicle,
there is a possib ility that the door
may not be unlocke d by the entry
function. (Use the wireless remote
control to unloc k the doors.)
●Touching the door lock sensor
while wearing gloves may delay or
prevent lock operation. Remove
the gloves and touch the lock sen-
sor again.
●When the lock op eration is per-
formed using the lock sensor, rec-
ognition signals will be shown up
to two consecutive times. After
this, no recogniti on signals will be
given.
●If the door handle becomes wet
while the electronic key is within
the effective ran ge, the door may
lock and unlock repeatedly. In that
case, follow the fo llowing correc-
tion procedures to wash the vehi-
cle:
• Place the electronic key in a loca-
tion 6 ft. (2 m) or more away from
the vehicle. (Take care to ensure
that the key is not stolen.)
• Set the electronic key to battery- saving mode to disable the smart
key system. ( P.218)
●If the electronic key is inside the
vehicle and a door handle
becomes wet during a car wash, a
message may be shown on the
multi-informatio n display and a
buzzer will sound outside the vehi-
cle. To turn off the alarm, lock all
the doors.
●The lock sensor may not work
properly if it com es into contact
with ice, snow, mud, etc. Clean
the lock sensor and attempt to
operate it again, or use the lock
sensor on the lower part of the
door handle.
●A sudden approac h to the effec-
tive range or door handle may pre-
vent the doors from being
unlocked. In this case, return the
door handle to the original position and check that t
he doors unlock
before pulling the door handle
again.
●If there is another electronic key in
the detection area, it may take
slightly longer to unlock the doors
after the door handle is gripped.
■When the vehicle is not driven
for extended periods
●To prevent theft of the vehicle, do
not leave the electronic key within
6 ft. (2 m) of the vehicle.
●The smart key system can be
deactivated in advance. ( P.574)
●Battery-saving mode can reduce
the power consumption of elec-
tronic keys. ( P.218)
■To operate the system properly
Make sure to carry the electronic
key when operating the system. Do
not get the electronic key too close
to the vehicle when operating the
system from the out side of the vehi-
cle.
Depending on the position and hold-
ing condition of the electronic key,
the key may not be detected cor-
rectly and the system may not oper-
ate properly. (The alarm may go off
accidentally, or the door lock pre-
vention may not operate.)
■If the smart key system does
not operate properly
●Locking and unlocking the doors:
Use the mechanical key.
( P.537)
●Starting the hybrid system:
P.538
■Customization
Settings (e.g. smart key system)
can be changed.
(Customizable features: P.573)
If the smart key system has been
deactivated in a customized setting,
refer to the explanations for the fol-
lowing operations.
●Locking and unlocking the doors:
Use the wireless remote control or
Page 257 of 616
257
5
5
Driving
Driving
5-1. Before drivingDriving the vehicle....... 258
Cargo and luggage ..... 265
Vehicle load limits ....... 268
Trailer towing .............. 269
Dinghy towing ............. 278
5-2. Driving procedures Power (ignition) switch 279
Hybrid transmission .... 285
Turn signal lever ......... 289
Parking brake .............. 290
Brake Hold .................. 293
5-3. Operating the lights and wipers
Headlight switch .......... 295
AHB (Automatic High Beam)........................ 298
Windshield wipers and washer....................... 301
Rear window wiper and washer....................... 304
5-4. Refueling Opening the fuel tank cap.................................. 306
5-5. Using the driving support
systems
Toyota Safety Sense 2.0 .................................. 309
PCS (Pre-Collision System) .................................. 315LTA (Lane Tracing Assist)
.................................. 323
RSA (Road Sign Assist) .................................. 333
Dynamic radar cruise con- trol with full-speed range.................................. 336
BSM (Blind Spot Monitor) .................................. 347
Intuitive parking assist . 356
PKSB (Parking Support Brake) ........................ 363
Parking Support Brake func- tion (static objects) .... 368
Parking Support Brake func- tion (rear-crossing vehi-
cles) ........................... 373
Driving mode select switch .................................. 377
Trail Mode ................... 379
Driving assist systems. 380
5-6. Driving tips Winter driving tips........ 387
Utility vehicle precautions .................................. 390
Page 289 of 616
2895-2. Driving procedures
5
Driving
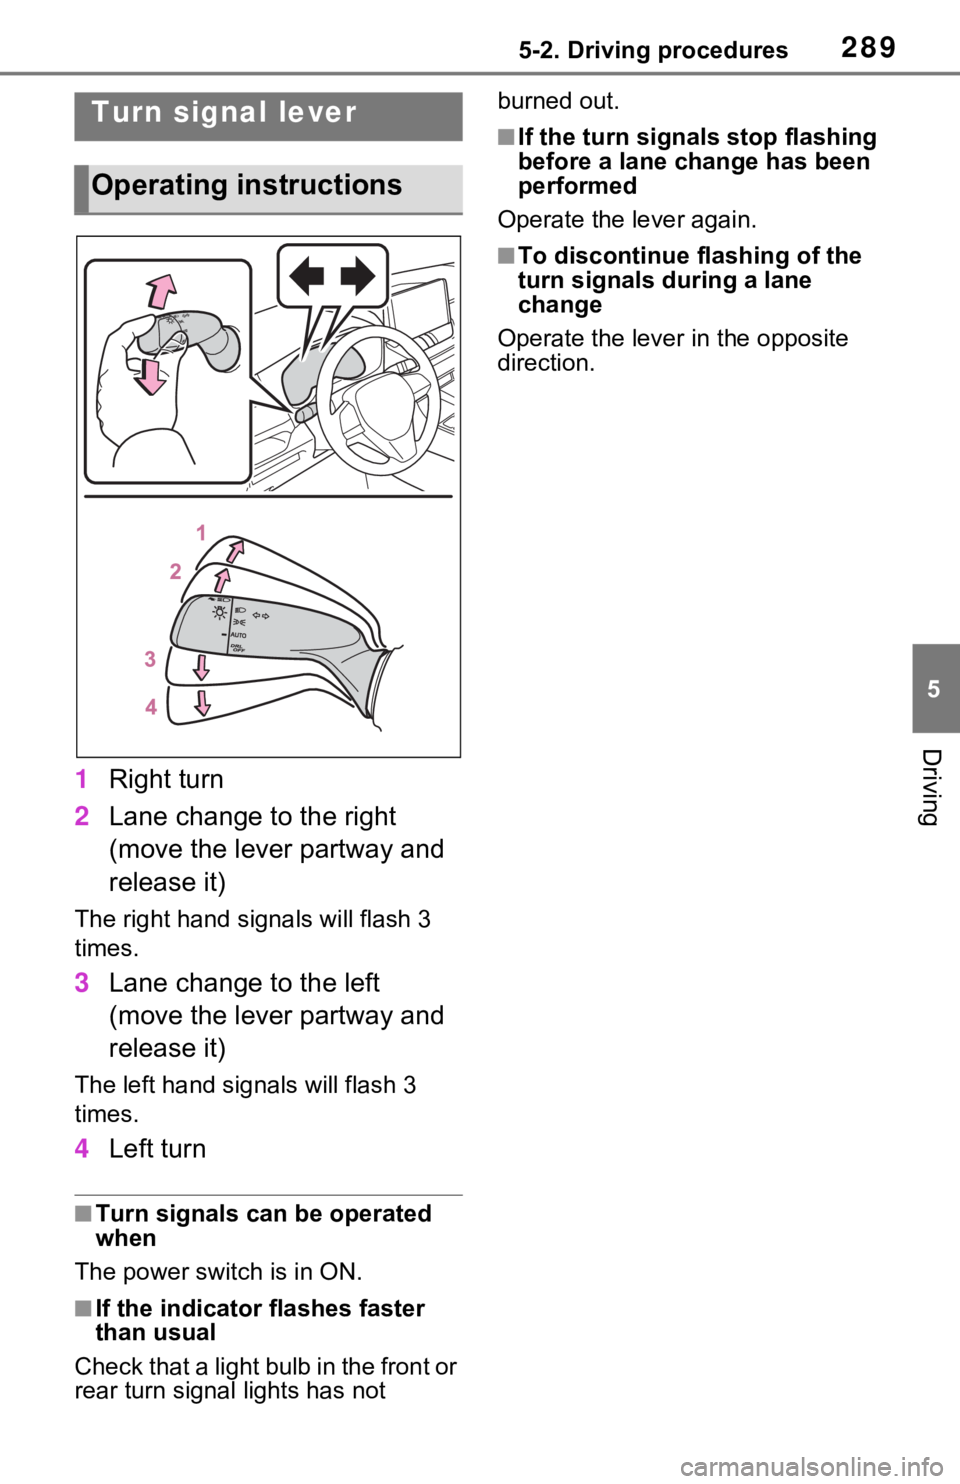
1Right turn
2 Lane change to the right
(move the lever partway and
release it)
The right hand signals will flash 3
times.
3Lane change to the left
(move the lever partway and
release it)
The left hand signals will flash 3
times.
4Left turn
■Turn signals can be operated
when
The power swit ch is in ON.
■If the indicator flashes faster
than usual
Check that a light bulb in the front or
rear turn signal lights has not burned out.
■If the turn signals stop flashing
before a lane change has been
performed
Operate the lever again.
■To discontinue flashing of the
turn signals during a lane
change
Operate the lever in the opposite
direction.
Turn signal lever
Operating instructions