display TOYOTA RAV4 PRIME 2022 Owner's Manual
[x] Cancel search | Manufacturer: TOYOTA, Model Year: 2022, Model line: RAV4 PRIME, Model: TOYOTA RAV4 PRIME 2022Pages: 624, PDF Size: 24.01 MB
Page 119 of 624
1192-2. Charging
2
Plug-in hybrid system
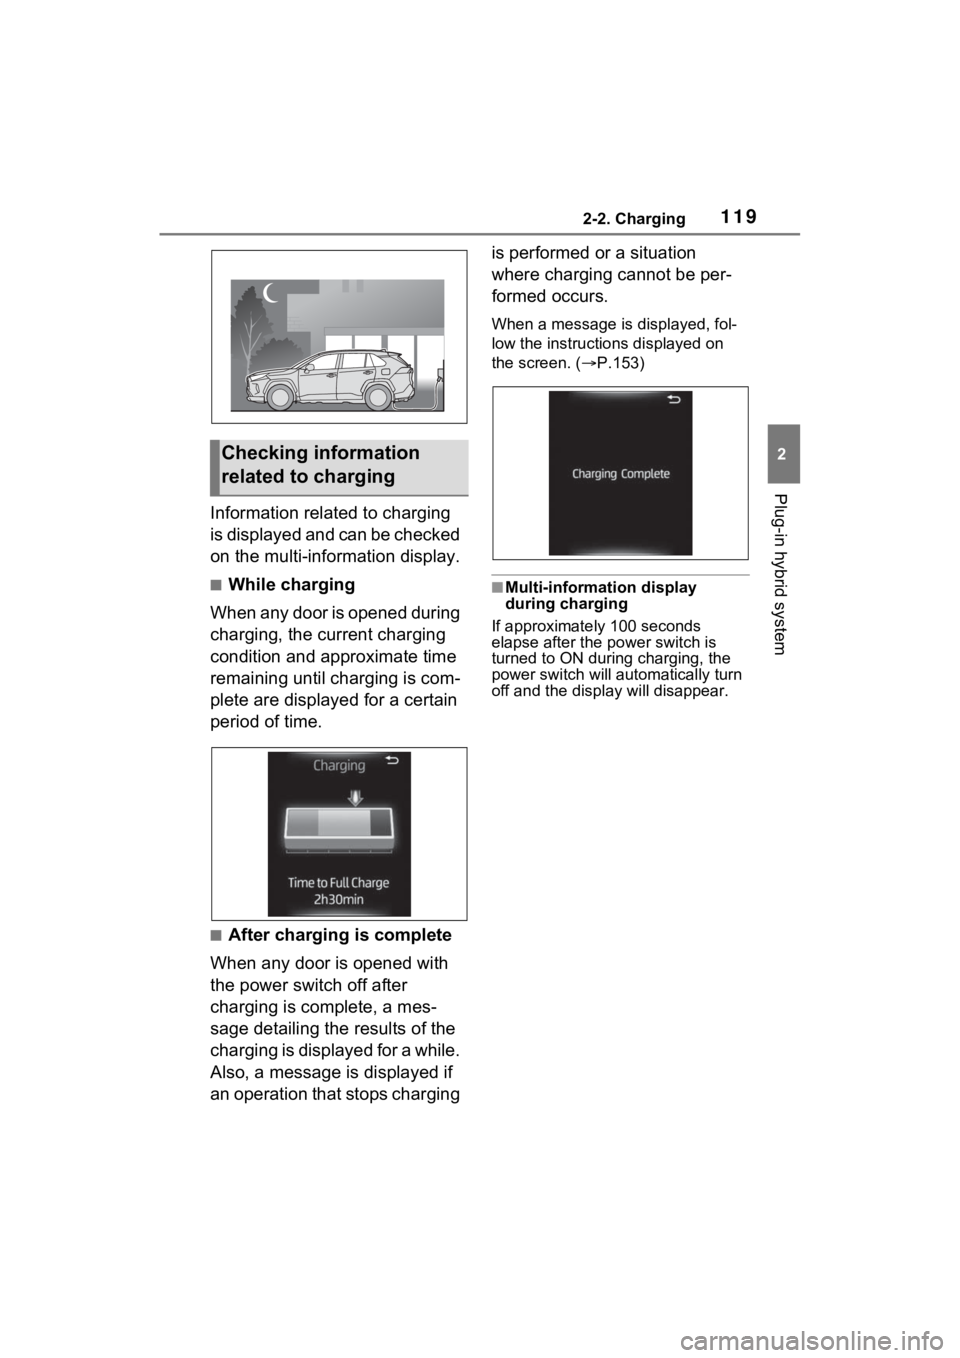
Information related to charging
is displayed and can be checked
on the multi-information display.
■While charging
When any door is opened during
charging, the current charging
condition and approximate time
remaining until charging is com-
plete are displayed for a certain
period of time.
■After charging is complete
When any door is opened with
the power switch off after
charging is complete, a mes-
sage detailing the results of the
charging is displayed for a while.
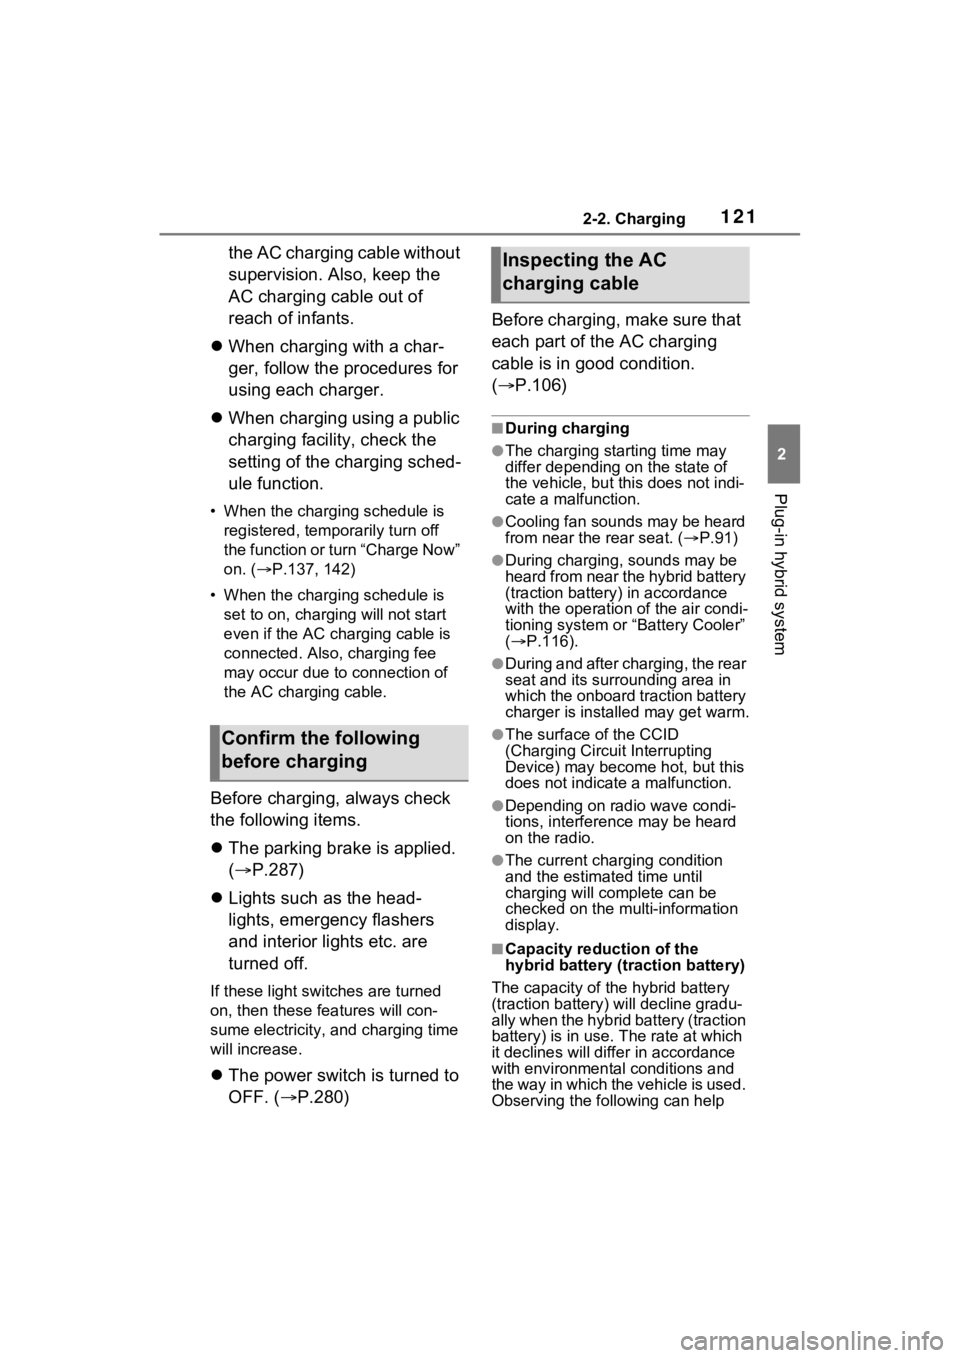
Also, a message is displayed if
an operation that stops charging is performed or a situation
where charging cannot be per-
formed occurs.
When a message is displayed, fol-
low the instructio
ns displayed on
the screen. ( P.153)
■Multi-information display
during charging
If approximate ly 100 seconds
elapse after the power switch is
turned to ON during charging, the
power switch will automatically turn
off and the display will disappear.
Checking information
related to charging
Page 121 of 624
1212-2. Charging
2
Plug-in hybrid system
the AC charging cable without
supervision. Also, keep the
AC charging cable out of
reach of infants.
When charging with a char-
ger, follow the procedures for
using each charger.
When charging using a public
charging facility, check the
setting of the charging sched-
ule function.
• When the charging schedule is
registered, temporarily turn off
the function or turn “Charge Now”
on. ( P.137, 142)
• When the charging schedule is set to on, charg ing will not start
even if the AC charging cable is
connected. Also, charging fee
may occur due to connection of
the AC charging cable.
Before charging, always check
the following items.
The parking brake is applied.
( P.287)
Lights such as the head-
lights, emergency flashers
and interior lights etc. are
turned off.
If these light switches are turned
on, then th ese features will con-
sume electricity, and charging time
will increase.
The power switch is turned to
OFF. ( P.280) Before charging, make sure that
each part of the AC charging
cable is in good condition.
(
P.106)
■During charging
●The charging starting time may
differ depending on the state of
the vehicle, but this does not indi-
cate a malfunction.
●Cooling fan sounds may be heard
from near the rear seat. ( P.91)
●During charging, sounds may be
heard from near the hybrid battery
(traction battery) in accordance
with the operation of the air condi-
tioning system or “Battery Cooler”
( P.116).
●During and after charging, the rear
seat and its surrounding area in
which the onboard traction battery
charger is installed may get warm.
●The surface of the CCID
(Charging Circuit Interrupting
Device) may become hot, but this
does not indicate a malfunction.
●Depending on radio wave condi-
tions, interference may be heard
on the radio.
●The current charging condition
and the estimated time until
charging will complete can be
checked on the mu lti-information
display.
■Capacity reduction of the
hybrid battery (traction battery)
The capacity of the hybrid battery
(traction battery) will decline gradu-
ally when the hybrid battery (traction
battery) is in use. The rate at which
it declines will diff er in accordance
with environmental conditions and
the way in which the vehicle is used.
Observing the fo llowing can help
Confirm the following
before charging
Inspecting the AC
charging cable
Page 122 of 624
1222-2. Charging
suppress battery capacity decline.
●Avoid parking the vehicle in areas
with a high temperature under
direct sunlight when the hybrid
battery (traction battery) is fully
charged.
●Avoid accelerating and decelerat-
ing frequently and suddenly when
EV driving.
●Avoid frequent driving near the top
speed for EV driving. (P.82)
●Leave a low level of charge in the
hybrid battery (traction battery)
when leaving the vehicle undriven
for a long period of time.
After confirming that EV mode or
AUTO EV/HV mode has switched
to HV mode, turn the power switch
off.
●Use the charging schedule func-
tion as much as possible in order
to fully charge the hybrid battery
(traction battery) immediately
before starting off. ( P.130)
Also, if the hybrid battery (traction
battery) capacity reduces, the dis-
tance that can be driven in EV mode
or AUTO EV/HV mode decreases.
H ow ev er , ve hic le p er fo rm an ce do e s
not significantly become worse.
■When the remaining charge of
the hybrid battery (traction bat-
tery) is low after charging
In the following situations, the
remaining charge of the hybrid bat-
tery (traction battery) after charging
completes may be less than normal
in order to protect the system (the
EV driving range after the battery is
fully charged may be shorter).
*
●Charging is carried out when the
outside temperature is low or high.
●Charging is carried out immedi-
ately after high-load driving or in
extreme heat.
When none of the above situations
apply and there is a drastic drop in
the remaining charge of the hybrid
battery (traction battery) after charging completes, have the vehi-
cle inspected by your Toyota dealer.
*: When this occurs, even if the
remaining charge display of the
hybrid battery (traction battery)
shows that it is f ully charged, the
remaining charge rapidly
decreases faster than normal.
■When the charging amount sent
to the hybrid battery (traction
battery) decreases
When the amount of power supplied
by the charger is low or operation of
the “Battery Heate r”, etc., reduces
the charging pow er sent to the
hybrid battery (trac tion battery), the
charging amount sent to the hybrid
battery (traction battery) may
decrease.
■Certification
This device complies with Part 15 of
the FCC Rules. Operation is subject
to the following two conditions:
(1) this device may not cause harm-
ful interference, and
(2) this device must accept any
interference received, including
interference that may cause unde-
sired operation.
Page 125 of 624
1252-2. Charging
2
Plug-in hybrid system
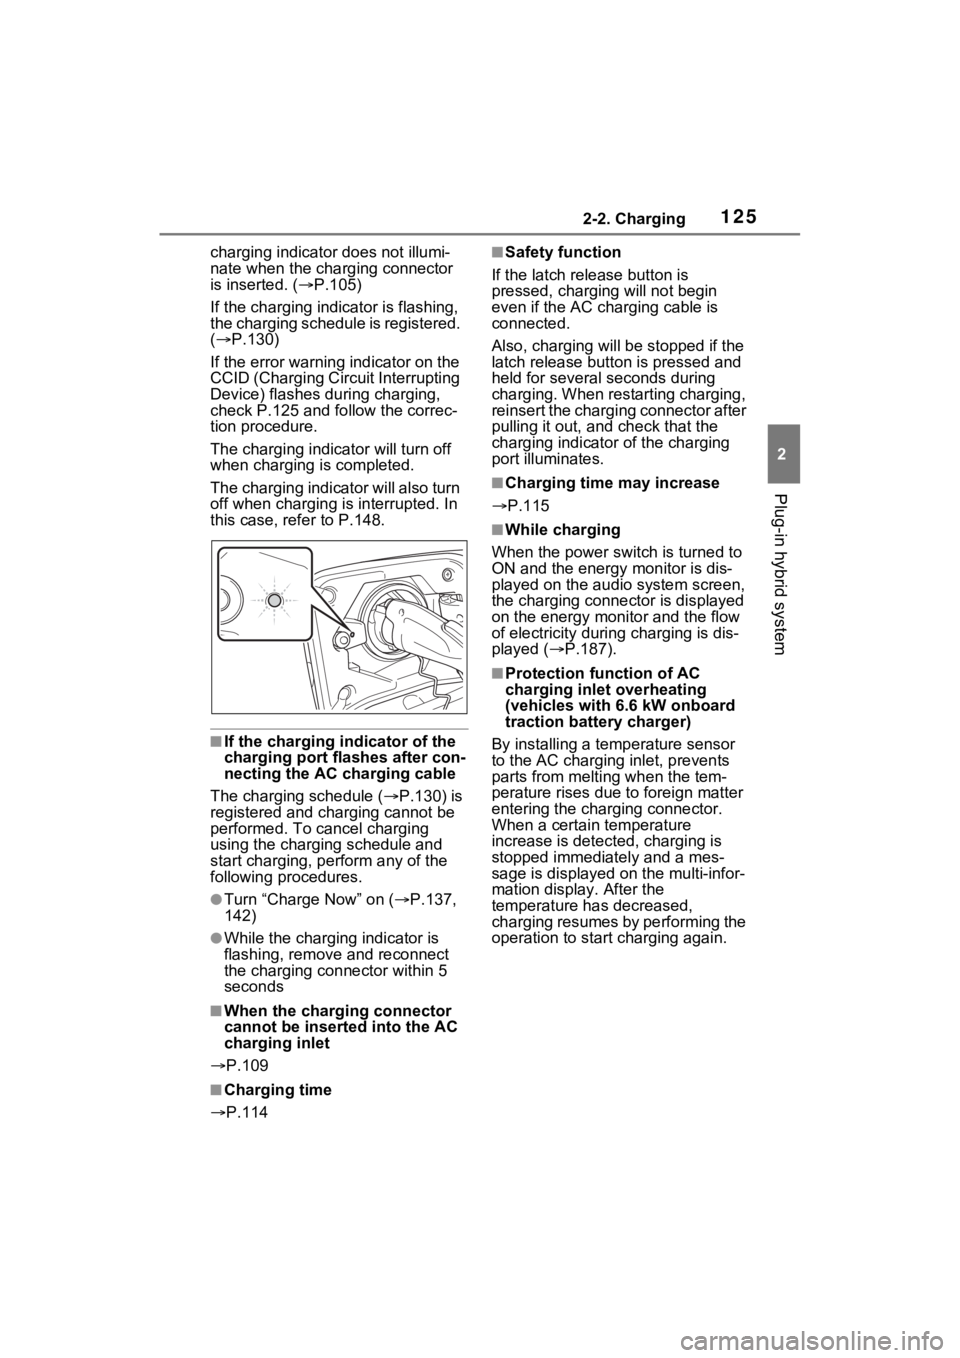
charging indicator does not illumi-
nate when the charging connector
is inserted. ( P.105)
If the charging indicator is flashing,
the charging schedule is registered.
( P.130)
If the error warning indicator on the
CCID (Charging Circuit Interrupting
Device) flashes during charging,
check P.125 and follow the correc-
tion procedure.
The charging indicator will turn off
when charging is completed.
The charging indicator will also turn
off when charging is interrupted. In
this case, refer to P.148.
■If the charging indicator of the
charging port flashes after con-
necting the AC charging cable
The charging schedule ( P.130) is
registered and charging cannot be
performed. To cancel charging
using the charging schedule and
start charging, per form any of the
following procedures.
●Turn “Charge Now” on ( P.137,
142)
●While the charging indicator is
flashing, remove and reconnect
the charging connector within 5
seconds
■When the charging connector
cannot be inserted into the AC
charging inlet
P.109
■Charging time
P.114
■Safety function
If the latch release button is
pressed, charging will not begin
even if the AC cha rging cable is
connected.
Also, charging will be stopped if the
latch release button is pressed and
held for several seconds during
charging. When restarting charging,
reinsert the charging connector after
pulling it out, and check that the
charging indicator of the charging
port illuminates.
■Charging time may increase
P.115
■While charging
When the power switch is turned to
ON and the energy monitor is dis-
played on the audio system screen,
the charging connector is displayed
on the energy monitor and the flow
of electricity during charging is dis-
played ( P.187).
■Protection function of AC
charging inlet overheating
(vehicles with 6.6 kW onboard
traction battery charger)
By installing a temp erature sensor
to the AC charging inlet, prevents
parts from melti ng when the tem-
perature rises due to foreign matter
entering the charging connector.
When a certain temperature
increase is detected, charging is
stopped immediat ely and a mes-
sage is displayed on the multi-infor-
mation display. After the
temperature has decreased,
charging resumes by performing the
operation to start charging again.
Page 130 of 624
1302-2. Charging
■Calendar settings
Current date and time information is
automatically set using GPS. How-
ever, if GPS calibra tion of clock is
turned off in the multimedia system
settings, the date needs to be set on
the multi-inform ation display.
If the calendar settings check
screen is displayed when an
attempt was made to register a
charge schedule, check that the cor-
rect date is set. If it is incorrect, be
sure to correct it.
If the calendar information is wrong,
the charging sche dule function will
not operate normally.
When registering the charging
schedule, the following settings
can be changed.
■Select the charging mode
One of the two following
charging modes can be
selected.
“Start”
Starts charging at the set time
*1
and finishes charging when fully
charged.
*2
“Departure”
Starts charging to finish at the
set time.
*3, 4
When this setting is selected,
the air conditioning-linked func-
tion can be used.
*1: Charging schedule function is performed in accordance with
the clock in the multi-information
display. Before registering the
charging schedule, check the
clock settings to the proper time.
*2: There might be a slight error in the timing when charging starts
due to the state of the hybrid bat-
tery (traction battery).
*3: When the system determines that there is no time to finish
charging by the set scheduled
departure time, it starts charging.
Check the charging schedules.
*4: If sudden changes in tempera-ture or changes in the condition
of the power source occur while
charging, charging may not end
exactly at the time estimated by
the system.
■Repeated setting
The periodic charging schedule
can be set by selecting your
desired day of the week. (If no
days are selected, charging is
only carried out once.)
Using the charging
schedule function
Charging can be carried out
at the desired time by regis-
tering the charging sched-
ule. Also, it is possible to
set the charging schedule to
one’s preferences, such as
having charging complete
by a certain departure time
or be carried out at the
same time on certain days.
Settings of the charging
schedule function
Page 131 of 624
1312-2. Charging
2
Plug-in hybrid system
■Air conditioning-linked set-
ting (“Climate Prep”)
When the charging mode is set
to “Departure”, the vehicle air
conditioning system ( P.390)
can be set to automatically oper-
ate
* according to the set time.
By adjusting the cabin temperature
in advance, passengers can enjoy
a pleasant interior immediately after
entering the vehicle.
*: Operation starts approximately 20 minutes before the set depar-
ture time.
■Turning “Charge Now” on
and off
If even one charging schedule is
registered, charging does not
start until the set time, even if
the AC charging cable is con-
nected to the vehicle. To start
charging without changing the
charging schedule setting, turn
“Charge Now” on to temporarily
cancel the charging schedule
and enable charging after con-
necting the AC charging cable.
*
*: If the charging connector is removed during charging while
the charging schedule is regis-
tered and “Charge Now” is on,
“Charge Now” turns off.
■Changing “Next Event”*1
It is possible to temporarily set
the time of the next charging
schedule without changing the
registered repeated setting.
*2
*1: The “Next Event” refers to the closest charging schedule from
the current time among the regis-
tered charging schedules.
Charging schedule is performed
based on the “Next Event”.
*2: When “Next Event” is changed,
the current charging schedule
will be temporarily ignored and
charging will not be carried out
until the time specified by “Next
Event”. (For example, when
“Next Event” is set for 2 days
later, even if items are registered
on the charging schedule,
charging will not be carried out
until the time specified by “Next
Event”.)
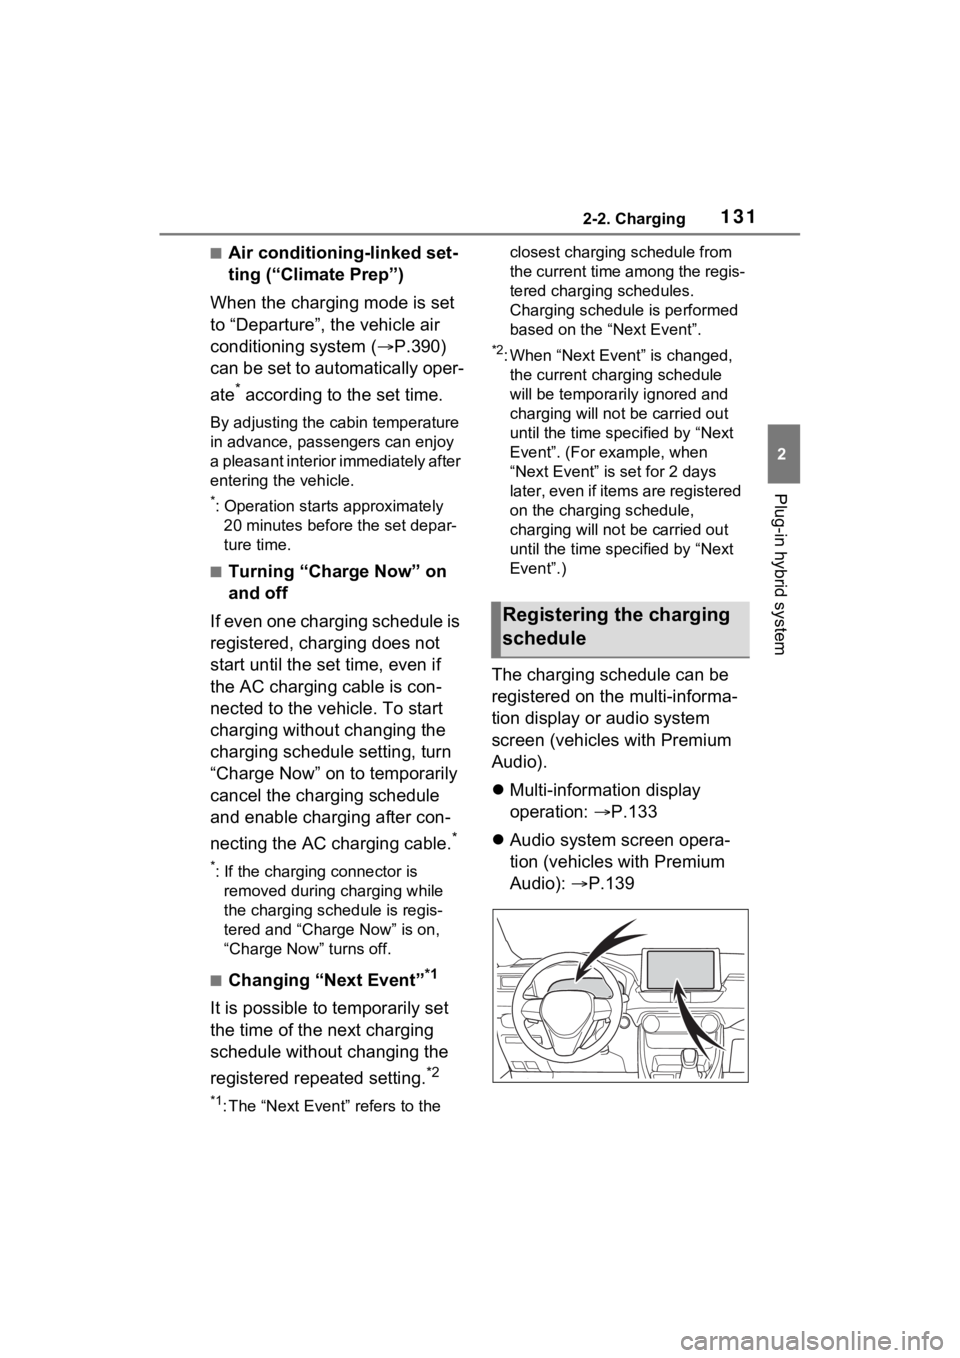
The charging schedule can be
registered on the multi-informa-
tion display or audio system
screen (vehicles with Premium
Audio).
Multi-information display
operation: P.133
Audio system screen opera-
tion (vehicles with Premium
Audio): P.139
Registering the charging
schedule
Page 133 of 624
1332-2. Charging
2
Plug-in hybrid system
●When turning “Charge Now” on
( P.137, 142)
●When an operation that temporar-
ily cancels charg ing using the
charging schedule is performed
( P.125)
■Effects of outside temperature
When the charging mode is set to
“Departure”, charging schedule may
be ignored due to the outside tem-
perature and charging may start.
■“Battery Heater” ( P.115) /
“Battery Cooler” ( P.116)
When charging is c arried out using
the charging schedule, the hybrid
battery (traction battery) heating or
cooling function may operate
according to the te mperature of the
hybrid battery (traction battery).
●When the charging mode is set to
“Start”, the function starts at the
set charging start time.
●“Battery Heater”: When the
charging mode is set to “Depar-
ture”, the function starts automati-
cally to complete heating by the
desired departure time.
●“Battery Cooler”: When the
charging mode is set to “Depar-
ture”, cooling starts approximately
30 minutes before the charging
start time. However, if there is no
time to finish charging by the
charging schedule, the hybrid bat-
tery (traction battery) cooling time
may be shortened and “Battery
Cooler” may not operate.
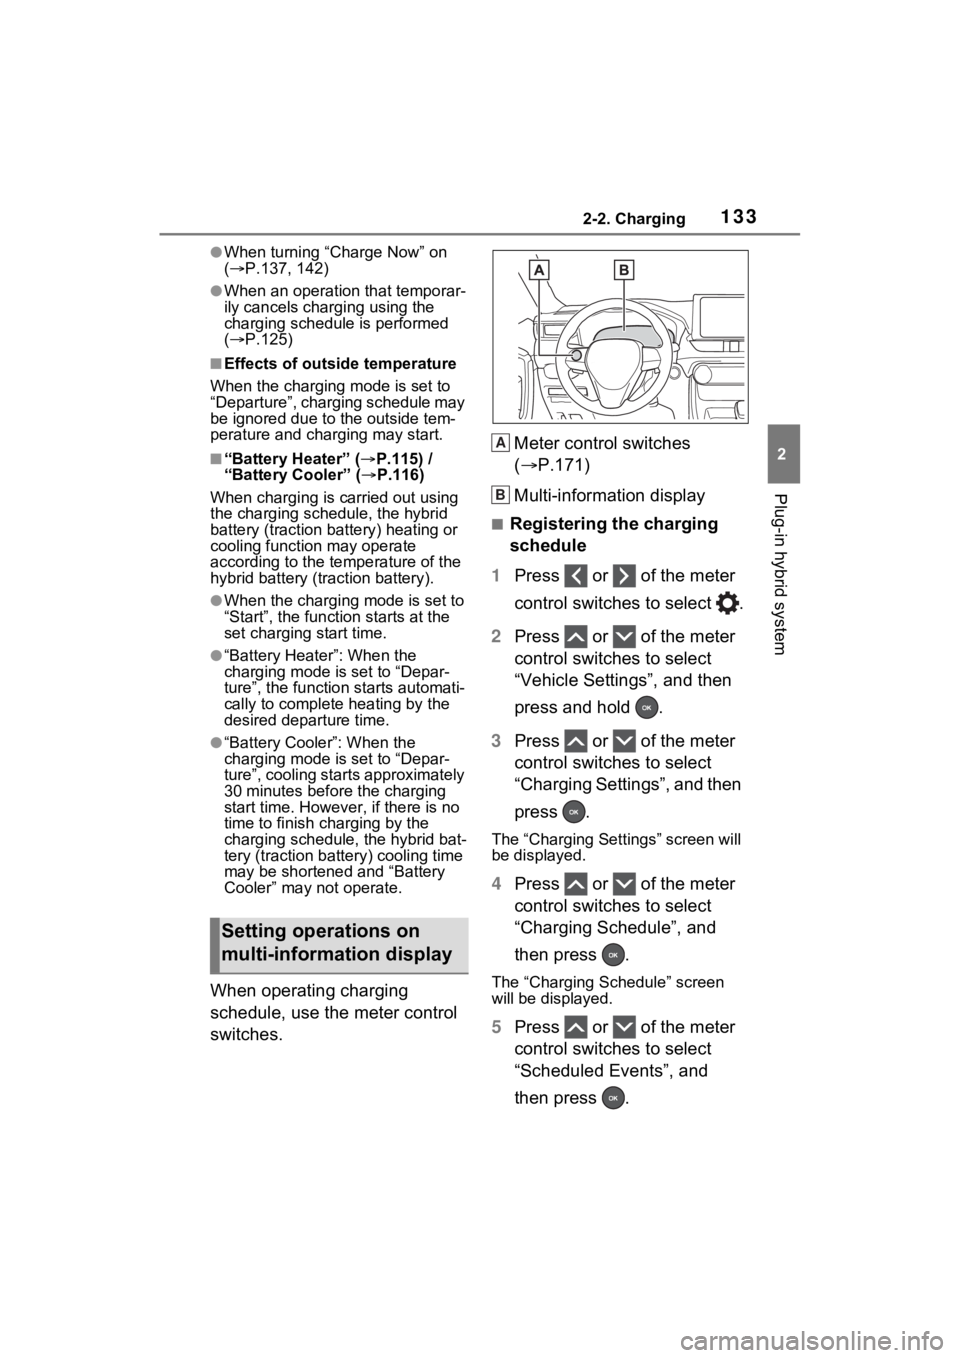
When operating charging
schedule, use the meter control
switches. Meter control switches
(
P.171)
Multi-information display
■Registering the charging
schedule
1 Press or of the meter
control switches to select .
2 Press or of the meter
control switches to select
“Vehicle Settings”, and then
press and hold .
3 Press or of the meter
control switches to select
“Charging Settings”, and then
press .
The “Charging Settings” screen will
be displayed.
4Press or of the meter
control switches to select
“Charging Schedule”, and
then press .
The “Charging Schedule” screen
will be displayed.
5Press or of the meter
control switches to select
“Scheduled Events”, and
then press .
Setting operations on
multi-information display
A
B
Page 134 of 624
1342-2. Charging
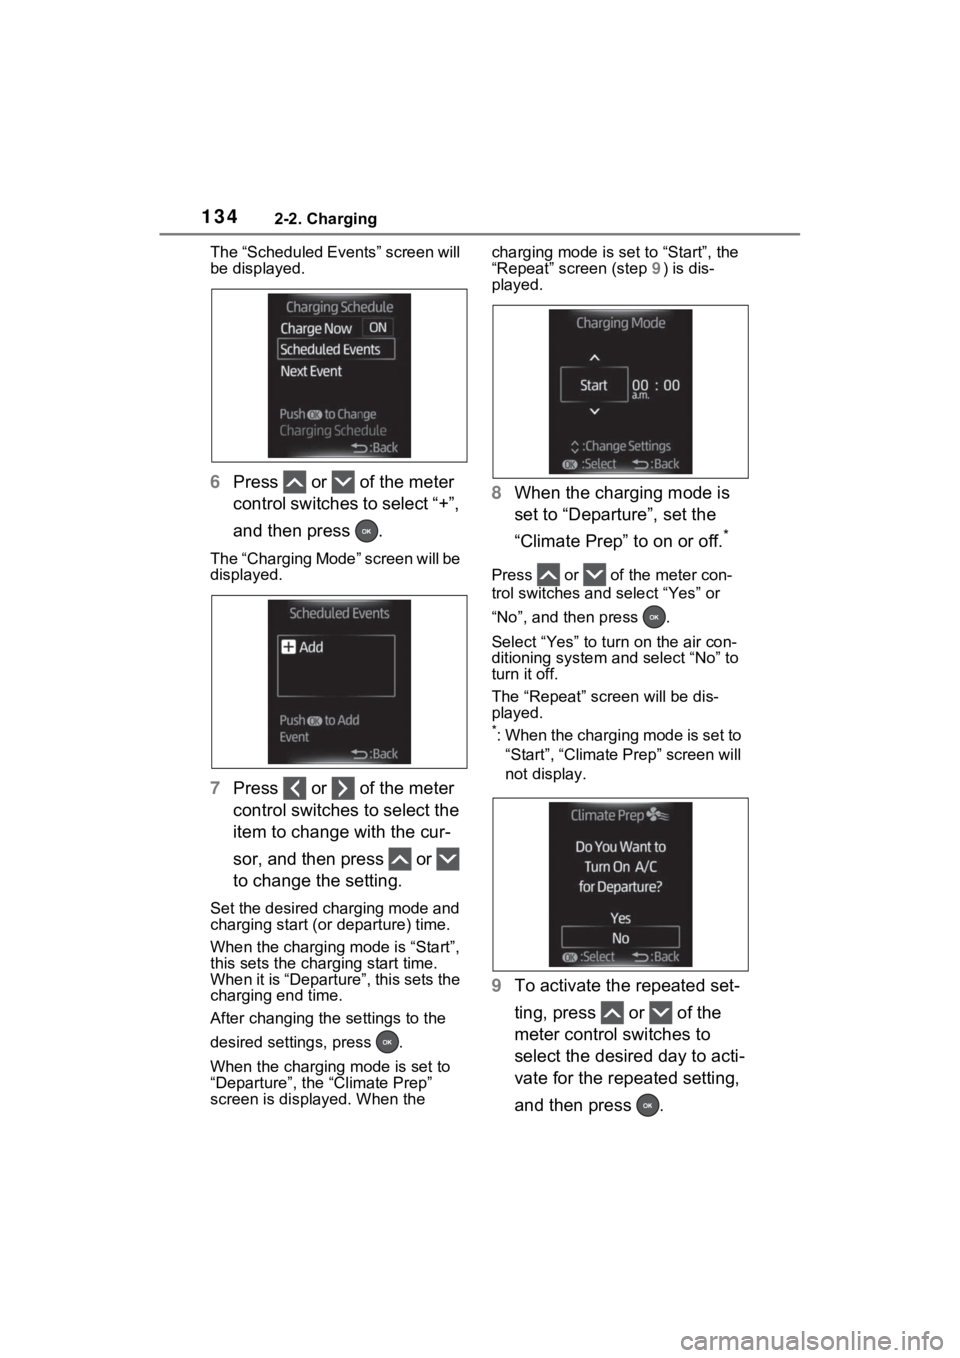
The “Scheduled Events” screen will
be displayed.
6Press or of the meter
control switches to select “+”,
and then press .
The “Charging Mode” screen will be
displayed.
7Press or of the meter
control switches to select the
item to change with the cur-
sor, and then press or
to change the setting.
Set the desired charging mode and
charging start (or departure) time.
When the charging mode is “Start”,
this sets the charging start time.
When it is “Departure”, this sets the
charging end time.
After changing the settings to the
desired settings, press .
When the charging mode is set to
“Departure”, the “Climate Prep”
screen is displayed. When the charging mode is set to “Start”, the
“Repeat” screen (step
9) is dis-
played.
8 When the charging mode is
set to “Departure”, set the
“Climate Prep” to on or off.
*
Press or of the meter con-
trol switches and select “Yes” or
“No”, and then press .
Select “Yes” to tu rn on the air con-
ditioning system and select “No” to
turn it off.
The “Repeat” scr een will be dis-
played.
*: When the charging mode is set to
“Start”, “Climate Prep” screen will
not display.
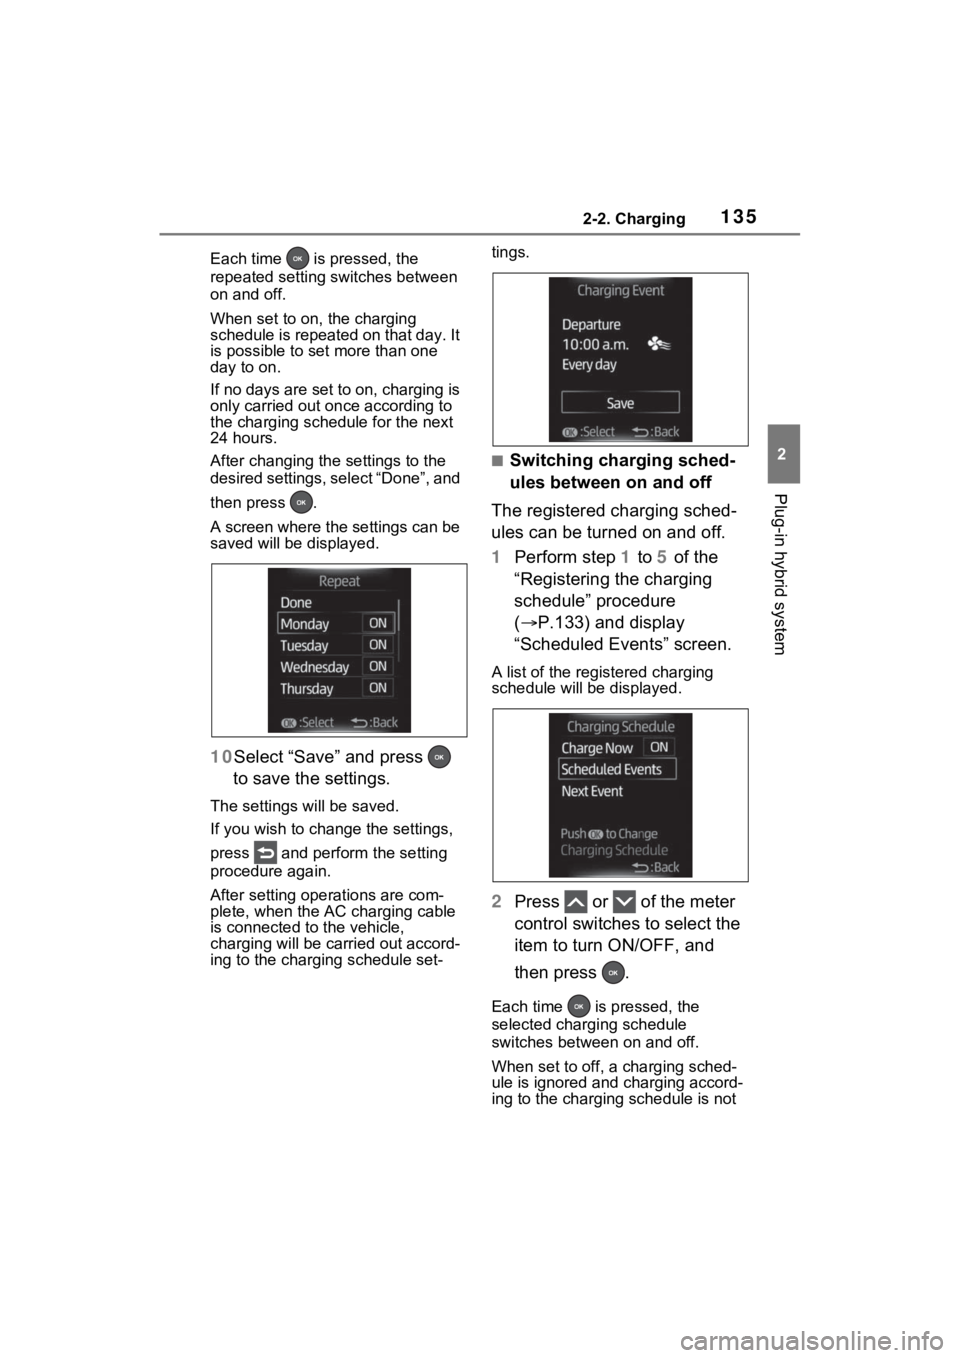
9 To activate the repeated set-
ting, press or of the
meter control switches to
select the desired day to acti-
vate for the repeated setting,
and then press .
Page 135 of 624
1352-2. Charging
2
Plug-in hybrid system
Each time is pressed, the
repeated setting switches between
on and off.
When set to on, the charging
schedule is repeated on that day. It
is possible to set more than one
day to on.
If no days are set to on, charging is
only carried out once according to
the charging sche dule for the next
24 hours.
After changing the settings to the
desired settings, select “Done”, and
then press .
A screen where the settings can be
saved will be displayed.
10 Select “Save” and press
to save the settings.
The settings will be saved.
If you wish to change the settings,
press and perform the setting
procedure again.
After setting operations are com-
plete, when the AC charging cable
is connected to the vehicle,
charging will be car ried out accord-
ing to the charging schedule set- tings.
■Switching charging sched-
ules between on and off
The registered charging sched-
ules can be turned on and off.
1 Perform step 1 to 5 of the
“Registering the charging
schedule” procedure
( P.133) and display
“Scheduled Events” screen.
A list of the registered charging
schedule will be displayed.
2 Press or of the meter
control switches to select the
item to turn ON/OFF, and
then press .
Each time is pressed, the
selected charging schedule
switches between on and off.
When set to off, a charging sched-
ule is ignored and charging accord-
ing to the charging schedule is not
Page 136 of 624
1362-2. Charging
carried out.
■Changing the registered
charging schedules
The registered charging sched-
ules can be modified or deleted.
1 Perform step 1 to 5 of the
“Registering the charging
schedule” ( P.133) proce-
dure and display “Scheduled
Events” screen.
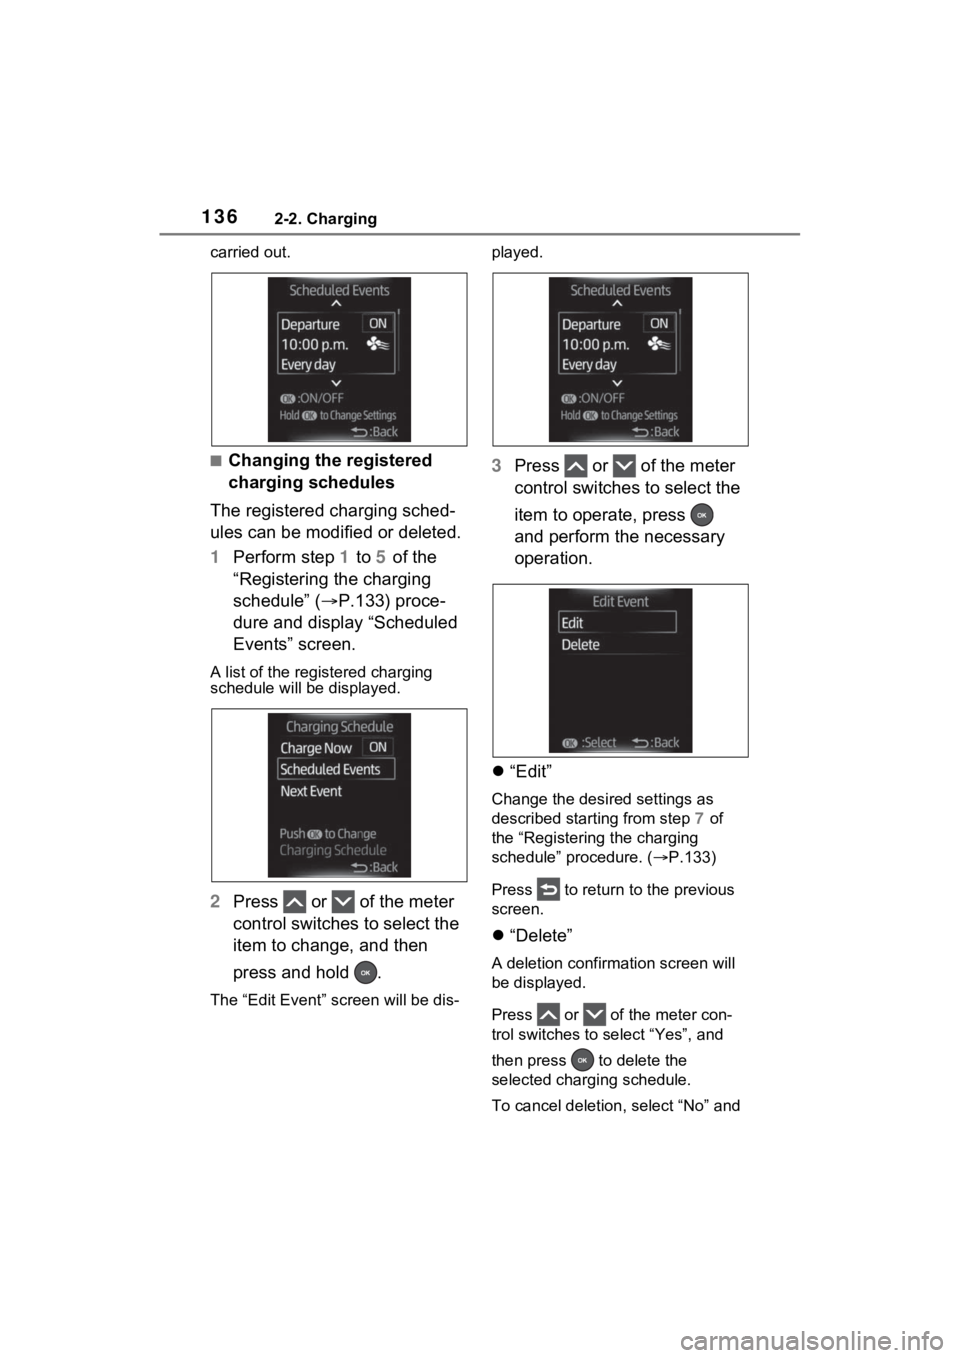
A list of the regi stered charging
schedule will be displayed.
2Press or of the meter
control switches to select the
item to change, and then
press and hold .
The “Edit Event” s creen will be dis- played.
3
Press or of the meter
control switches to select the
item to operate, press
and perform the necessary
operation.
“Edit”
Change the desired settings as
described starting from step 7 of
the “Registering the charging
schedule” procedure. ( P.133)
Press to return to the previous
screen.
“Delete”
A deletion confir mation screen will
be displayed.
Press or of the meter con-
trol switches to select “Yes”, and
then press to delete the
selected charging schedule.
To cancel deletion , select “No” and