display TOYOTA SEQUOIA 2009 2.G Owner's Guide
[x] Cancel search | Manufacturer: TOYOTA, Model Year: 2009, Model line: SEQUOIA, Model: TOYOTA SEQUOIA 2009 2.GPages: 612
Page 259 of 612
Interior features3
259
3-5. Using the interior lights ............................. 371
Interior lights list ............... 371
• Personal/interior light main switch .................... 372
• Personal/interior lights ... 373
• Interior light .................... 374
3-6. Using the storage features ......................... 375
List of storage features .... 375
• Glove boxes ................... 376
• Coin holder .................... 377
• Front console box .......... 377
• Card holder .................... 379
• Map holder ..................... 380
• Pen holder ..................... 381
• Tissue pocket................. 382
• Rear console box ........... 382
• Overhead console.......... 385
• Cup holders ................... 386
• Bottle holders ................. 391
• Auxiliary boxes............... 392 3-7. Other interior
features ......................... 394
Sun visors ........................ 394
Vanity mirrors ................... 395
Clock ................................ 396
Outside temperature display............................ 397
Portable ashtray ............... 399
Cigarette lighter................ 400
Conversation mirror ......... 401
Power outlets ................... 402
Seat heaters..................... 408
Seat heaters and ventilators ...................... 411
Armrests........................... 413
Rear side sunshades ....... 414
Seatback table ................. 416
Floor mat .......................... 417
Luggage compartment features .......................... 418
Garage door opener ........ 423
Compass .......................... 428
Page 261 of 612
261
3-1. Using the air conditioning system
and defogger
3
Interior features
Using the automatic mode
Press .
The air conditioning system will begin to operate. Air outlets and fan
speed are automatically adjusted according to the temperature set-
ting.
Turn the temperature control dial clockwise (warm) or coun-
terclockwise (cool).
The temperature for the driver and passenger seat can be set sepa-
rately.
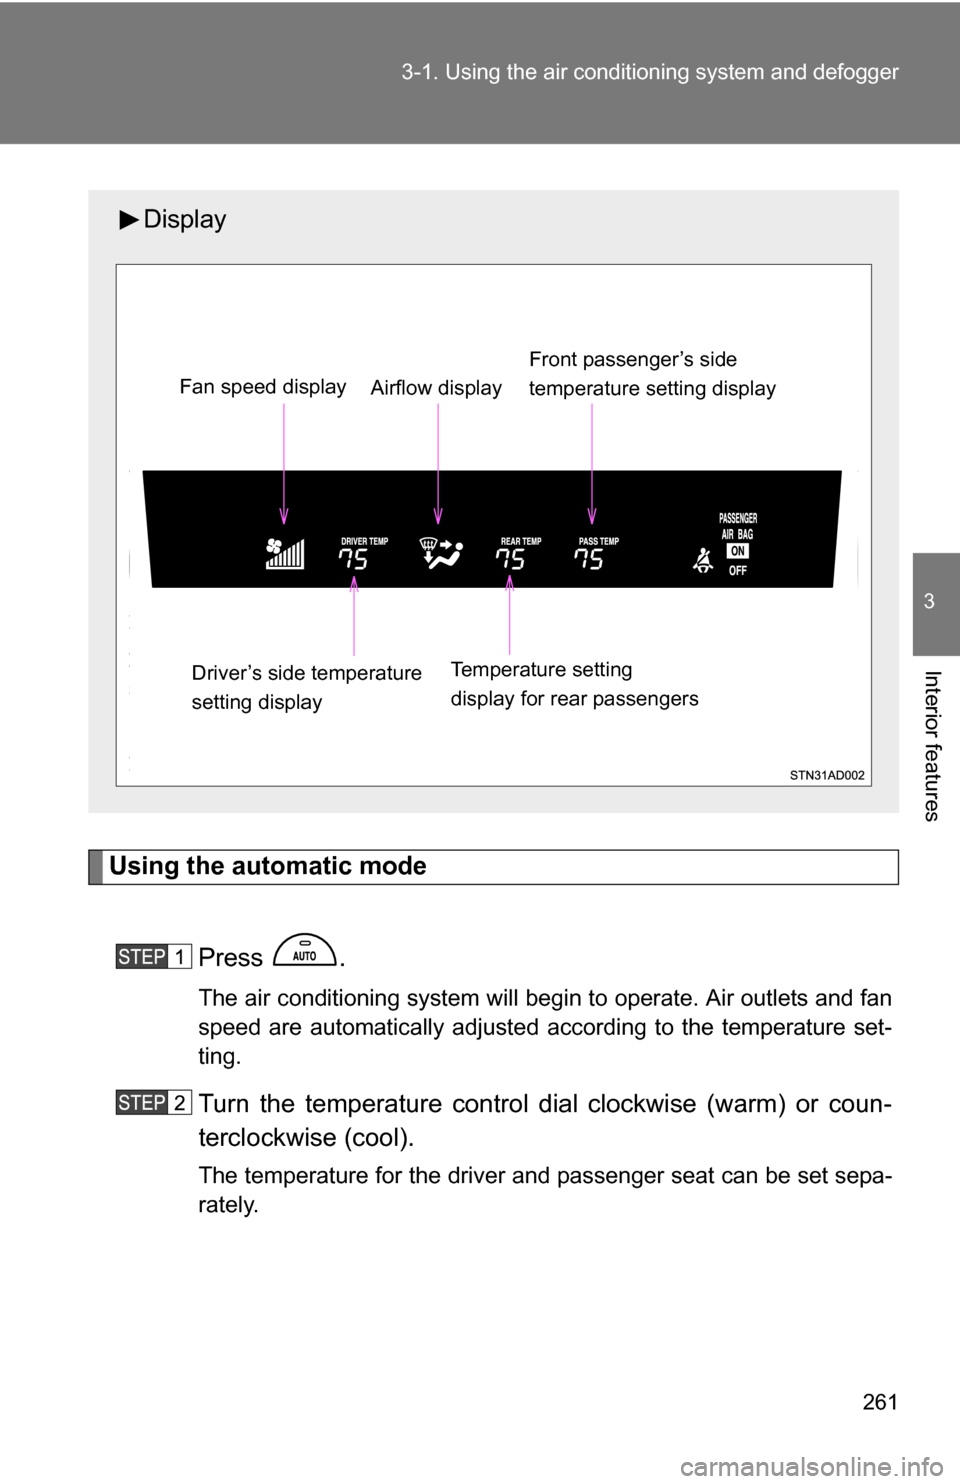
Display
Front passenger’s side
temperature setting display
Fan speed display
Airflow display
Driver’s side temperature
setting display Temperature setting
display for rear passengers
Page 262 of 612
262 3-1. Using the air conditioning system and defogger
Adjusting the settings
■ Adjusting the temperature setting
Turn the temperature control dial clockwise (warm) or counter-
clockwise (cool).
The air conditioning system sw itches between individual and
simultaneous modes each time is pressed.
● Simultaneous mode (the indicator on is on)
The driver’s side temperature control dial can be used to adjust
the temperature for all seats.
● Individual mode (the indicator on is off)
The temperature for the driver’s, front passenger’s and rear
seats ( P. 268) can be adjusted separately. Operate the pas-
senger’s side or rear temperature controls to enter individual
mode.
■ Adjusting the fan speed
Turn the fan speed control dial clockwise (increase) or counter-
clockwise (decrease).
The fan speed is shown on the display. (7 levels)
Press to turn the fan off.
Page 263 of 612
263
3-1. Using the air conditioning system
and defogger
3
Interior features
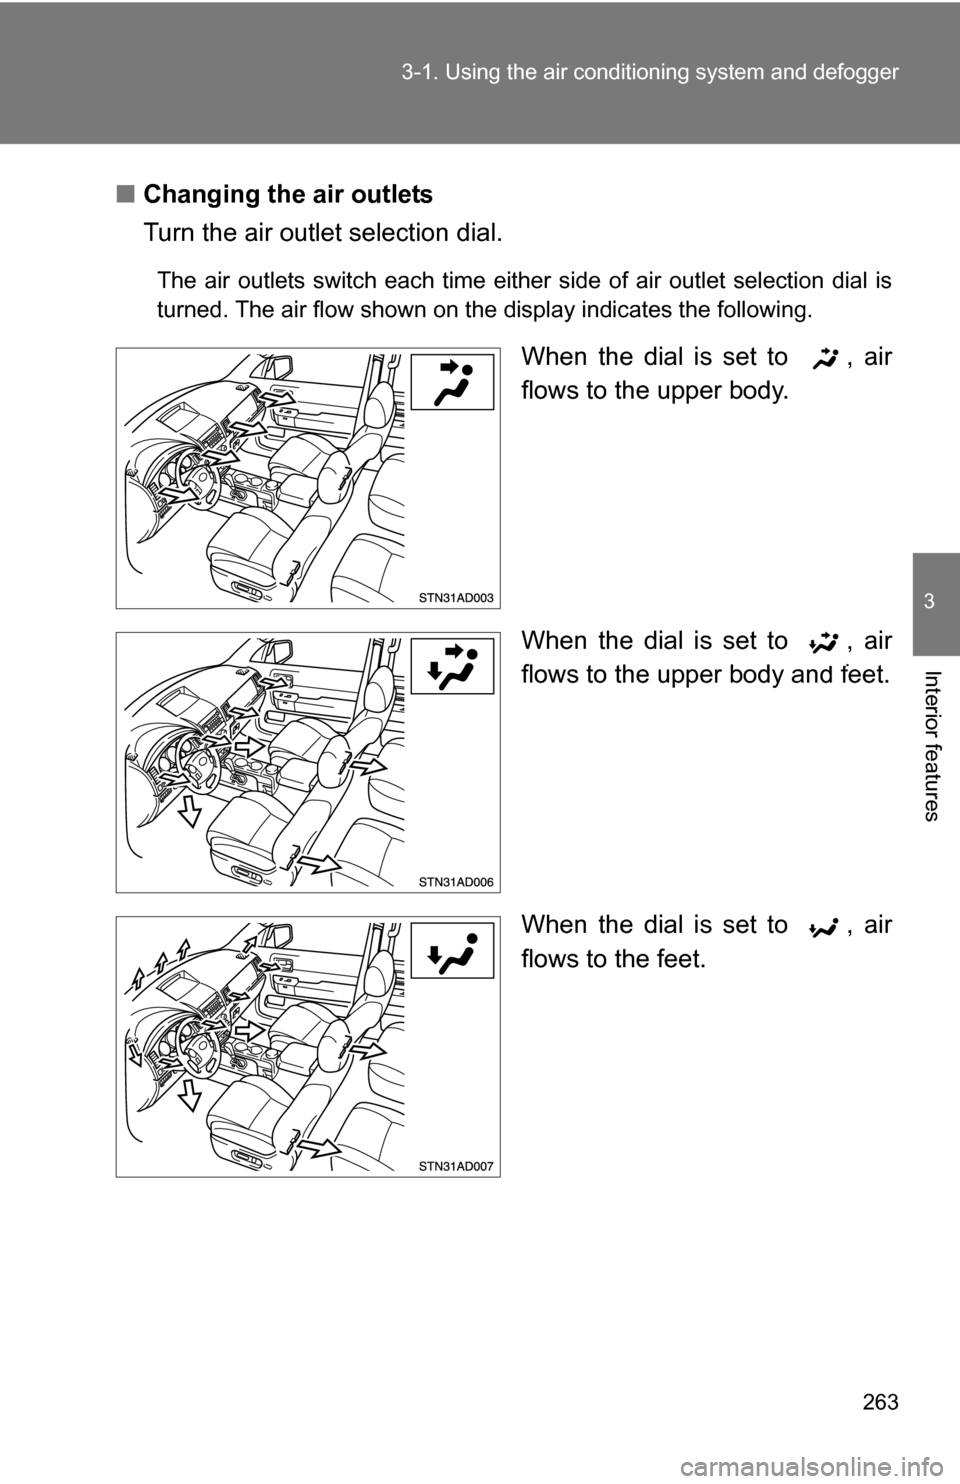
■Changing the air outlets
Turn the air outlet selection dial.
The air outlets switch each time either side of air outlet selection dial is
turned. The air flow shown on the display indicates the following.
When the dial is set to , air
flows to the upper body.
When the dial is set to , air
flows to the upper body and feet.
When the dial is set to , air
flows to the feet.
Page 268 of 612
268
3-1. Using the air conditioning system and defogger
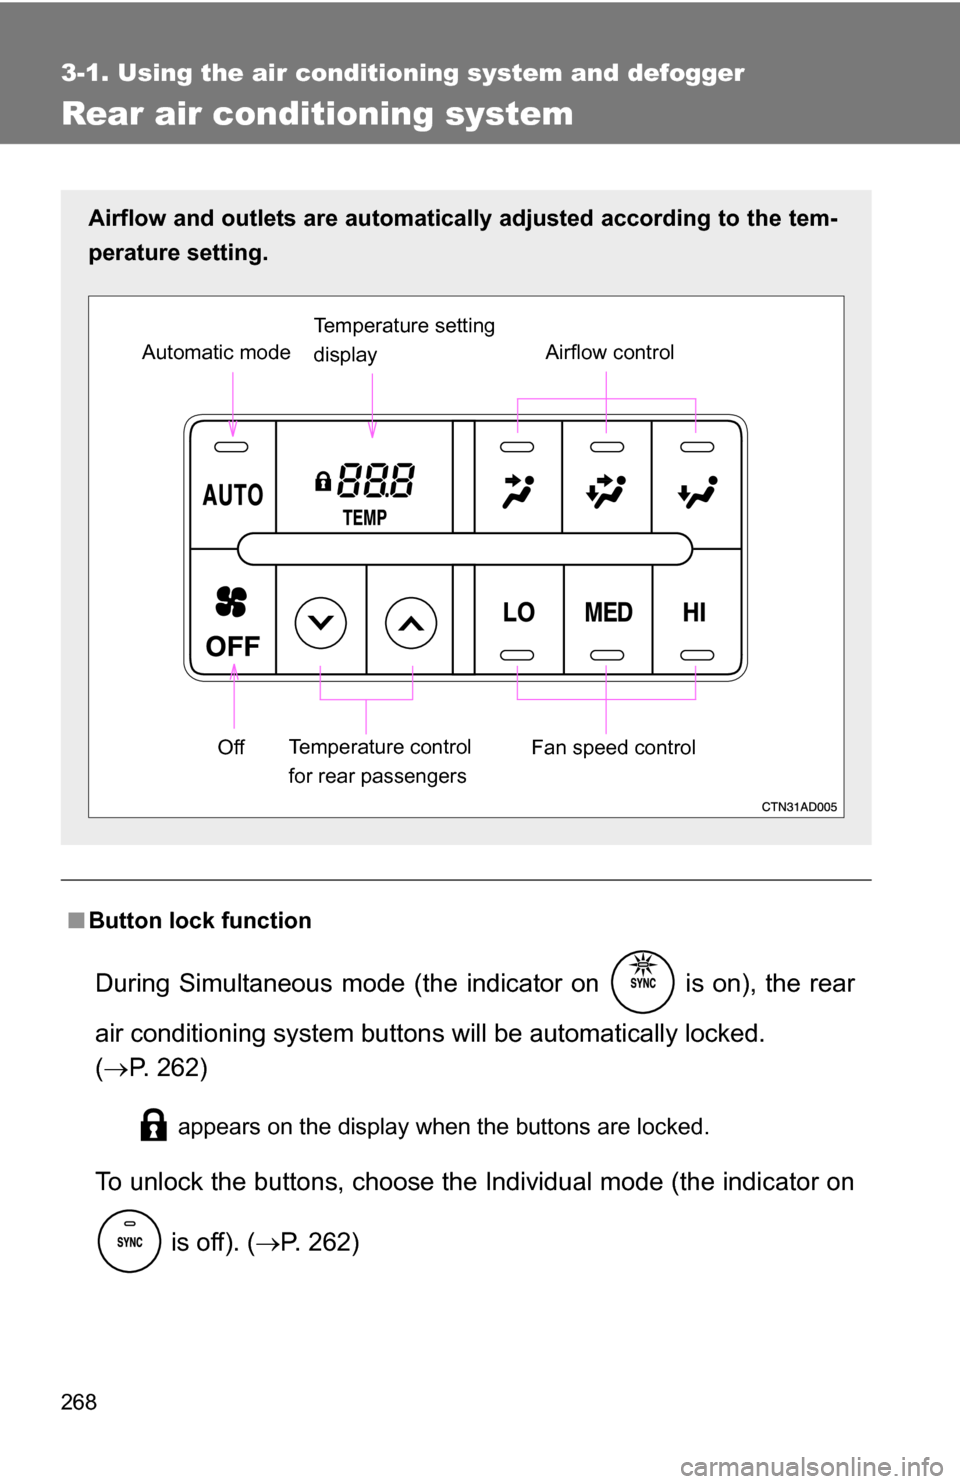
Rear air conditioning system
■Button lock function
During Simultaneous mode (the indicator on is on), the rear
air conditioning system button s will be automatically locked.
( P. 262)
appears on the display when the buttons are locked.
To unlock the buttons, c hoose the Individual mode (the indicator on
is off). ( P. 262)
Airflow and outlets are automatica lly adjusted according to the tem-
perature setting.
Airflow control
Temperature setting
display
Fan speed control
Off
Automatic mode
Temperature control
for rear passengers
Page 279 of 612
279
3-2. Using the audio system
3
Interior features
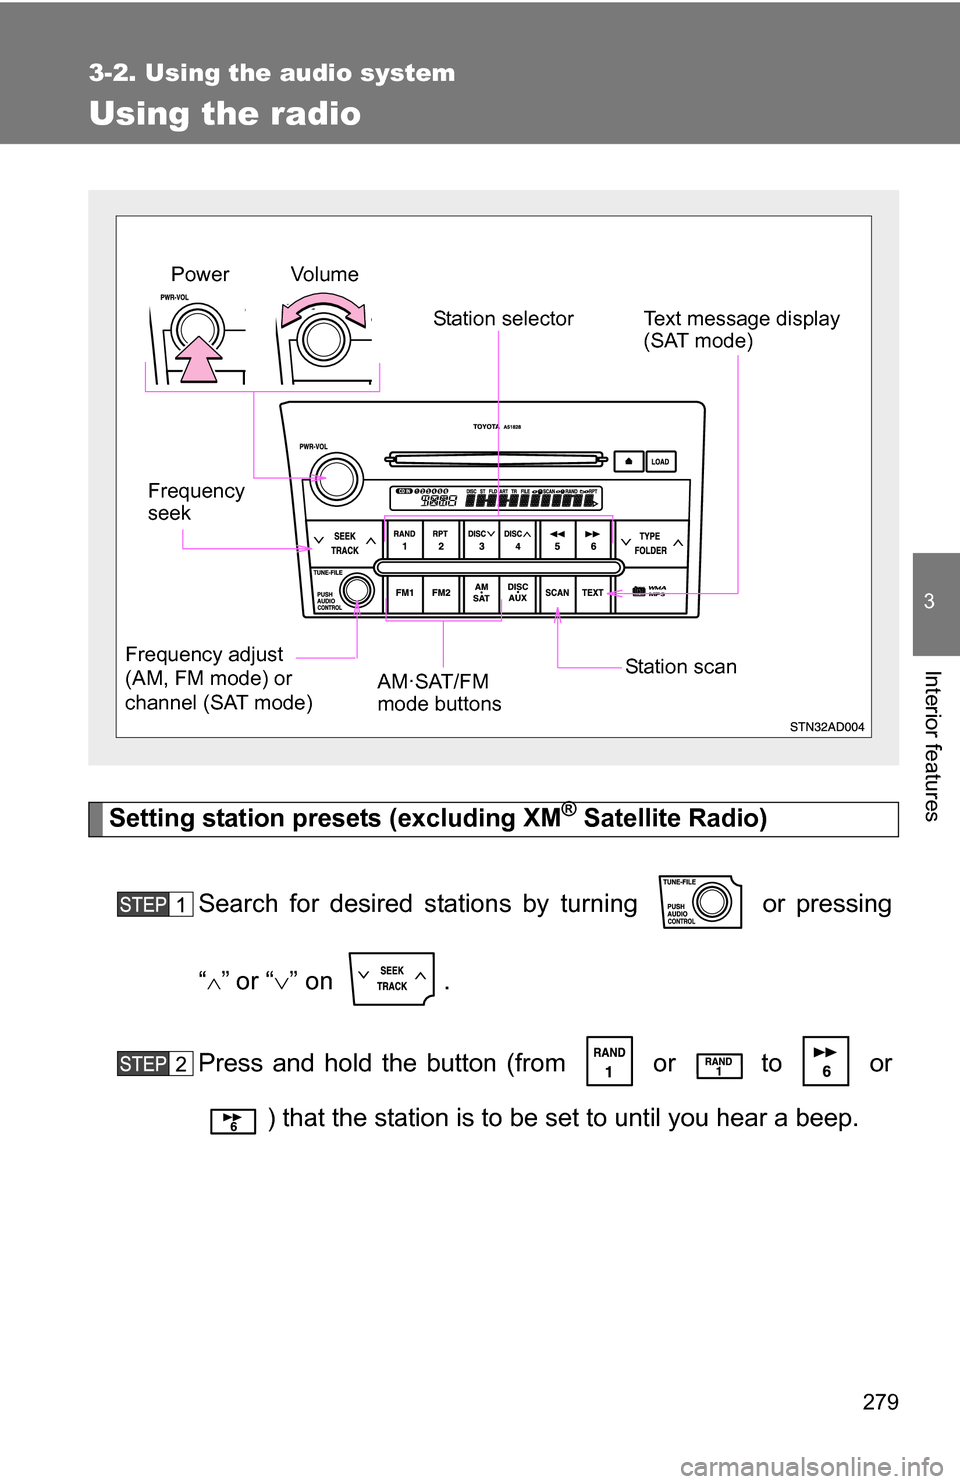
Using the radio
Setting station presets (excluding XM® Satellite Radio)
Search for desired stations by turning or pressing
“
”or “ ” on .
Press and hold the button (from or
to or
) that the station is to be set to until you hear a beep.
Vol u m e Station selector
Frequency
seek
Frequency adjust
(AM, FM mode) or
channel (SAT mode) AM·SAT/FM
mode buttonsPower
Station scanText message display
(SAT mode)
Page 280 of 612
280 3-2. Using the audio system
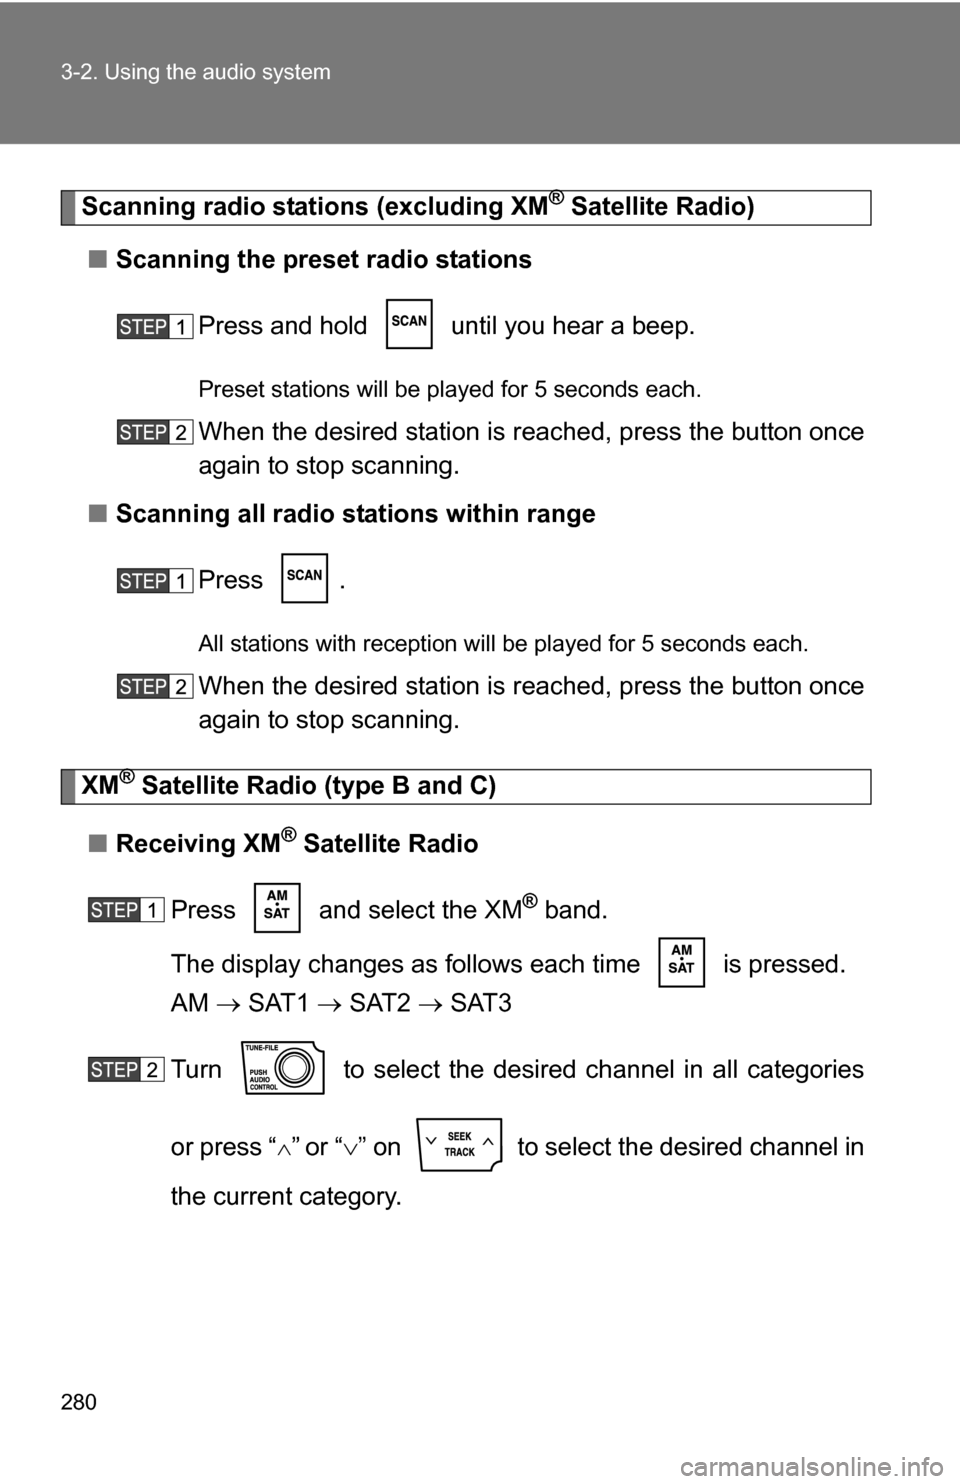
Scanning radio stations (excluding XM® Satellite Radio)
■ Scanning the preset radio stations
Press and hold until you hear a beep.
Preset stations will be played for 5 seconds each.
When the desired station is reached, press the button once
again to stop scanning.
■ Scanning all radio stations within range
Press .
All stations with reception will be played for 5 seconds each.
When the desired station is reached, press the button once
again to stop scanning.
XM® Satellite Radio (type B and C)
■ Receiving XM
® Satellite Radio
Press and select the XM
® band.
The display changes as follows each time is pressed.
AM SAT1 SAT2 SAT3
Turn to select the desired channel in all categories
or press “
”or “ ” on to select the desired channel in
the current category.
Page 281 of 612
281
3-2. Using the audio system
3
Interior features
■
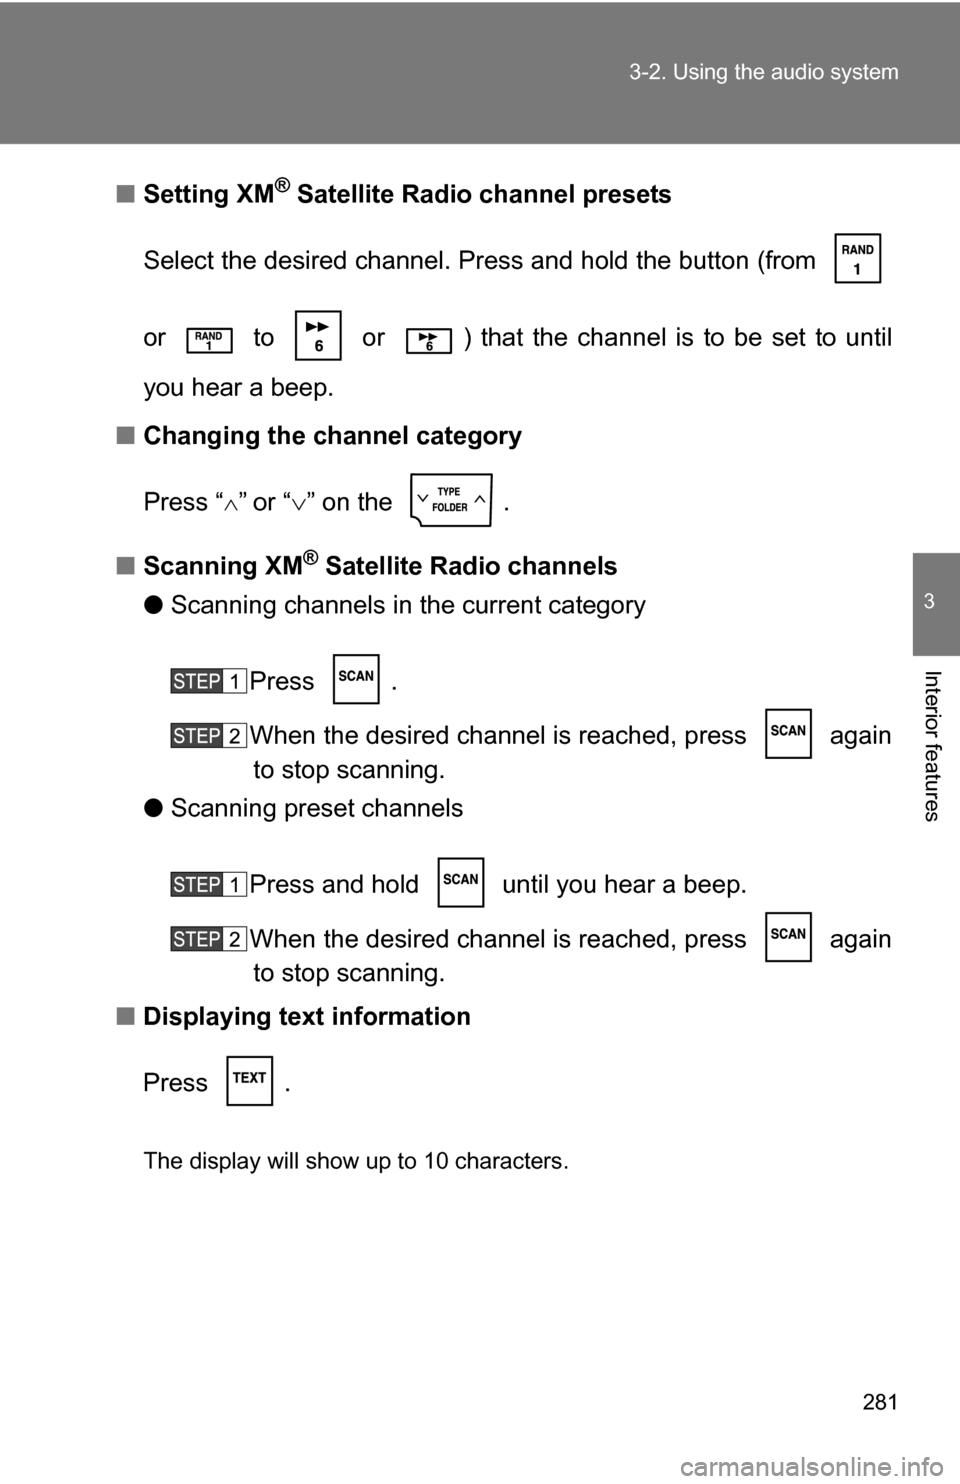
Setting XM® Satellite Radio channel presets
Select the desired channel. Press and hold the button (from
or to or ) that the channel is to be set to until
you hear a beep.
■ Changing the channel category
Press “
”or “ ” on the .
■ Scanning XM
® Satellite Radio channels
● Scanning channels in the current category
Press .
When the desired channel is reached, press againto stop scanning.
● Scanning preset channels
Press and hold until you hear a beep.
When the desired channel is reached, press againto stop scanning.
■ Displaying text information
Press .
The display will show up to 10 characters.
Page 282 of 612
282 3-2. Using the audio system
The display changes as follows each time the button is pressed.
●CH NAME
● TITLE (SONG/PROGRAM TITLE)
● NAME (ARTIST NAME/FEATURE)
● CH NUMBER
■When the battery is disconnected
Stations presets are erased.
■ Reception sensitivity
●Cargo loaded on the roof luggage carrier, especially metal objects, may
adversely affect the reception of XM
® Satellite Radio.
● Maintaining stable radio reception at all times is difficult due to the contin-
ually changing position of the antenna and differences in signal strength
and surrounding objects, such as trains, transmitters, etc.
● The radio antenna is mounted inside the rear quarter windows. To main-
tain clear radio reception, do not attach metallic window tinting or other
metallic objects to the antenna wire mounted inside the rear quarter win-
dows.
■ XM
® Satellite Radio (type B and C)
An XM
® Satellite Radio is a tuner designed exclusively to receive broadcasts
provided under a separate subscription. Availability is limited to the 48 con-
tiguous states and 10 Canadian provinces.
● XM
® subscriptions
For detailed information about XM® Satellite Radio or to subscribe:
U.S.A.—
Visit on the web at www.xmradio.com
or call 1-800-967-2346.
Canada—
Visit on the web at www.xmradio.ca
or call 1-877-438-9677.
Page 285 of 612

285
3-2. Using the audio system
3
Interior features
Using the CD player
Loading CDs■ Loading a CD (type A)
Insert a CD.
■ Loading a CD (type B and C)
Press .
WAIT is shown on the display.
Insert a CD when the indicator on the slot turns from amber to
green.
The display changes from WAIT to LOAD.
Random playback
Track selection
Repeat playPlayback
CD eject
Text message display
CD selection (with external
CD changer only for Type A)
Fast-forward
Search playback
Reverse
Vo l u m e
Power
CD insert
(Type B and C)