radio TOYOTA SEQUOIA 2021 Accessories, Audio & Navigation (in English)
[x] Cancel search | Manufacturer: TOYOTA, Model Year: 2021, Model line: SEQUOIA, Model: TOYOTA SEQUOIA 2021Pages: 310, PDF Size: 14.34 MB
Page 145 of 310
1474-6. Tips for operating the audio/visual system
4
Audio/visual system
Station interference: When a
reflected signal and a signal
received directly from a radio
station are very nearly the same
frequency, they can interfere
with each other, making it diffi-
cult to hear the broadcast.
Static: AM is easily affected by
external sources of electrical
noise, such as high tension
power lines, lightening or electri-
cal motors. This results in static.
■SiriusXM
Cargo loaded on the roof lug-
gage carrier, especially metal
objects, may adversely affect
the reception of SiriusXM Sat-
ellite Radio.
Alternation or modifications
carried out without appropri-
ate authorization may invali-
date the user’s right to
operate the equipment.
■Certification
Use of the Made for Apple
badge means that an acces-
sory has been designed to
connect specifically to the
Apple product(s) identified in
the badge, and has been cer-
tified by the developer to meet
Apple performance stan-
dards. Apple is not responsi-
ble for the operation of this
device or its compliance with
safety and regulatory stan-
dards. Please note that the
use of this accessory with an
Apple product may affect
wireless performance.
iPhone
®, iPod®, iPod nano®,
iPod touch
®, and Lightning®
are trademarks of Apple Inc.,
registered in the U.S. and
other countries.
■Compatible models
The following iPod nano
®, iPod
touch
® and iPhone® devices
can be used with this system.
Made for
• iPhone X
• iPhone 8
• iPhone 8 Plus
• iPhone 7
• iPhone 7 Plus
iPod/iPhone
Page 180 of 310

1824-8. Rear seat entertainment system operation
●Wi-Fi® is a registered trademark
of Wi-Fi Alliance®.
●The Wi-Fi® networks serve best-
effort traffic.
Selecting a control icon
Inputting the selected control
icon
Using the DLNA mode
Plays or displays music,
pictures and video that are
stored on a DLNA server.
This device supports a
DLNA renderer function.
This device can play and
display content from
devices equipped with a
DLNA server function.
Make sure to install DMC-
compatible software on the
DLNA server.
Press the “INPUT” button
repeatedly until the DLNA
mode is selected.
WA R N I N G
●Use Wi-Fi® devices only when
safe and legal to do so.
●Your audio unit is fitted with Wi-
Fi® antennas. People with
implantable cardiac pacemak-
ers, cardiac resynchronization
therapy-pacemakers or implant-
able cardioverter defibrillators
should maintain a reasonable
distance between themselves
and the Wi-Fi
® antennas. The
radio waves may affect the
operation of such devices.
●Before using Wi-Fi® devices,
users of any electrical medical
device other than implantable
cardiac pacemakers, cardiac
resynchronization therapy-
pacemakers or implantable car-
dioverter defibrillators should
consult the manufacturer of the
device for information about its
operation under the influence of
radio waves. Radio waves could
have unexpected effects on the
operation of such medical
devices.
NOTICE
●Do not leave your smartphone
in the vehicle. In particular, high
temperatures inside the vehicle
may damage the smartphone.
Remote controller
A
B
Page 185 of 310
1874-8. Rear seat entertainment system operation
4
Audio/visual system
able to be connected to the inter-
net via mobile network (3G or 4G).
1Display the Miracast™ oper-
ation screen. 2
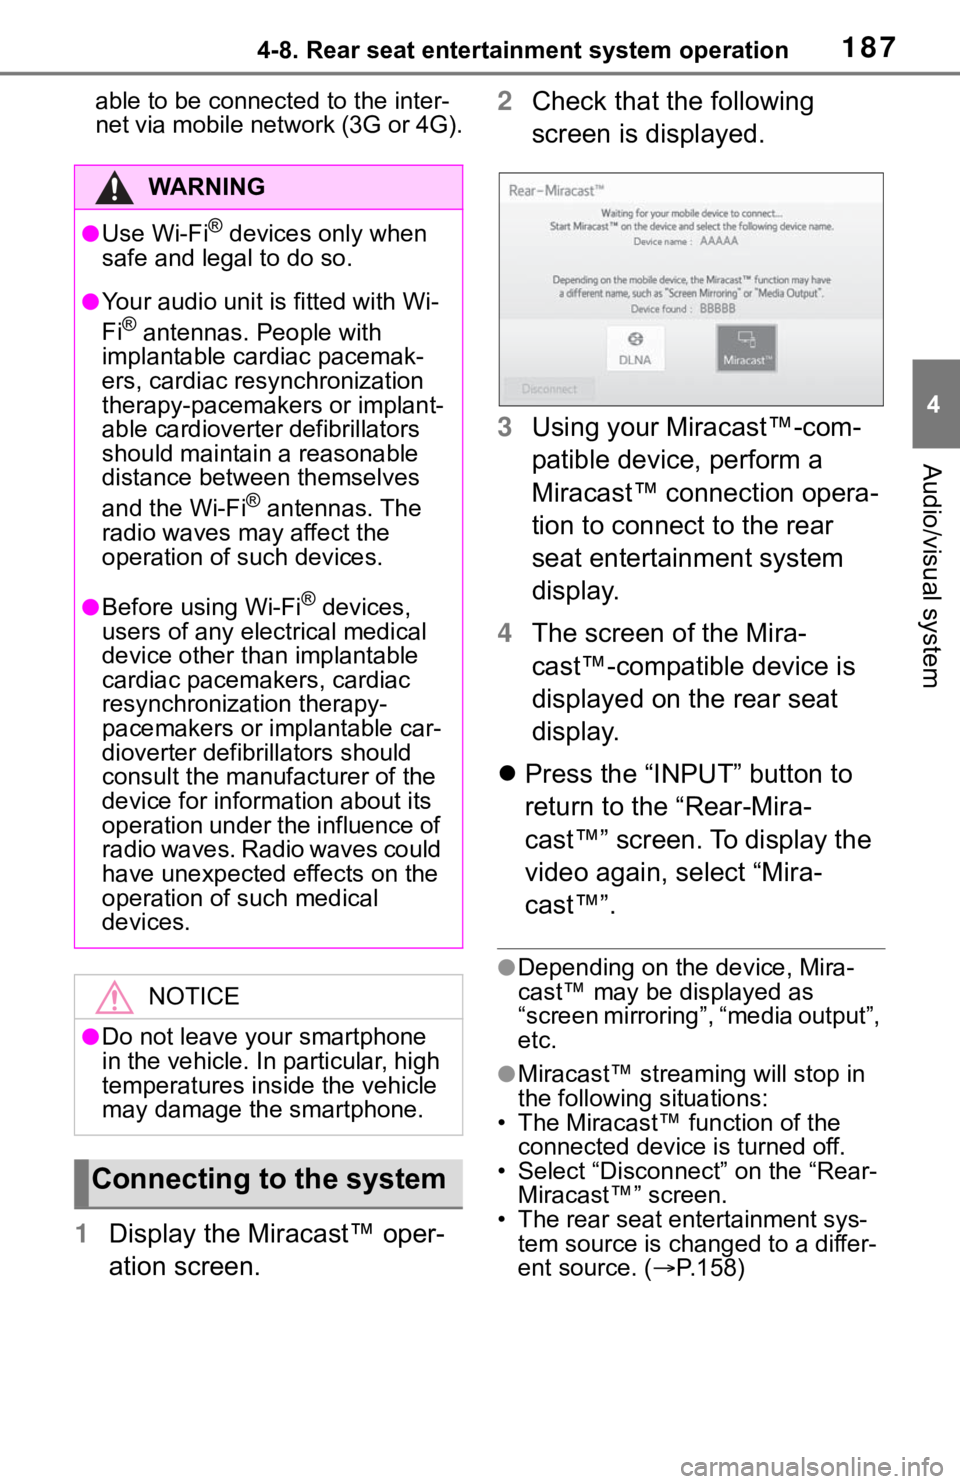
Check that the following
screen is displayed.
3 Using your Miracast™-com-
patible device, perform a
Miracast™ connection opera-
tion to connect to the rear
seat entertainment system
display.
4 The screen of the Mira-
cast™-compatible device is
displayed on the rear seat
display.
Press the “INPUT” button to
return to the “Rear-Mira-
cast™” screen. To display the
video again, select “Mira-
cast™”.
●Depending on the device, Mira-
cast™ may be displayed as
“screen mirroring”, “media output”,
etc.
●Miracast™ stream ing will stop in
the following situations:
• The Miracast™ function of the connected device is turned off.
• Select “Disconnect” on the “Rear- Miracast™” screen.
• The rear seat entertainment sys-
tem source is changed to a differ-
ent source. ( P.158)
WA R N I N G
●Use Wi-Fi® devices only when
safe and legal to do so.
●Your audio unit is fitted with Wi-
Fi® antennas. People with
implantable cardiac pacemak-
ers, cardiac resynchronization
therapy-pacemakers or implant-
able cardioverter defibrillators
should maintain a reasonable
distance between themselves
and the Wi-Fi
® antennas. The
radio waves may affect the
operation of such devices.
●Before using Wi-Fi® devices,
users of any electrical medical
device other than implantable
cardiac pacemakers, cardiac
resynchronization therapy-
pacemakers or implantable car-
dioverter defibrillators should
consult the manufacturer of the
device for information about its
operation under the influence of
radio waves. Radio waves could
have unexpected e ffects on the
operation of such medical
devices.
NOTICE
●Do not leave your smartphone
in the vehicle. In particular, high
temperatures inside the vehicle
may damage the smartphone.
Connecting to the system
Page 216 of 310
2185-1. Voice command system operation
5-1.Voice command system operation
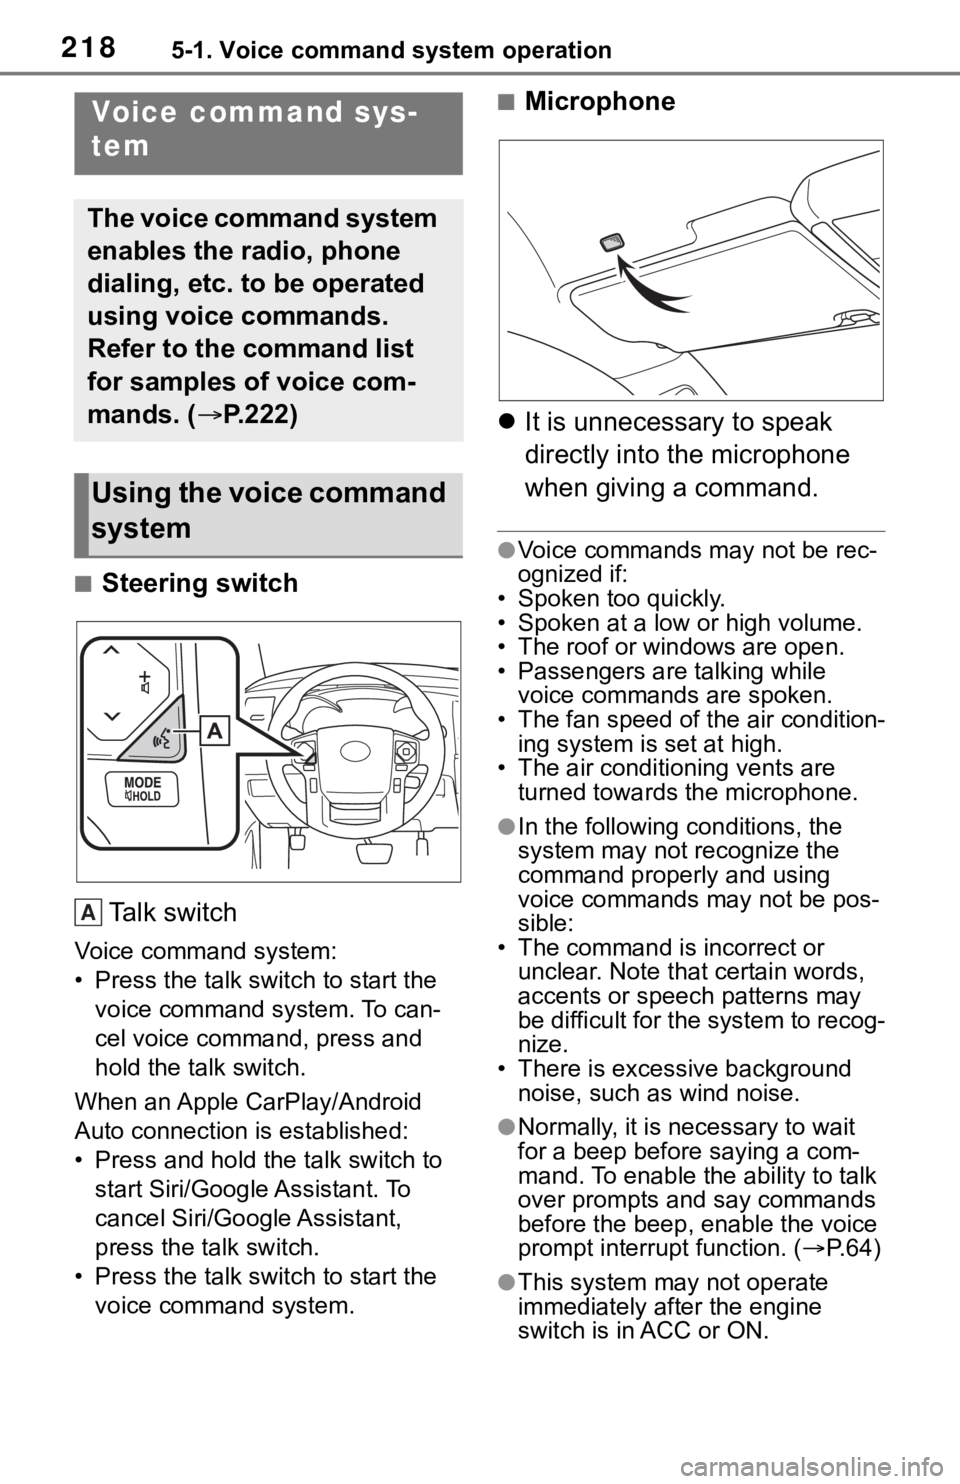
■Steering switchTa l k s w i t c h
Voice command system:
• Press the talk switch to start the voice command system. To can-
cel voice command, press and
hold the talk switch.
When an Apple CarPlay/Android
Auto connection is established:
• Press and hold the talk switch to start Siri/Google Assistant. To
cancel Siri/Google Assistant,
press the talk switch.
• Press the talk switch to start the voice command system.
■Microphone
It is unnecessary to speak
directly into the microphone
when giving a command.
●Voice commands may not be rec-
ognized if:
• Spoken too quickly.
• Spoken at a low or high volume.
• The roof or windows are open.
• Passengers are talking while voice commands are spoken.
• The fan speed of the air condition-
ing system is set at high.
• The air conditioning vents are turned towards the microphone.
●In the following c onditions, the
system may not recognize the
command properly and using
voice commands may not be pos-
sible:
• The command is incorrect or unclear. Note that certain words,
accents or speech patterns may
be difficult for the system to recog-
nize.
• There is excessive background
noise, such as wind noise.
●Normally, it is necessary to wait
for a beep before saying a com-
mand. To enable th e ability to talk
over prompts and say commands
before the beep, enable the voice
prompt interrupt function. ( P. 6 4 )
●This system may not operate
immediately after the engine
switch is in ACC or ON.
Voice command sys-
tem
The voice command system
enables the radio, phone
dialing, etc. to be operated
using voice commands.
Refer to the command list
for samples of voice com-
mands. ( P.222)
Using the voice command
system
A
Page 223 of 310
2255-1. Voice command system operation
5
Voice command system
commands will be unavailable.
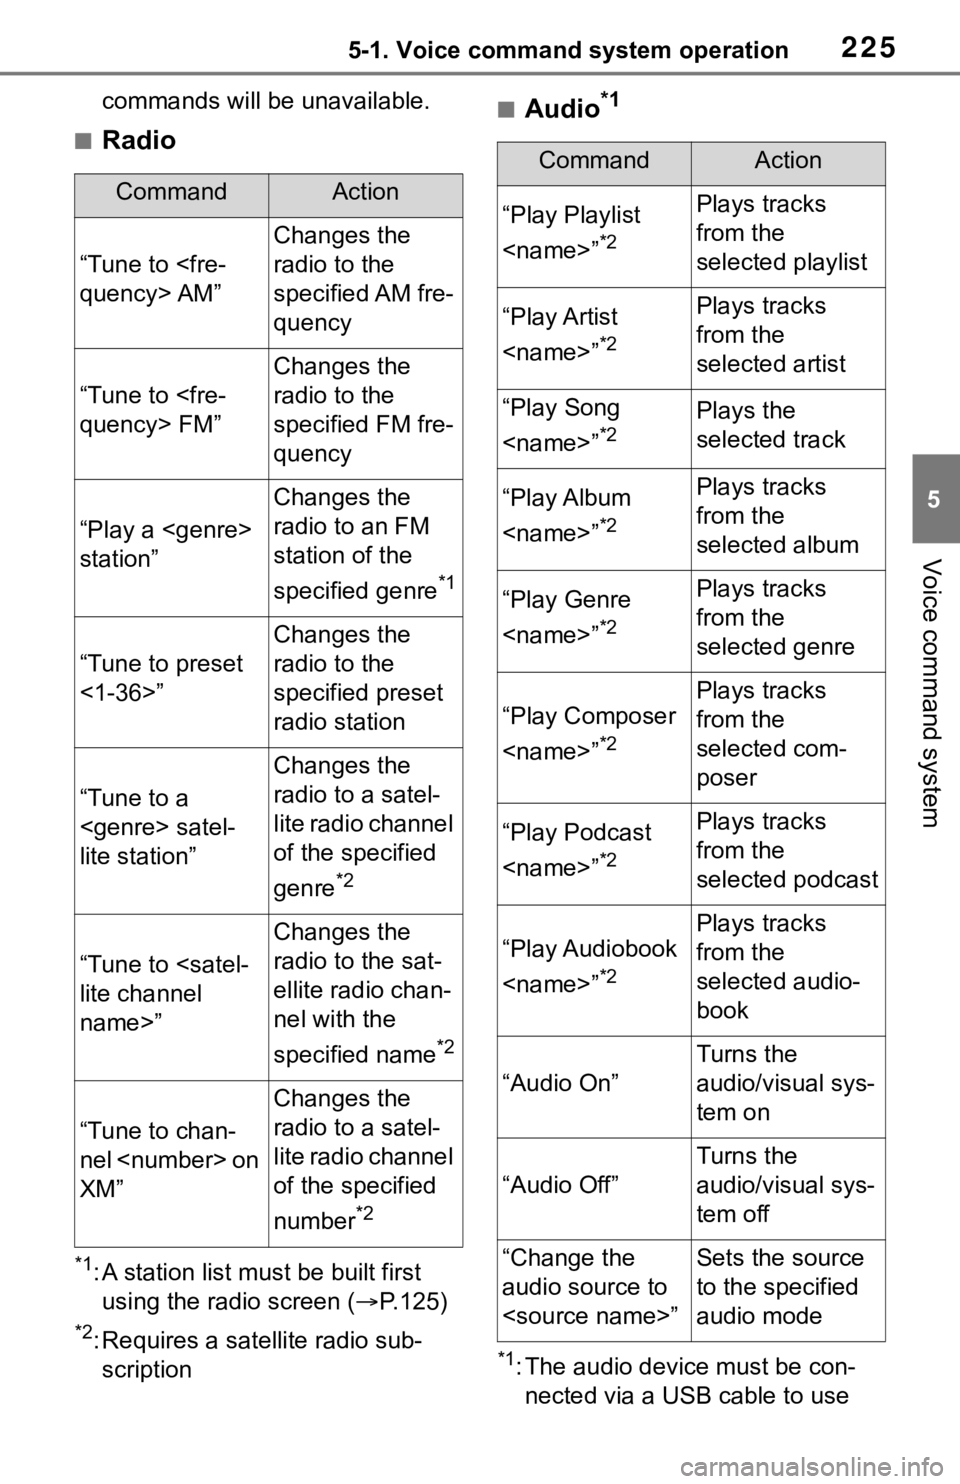
■Radio
*1: A station list must be built first
using the radio screen ( P.125)
*2: Requires a satellite radio sub-
scription
■Audio*1
*1: The audio device must be con-nected via a USB cable to use
CommandAction
“Tune to
Changes the
radio to the
specified AM fre-
quency
“Tune to
Changes the
radio to the
specified FM fre-
quency
“Play a
station”
Changes the
radio to an FM
station of the
specified genre
*1
“Tune to preset
<1-36>”
Changes the
radio to the
specified preset
radio station
“Tune to a
lite station”
Changes the
radio to a satel-
lite radio channel
of the specified
genre
*2
“Tune to
name>”
Changes the
radio to the sat-
ellite radio chan-
nel with the
specified name
*2
“Tune to chan-
nel
XM”
Changes the
radio to a satel-
lite radio channel
of the specified
number
*2
CommandAction
“Play Playlist
*2
Plays tracks
from the
selected playlist
“Play Artist
*2
Plays tracks
from the
selected artist
“Play Song
*2Plays the
selected track
“Play Album
*2
Plays tracks
from the
selected album
“Play Genre
*2
Plays tracks
from the
selected genre
“Play Composer
*2
Plays tracks
from the
selected com-
poser
“Play Podcast
*2
Plays tracks
from the
selected podcast
“Play Audiobook
*2
Plays tracks
from the
selected audio-
book
“Audio On”
Turns the
audio/visual sys-
tem on
“Audio Off”
Turns the
audio/visual sys-
tem off
“Change the
audio source to
to the specified
audio mode
Page 226 of 310
2286-1. Information display
6-1.Information display
*: Premium Audio only
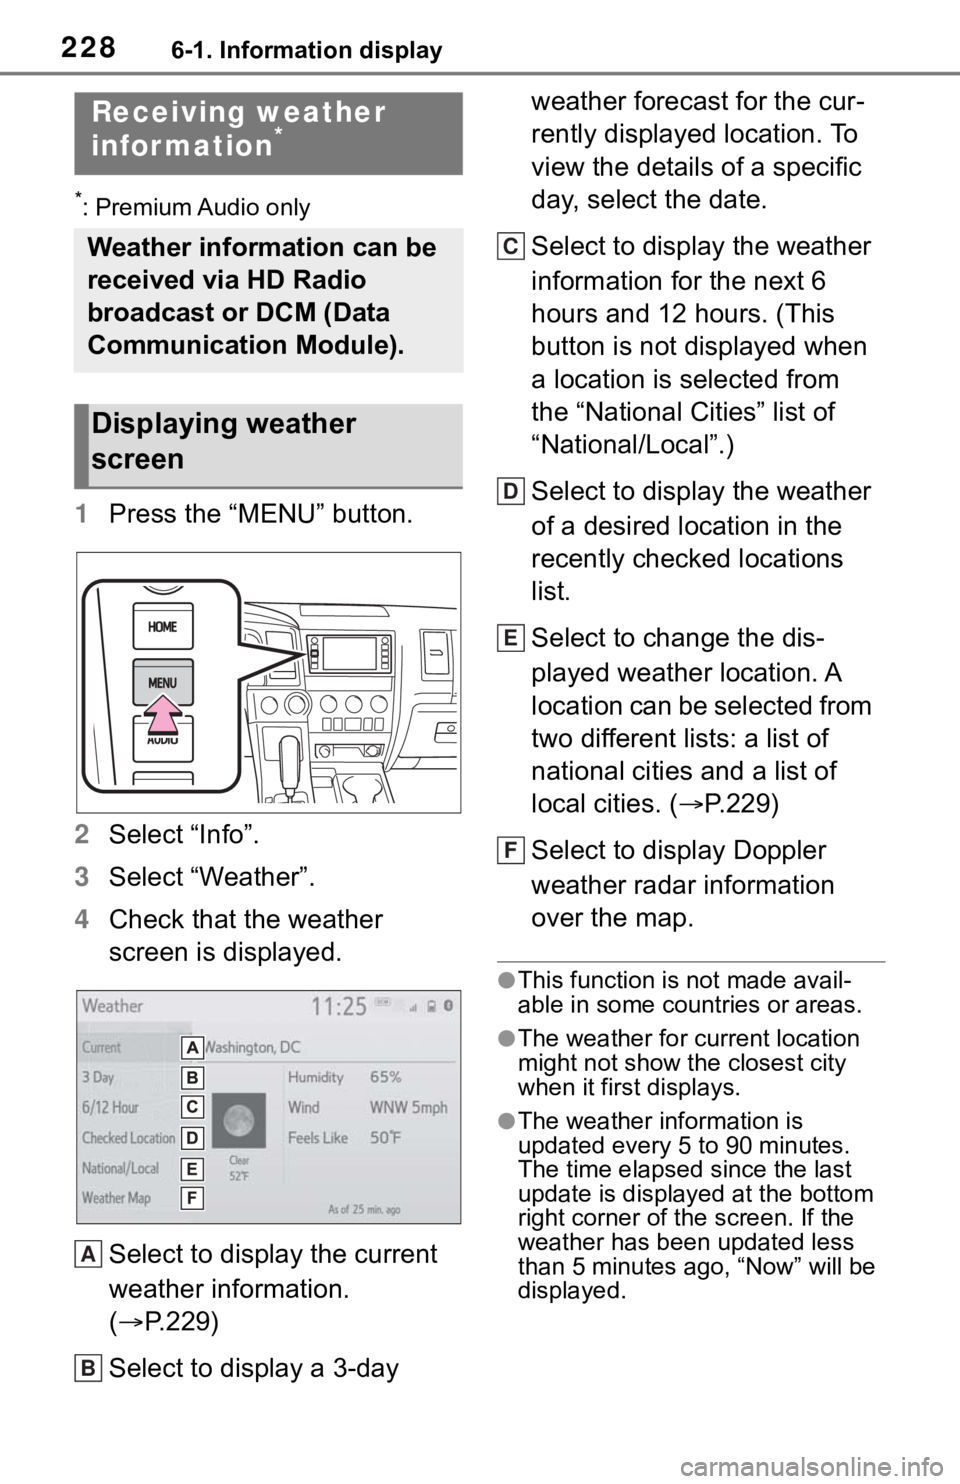
1Press the “MENU” button.
2 Select “Info”.
3 Select “Weather”.
4 Check that the weather
screen is displayed.
Select to display the current
weather information.
( P.229)
Select to display a 3-day weather forecast for the cur-
rently displayed location. To
view the details of a specific
day, select the date.
Select to display the weather
information for the next 6
hours and 12 hours. (This
button is not displayed when
a location is selected from
the “National Cities” list of
“National/Local”.)
Select to display the weather
of a desired location in the
recently checked locations
list.
Select to change the dis-
played weather location. A
location can be selected from
two different lists: a list of
national cities and a list of
local cities. (
P.229)
Select to display Doppler
weather radar information
over the map.
●This function is not made avail-
able in some countries or areas.
●The weather for current location
might not show the closest city
when it first displays.
●The weather information is
updated every 5 to 90 minutes.
The time elapsed since the last
update is displayed at the bottom
right corner of the screen. If the
weather has been updated less
than 5 minutes a go, “Now” will be
displayed.
Receiving weather
infor mation*
Weather information can be
received via HD Radio
broadcast or DCM (Data
Communication Module).
Displaying weather
screen
A
B
C
D
E
F
Page 228 of 310
2306-1. Information display
*: Premium Audio only
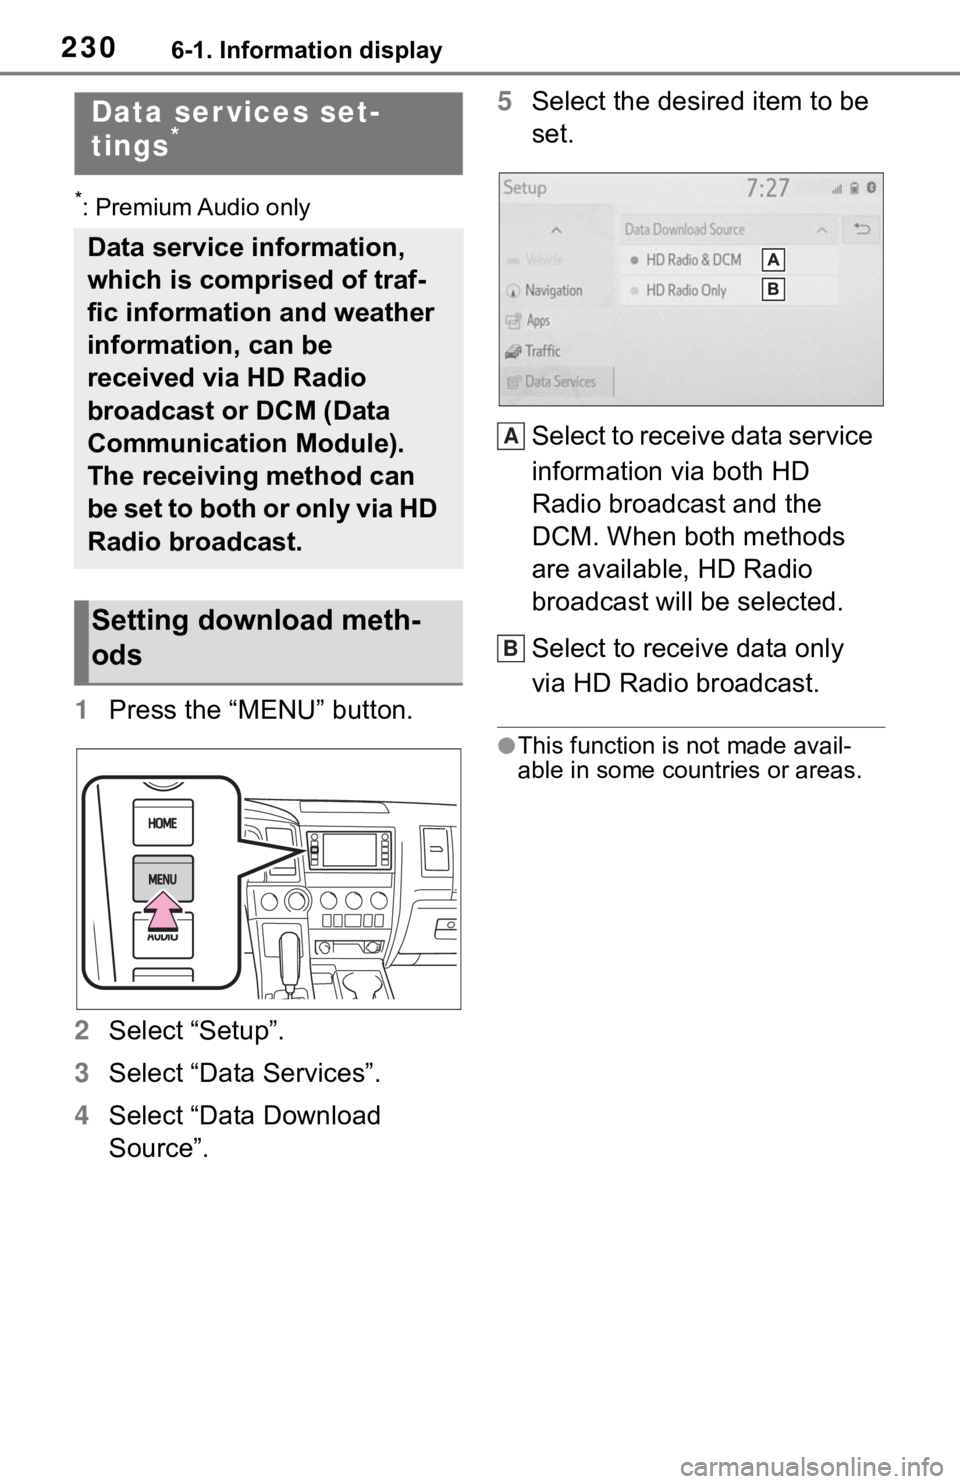
1Press the “MENU” button.
2 Select “Setup”.
3 Select “Data Services”.
4 Select “Data Download
Source”. 5
Select the desired item to be
set.
Select to receive data service
information via both HD
Radio broadcast and the
DCM. When both methods
are available, HD Radio
broadcast will be selected.
Select to receive data only
via HD Radio broadcast.
●This function is not made avail-
able in some countries or areas.
Data ser vices set-
tings*
Data service information,
which is comprised of traf-
fic information and weather
information, can be
received via HD Radio
broadcast or DCM (Data
Communication Module).
The receiving method can
be set to both or only via HD
Radio broadcast.
Setting download meth-
ods
A
B
Page 242 of 310
2448-1. Phone operation (Hands-free system for cellular phones)
To use the hands-free system
for cellular phones, it is neces-
sary to register a cellular phone
with the system. (P.36)
■Connecting a Bluetooth®
device
Registering an additional
device
1 Display the phone top
screen. ( P.242)
2 Select “Select Device”.
3 Select “Add Device”.
When another Bluetooth
®
device is connected, a confir-
mation screen will be dis-
played. To disconnect the
Bluetooth
® device, select
“Yes”.
4 Follow the steps in “Register-
ing a Bluetooth
® phone for
the first time” from step 5.
( P.36)
Selecting a registered device
1 Display the phone top
screen. ( P.242)
2 Select “Select Device”.
3 Select the desired device to
be connected.
4 Check that a confirmation
screen is displayed when the
connection is complete.
If an error message is dis-
played, follow the guidance
on the screen to try again.
■Bluetooth® phone condition
display
The condition of the Bluetooth
®
phone appears on the upper
right side of the screen. ( P.16)
WA R N I N G
●Your audio unit is fitted with
Bluetooth® antennas. People
with implantable cardiac pace-
makers, cardiac resynchroniza-
tion therapy-pacemakers or
implantable cardioverter defibril-
lators should maintain a reason-
able distance between
themselves and the Bluetooth
®
antennas. The radio waves may
affect the operation of such
devices.
●Before using Bluetooth®
devices, users of any electrical
medical device other than
implantable cardiac pacemak-
ers, cardiac resynchronization
therapy-pacemakers or implant-
able cardioverter defibrillators
should consult the manufacturer
of the device for information
about its operation under the
influence of radio waves. Radio
waves could have unexpected
effects on the operation of such
medical devices.
NOTICE
●Do not leave your cellular phone
in the vehicle. The temperature
inside may rise to a level that
could damage the phone.
Registering/Connecting a
Bluetooth® phone
Page 270 of 310
2728-3. What to do if...
New message notifications are
not displayed.■In other situations
The Bluetooth
® connection sta-
tus is displayed at the top of the
screen each time the engine
switch is in ACC or ON.
Even though all conceivable
measures have been taken, the
symptom status does not
change.
Likely causeSolution
Notification of
SMS/MMS/E-
mail reception on
this system is set
to off.Set notification
of SMS/MMS/E-
mail reception on
this system to
on. ( P.260)
Automatic mes-
sage transfer
function is not
enabled on the
cellular phone.Enable auto-
matic transfer
function on the
cellular phone.
Likely causeSolution
Connection con-
firmation display
on this system is
set to on.
To turn off the
display, set con-
nection confir-
mation display
on this system to
off. ( P. 4 6 )
Likely causeSolution
The cellular
phone is not
close enough to
this system.Bring the cellu-
lar phone closer
to this system.
Radio interfer-
ence has
occurred.
Turn off Wi-Fi®
devices or other
devices that may
emit radio
waves.
Page 277 of 310
2799-1. Connected Services overview
9
Connected Services
connected-services
in the United States,
https://www.toyota.ca/connected
in Canada, and
http://www.toyotapr.com/
connected-servicesin Puerto Rico.
●These functions are not made
available in some countries or
areas. Availability of functions of
the Toyota apps is dependent on
network reception level.
■Initializing personal data
The personal data used in appli-
cations can be reset. ( P.63)
The following personal data
can be deleted and returned
to their default settings:
• Downloaded contents
• Radio stations that were listened
to
●Once initialized, the data and set-
tings will be erased. Pay much
attention when initializing the data.
■Settings required to use
Toyota mobile application
Perform the settings in the fol-
lowing order.
1 Download the Toyota mobile
application to your smart-
phone.
2 Open the Toyota mobile
application on your smart
phone and follow instruc-
tions. Bluetooth
® Pairing is
required.
In order to use Toyota mobile appli-
cation, the following must first be
performed:
Register a Bluetooth® phone
with the hands-free system.
( P.36)
●Applications can only be used
when the Toyota mobile applica-
tion has been downloaded to your
smartphone, and the application is
running.
●Toyota mobile application opera-
tional procedures can also be con-
firmed by visiting
https://www.toyota.com/
connected-services
in the United States,
https://www.toyota.ca/connected
in Canada, and
http://www.toyotapr.com/
connected-services
in Puerto Rico.
●If a Toyota mobile application is
used while iPod audio/video is
being played back, system opera-
tion may become unstable.
Preparation before using
Toyota mobile application