TOYOTA SUPRA 2023 Owners Manual
Manufacturer: TOYOTA, Model Year: 2023, Model line: SUPRA, Model: TOYOTA SUPRA 2023Pages: 372, PDF Size: 6.32 MB
Page 281 of 372
2815-1. MOBILITY
5
MOBILITY
Winter tires are recommended
for operating on winter roads.
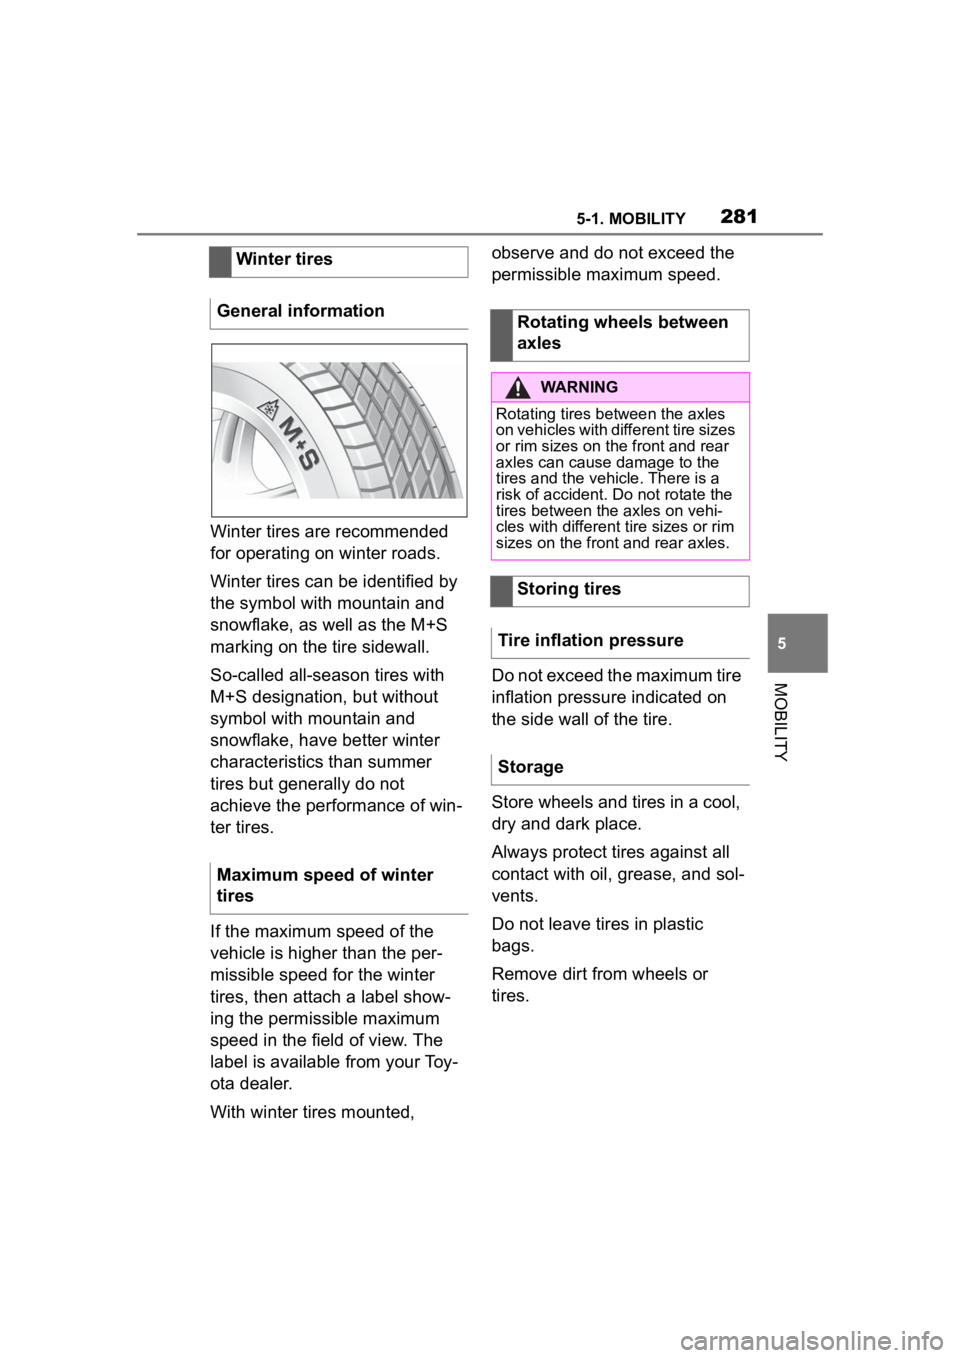
Winter tires can be identified by
the symbol with mountain and
snowflake, as well as the M+S
marking on the tire sidewall.
So-called all-season tires with
M+S designation, but without
symbol with mountain and
snowflake, have better winter
characteristics than summer
tires but generally do not
achieve the performance of win-
ter tires.
If the maximum speed of the
vehicle is higher than the per-
missible speed for the winter
tires, then attach a label show-
ing the permissible maximum
speed in the field of view. The
label is available from your Toy-
ota dealer.
With winter tires mounted, observe and do not exceed the
permissible maximum speed.
Do not exceed the maximum tire
inflation pressure indicated on
the side wall of the tire.
Store wheels and tires in a cool,
dry and dark place.
Always protect tires against all
contact with oil, grease, and sol-
vents.
Do not leave tires in plastic
bags.
Remove dirt from wheels or
tires.
Winter tires
General information
Maximum speed of winter
tires
Rotating wheels between
axles
WARNING
Rotating tires between the axles
on vehicles with different tire sizes
or rim sizes on the front and rear
axles can cause damage to the
tires and the vehicle. There is a
risk of accident. Do not rotate the
tires between the axles on vehi-
cles with different tire sizes or rim
sizes on the front and rear axles.
Storing tires
Tire inflation pressure
Storage
Page 282 of 372
2825-1. MOBILITY
• Park the vehicle as far away as possible from passing traf-
fic and on solid ground.
• Switch on the hazard warning system.
• Secure the vehicle against rolling away by setting the
parking brake.
• Turn the steering wheel until the front wheels are in the
straight-ahead position and
engage the steering wheel
lock.
• Have all vehicle occupants get out of the vehicle and
ensure that they remain out-
side the immediate area in a
safe place, such as behind a
guardrail.
• If necessary, set up a warning triangle at an appropriate dis-
tance.
With the Mobility System, minor
tire damage can be sealed tem-
porarily to enable continued
travel. To accomplish this, seal-
ant is pumped into the tires,
which seals the damage from
the inside. • Follow the instructions on
using the Mobility System
found on the compressor and
sealant container.
• Use of the Mobility System may be ineffective if the tire
puncture measures approx.
1/8 inches/4 mm or more.
• Contact your Toyota dealer if the tire cannot be made driv-
able.
• Do not remove foreign bodies that have penetrated the tire.
Only remove foreign objects if
they are visibly protruding
from the tire.
• Pull the speed limit sticker off the sealant container and
apply it to the steering wheel.
• The use of a sealant can
damage the TPM wheel elec-
tronics. In this case, have the
electronics checked and
replaced at the next opportu-
nity.
• The compressor can be used to check the tire inflation pres-
sure.
Repairing a flat tire
Safety measures
Mobility System
Concept
General information
Page 283 of 372
2835-1. MOBILITY
5
MOBILITY
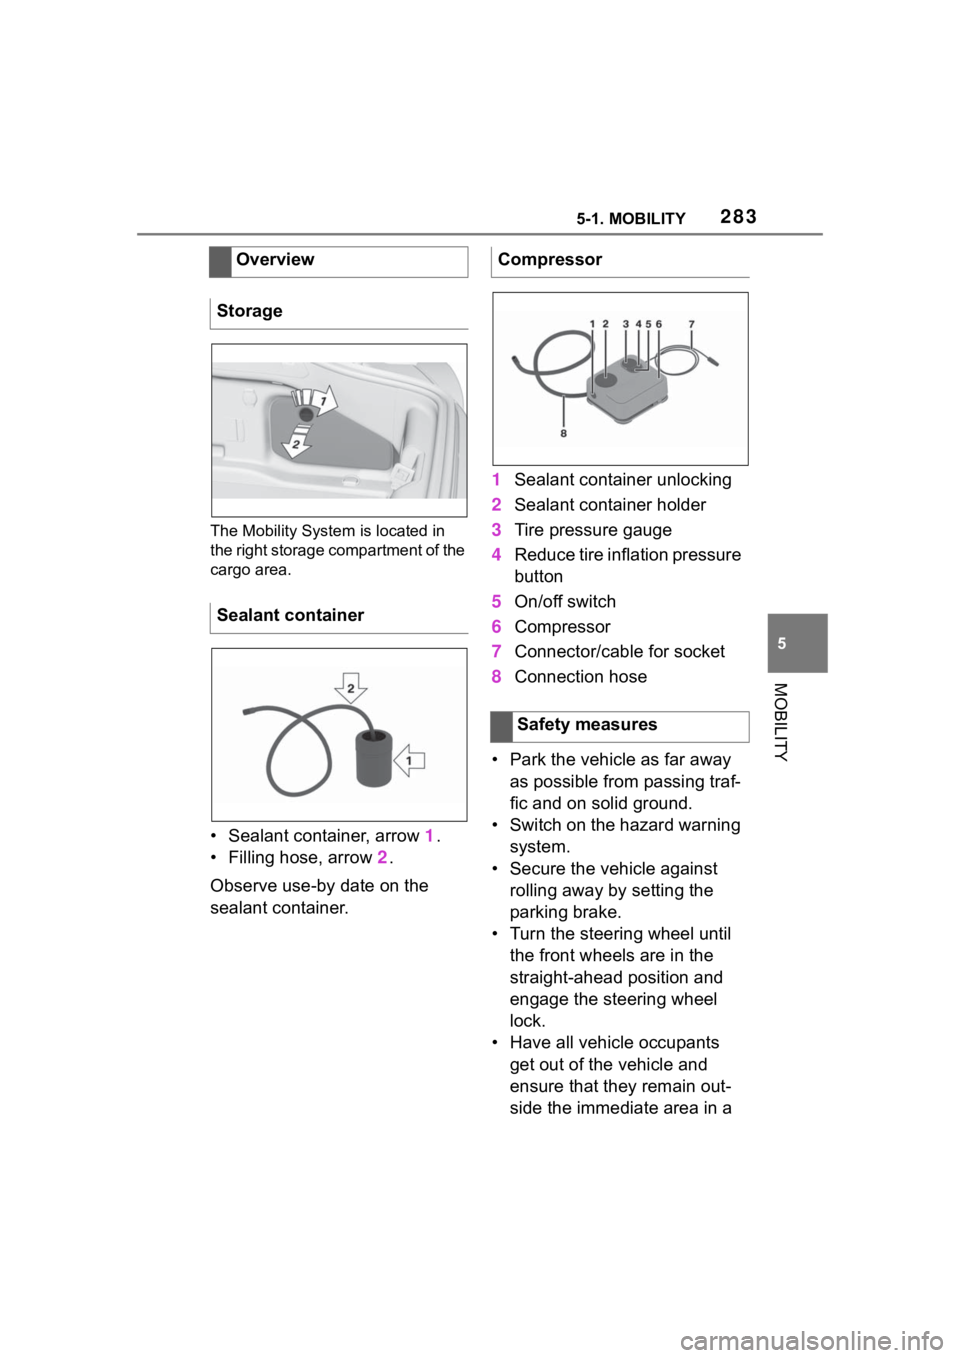
The Mobility System is located in
the right storage compartment of the
cargo area.
• Sealant container, arrow 1.
• Filling hose, arrow 2.
Observe use-by date on the
sealant container. 1
Sealant container unlocking
2 Sealant container holder
3 Tire pressure gauge
4 Reduce tire inflation pressure
button
5 On/off switch
6 Compressor
7 Connector/cable for socket
8 Connection hose
• Park the vehicle as far away as possible from passing traf-
fic and on solid ground.
• Switch on the hazard warning system.
• Secure the vehicle against rolling away by setting the
parking brake.
• Turn the steering wheel until the front wheels are in the
straight-ahead position and
engage the steering wheel
lock.
• Have all vehicle occupants get out of the vehicle and
ensure that they remain out-
side the immediate area in a
Overview
Storage
Sealant container
Compressor
Safety measures
Page 284 of 372
2845-1. MOBILITY
safe place, such as behind a
guardrail.
• If necessary, set up a warning triangle at an appropriate dis-
tance.
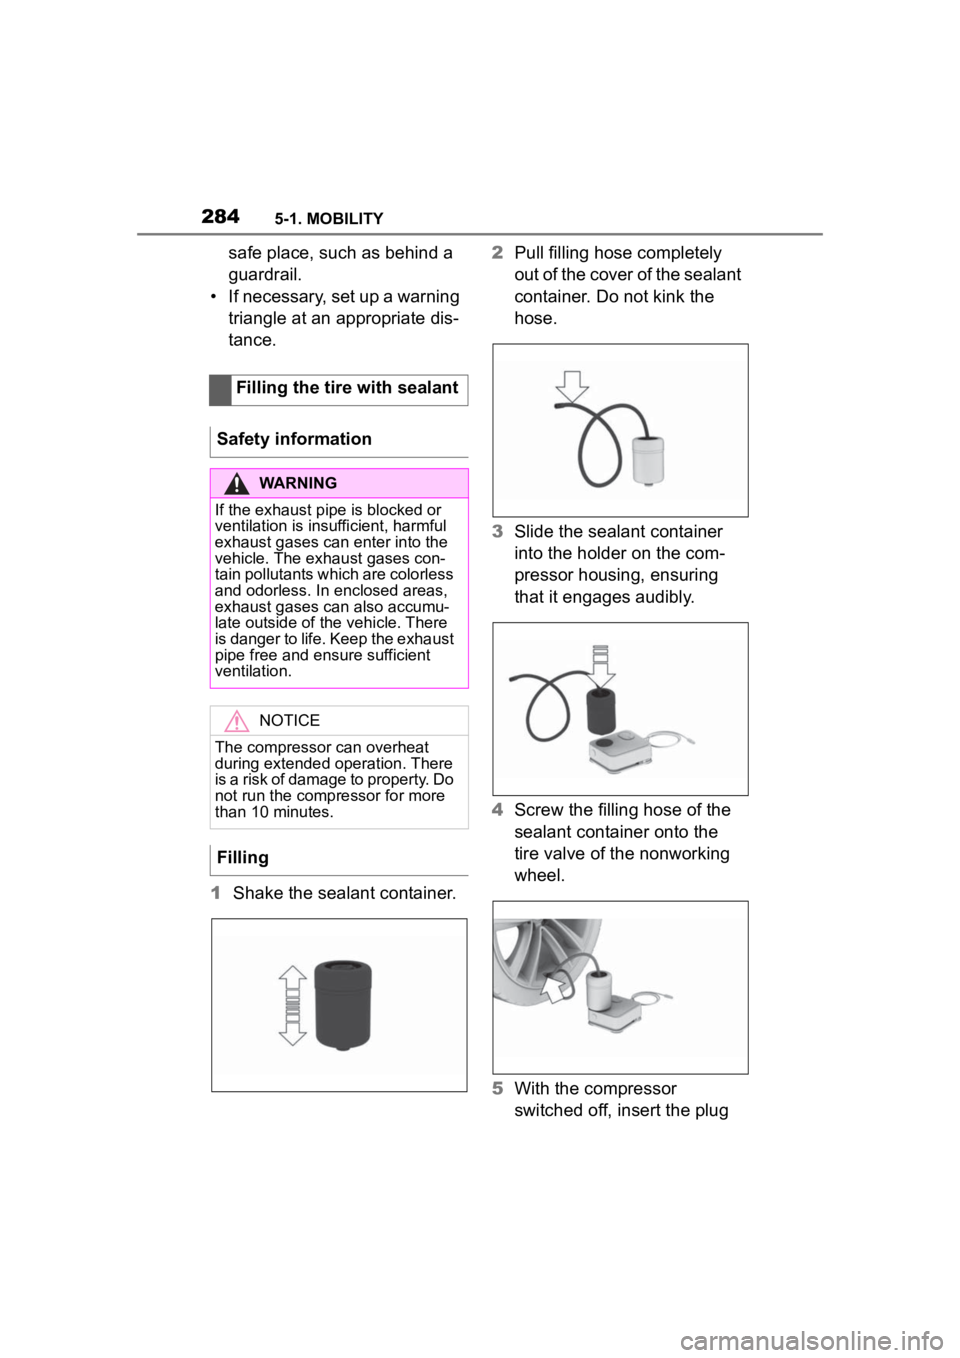
1 Shake the sealant container. 2
Pull filling hose completely
out of the cover of the sealant
container. Do not kink the
hose.
3 Slide the sealant container
into the holder on the com-
pressor housing, ensuring
that it engages audibly.
4 Screw the filling hose of the
sealant container onto the
tire valve of the nonworking
wheel.
5 With the compressor
switched off, insert the plug
Filling the tire with sealant
Safety information
WARNING
If the exhaust pipe is blocked or
ventilation is insufficient, harmful
exhaust gases can enter into the
vehicle. The exhaust gases con-
tain pollutants which are colorless
and odorless. In enclosed areas,
exhaust gases can also accumu-
late outside of the vehicle. There
is danger to life. Keep the exhaust
pipe free and ensure sufficient
ventilation.
NOTICE
The compressor can overheat
during extended operation. There
is a risk of damage to property. Do
not run the compressor for more
than 10 minutes.
Filling
Page 285 of 372
2855-1. MOBILITY
5
MOBILITY
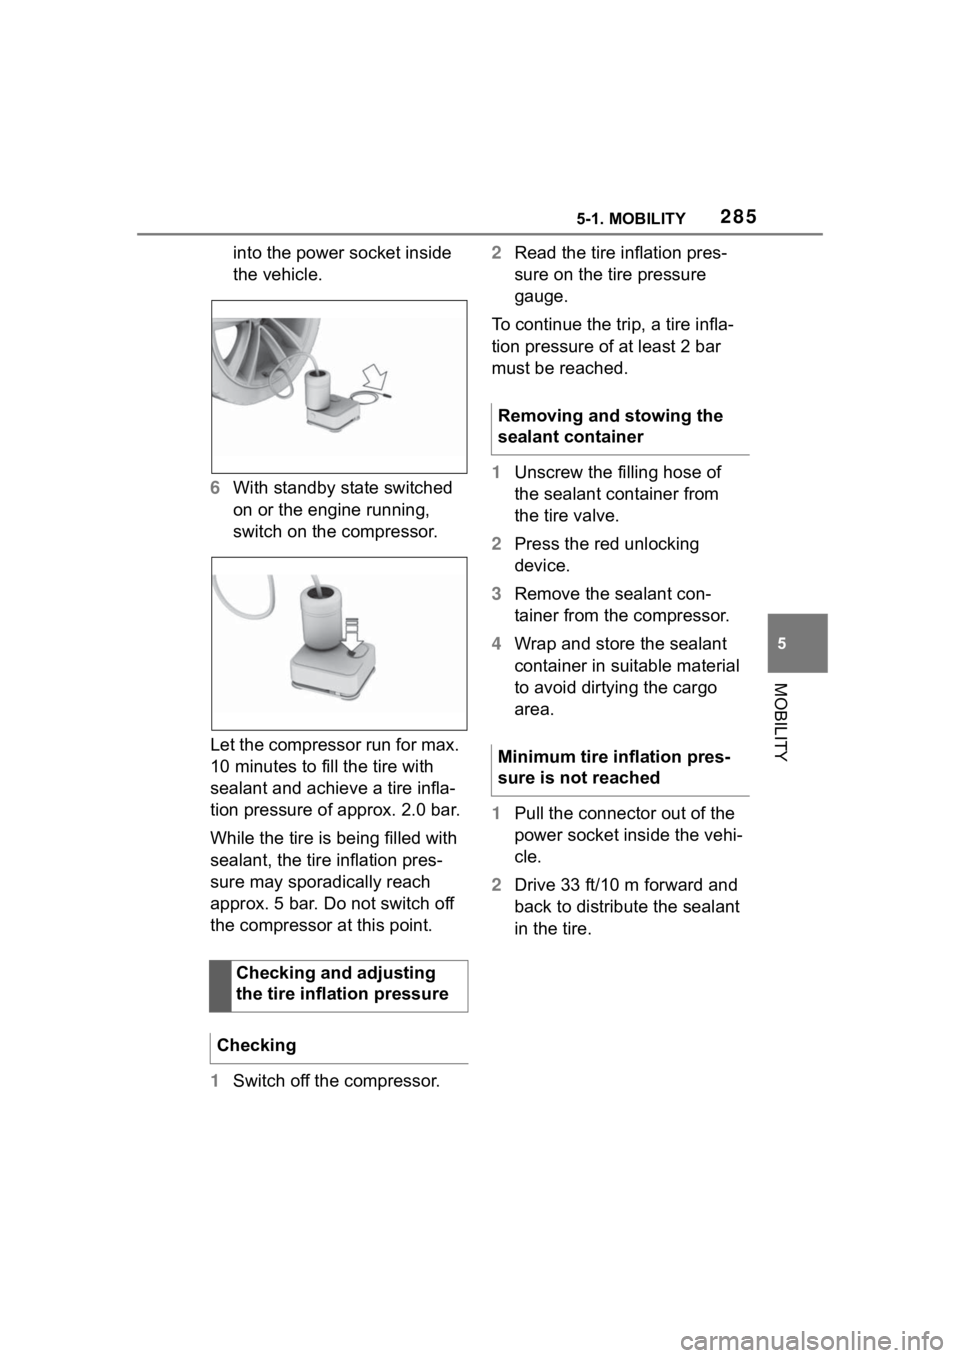
into the power socket inside
the vehicle.
6 With standby state switched
on or the engine running,
switch on the compressor.
Let the compressor run for max.
10 minutes to fill the tire with
sealant and achieve a tire infla-
tion pressure of approx. 2.0 bar.
While the tire is being filled with
sealant, the tire inflation pres-
sure may sporadically reach
approx. 5 bar. Do not switch off
the compressor at this point.
1 Switch off the compressor. 2
Read the tire inflation pres-
sure on the tire pressure
gauge.
To continue the trip, a tire infla-
tion pressure of at least 2 bar
must be reached.
1 Unscrew the filling hose of
the sealant container from
the tire valve.
2 Press the red unlocking
device.
3 Remove the sealant con-
tainer from the compressor.
4 Wrap and store the sealant
container in suitable material
to avoid dirtying the cargo
area.
1 Pull the connector out of the
power socket inside the vehi-
cle.
2 Drive 33 ft/10 m forward and
back to distribute the sealant
in the tire.
Checking and adjusting
the tire inflation pressure
Checking
Removing and stowing the
sealant container
Minimum tire inflation pres-
sure is not reached
Page 286 of 372
2865-1. MOBILITY
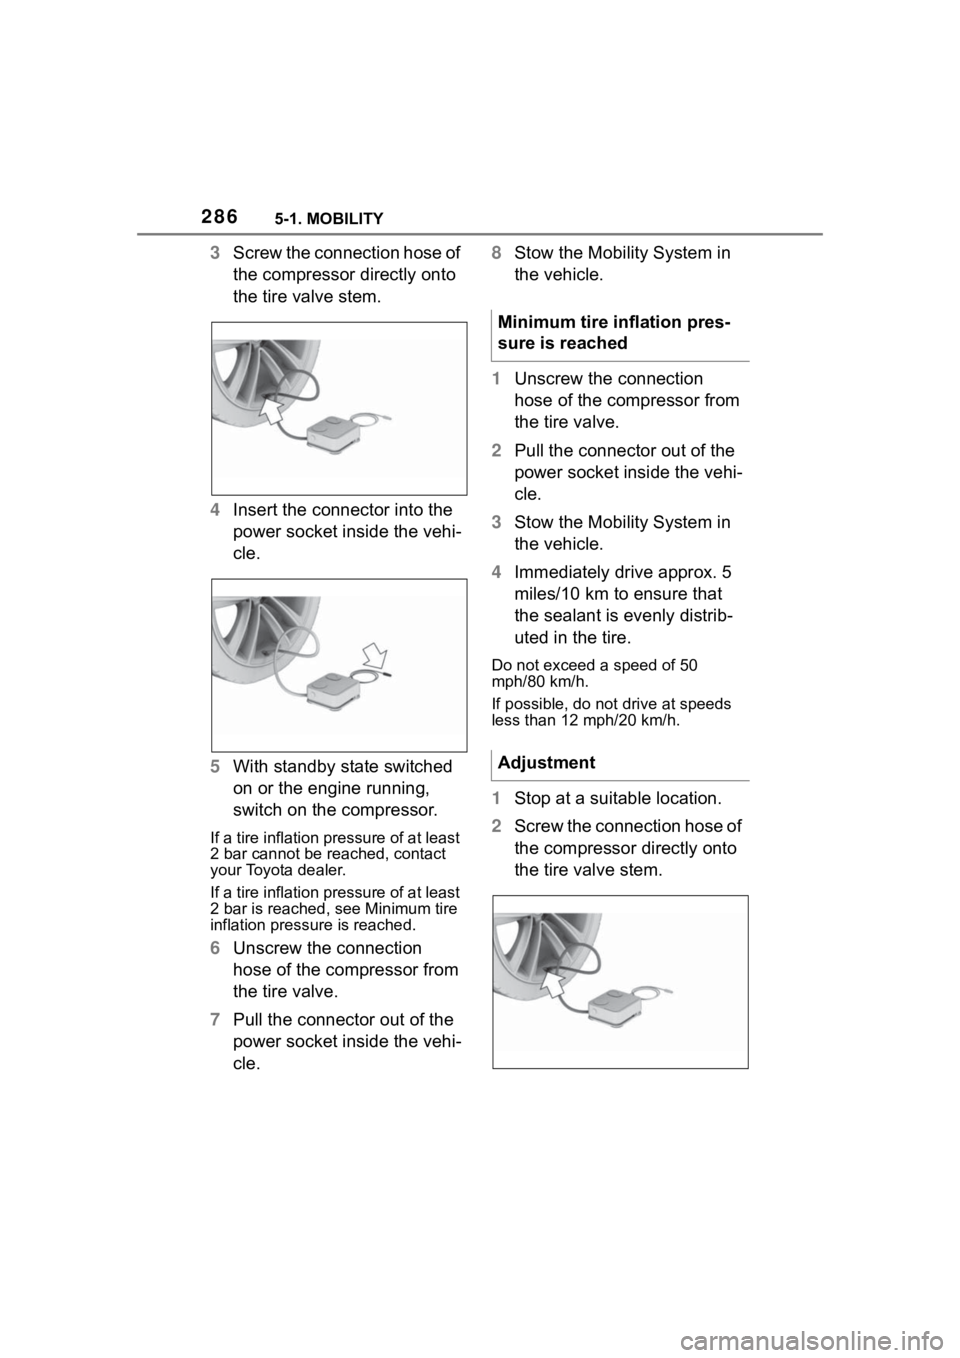
3Screw the connection hose of
the compressor directly onto
the tire valve stem.
4 Insert the connector into the
power socket inside the vehi-
cle.
5 With standby state switched
on or the engine running,
switch on the compressor.
If a tire inflation pressure of at least
2 bar cannot be reached, contact
your Toyota dealer.
If a tire inflation pressure of at least
2 bar is reached, see Minimum tire
inflation pressure is reached.
6Unscrew the connection
hose of the compressor from
the tire valve.
7 Pull the connector out of the
power socket inside the vehi-
cle. 8
Stow the Mobility System in
the vehicle.
1 Unscrew the connection
hose of the compressor from
the tire valve.
2 Pull the connector out of the
power socket inside the vehi-
cle.
3 Stow the Mobility System in
the vehicle.
4 Immediately drive approx. 5
miles/10 km to ensure that
the sealant is evenly distrib-
uted in the tire.
Do not exceed a speed of 50
mph/80 km/h.
If possible, do no t drive at speeds
less than 12 mph/20 km/h.
1 Stop at a suitable location.
2 Screw the connection hose of
the compressor directly onto
the tire valve stem.
Minimum tire inflation pres-
sure is reached
Adjustment
Page 287 of 372
2875-1. MOBILITY
5
MOBILITY
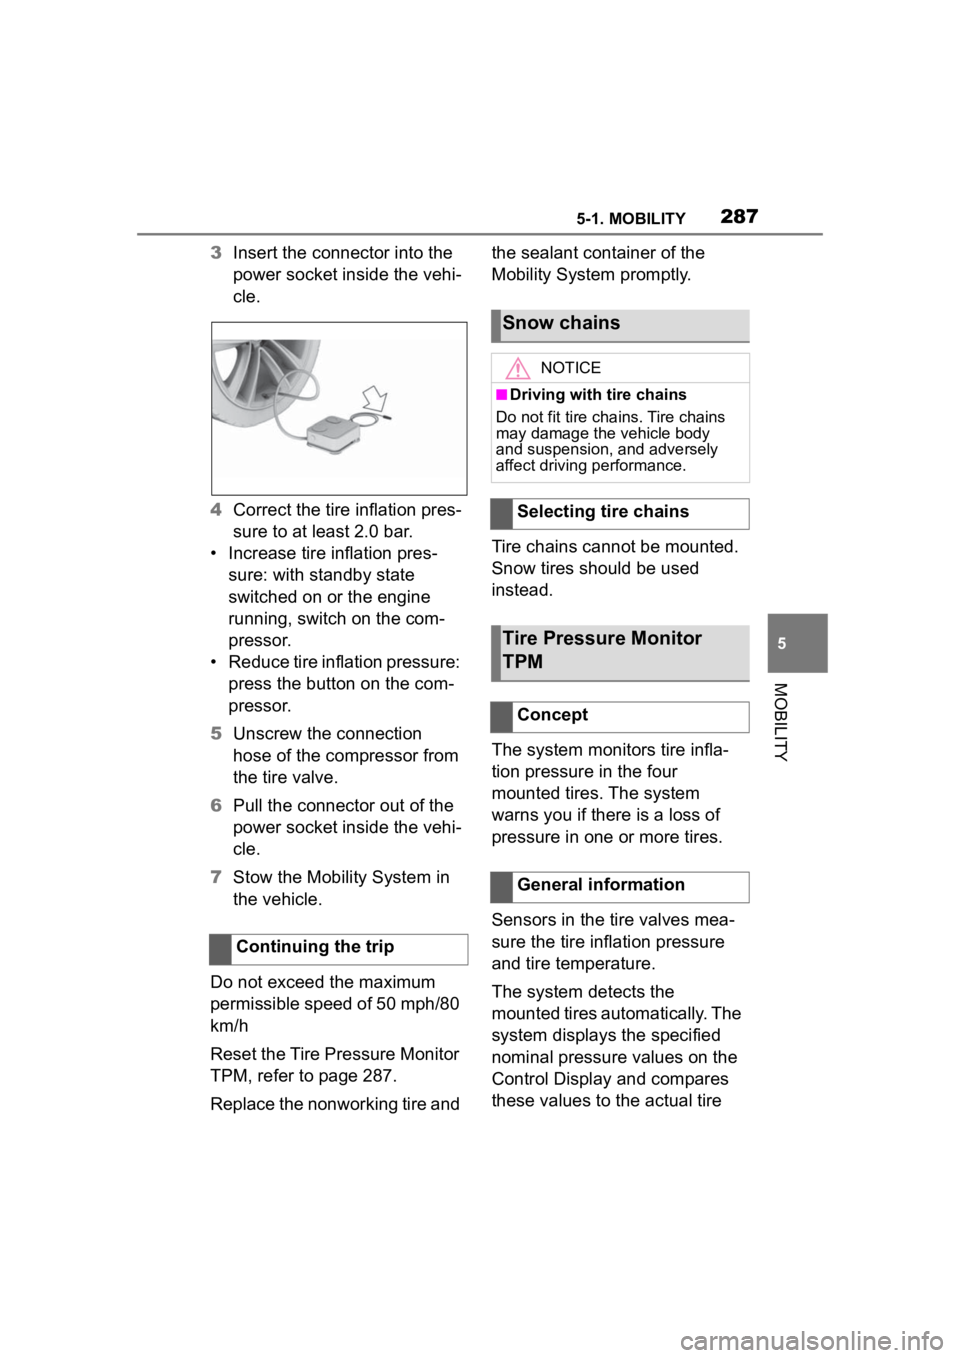
3Insert the connector into the
power socket inside the vehi-
cle.
4 Correct the tire inflation pres-
sure to at least 2.0 bar.
• Increase tire inflation pres- sure: with standby state
switched on or the engine
running, switch on the com-
pressor.
• Reduce tire inflation pressure: press the button on the com-
pressor.
5 Unscrew the connection
hose of the compressor from
the tire valve.
6 Pull the connector out of the
power socket inside the vehi-
cle.
7 Stow the Mobility System in
the vehicle.
Do not exceed the maximum
permissible speed of 50 mph/80
km/h
Reset the Tire Pressure Monitor
TPM, refer to page 287.
Replace the nonworking tire and the sealant container of the
Mobility System promptly.
Tire chains cannot be mounted.
Snow tires should be used
instead.
The system monitors tire infla-
tion pressure in the four
mounted tires. The system
warns you if there is a loss of
pressure in one or more tires.
Sensors in the tire valves mea-
sure the tire inflation pressure
and tire temperature.
The system detects the
mounted tires automatically. The
system displays the specified
nominal pressure values on the
Control Display and compares
these values to the actual tire
Continuing the trip
Snow chains
NOTICE
■Driving with tire chains
Do not fit tire chains. Tire chains
may damage the vehicle body
and suspension, and adversely
affect driving performance.
Selecting tire chains
Tire Pressure Monitor
TPM
Concept
General information
Page 288 of 372
2885-1. MOBILITY
pressure values.
If tires are being used that are
not specified on the tire inflation
pressure details on the vehicle,
refer to page 270, such as tires
with special approval, the sys-
tem needs to be actively reset.
The system will then take over
the actual tire inflation pressures
as the target pressures.
When operating the system,
also note the additional informa-
tion found in the Tire inflation
pressure, refer to page 270.
The following conditions must
be met for the system; other-
wise, reliable flagging of a loss
of tire inflation pressure is not
assured:
• After each tire or wheel change, the system detects and updates the mounted
tires and displays them after a
short trip on the Control Dis-
p l a y.
Enter the inform
ation about the
mounted tires in th e tire settings
when the system does not automat-
ically detect the tires.
• TPM does not activate until
after driving for a few minutes:
• After a tire or wheel replacement.
• Reset, for tires without special approval.
• After changing the tire setting.
• For tires with special approval:
• After a tire or wheel replacement, a reset was perfo rmed with the
correct tire inflation pressure.
• After the tire inflation pressure was adjusted to a new value, a
reset was p erformed.
• Wheels with TPM wheel elec-
tronics.
The information about the
mounted tires can be entered in
the tire settings if the system
does not automatically detect
the tires.
The tire sizes of the mounted
tires can be gathered from the
tire inflation pressure details on
the vehicle, refer to page 270, or
directly on the tires.
Safety information
WARNING
The display of the target pres-
sures is not a sub
stitute for the
tire inflation pressure details on
the vehicle. Incorrect entries in
the tire settings can lead to incor-
rect target tire inflation pressure
values. In this case, it cannot be
guaranteed that the notification of
a loss of tire inflation pressure will
be reliable. There is a risk of injury
and risk of damage to property.
Ensure that the tire sizes of the
mounted tires are displayed cor-
rectly and match the details on the
tires and on the vehicle.
Functional requirements
Tire settings
General information
Page 289 of 372

2895-1. MOBILITY
5
MOBILITY
The tire details do not need to
be re-entered when the tire infla-
tion pressure is corrected.
For summer and winter tires, the
tire details entered last are
stored. After a tire or wheel
replacement, the settings of the
tire sets used last can be
selected.
Via Toyota Supra Command:
1"My vehicle"
2 "Vehicle status"
3 "Tire Pressure Monitor"
Via Toyota Supra Command:
1 "Tire settings"
2 Selecting tires:
• "Summer tires"
• "Winter tires/all-season tires"
3 "Current:"
4 Select the tire type that is
mounted on the rear axle:
• Tire size, e.g., 245/45 R18 96 Y.
• For tires with special approval: "Other tire"
5 Select the maximum road
speed that will be used with
the tires.
6 "Confirm settings"
The measurement of the current
tire inflation pressure is started. The measurement progress is
displayed.
The system status can be dis-
played on the Control Display,
e.g., whether or not the system
is active.
Via Toyota Supra Command:
1
"My vehicle"
2 "Vehicle status"
3 "Tire Pressure Monitor"
The current status is displayed.
The current tire inflation pres-
sure is displayed for each tire.
The current tire inflation pres-
sures may change during driv-
ing operation or depending on
the external temperature.
Depending on the model, the
current tire temperatures are
displayed.
The current tire temperatures
may change while driving or due
to the external temperature.
Opening the menu
Changing settings
Status display
Current status
Current tire inflation pres-
sure
Current tire temperature
Page 290 of 372

2905-1. MOBILITY
Tire and system status are indi-
cated by the color of the wheels
and a SMS text message on the
Control Display.
Any existing messages are not
deleted if the displayed target
pressure is not reached after the
tire inflation pressure is cor-
rected.
• The system is active and bases warnings on the dis-
played target pressures.
• For tires with special approval: the system is active
and bases warnings on the
tire inflation pressures stored
during the last reset.
A flat tire or major drop in the
tire inflation pressure has
occurred in the indicated tires.
It may not be possible to identify
tire inflation pressure losses.
Possible causes:
• Malfunction.
• During tire inflation pressure measurement, after confirma-
tion of the tire settings. • For tires with special
approval: the system is being
reset.
Via Toyota Supra Command:
1 "My vehicle"
2 "Vehicle status"
3 "Tire Pressure Monitor"
4 "Tire settings"
5 Selecting tires:
• "Summer tires"
• "Winter tires/all-season tires"
6 "Current:"
When not selecting "Other
tire":
7 "Load state"
8 "Confirm settings"
9 Drive the vehicle.
When selecting "Other tire":
7 "Tire settings"
8 Switch on drive-ready state
and do not drive off.
9 Reset tire inflation pressure:
"Perform reset".
10Drive away.
After driving faster than 19
mph/30 km/h for a short period,
the set tire inflation pressures
are accepted as the target tire
inflation pressures. The reset is
completed automatically while
driving.
After a successfully completed
Tire conditions
General information
All wheels green
One to four yellow wheels
Gray wheels
Reset the tire inflation
pressure