set clock TOYOTA TACOMA 2009 Owners Manual (in English)
[x] Cancel search | Manufacturer: TOYOTA, Model Year: 2009, Model line: TACOMA, Model: TOYOTA TACOMA 2009Pages: 520, PDF Size: 10.75 MB
Page 148 of 520
148
2-1. Driving procedures
Parking brake
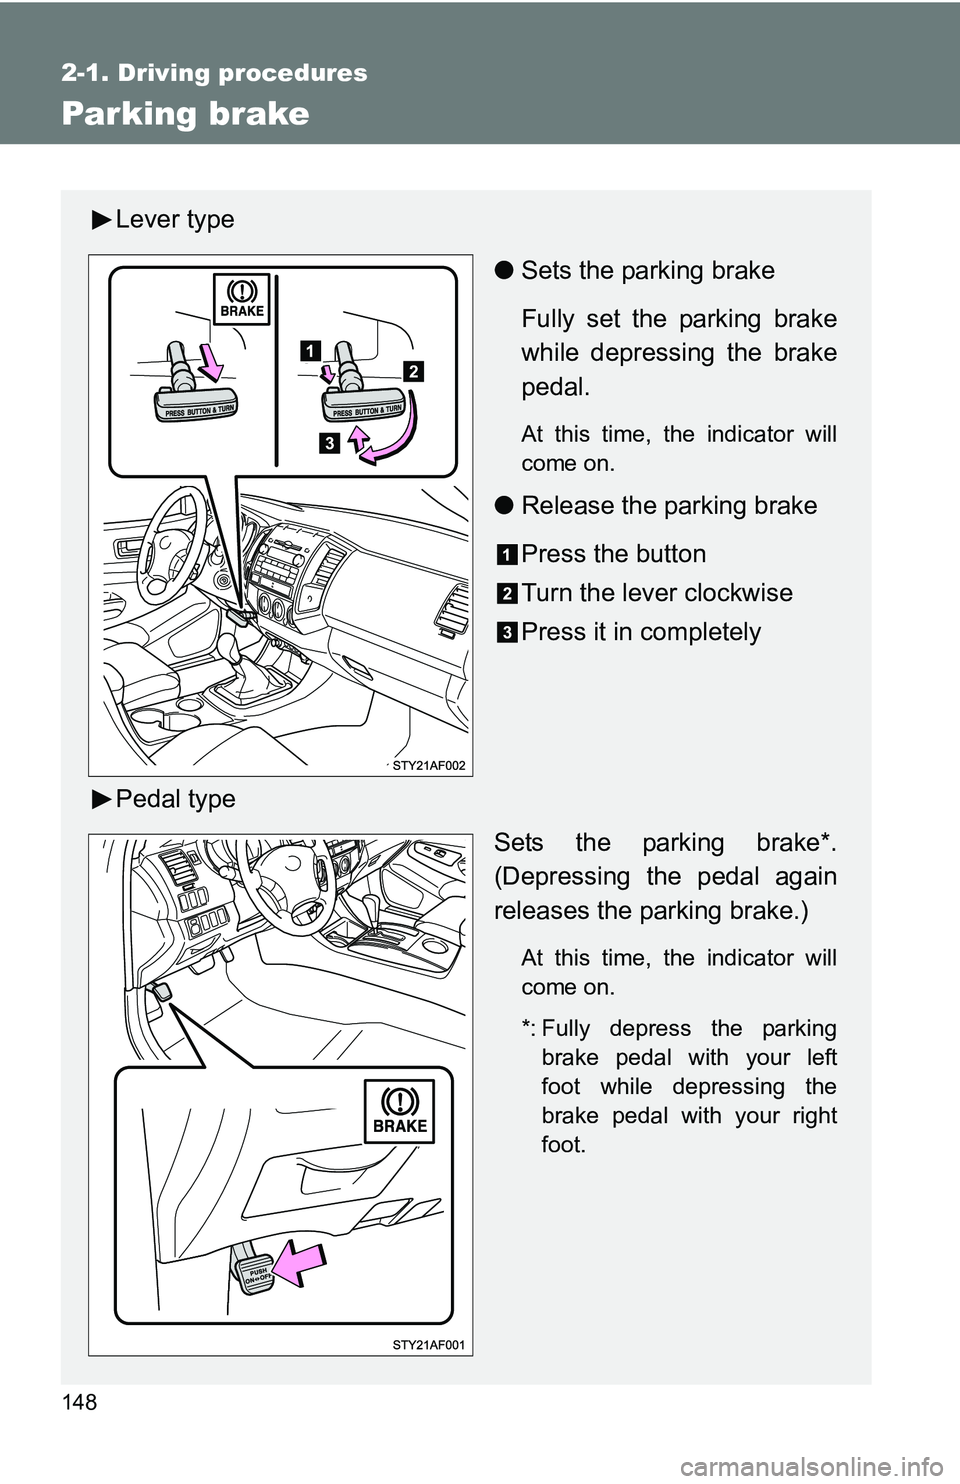
Lever type●Sets the parking brake
Fully set the parking brake
while depressing the brake
pedal.
At this time, the indicator will
come on.
●Release the parking brake
Press the button
Turn the lever clockwise
Press it in completely
Pedal type Sets the parking brake*.
(Depressing the pedal again
releases the parking brake.)
At this time, the indicator will
come on.
*: Fully depress the parkingbrake pedal with your left
foot while depressing the
brake pedal with your right
foot.
Page 219 of 520
Interior and exterior features3
219
3-1. Using the air conditioning
system and
defogger ....................... 220
Air conditioning system .... 220
3-2. Using the audio system .......................... 228
Audio system types .......... 228
Using the radio ................. 231
Using the CD player ......... 237
Playing back MP3 and WMA discs ..................... 244
Optimal use of the audio system ........................... 253
Operating the sub woofer (on some Access Cab
models) .......................... 256
Using the AUX adapter .... 257
Using the steering wheel audio switches ............... 259
3-3. Using the hands-free phone system (for
cellular phone) ............. 262
Hands-free phone system (for cellular phone) ......... 262
Using the hands-free phone system ................ 266
Making a phone call ......... 274
Setting a cellular phone ... 279
Security and system setup .............................. 284
Using the phone book ...... 287 3-4. Using the interior
lights ............................. 294
Interior lights list ............... 294
• Interior light .................... 295
• Personal lights ............... 295
3-5. Using the storage features ......................... 296
List of storage features .... 296
• Glove box....................... 296
• Console boxes ............... 297
• Cup holders ................... 298
• Bottle holders ................. 300
• Auxiliary boxes ............... 302
• Overhead console .......... 304
3-6. Other interior features ......................... 305
Sun visors ........................ 305
Vanity mirrors ................... 306
Clock ................................ 307
Outside temperature display (vehicles with
accessory meter) ........... 308
Cigarette lighter................ 309
Power outlet (12V DC) ..... 310
Power outlet (if 115V AC equipped) ....................... 311
Seatback table ................. 317
Floor mat .......................... 318
Luggage compartment features .......................... 319
Garage door opener box ................................. 328
Compass (vehicles with accessory meter) ........... 332
Page 221 of 520
221
3-1. Using the air conditioning system
and defogger
3
Interior and exterior features
Adjusting the settings
■ Adjusting the temperature setting (Type A)
Turn the temperature control dial clockwise to increase the temper-
ature.
■ Adjusting the temperature setting (Type B)
Turn the temperature control dial clockwise (warm) or counter-
clockwise (cool).
If is not pressed, the system will blow ambient temperature air or
heated air.
For quick cooling, turn the temperature control dial to the MAX A/C posi-
tion. The air conditioning will automatically turn on and the air intake
selector will be set to recirculated air mode.
■ Adjusting the fan speed
Turn the fan speed control dial clockwise (increase) or counter-
clockwise (decrease).
Set the dial to OFF to turn the fan off.
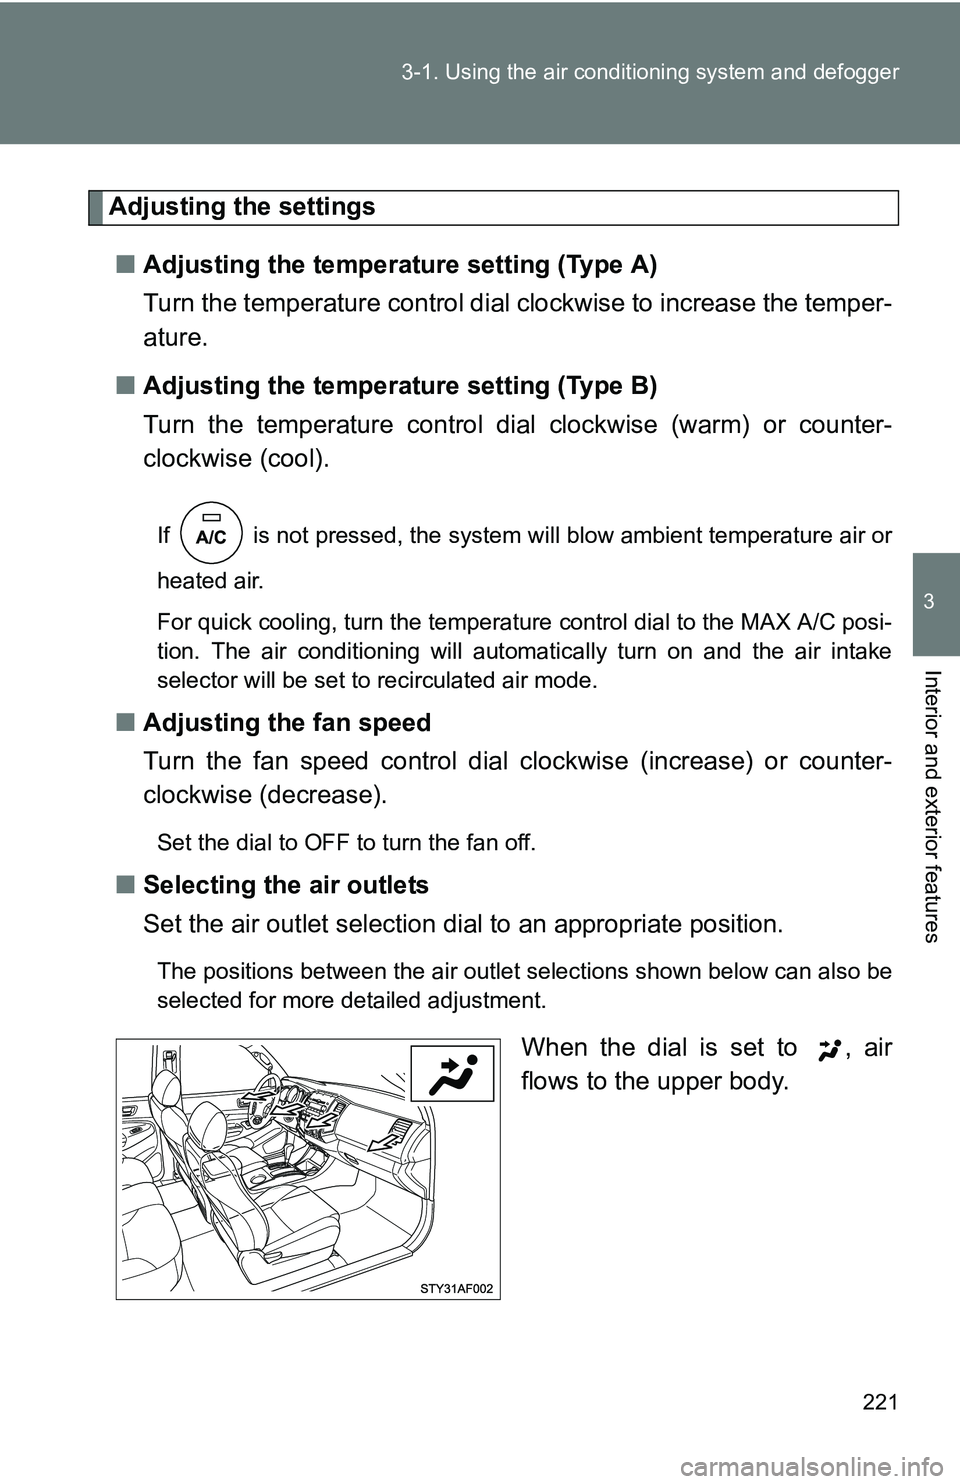
■ Selecting the air outlets
Set the air outlet selection di al to an appropriate position.
The positions between the air outlet selections shown below can also be
selected for more detailed adjustment.
When the dial is set to , air
flows to the upper body.
Page 286 of 520
286 3-3. Using the hands-free phone system (for cellular phone)
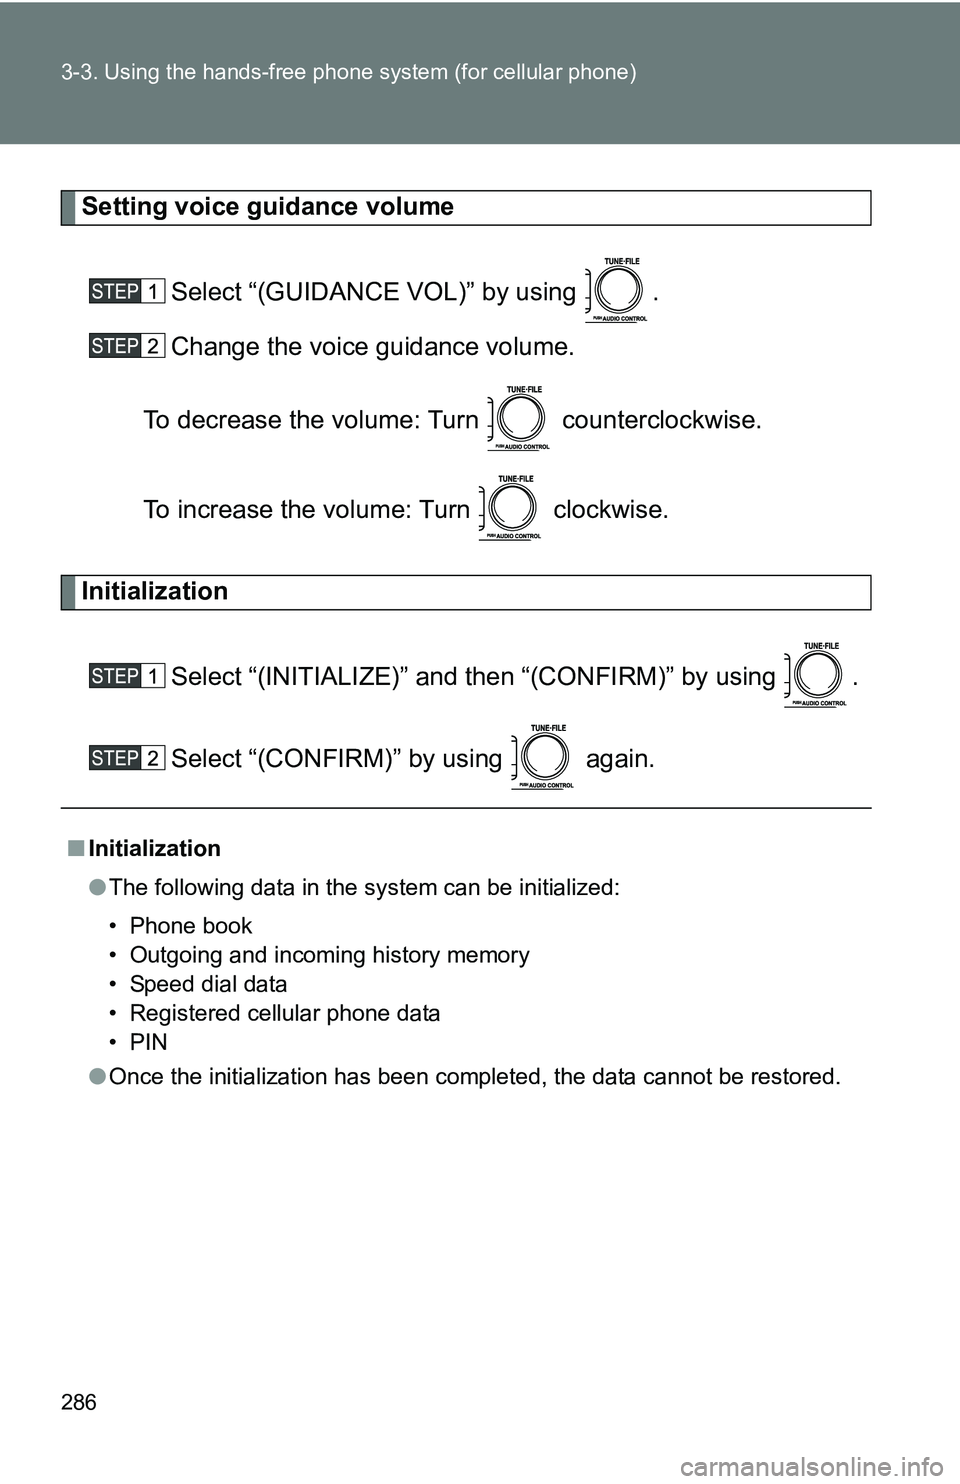
Setting voice guidance volume
Select “(GUIDANCE VOL)” by using .
Change the voice guidance volume.
To decrease the volume: Turn counterclockwise.
To increase the volume: Turn clockwise.
Initialization
Select “(INITIALIZE)” and then “(CONFIRM)” by using .
Select “(CONFIRM)” by using again.
■Initialization
●The following data in the system can be initialized:
• Phone book
• Outgoing and incoming history memory
• Speed dial data
• Registered cellular phone data
•PIN
● Once the initialization has been completed, the data cannot be restored.
Page 307 of 520
307
3-6. Other interior features
3
Interior and exterior features
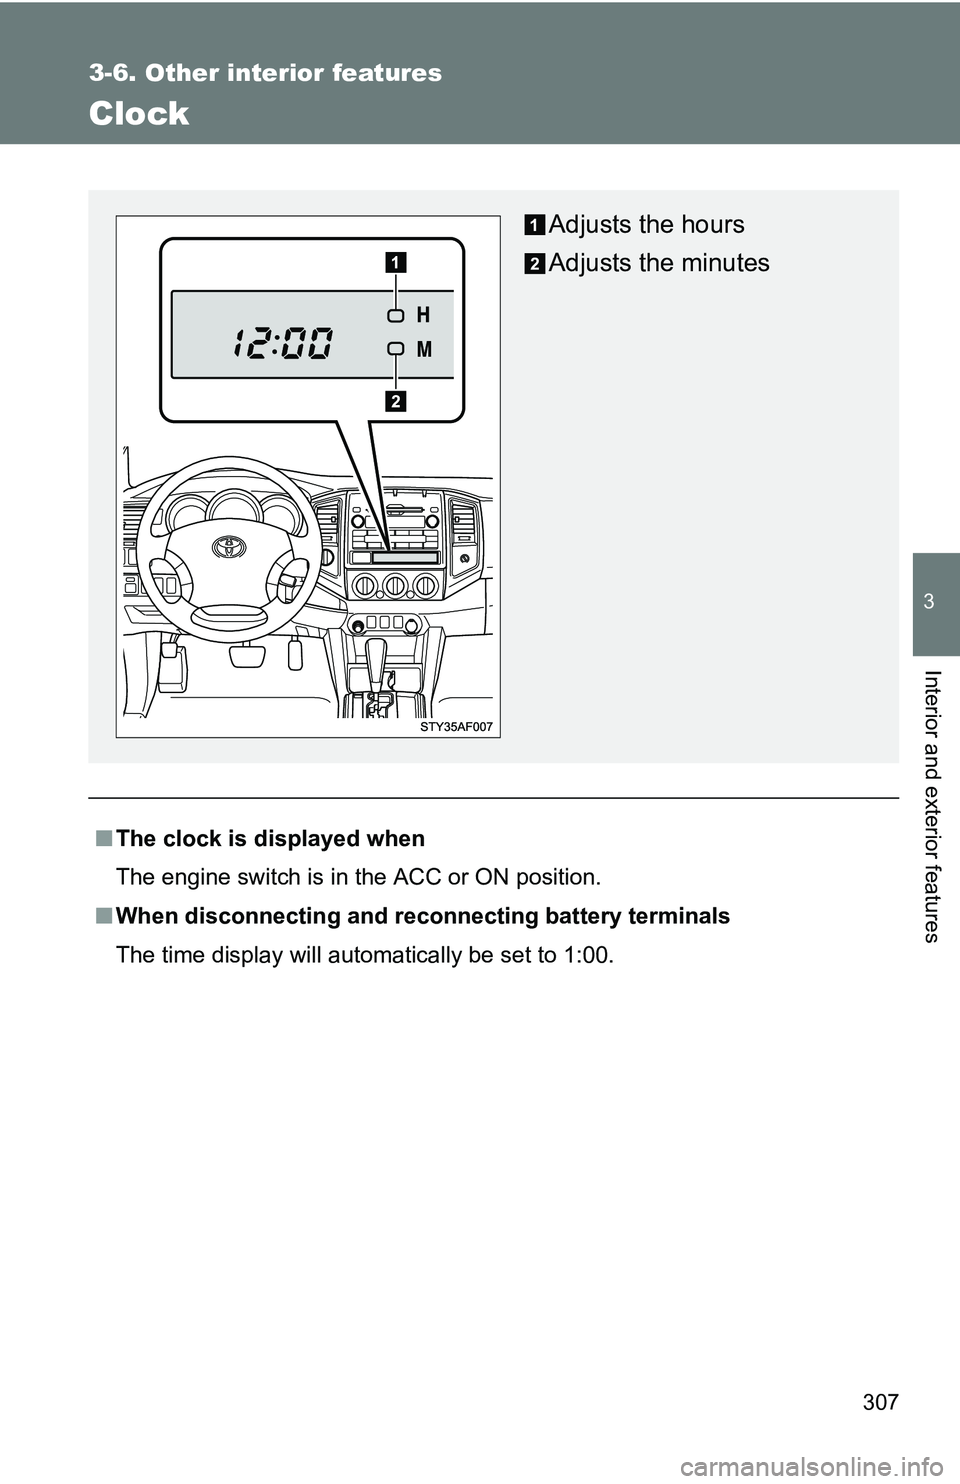
Clock
■The clock is displayed when
The engine switch is in the ACC or ON position.
■ When disconnecting and reco nnecting battery terminals
The time display will automatically be set to 1:00.
Adjusts the hours
Adjusts the minutes