TOYOTA TACOMA 2011 Owners Manual (in English)
TACOMA 2011
TOYOTA
TOYOTA
https://www.carmanualsonline.info/img/14/42953/w960_42953-0.png
TOYOTA TACOMA 2011 Owners Manual (in English)
Trending: battery, seats, radio antenna, TPMS, recommended oil, headlights, low beam
Page 451 of 548
5
When trouble arises
451
5-2. Steps to take in an emergency
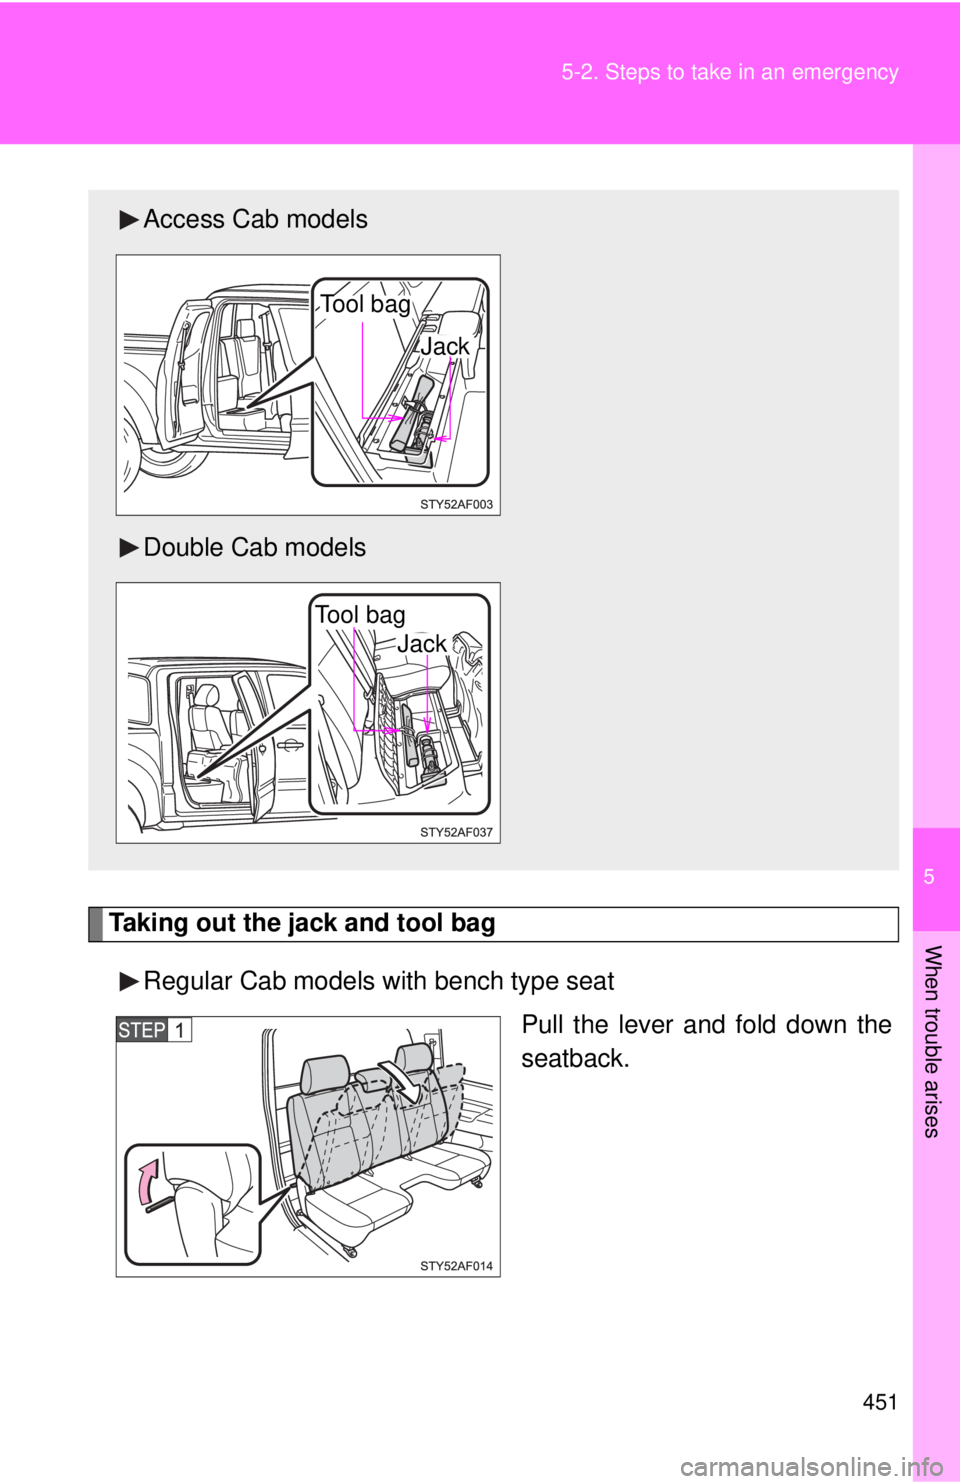
Taking out the jack and tool bag
Regular Cab models with bench type seat Pull the lever and fold down the
seatback.
Access Cab models
Double Cab models
Tool bag
Jack
Tool bag
Jack
Page 452 of 548
452 5-2. Steps to take in an emergency
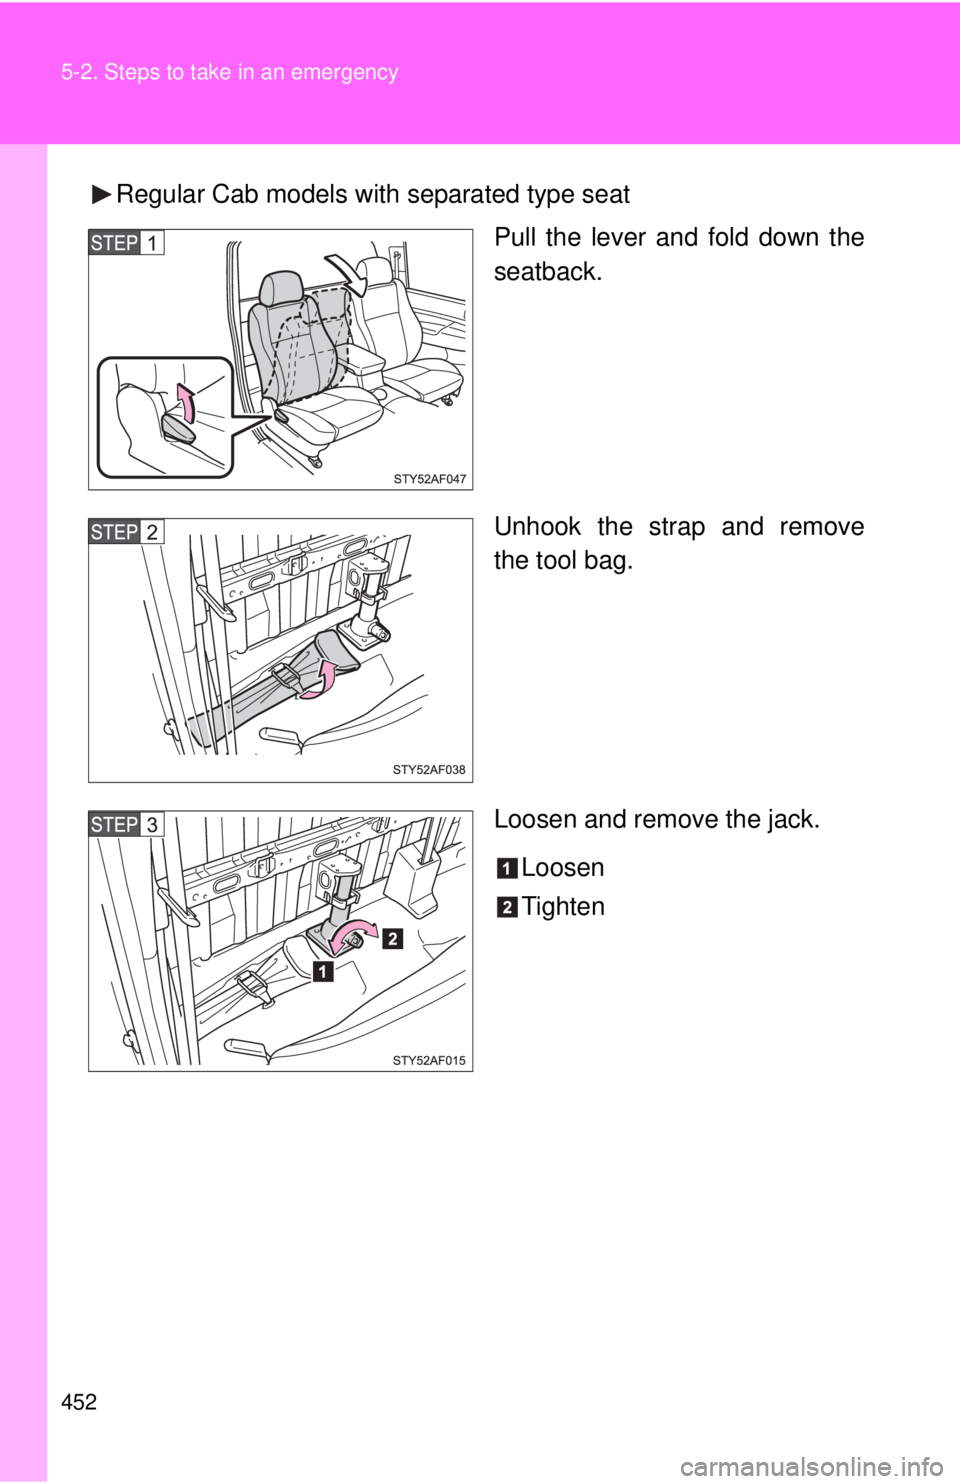
Regular Cab models with separated type seatPull the lever and fold down the
seatback.
Unhook the strap and remove
the tool bag.
Loosen and remove the jack.
Loosen
Tighten
Page 453 of 548
5
When trouble arises
453
5-2. Steps to take in an emergency
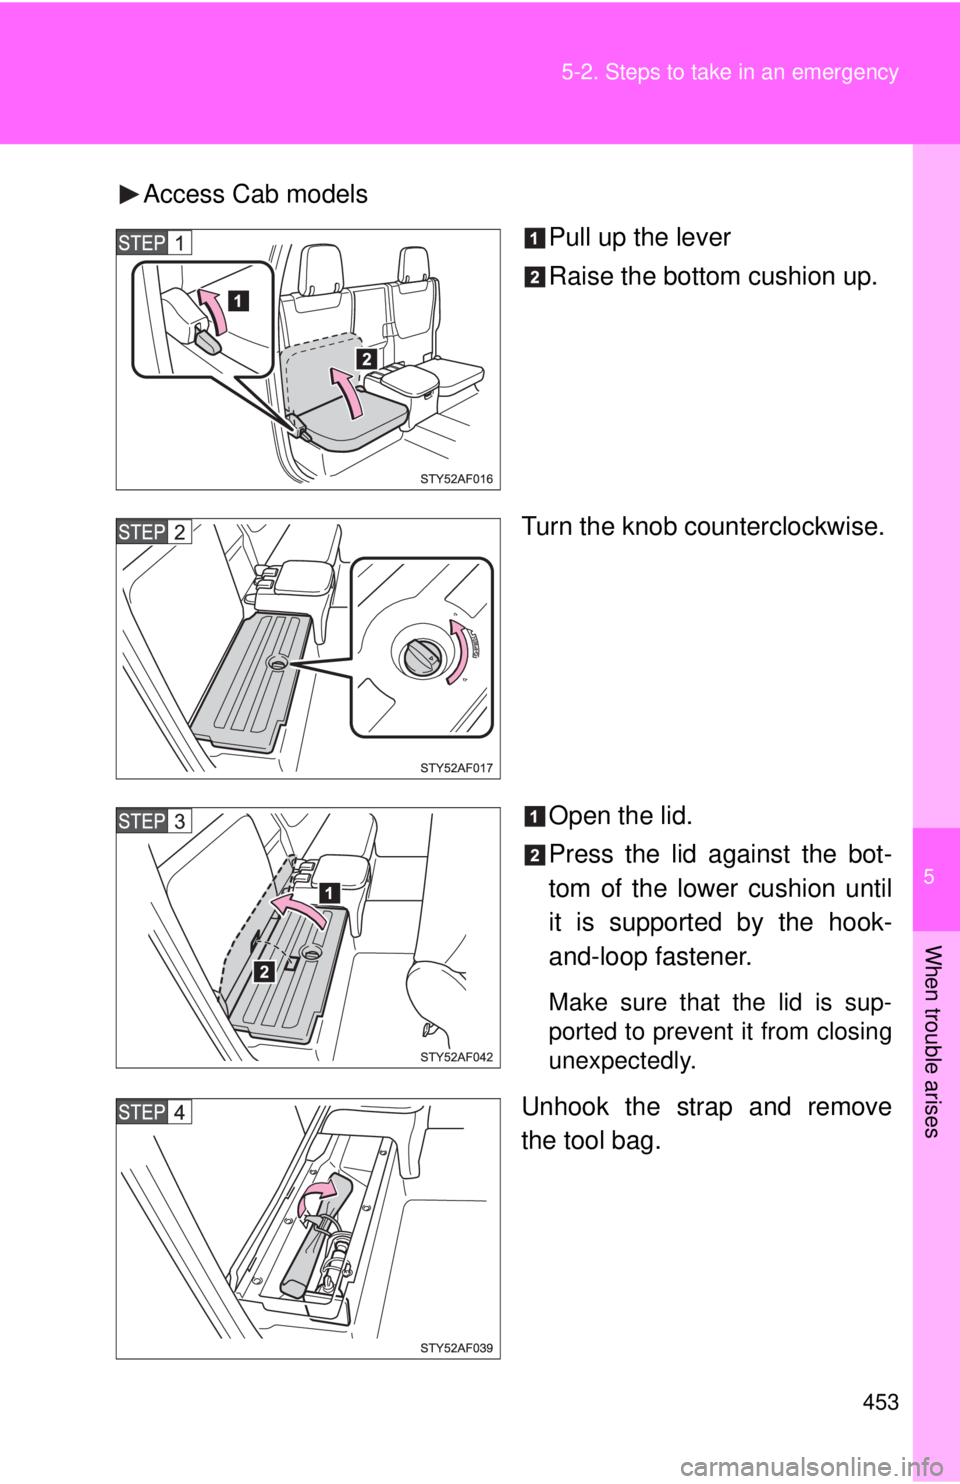
Access Cab models
Pull up the lever
Raise the bottom cushion up.
Turn the knob counterclockwise.
Open the lid.
Press the lid against the bot-
tom of the lower cushion until
it is supported by the hook-
and-loop fastener.
Make sure that the lid is sup-
ported to prevent it from closing
unexpectedly.
Unhook the strap and remove
the tool bag.
Page 454 of 548
454 5-2. Steps to take in an emergency
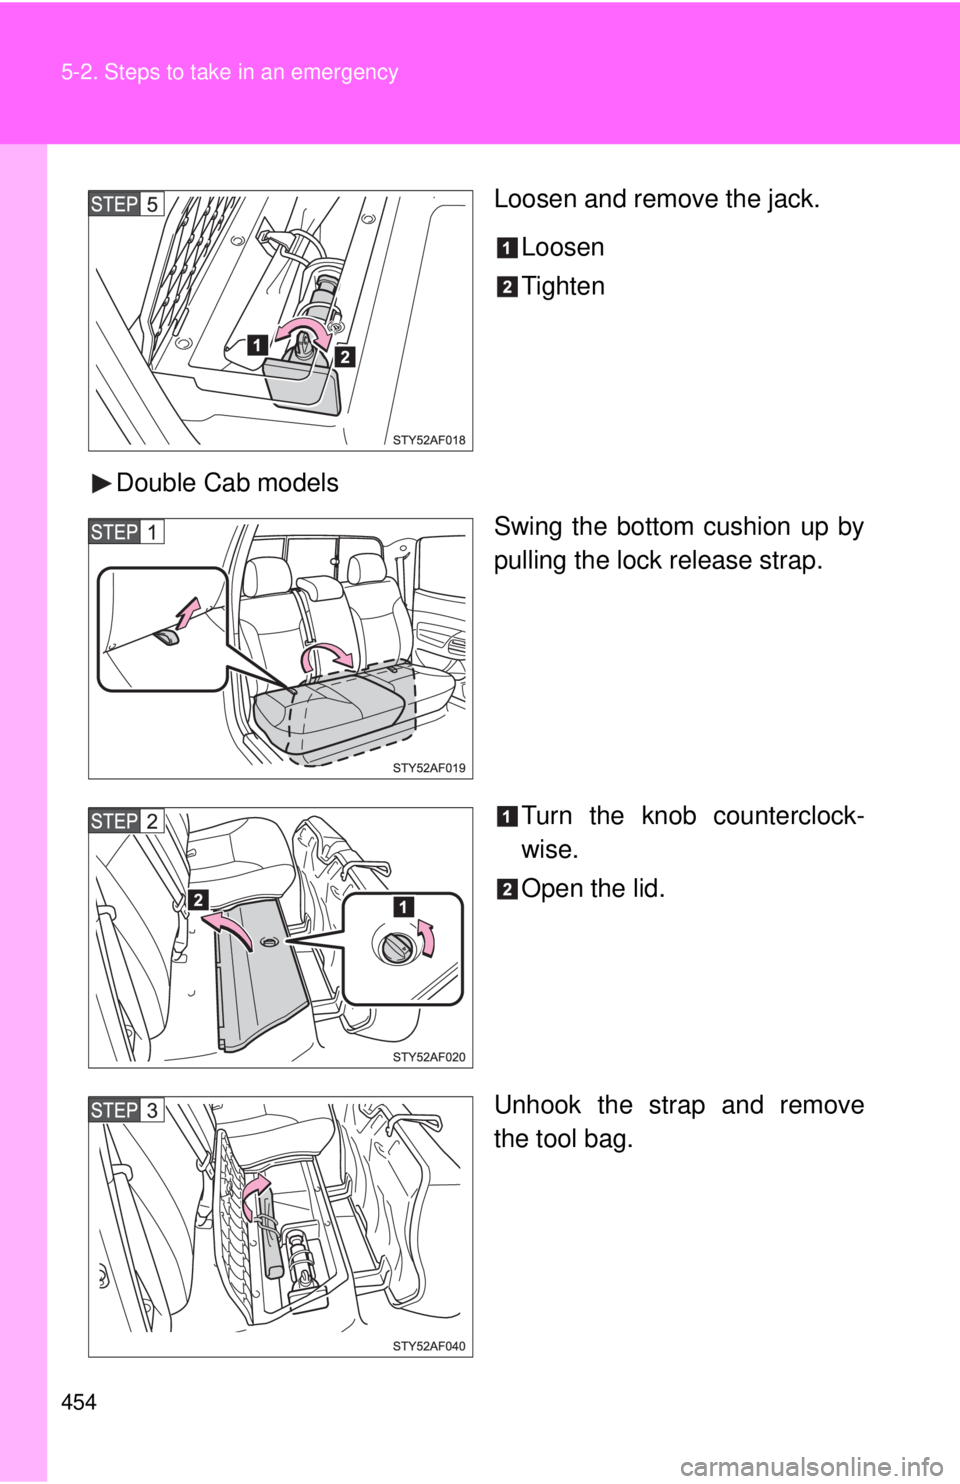
Loosen and remove the jack.Loosen
Tighten
Double Cab models Swing the bottom cushion up by
pulling the lock release strap.
Turn the knob counterclock-
wise.
Open the lid.
Unhook the strap and remove
the tool bag.
Page 455 of 548
5
When trouble arises
455
5-2. Steps to take in an emergency
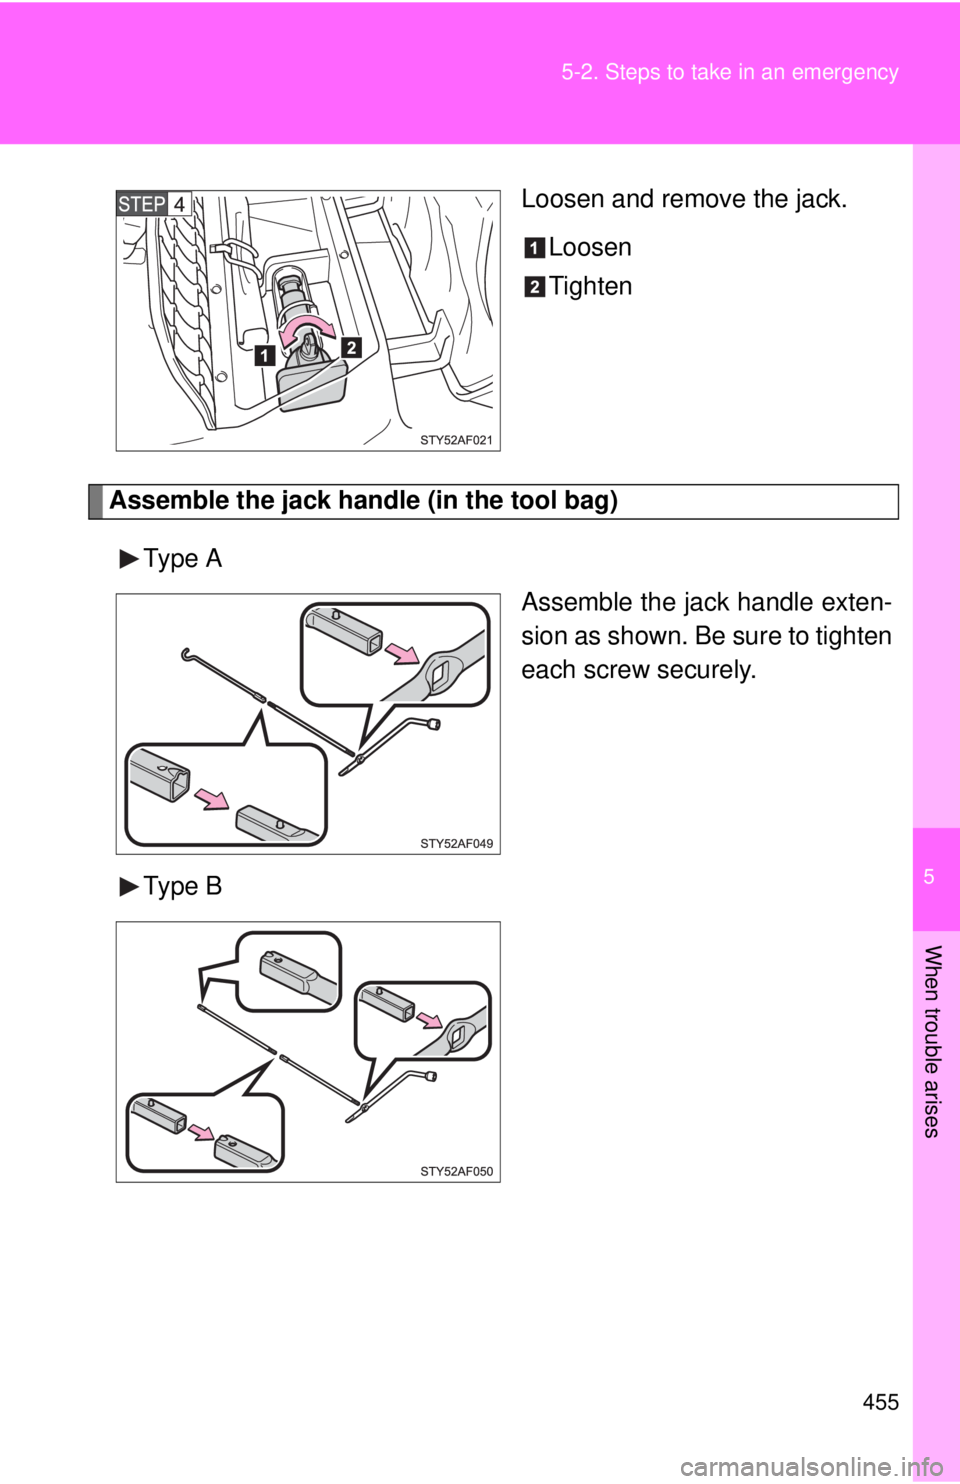
Loosen and remove the jack.
Loosen
Tighten
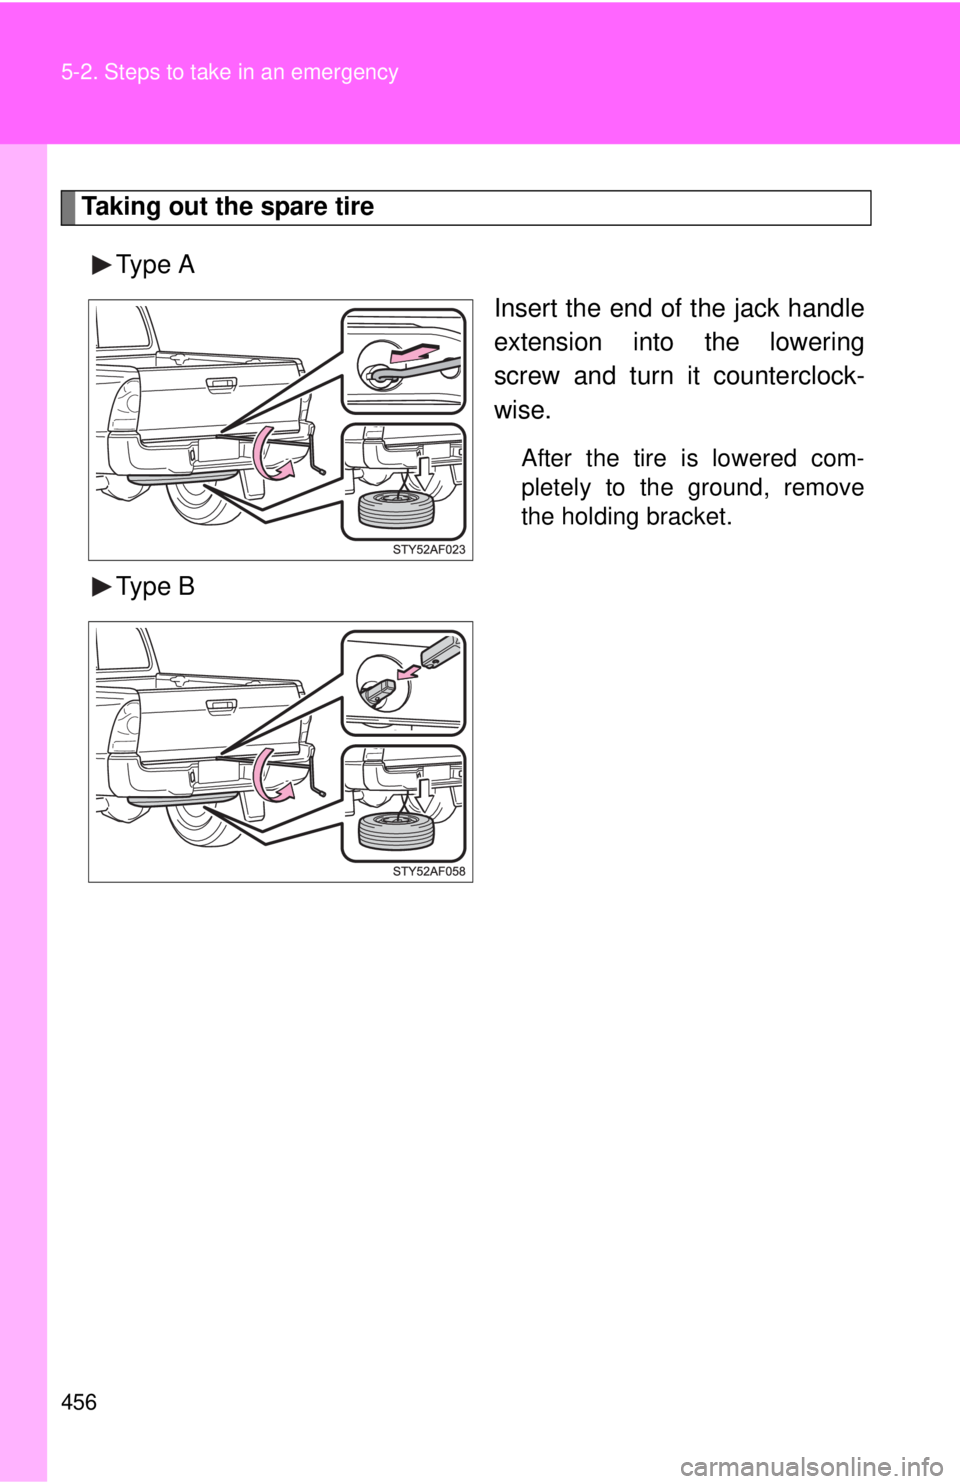
Assemble the jack handle (in the tool bag)
Type A Assemble the jack handle exten-
sion as shown. Be sure to tighten
each screw securely.
Type B
Page 456 of 548
456 5-2. Steps to take in an emergency
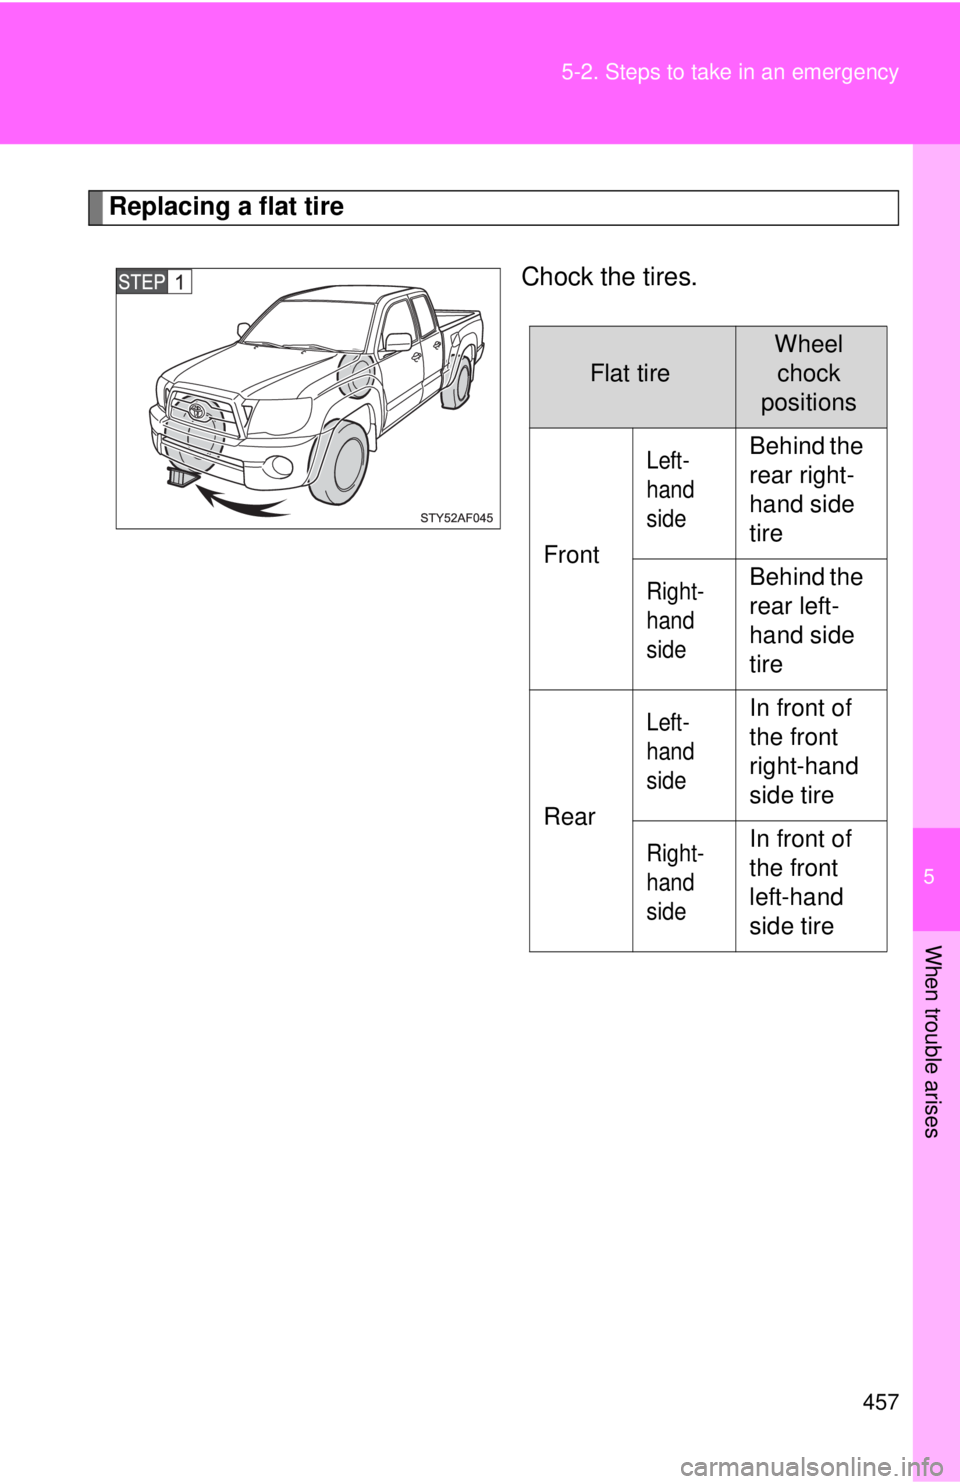
Taking out the spare tireType A Insert the end of the jack handle
extension into the lowering
screw and turn it counterclock-
wise.
After the tire is lowered com-
pletely to the ground, remove
the holding bracket.
Type B
Page 457 of 548
5
When trouble arises
457
5-2. Steps to take in an emergency
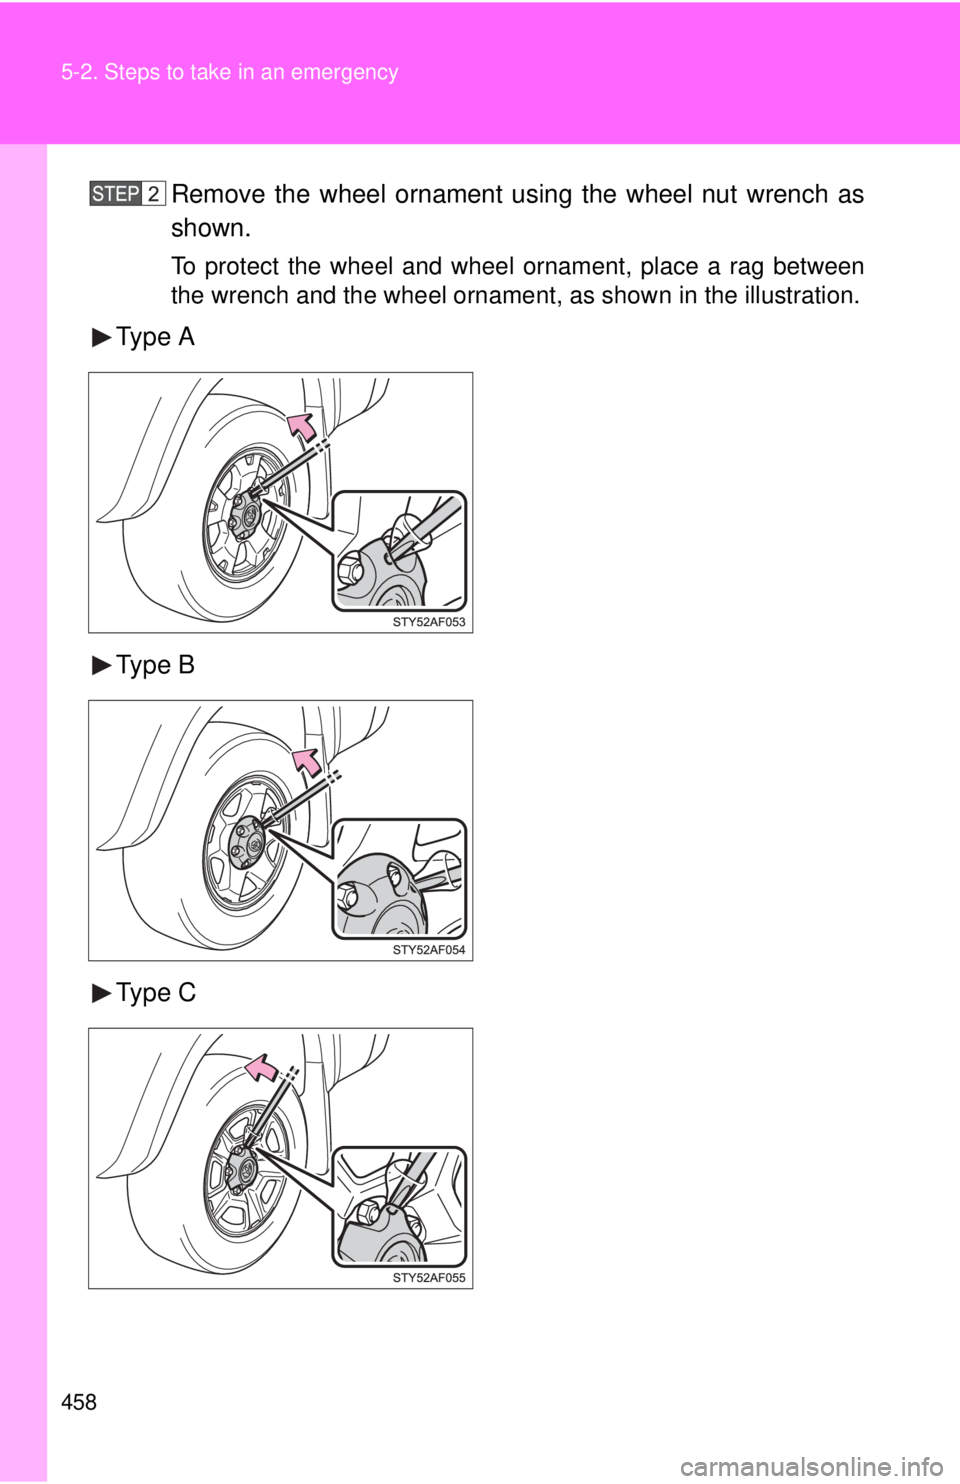
Replacing a flat tire
Chock the tires.
Flat tire
Wheelchock
positions
Front
Left-
hand
sideBehind the
rear right-
hand side
tire
Right-
hand
sideBehind the
rear left-
hand side
tire
Rear
Left-
hand
sideIn front of
the front
right-hand
side tire
Right-
hand
sideIn front of
the front
left-hand
side tire
Page 458 of 548
458 5-2. Steps to take in an emergency
Remove the wheel ornament using the wheel nut wrench as
shown.
To protect the wheel and wheel ornament, place a rag between
the wrench and the wheel ornament, as shown in the illustration.
Type A
Type B
Type C
Page 459 of 548
5
When trouble arises
459
5-2. Steps to take in an emergency
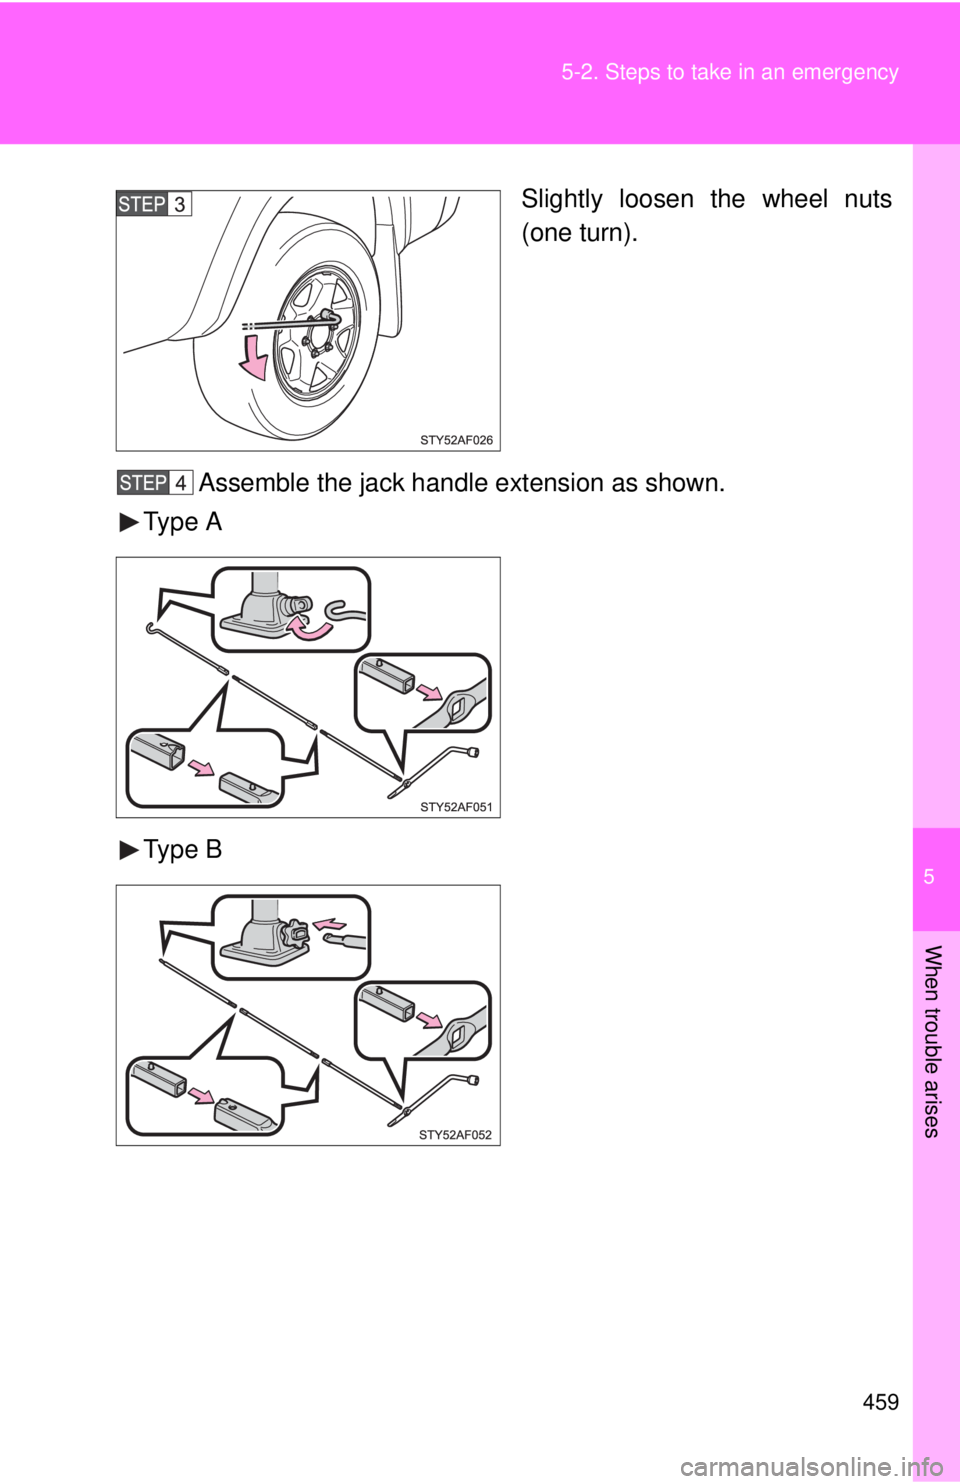
Slightly loosen the wheel nuts
(one turn).
Assemble the jack handl e extension as shown.
Type A
Type B
Page 460 of 548
460 5-2. Steps to take in an emergency
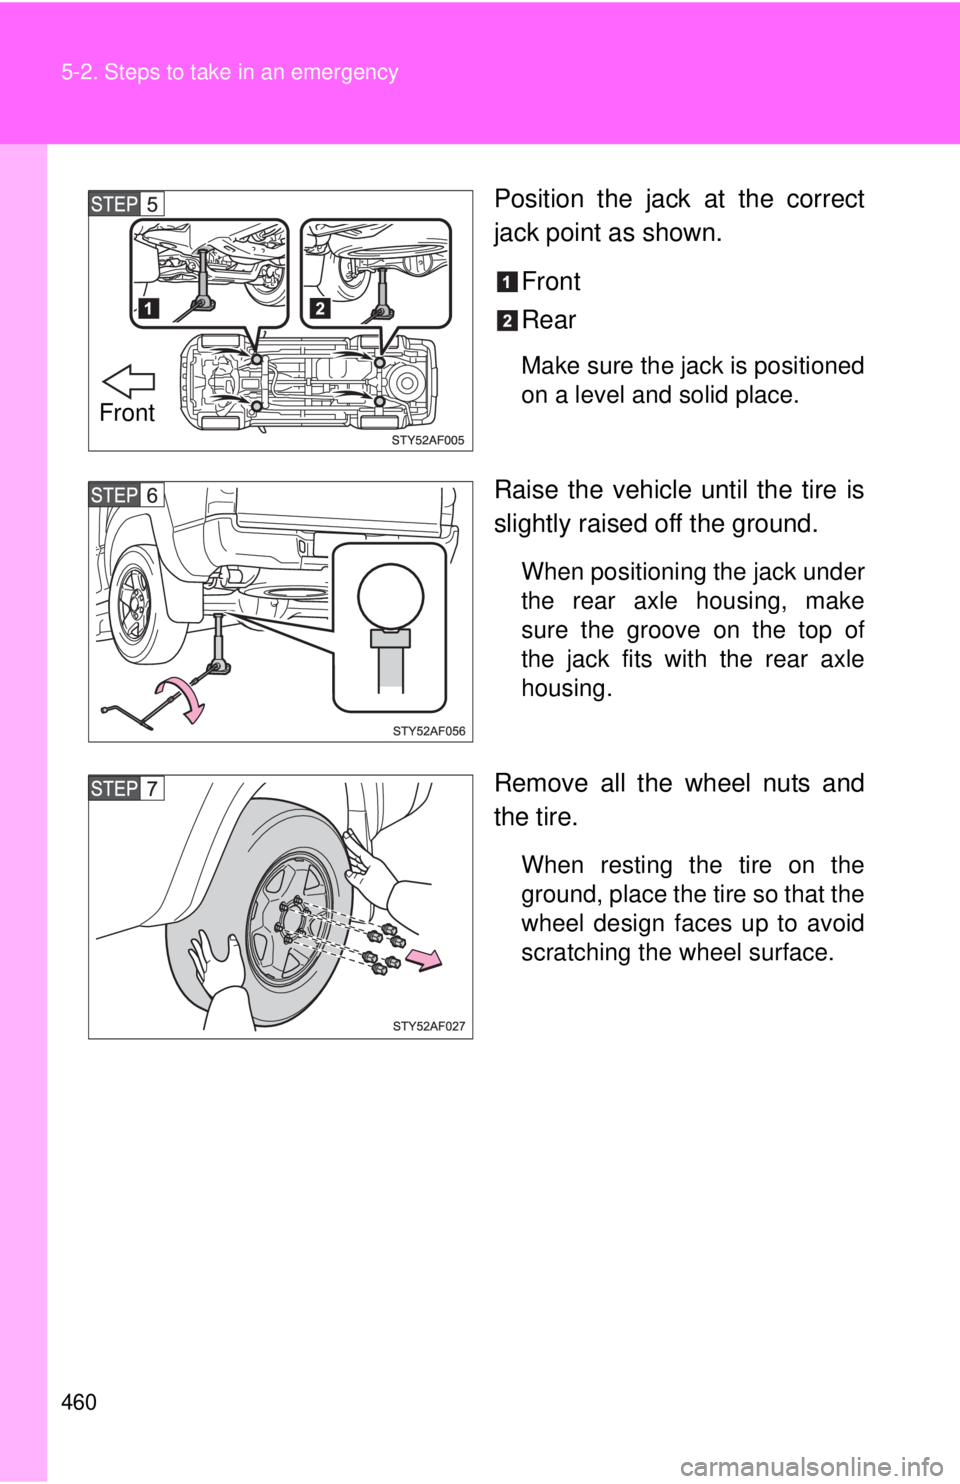
Position the jack at the correct
jack point as shown.Front
Rear
Make sure the jack is positioned
on a level and solid place.
Raise the vehicle until the tire is
slightly raised off the ground.
When positioning the jack under
the rear axle housing, make
sure the groove on the top of
the jack fits with the rear axle
housing.
Remove all the wheel nuts and
the tire.
When resting the tire on the
ground, place the tire so that the
wheel design faces up to avoid
scratching the wheel surface.
Front
Trending: clutch, lock, child lock, turn signal, ECU, brakes, rear view mirror
