set clock TOYOTA TACOMA 2012 Owners Manual (in English)
[x] Cancel search | Manufacturer: TOYOTA, Model Year: 2012, Model line: TACOMA, Model: TOYOTA TACOMA 2012Pages: 628, PDF Size: 12.11 MB
Page 4 of 628

TABLE OF CONTENTSIndex
4
3-4. Using the hands-free phonesystem (for cellula r phone)
Hands-free phone system features ............................ 326
Using the hands-free phone system ................... 330
Making a phone call ........... 339
Setting a cellular phone...... 344
Security and system setup ................................ 350
Using the phone book ........ 355
3-5. Using the interior lights Interior lights list ................. 363
• Interior light ...................... 364
• Personal lights ................. 364
3-6. Using the storage features List of storage features....... 365
• Glove box .......................... 366
• Front console box ............ 366
• Cup holders ...................... 367
• Bottle holders ................... 369
• Auxiliary boxes ................. 370
• Overhead console ............ 372 3-7. Other interior features
Sun visors ........................... 373
Vanity mirrors ..................... 374
Clock................................... 375
Outside temperature display (vehicles with
auto anti-glare inside rear
view mirror) ....................... 376
Power outlets (12V DC) ...... 381
Power outlet (120V AC) ...... 382
Seatback table .................... 388
Floor mat ............................ 389
Luggage compartment features ............................ 391
Garage door opener ........... 400
Compass (vehicles with auto anti-glare inside rear
view mirror) ....................... 409
4-1. Maintenance and care Cleaning and protecting the vehicle exterior ........... 418
Cleaning and protecting the vehicle interior ............ 421
4-2. Maintenance Maintenance requirements .................... 424
General maintenance ......... 426
Emission inspection and maintenance (I/M)
programs .......................... 429
4Maintenance and care
Page 154 of 628

154
2-1. Driving procedures
Parking brake
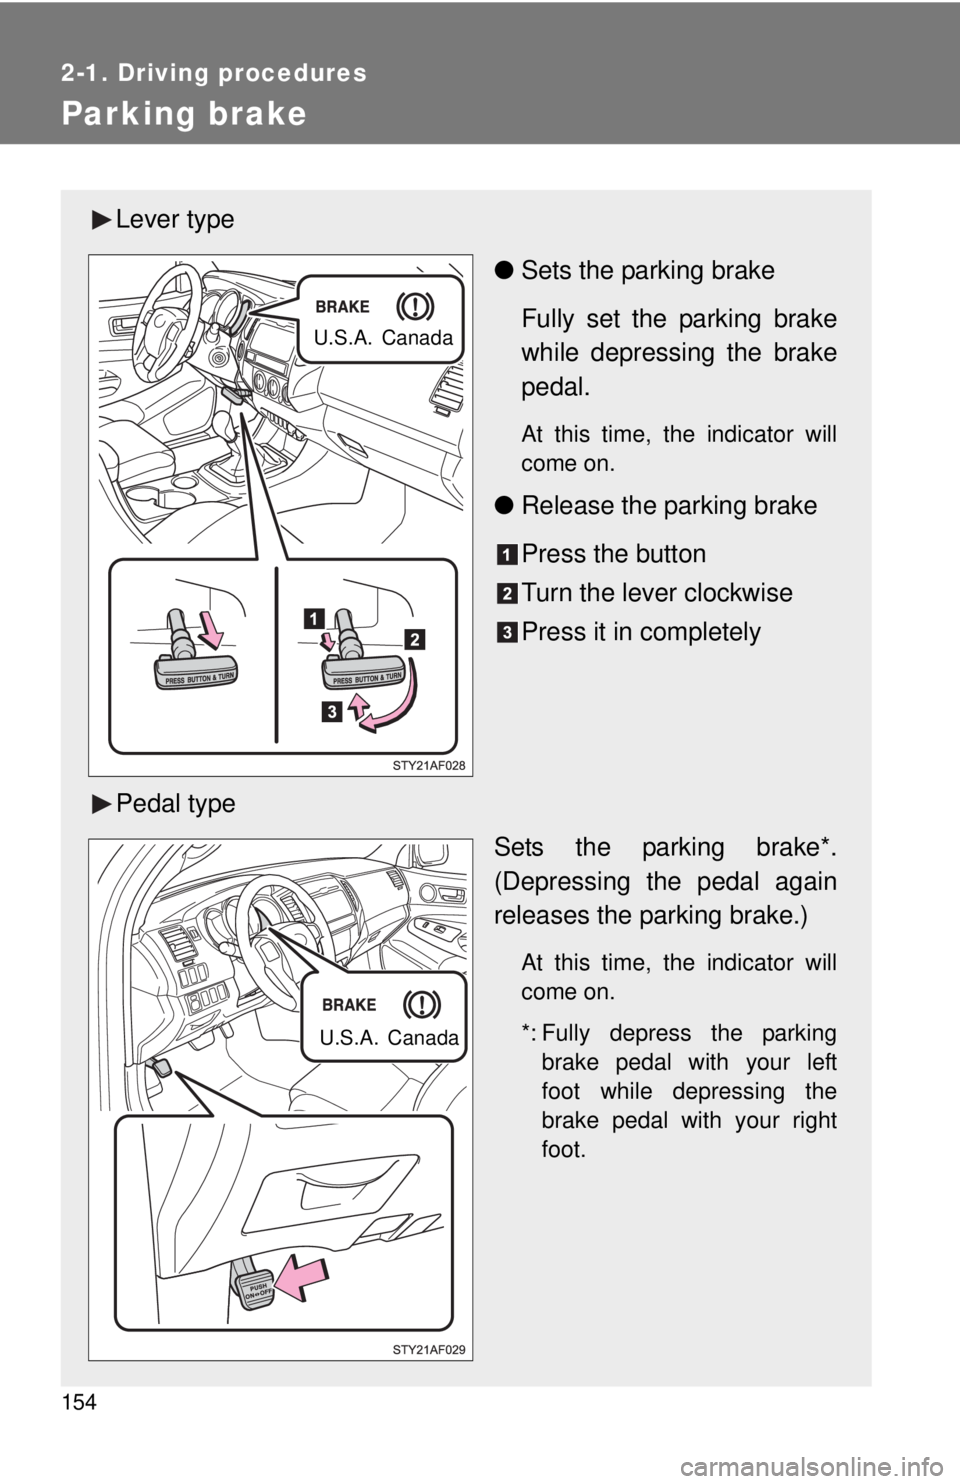
Lever type●Sets the parking brake
Fully set the parking brake
while depressing the brake
pedal.
At this time, the indicator will
come on.
●Release the parking brake
Press the button
Turn the lever clockwise
Press it in completely
Pedal type Sets the parking brake*.
(Depressing the pedal again
releases the parking brake.)
At this time, the indicator will
come on.
*: Fully depress the parkingbrake pedal with your left
foot while depressing the
brake pedal with your right
foot.
U.S.A. Canada
U.S.A. Canada
Page 248 of 628

248
3-1. Using the air conditioning system and defogger
Air conditioning system
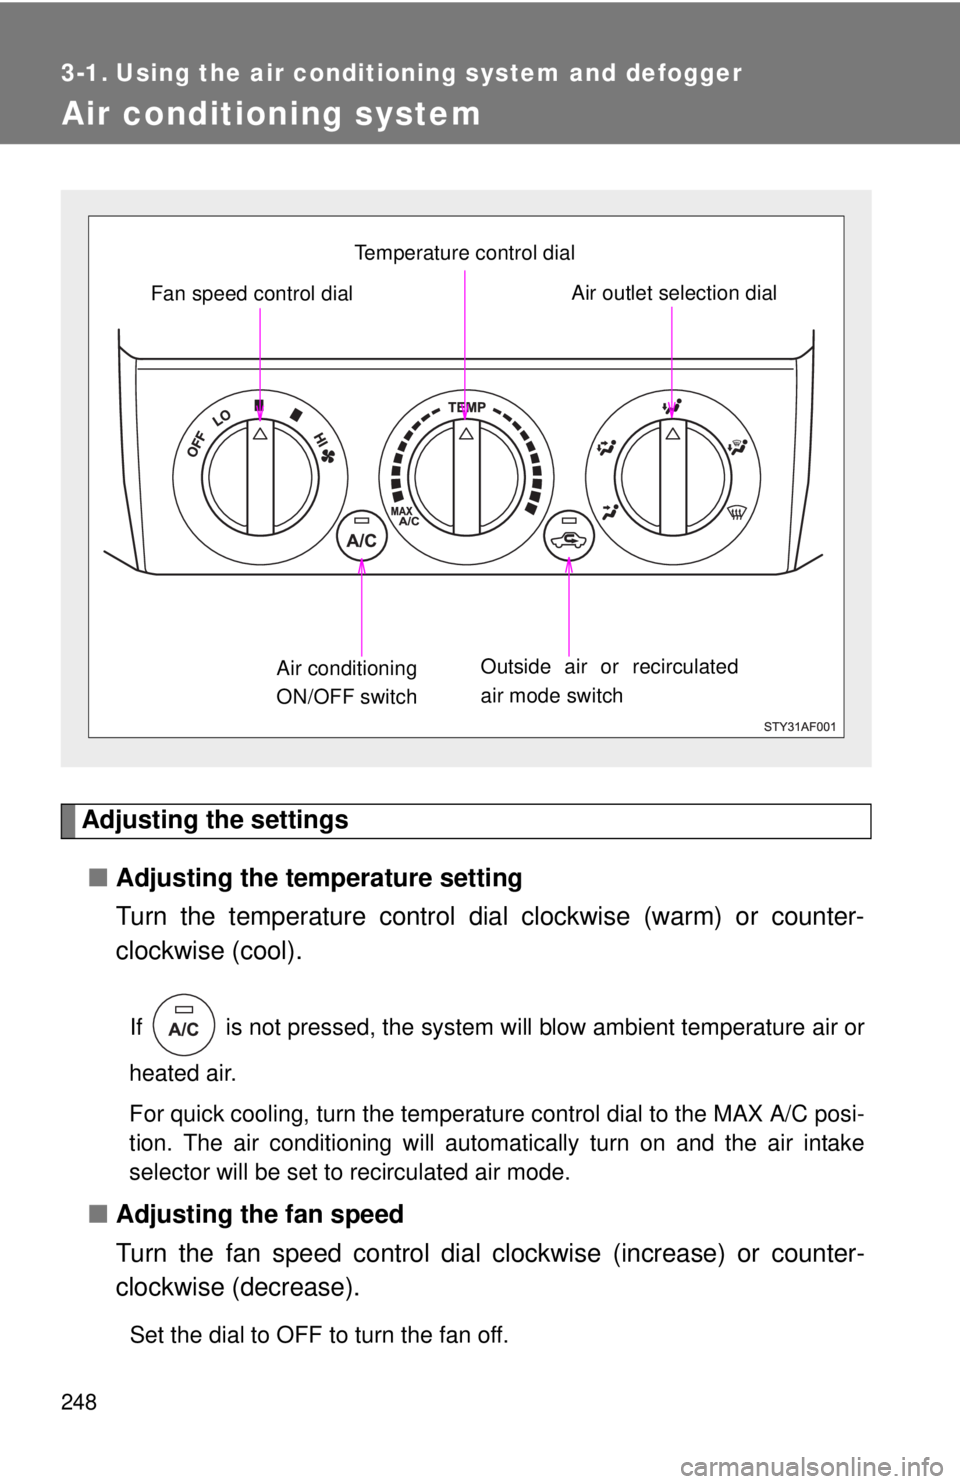
Adjusting the settings■ Adjusting the temperature setting
Turn the temperature control dial clockwise (warm) or counter-
clockwise (cool).
If is not pressed, the system will blow ambient temperature air or
heated air.
For quick cooling, turn the temperature control dial to the MAX A/C posi-
tion. The air conditioning will automatically turn on and the air intake
selector will be set to recirculated air mode.
■ Adjusting the fan speed
Turn the fan speed control dial clockwise (increase) or counter-
clockwise (decrease).
Set the dial to OFF to turn the fan off.
Outside air or recirculated
air mode switch Air outlet selection dialAir conditioning
ON/OFF switch Temperature control dial
Fan speed control dial
Page 352 of 628

352 3-4. Using the hands-free phone system (for cellular phone)
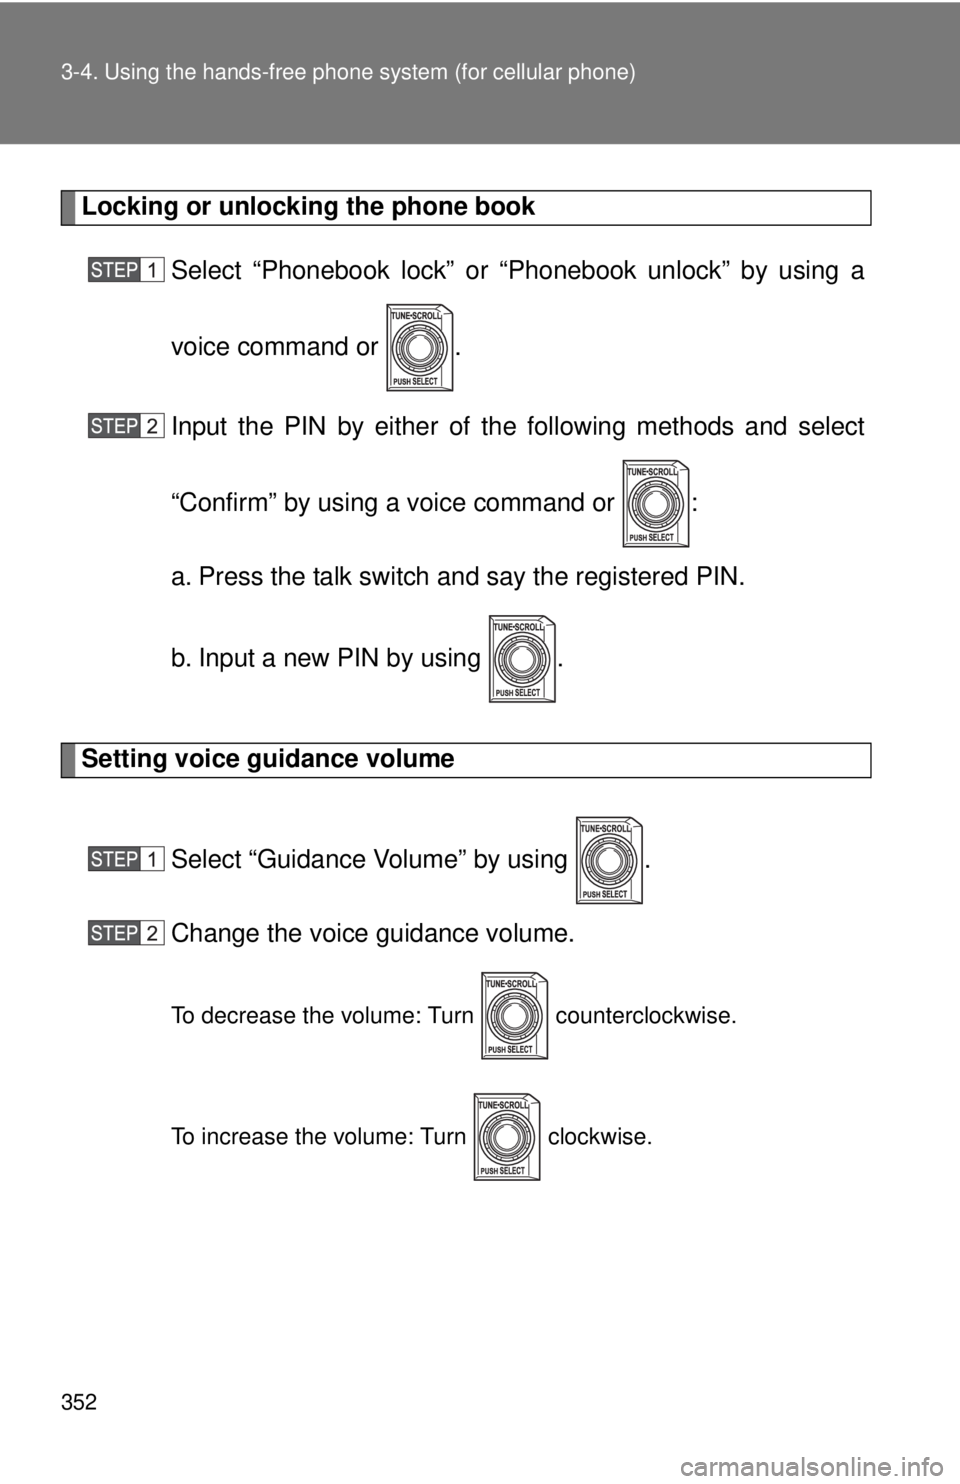
Locking or unlocking the phone book
Select “Phonebook lock” or “Phonebook unlock” by using a
voice command or .
Input the PIN by either of the following methods and select
“Confirm” by using a voice command or :
a. Press the talk switch and say the registered PIN.
b. Input a new PIN by using .
Setting voice guidance volume
Select “Guidance Volume” by using .
Change the voice guidance volume.
To decrease the volume: Turn counterclockwise.
To increase the volume: Turn clockwise.
Page 375 of 628

375
3-7. Other interior features
3
Interior and exterior features
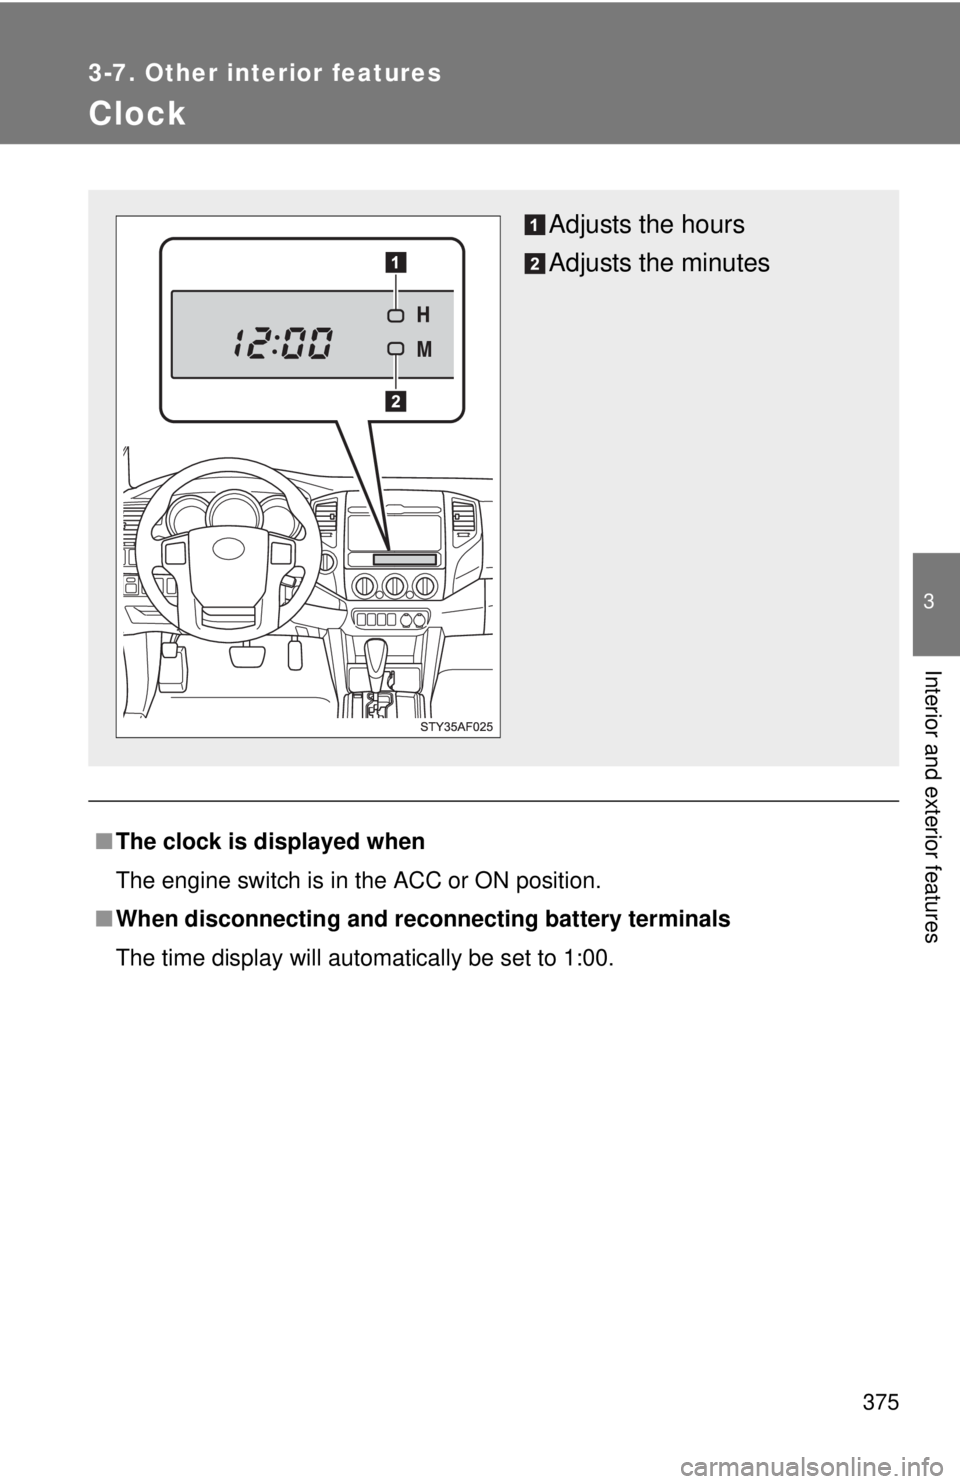
Clock
■The clock is displayed when
The engine switch is in the ACC or ON position.
■ When disconnecting and reco nnecting battery terminals
The time display will automatically be set to 1:00.
Adjusts the hours
Adjusts the minutes