bulb TOYOTA TACOMA 2013 Owners Manual (in English)
[x] Cancel search | Manufacturer: TOYOTA, Model Year: 2013, Model line: TACOMA, Model: TOYOTA TACOMA 2013Pages: 524, PDF Size: 10.96 MB
Page 4 of 524
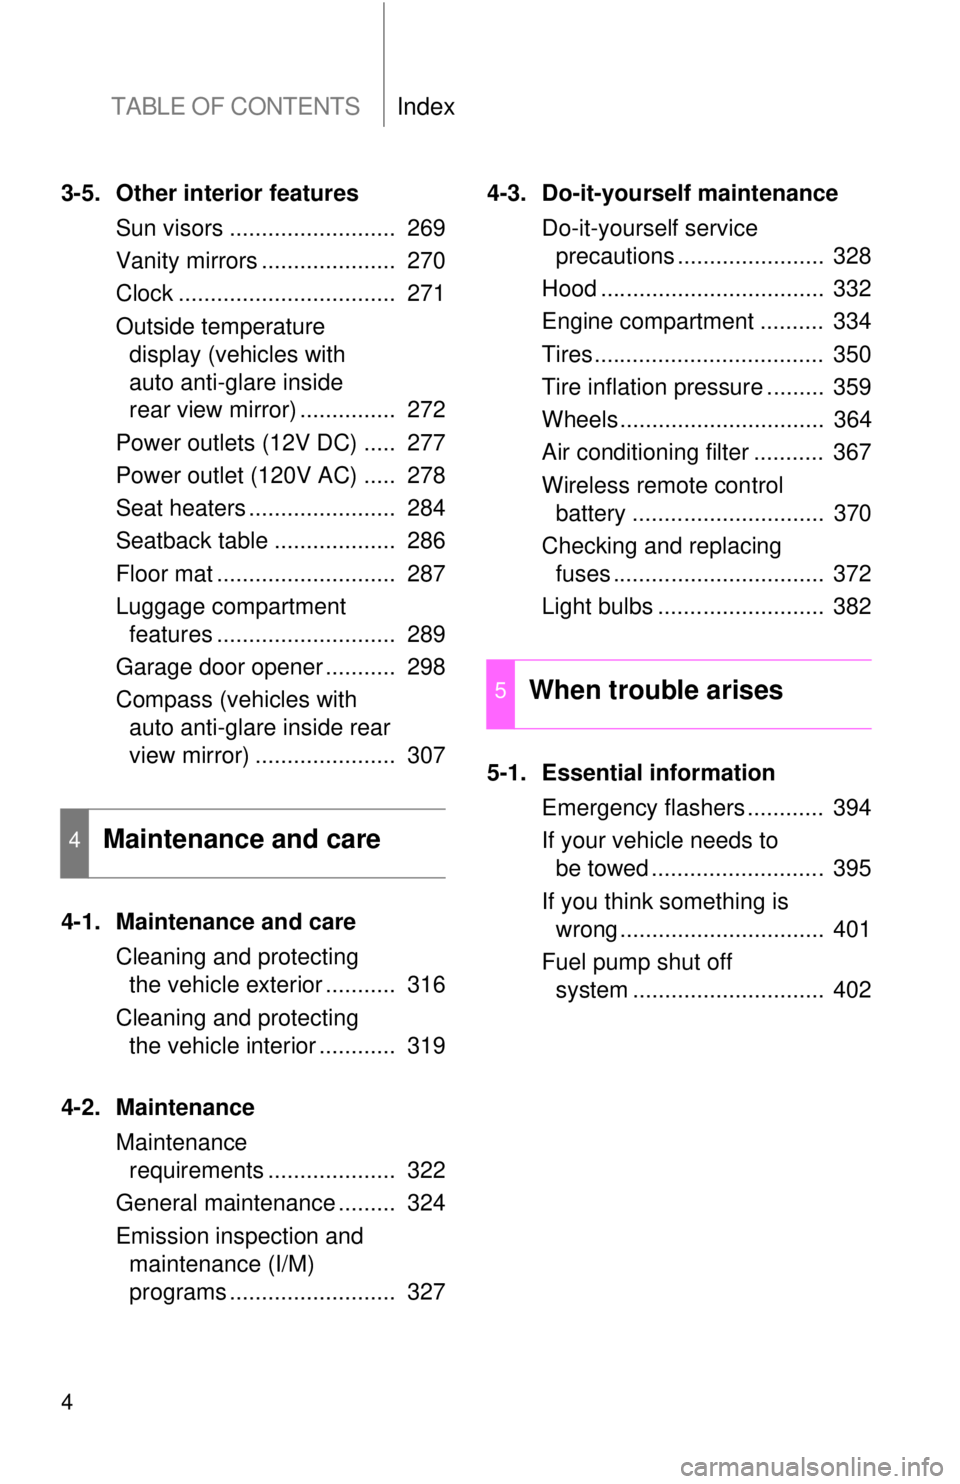
TABLE OF CONTENTSIndex
4
3-5. Other interior featuresSun visors .......................... 269
Vanity mirrors ..................... 270
Clock .................................. 271
Outside temperature display (vehicles with
auto anti-glare inside
rear view mirror) ............... 272
Power outlets (12V DC) ..... 277
Power outlet (120V AC) ..... 278
Seat heaters ....................... 284
Seatback table ................... 286
Floor mat ............................ 287
Luggage compartment features ............................ 289
Garage door opener ........... 298
Compass (vehicles with auto anti-glare inside rear
view mirror) ...................... 307
4-1. Maintenance and care Cleaning and protecting the vehicle exterior ........... 316
Cleaning and protecting the vehicle interior ............ 319
4-2. Maintenance Maintenance requirements .................... 322
General maintenance ......... 324
Emission inspection and maintenance (I/M)
programs .......................... 327 4-3. Do-it-yourself maintenance
Do-it-yourself service precautions ....................... 328
Hood ................................... 332
Engine compartment .......... 334
Tires.................................... 350
Tire inflation pressure ......... 359
Wheels................................ 364
Air conditioning filter ........... 367
Wireless remote control battery .............................. 370
Checking and replacing fuses ................................. 372
Light bulbs .......................... 382
5-1. Essential information Emergency flashers ............ 394
If your vehicle needs to be towed ........................... 395
If you think something is wrong ................................ 401
Fuel pump shut off system .............................. 402
4Maintenance and care
5When trouble arises
Page 151 of 524
151
2-1. Driving procedures
2
When driving
Tur n signal lever
■Turn signals can be operated when
The engine switch is in the ON position.
■ If the indicators flash faster than usual
Check that a light bulb in the front or rear turn signal lights has not burned
out.
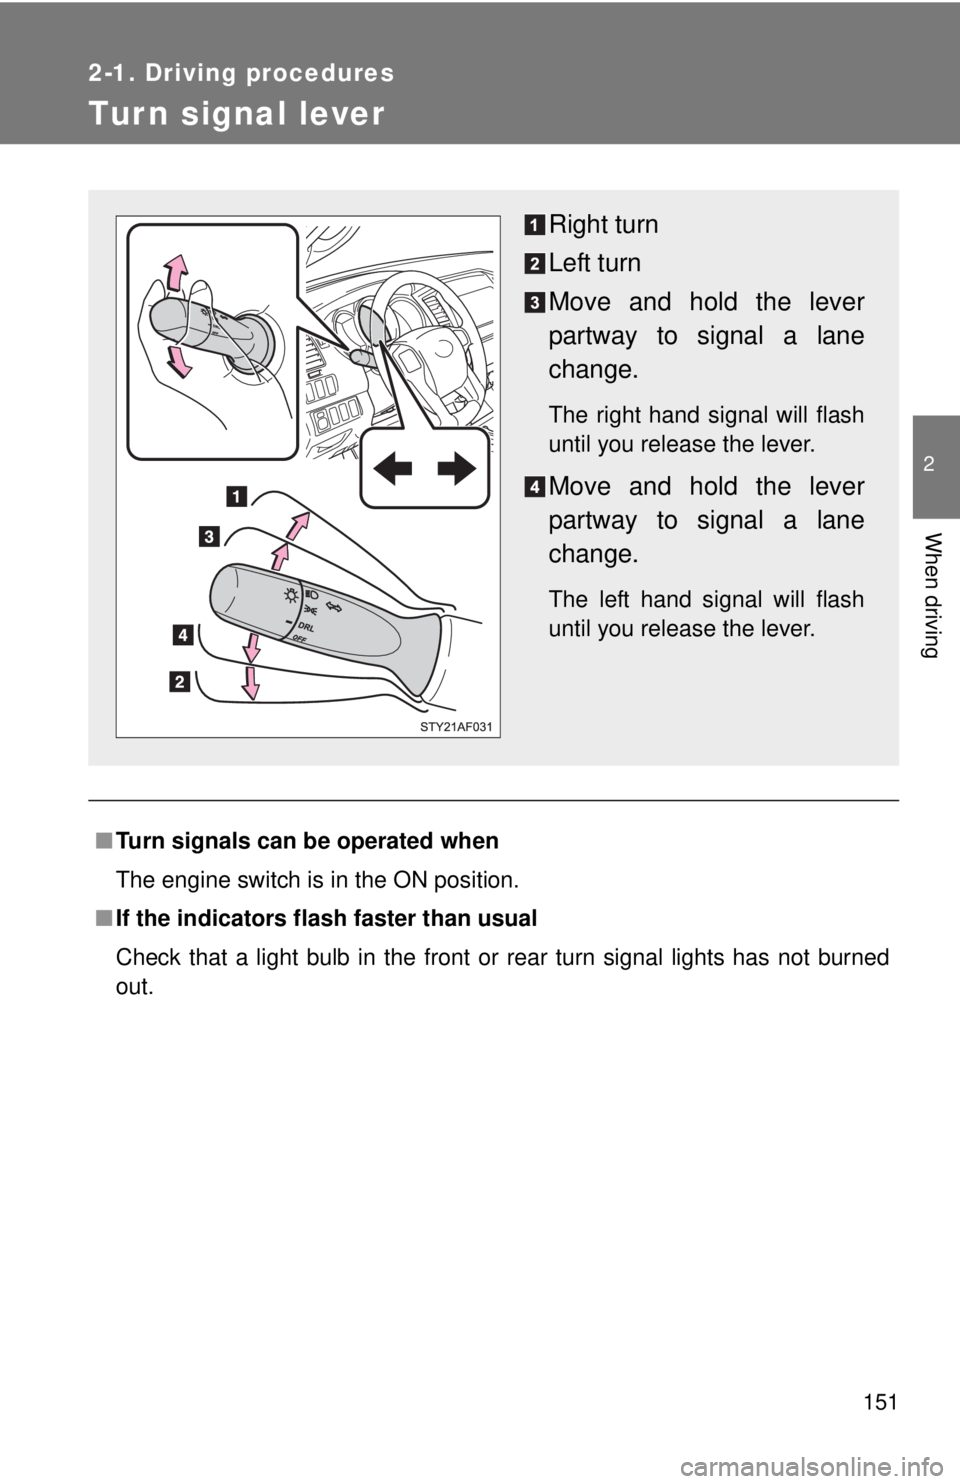
Right turn
Left turn
Move and hold the lever
partway to signal a lane
change.
The right hand signal will flash
until you release the lever.
Move and hold the lever
partway to signal a lane
change.
The left hand signal will flash
until you release the lever.
Page 315 of 524
Maintenance and care4
315
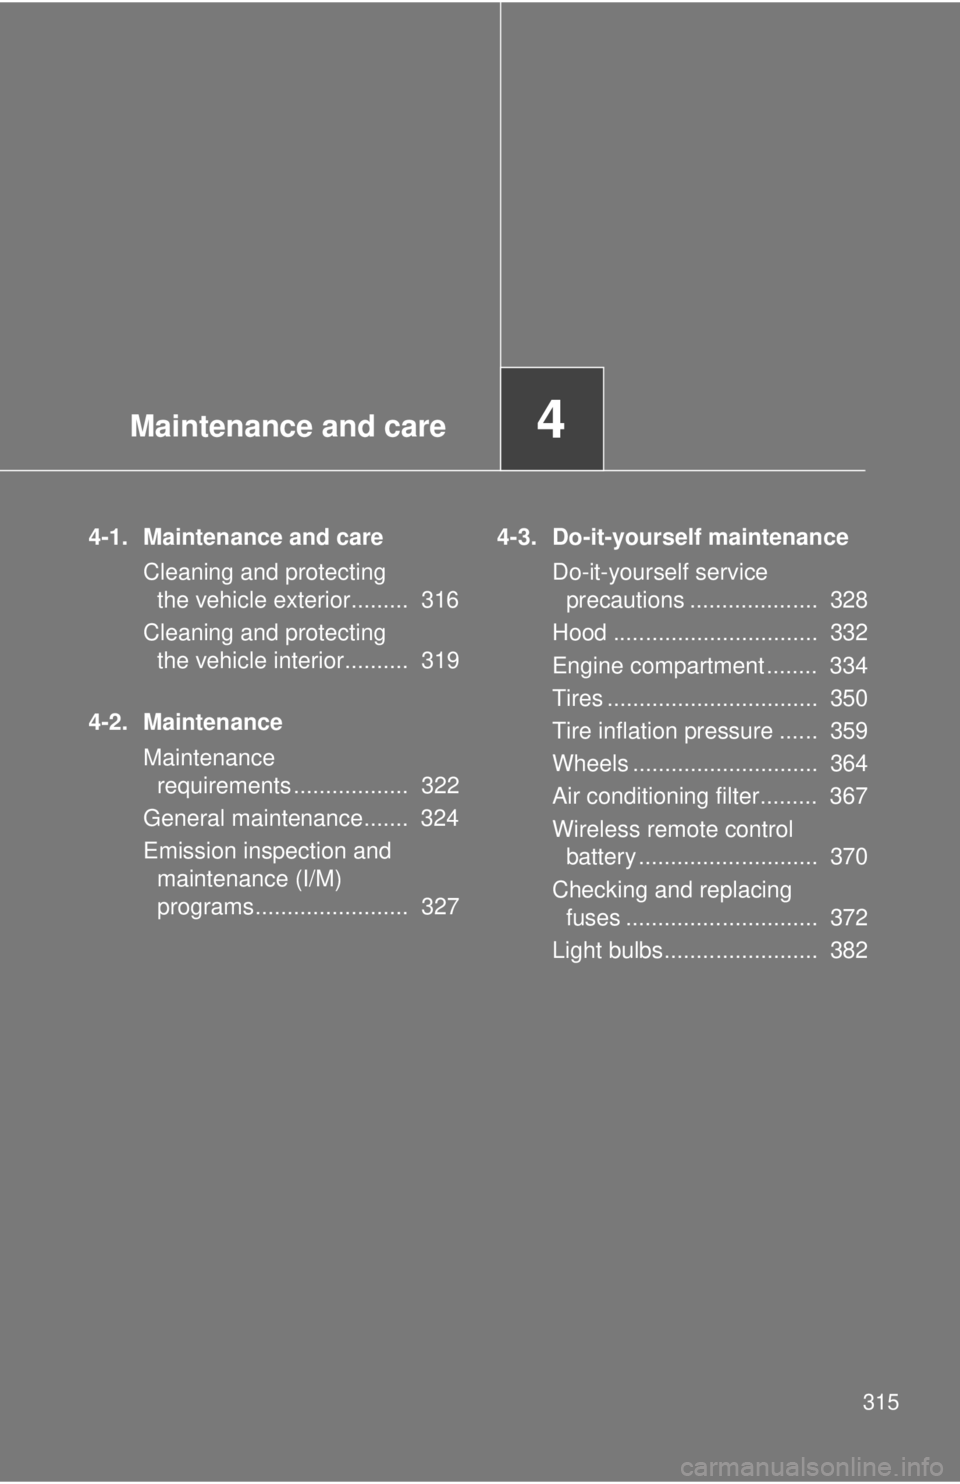
4-1. Maintenance and careCleaning and protecting the vehicle exterior......... 316
Cleaning and protecting the vehicle interior.......... 319
4-2. Maintenance Maintenance requirements .................. 322
General maintenance....... 324
Emission inspection and maintenance (I/M)
programs........................ 327 4-3. Do-it-yourself maintenance
Do-it-yourself service precautions .................... 328
Hood ................................ 332
Engine compartment ........ 334
Tires ................................. 350
Tire inflation pressure ...... 359
Wheels ............................. 364
Air conditioning filter......... 367
Wireless remote control battery ............................ 370
Checking and replacing fuses .............................. 372
Light bulbs........................ 382
Page 329 of 524
329
4-3. Do-it-yourself maintenance
4
Maintenance and care
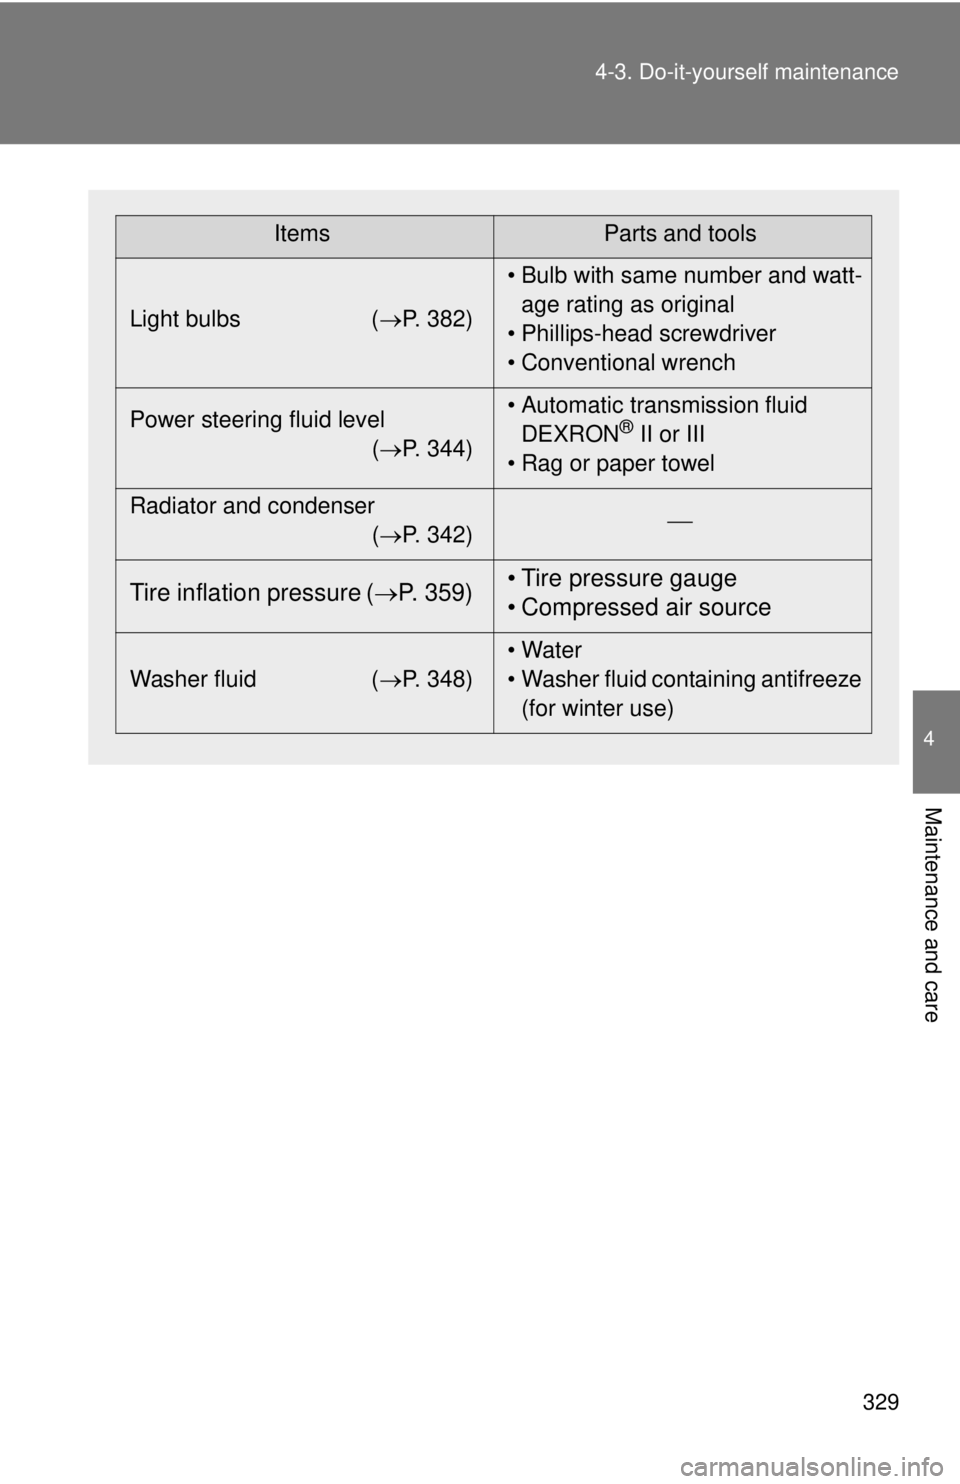
ItemsParts and tools
Light bulbs ( P. 382)• Bulb with same number and watt-
age rating as original
• Phillips-head screwdriver
• Conventional wrench
Power steering fluid level (P. 344) • Automatic transmission fluid
DEXRON
® II or III
• Rag or paper towel
Radiator and condenser (P. 342)
Tire inflation pressure (
P. 359) • Tire pressure gauge
• Compressed air source
Washer fluid
(P. 348) • Water
• Washer fluid containing antifreeze
(for winter use)
Page 381 of 524
381
4-3. Do-it-yourself maintenance
4
Maintenance and care
■
After a fuse is replaced
●If the lights do not turn on even after the fuse has been replaced, a bulb
may need replacement. ( P. 382)
● If the replaced fuse blows again, have the vehicle inspected by your
Toyota dealer.
■ If there is an overload in the circuits
The fuses are designed to blow, protecting the wiring harness from damage.
CAUTION
■To prevent system breakdowns and vehicle fire
Observe the following precautions.
Failing to do so may cause damage to the vehicle, and possibly a fire or
injury.
●Never use a fuse of a higher amperage rating than indicated, or use any
other object in place of a fuse.
● Always use a genuine Toyota fuse or equivalent.
Never replace a fuse with a wire, even as a temporary fix.
● Do not modify the fuse or the fuse box.
NOTICE
■Before replacing fuses
Have the cause of electrical overload determined and repaired by your Toy-
ota dealer as soon as possible.
Page 382 of 524
382
4-3. Do-it-yourself maintenance
Light bulbs
You may replace the following bulbs yourself. The difficulty level of
replacement varies depending on the bulb. If necessary bulb
replacement seems difficult to perfor m, contact your Toyota dealer.
For more information about replacing other light bulbs, contact your
Toyota dealer.
■ Prepare a replacement light bulb
Check the wattage of the light bulb being replaced. ( P. 466)
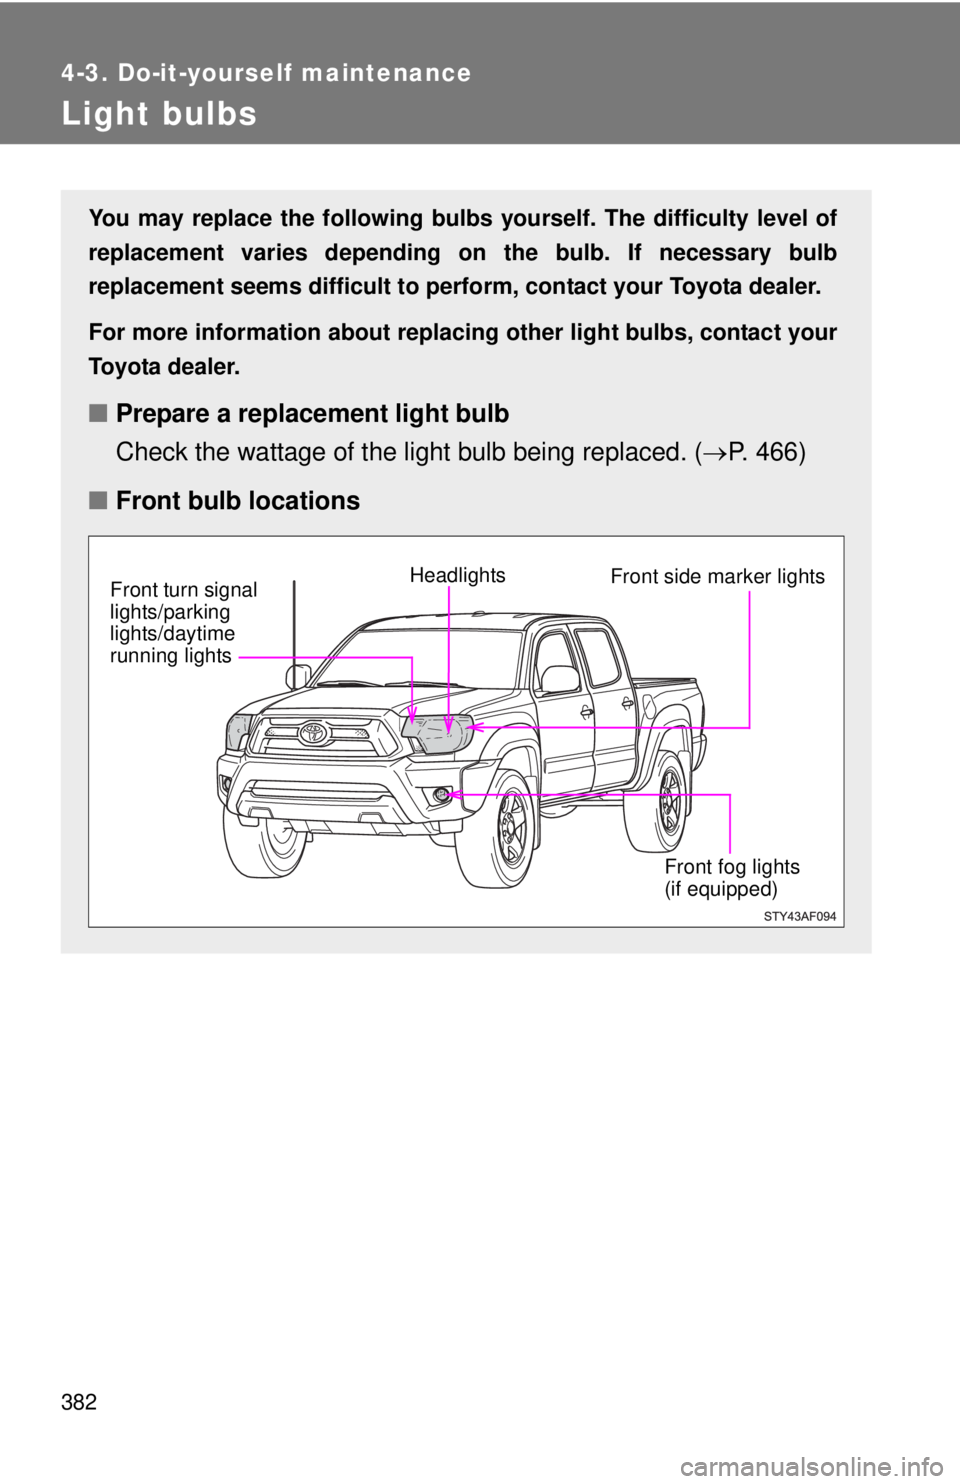
■ Front bulb locations
Headlights
Front fog lights
(if equipped)Front side marker lightsFront turn signal
lights/parking
lights/daytime
running lights
Page 383 of 524
383
4-3. Do-it-yourself maintenance
4
Maintenance and care
Replacing light bulbs
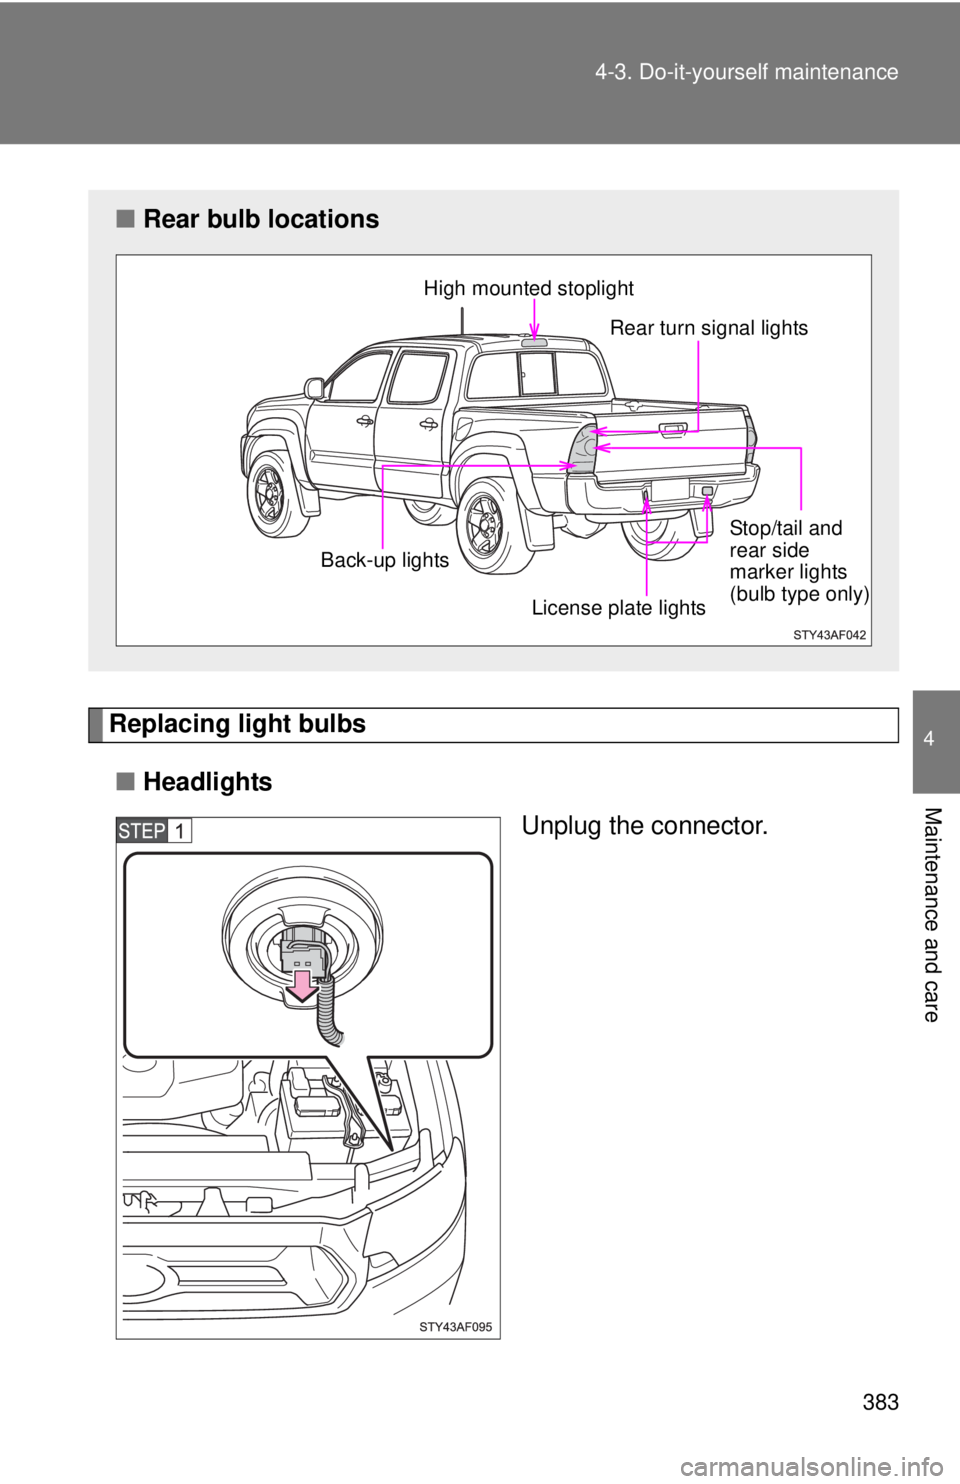
■ Headlights
Unplug the connector.
■Rear bulb locations
High mounted stoplight
Rear turn signal lights
License plate lights
Back-up lights
Stop/tail and
rear side
marker lights
(bulb type only)
Page 384 of 524
384 4-3. Do-it-yourself maintenance
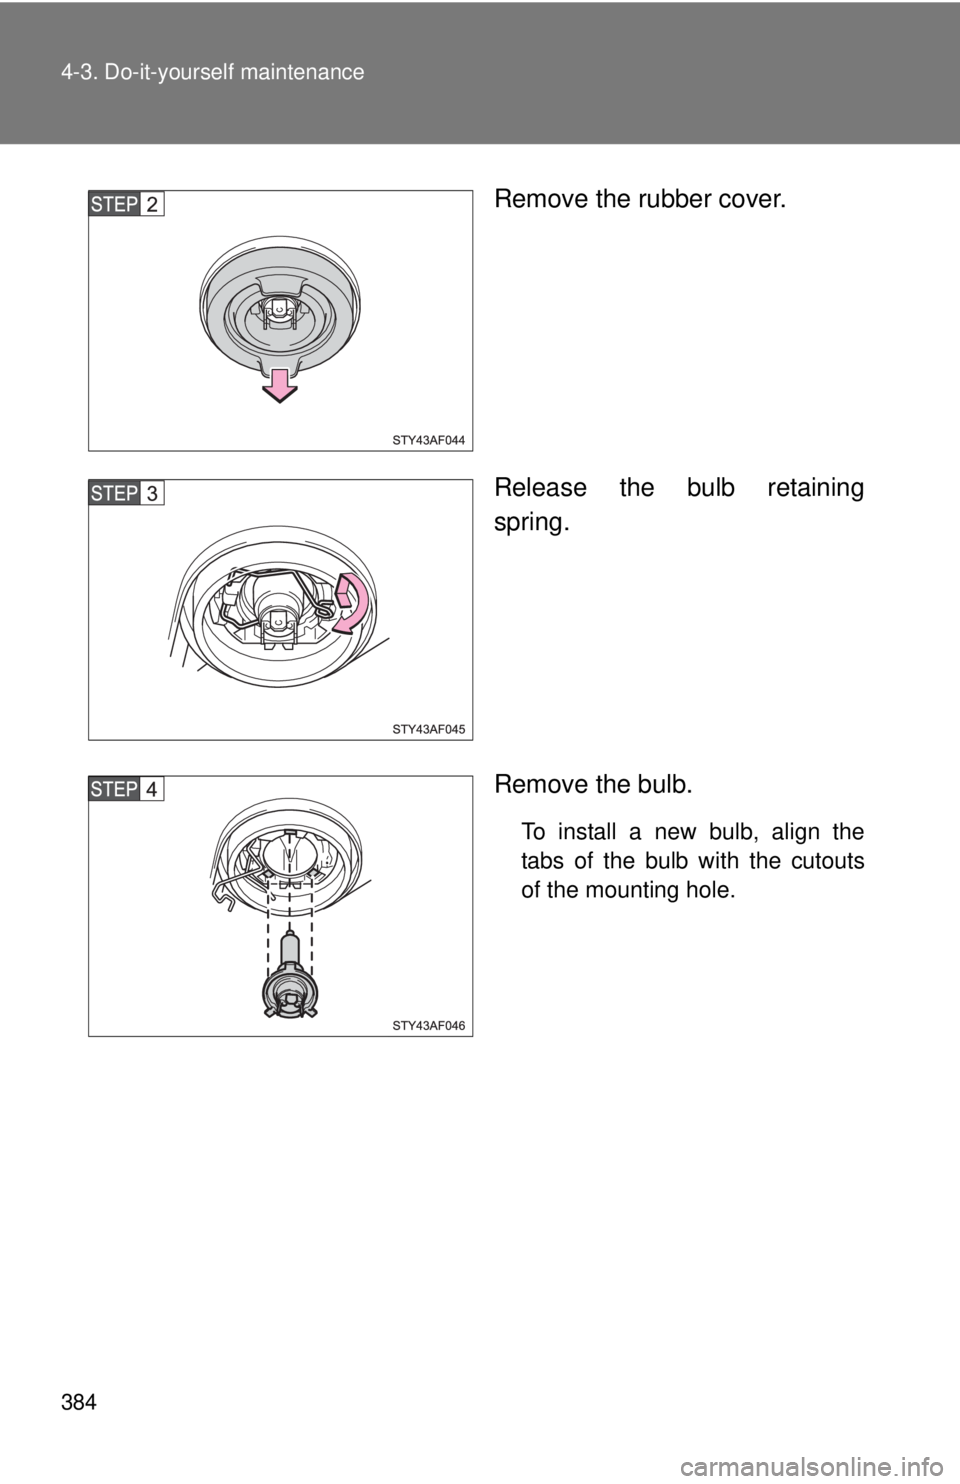
Remove the rubber cover.
Release the bulb retaining
spring.
Remove the bulb.
To install a new bulb, align the
tabs of the bulb with the cutouts
of the mounting hole.
Page 385 of 524
385
4-3. Do-it-yourself maintenance
4
Maintenance and care
■
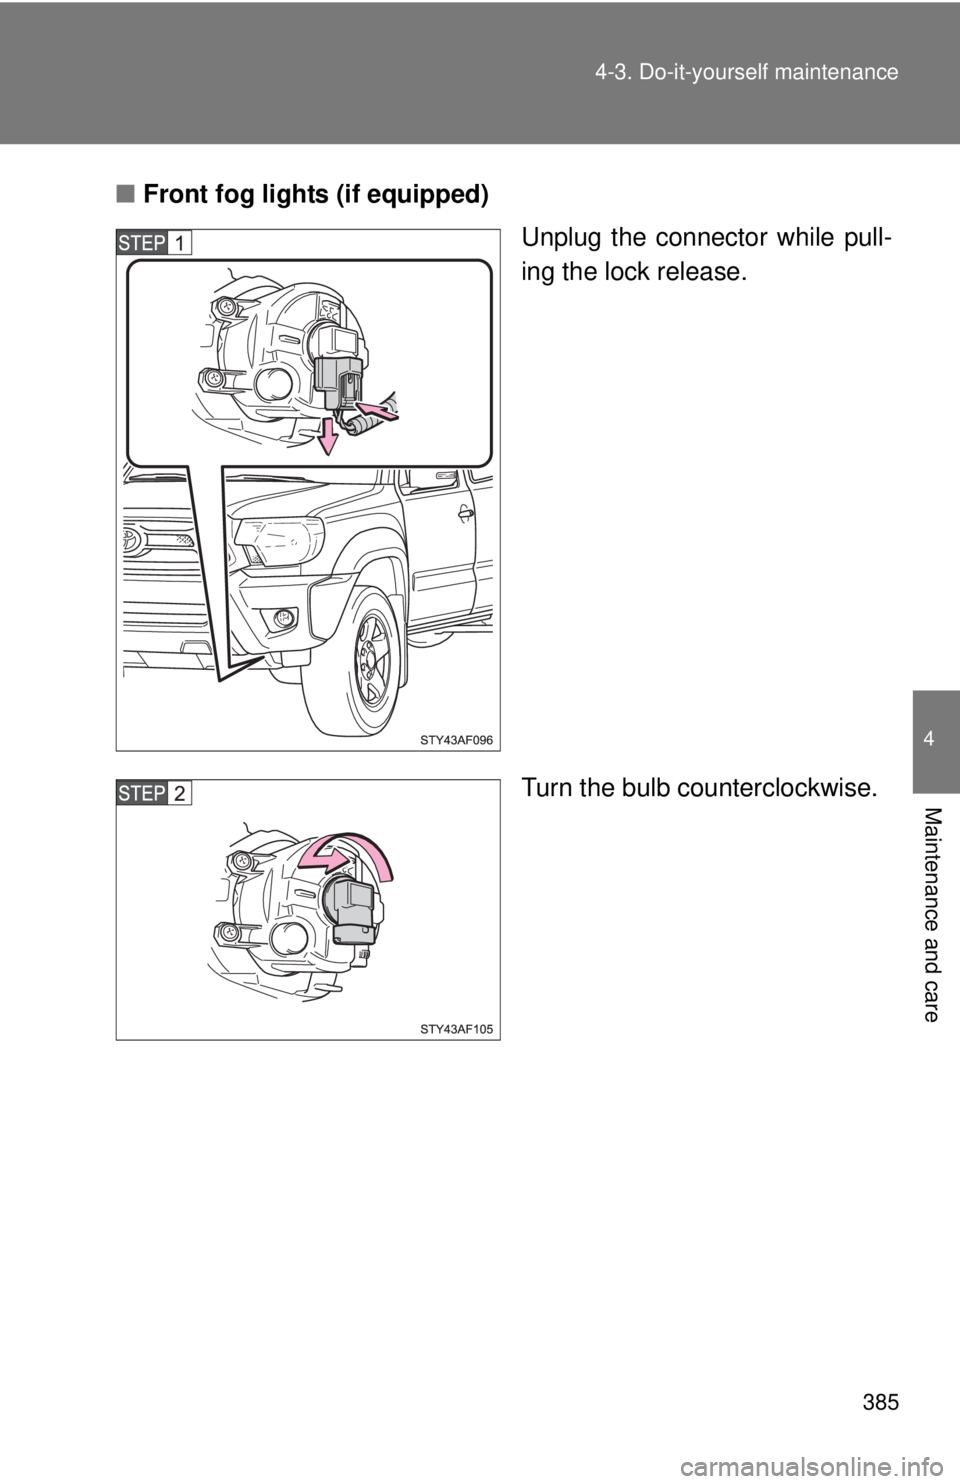
Front fog lights (if equipped)
Unplug the connector while pull-
ing the lock release.
Turn the bulb counterclockwise.
Page 386 of 524
386 4-3. Do-it-yourself maintenance
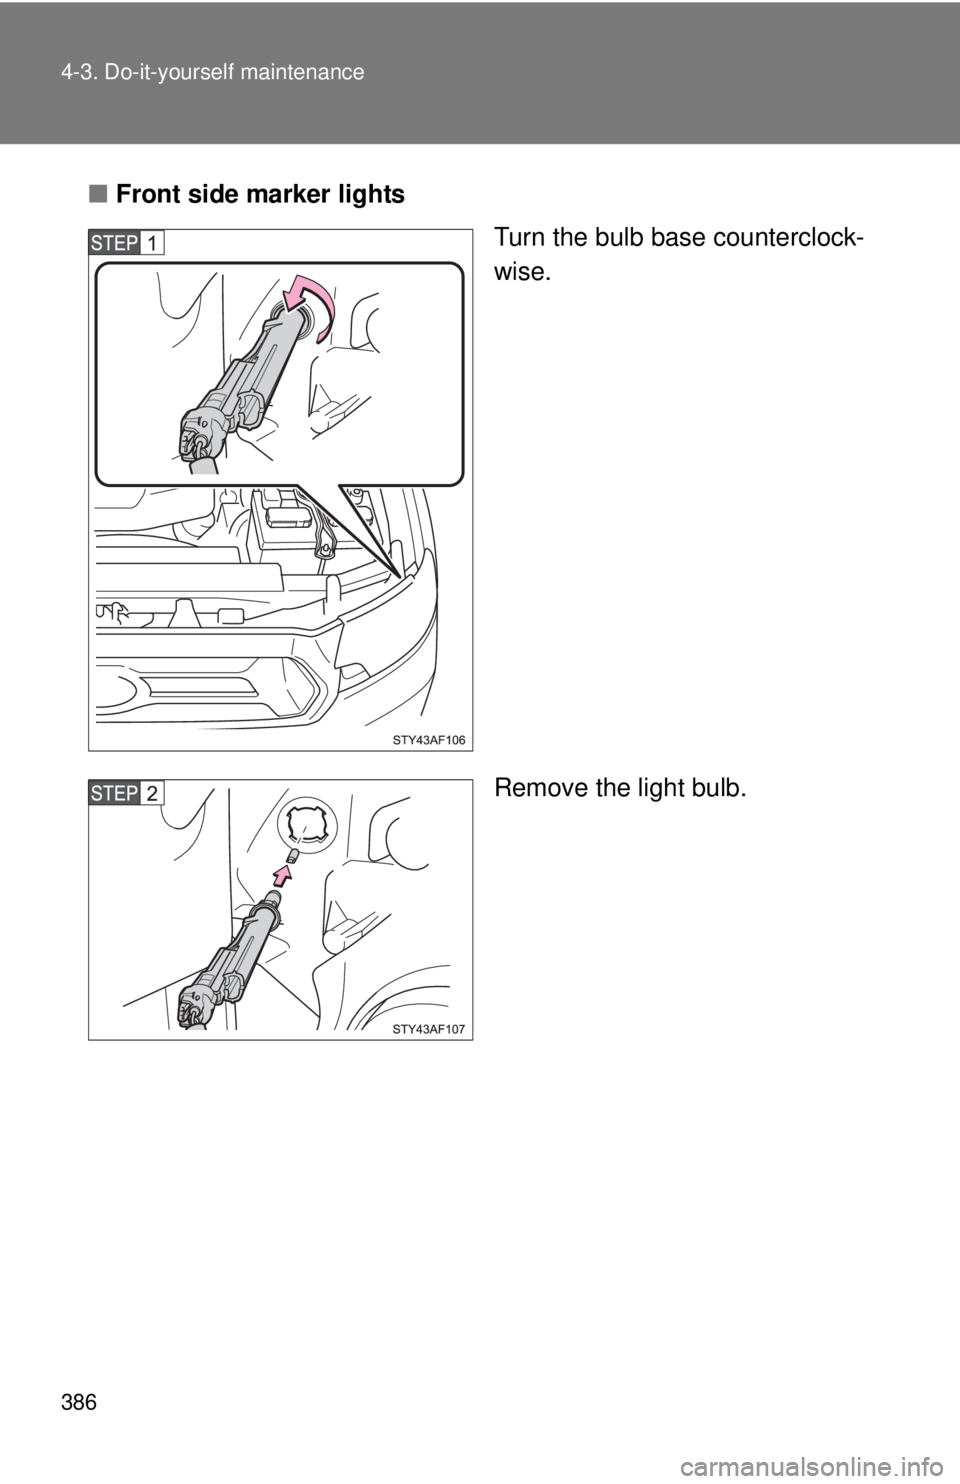
■Front side marker lights
Turn the bulb base counterclock-
wise.
Remove the light bulb.