ESP TOYOTA TACOMA 2017 (in English) User Guide
[x] Cancel search | Manufacturer: TOYOTA, Model Year: 2017, Model line: TACOMA, Model: TOYOTA TACOMA 2017Pages: 640, PDF Size: 11.07 MB
Page 95 of 640
952. Instrument cluster
2
Instrument cluster
●Trip distance*1/Distance*1, 2
Displays the engine was started an d the distance since the function
was reset, respectively
● Digital speedometer
*1
●Display off*1
A blank screen is displayed
*1: Can be registered to Drive information 1 through 3.
*2: Resetting procedures:
• Select a function to be reset using the meter control switch and then press and hold the center button to reset.
• If there is more than one function that can be reset, check boxes will be
displayed next to the functions.
● Clinometer (if equipped)
Displays the longitudinal and late ral inclination of the vehicle.
● Intuitive parking assist (if equipped)
→P. 2 2 3
● Multi-terrain select (if equipped)
→P. 2 5 8
● Crawl control (if equipped)
→P. 2 6 2
● Tire inflation pressure (if equipped)
→P. 4 6 7
■Changing the settings
Select using the meter control switch.
Select an item and then set it with the center button.
Vehicle information
Settings display
1
2
Page 105 of 640

1053-1. Key information
3
Operation of each component
■When required to leave the vehicle’s key with a parking attendant (type
D)
Lock the glove box as circumstances demand. ( →P. 393)
Remove the mechanical key for your own use and provide the attendant with
the electronic key only.
■ If you lose your keys
Type A, B and C
New genuine key can be made by your Toyota dealer using the other key and
the key number stamped on your key number plate.
Keep the plate in a safe place such as your wallet, not in the vehicle.
Type D
New genuine key can be made by your Toyota dealer.
The following are necessary when making new keys.
Mechanical key:
The key number for the mechanical key stamped on the number plate and the
other key.
Key:
The key number for key stamped on the key number plate.
Keep the plates in a safe place such as your wallet, not in the vehicle.
There are key number plates for the mechanical key and key respectively.
When storing them, keep them in a safe place in a manner to distinguish one
from the other (such as markings, etc.).
■ When riding in an aircraft (type C or type D)
When bringing an wireless remote control function onto an aircraft, make sure
you do not press any button on the key while inside the aircraft cabin. If you
are carrying the key in your bag, etc., ensure that the buttons are not likely to
be pressed accidentally. Pressing a button may cause the key to emit radio
waves that could interfere with the operation of the aircraft.
■ Conditions affecting operation (type C or type D)
Type C
The wireless remote control function may not operate normally in the follow-
ing situations:
● Near a TV tower, radio station, electric power plant, airport or other facility
that generates strong radio waves
● When carrying a portable radio, cellul ar phone or other wireless communi-
cation devices
● When multiple wireless keys are in the vicinity
● When the wireless key is in contact with, or is covered by a metallic object
● When a wireless key (that emits radio waves) is being used nearby
● When the wireless key has been left near an electrical appliance such as a
personal computer
Type D
→P. 124
Page 107 of 640

1073-1. Key information
3
Operation of each component
■Certification for wireless remote control (type C)
For vehicles sold in U.S.A. and New Caledonia
FCC ID: HYQ23AAH
FCC ID: HYQ23AAN
FCC ID: HYQ12BEL
NOTE:
This device complies with part 15 of the FCC Rules. Operation is subject to
the following two conditions: (1) This device may not cause harmful interfer-
ence, and (2) this device must accept any interference received, including
interference that may cause undesired operation.
FCC WARNING:
Changes or modifications not expressly approved by the party responsible for
compliance could void the user’s authority to operate the equipment.
The FCC ID/IC Certification number is affixed inside the equipment. You can
find the ID/number when replacing the battery.
For vehicles sold in Canada
NOTE:
This device complies with Industry Canada’s licence-exempt RSSs. Opera-
tion is subject to the following two conditions:
(1) This device may not cause interference; and
(2) This device must accept any interference, including interference that may
cause undesired operation of the device.
The FCC ID/IC Certification number is affixed inside the equipment. You can
find the ID/number when replacing the battery.
NOTE:
Le présent appareil est conforme aux CNR d’Industrie Canada applicables
aux appareils radio exempts de licence. L’exploitation est autorisée aux deux
conditions suivantes:
(1) l’appareil ne doit pas produire de brouillage;
(2) l’utilisateur de l’appareil doit accepter tout brouillage radioélectrique subi,
même si le brouillage est susceptible d’en compromettre le fonctionnement.
L’identification FCC/Ie numéro d’accréditation IC est apposé(e) à l’intérieur
de l’appareil. Cette identification/ce numéro est visible au remplacement de la
pile.
■ Certification for wireless remote control (type D)
→P. 127
Page 114 of 640
1143-2. Opening, closing and locking the doors
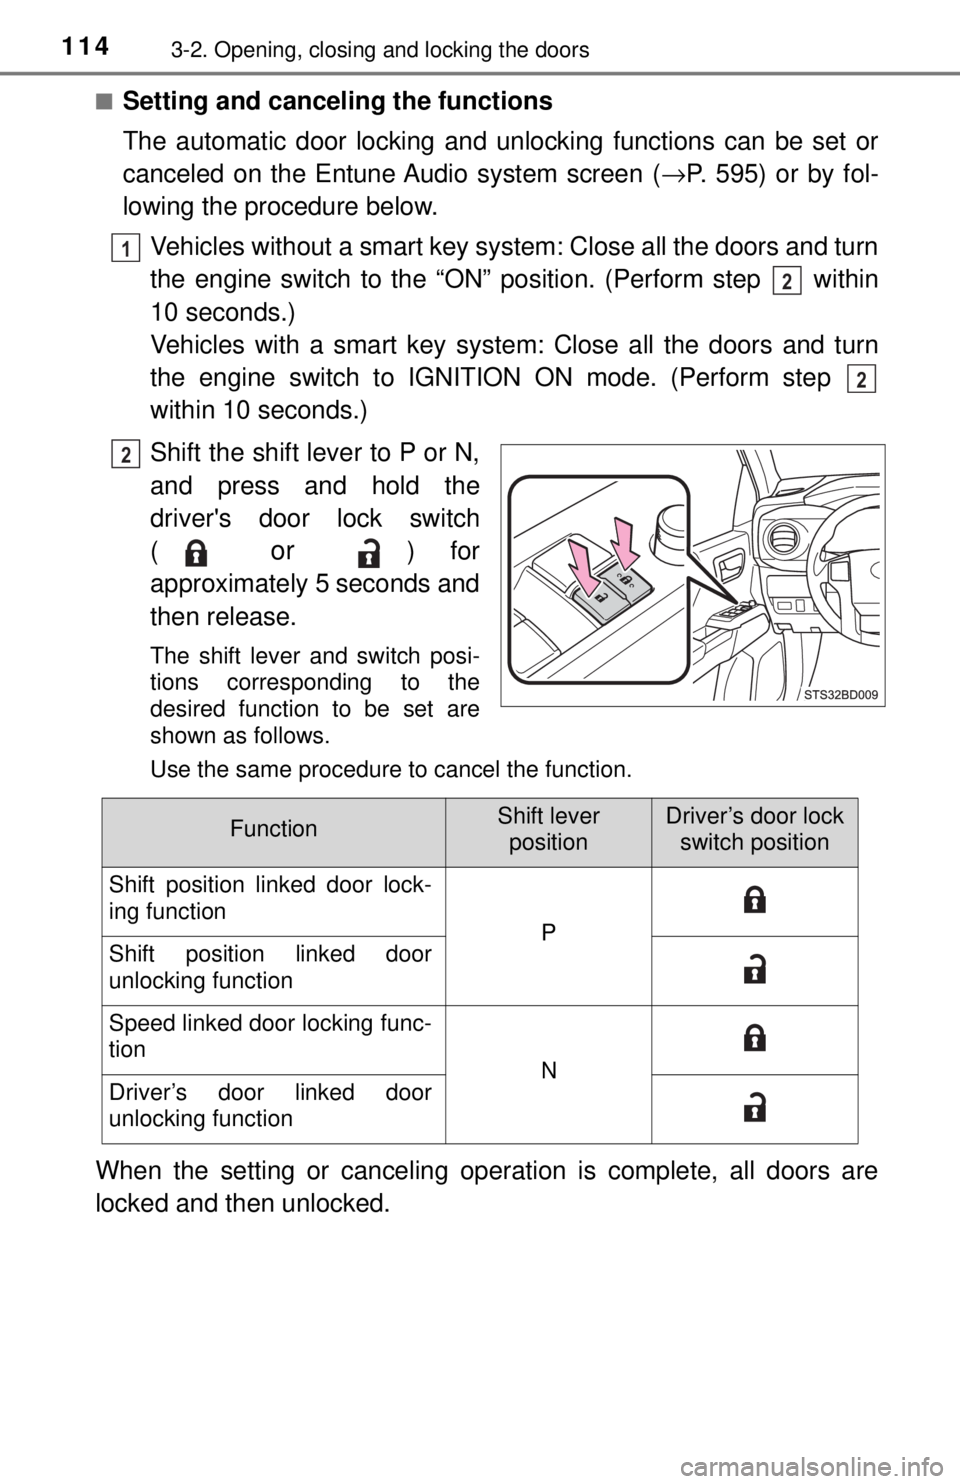
■Setting and canceling the functions
The automatic door locking and unlocking functions can be set or
canceled on the Entune Audio system screen (→P. 595) or by fol-
lowing the procedure below.
Vehicles without a smart key system: Close all the doors and turn
the engine switch to the “ON” position. (Perform step within
10 seconds.)
Vehicles with a smart key syst em: Close all the doors and turn
the engine switch to IGNITION ON mode. (Perform step
within 10 seconds.)
Shift the shift lever to P or N,
and press and hold the
driver's door lock switch
(
or ) for
approximately 5 seconds and
then release.
The shift lever and switch posi-
tions corresponding to the
desired function to be set are
shown as follows.
Use the same procedure to cancel the function.
When the setting or canceling operation is complete, all doors are
locked and then unlocked.
1
2
2
2
FunctionShift lever positionDriver’s door lock switch position
Shift position linked door lock-
ing function
PShift position linked door
unlocking function
Speed linked door locking func-
tion
NDriver’s door linked door
unlocking function
Page 115 of 640
1153-2. Opening, closing and locking the doors
3
Operation of each component
■Customization that can be co nfigured at Toyota dealer
Settings (e.g. unlocking function using a key) can be changed.
(Customizable features: →P. 595)
WARNING
■To prevent an accident
Observe the following precautions while driving the vehicle.
Failure to do so may result in a door opening and an occupant throwing out
of the vehicle, resulting in death or serious injury.
● Ensure that all doors are properly closed and locked.
● Do not pull the inside handle of the doors while driving.
Be especially careful for the front doors, as the doors may be opened even
if the inside lock buttons are in locked position.
● Double Cab models only: Set the rear door child-protector locks when chil-
dren are seated in the rear seats.
NOTICE
■When opening or closing the fr ont door and access door (Access Cab
models only)
The front door and access door could be damaged if they hit each other
when being opened or closed.
Page 122 of 640
1223-2. Opening, closing and locking the doors
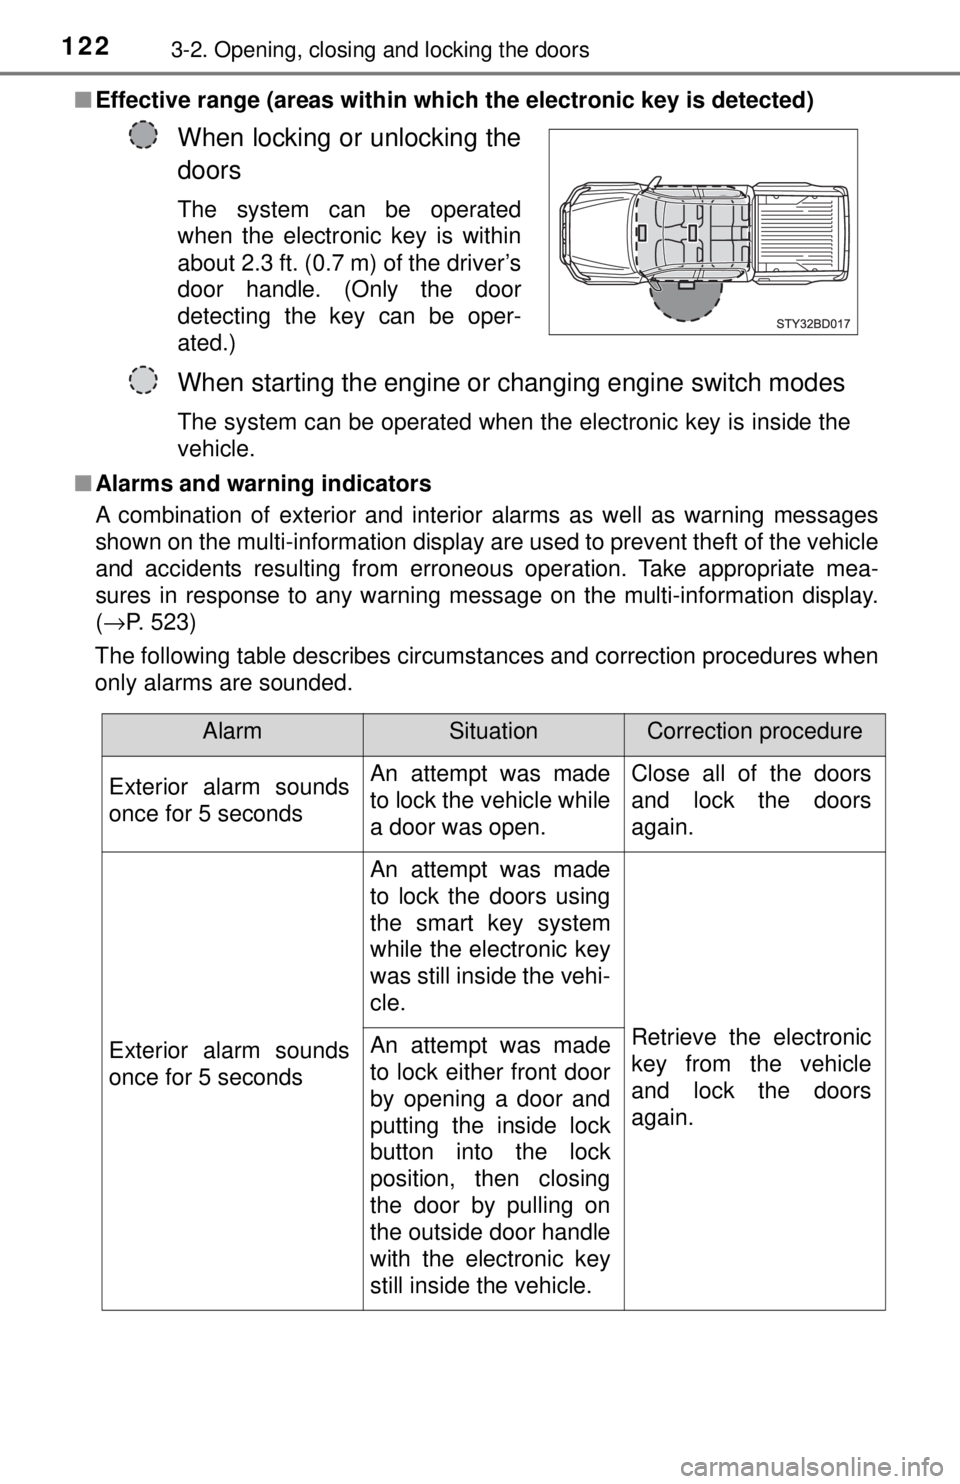
■Effective range (areas within whic h the electronic key is detected)
■ Alarms and warning indicators
A combination of exterior and interior alarms as well as warning messages
shown on the multi-information display are used to prevent theft of the vehicle
and accidents resulting from erroneous operation. Take appropriate mea-
sures in response to any warning message on the multi-information display.
(→P. 523)
The following table describes circumstances and correction procedures when
only alarms are sounded.
When locking or unlocking the
doors
The system can be operated
when the electronic key is within
about 2.3 ft. (0.7 m) of the driver’s
door handle. (Only the door
detecting the key can be oper-
ated.)
When starting the engine or changing engine switch modes
The system can be operated when the electronic key is inside the
vehicle.
AlarmSituationCorrection procedure
Exterior alarm sounds
once for 5 seconds An attempt was made
to lock the vehicle while
a door was open.Close all of the doors
and lock the doors
again.
Exterior alarm sounds
once for 5 seconds An attempt was made
to lock the doors using
the smart key system
while the electronic key
was still inside the vehi-
cle.
Retrieve the electronic
key from the vehicle
and lock the doors
again.
An attempt was made
to lock either front door
by opening a door and
putting the inside lock
button into the lock
position, then closing
the door by pulling on
the outside door handle
with the electronic key
still inside the vehicle.
Page 127 of 640

1273-2. Opening, closing and locking the doors
3
Operation of each component
■Certification for the smart key system
For vehicles sold in U.S.A. and New Caledonia
FCC ID: HYQ23AAP
FCC ID: HYQ14FBA
NOTE:
This device complies with part 15 of the FCC Rules. Operation is subject to
the following two conditions: (1) This device may not cause harmful interfer-
ence, and (2) this device must accept any interference received, including
interference that may cause undesired operation.
FCC WARNING:
Changes or modifications not expressly approved by the party responsible for
compliance could void the user’s authority to operate the equipment.
For vehicles sold in Canada
NOTE:
This device complies with Industry Canada’s licence-exempt RSSs. Opera-
tion is subject to the following two conditions:
(1) This device may not cause interference; and
(2) This device must accept any interference, including interference that may
cause undesired operation of the device.
NOTE:
Le présent appareil est conforme aux CNR d’Industrie Canada applicables
aux appareils radio exempts de licence. L’exploitation est autorisée aux deux
conditions suivantes:
(1) I’appareil ne doit pas produire de brouillage;
(2) l’utilisateur de I’appareil doit accepter tout brouillage radioélectrique subi,
même si le brouillage est susceptible d’en compromettre le fonctionnement.
Page 137 of 640
1373-3. Adjusting the seats
3
Operation of each component
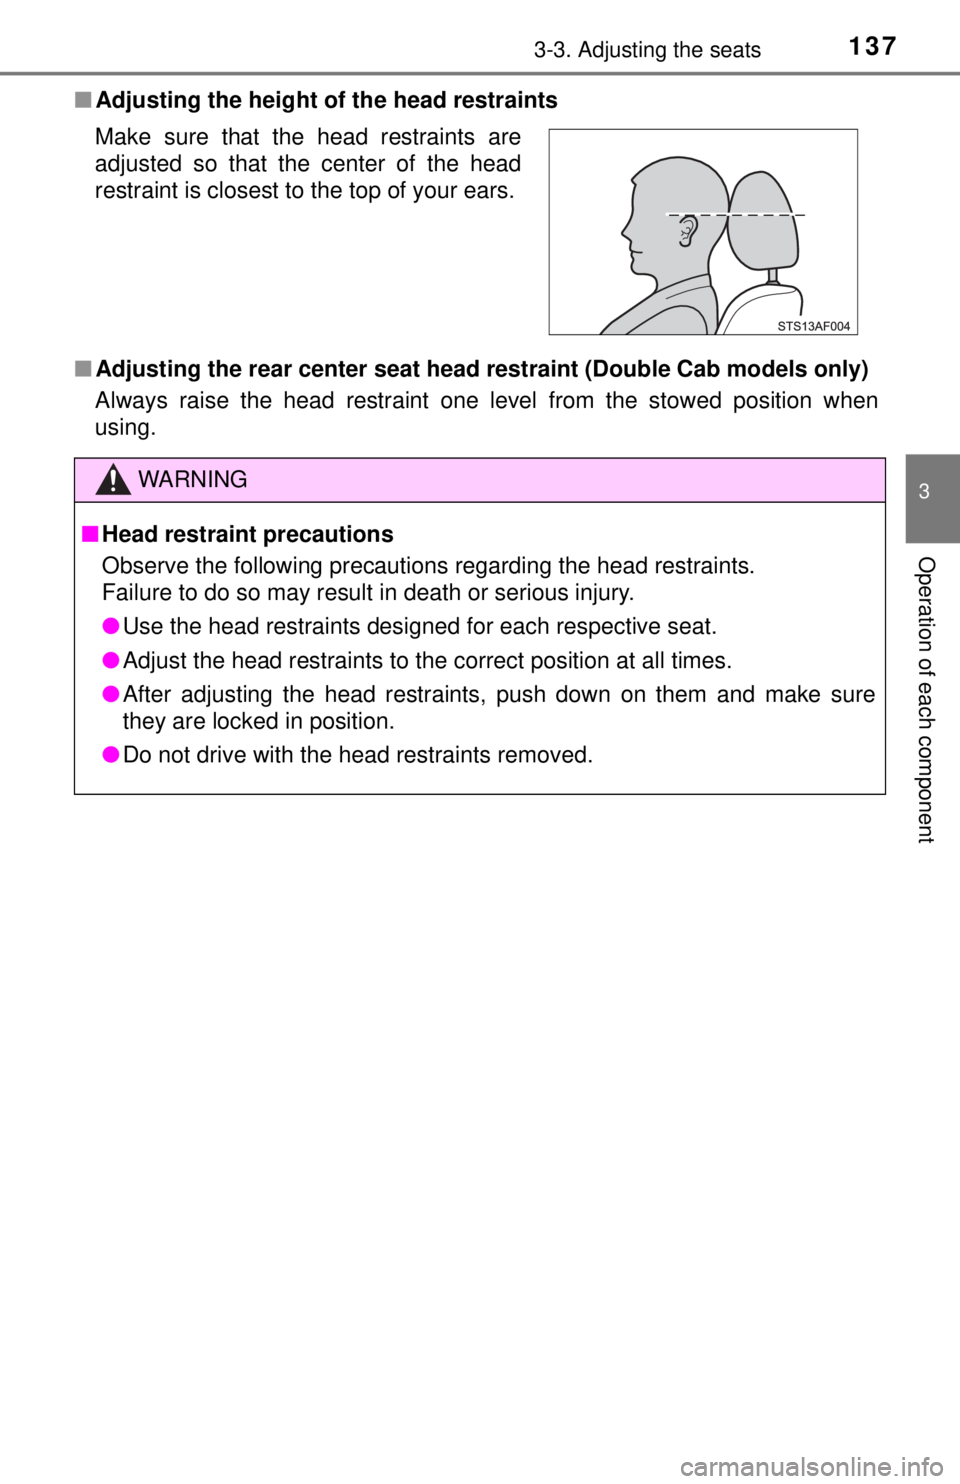
■Adjusting the height of the head restraints
■ Adjusting the rear center seat head restraint (Double Cab models only)
Always raise the head restraint one level from the stowed position when
using. Make sure that the head restraints are
adjusted so that the center of the head
restraint is closest to the top of your ears.
WARNING
■ Head restraint precautions
Observe the following precautions regarding the head restraints.
Failure to do so may result in death or serious injury.
● Use the head restraints designed for each respective seat.
● Adjust the head restraints to the correct position at all times.
● After adjusting the head restraints, push down on them and make sure
they are locked in position.
● Do not drive with the head restraints removed.
Page 141 of 640
1413-4. Adjusting the steering wheel and mirrors
3
Operation of each component
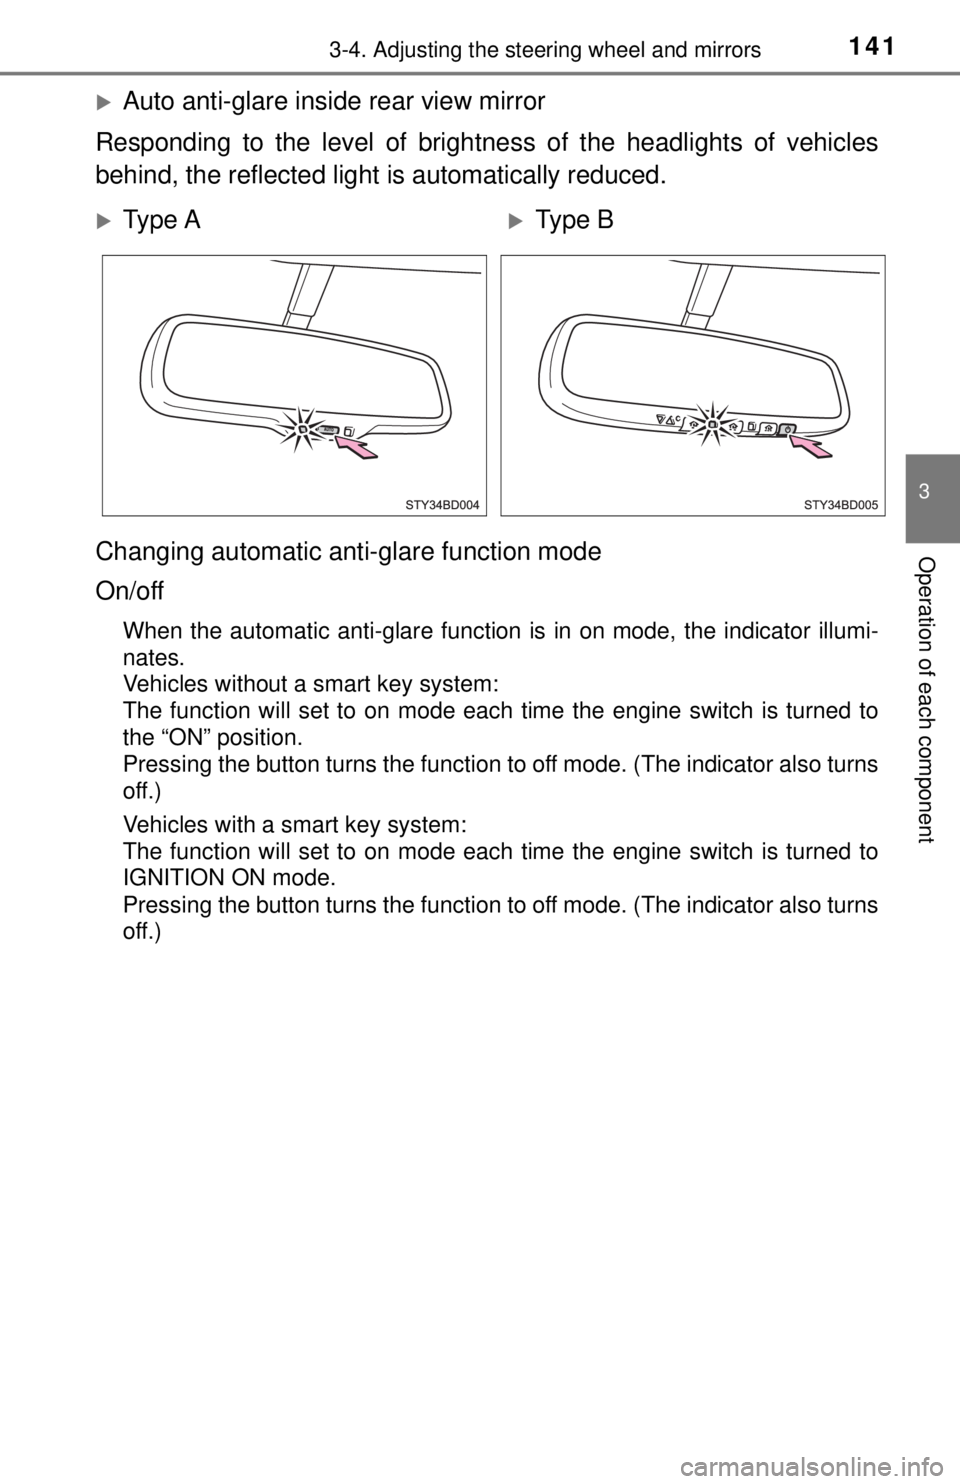
Auto anti-glare inside rear view mirror
Responding to the level of brightne ss of the headlights of vehicles
behind, the reflected light is automatically reduced.
Changing automatic anti- glare function mode
On/off
When the automatic anti-glare function is in on mode, the indicator illumi-
nates.
Vehicles without a smart key system:
The function will set to on mode each time the engine switch is turned to
the “ON” position.
Pressing the button turns the function to off mode. (The indicator also turns
off.)
Vehicles with a smart key system:
The function will set to on mode each time the engine switch is turned to
IGNITION ON mode.
Pressing the button turns the function to off mode. (The indicator also turns
off.)
Ty p e AType B
Page 147 of 640

1473-5. Opening, closing the windows and moon roof
3
Operation of each component
WARNING
Observe the following precautions.
Failure to do so may result in death or serious injury.
■Closing the windows
● The driver is responsible for all the power window operations, including the
operation for the passengers. In order to prevent accidental operation,
especially by a child, do not let a child operate the power windows. It is
possible for children and other passengers to have body parts caught in
the power window. Also, when riding with a child, it is recommended to use
the window lock switch. ( →P. 145)
● Check to make sure that all passengers do not have any part of their body
in a position where it could be caught when a window is being operated.
● When exiting the vehicle, turn the engine switch off, carry the key and exit
the vehicle along with the child. There may be accidental operation, due to
mischief, etc., that may possibly lead to an accident.
■ Jam protection function (type B only)
● Never use any part of your body to intentionally activate the jam protection
function.
● The jam protection function may not work if something gets caught just
before the window fully closes.