ESP TOYOTA TACOMA 2019 Accessories, Audio & Navigation (in English)
[x] Cancel search | Manufacturer: TOYOTA, Model Year: 2019, Model line: TACOMA, Model: TOYOTA TACOMA 2019Pages: 294, PDF Size: 7.96 MB
Page 52 of 294
52
2. Bluetooth® SETTINGS
1Display the “Bluetooth* Setup” screen.
(P.51)
2Select “Add”.
When another Bluetooth
® device is con-
nected
To disconnect the Bluetooth® device,
select “Yes”.
When 5 Bluetooth® devices have al-
ready been registered
A registered device needs to be replaced.
Select “Yes”, and select the device to be
replaced.
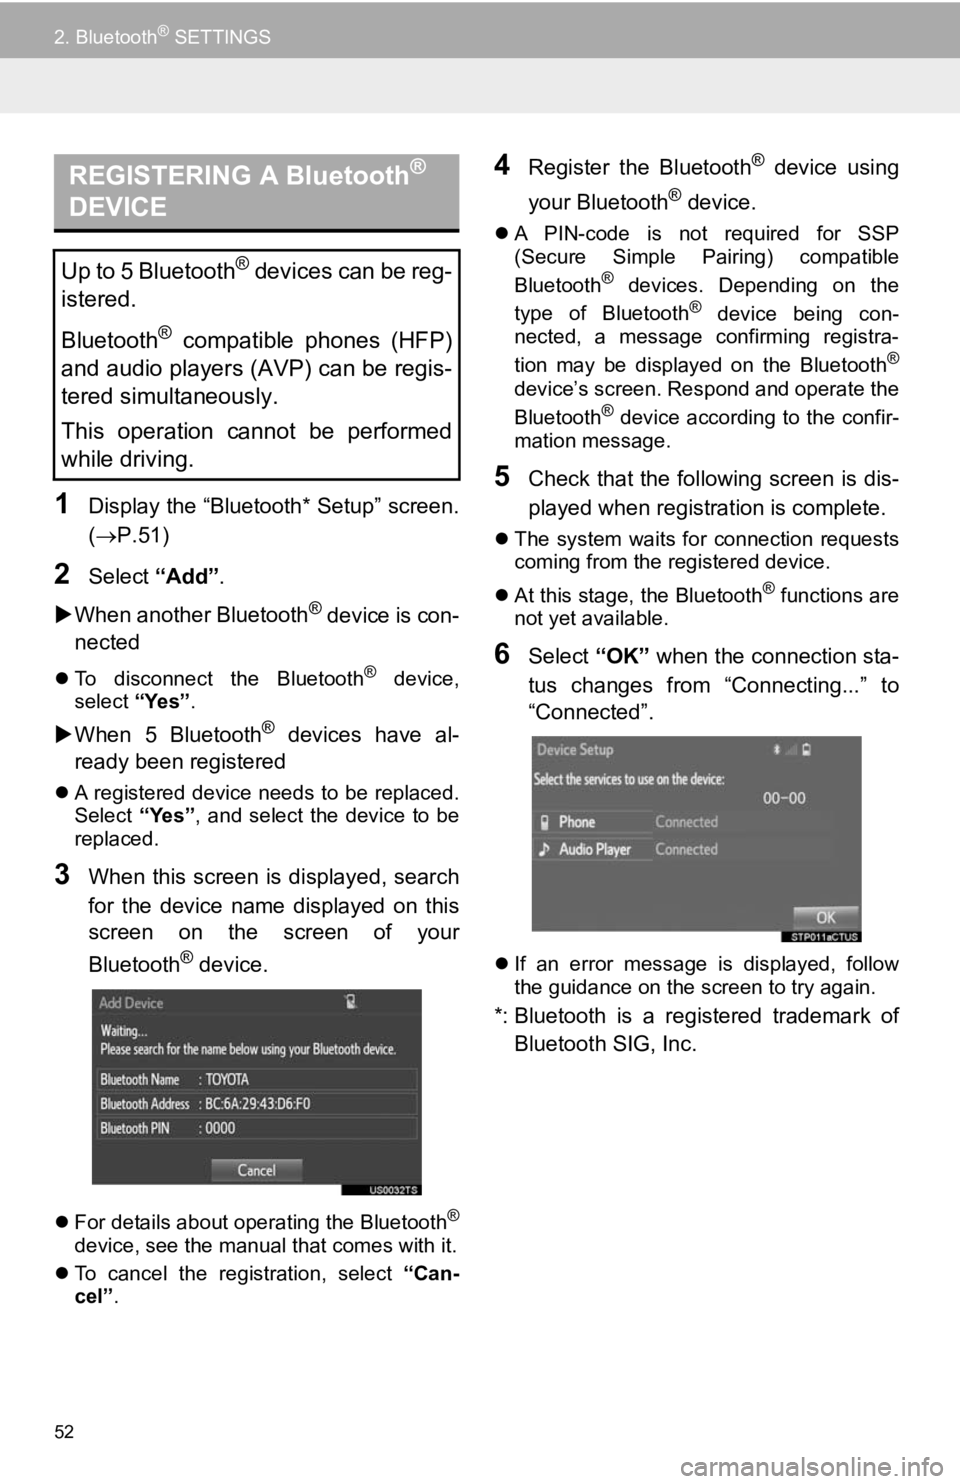
3When this screen is displayed, search
for the device name displayed on this
screen on the screen of your
Bluetooth
® device.
For details about operating the Bluetooth®
device, see the manual that comes with it.
To cancel the registration, select “Can-
cel”.
4Register the Bluetooth® device using
your Bluetooth
® device.
A PIN-code is not required for SSP
(Secure Simple Pairing) compatible
Bluetooth
® devices. Depending on the
type of Bluetooth® device being con-
nected, a message confirming registra-
tion may be displayed on the Bluetooth
®
device’s screen. Respond and operate the
Bluetooth® device according to the confir-
mation message.
5Check that the following screen is dis-
played when registration is complete.
The system waits for connection requests
coming from the registered device.
At this stage, the Bluetooth
® functions are
not yet available.
6Select “OK” when the connection sta-
tus changes from “Connecting...” to
“Connected”.
If an error message is displayed, follow
the guidance on the screen to try again.
*: Bluetooth is a registered trademark of
Bluetooth SIG, Inc.
REGISTERING A Bluetooth®
DEVICE
Up to 5 Bluetooth® devices can be reg-
istered.
Bluetooth
® compatible phones (HFP)
and audio players (AVP) can be regis-
tered simultaneously.
This operation cannot be performed
while driving.
Page 94 of 294
94
2. RADIO OPERATION
INFORMATION
●XM Radio Services Descriptions
• Radio and Entertainment XM offers more than 170 satellite radio
channels of commercial-free music
and premier sports, news, talk, and
entertainment. XM is broadcast via sat-
ellites to millions of listeners across the
continental United States. XM sub-
scribers listen to XM on satellite radio
receivers for the car, home, and porta-
ble use. More information about XM is
available online at www.siriusxm.com
(U.S.A.) or www.xmradio.ca (Canada).
● XM Radio ServicesSubscription
Instructions
• For XM Services requiring a subscrip-
tion (such as XM Radio, and some
Infotainment & data services), the fol-
lowing paragraph shall be included.
Required XM Radio and some Infotain-
ment & data services monthly sub-
scriptions sold separately after trial
period. Subscription fee is consumer
only. All fees and programming subject
to change. Subscriptions are subject to
the Customer Agreement available at
www.siriusxm.com. XM service only
available in the 48 contiguous United
States. 2011 Sirius XM Radio Inc.
Sirius, XM and all related marks and
logos are trademarks of Sirius XM
Radio Inc. All other marks, channel
names and logos are the property of
their respective owners.
For more information, program sched-
ules, and to subscribe or extend sub-
scription after complimentary trial
period; more information is available
at:
USA Customers:
Visit www.siriusxm.com or call
1-877-447-0011
INFORMATION
● XM Satellite Radio is solely responsible
for the quality, availability and content of
the satellite radio services provided,
which are subject to the terms and con-
ditions of the XM Satellite Radio cus-
tomer service agreement.
● Customers should have their radio ID
ready; the radio ID can be found by tun-
ing to “Ch 000” on the radio. For details,
see “DISPLAYING THE RADIO ID”
below.
● All fees and programming are the
responsibility of XM Satellite Radio and
are subject to change.
SATELLITE TUNER
TECHNOLOGY NOTICE
Toyota’s satellite radio tuners are
awarded Type Approval Certificates
from XM Satellite Radio Inc. as proof of
compatibility with the services offered
by XM Satellite Radio.
INFORMATION
● Satellite tuner
The tuner supports only Audio Services
(Music and Talk) and the accompanying
Text Information of XM
® Satellite Radio.
Page 121 of 294
121
AUDIO SYSTEM
3
6. TIPS FOR OPERATING THE AUDIO SYSTEM
1. OPERATING INFORMATION
Fading and drifting stations: Generally, the
effective range of FM is about 25 miles (40
km). Once outside this range, you may no-
tice fading and drifti ng, which increase with
the distance from the radio transmitter.
They are often accompanied by distortion.
Multi-path: FM signals are reflective, mak-
ing it possible for 2 signals to reach the ve-
hicle’s antenna at the same time. If this
happens, the signals will cancel each other
out, causing a momentar y flutter or loss of
reception.
Static and fluttering: These occur when
signals are blocked by buildings, trees or
other large objects. Increasing the bass
level may reduce static and fluttering.
Station swapping: If the FM signal being
listened to is interrupted or weakened, and
there is another str ong station nearby on
the FM band, the radio may tune in the
second station until the original signal can
be picked up again.
Fading: AM broadcasts are reflected by
the upper atmosphere — especially at
night. These reflected signals can interfere
with those received directly from the radio
station, causing the radio station to sound
alternately strong and weak.
Station interference: When a reflected sig-
nal and a signal received directly from a ra-
dio station are very nearly the same
frequency, they can interfere with each
other, making it difficult to hear the broad-
cast.
Static: AM is easily affected by external
sources of electrical noise, such as high
tension power lines, lightening or electrical
motors. This results in static.
NOTICE
● To avoid damage to the audio system:
• Be careful not to spill beverages over
the audio system.
• Do not put anything other than an appropriate disc into the disc slot.
INFORMATION
● The use of a cellular phone inside or
near the vehicle may cause a noise from
the speakers of the audio system which
you are listening to. However, this does
not indicate a malfunction.
RADIO
Usually, a problem with radio reception
does not mean there is a problem with
the radio — it is just the normal result
of conditions outside the vehicle.
For example, nearby buildings and ter-
rain can interfere with FM reception.
Power lines or phone wires can inter-
fere with AM signals. And of course, ra-
dio signals have a limited range. The
farther the vehicle is from a station, the
weaker its signal will be. In addition, re-
ception conditions change constantly
as the vehicle moves.
Here, some common reception prob-
lems that probably do not indicate a
problem with the radio are described.
FM
AM
Page 122 of 294
122
6. TIPS FOR OPERATING THE AUDIO SYSTEM
Cargo loaded on the roof luggage carrier,
especially metal objects, may adversely
affect the reception of XM Satellite Radio.
Alternation or modifications carried out
without appropriate authorization may
invalidate the user’s right to operate the
equipment.
This CD player is intended for use with 4.7
in. (12 cm). discs only.
Extremely high temperatures can keep the
CD player from working. On hot days, use
the air conditioning system to cool the
inside of the vehicle before using the
player.
Bumpy roads or other vibrations may
make the CD player skip.
If moisture gets into the CD player, the
discs may not be able to be played.
Remove the discs from the player and
wait until it dries.
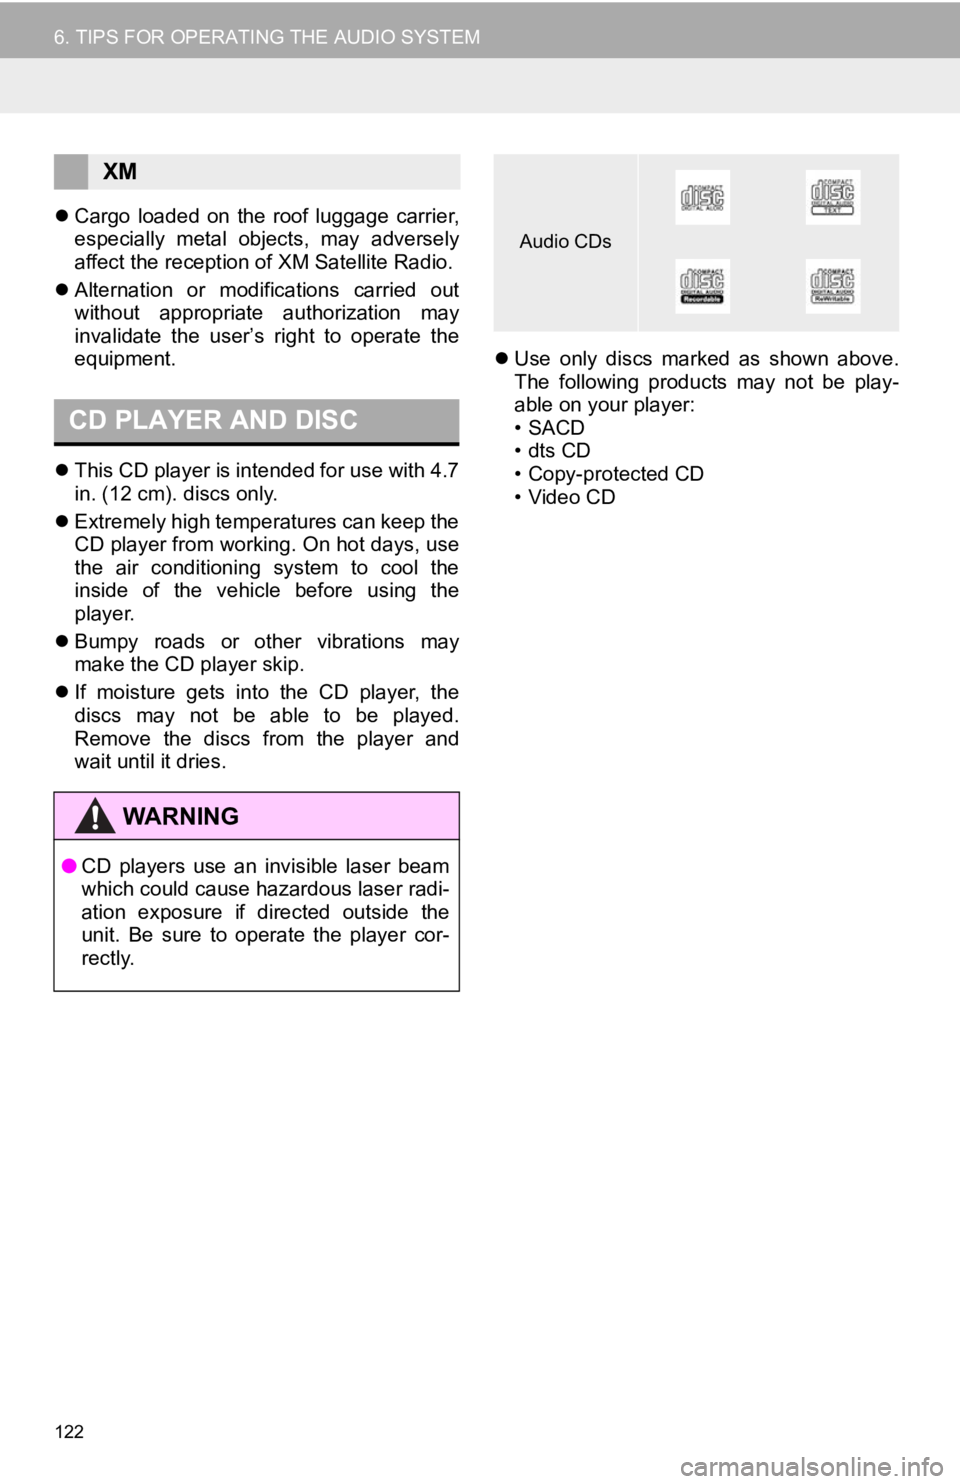
Use only discs marked as shown above.
The following products may not be play-
able on your player:
•SACD
•dts CD
• Copy-protected CD
• Video CD
XM
CD PLAYER AND DISC
WA R N I N G
●CD players use an invisible laser beam
which could cause hazardous laser radi-
ation exposure if directed outside the
unit. Be sure to operate the player cor-
rectly.
Audio CDs
Page 123 of 294
123
6. TIPS FOR OPERATING THE AUDIO SYSTEM
AUDIO SYSTEM
3
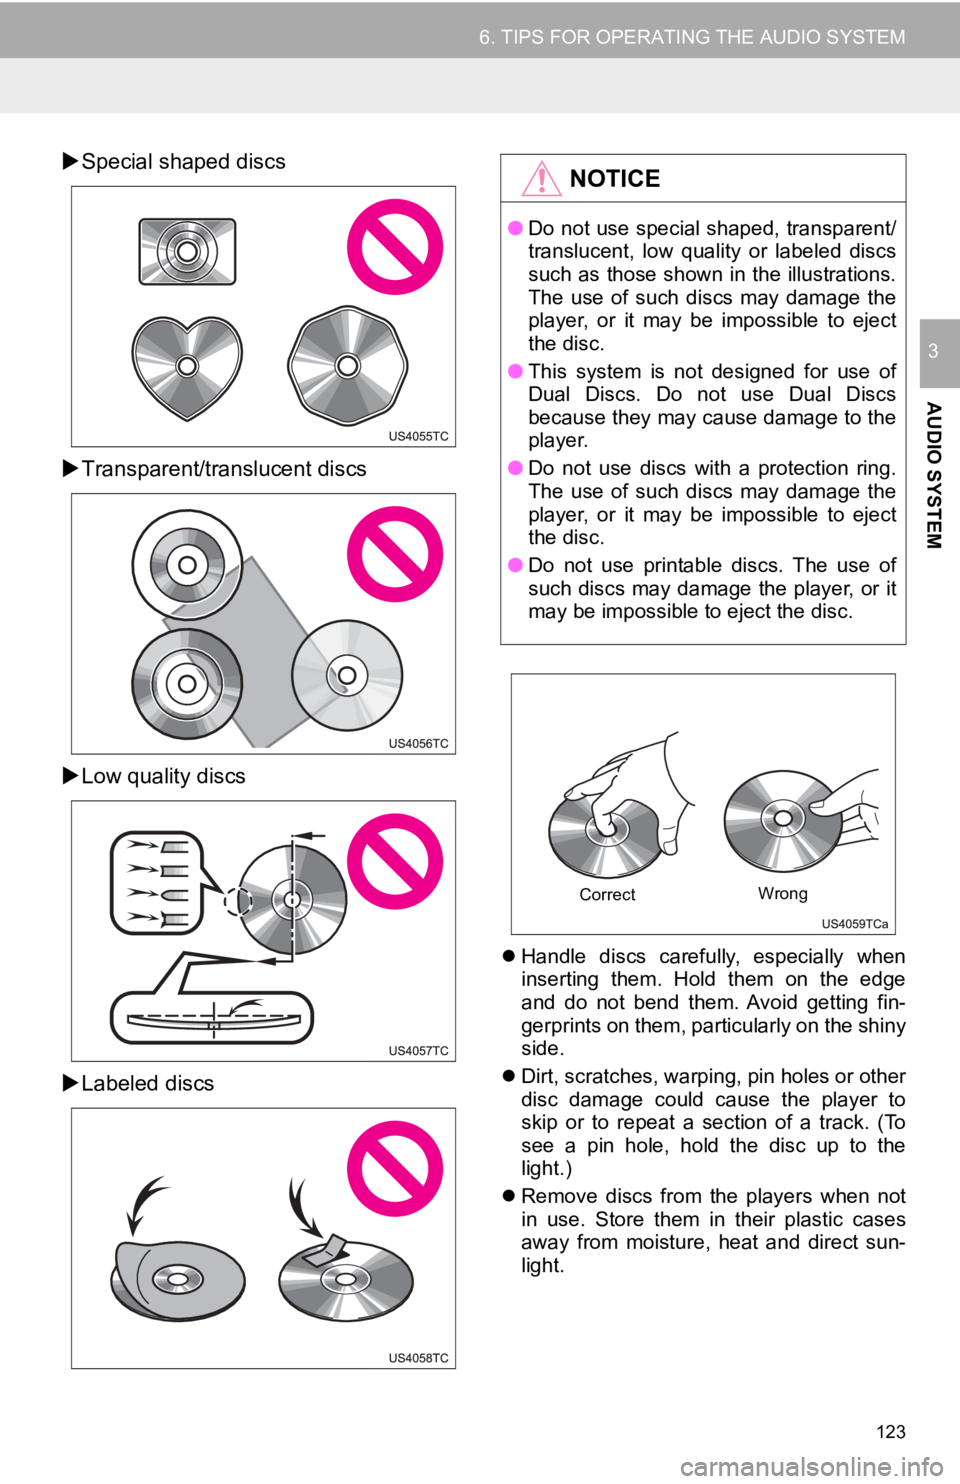
Special shaped discs
Transparent/translucent discs
Low quality discs
Labeled discs
Handle discs carefully, especially when
inserting them. Hold them on the edge
and do not bend them. Avoid getting fin-
gerprints on them, particularly on the shiny
side.
Dirt, scratches, warping, pin holes or other
disc damage could cause the player to
skip or to repeat a section of a track. (To
see a pin hole, hold the disc up to the
light.)
Remove discs from the players when not
in use. Store them in their plastic cases
away from moisture, heat and direct sun-
light.
NOTICE
● Do not use special shaped, transparent/
translucent, low quality or labeled discs
such as those shown in the illustrations.
The use of such discs may damage the
player, or it may be impossible to eject
the disc.
● This system is not designed for use of
Dual Discs. Do not use Dual Discs
because they may cause damage to the
player.
● Do not use discs with a protection ring.
The use of such discs may damage the
player, or it may be impossible to eject
the disc.
● Do not use printable discs. The use of
such discs may damage the player, or it
may be impossible to eject the disc.
Correct Wrong
Page 124 of 294
124
6. TIPS FOR OPERATING THE AUDIO SYSTEM
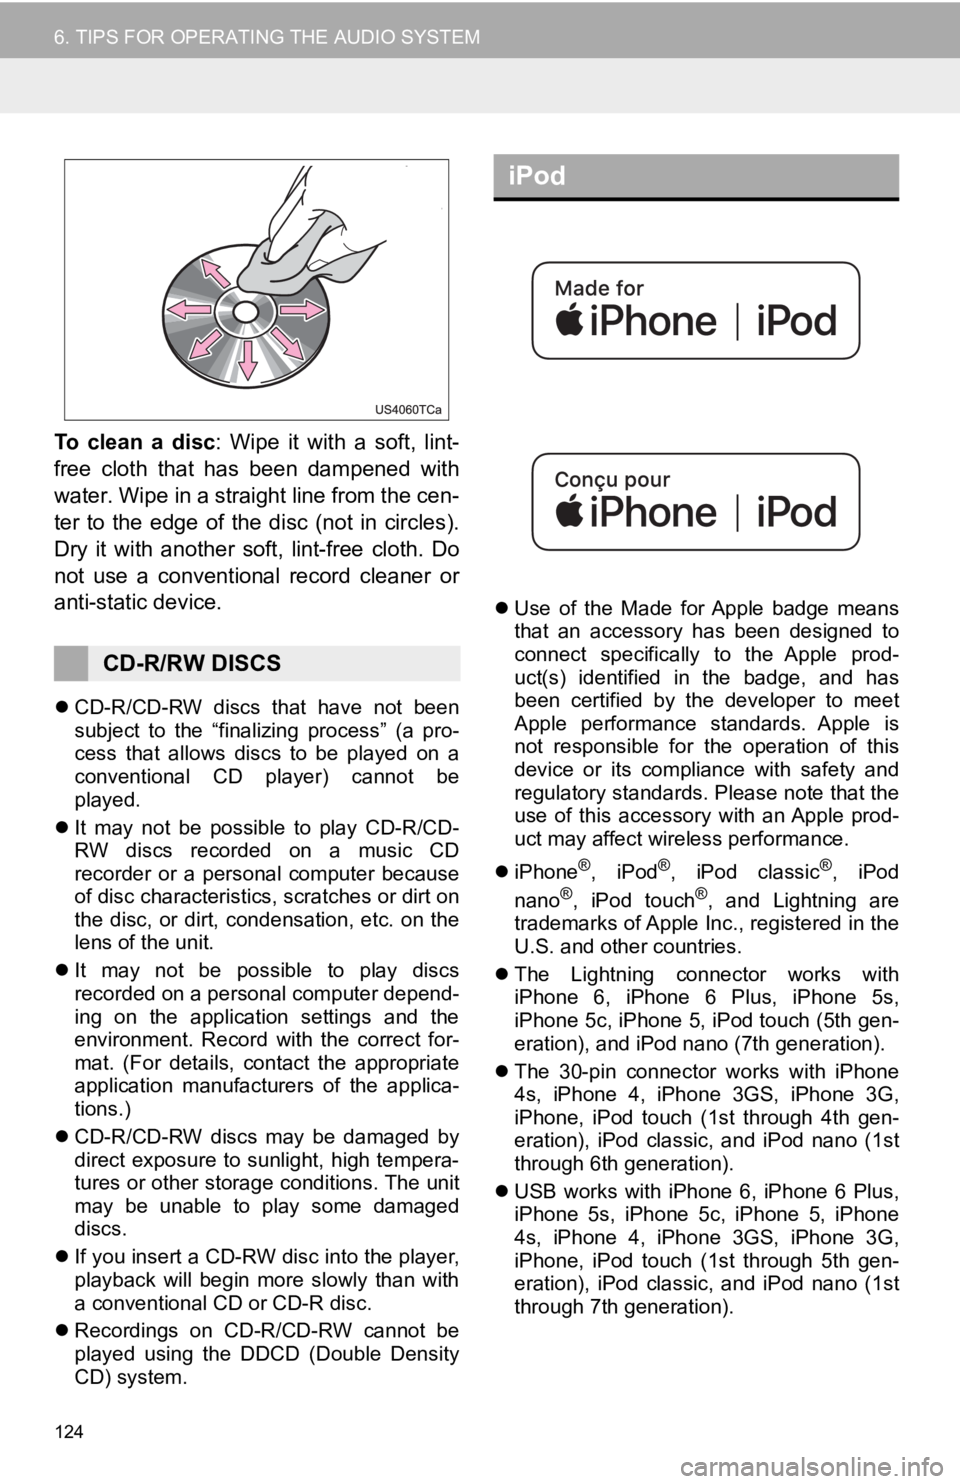
To clean a disc: Wipe it with a soft, lint-
free cloth that has been dampened with
water. Wipe in a straight line from the cen-
ter to the edge of the disc (not in circles).
Dry it with another soft, lint-free cloth. Do
not use a conventional record cleaner or
anti-static device.
CD-R/CD-RW discs that have not been
subject to the “finalizing process” (a pro-
cess that allows discs to be played on a
conventional CD player) cannot be
played.
It may not be possible to play CD-R/CD-
RW discs recorded on a music CD
recorder or a personal computer because
of disc characteristics, scratches or dirt on
the disc, or dirt, condensation, etc. on the
lens of the unit.
It may not be possible to play discs
recorded on a personal computer depend-
ing on the application settings and the
environment. Record with the correct for-
mat. (For details, contact the appropriate
application manufacturers of the applica-
tions.)
CD-R/CD-RW discs may be damaged by
direct exposure to sunlight, high tempera-
tures or other storage conditions. The unit
may be unable to play some damaged
discs.
If you insert a CD-RW disc into the player,
playback will begin more slowly than with
a conventional CD or CD-R disc.
Recordings on CD-R/CD-RW cannot be
played using the DDCD (Double Density
CD) system.
Use of the Made for Apple badge means
that an accessory has been designed to
connect specifically to the Apple prod-
uct(s) identified in the badge, and has
been certified by the developer to meet
Apple performance standards. Apple is
not responsible for the operation of this
device or its compliance with safety and
regulatory standards. Please note that the
use of this accessory with an Apple prod-
uct may affect wireless performance.
iPhone
®, iPod®, iPod classic®, iPod
nano®, iPod touch®, and Lightning are
trademarks of Apple Inc., registered in the
U.S. and other countries.
The Lightning connector works with
iPhone 6, iPhone 6 Plus, iPhone 5s,
iPhone 5c, iPhone 5, iPod touch (5th gen-
eration), and iPod nano (7th generation).
The 30-pin connector works with iPhone
4s, iPhone 4, iPhone 3GS, iPhone 3G,
iPhone, iPod touch (1st through 4th gen-
eration), iPod classic, and iPod nano (1st
through 6th generation).
USB works with iPhone 6, iPhone 6 Plus,
iPhone 5s, iPhone 5c, iPhone 5, iPhone
4s, iPhone 4, iPhone 3GS, iPhone 3G,
iPhone, iPod touch (1st through 5th gen-
eration), iPod classic, and iPod nano (1st
through 7th generation).
CD-R/RW DISCS
iPod
Page 125 of 294
125
6. TIPS FOR OPERATING THE AUDIO SYSTEM
AUDIO SYSTEM
3
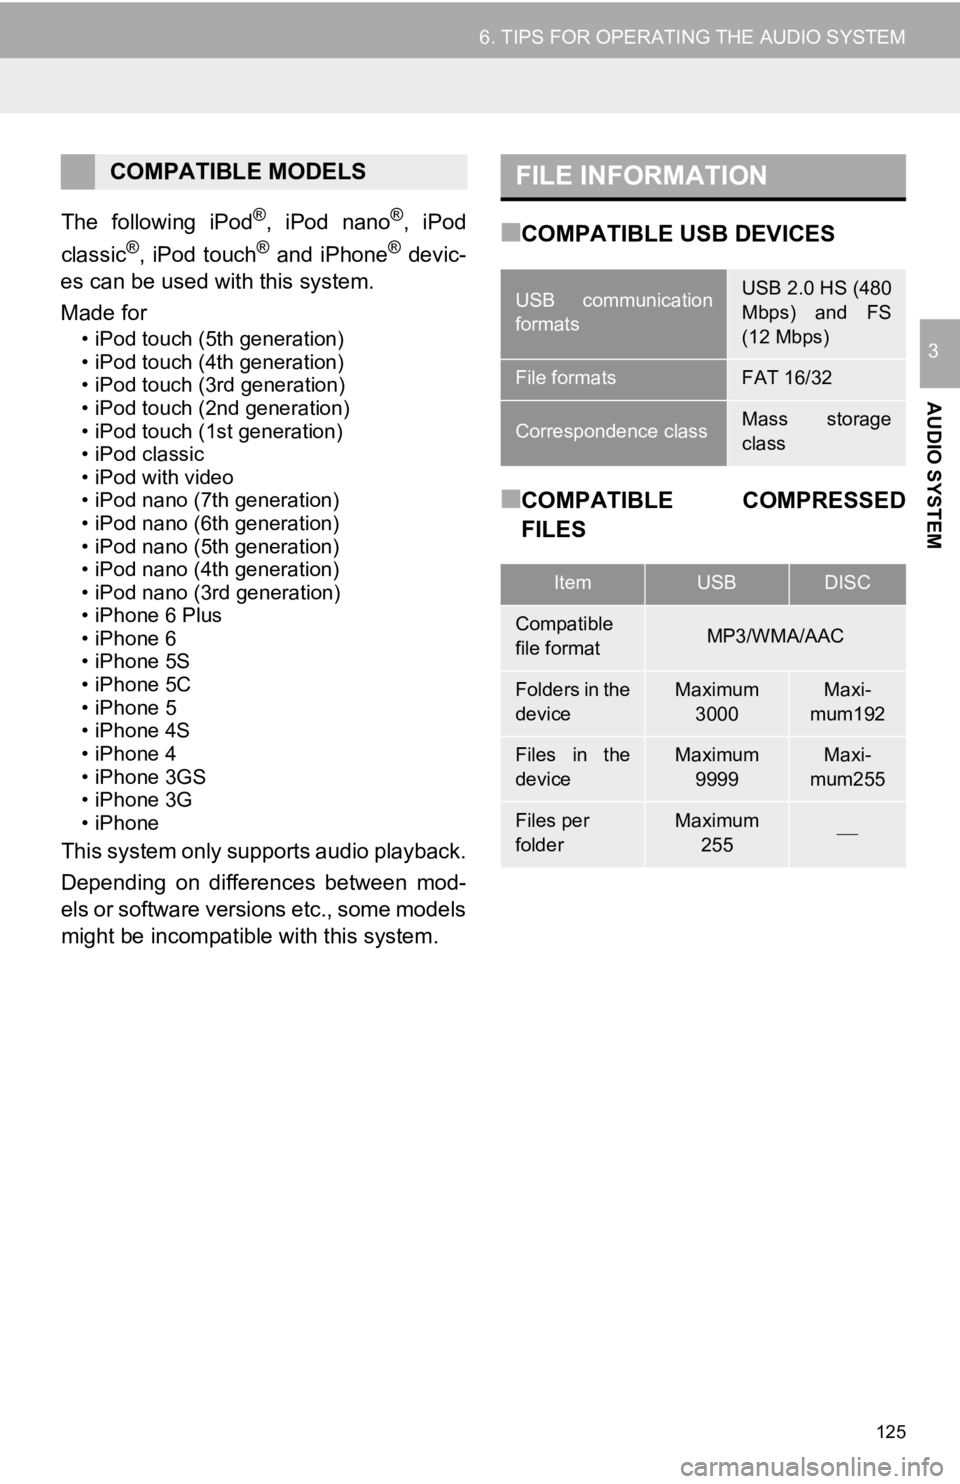
The following iPod®, iPod nano®, iPod
classic®, iPod touch® and iPhone® devic-
es can be used wit h this system.
Made for
• iPod touch (5th generation)
• iPod touch (4th generation)
• iPod touch (3rd generation)
• iPod touch (2nd generation)
• iPod touch (1st generation)
• iPod classic
• iPod with video
• iPod nano (7th generation)
• iPod nano (6th generation)
• iPod nano (5th generation)
• iPod nano (4th generation)
• iPod nano (3rd generation)
• iPhone 6 Plus
• iPhone 6
• iPhone 5S
• iPhone 5C
• iPhone 5
• iPhone 4S
• iPhone 4
• iPhone 3GS
• iPhone 3G
• iPhone
This system only supports audio playback.
Depending on differences between mod-
els or software versions etc., some models
might be incompatible with this system.
■COMPATIBLE USB DEVICES
■COMPATIBLE COMPRESSED
FILES
COMPATIBLE MODELSFILE INFORMATION
USB communication
formatsUSB 2.0 HS (480
Mbps) and FS
(12 Mbps)
File formatsFAT 16/32
Correspondence classMass storage
class
ItemUSBDISC
Compatible
file formatMP3/WMA/AAC
Folders in the
deviceMaximum
3000Maxi-
mum192
Files in the
deviceMaximum 9999Maxi-
mum255
Files per
folderMaximum 255
Page 126 of 294
126
6. TIPS FOR OPERATING THE AUDIO SYSTEM
■CORRESPONDING SAMPLING
FREQUENCY
■CORRESPONDING BIT RATES
(Variable Bit Rate (VBR) compatible)
MP3 (MPEG Audio Layer 3), WMA
(Windows Media Audio) and AAC
(Advanced Audio Coding) are audio com-
pression standards.
This system can play MP3/WMA/AAC files
on CD-R, CD-RW discs and USB memory.
This system can play disc recordings com-
patible with ISO 9660 level 1 and level 2
and with the Romeo and Joliet file system.
When naming an MP3/WMA/AAC file, add
an appropriate file extension (.mp3/.wma/
.m4a).
This system plays back files with .mp3/
.wma/.m4a file extensions as MP3/WMA/
AAC files respectively. To prevent noise
and playback errors, use the appropriate
file extension.
This system can play only the first session
when using multi-session compatible CDs.
MP3 files are compatible with the ID3 Tag
Ver. 1.0, Ver. 1.1, Ver. 2.2 and Ver. 2.3 for-
mats. This system cannot display disc
title, track title and artist name in other for-
mats.
WMA/AAC files can contain a WMA/AAC
tag that is used in the same way as an ID3
tag. WMA/AAC tags carry information
such as track title and artist name.
The emphasis function is available only
when playing MP3/WMA files recorded at
32, 44.1 and 48 kHz.
This system can play back AAC files
encoded by iTunes.
The sound quality of MP3/WMA files gen-
erally improves with higher bit rates. In
order to achieve a reasonable level of
sound quality, discs recorded with a bit
rate of at least 128 kbps are recom-
mended.
The MP3/WMA player does not play back
MP3/WMA files from discs recorded using
packet write data transfer (UDF format).
Discs should be recorded using “pre-mas-
tering” software rather than packet-write
software.
M3u playlists are not compatible with the
audio player.
MP3i (MP3 interactive) and MP3PRO for-
mats are not compatible with the audio
player.
File typeFrequency (kHz)
MP3 files:
MPEG 1 LAYER 332/44.1/48
MP3 files:
MPEG 2 LSF LAYER 316/22.05/24
WMA files:
Ver. 7, 8, 9 (9.1/9.2)32/44.1/48
AAC files:
MPEG4/AAC-LC11.025/12/16/
22.05/24/32/
44.1/48
File typeBit rate (kbps)
MP3 files:
MPEG 1 LAYER 332 - 320
MP3 files:
MPEG 2 LSF LAYER 38 - 160
WMA files: Ver. 7, 8CBR 48 - 192
WMA files:
Ver. 9 (9.1/9.2)CBR 48 - 320
AAC files:
MPEG4/AAC-LC16 - 320
Page 133 of 294
133
1. VOICE COMMAND SYSTEM OPERATION
VOICE COMMAND SYSTEM
4
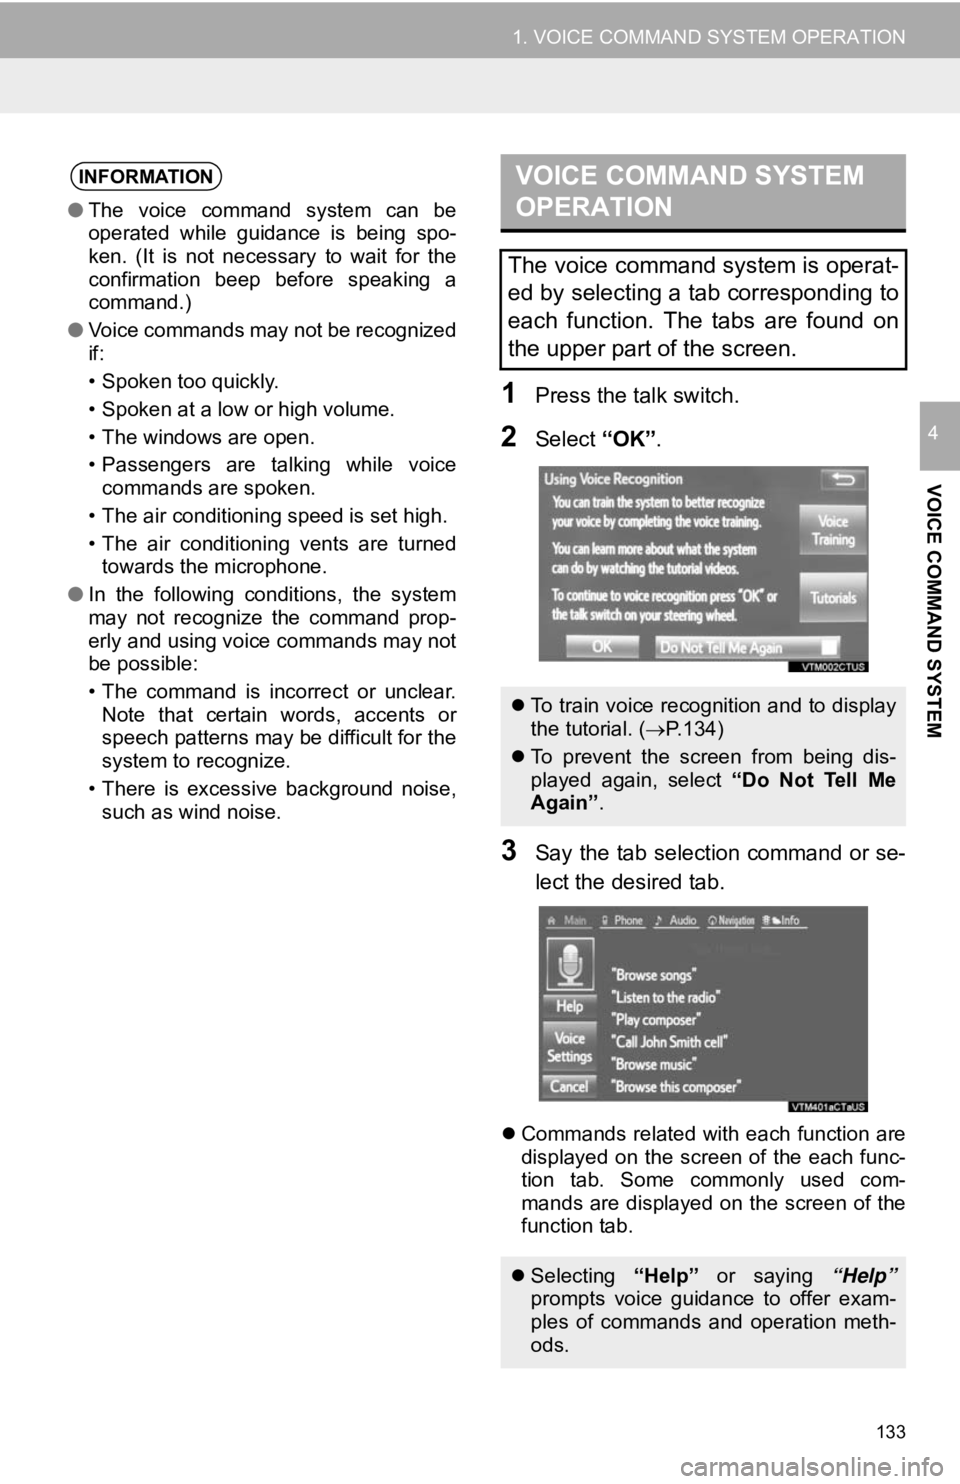
1Press the talk switch.
2Select “OK”.
3Say the tab selection command or se-
lect the desired tab.
Commands related with each function are
displayed on the screen of the each func-
tion tab. Some commonly used com-
mands are displayed on the screen of the
function tab.
INFORMATION
● The voice command system can be
operated while guidance is being spo-
ken. (It is not necessary to wait for the
confirmation beep before speaking a
command.)
● Voice commands may not be recognized
if:
• Spoken too quickly.
• Spoken at a low or high volume.
• The windows are open.
• Passengers are talking while voice
commands are spoken.
• The air conditioning speed is set high.
• The air conditioning vents are turned towards the microphone.
● In the following conditions, the system
may not recognize the command prop-
erly and using voice commands may not
be possible:
• The command is incorrect or unclear.
Note that certain words, accents or
speech patterns may be difficult for the
system to recognize.
• There is excessive background noise, such as wind noise.
VOICE COMMAND SYSTEM
OPERATION
The voice command system is operat-
ed by selecting a tab corresponding to
each function. The tabs are found on
the upper part of the screen.
To train voice recognition and to display
the tutorial. ( P.134)
To prevent the screen from being dis-
played again, select “Do Not Tell Me
Again” .
Selecting “Help” or saying “Help”
prompts voice guidance to offer exam-
ples of commands and operation meth-
ods.
Page 134 of 294
134
1. VOICE COMMAND SYSTEM OPERATION
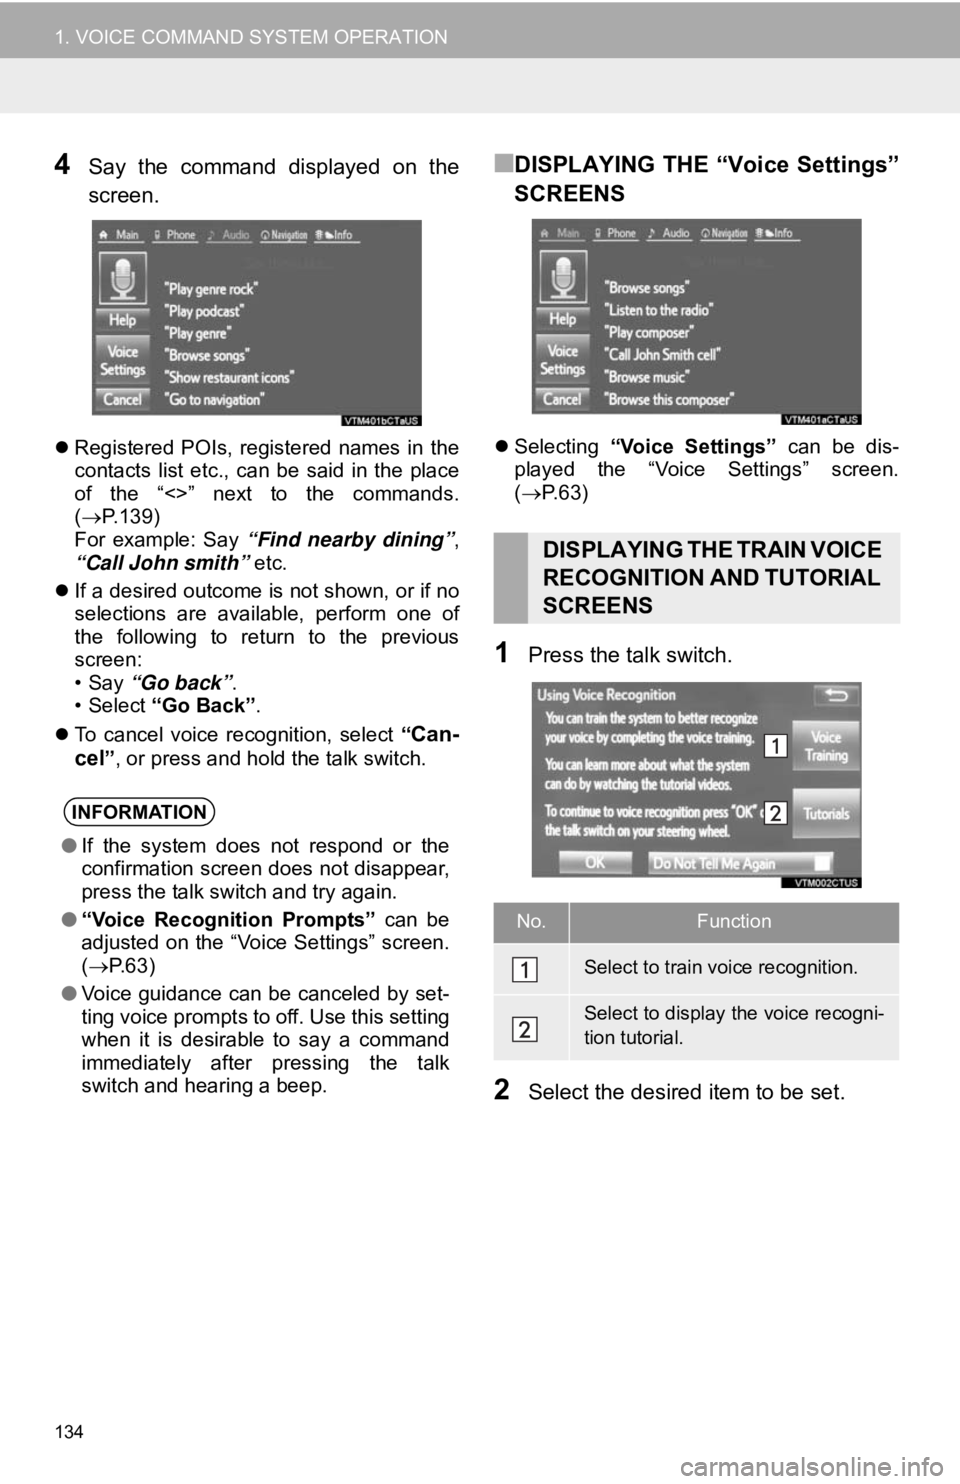
4Say the command displayed on the
screen.
Registered POIs, registered names in the
contacts list etc., can be said in the place
of the “<>” next to the commands.
( P.139)
For example: Say “Find nearby dining” ,
“Call John smith” etc.
If a desired outcome is not shown, or if no
selections are available, perform one of
the following to return to the previous
screen:
•Say “Go back” .
•Select “Go Back” .
To cancel voice recognition, select “
Can-
cel” , or press and hold the talk switch.
■DISPLAYING THE “Voice Settings”
SCREENS
Selecting “Voice Settings” can be dis-
played the “Voice Settings” screen.
( P. 6 3 )
1Press the talk switch.
2Select the desired item to be set.
INFORMATION
●If the system does not respond or the
confirmation screen does not disappear,
press the talk switch and try again.
● “Voice Recognition Prompts” can be
adjusted on the “Voice Settings” screen.
( P.63)
● Voice guidance can be canceled by set-
ting voice prompts to off. Use this setting
when it is desirable to say a command
immediately after pressing the talk
switch and hearing a beep.
D I S P L A Y I N G T H E T R A I N V O I C E
RECOGNITION AND TUTORIAL
SCREENS
No.Function
Select to train voice recognition.
Select to display the voice recogni-
tion tutorial.