tow TOYOTA VENZA 2013 Accessories, Audio & Navigation (in English)
[x] Cancel search | Manufacturer: TOYOTA, Model Year: 2013, Model line: VENZA, Model: TOYOTA VENZA 2013Pages: 48, PDF Size: 3.27 MB
Page 11 of 48
128-8673b
11 of 48
- 1 -
QUICK START GUIDEOperating the DVD SystemThe Seat Top DVD System can be operated using the touch
screen or the Remote Control.
1. Apply power to the Seat Top DVD Rear Seat Entertainment
System by placing the vehicle in the ACC or ON mode using
the power (ignition) switch.
2. Turn on the passenger side monitor (M1) using the Power
button on the top of the monitor or on the Remote
Control*.
3. Insert a DVD, CD or MP3 disc into the disc slot (disc label
towards viewer).
4. The disc will start playing.
5. Tilt the monitor to a comfortable viewing position.
6. When the DVD menu appears, touch the menu item on the
screen or select the menu item using the Remote Control.
Use the cursor keys to highlight a menu item and press the
ENTER or PLAY button on the Remote Control.
7. Each wireless headphone has a channel select switch. When
sitting in front of the passenger side monitor (M1), use the
“1” switch setting. When sitting in front of the driver side
monitor (M2), use the “2” switch setting. Set the headphone
to the proper channel and press the Power On/Off button.
The power indicator will light up red. Turn the volume down
to its lowest setting before putting the headphones on your
head. Increase the volume to a comfortable listening level.8. If audio playback through the vehicle radio is preferred, set
the radio to AUX mode. Verify that nothing is connected
to the radio’s AUX jack. The passenger side monitor (M1)
provides audio to the vehicle radio.
Note: If there is a device plugged into the radio’s AUX jack, it
will override the DVD audio.
9. Turn on the driver side monitor (M2) using the power button
on the top of the monitor or on the Remote Control*.
10. Tilt the monitor to a comfortable viewing position.
11. Select M1 using the touch screen or the SOURCE button on
the Remote Control to view program material playing on the
passenger side monitor, or select from the other available
sources: DVD for the M2 Monitor or AUX.
*Note: To operate the passenger side monitor with the
Remote Control, press the M1 button on the Remote
Control. To operate the driver side monitor, press the
M2 button on the Remote Control.
Page 12 of 48
128-8673b
12 of 48
- 2 -
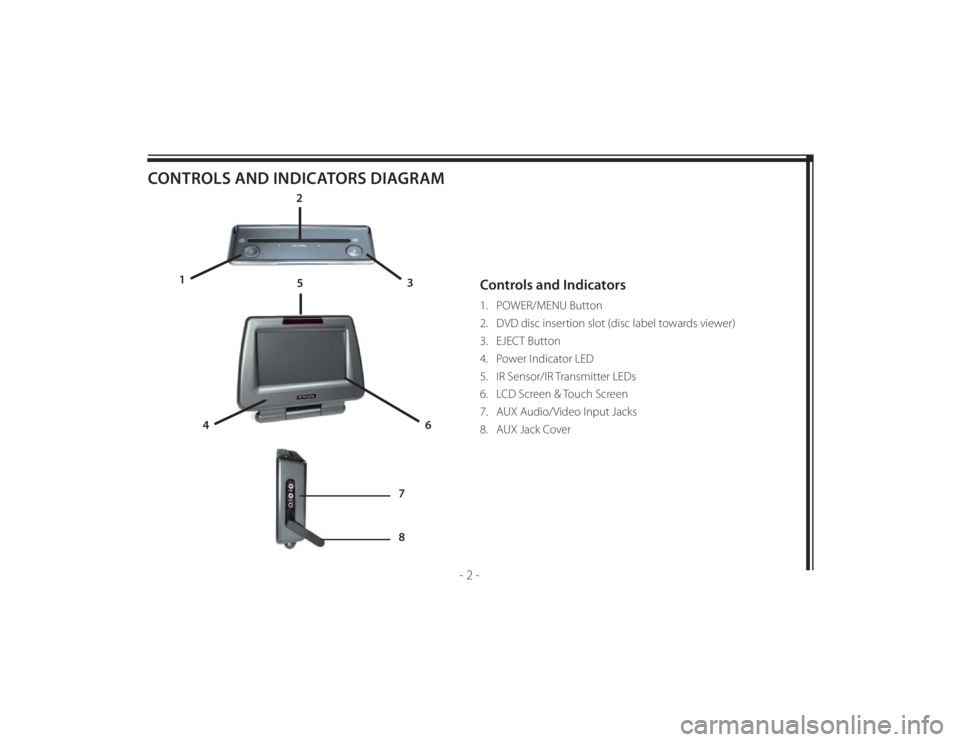
CONTROLS AND INDICATORS DIAGRAM
Controls and Indicators1. POWER/MENU Button
2. DVD disc insertion slot (disc label towards viewer)
3. EJECT Button
4. Power Indicator LED
5. IR Sensor/IR Transmitter LEDs
6. LCD Screen & Touch Screen
7. AUX Audio/Video Input Jacks
8. AUX Jack Cover
2
3 1
4
6
5
7
8
Page 22 of 48
128-8673b
22 of 48
- 12 -
OPERATION INSTRUCTIONS
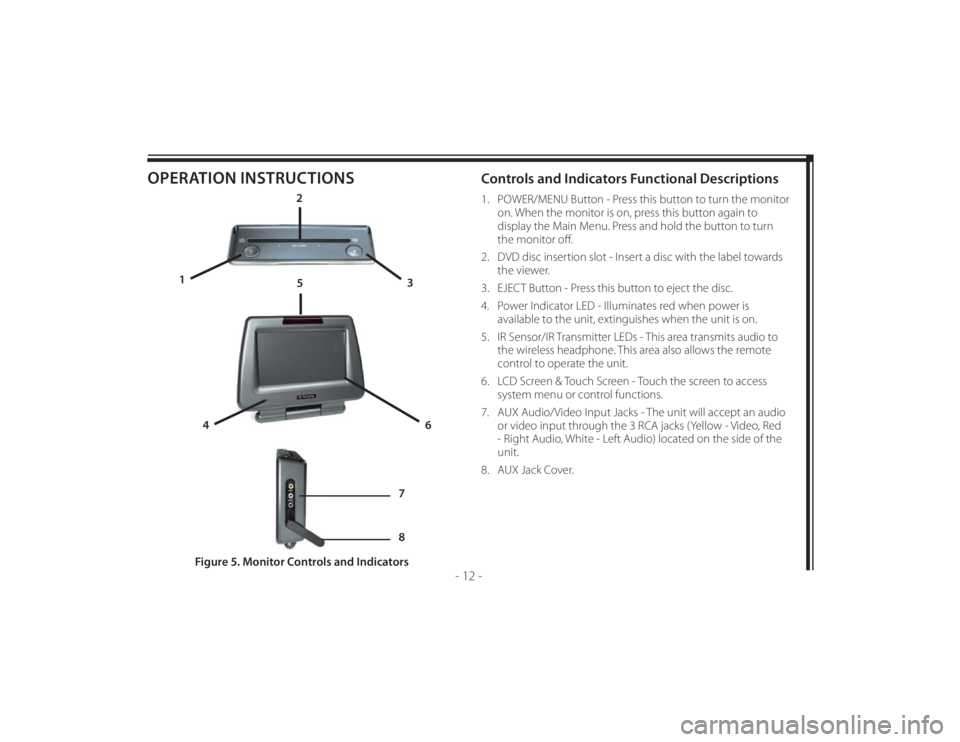
Controls and Indicators Functional Descriptions 1. POWER/MENU Button - Press this button to turn the monitor
on. When the monitor is on, press this button again to
display the Main Menu. Press and hold the button to turn
the monitor off .
2. DVD disc insertion slot - Insert a disc with the label towards
the viewer.
3. EJECT Button - Press this button to eject the disc.
4. Power Indicator LED - Illuminates red when power is
available to the unit, extinguishes when the unit is on.
5. IR Sensor/IR Transmitter LEDs - This area transmits audio to
the wireless headphone. This area also allows the remote
control to operate the unit.
6. LCD Screen & Touch Screen - Touch the screen to access
system menu or control functions.
7. AUX Audio/Video Input Jacks - The unit will accept an audio
or video input through the 3 RCA jacks (Yellow - Video, Red
- Right Audio, White - Left Audio) located on the side of the
unit.
8. AUX Jack Cover.
Figure 5. Monitor Controls and Indicators
2
3 1
4
6
5
7
8
Page 25 of 48
128-8673b
25 of 48
- 15 -
LOADING AND PLAYING DVD DISCSTo Load and Play a Disc1. Apply power to the Seat Top DVD Rear Seat Entertainment
System by placing the vehicle in the ACC or ON mode using
the power (ignition) switch.
2. Press the Power button to turn the unit ON, select DVD
mode and insert the disc (label towards viewer) into the disc
insertion slot.
3. When the disc displays the DVD menu, touch “Play” or “Play
Movie” on the touch screen or press PLAY on the Remote
Control.
4. If touching “Play” on the touch screen does not start the
movie playing, touch a corner on the touch screen to bring
up the DVD Navigation Menu screen.
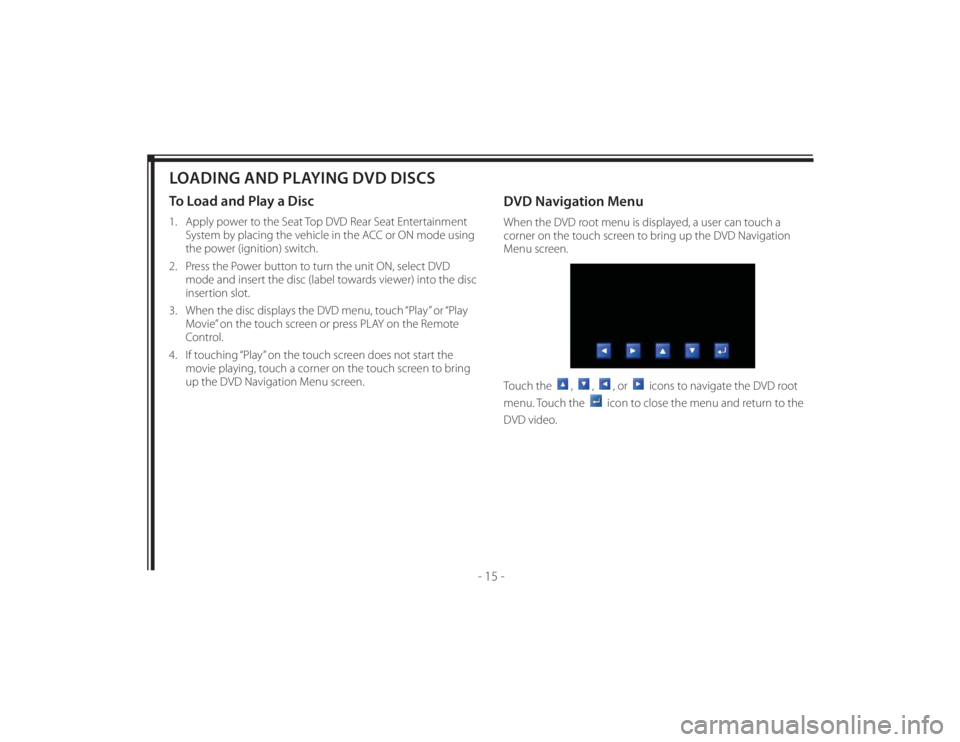
DVD Navigation MenuWhen the DVD root menu is displayed, a user can touch a
corner on the touch screen to bring up the DVD Navigation
Menu screen.
Touch the
,
,
, or
icons to navigate the DVD root
menu. Touch the
icon to close the menu and return to the
DVD video.
Page 40 of 48
128-8673b
40 of 48
- 30 -
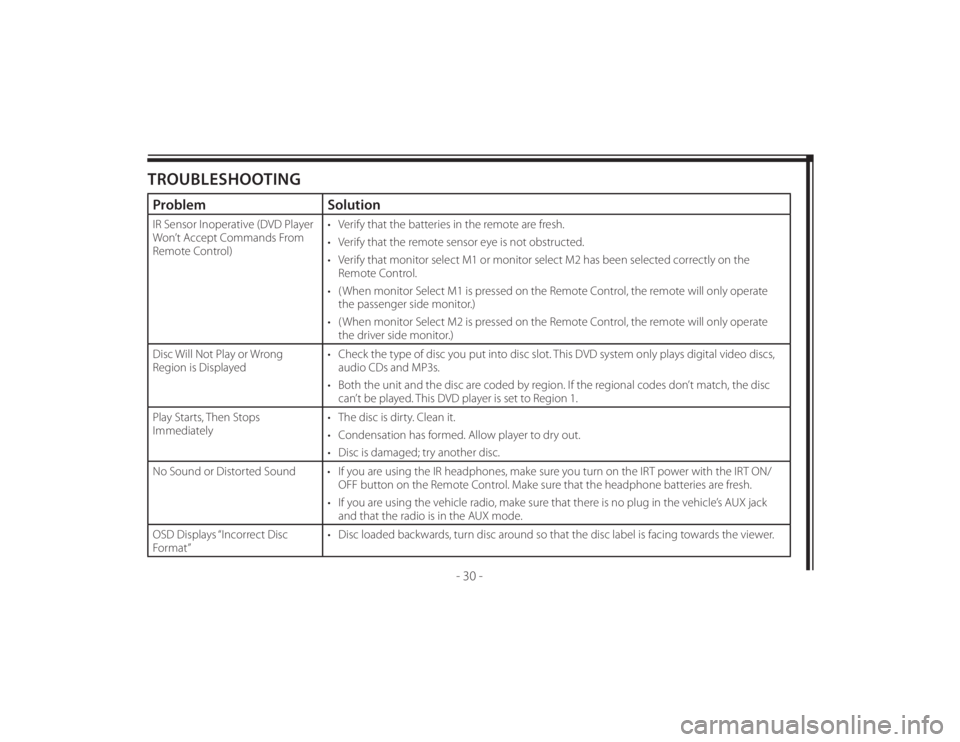
TROUBLESHOOTINGProblem SolutionIR Sensor Inoperative (DVD Player
Won’t Accept Commands From
Remote Control)• Verify that the batteries in the remote are fresh.
• Verify that the remote sensor eye is not obstructed.
• Verify that monitor select M1 or monitor select M2 has been selected correctly on the
Remote Control.
• ( When monitor Select M1 is pressed on the Remote Control, the remote will only operate
the passenger side monitor.)
• ( When monitor Select M2 is pressed on the Remote Control, the remote will only operate
the driver side monitor.)
Disc Will Not Play or Wrong
Region is Displayed• Check the type of disc you put into disc slot. This DVD system only plays digital video discs,
audio CDs and MP3s.
• Both the unit and the disc are coded by region. If the regional codes don’t match, the disc
can’t be played. This DVD player is set to Region 1.
Play Starts, Then Stops
Immediately• The disc is dirty. Clean it.
• Condensation has formed. Allow player to dry out.
• Disc is damaged; try another disc.
No Sound or Distorted Sound • If you are using the IR headphones, make sure you turn on the IRT power with the IRT ON/
OFF button on the Remote Control. Make sure that the headphone batteries are fresh.
• If you are using the vehicle radio, make sure that there is no plug in the vehicle’s AUX jack
and that the radio is in the AUX mode.
OSD Displays “Incorrect Disc
Format”• Disc loaded backwards, turn disc around so that the disc label is facing towards the viewer.