change time TOYOTA xB 2008 Accessories, Audio & Navigation (in English)
[x] Cancel search | Manufacturer: TOYOTA, Model Year: 2008, Model line: xB, Model: TOYOTA xB 2008Pages: 32, PDF Size: 0.33 MB
Page 4 of 32
128-7907A
4 of 32
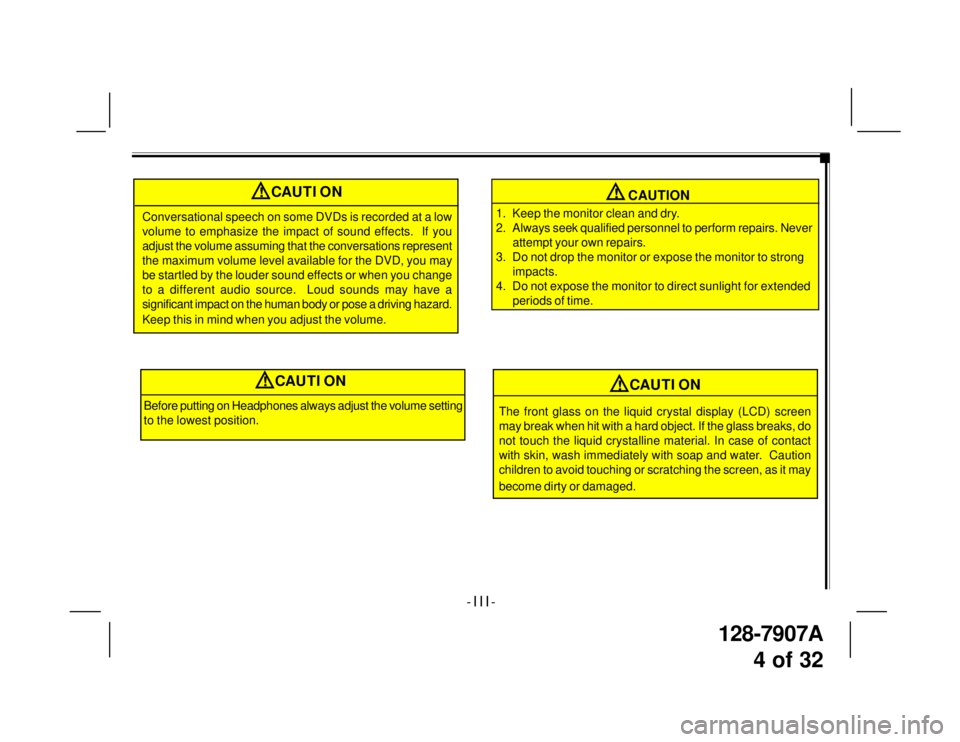
CAUTION
1. Keep the monitor clean and dry.
2. Always seek qualified personnel to perform repairs. Never
attempt your own repairs.
3. Do not drop the monitor or expose the monitor to strong
impacts.
4. Do not expose the monitor to direct sunlight for extended
periods of time.
- I I I -
!CAUTION
Conversational speech on some DVDs is recorded at a low
volume to emphasize the impact of sound effects. If you
adjust the volume assuming that the conversations represent
the maximum volume level available for the DVD, you may
be startled by the louder sound effects or when you change
to a different audio source. Loud sounds may have a
significant impact on the human body or pose a driving hazard.
Keep this in mind when you adjust the volume.
!
Before putting on Headphones always adjust the volume setting
to the lowest position.
!CAUTION
The front glass on the liquid crystal display (LCD) screen
may break when hit with a hard object. If the glass breaks, do
not touch the liquid crystalline material. In case of contact
with skin, wash immediately with soap and water. Caution
children to avoid touching or scratching the screen, as it may
become dirty or damaged.
!CAUTION
Page 12 of 32
128-7907A
12 of 32
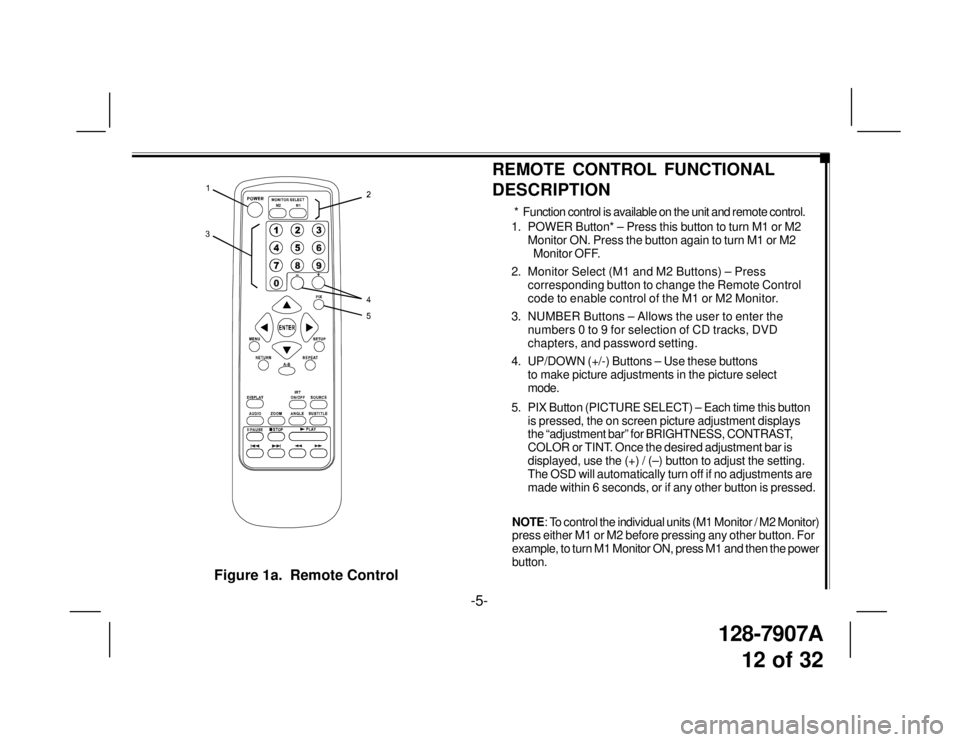
Figure 1a. Remote Control
-5-
1. POWER Button* – Press this button to turn M1 or M2
Monitor ON. Press the button again to turn M1 or M2
Monitor OFF.
2. Monitor Select (M1 and M2 Buttons) – Press
corresponding button to change the Remote Control
code to enable control of the M1 or M2 Monitor.
3. NUMBER Buttons – Allows the user to enter the
numbers 0 to 9 for selection of CD tracks, DVD
chapters, and password setting.
4. UP/DOWN (+/-) Buttons – Use these buttons
to make picture adjustments in the picture select
mode.
5. PIX Button (PICTURE SELECT) – Each time this button
is pressed, the on screen picture adjustment displays
the “adjustment bar” for BRIGHTNESS, CONTRAST,
COLOR or TINT. Once the desired adjustment bar is
displayed, use the (+) / (–) button to adjust the setting.
The OSD will automatically turn off if no adjustments are
made within 6 seconds, or if any other button is pressed.
REMOTE CONTROL FUNCTIONAL
DESCRIPTION
* Function control is available on the unit and remote control.
NOTE: To control the individual units (M1 Monitor / M2 Monitor)
press either M1 or M2 before pressing any other button. For
example, to turn M1 Monitor ON, press M1 and then the power
button.
Page 14 of 32

128-7907A
14 of 32
Figure 1c. Remote Control
12. SOURCE Button* – Press this button to select the
available sources. On the M1 monitor, the sources are
DVD, AV1, & AUX. On the M2 Monitor, the sources are
DVD, AV1, & AUX.
13. SUBTITLE Button – Press to display and select the
subtitle language in DVD mode. Each time you press
the button, the subtitle language changes.
NOTE: The type and number of languages for subtitles vary
from disc to disc.
14. ANGLE Button – Press to display and select different
camera angles in DVD mode. Each time you press the
button, the angle changes.
NOTE: The numbers of angles vary from disc to disc. Not
all discs contain this option.
15. ZOOM Button – Press this button to enlarge the picture
when playing a DVD disc.
Press ZOOM buttonDVD Player Performs
OnceEnlarge the picture 2 times of
the original size
TwiceEnlarge the picture 3 times of
the original size
3 times Enlarge the picture 4 times of
the original size
4 times Picture is returned to original
size
-7-
12
13
15
M1 M2
+–
14
Page 15 of 32
128-7907A
15 of 32
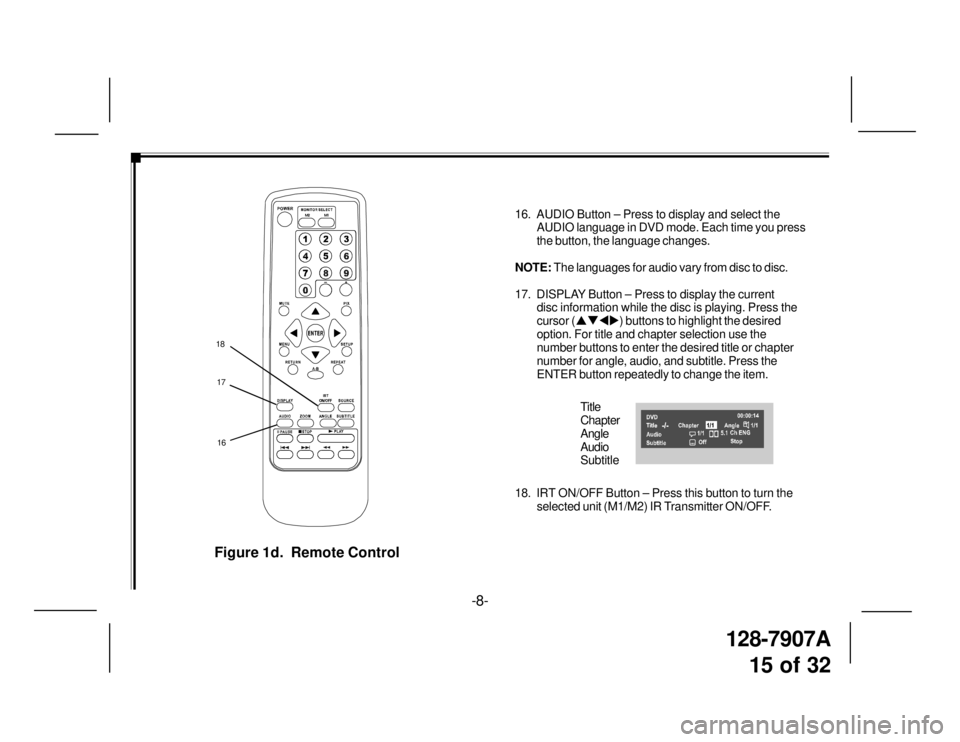
Figure 1d. Remote Control
16. AUDIO Button – Press to display and select the
AUDIO language in DVD mode. Each time you press
the button, the language changes.
NOTE: The languages for audio vary from disc to disc.
17. DISPLAY Button – Press to display the current
disc information while the disc is playing. Press the
cursor (�S�T�W�X) buttons to highlight the desired
option. For title and chapter selection use the
number buttons to enter the desired title or chapter
number for angle, audio, and subtitle. Press the
ENTER button repeatedly to change the item.
Title
Chapter
Angle
Audio
Subtitle
18. IRT ON/OFF Button – Press this button to turn the
selected unit (M1/M2) IR Transmitter ON/OFF.
17 18
M1 M2
+–
16
-8-
Page 16 of 32
128-7907A
16 of 32
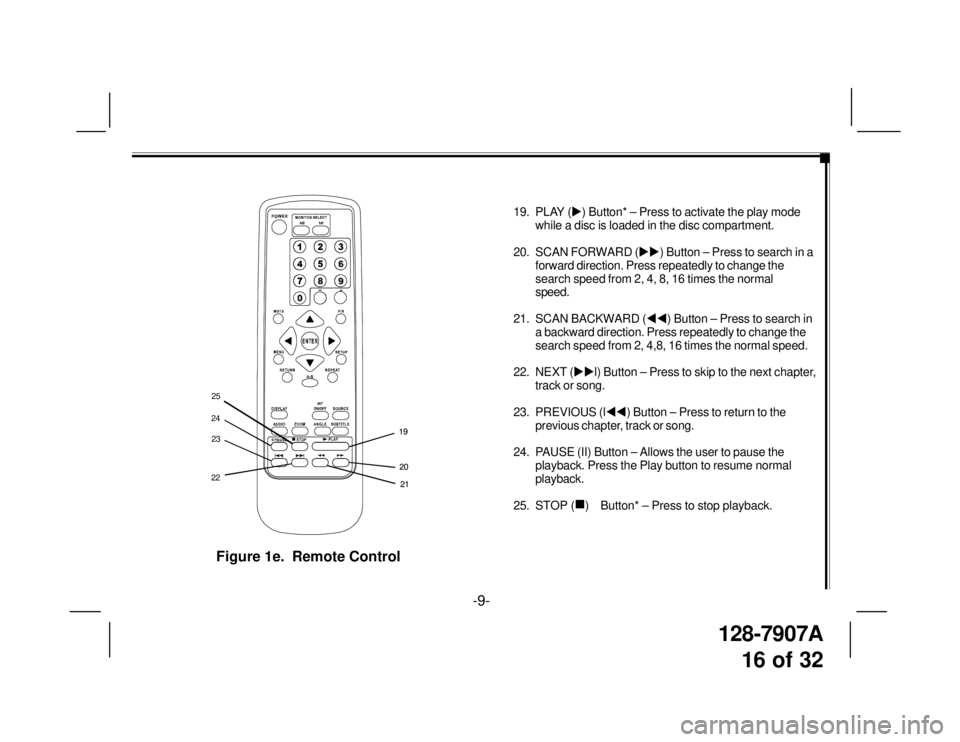
Figure 1e. Remote Control
19. PLAY (�X) Button* – Press to activate the play mode
while a disc is loaded in the disc compartment.
20. SCAN FORWARD (�X�X) Button – Press to search in a
forward direction. Press repeatedly to change the
search speed from 2, 4, 8, 16 times the normal
speed.
21. SCAN BACKWARD (�W�W) Button – Press to search in
a backward direction. Press repeatedly to change the
search speed from 2, 4,8, 16 times the normal speed.
22. NEXT (�X�Xl) Button – Press to skip to the next chapter,
track or song.
23. PREVIOUS (l�W�W) Button – Press to return to the
previous chapter, track or song.
24. PAUSE (II) Button – Allows the user to pause the
playback. Press the Play button to resume normal
playback.
25. STOP (
�„) Button* – Press to stop playback.
-9-
20 19
M1 M2
+–
21 20 19
212223 2425
Page 24 of 32
128-7907A
24 of 32
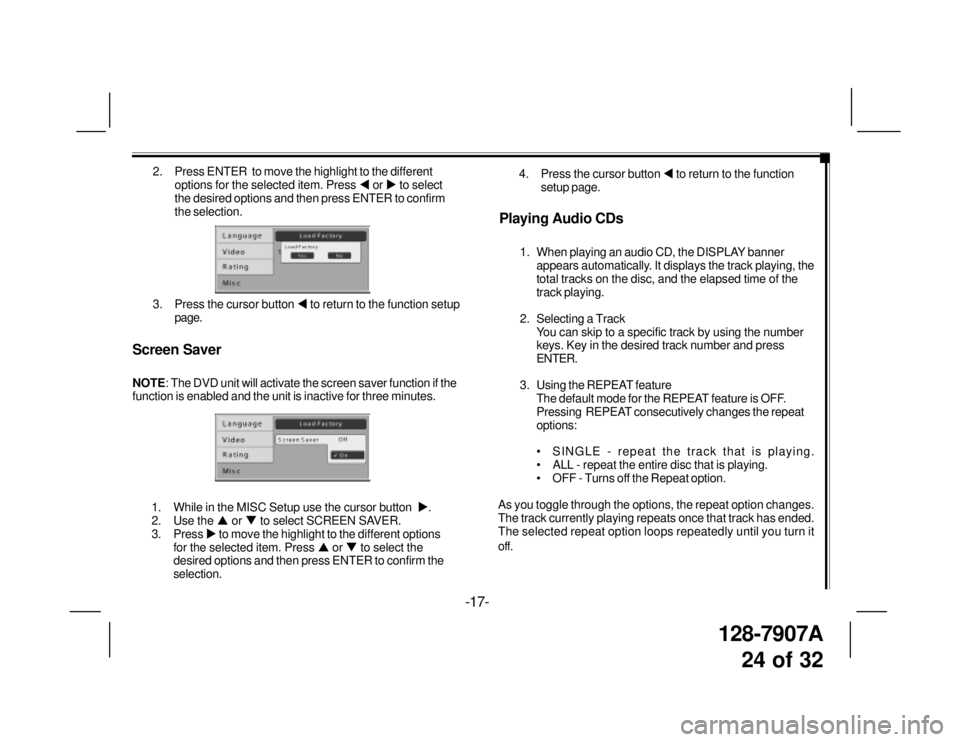
2. Press ENTER to move the highlight to the different
options for the selected item. Press �W or �X to select
the desired options and then press ENTER to confirm
the selection.
3. Press the cursor button �W to return to the function setup
page.
Screen Saver
NOTE: The DVD unit will activate the screen saver function if the
function is enabled and the unit is inactive for three minutes.
-17-
1. While in the MISC Setup use the cursor button �X.
2. Use the �S or �T to select SCREEN SAVER.
3. Press �X to move the highlight to the different options
for the selected item. Press �S or �T to select the
desired options and then press ENTER to confirm the
selection.
Playing Audio CDs
1. When playing an audio CD, the DISPLAY banner
appears automatically. It displays the track playing, the
total tracks on the disc, and the elapsed time of the
track playing.
2. Selecting a Track
You can skip to a specific track by using the number
keys. Key in the desired track number and press
ENTER.
3. Using the REPEAT feature
The default mode for the REPEAT feature is OFF.
Pressing REPEAT consecutively changes the repeat
options:
• SINGLE - repeat the track that is playing.
• ALL - repeat the entire disc that is playing.
• OFF - Turns off the Repeat option.
As you toggle through the options, the repeat option changes.
The track currently playing repeats once that track has ended.
The selected repeat option loops repeatedly until you turn it
off.4. Press the cursor button �W to return to the function
setup page.