key TOYOTA YARIS HATCHBACK 2010 User Guide
[x] Cancel search | Manufacturer: TOYOTA, Model Year: 2010, Model line: YARIS HATCHBACK, Model: TOYOTA YARIS HATCHBACK 2010Pages: 406, PDF Size: 8.14 MB
Page 48 of 406
34 1-2. Opening, closing and locking the doors
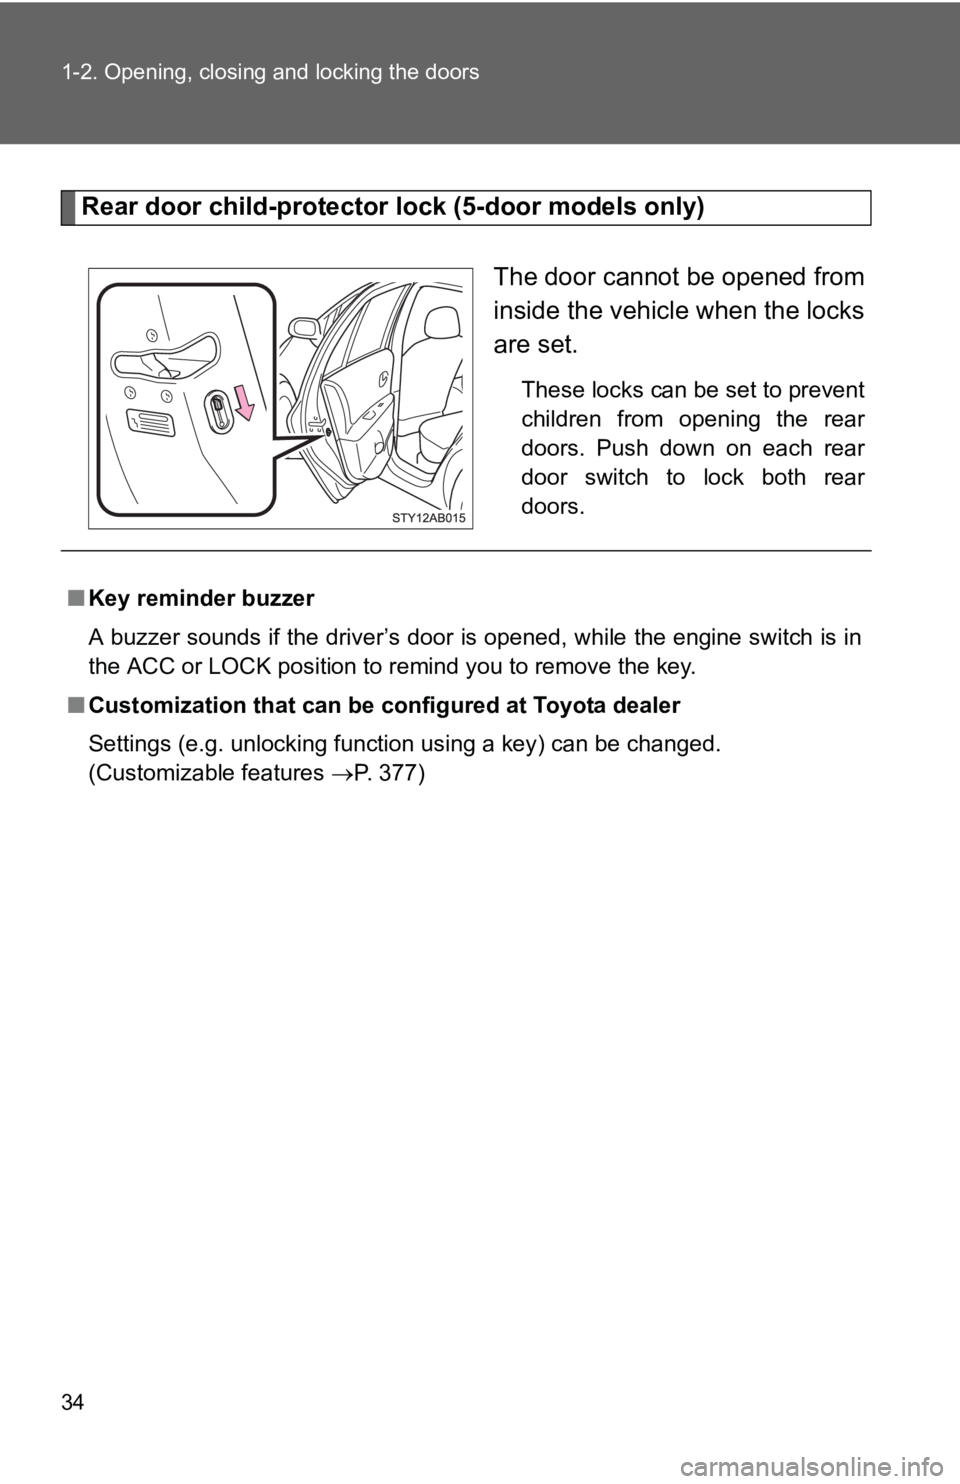
Rear door child-protector lock (5-door models only)The door cannot be opened from
inside the vehicle when the locks
are set.
These locks can be set to prevent
children from opening the rear
doors. Push down on each rear
door switch to lock both rear
doors.
■Key reminder buzzer
A buzzer sounds if the driver’s door is opened, while the engine switch is in
the ACC or LOCK position to remind you to remove the key.
■ Customization that can be co nfigured at Toyota dealer
Settings (e.g. unlocking function using a key) can be changed.
(Customizable features →P. 377)
Page 50 of 406
36
1-2. Opening, closing and locking the doors
Back door
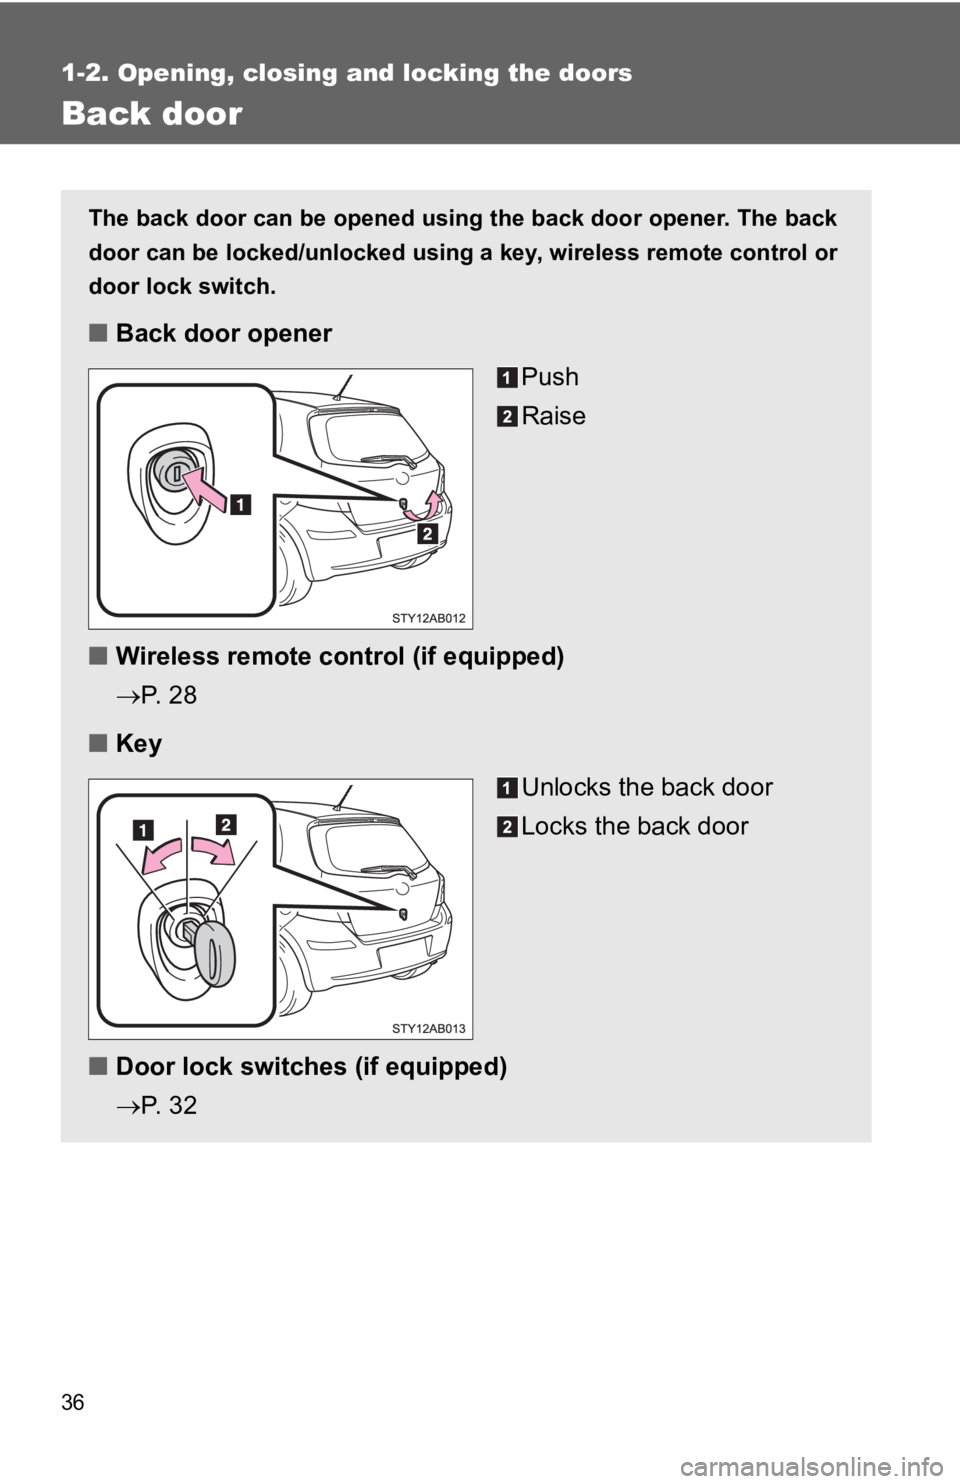
The back door can be opened using the back door opener. The back
door can be locked/unlocked using a key, wireless remote control or
door lock switch.
■ Back door opener
Push
Raise
■ Wireless remote control (if equipped)
→P. 2 8
■ Key
Unlocks the back door
Locks the back door
■ Door lock switches (if equipped)
→P. 3 2
Page 59 of 406
45
1-3. Adjustable components (s
eats, mirrors, steering wheel)
1
Before driving
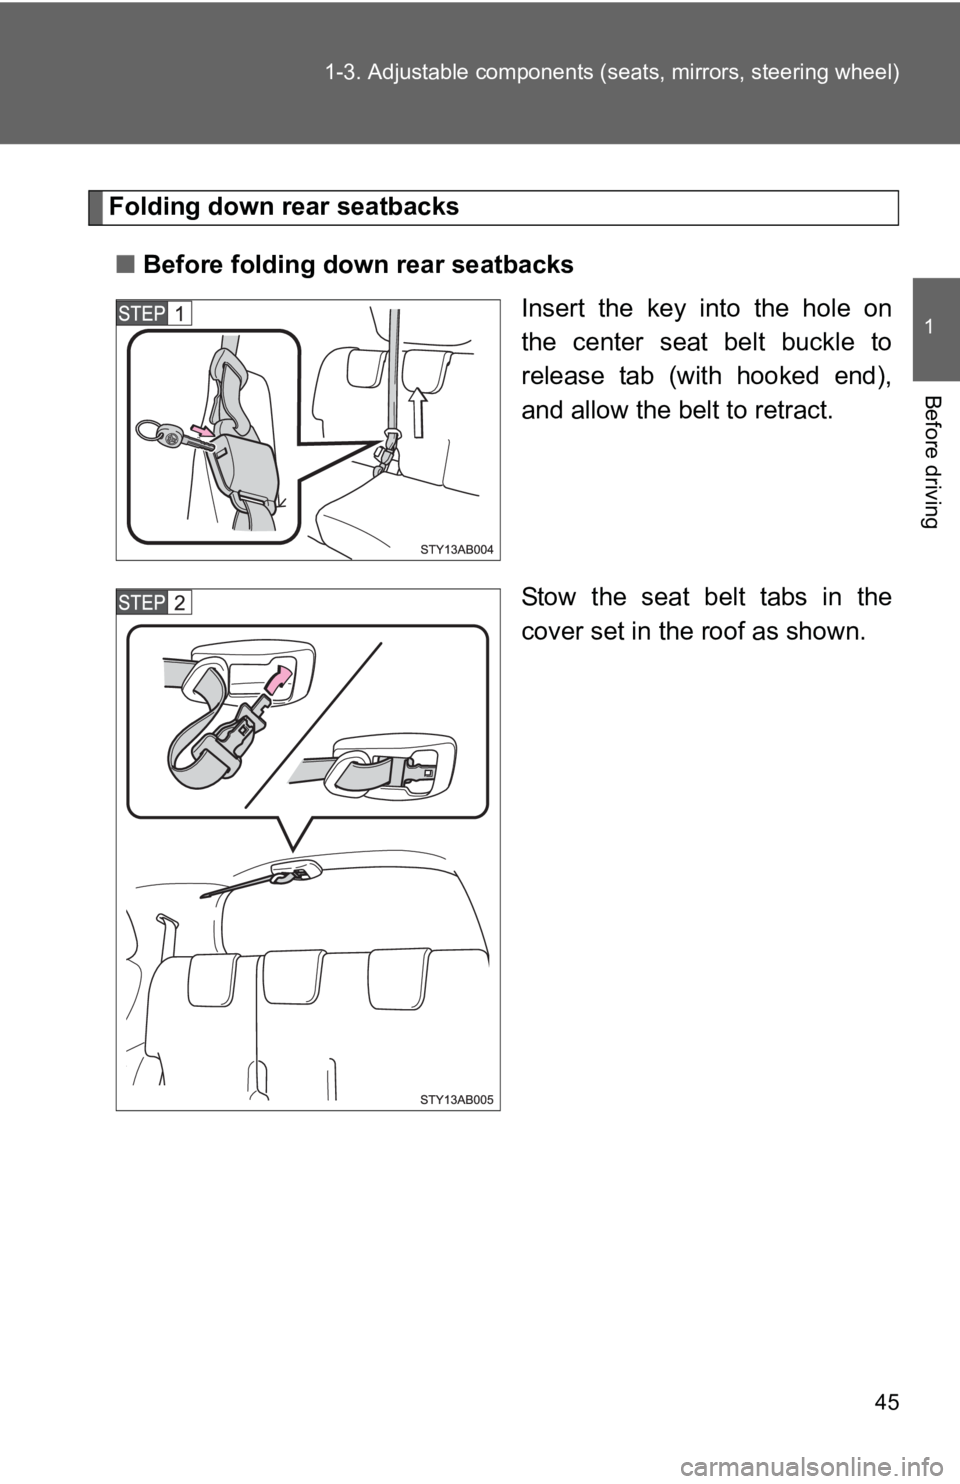
Folding down rear seatbacks
■ Before folding down rear seatbacks
Insert the key into the hole on
the center seat belt buckle to
release tab (with hooked end),
and allow the belt to retract.
Stow the seat belt tabs in the
cover set in the roof as shown.
Page 72 of 406
58 1-3. Adjustable components (seats, mirrors, steering wheel)
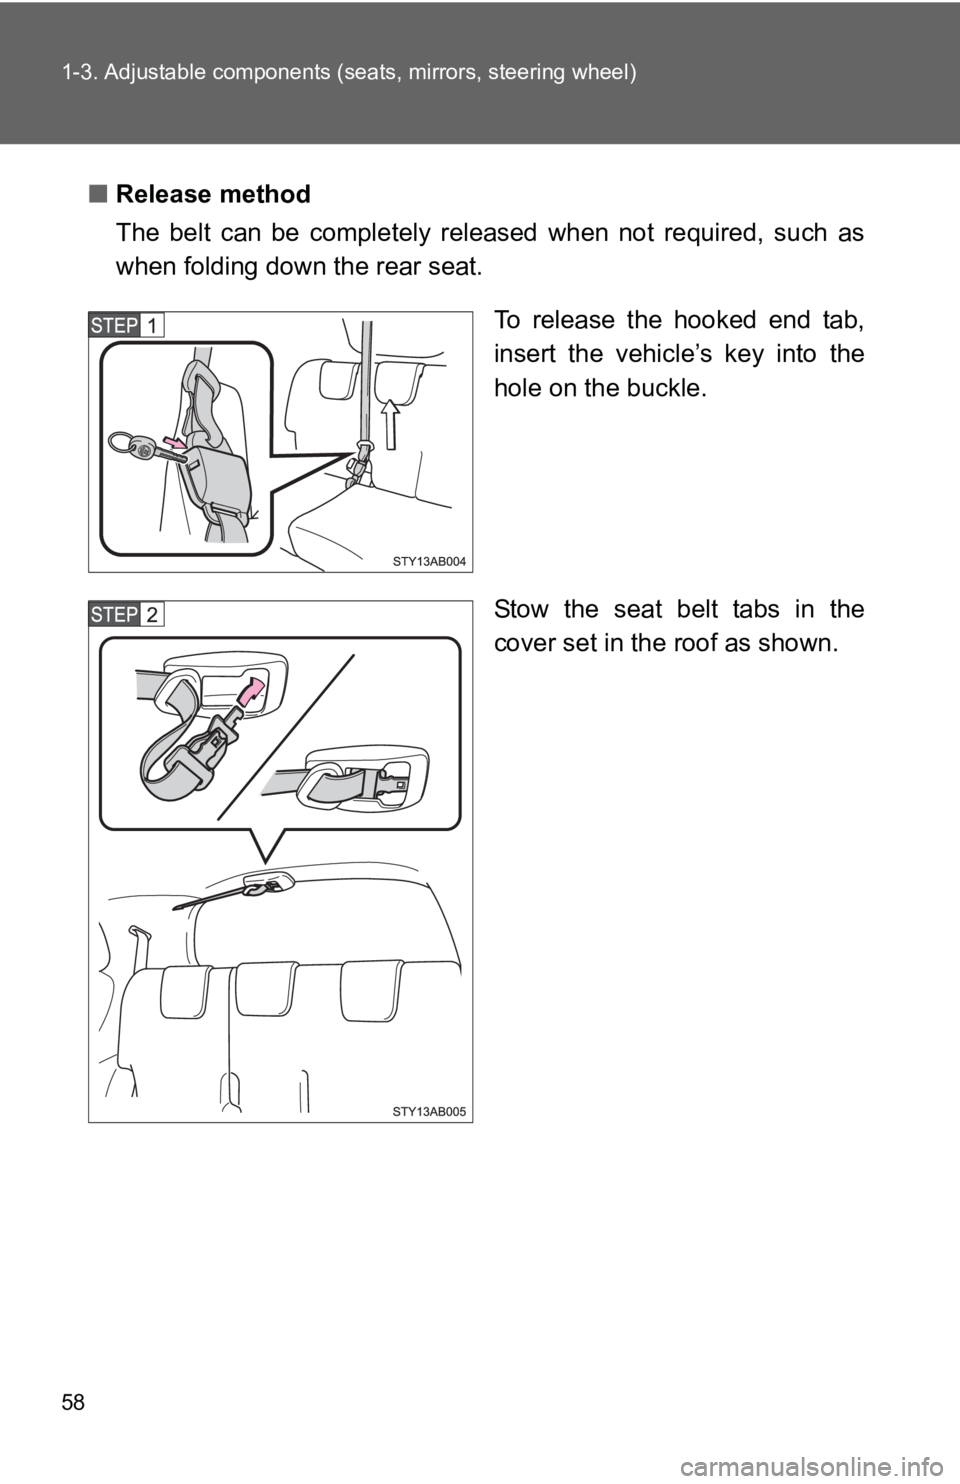
■Release method
The belt can be completely released when not required, such as
when folding down the rear seat.
To release the hooked end tab,
insert the vehicle’s key into the
hole on the buckle.
Stow the seat belt tabs in the
cover set in the roof as shown.
Page 92 of 406
78
1-6. Theft deterrent system
Engine immobilizer system∗
∗: If equipped
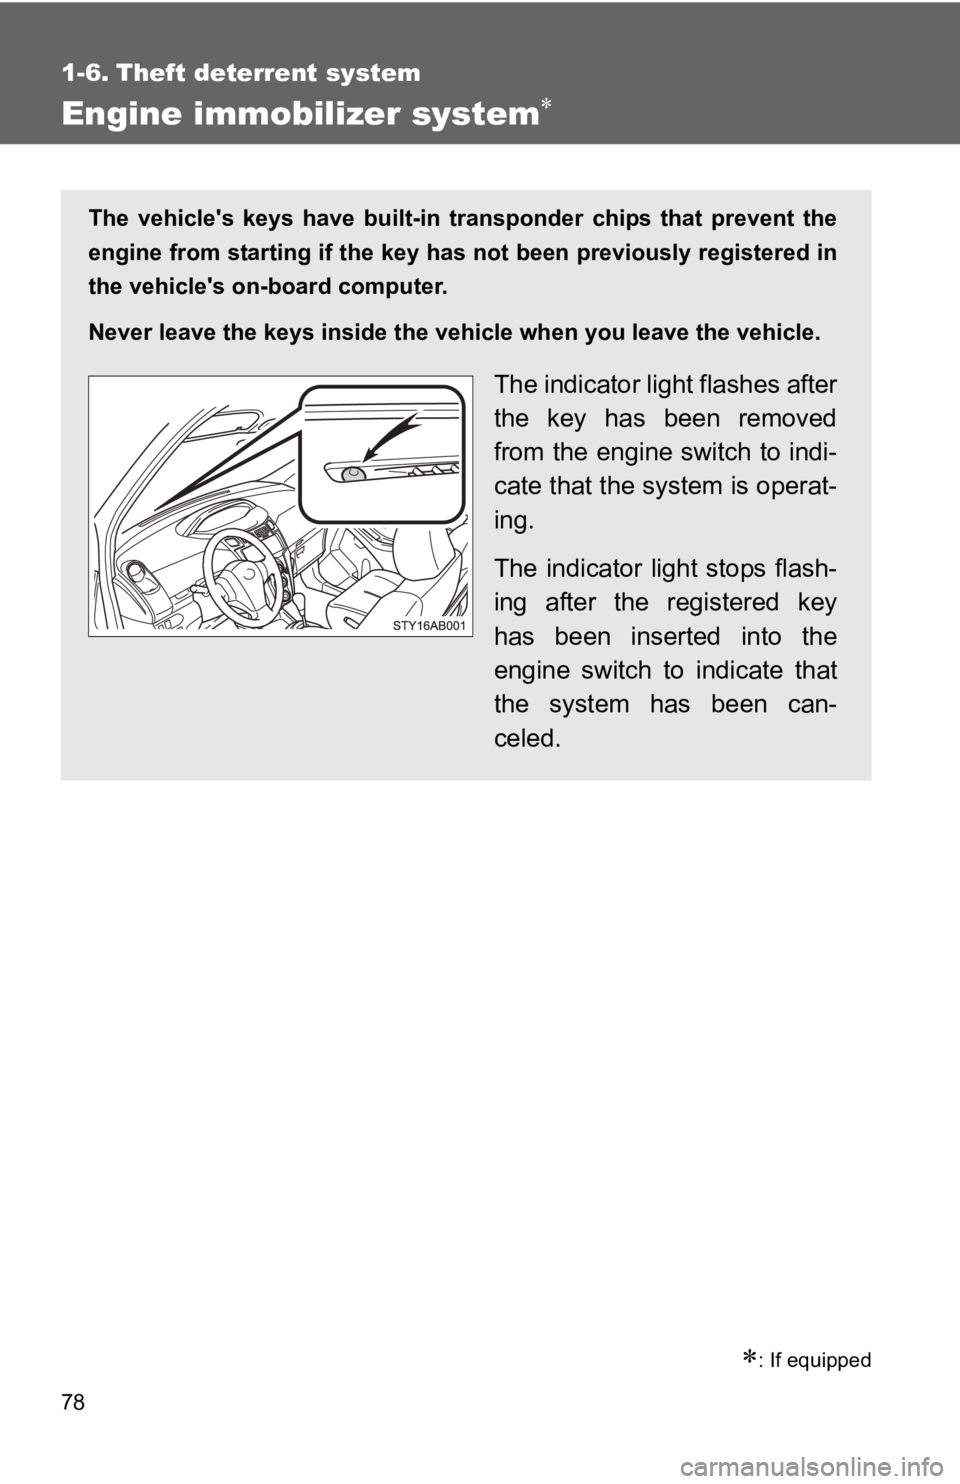
The vehicle's keys have built-in transponder chips that prevent the
engine from starting if the key has not been previously registered in
the vehicle's on-board computer.
Never leave the keys inside the vehicle when you leave the vehicle.
The indicator light flashes after
the key has been removed
from the engine switch to indi-
cate that the system is operat-
ing.
The indicator light stops flash-
ing after the registered key
has been inserted into the
engine switch to indicate that
the system has been can-
celed.
Page 93 of 406
![TOYOTA YARIS HATCHBACK 2010 User Guide 79
1-6. Theft deterrent system
1
Before driving
]
■
System maintenance
The vehicle has a maintenance-free type engine immobilizer system.
■ Conditions that may cause the system to malfunction
● TOYOTA YARIS HATCHBACK 2010 User Guide 79
1-6. Theft deterrent system
1
Before driving
]
■
System maintenance
The vehicle has a maintenance-free type engine immobilizer system.
■ Conditions that may cause the system to malfunction
●](/img/14/59277/w960_59277-92.png)
79
1-6. Theft deterrent system
1
Before driving
]
■
System maintenance
The vehicle has a maintenance-free type engine immobilizer system.
■ Conditions that may cause the system to malfunction
● If the key is in contact with a metallic object
● If the key is in close proximity to or touching a key to the security system
(key with a built-in transponder chip) of another vehicle
■ Certifications for the engine immobilizer system
For vehicles sold in U.S.A.
FCC ID: MOZRI-20BTY
This device complies with Part 15 of the FCC Rules. Operation is subject to
the following two conditions: (1) This device may not cause harmful interfer-
ence, and (2) this device must accept any interference received, including
interference that may cause undesired operation.
FCC WARNING:
Changes or modifications not expressly approved by the party responsible
for compliance could void the user’s authority to operate the equipment. For vehicles sold in Canada
This device complies with RSS-210 of Industry Canada. Operation is subject
to the following two conditions: (1) This device may not cause interference,
and (2) this device must accept any interference, including interference that
may cause undesired operation of the device.
NOTICE
■ To ensure the system operates correctly
Do not modify or remove the system. If modified or removed, the proper
operation of the system cannot be guaranteed.
Page 94 of 406
80
1-6. Theft deterrent system
Alarm (Puerto Rico)
The system sounds the alarm and flashes lights when forcible entry
is detected.
■ Triggering of the alarm
The alarm is triggered in the following situations.
●A locked door is unlocked or opened in any way other than
using the key.
● The hood is opened while t he vehicle is locked.
■ Setting the alarm system
Close the doors and
hood, and lock all
doors using the key.
Use the key to lock the
last door. When the back
door is the last, turn the
key to the unlock posi-
tion and then turn to the
door lock position.
The system will be set
automatically after 30
seconds.
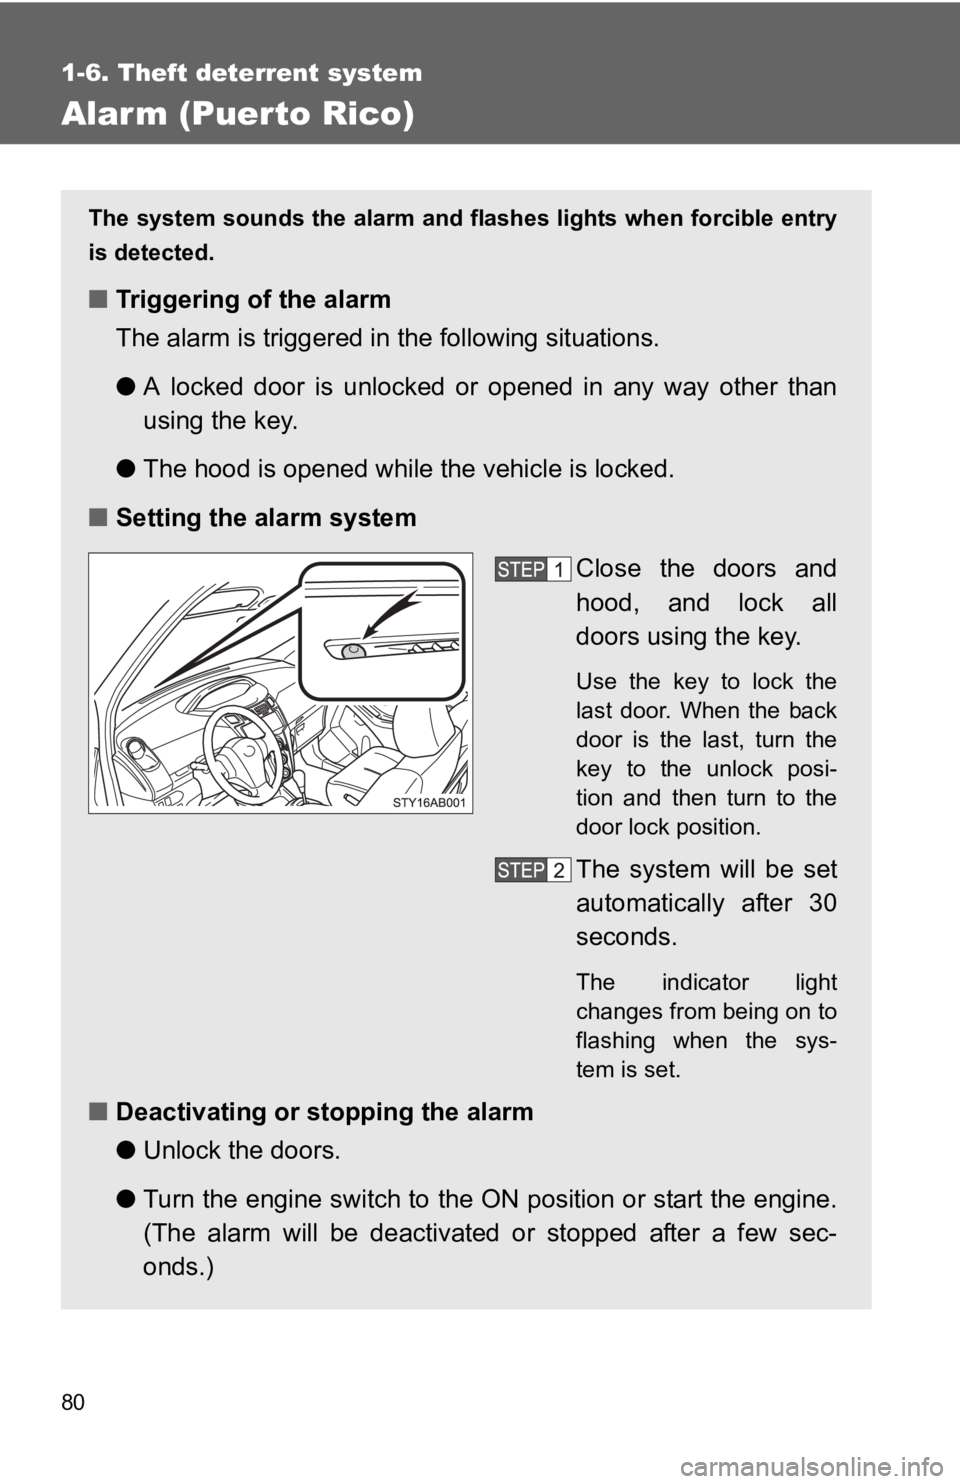
The indicator light
changes from being on to
flashing when the sys-
tem is set.
■Deactivating or stopping the alarm
●Unlock the doors.
● Turn the engine switch to the ON position or start the engine.
(The alarm will be deactivated or stopped after a few sec-
onds.)
Page 95 of 406

81
1-6. Theft deterrent system
1
Before driving
■
System maintenance
The vehicle has a maintenance-free type alarm system.
■ Items to check before locking the vehicle
To prevent unexpected triggering of the alarm and vehicle theft, make sure
of the following.
●Nobody is in the vehicle.
● The windows are closed before the alarm is set.
● No valuables or other personal items are left in the vehicle.
■ Triggering of the alarm
The alarm may be triggered in the following situations.
(Stopping the alarm deactivates the system.)
●A person inside the vehicle opens a door or hood.
● The battery is recharged or replaced when the vehicle is locked.
■ When the battery is disconnected
Be sure to cancel the alarm system.
If the battery is disconnected before canceling the alarm, the system may be
triggered when the battery is reconnected.
■ Alarm-operated door lock
●When the alarm is operating, the doors are locked automatically to pre-
vent intruders.
● Do not leave the key inside the vehicle when the alarm is operating, and
make sure the key is not inside the vehicle when recharging or replacing
the battery.
NOTICE
■To ensure the system operates correctly
Do not modify or remove the system. If modified or removed, the proper
operation of the system cannot be guaranteed.
Page 134 of 406
121
2-1. Driving procedures
2
When driving
Starting on a steep uphill
Automatic transmission With the brake pedal depressed, firmly set the parking brake
and shift the shift lever to D.
Gently depress the accelerator pedal.
Release the parking brake.
■Parking the vehicle
Automatic transmission
With the shift lever in D, depress the brake pedal.
Set the parking brake. ( →P. 136)
Shift the shift lever to P. ( →P. 132)
When parking on a hill, if necessary, block the wheels.
Turn the engine switch off to stop the engine.
Lock the door, making sure that you have the key on your
person.
Manual transmission
With the clutch pedal fully depressed, depress the brake
pedal.
Set the parking brake. ( →P. 136)
Shift the shift lever to N. ( →P. 134)
When parking on a hill, shift the shift lever to 1 or R. If necessary,
block the wheels.
Turn the engine switch off to stop the engine.
Lock the door, making sure that you have the key on your
person.
Page 142 of 406
129
2-1. Driving procedures
2
When driving
Engine (ignition) switch
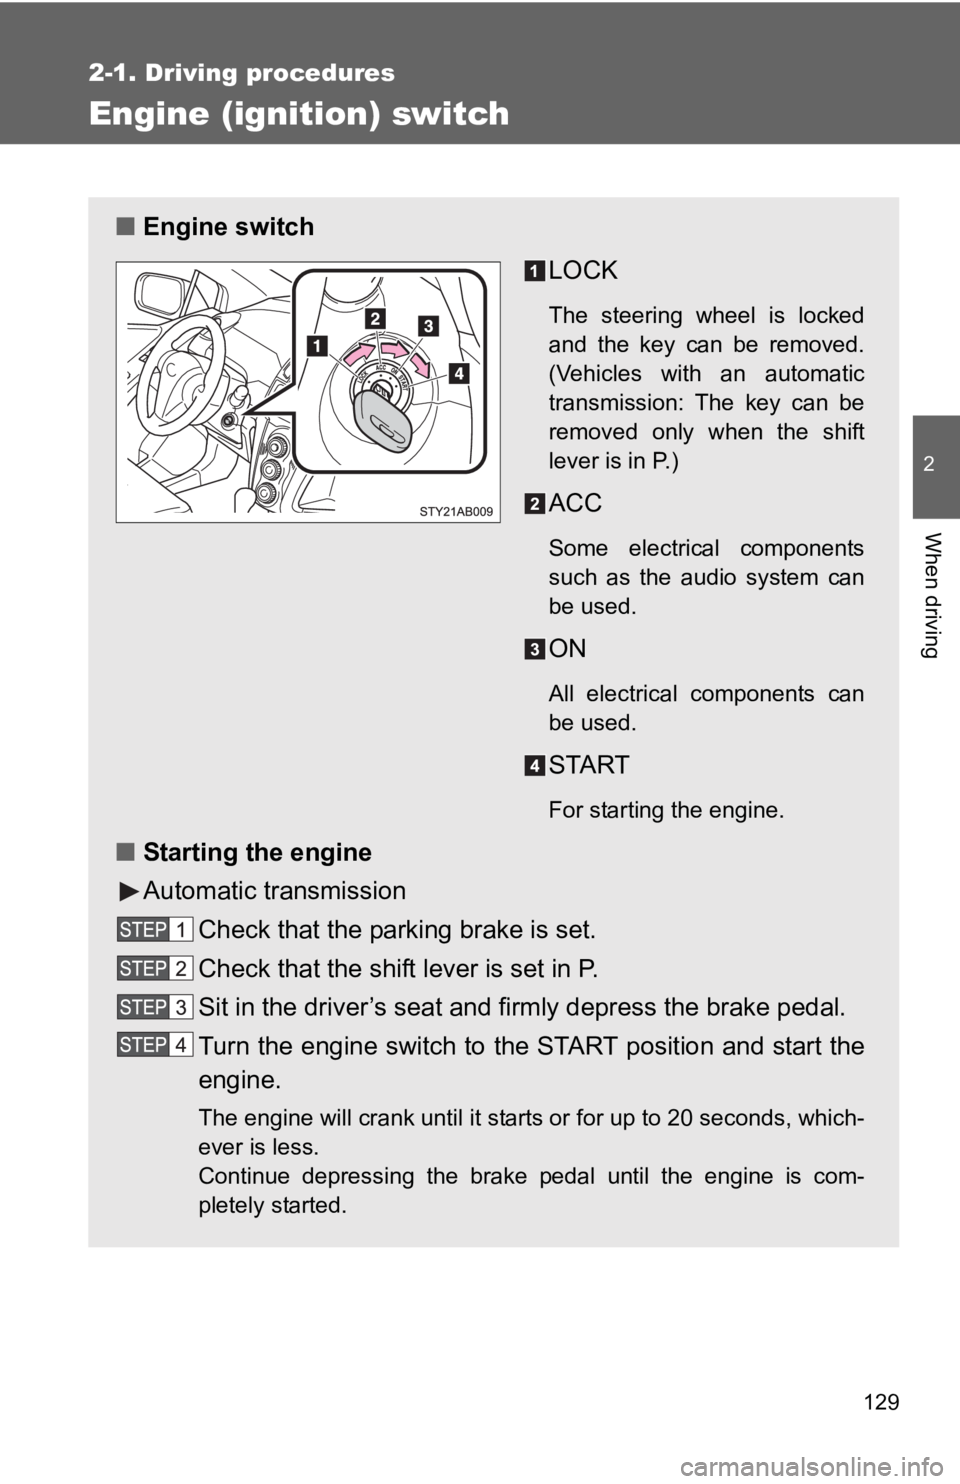
■Engine switch
LOCK
The steering wheel is locked
and the key can be removed.
(Vehicles with an automatic
transmission: The key can be
removed only when the shift
lever is in P.)
ACC
Some electrical components
such as the audio system can
be used.
ON
All electrical components can
be used.
START
For starting the engine.
■Starting the engine
Automatic transmission
Check that the parking brake is set.
Check that the shift lever is set in P.
Sit in the driver’s seat and firmly depress the brake pedal.
Turn the engine switch to the START position and start the
engine.
The engine will crank until it starts or for up to 20 seconds, which-
ever is less.
Continue depressing the brake pedal until the engine is com-
pletely started.