fuel cap TOYOTA YARIS HATCHBACK 2018 Owners Manual
[x] Cancel search | Manufacturer: TOYOTA, Model Year: 2018, Model line: YARIS HATCHBACK, Model: TOYOTA YARIS HATCHBACK 2018Pages: 520, PDF Size: 8.69 MB
Page 3 of 520
3
1
4 3
2
9
8
7 5
10
6
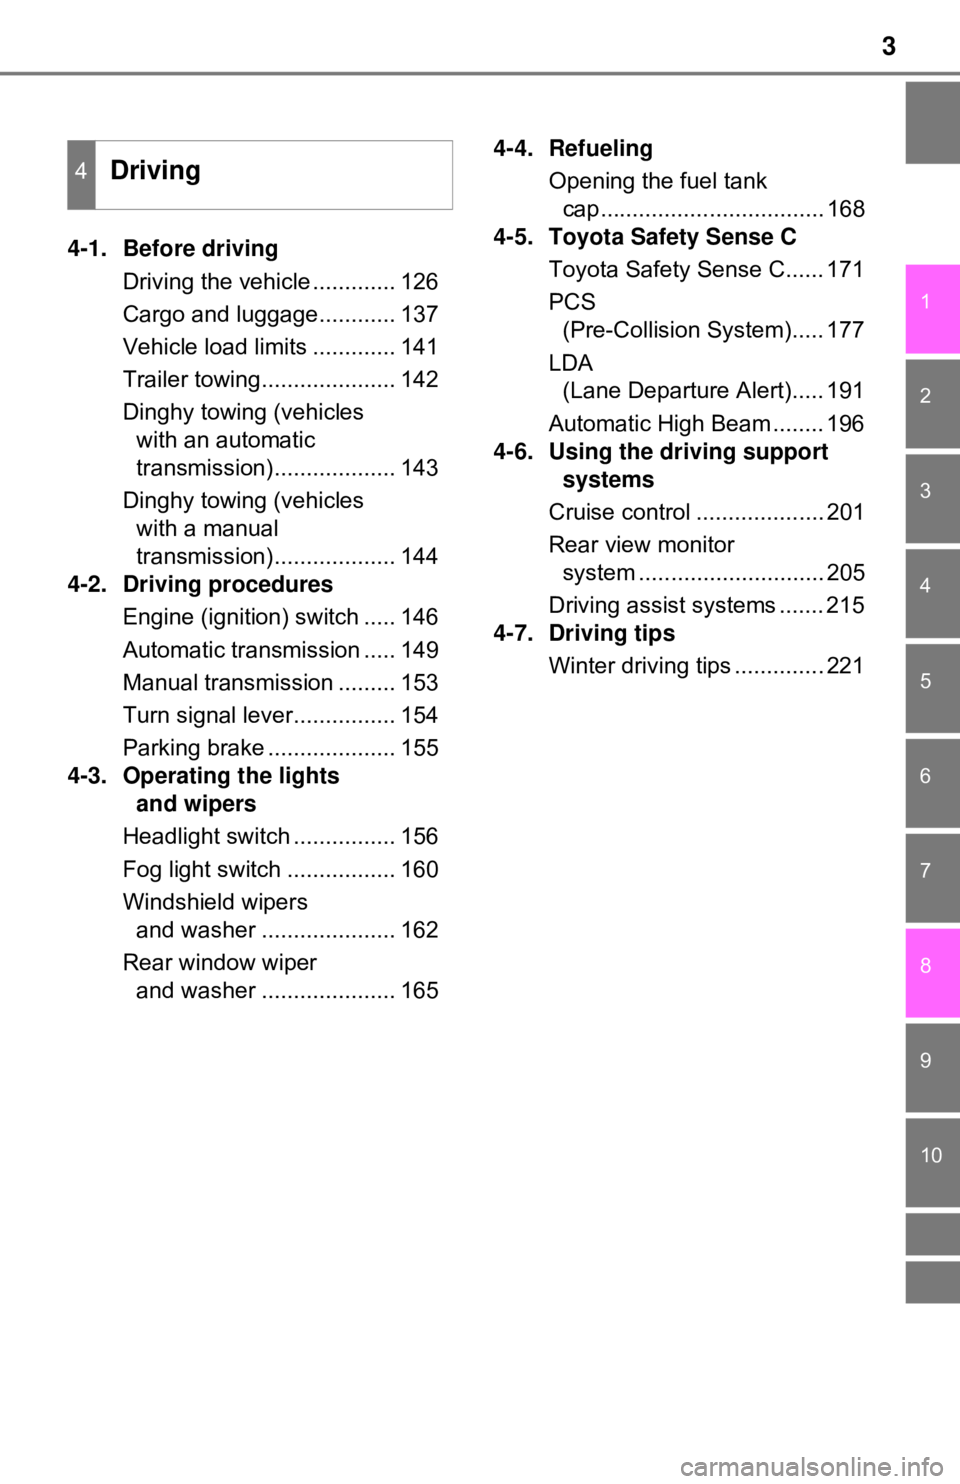
4-1. Before drivingDriving the vehicle ............. 126
Cargo and luggage............ 137
Vehicle load limits ............. 141
Trailer towing..................... 142
Dinghy towing (vehicles with an automatic
transmission)................... 143
Dinghy towing (vehicles with a manual
transmission)................... 144
4-2. Driving procedures
Engine (ignition) switch ..... 146
Automatic transmission ..... 149
Manual transmission ......... 153
Turn signal lever................ 154
Parking brake .................... 155
4-3. Operating the lights and wipers
Headlight switch ................ 156
Fog light switch ................. 160
Windshield wipers and washer ..................... 162
Rear window wiper and washer ..................... 165 4-4. Refueling
Opening the fuel tank cap................................... 168
4-5. Toyota Safety Sense C
Toyota Safety Sense C...... 171
PCS (Pre-Collision System)..... 177
LDA (Lane Departure Alert)..... 191
Automatic High Beam ........ 196
4-6. Using the driving support systems
Cruise control .................... 201
Rear view monitor system ............................. 205
Driving assist systems ....... 215
4-7. Driving tips
Winter driving tips .............. 221
4Driving
Page 15 of 520
15Pictorial index
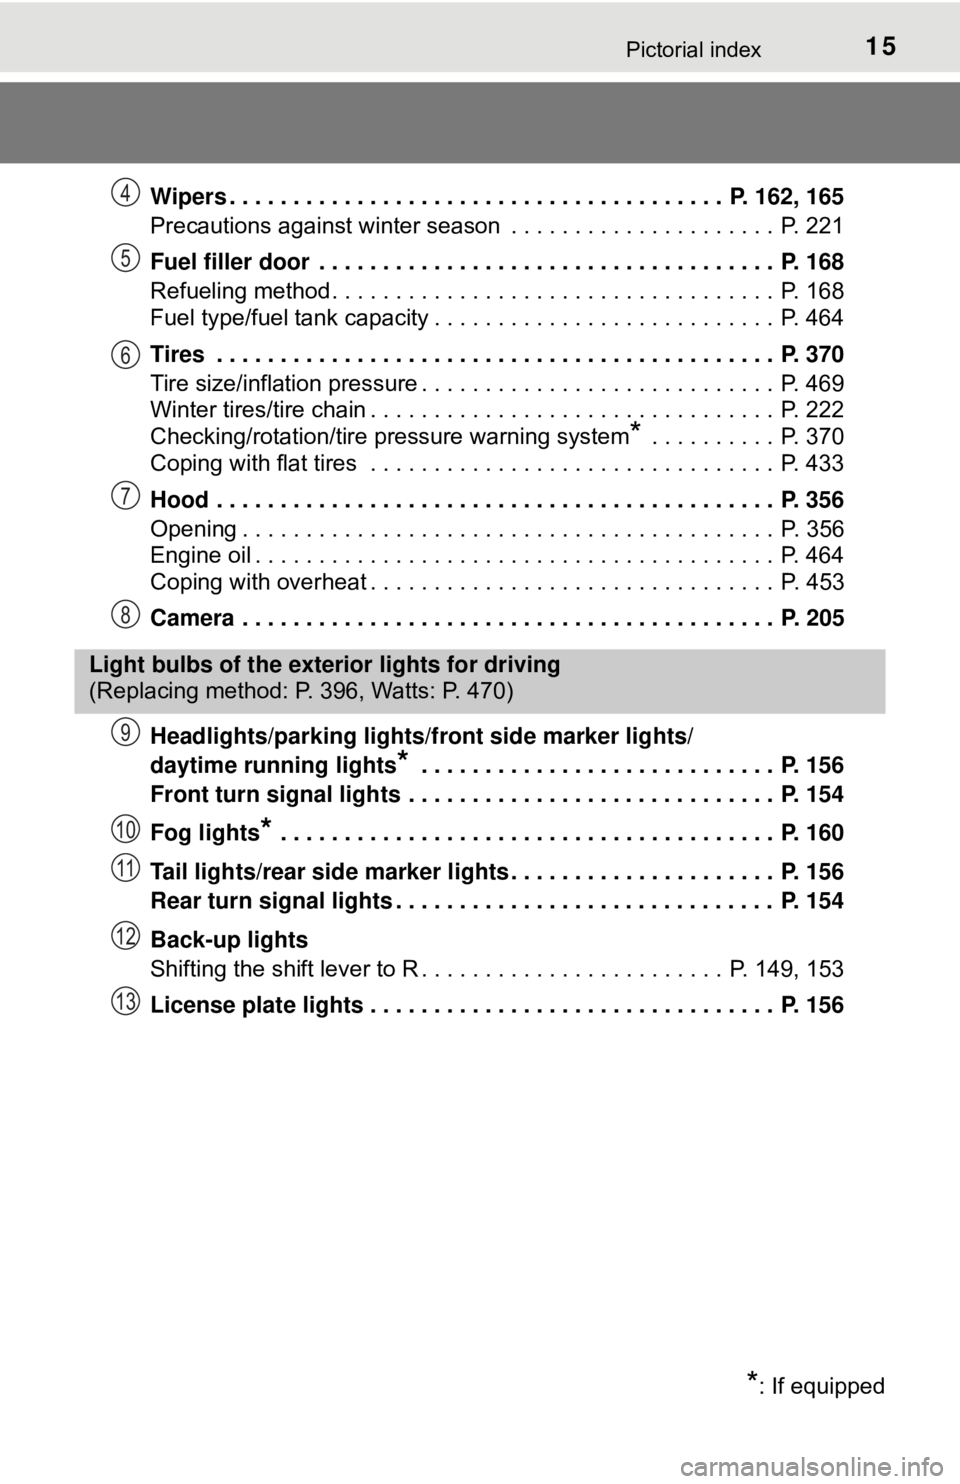
Wipers . . . . . . . . . . . . . . . . . . . . . . . . . . . . . . . . . . . . . . . P. 162, 165
Precautions against winter season . . . . . . . . . . . . . . . . . . . . . P. 221
Fuel filler door . . . . . . . . . . . . . . . . . . . . . . . . . . . . . . . . . . . . P. 168
Refueling method . . . . . . . . . . . . . . . . . . . . . . . . . . . . . . . . . . . P. 168
Fuel type/fuel tank capacity . . . . . . . . . . . . . . . . . . . . . . . . . . . P. 464
Tires . . . . . . . . . . . . . . . . . . . . . . . . . . . . . . . . . . . . . . . . . . . . P. 370
Tire size/inflation pressure . . . . . . . . . . . . . . . . . . . . . . . . . . . . P. 469
Winter tires/tire chain . . . . . . . . . . . . . . . . . . . . . . . . . . . . . . . . P. 222
Checking/rotation/tire pressure warning system
* . . . . . . . . . . P. 370
Coping with flat tires . . . . . . . . . . . . . . . . . . . . . . . . . . . . . . . . P. 433
Hood . . . . . . . . . . . . . . . . . . . . . . . . . . . . . . . . . . . . . . . . . . . . P. 356
Opening . . . . . . . . . . . . . . . . . . . . . . . . . . . . . . . . . . . . . . . . . . P. 356
Engine oil . . . . . . . . . . . . . . . . . . . . . . . . . . . . . . . . . . . . . . . . . P. 464
Coping with overheat . . . . . . . . . . . . . . . . . . . . . . . . . . . . . . . . P. 453
Camera . . . . . . . . . . . . . . . . . . . . . . . . . . . . . . . . . . . . . . . . . . P. 205
Headlights/parking lights/front side marker lights/
daytime running lights
* . . . . . . . . . . . . . . . . . . . . . . . . . . . . P. 156
Front turn signal lights . . . . . . . . . . . . . . . . . . . . . . . . . . . . . P. 154
Fog lights
* . . . . . . . . . . . . . . . . . . . . . . . . . . . . . . . . . . . . . . . P. 160
Tail lights/rear side marker lights . . . . . . . . . . . . . . . . . . . . . P. 156
Rear turn signal lights . . . . . . . . . . . . . . . . . . . . . . . . . . . . . . P. 154
Back-up lights
Shifting the shift lever to R . . . . . . . . . . . . . . . . . . . . . . . . P. 149, 153
License plate lights . . . . . . . . . . . . . . . . . . . . . . . . . . . . . . . . P. 156
4
5
6
7
8
Light bulbs of the exterior lights for driving
(Replacing method: P. 396, Watts: P. 470)
*: If equipped
9
10
11
12
13
Page 125 of 520

125
4Driving
4-1. Before drivingDriving the vehicle ............. 126
Cargo and luggage ........... 137
Vehicle load limits ............. 141
Trailer towing..................... 142
Dinghy towing (vehicles with an automatic
transmission)................... 143
Dinghy towing (vehicles with a manual
transmission)................... 144
4-2. Driving procedures Engine (ignition) switch ..... 146
Automatic transmission ..... 149
Manual transmission ......... 153
Turn signal lever................ 154
Parking brake .................... 155 4-3. Operating the lights
and wipers
Headlight switch ................ 156
Fog light switch ................. 160
Windshield wipers and washer ..................... 162
Rear window wiper and washer ..................... 165
4-4. Refueling Opening the fuel tank cap .................................. 168
4-5. Toyota Safety Sense C Toyota Safety Sense C ..... 171
PCS (Pre-Collision System) .... 177
LDA (Lane Departure Alert) .... 191
Automatic High Beam ....... 196
4-6. Using the driving support systems
Cruise control .................... 201
Rear view monitor system ............................ 205
Driving assist systems ...... 215
4-7. Driving tips Winter driving tips ............. 221
Page 137 of 520
1374-1. Before driving
4
Driving
Cargo and luggage
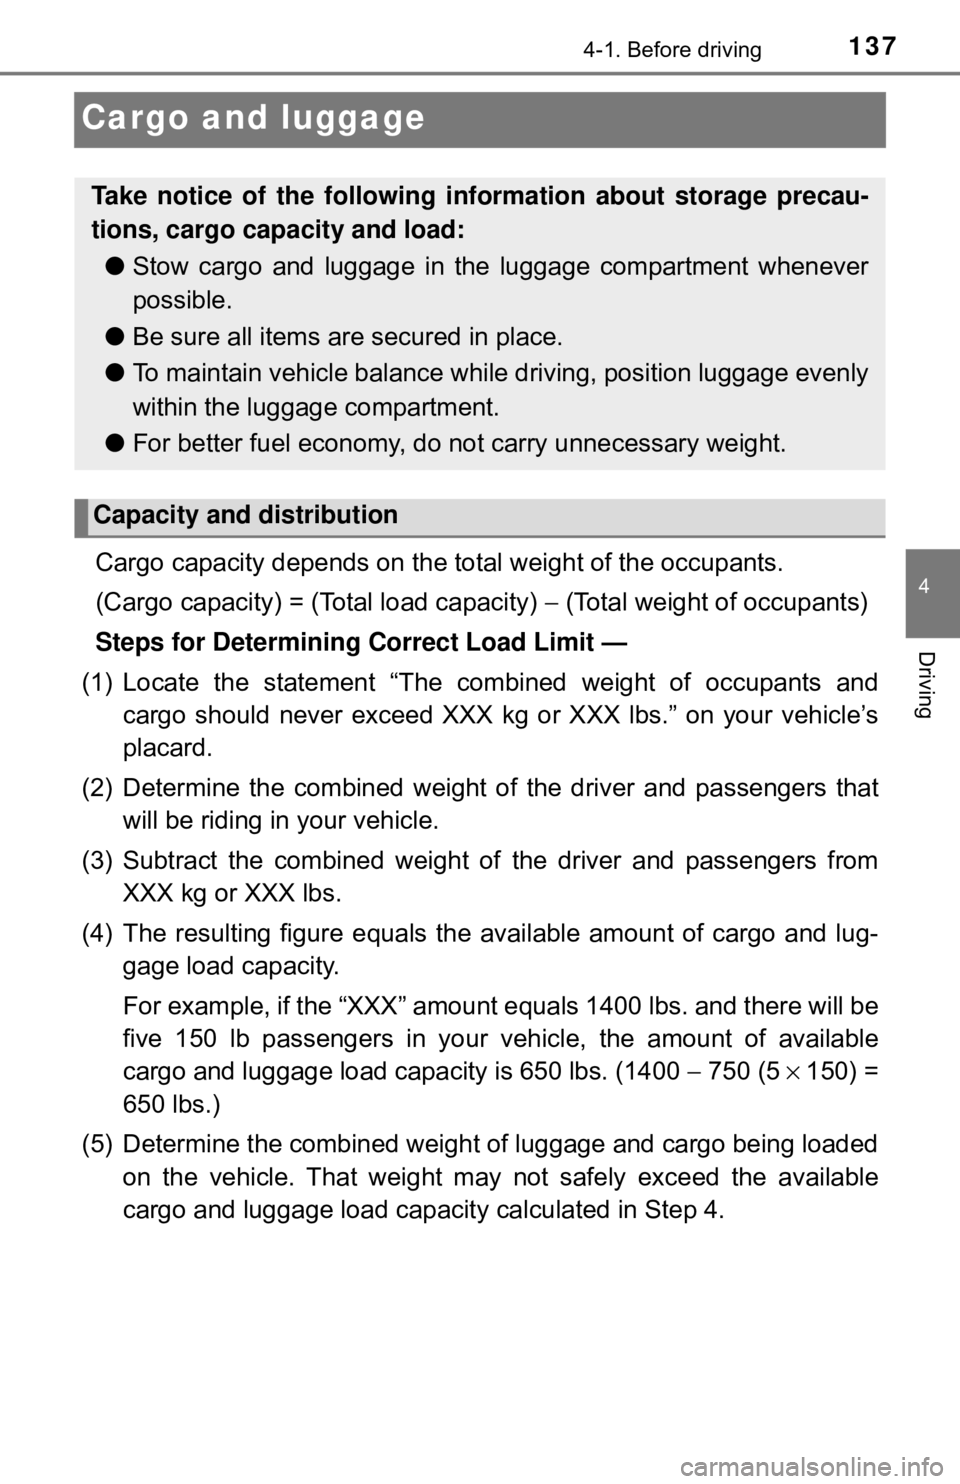
Cargo capacity depends on the total weight of the occupants.
(Cargo capacity) = (Total load capacity) − (Total weight of occupants)
Steps for Determining Correct Load Limit —
(1) Locate the statement “The comb ined weight of occupants and
cargo should never exceed XXX kg or XXX lbs.” on your vehicle’s
placard.
(2) Determine the combined weight of the driver and passengers that
will be riding in your vehicle.
(3) Subtract the combined weight of the driver and passengers from
XXX kg or XXX lbs.
(4) The resulting figure equals the available amount of cargo and lug- gage load capacity.
For example, if the “ XXX” amount equals 1400 lbs. and there will be
five 150 lb passengers in your v ehicle, the amount of available
cargo and luggage load capacity is 650 lbs. (1400 − 750 (5 × 150) =
650 lbs.)
(5) Determine the combined weight of luggage and cargo being loaded on the vehicle. That weight ma y not safely exceed the available
cargo and luggage load capacity calculated in Step 4.
Take notice of the following information about storage precau-
tions, cargo capacity and load:
● Stow cargo and luggage in the luggage compartment whenever
possible.
● Be sure all items are secured in place.
● To maintain vehicle balance while driving, position luggage evenly
within the luggage compartment.
● For better fuel economy, do not carry unnecessary weight.
Capacity and distribution
Page 168 of 520
1684-4. Refueling
Opening the fuel tank cap
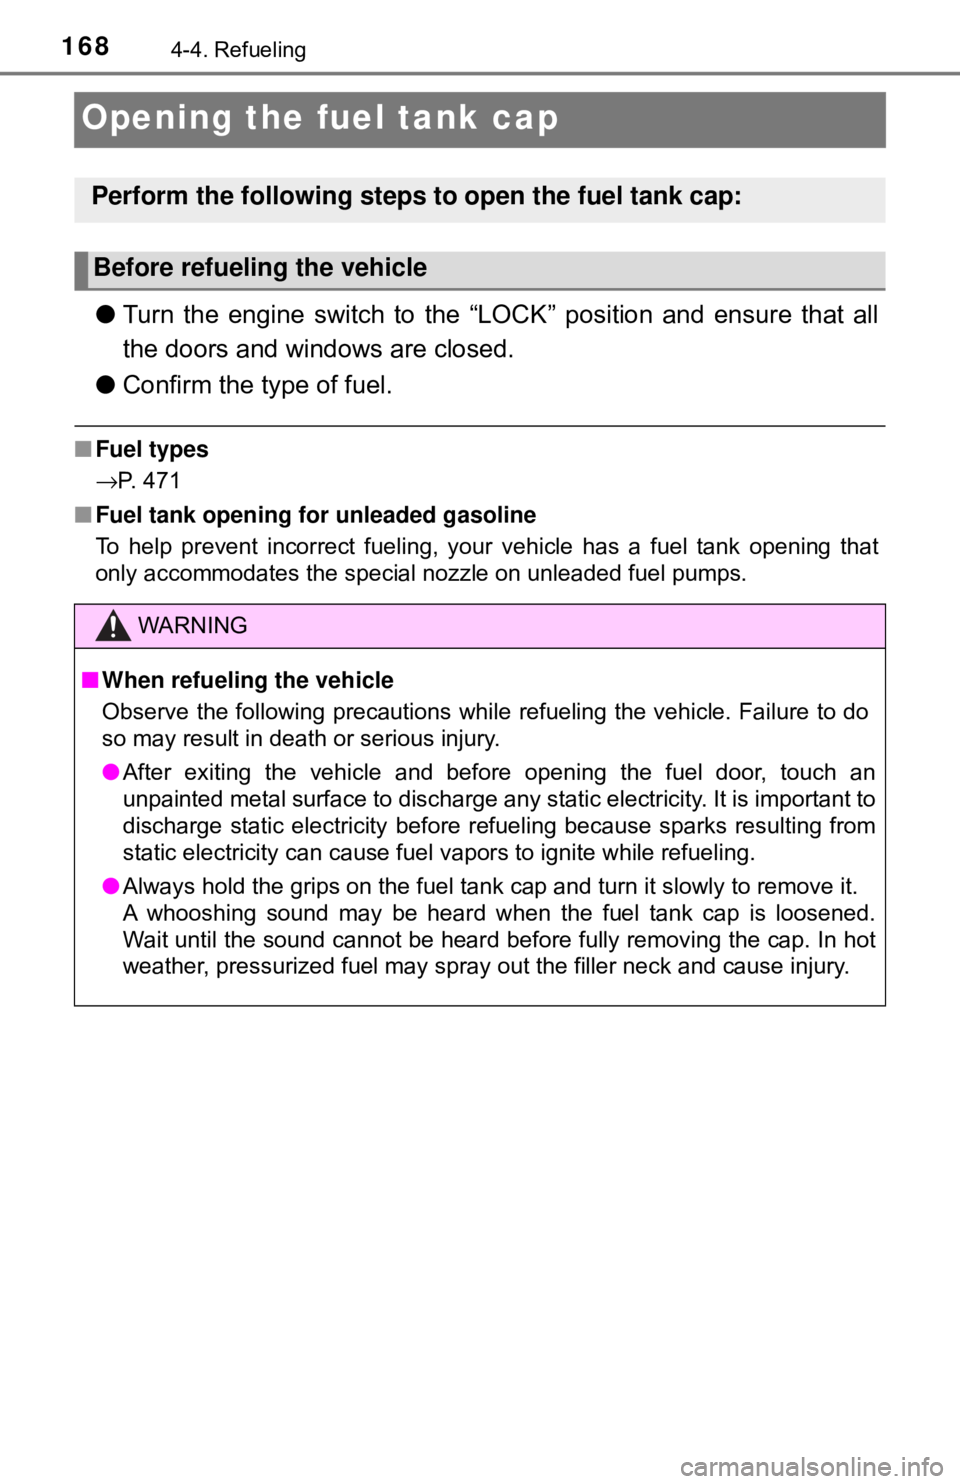
●Turn the engine switch to the “LOC K” position and ensure that all
the doors and windows are closed.
● Confirm the type of fuel.
■Fuel types
→P. 471
■ Fuel tank opening for unleaded gasoline
To help prevent incorrect fueling, y our vehicle has a fuel tank opening that
only accommodates the special nozzle on unleaded fuel pumps.
Perform the following steps to open the fuel tank cap:
Before refueling the vehicle
WARNING
■ When refueling the vehicle
Observe the following precautions while refueling the vehicle. Failure to do
so may result in death or serious injury.
● After exiting the vehicle and before opening the fuel door, touch an
unpainted metal surface to discharge any static electricity. It is important to
discharge static electricity before refueling because sparks resulting from
static electricity can cause fuel vapors to ignite while refueling.
● Always hold the grips on the fuel tank cap and turn it slowly to remove it.
A whooshing sound may be heard when the fuel tank cap is loosened.
Wait until the sound cannot be heard before fully removing the cap. In hot
weather, pressurized fuel may spray out the filler neck and cause injury.
Page 170 of 520
1704-4. Refueling
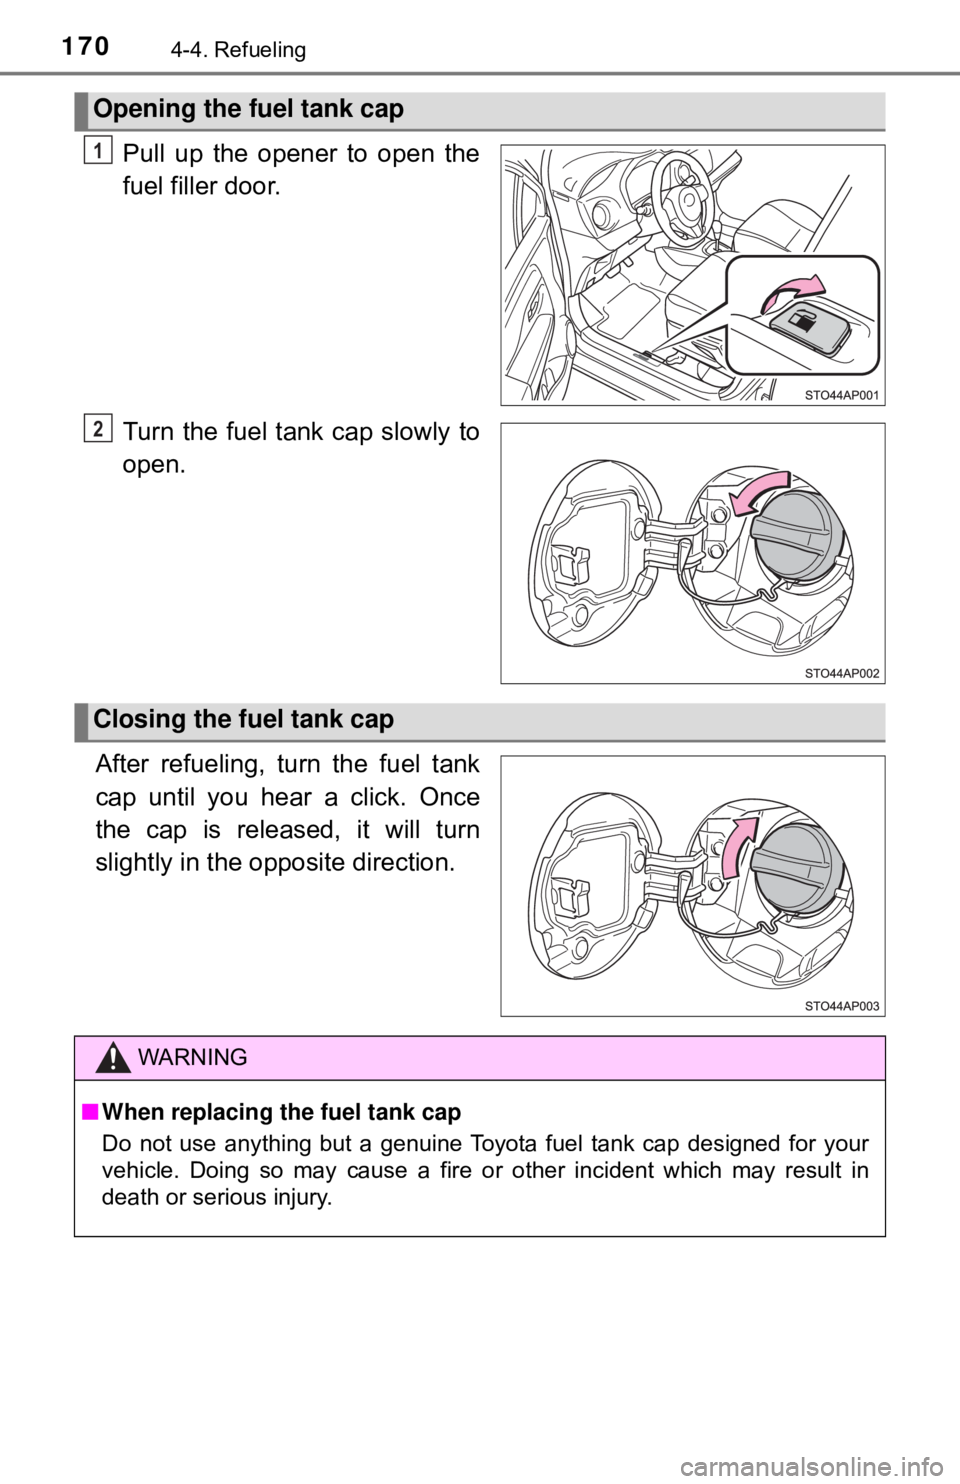
Pull up the opener to open the
fuel filler door.
Turn the fuel tank cap slowly to
open.
After refueling, turn the fuel tank
cap until you hear a click. Once
the cap is released, it will turn
slightly in the opposite direction.
Opening the fuel tank cap
1
2
Closing the fuel tank cap
WARNING
■ When replacing the fuel tank cap
Do not use anything but a genuine Toyota fuel tank cap designed for your
vehicle. Doing so may cause a fire or other incident which may result in
death or serious injury.
Page 352 of 520
3527-2. Maintenance
Emission inspection and maintenance (I/M)
programs
The OBD system determin es that a problem exists somewhere in the
emission control system. Your vehi cle may not pass the I/M test and
may need to be repaired. Contact your Toyota dealer to service the
vehicle.
● When the battery is disconnected or discharged
Readiness codes that are set duri ng ordinary driving are erased.
Also, depending on your driving habits, the readiness codes may
not be completely set.
● When the fuel tank cap is loose
The malfunction indicator lamp comes on indicating a temporary
malfunction and your vehicle may not pass the I/M test.
The error code in the OBD system will not be cleared unless the vehi-
cle is driven 40 or more times.
Contact your Toyota dealer to prepare the vehicle for re-testing.
Some states have vehicle emission inspection programs which
include OBD (On Board Diagnos tics) checks. The OBD system
monitors the operation of the emission control system.
If the malfunction indicator lamp comes on
Your vehicle may not pass the I/M test in the following situations:
When the malfunction indicator la mp still remains on after sev-
eral driving trips
If your vehicle does not pass the I/M test
Page 380 of 520

3807-3. Do-it-yourself maintenance
■Tire inflation pressure check interval
You should check tire inflation pressure every two weeks, or at least once
a month.
Do not forget to check the spare.
■Effects of incorrect tire inflation pressure
Driving with incorrect tire inflation pressure may result in the following:
●Reduced fuel economy
●Reduced driving comfort and poor handling
●Reduced tire life due to wear
●Reduced safety
●Damage to the drive train
If a tire needs frequent inflating, have it checked by your Toyota dealer.
■Instructions for checking tire inflation pressure
When checking tire inflation pressure, observe the following:
●Check only when the tires are cold.
If your vehicle has been parked for at least 3 hours or has not been
driven for more than 1 mile or 1.5 km, you will get an accurate cold tire
inflation pressure reading.
●Always use a tire pressure gauge.
It is difficult to judge if a tire is properly inflated based only on its appear-
ance.
●It is normal for the tire inflation pressure to be higher after driving as
heat is generated in the tire. Do no t reduce tire inflation pressure after
driving.
●Never exceed the vehicle capacity weight.
Passengers and luggage weight should be placed so that the vehicle is
balanced.
Page 428 of 520

4288-2. Steps to take in an emergency
■SRS warning light
This warning light system monitors the airbag sensor assembly, front impact
sensors, side impact sensors (front), side impact sensors (front door\
), side
impact sensors (rear), driver’s seat belt buckle switch, front passenger occu-
pant classification system (ECU and sensors), “AIR BAG ON” indicator, “AIR
BAG OFF” indicator, front passenger’s seat belt buckle switch, seat belt pre-
tensioners, airbags, interconnecting wiring and power sources. ( →P. 36)
■ Front passenger detection sensor, passenger seat belt reminder and
warning buzzer
● If luggage is placed on the front passenger seat, the front passenger de\
tec-
tion sensor may cause the warning light to flash and the warning buzzer to
sound even if a passenger is not sitting in the seat.
● If a cushion is placed on the seat, the sensor may not detect a passenger,
and the warning light may not operate properly.
■ Electric power steering system warning light (warning buzzer)
When the battery charge becomes insufficient or the voltage temporarily
drops, the electric power steering system warning light may come on and \
the
warning buzzer may sounds.
■ If the malfunction indicator la mp comes on while driving
First check the following:
● Is the fuel tank empty?
If it is, fill the fuel tank immediately.
● Is the fuel tank cap loose?
If it is, tighten it securely.
The malfunction indicator lamp will go off after several driving trips.
If the malfunction indicator lamp does not go off even after several trips, con-
tact your Toyota dealer as soon as possible.
■
When the tire pressure warning light comes on (vehicles with a tire
pressure warning system)
Check the tire inflation pressure and adjust to the appropriate level. Push-
ing the tire pressure warning reset switch will not turn off the tire pressure
warning light.
Page 460 of 520
4609-1. Specifications
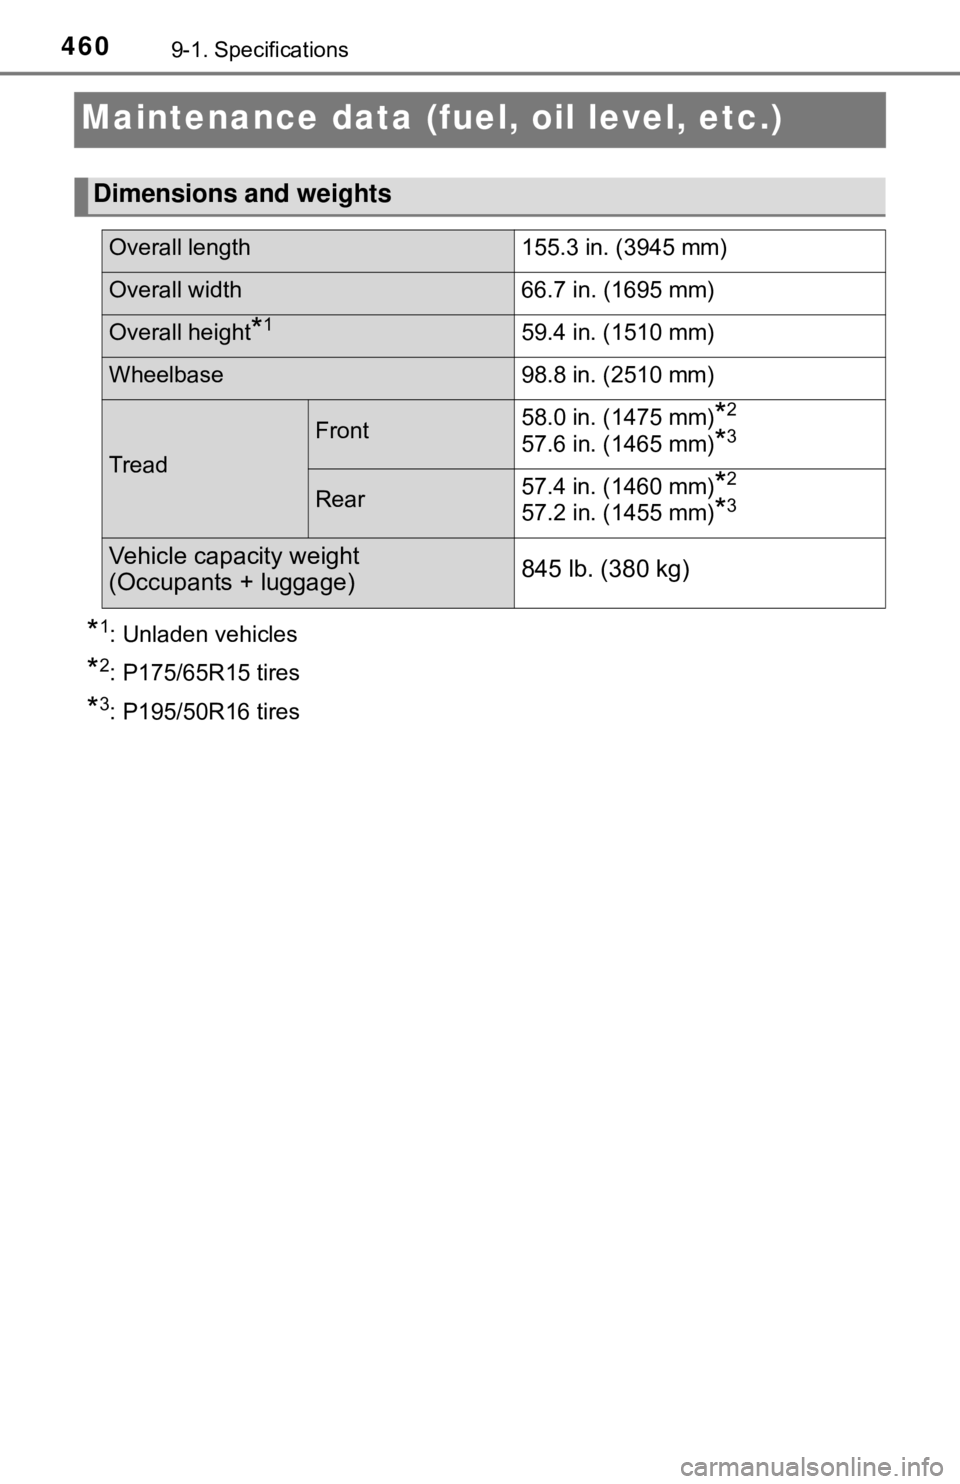
Maintenance data (fuel, oil level, etc.)
*1: Unladen vehicles
*2: P175/65R15 tires
*3: P195/50R16 tires
Dimensions and weights
Overall length 155.3 in. (3945 mm)
Overall width 66.7 in. (1695 mm)
Overall height*159.4 in. (1510 mm)
Wheelbase98.8 in. (2510 mm)
Tread
Front58.0 in. (1475 mm)*2
57.6 in. (1465 mm)*3
Rear57.4 in. (1460 mm)*2
57.2 in. (1455 mm)*3
Vehicle capacity weight
(Occupants + luggage)
845 lb. (380 kg)