display VAUXHALL ANTARA 2015 Infotainment system
[x] Cancel search | Manufacturer: VAUXHALL, Model Year: 2015, Model line: ANTARA, Model: VAUXHALL ANTARA 2015Pages: 151, PDF Size: 2.82 MB
Page 66 of 151
66Navigation
Controlling route guidance via
the NAVIGATION menu Press the NAV button to open the
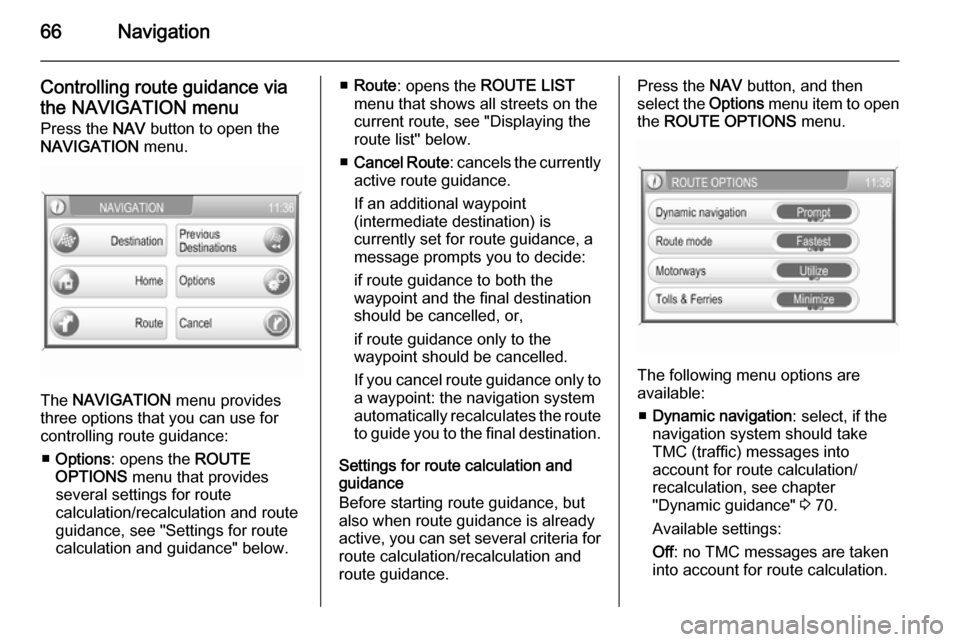
NAVIGATION menu.
The NAVIGATION menu provides
three options that you can use for controlling route guidance:
■ Options : opens the ROUTE
OPTIONS menu that provides
several settings for route
calculation/recalculation and route
guidance, see "Settings for route
calculation and guidance" below.
■ Route : opens the ROUTE LIST
menu that shows all streets on the
current route, see "Displaying the
route list" below.
■ Cancel Route : cancels the currently
active route guidance.
If an additional waypoint
(intermediate destination) is
currently set for route guidance, a
message prompts you to decide:
if route guidance to both the
waypoint and the final destination should be cancelled, or,
if route guidance only to the
waypoint should be cancelled.
If you cancel route guidance only to a waypoint: the navigation system
automatically recalculates the route to guide you to the final destination.
Settings for route calculation and
guidance
Before starting route guidance, but also when route guidance is already
active, you can set several criteria for route calculation/recalculation and
route guidance.Press the NAV button, and then
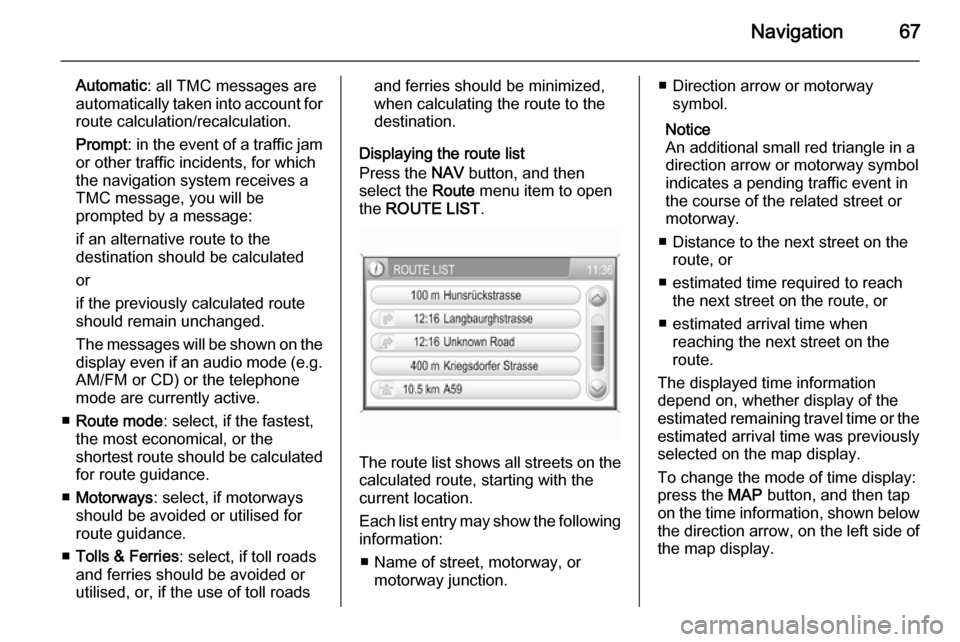
select the Options menu item to open
the ROUTE OPTIONS menu.
The following menu options are
available:
■ Dynamic navigation : select, if the
navigation system should take
TMC (traffic) messages into
account for route calculation/
recalculation, see chapter
"Dynamic guidance" 3 70.
Available settings:
Off : no TMC messages are taken
into account for route calculation.
Page 67 of 151
Navigation67
Automatic: all TMC messages are
automatically taken into account for
route calculation/recalculation.
Prompt : in the event of a traffic jam
or other traffic incidents, for which
the navigation system receives a
TMC message, you will be
prompted by a message:
if an alternative route to the
destination should be calculated
or
if the previously calculated route
should remain unchanged.
The messages will be shown on the display even if an audio mode (e.g.
AM/FM or CD) or the telephone
mode are currently active.
■ Route mode : select, if the fastest,
the most economical, or the
shortest route should be calculated for route guidance.
■ Motorways : select, if motorways
should be avoided or utilised for
route guidance.
■ Tolls & Ferries : select, if toll roads
and ferries should be avoided or
utilised, or, if the use of toll roadsand ferries should be minimized,
when calculating the route to the
destination.
Displaying the route list
Press the NAV button, and then
select the Route menu item to open
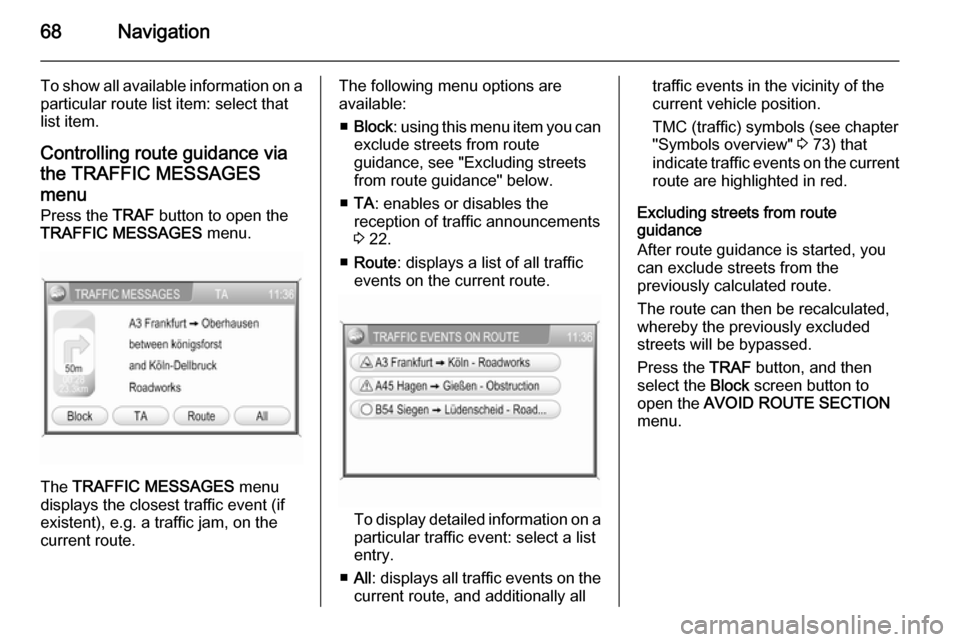
the ROUTE LIST .
The route list shows all streets on the
calculated route, starting with the
current location.
Each list entry may show the following
information:
■ Name of street, motorway, or motorway junction.
■ Direction arrow or motorwaysymbol.
Notice
An additional small red triangle in a
direction arrow or motorway symbol
indicates a pending traffic event in
the course of the related street or
motorway.
■ Distance to the next street on the route, or
■ estimated time required to reach the next street on the route, or
■ estimated arrival time when reaching the next street on the
route.
The displayed time information
depend on, whether display of the
estimated remaining travel time or the estimated arrival time was previously
selected on the map display.
To change the mode of time display:
press the MAP button, and then tap
on the time information, shown below the direction arrow, on the left side of
the map display.
Page 68 of 151
68Navigation
To show all available information on aparticular route list item: select that
list item.
Controlling route guidance via
the TRAFFIC MESSAGES
menu
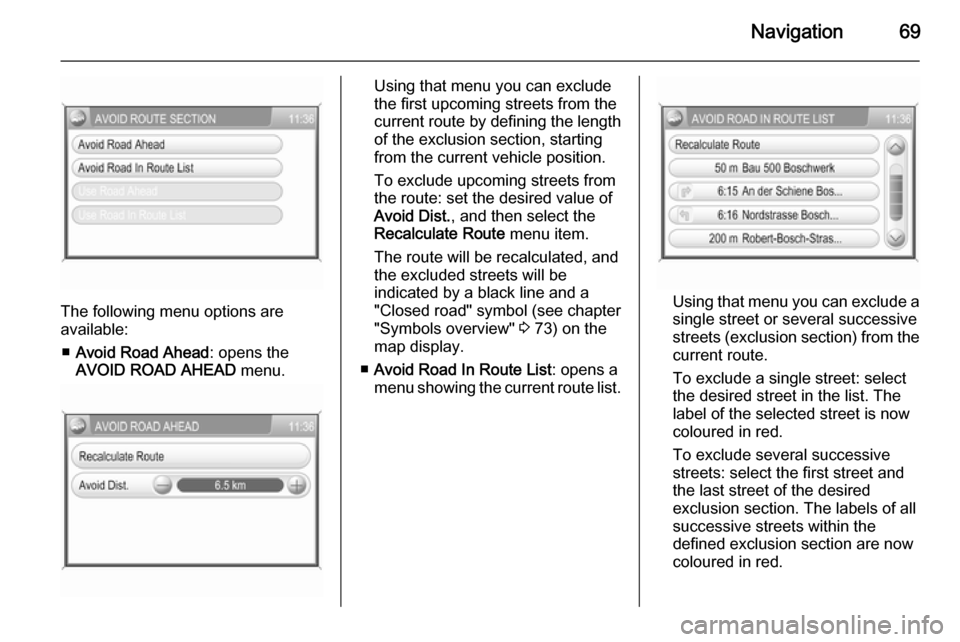
Press the TRAF button to open the
TRAFFIC MESSAGES menu.
The TRAFFIC MESSAGES menu
displays the closest traffic event (if
existent), e.g. a traffic jam, on the
current route.
The following menu options are
available:
■ Block : using this menu item you can
exclude streets from route
guidance, see "Excluding streets
from route guidance" below.
■ TA : enables or disables the
reception of traffic announcements
3 22.
■ Route : displays a list of all traffic
events on the current route.
To display detailed information on a
particular traffic event: select a list
entry.
■ All : displays all traffic events on the
current route, and additionally all
traffic events in the vicinity of the current vehicle position.
TMC (traffic) symbols (see chapter
"Symbols overview" 3 73) that
indicate traffic events on the current route are highlighted in red.
Excluding streets from route
guidance
After route guidance is started, you can exclude streets from the
previously calculated route.
The route can then be recalculated,
whereby the previously excluded
streets will be bypassed.
Press the TRAF button, and then
select the Block screen button to
open the AVOID ROUTE SECTION
menu.
Page 69 of 151
Navigation69
The following menu options are
available:
■ Avoid Road Ahead : opens the
AVOID ROAD AHEAD menu.
Using that menu you can exclude
the first upcoming streets from the
current route by defining the length
of the exclusion section, starting from the current vehicle position.
To exclude upcoming streets from
the route: set the desired value of
Avoid Dist. , and then select the
Recalculate Route menu item.
The route will be recalculated, and
the excluded streets will be
indicated by a black line and a
"Closed road" symbol (see chapter
"Symbols overview" 3 73) on the
map display.
■ Avoid Road In Route List : opens a
menu showing the current route list.
Using that menu you can exclude a
single street or several successive
streets (exclusion section) from the current route.
To exclude a single street: select
the desired street in the list. The
label of the selected street is now coloured in red.
To exclude several successive streets: select the first street and
the last street of the desired
exclusion section. The labels of all
successive streets within the
defined exclusion section are now coloured in red.
Page 70 of 151

70Navigation
Notice
You can only define one single
exclusion street or one exclusion
section at a time in the route list.
To perform the street exclusion:select the Recalculate Route menu
item (first entry in route list).
The route will be recalculated, and
the excluded streets will be
indicated by a black line and a
"Closed road" symbol (see chapter
"Symbols overview" 3 73) on the
map display.
■ Use Road Ahead : cancels the
street exclusion previously
performed via Avoid Road Ahead .
■ Use Road In Route List : cancels the
street exclusion previously
performed via Avoid Road In Route
List .
Adding a waypoint (intermediate destination) to the routeAt any time during active route
guidance you can add a waypoint to
your route.Press the NAV button, and then
select the Destination menu item or
the Previous Destinations menu item.
In the message that is displayed now, select the Add waypoint screen
button.
Enter or select a destination for the
waypoint, see chapter "Destination
input" 3 48.
After adding the desired waypoint, the
navigation system will calculate the
route from the current position to that new intermediate destination, and the
route from the intermediate
destination to the final destination.
The waypoint will be indicated on the
map by a red chequered flag.
After reaching the waypoint, the route
guidance will automatically proceed
with guidance to the final destination.
Notice
For every trip you can set only one
waypoint at a time. If there is a
waypoint already active when
setting a new waypoint, route
guidance to the old waypoint will be
cancelled.Enabling user defined POI
warnings
You can define "POI warnings" for
POIs that you want to be warned of
(e.g. very sharp turns on a road),
before reaching the corresponding
location.
Defining your personal POI warnings,
and downloading them to the
Infotainment system, see chapter
"Usage" 3 37.
Enabling POI warnings:
Press the SETUP button, select the
Navigation menu item, and then set
POI Warning to On.
Dynamic guidance If dynamic route guidance is active,
the entire current traffic situation that the Infotainment system receives via
TMC is included in the calculation of
the route. The route is suggested
taking into account all traffic problems
or restrictions as per preset criteria
(e.g. "shortest route", "avoid
motorways" etc.).
Page 71 of 151
Navigation71
In the case of a traffic problem (e.g.
traffic jam, closed road) on the route
you are driving, a message is
displayed, and a voice message
output indicating the nature of the
problem. The driver can decide,
whether to drive around the traffic
problem taking the suggested change
to the route or to carry on through the traffic problem.
Nearby traffic problems are also
reported if route guidance is not
active.
If route guidance is active, the system
continuously checks, based on the
traffic information, whether it would
be better to recalculate the route or
take an alternative route taking into
account the current traffic situation.
The activation and deactivation of
dynamic route guidance, as well as
criteria for the calculation of the route,
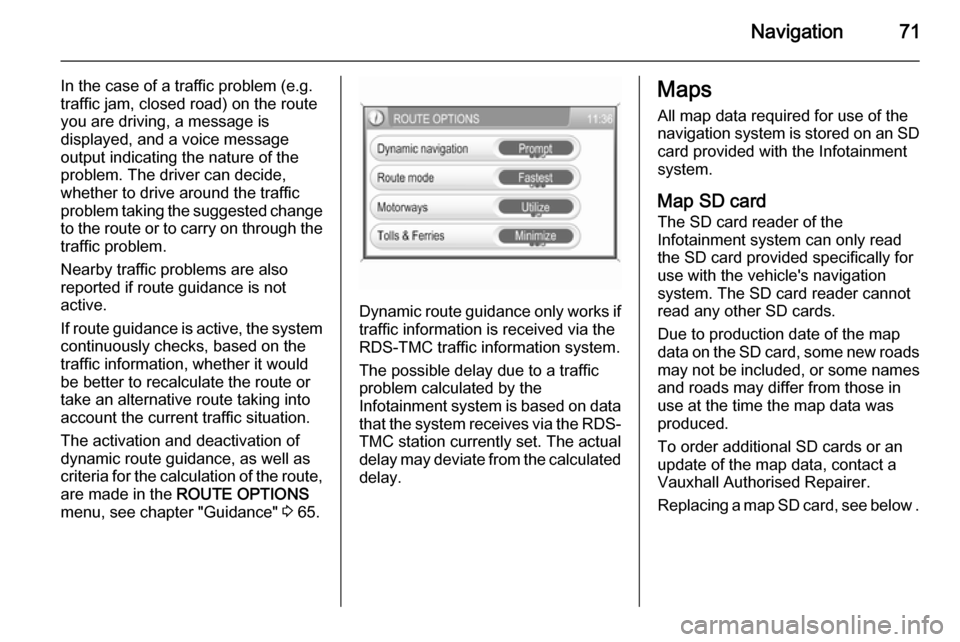
are made in the ROUTE OPTIONS
menu, see chapter "Guidance" 3 65.
Dynamic route guidance only works if
traffic information is received via the
RDS-TMC traffic information system.
The possible delay due to a traffic
problem calculated by the
Infotainment system is based on data
that the system receives via the RDS- TMC station currently set. The actual
delay may deviate from the calculated delay.
Maps
All map data required for use of the
navigation system is stored on an SD
card provided with the Infotainment
system.
Map SD card The SD card reader of the
Infotainment system can only read
the SD card provided specifically for
use with the vehicle's navigation
system. The SD card reader cannot
read any other SD cards.
Due to production date of the map
data on the SD card, some new roads
may not be included, or some names and roads may differ from those in
use at the time the map data was produced.
To order additional SD cards or an
update of the map data, contact a
Vauxhall Authorised Repairer.
Replacing a map SD card, see below .
Page 73 of 151
Navigation73
Inserting the SD card
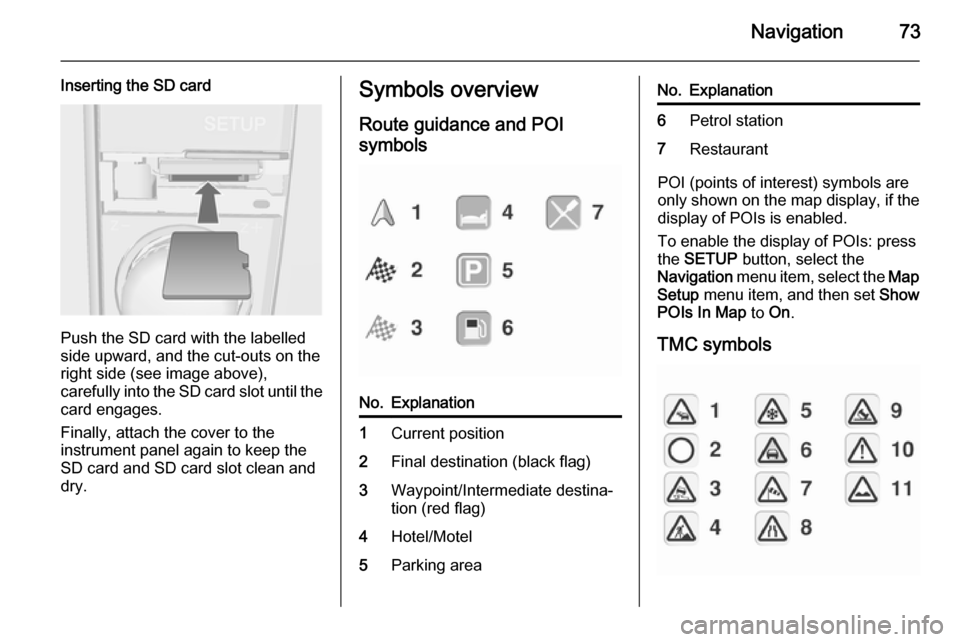
Push the SD card with the labelled
side upward, and the cut-outs on the
right side (see image above),
carefully into the SD card slot until the
card engages.
Finally, attach the cover to the
instrument panel again to keep the
SD card and SD card slot clean and
dry.
Symbols overview
Route guidance and POI
symbolsNo.Explanation1Current position2Final destination (black flag)3Waypoint/Intermediate destina‐
tion (red flag)4Hotel/Motel5Parking areaNo.Explanation6Petrol station7Restaurant
POI (points of interest) symbols are
only shown on the map display, if the display of POIs is enabled.
To enable the display of POIs: press
the SETUP button, select the
Navigation menu item, select the Map
Setup menu item, and then set Show
POIs In Map to On.
TMC symbols
Page 74 of 151

74Navigation
No.Explanation1Traffic jam2Closed road3Slippery road4Road works5Icy road6Fog7Cross winds8Narrowing9Accident10Danger11Uneven road
TMC (traffic) symbols are only shownon the map display, if dynamic route
guidance via TMC messages is
enabled.
To enable dynamic route guidance:
press the NAV button, select the
Options menu item, and then set
Dynamic navigation to Automatic or
Prompt , see chapter "Guidance"
3 65.
Page 77 of 151
Phone77
Infotainment system's Bluetooth
unit, CAR HF UNIT will be
displayed.
4. On the Bluetooth device: select CAR HF UNIT and then follow the
instructions to enter the PIN code
"1234".
5. On the Bluetooth device: confirm the entered PIN code.
On the Infotainment system's
display: after a few seconds a
message is displayed that shows,
if the pairing process was
successfully performed or if it
failed.
If the Bluetooth connection was
successfully performed: in case
another Bluetooth device was
connected to the Infotainment
system, that device is now
disconnected from the system.
If the Bluetooth connection failed:
start the procedure described above again, or consult the user guide of the Bluetooth device.Connecting to another paired
device
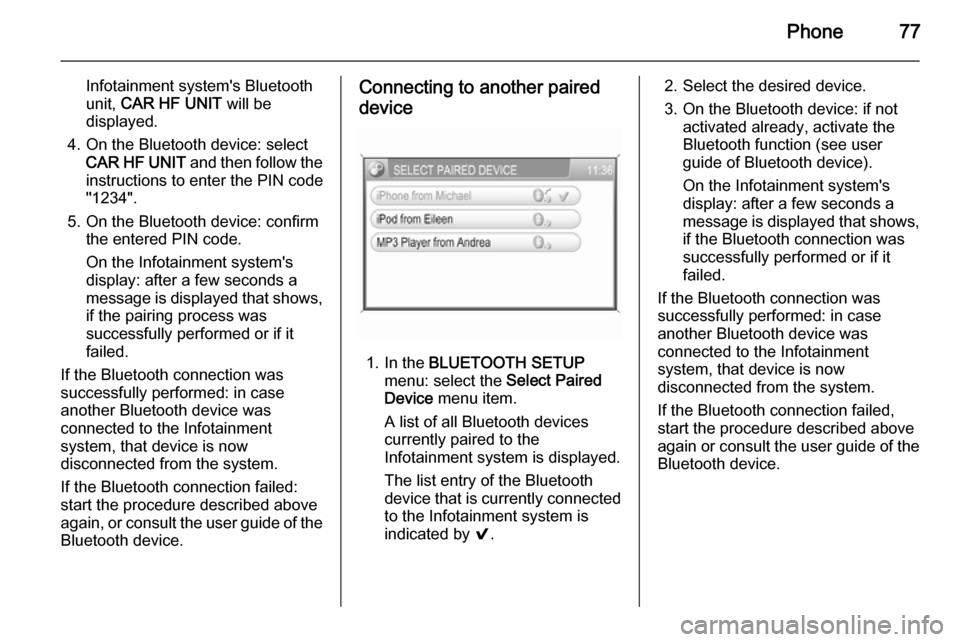
1. In the BLUETOOTH SETUP
menu: select the Select Paired
Device menu item.
A list of all Bluetooth devices
currently paired to the Infotainment system is displayed.
The list entry of the Bluetooth
device that is currently connected
to the Infotainment system is
indicated by 9.
2. Select the desired device.
3. On the Bluetooth device: if not activated already, activate the
Bluetooth function (see user
guide of Bluetooth device).
On the Infotainment system's
display: after a few seconds a
message is displayed that shows,
if the Bluetooth connection was
successfully performed or if it
failed.
If the Bluetooth connection was
successfully performed: in case
another Bluetooth device was
connected to the Infotainment
system, that device is now
disconnected from the system.
If the Bluetooth connection failed,
start the procedure described above again or consult the user guide of the
Bluetooth device.
Page 78 of 151
78Phone
Removing a paired device
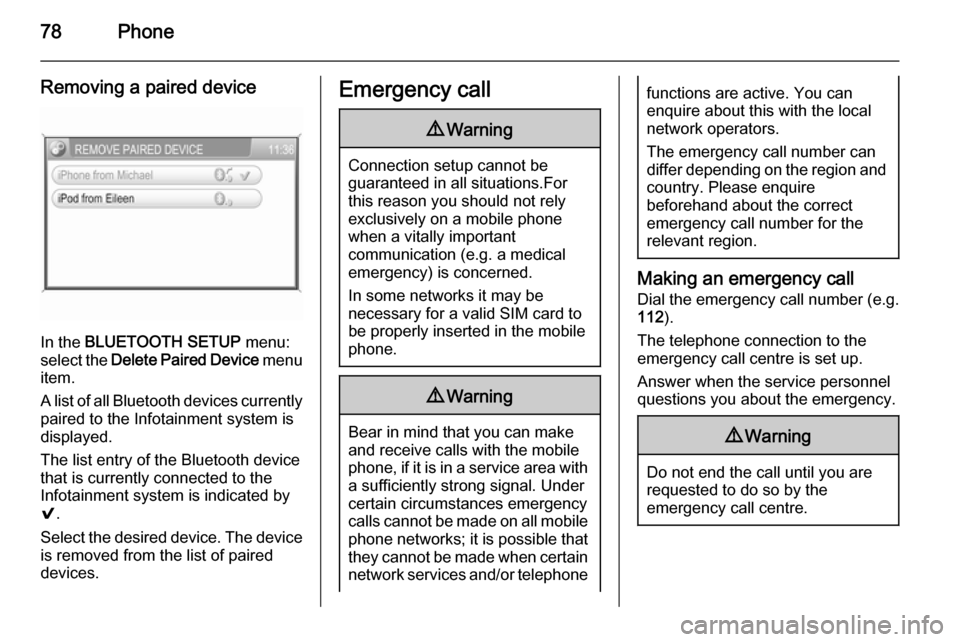
In the BLUETOOTH SETUP menu:
select the Delete Paired Device menu
item.
A list of all Bluetooth devices currently
paired to the Infotainment system is
displayed.
The list entry of the Bluetooth device
that is currently connected to the
Infotainment system is indicated by
9 .
Select the desired device. The device is removed from the list of paired
devices.
Emergency call9 Warning
Connection setup cannot be
guaranteed in all situations.For this reason you should not rely
exclusively on a mobile phone
when a vitally important
communication (e.g. a medical
emergency) is concerned.
In some networks it may be
necessary for a valid SIM card to
be properly inserted in the mobile
phone.
9 Warning
Bear in mind that you can make
and receive calls with the mobile
phone, if it is in a service area with
a sufficiently strong signal. Under
certain circumstances emergency
calls cannot be made on all mobile
phone networks; it is possible that
they cannot be made when certain network services and/or telephone
functions are active. You can
enquire about this with the local
network operators.
The emergency call number can
differ depending on the region and country. Please enquire
beforehand about the correct
emergency call number for the
relevant region.
Making an emergency call
Dial the emergency call number (e.g.
112 ).
The telephone connection to the
emergency call centre is set up.
Answer when the service personnel
questions you about the emergency.
9 Warning
Do not end the call until you are
requested to do so by the
emergency call centre.