key VAUXHALL ANTARA 2015 Owner's Guide
[x] Cancel search | Manufacturer: VAUXHALL, Model Year: 2015, Model line: ANTARA, Model: VAUXHALL ANTARA 2015Pages: 223, PDF Size: 6.07 MB
Page 130 of 223

128Driving and operating■ Switch off the engine and turnthe ignition key to position
LOCK , push key into ignition
switch and remove.
Turn the steering wheel until the steering wheel lock is felt to
engage.
For vehicles with automatic
transmission, depress foot
brake and shift into P before
pushing key into ignition switch
and removing.
■ If the vehicle is on a level surface or uphill slope, engage
first gear or move the selector
lever to P before switching off
the ignition. On an uphill slope,
turn the front wheels away from
the kerb.
If the vehicle is on a downhill
slope, engage reverse gear or
move the selector lever to P
before switching off the ignition.
Turn the front wheels towards
the kerb.■ Close windows and sunroof.
■ Lock the vehicle with button p on
the radio remote control 3 21.
Activate the anti-theft alarm system
3 25.Engine exhaust9 Danger
Engine exhaust gases contain
poisonous carbon monoxide,
which is colourless and odourless and could be fatal if inhaled.
If exhaust gases enter the interior
of the vehicle, open the windows.
Have the cause of the fault
rectified by a workshop.
Avoid driving with an open load
compartment, otherwise exhaust
gases could enter the vehicle.
Malfunction indicator light 3 85.
Diesel particle filter
The diesel particle filter system filters
harmful soot particles out of the
exhaust gases. The system includes
a self-cleaning function that runs
automatically during driving without
any notification.
Page 133 of 223

Driving and operating131
The selector lever is locked in position
P and N and can only be moved when
the ignition is on and the foot brake is applied.
To engage P or R, push the release
button.
Never shift to P or R while the vehicle
is moving.
The engine can only be started with
lever in position P or N. Depress foot
brake or apply electrical parking
brake before starting.
Do not accelerate while engaging a
gear. Never depress the accelerator
pedal and brake pedal at the same
time.
When a gear is engaged, the vehicle
slowly begins to creep when the foot
brake is released.
Engine braking To utilise the engine braking effect,
select a lower gear in good time when
driving downhill - see Manual mode.
Use of the engine braking effect, as
opposed to the use of the foot brake
when driving downhill, can extend the
life of the brakes.Rocking the vehicle
Rocking the vehicle is only
permissible if the vehicle is stuck in
water, ice, sand, mud, snow or a dip.
Move the selector lever between D
and R in a repeat pattern while
applying light pressure to the
accelerator pedal when the vehicle is in gear. Do not race the engine and
avoid sudden acceleration.
If the vehicle cannot be released after
rocking the vehicle several times,
your vehicle may need to be towed
3 192.
Parking
Apply the electrical parking brake and engage P.
The ignition key can only be removed
when the selector lever is in position
P .Manual mode
Move selector lever out of position D
towards the left and then forwards or backwards.
<=Shift to a higher gear.]=Shift to a lower gear.
Tip selector lever in the appropriate
direction. It then returns to the centre
position.
Gearshifting in manual mode can be
achieved whilst accelerating. If the
engine speed is too low, the
Page 135 of 223

Driving and operating133
Deactivation
Fuel economy mode is switched off
by pressing button s again;
control indicator s extinguishes in
the instrument cluster.
Fault
In the event of a fault in the automatic
transmission, control indicator Z
illuminates in the instrument cluster 3 85 . Automatic shifting may be much
harsher than normal or, in the case of
a serious fault, cancelled altogether.
Have the cause of the fault remedied
by a workshop.
If control indicator g illuminates in
the instrument cluster when the
engine is running, this may indicate a
fault in the transmission electronics
3 85. The electronics switch to the
emergency running programme, fuel
consumption may increase and the
driveability of the vehicle may be
affected. Seek the assistance of a
workshop.Interruption of power
supply
The clutch is not disengaged if the
vehicle battery is discharged and a
gear has been selected. The vehicle
cannot move. The selector lever
cannot be moved out of position P or
N .
If the battery is discharged, start the
vehicle using jump leads 3 190.
If the battery is not the cause of the
fault, release the selector lever:
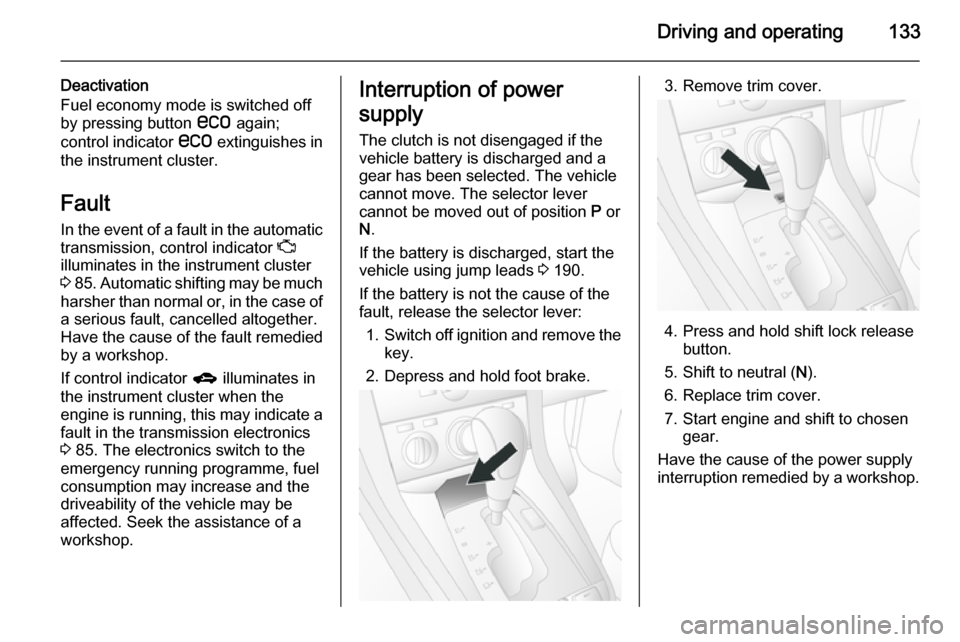
1. Switch off ignition and remove the
key.
2. Depress and hold foot brake.3. Remove trim cover.
4. Press and hold shift lock release button.
5. Shift to neutral ( N).
6. Replace trim cover.
7. Start engine and shift to chosen gear.
Have the cause of the power supply
interruption remedied by a workshop.
Page 150 of 223

148Driving and operating
If no eye is available, loop cable
around coupling ball bar. Ensure
cable is crossed under the vertical
coupling socket to ensure the trailer
nose cannot drop to the ground if it
becomes separated from the trailer
hitch. Do not allow the cable to drag
along the ground and always allow
enough slack to permit full turning.
Follow the instructions supplied with
the towing equipment.
Before attaching a trailer, lubricate
the coupling ball. However, do not do
so if a stabiliser, which acts on the coupling ball, is being used to reduce snaking movements. For trailers with
low driving stability, the use of a
friction-type stabiliser is strongly
recommended.
Do not drive faster than 50 mph, even
in countries where higher speeds are
permitted. When driving uphill, do not drive faster than 20 mph in 1st gear,
or 30 mph in 2nd gear.
If the trailer starts snaking, drive more slowly, do not attempt to correct the
steering and brake sharply if
necessary.When driving downhill, drive in the
same gear as if driving uphill and
drive at a similar speed.
Adjust tyre pressure to the value
specified for full load 3 210.
Trailer towing Trailer loads
The permissible trailer loads are
vehicle-dependent and engine-
dependent maximum values which
must not be exceeded. The actual
trailer load is the difference between
the actual gross weight of the trailer
and the actual coupling socket load
with the trailer coupled.
When the trailer load is being
checked, therefore, only the trailer
wheels - and not the jockey wheel -
must be standing on the weighing
apparatus.
The permissible trailer loads are
specified in the vehicle documents. In general, they are valid for gradients
up to max. 12 %.The permitted trailer load applies up
to the specified incline and up to an
altitude of 1000 metres above sea
level. Since engine power decreases
as altitude increases due to the air
becoming thinner, therefore reducing
climbing ability, the permissible gross train weight also decreases by 10 %
for every 1000 metres of additional
altitude. The gross train weight does
not have to be reduced when driving
on roads with slight inclines (less than
8 %, e.g. motorways).
The permissible gross train weight
must not be exceeded. This weight is
specified on the identification plate
3 201.
Vertical coupling load
The vertical coupling load is the load
exerted by the trailer on the coupling
ball. It can be varied by changing the
weight distribution when loading the
trailer.
The maximum permissible vertical
coupling load (80 kg) is specified on
the towing equipment identification
plate and in the vehicle documents.
Always aim for the maximum load,
Page 152 of 223

150Driving and operating
Inserting the coupling ball bar
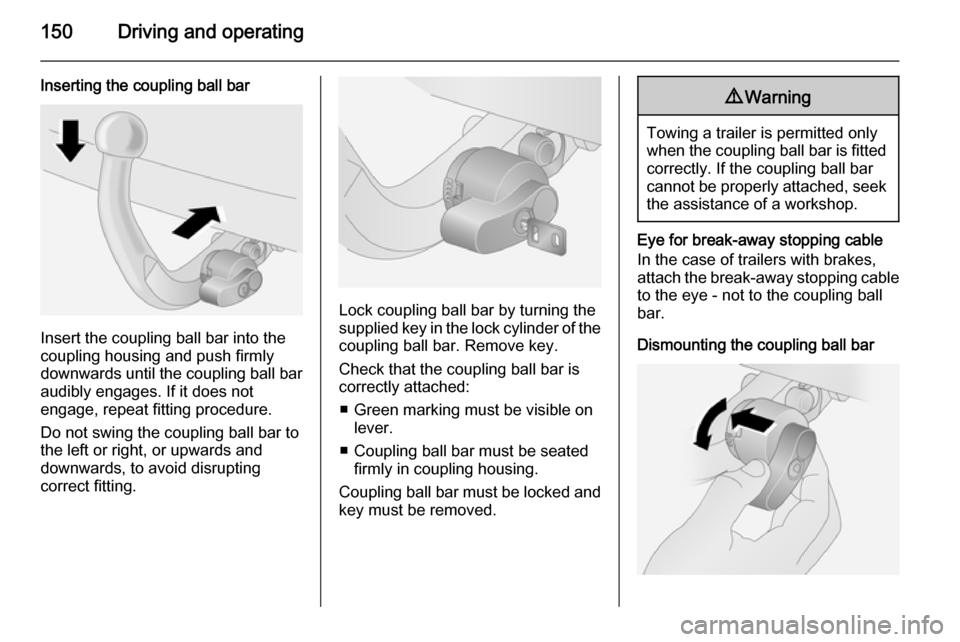
Insert the coupling ball bar into the
coupling housing and push firmly
downwards until the coupling ball bar
audibly engages. If it does not
engage, repeat fitting procedure.
Do not swing the coupling ball bar to
the left or right, or upwards and
downwards, to avoid disrupting
correct fitting.
Lock coupling ball bar by turning the supplied key in the lock cylinder of the coupling ball bar. Remove key.
Check that the coupling ball bar is
correctly attached:
■ Green marking must be visible on lever.
■ Coupling ball bar must be seated firmly in coupling housing.
Coupling ball bar must be locked and key must be removed.
9 Warning
Towing a trailer is permitted only
when the coupling ball bar is fitted correctly. If the coupling ball bar
cannot be properly attached, seek the assistance of a workshop.
Eye for break-away stopping cable
In the case of trailers with brakes,
attach the break-away stopping cable
to the eye - not to the coupling ball
bar.
Dismounting the coupling ball bar
Page 153 of 223

Driving and operating151
Unlock coupling ball bar and remove
key. Push lever to the left, towards the
coupling ball bar and turn it
downwards. Pull coupling ball bar out of coupling housing.
Remove any rust or dirt from area
around the coupling housing and
coupling ball bar connection before
inserting sealing plug in the hole.
Place the coupling ball bar in the bag supplied, fasten it with the strap and
stow it below the floor cover in the
load compartment.
Do not use steam-jet cleaners or
other high-pressure cleaners to clean
the coupling ball bar.
Trailer stability assist If the system detects snaking
movements, engine power is reduced
and the vehicle/trailer combination is
selectively braked until the snaking ceases. While system is working keep steering wheel as still as possible.
Trailer stability assist (TSA) is a
function of the Electronic Stability
Control 3 139.
Page 162 of 223

160Vehicle care
Charging the vehicle battery9Warning
On vehicles with stop-start
system, ensure that the charging potential does not exceed
14.6 volts when using a battery
charger. Otherwise the vehicle
battery might be damaged.
Jump starting 3 190.
Warning label
Meaning of symbols: ■ No sparks, naked flames or smoking.
■ Always shield eyes. Explosive gases can cause blindness or
injury.
■ Keep the vehicle battery out of reach of children.
■ The vehicle battery contains sulfuric acid which could cause
blindness or serious burn injuries.
■ See the Owner's Manual for further
information.
■ Explosive gas may be present in the vicinity of the vehicle battery.Diesel fuel filter
Drain diesel fuel filter of residual
water at every engine oil change.
Place a container underneath the
filter housing. Turn drain plug
anticlockwise using a suitable
screwdriver, to drain off the water.
The filter is drained as soon as diesel fuel emerges from the port. Retighten
the drain plug by turning it clockwise.
With engine switched off, turn ignition
key to ON, wait approx. 5 seconds,
and turn key to LOCK to perform
priming operation. Perform this
Page 176 of 223

174Vehicle care
FuseCircuitAMPAmplifierAPO JACK
(CONSOLE)Power outlet
(centre console)APO JACK
(REAR CARGO)Power outlet
(load compart‐
ment)AWD/VENTAll-wheel drive,
ventilationBCM (CTSY)Courtesy lightsBCM (DIMMER)Instrument illu‐
minationBCM (INT LIGHT
TRLR FOG)Interior lights,
trailer fog lightBCM (PRK/TRN)Parking lights,
turn signalsBCM (STOP)Brake lightsBCM (TRN SIG)Turn signalsBCM (VBATT)Battery voltageFuseCircuitCIMCommunica‐
tions Integration
ModuleCLSTRInstrument
clusterDRLDaytime running
lightsDR/LCKDriver door lockDRVR PWR
SEATDriver power
seatDRV/PWR
WNDWDriver power
windowF/DOOR LOCKFuel filler flapFRT WSRFront washerFSCMFuel systemFSCM/VENT SOLFuel system,
vent solenoidHEATING MAT
SWHeating mat
switchHTD SEAT PWRSeat heatingFuseCircuitHVAC BLWRClimate control,
air conditioning
fanIPCInstrument panel clusterISRVM/RCMInterior mirror,
remote compass moduleKEY CAPTUREKey captureL/GATETailgateLOGISTIC MODELogistic modeOSRVMExterior mirrorsPASS PWR
WNDWPassenger
power windowPWR DIODEPower diodePWR MODINGPower modingRADIORadioRR FOGHeated rear
window
Page 177 of 223

Vehicle care175
FuseCircuitRUN 2Power battery
key on runRUN/CRNKRun crankSDM (BATT)Safety Diag‐
nosis Module
(Battery)SDM (IGN 1)Safety Diag‐
nosis Module
(Ignition)SPARE-S/ROOFSunroofS/ROOF BATTSunroof batterySSPSPower steeringSTR/WHL SWSteering wheelTRLRTrailerTRLR BATTTrailer batteryFuseCircuitXBCMExport Body
Control ModuleXM/HVAC/DLCXM satellite
radio, climate
control, data link
connection
After changing of defective fuses
close the fuse box cover and press
until it engages.
If the fuse box cover is not closed
correctly, malfunctions may occur.
Vehicle tools
Tools
Vehicles with spare wheel
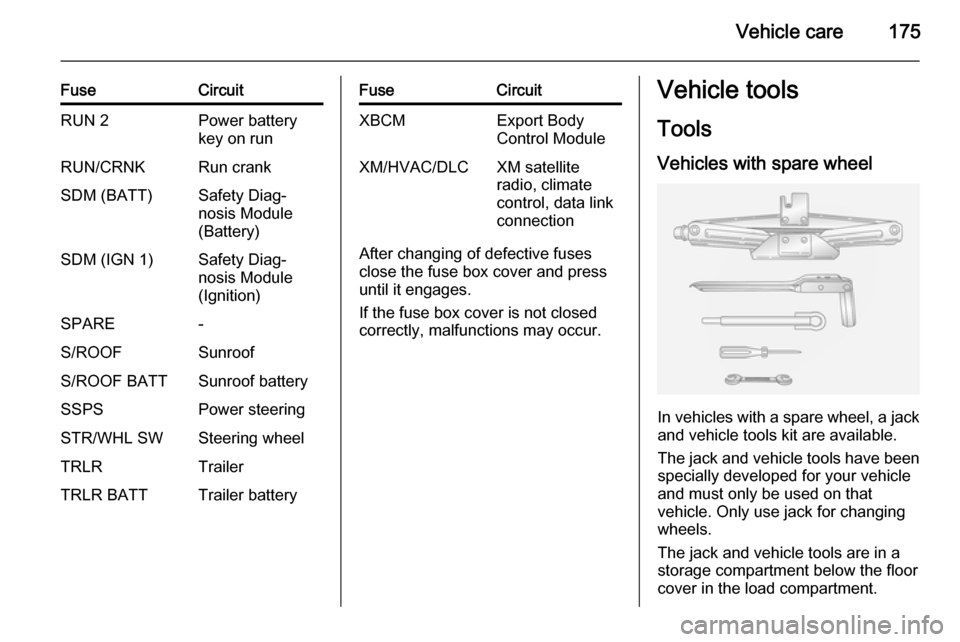
In vehicles with a spare wheel, a jack and vehicle tools kit are available.
The jack and vehicle tools have been
specially developed for your vehicle
and must only be used on that
vehicle. Only use jack for changing
wheels.
The jack and vehicle tools are in a
storage compartment below the floor
cover in the load compartment.
Page 180 of 223

178Vehicle care
V=up to 150 mphW=up to 168 mph
Tyre pressureCheck the pressure of cold tyres at
least every 14 days and before any
long journey. Do not forget the spare
wheel. This also applies to vehicles
with tyre pressure monitoring system.
Use the valve cap key to make
unscrewing the valve caps easier.
The valve cap key is located on the
inside of the tank flap.
Tyre pressure 3 210.
The tyre pressure data refers to cold
tyres. It applies to summer and winter tyres.
Always inflate the spare tyre to the
pressure specified for full load.
The ECO tyre pressure serves to
achieve the smallest amount of fuel
consumption possible.
Incorrect tyre pressures will impair
safety, vehicle handling, comfort and
fuel economy and will increase tyre
wear.
Tyre pressures differ depending on
various options. For the correct tyre
pressure value, follow the procedure
below:
1. Identify the engine identifier code.
Engine data 3 205.
2. Identify the respective tyre.
The tyre pressure tables show all
possible tyre combinations 3 210.
For the tyres approved for your
vehicle, refer to the EEC Certificate of Conformity provided with your vehicle
or other national registration
documents.
The driver is responsible for correct
adjustment of tyre pressure.9 Warning
If the pressure is too low, this can
result in considerable tyre warm-
up and internal damage, leading to tread separation and even to tyre
blow-out at high speeds.
If the tyre pressure must be reduced
or increased on a vehicle with tyre
pressure monitoring system, switch
off ignition.
Tyre pressure monitoring system The tyre pressure monitoring system
checks the pressure of all four wheels
once per minute when vehicle speed
exceeds a certain limit.Caution
Tyre pressure monitoring system
warns only about low tyre pressure
condition and does not replace
regular tyre maintenance by the
driver.
All wheels must be equipped with pressure sensors and the tyres must
have the prescribed pressure. If
wheels without sensors are mounted,
the tyre pressure monitoring system
is not operational.