change time VAUXHALL ANTARA 2015 Owner's Manual
[x] Cancel search | Manufacturer: VAUXHALL, Model Year: 2015, Model line: ANTARA, Model: VAUXHALL ANTARA 2015Pages: 223, PDF Size: 6.07 MB
Page 76 of 223

74Instruments and controlsHorn
Press j.
Windscreen wiper/washer
Windscreen wiper&=fast%=slow$=timed interval wiping or
automatic wiping with rain
sensor§=off
For a single wipe when the
windscreen wiper is off, press the
lever down.
Do not use if the windscreen is frozen.
Switch off in car washes.
Adjustable wiper interval
To set the wiping interval to a value
between 1 and 10 seconds:
■ Switch on ignition.
■ Push lever down from position §.
■ Wait until wiping frequency reaches
the desired interval.
■ Set lever to position $.
The interval remains stored until the
next change or until the ignition is
switched off. Switching the ignition on
and moving the lever to $ sets the
interval to 3.5 seconds.
Page 95 of 223
Instruments and controls93
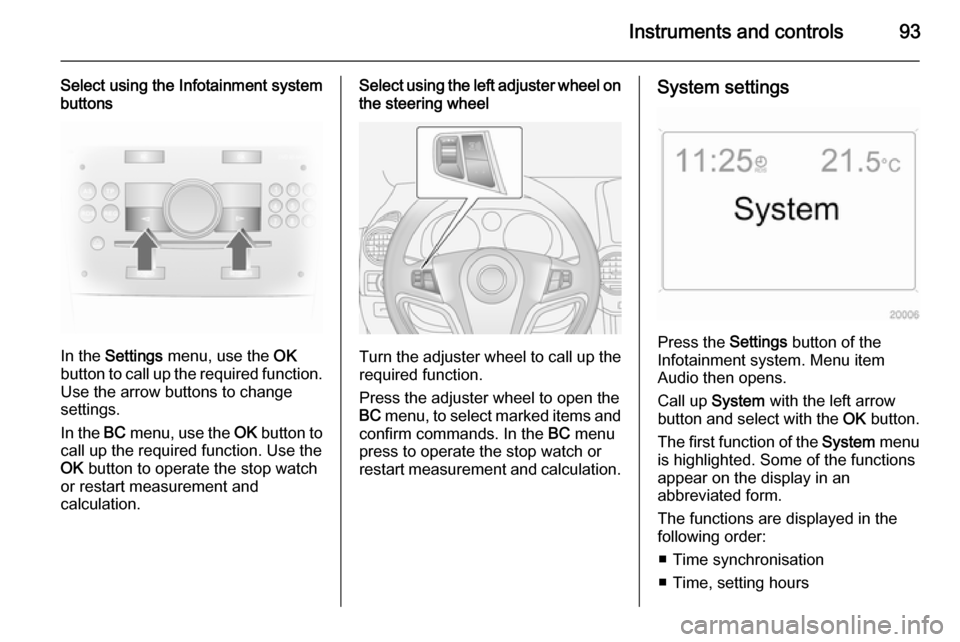
Select using the Infotainment system
buttons
In the Settings menu, use the OK
button to call up the required function.
Use the arrow buttons to change
settings.
In the BC menu, use the OK button to
call up the required function. Use the
OK button to operate the stop watch
or restart measurement and
calculation.
Select using the left adjuster wheel on the steering wheel
Turn the adjuster wheel to call up the
required function.
Press the adjuster wheel to open the
BC menu, to select marked items and
confirm commands. In the BC menu
press to operate the stop watch or
restart measurement and calculation.
System settings
Press the Settings button of the
Infotainment system. Menu item
Audio then opens.
Call up System with the left arrow
button and select with the OK button.
The first function of the System menu
is highlighted. Some of the functions
appear on the display in an
abbreviated form.
The functions are displayed in the
following order:
■ Time synchronisation
■ Time, setting hours
Page 100 of 223
98Instruments and controls
Some RDS transmitters do not send
a correct time signal. In such cases,
switch off automatic time
synchronisation and set the time
manually.
To set date and time manually, select
menu item Time, Date from the
Settings menu. The menu is
displayed. Select the menu items
required and make the desired
setting.
To correct time with the help of RDS,
select menu item Synchron. clock
automatical. from the Time, Date
menu. The box in front of Synchron.
clock automatical. will be checked.Language selection
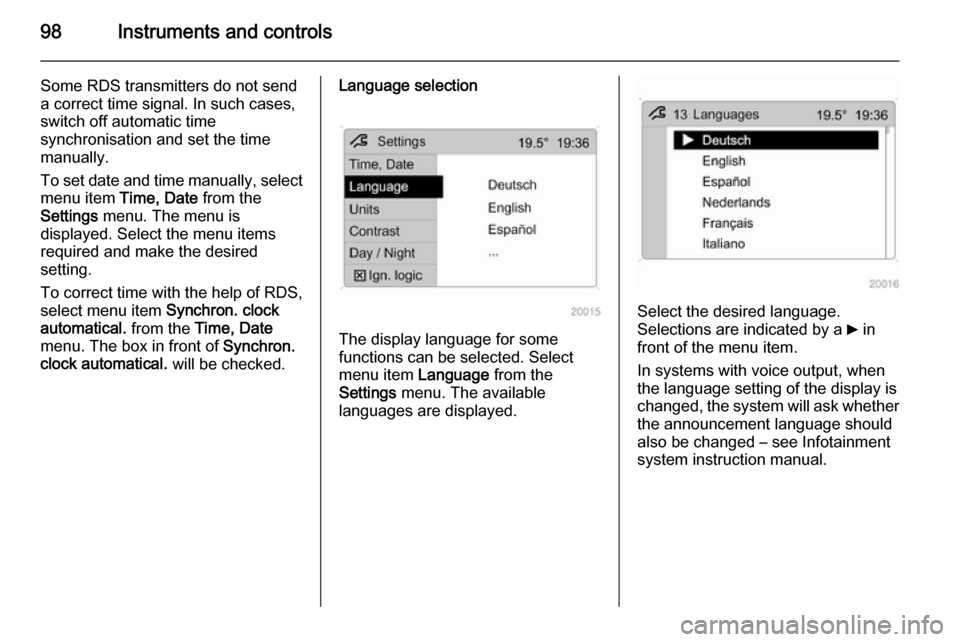
The display language for some
functions can be selected. Select
menu item Language from the
Settings menu. The available
languages are displayed.
Select the desired language.
Selections are indicated by a 6 in
front of the menu item.
In systems with voice output, when
the language setting of the display is
changed, the system will ask whether the announcement language should
also be changed – see Infotainment
system instruction manual.
Page 102 of 223
100Instruments and controlsVehicle messagesWarning chimes
When starting the engine or whilst driving
Only one warning chime will sound at a time.
The warning chime regarding
unfastened seat belts has priority
over any other warning chime.
■ If seat belt is not fastened.
■ When operating the turn and lane- change signals.
■ When the vehicle is being driven and the electrical parking brake is
applied 3 137.
■ When releasing the electrical parking brake without applying the
foot brake 3 90.
■ If there is a fault in the braking system 3 85.
■ If the parking assist detects an object 3 143.■ During automatic self-cleaning of
the diesel particle filter 3 128.
■ In vehicles equipped with engine overspeed warning; when vehicle
speed exceeds 75 mph 3 91.
When the vehicle is parked and/ or the driver's door is opened ■ When the key is in the ignition switch.
■ With exterior lights on.
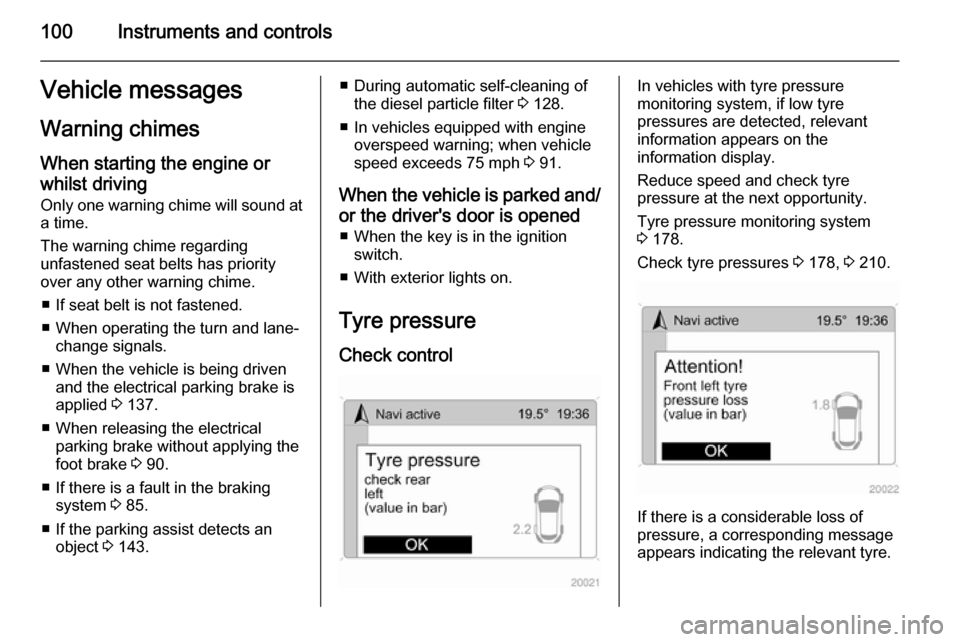
Tyre pressure
Check controlIn vehicles with tyre pressure
monitoring system, if low tyre
pressures are detected, relevant
information appears on the
information display.
Reduce speed and check tyre
pressure at the next opportunity.
Tyre pressure monitoring system
3 178.
Check tyre pressures 3 178, 3 210.
If there is a considerable loss of
pressure, a corresponding message
appears indicating the relevant tyre.
Page 106 of 223
104Instruments and controls
Instantaneous consumption
Display of the instantaneous
consumption.
Display changes depending on
speed:Display in gal/h=below 8 mphDisplay in
miles/gal=above 8 mph
Distance travelled
Display of distance travelled. The
measurement can be reset at any
time.
Average speed Display of average speed. The
measurement can be reset at any
time.
Stoppages in the journey with the
ignition off are not included in the
calculations.
Effective consumption
Display of the amount of fuel
consumed. The measurement can be reset at any time.
Average consumption
Display of average consumption. Themeasurement can be reset at any
time.
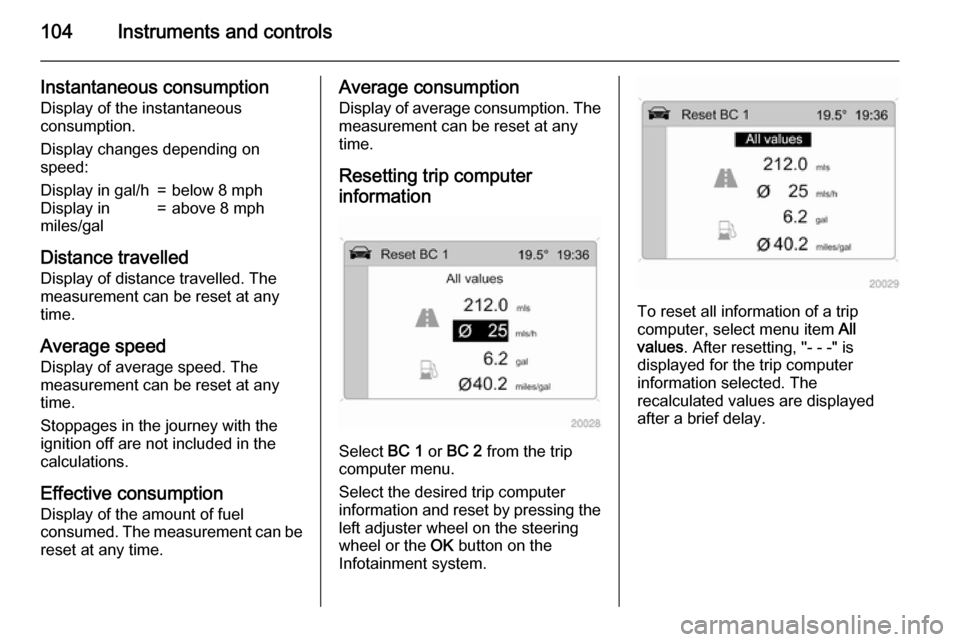
Resetting trip computer
information
Select BC 1 or BC 2 from the trip
computer menu.
Select the desired trip computer
information and reset by pressing the
left adjuster wheel on the steering
wheel or the OK button on the
Infotainment system.
To reset all information of a trip
computer, select menu item All
values . After resetting, "- - -" is
displayed for the trip computer
information selected. The
recalculated values are displayed
after a brief delay.
Page 154 of 223
152Vehicle careVehicle careGeneral Information...................152
Vehicle checks ........................... 153
Bulb replacement .......................161
Electrical system ........................167
Vehicle tools .............................. 175
Wheels and tyres .......................177
Jump starting ............................. 190
Towing ....................................... 192
Appearance care .......................194General Information
Accessories and vehicle
modifications
We recommend the use of genuine parts and accessories and factory
approved parts specific for your
vehicle type. We cannot assess or
guarantee reliability of other products
- even if they have a regulatory or
otherwise granted approval.
Do not make any modifications to the electrical system, e.g. changes of
electronic control units (chip tuning).Caution
When transporting the vehicle on
a train or on a recovery vehicle, the
mud flaps might be damaged.
Vehicle storage
Storage for a long period of time
If the vehicle is to be stored for several months:
■ Wash and wax the vehicle.
■ Have the wax in the engine compartment and underbody
checked.
■ Clean and preserve the rubber seals.
■ Change the engine oil.
■ Drain the washer fluid reservoir.
■ Check the coolant antifreeze and corrosion protection.
■ Adjust tyre pressure to the value specified for full load.
■ Park the vehicle in a dry, well ventilated place. Engage first orreverse gear or move selector lever
to P. Prevent the vehicle from
rolling.
■ Do not apply the electrical parking brake.
Page 182 of 223
180Vehicle care
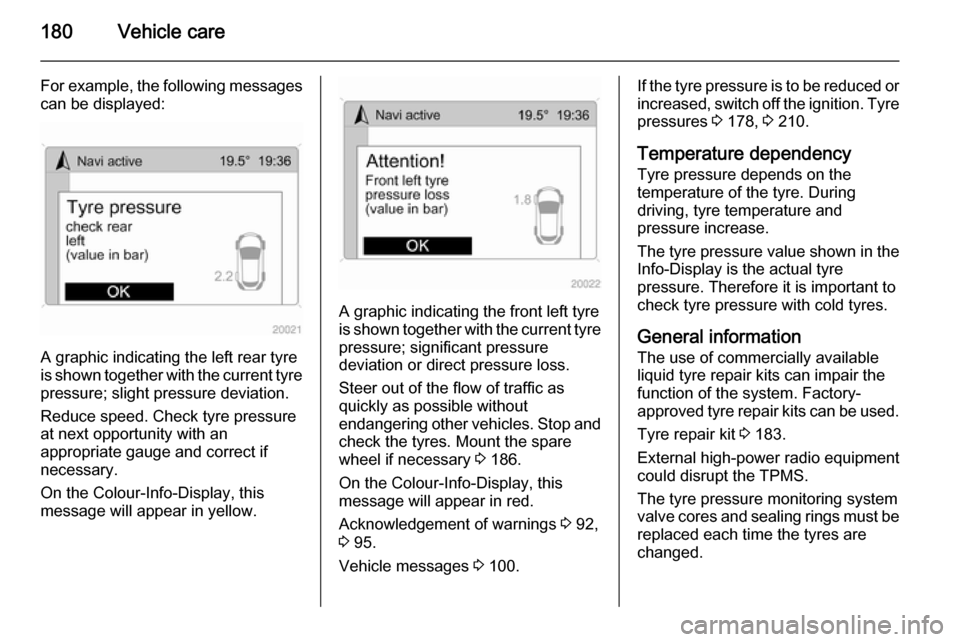
For example, the following messagescan be displayed:
A graphic indicating the left rear tyre
is shown together with the current tyre
pressure; slight pressure deviation.
Reduce speed. Check tyre pressure
at next opportunity with an
appropriate gauge and correct if
necessary.
On the Colour-Info-Display, this
message will appear in yellow.
A graphic indicating the front left tyre is shown together with the current tyre
pressure; significant pressure
deviation or direct pressure loss.
Steer out of the flow of traffic as
quickly as possible without
endangering other vehicles. Stop and check the tyres. Mount the spare
wheel if necessary 3 186.
On the Colour-Info-Display, this
message will appear in red.
Acknowledgement of warnings 3 92,
3 95.
Vehicle messages 3 100.
If the tyre pressure is to be reduced or
increased, switch off the ignition. Tyre
pressures 3 178, 3 210.
Temperature dependency Tyre pressure depends on the
temperature of the tyre. During
driving, tyre temperature and
pressure increase.
The tyre pressure value shown in the Info-Display is the actual tyre
pressure. Therefore it is important to
check tyre pressure with cold tyres.
General information
The use of commercially available
liquid tyre repair kits can impair the
function of the system. Factory-
approved tyre repair kits can be used.
Tyre repair kit 3 183.
External high-power radio equipment
could disrupt the TPMS.
The tyre pressure monitoring system
valve cores and sealing rings must be
replaced each time the tyres are
changed.
Page 188 of 223

186Vehicle care
13.Turn the selector switch clockwise
to the air only position. Switch on
the compressor to inflate the tyre
with air only.
Notice
The driving characteristic of the
repaired tyre is severely affected,
therefore have this tyre replaced.
If unusual noise is heard or the
compressor becomes hot, turn
compressor off for at least
30 minutes.
Note the expiry date of the kit. After
this date its sealing capability is no
longer guaranteed. Pay attention to
storage information on sealant
canister.
Replace the used sealant canister.
To remove sealant canister, release sealant filler hose and air hose, slide
canister out of housing and unscrew hose from canister. Dispose of thecanister as prescribed by applicable
laws.
The accessory adapter supplied can
be used to pump up other items
e.g. footballs, air mattresses,
inflatable dinghies etc. The adapter
is located on the underside of the
tyre repair kit.
Wheel changing Some vehicles are equipped with a
tyre repair kit instead of a spare wheel 3 183.Make the following preparations and
observe the following information:
■ Park the vehicle on a level, firm and
non-slippery surface. The frontwheels must be in the straight-
ahead position.
■ Apply the electrical parking brake 3 137 and engage first gear,
reverse gear or P.
■ Remove the spare wheel 3 189.
■ Never change more than one wheel
at a time.
■ Block wheel diagonally opposite the wheel to be changed, by placing
wedge blocks or equivalent in front
and behind the wheel.
■ Use the jack only to change wheels
in case of puncture, not for
seasonal winter or summer tyre
changes.
■ Never exceed jack maximum working load (900 kg).
■ If the ground on which the vehicle is standing is soft, a solid board
(max. 1 cm thick) should be placed
under the jack.
Page 219 of 223

217
Centre high-mounted brakelight.................................. 110, 166
Change engine oil .......................89
Changing tyre and wheel size ...182
Charging system .......................... 84
Check control.............................. 100
Child locks ................................... 22
Child restraint installation locations ................................... 52
Child restraints.............................. 51
Child restraint systems ................51
Cleaning the vehicle ...................194
Climate control ............................. 15
Climate control systems .............115
Clock ............................................ 77
Clutch fluid ................................. 158
Coin storage ................................. 56
Console box.................................. 58
Console net .................................. 56
Control indicators.......................... 81
Control of the vehicle .................123
Controls ........................................ 73
Controls in steering wheel ............73
Convex shape .............................. 28
Coolant and antifreeze ...............198
Coupling ball bar ........................149
Cruise control ...................... 91, 141
Cupholders .................................. 57
Curtain airbag system .................. 49D
Danger, Warnings and Cautions ...3
Daytime running lights ...............108
Declaration of conformity ............211
Descent control system .......87, 140
Diesel fuel filter .......................... 160
Diesel fuel system bleeding .......161
Diesel particle filter .........85, 88, 128
Door open .................................... 91
Doors ............................................ 23
Drain fuel filter ............................. 90
Drink holders ................................ 57
Driver assistance systems ..........141
Driving characteristics and towing tips .............................. 147
Driving hints ................................ 123
E
Electric adjustment ......................28
Electrical parking brake .......86, 137
Electrical parking brake fault .......86
Electrical system......................... 167
Electronic climate control system 117
Electronic driving programmes ..132
Electronic Stability Control ..87, 139
Electronic Stability Control off ...... 88
End-of-life vehicle recovery .......153
Engine compartment fuse box ...169
Engine coolant ........................... 155Engine coolant temperature ........88
Engine data ............................... 205
Engine exhaust .......................... 128
Engine identification ...................201
Engine oil ................... 154, 198, 202
Engine oil life monitor ...................89
Engine oil pressure ......................89
Entry lighting .............................. 113
Event data recorders ..................213
Exhaust gases ............................ 128
Exit lighting ................................ 113
Exterior care .............................. 194
Exterior lighting ....................12, 106
Exterior mirrors ............................. 28
F
Fault ........................................... 133
Fire extinguisher ........................... 70
First aid kit ................................... 70
Fixed air vents ........................... 121
Flex-Fix system ............................ 58
Fog light ....................................... 91
Fog lights .................... 109, 110, 164
Folding mirrors ............................. 28
Front airbag system .....................47
Front fog lights ........................... 109
Front passenger seat undertray ...57
Front seats.................................... 35
Fuel............................................. 144