VAUXHALL ASTRA J 2016 Owners Manual
Manufacturer: VAUXHALL, Model Year: 2016, Model line: ASTRA J, Model: VAUXHALL ASTRA J 2016Pages: 341, PDF Size: 10.35 MB
Page 91 of 341
Storage89Lashing eyes
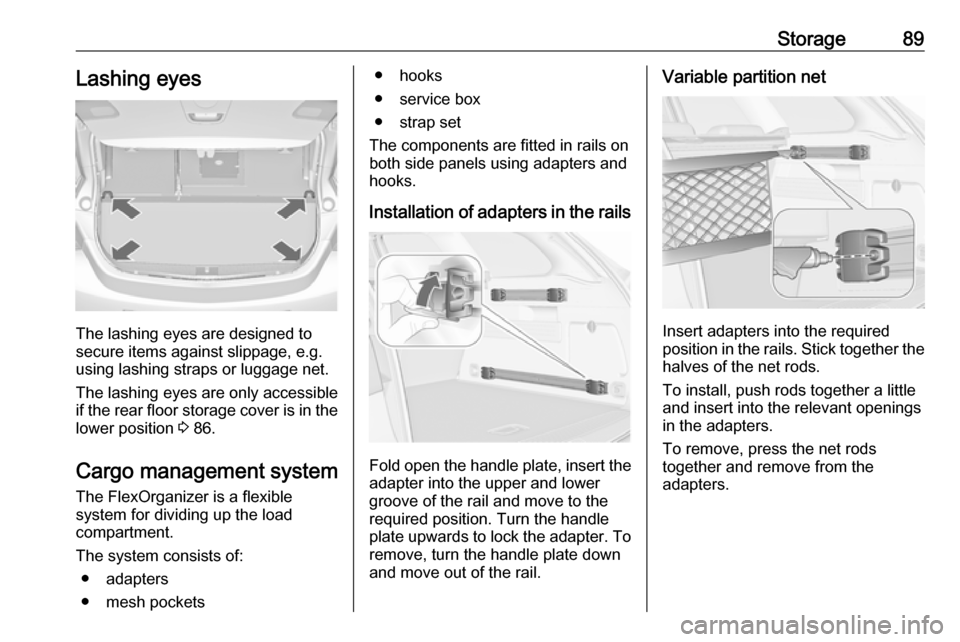
The lashing eyes are designed to
secure items against slippage, e.g.
using lashing straps or luggage net.
The lashing eyes are only accessible
if the rear floor storage cover is in the lower position 3 86.
Cargo management system
The FlexOrganizer is a flexible
system for dividing up the load
compartment.
The system consists of: ● adapters
● mesh pockets
● hooks
● service box
● strap set
The components are fitted in rails on
both side panels using adapters and hooks.
Installation of adapters in the rails
Fold open the handle plate, insert theadapter into the upper and lower
groove of the rail and move to the
required position. Turn the handle
plate upwards to lock the adapter. To
remove, turn the handle plate down
and move out of the rail.
Variable partition net
Insert adapters into the required
position in the rails. Stick together the
halves of the net rods.
To install, push rods together a little
and insert into the relevant openings
in the adapters.
To remove, press the net rods
together and remove from the
adapters.
Page 92 of 341
90StorageNet pocket
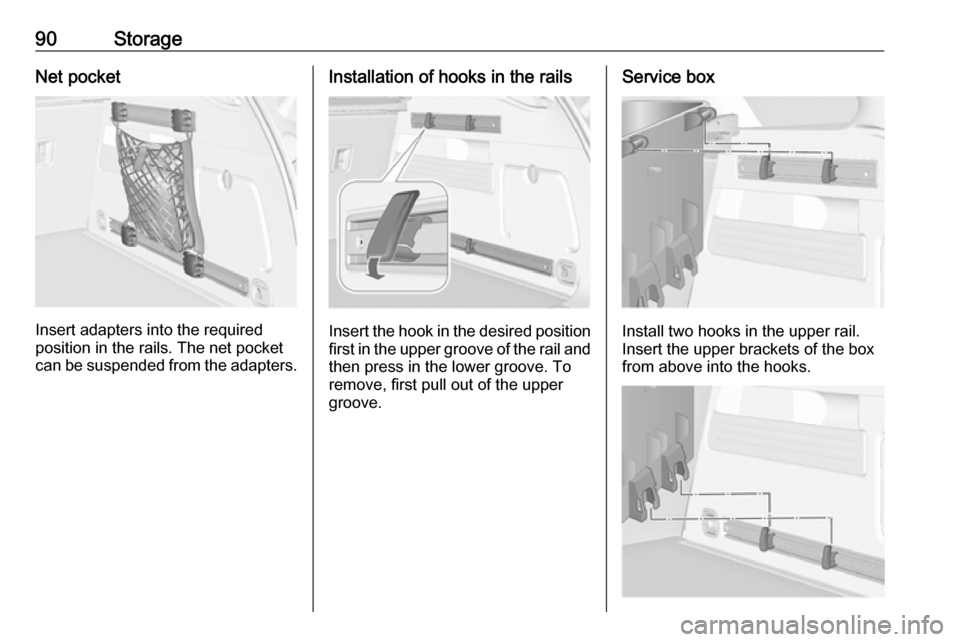
Insert adapters into the required
position in the rails. The net pocket
can be suspended from the adapters.
Installation of hooks in the rails
Insert the hook in the desired position first in the upper groove of the rail and
then press in the lower groove. To
remove, first pull out of the upper
groove.
Service box
Install two hooks in the upper rail.
Insert the upper brackets of the box
from above into the hooks.
Page 93 of 341
Storage91Alternatively install both hooks in the
lower rail. Plug in the lower brackets
of the box from above into the lower
hooks.
Strap set
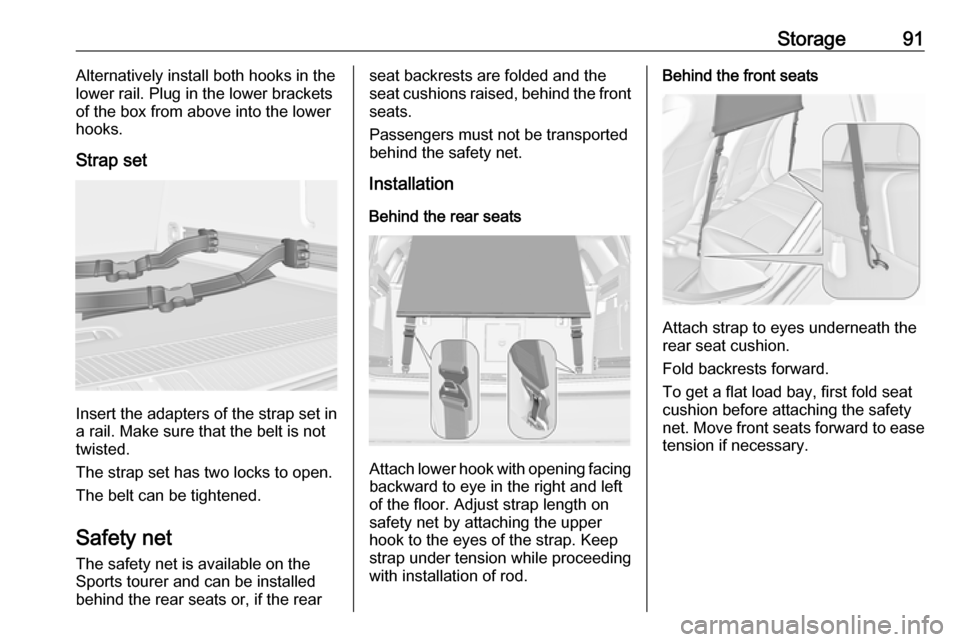
Insert the adapters of the strap set in
a rail. Make sure that the belt is not
twisted.
The strap set has two locks to open. The belt can be tightened.
Safety net
The safety net is available on the
Sports tourer and can be installed
behind the rear seats or, if the rear
seat backrests are folded and the
seat cushions raised, behind the front
seats.
Passengers must not be transported
behind the safety net.
Installation
Behind the rear seats
Attach lower hook with opening facing
backward to eye in the right and left
of the floor. Adjust strap length on
safety net by attaching the upper
hook to the eyes of the strap. Keep
strap under tension while proceeding
with installation of rod.
Behind the front seats
Attach strap to eyes underneath the
rear seat cushion.
Fold backrests forward.
To get a flat load bay, first fold seat cushion before attaching the safety
net. Move front seats forward to ease
tension if necessary.
Page 94 of 341
92StorageInstallation of the rod
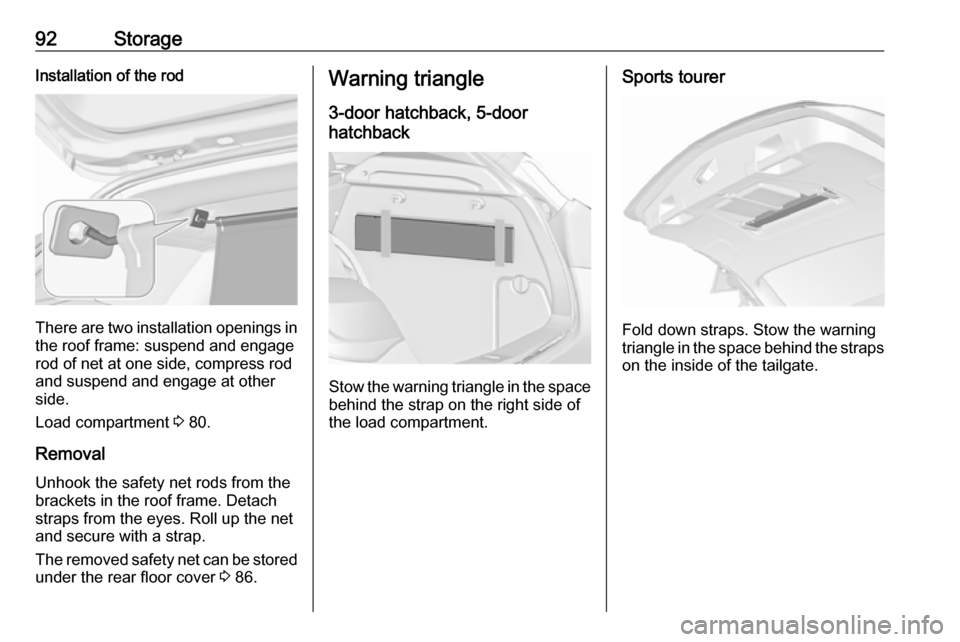
There are two installation openings inthe roof frame: suspend and engage
rod of net at one side, compress rod and suspend and engage at other
side.
Load compartment 3 80.
Removal
Unhook the safety net rods from the
brackets in the roof frame. Detach
straps from the eyes. Roll up the net
and secure with a strap.
The removed safety net can be stored under the rear floor cover 3 86.
Warning triangle
3-door hatchback, 5-door
hatchback
Stow the warning triangle in the space
behind the strap on the right side of
the load compartment.
Sports tourer
Fold down straps. Stow the warning
triangle in the space behind the straps on the inside of the tailgate.
Page 95 of 341
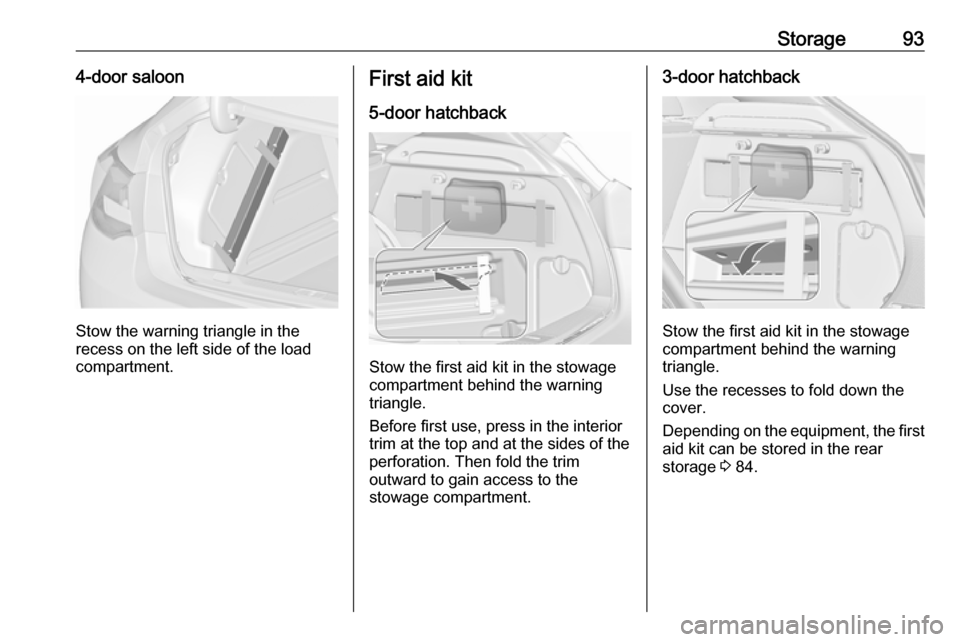
Storage934-door saloon
Stow the warning triangle in the
recess on the left side of the load
compartment.
First aid kit
5-door hatchback
Stow the first aid kit in the stowage
compartment behind the warning
triangle.
Before first use, press in the interior
trim at the top and at the sides of the
perforation. Then fold the trim
outward to gain access to the
stowage compartment.
3-door hatchback
Stow the first aid kit in the stowage
compartment behind the warning
triangle.
Use the recesses to fold down the
cover.
Depending on the equipment, the first aid kit can be stored in the rear
storage 3 84.
Page 96 of 341
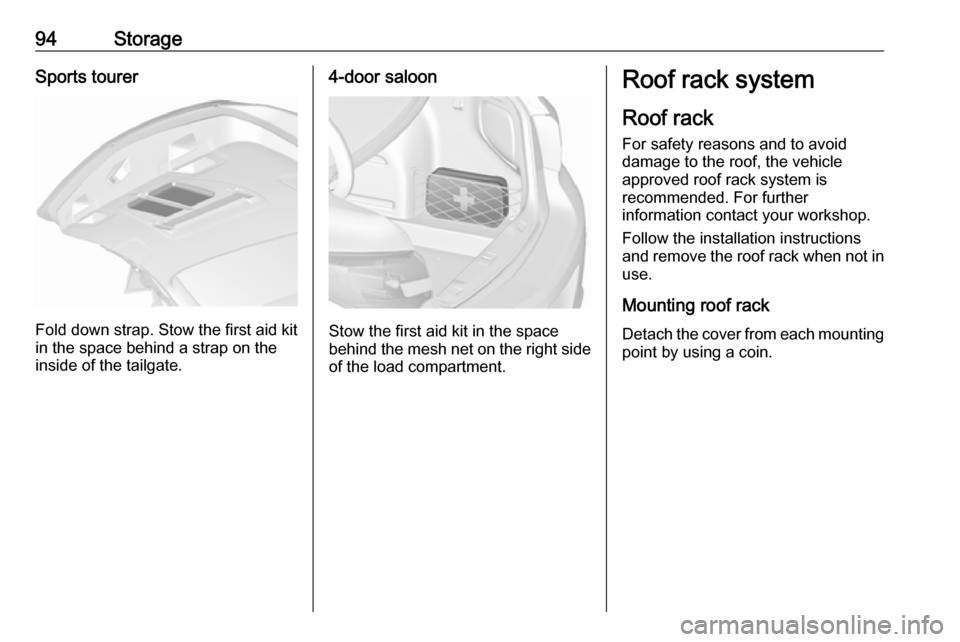
94StorageSports tourer
Fold down strap. Stow the first aid kit
in the space behind a strap on the
inside of the tailgate.
4-door saloon
Stow the first aid kit in the space
behind the mesh net on the right side of the load compartment.
Roof rack system
Roof rack
For safety reasons and to avoid
damage to the roof, the vehicle
approved roof rack system is
recommended. For further
information contact your workshop.
Follow the installation instructions
and remove the roof rack when not in use.
Mounting roof rack Detach the cover from each mounting
point by using a coin.
Page 97 of 341
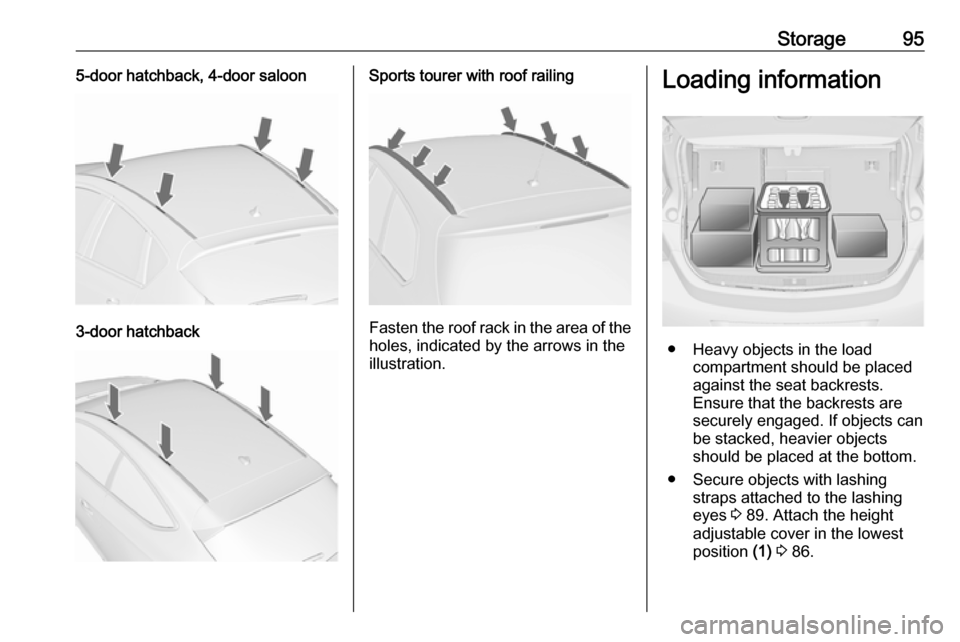
Storage955-door hatchback, 4-door saloon
3-door hatchback
Sports tourer with roof railing
Fasten the roof rack in the area of the
holes, indicated by the arrows in the
illustration.
Loading information
● Heavy objects in the load compartment should be placed
against the seat backrests.
Ensure that the backrests are
securely engaged. If objects can
be stacked, heavier objects
should be placed at the bottom.
● Secure objects with lashing straps attached to the lashing
eyes 3 89. Attach the height
adjustable cover in the lowest
position (1) 3 86.
Page 98 of 341
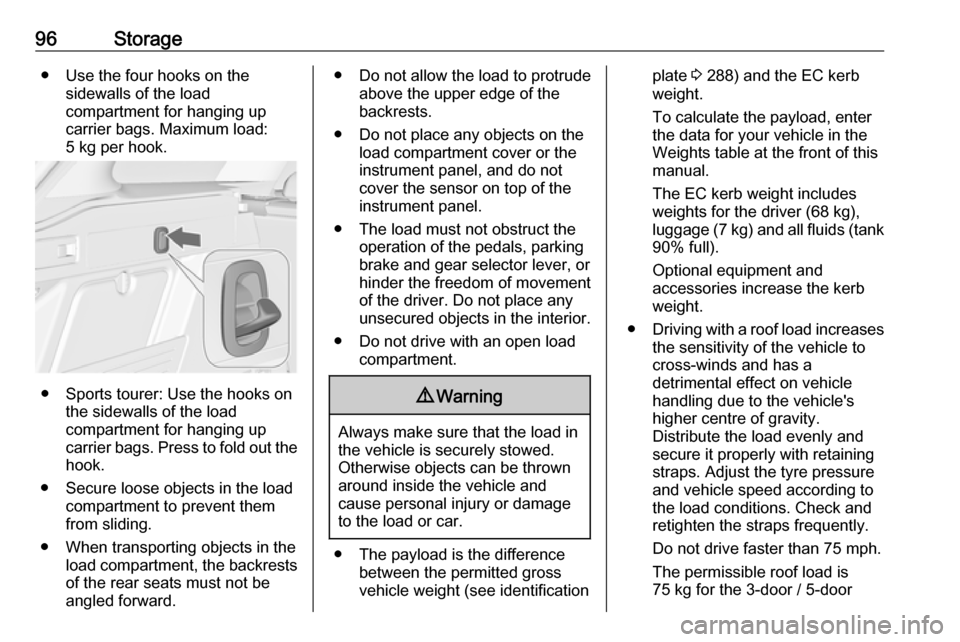
96Storage● Use the four hooks on thesidewalls of the load
compartment for hanging up
carrier bags. Maximum load:
5 kg per hook.
● Sports tourer: Use the hooks on the sidewalls of the load
compartment for hanging up
carrier bags. Press to fold out the
hook.
● Secure loose objects in the load compartment to prevent themfrom sliding.
● When transporting objects in the load compartment, the backrestsof the rear seats must not beangled forward.
● Do not allow the load to protrude above the upper edge of the
backrests.
● Do not place any objects on the load compartment cover or theinstrument panel, and do notcover the sensor on top of the
instrument panel.
● The load must not obstruct the operation of the pedals, parking
brake and gear selector lever, or
hinder the freedom of movement of the driver. Do not place any
unsecured objects in the interior.
● Do not drive with an open load compartment.9Warning
Always make sure that the load in
the vehicle is securely stowed.
Otherwise objects can be thrown
around inside the vehicle and
cause personal injury or damage
to the load or car.
● The payload is the difference between the permitted gross
vehicle weight (see identification
plate 3 288) and the EC kerb
weight.
To calculate the payload, enter
the data for your vehicle in the
Weights table at the front of this
manual.
The EC kerb weight includes
weights for the driver (68 kg),
luggage (7 kg) and all fluids (tank 90% full).
Optional equipment and
accessories increase the kerb
weight.
● Driving with a roof load increases
the sensitivity of the vehicle to
cross-winds and has a
detrimental effect on vehicle
handling due to the vehicle's
higher centre of gravity.
Distribute the load evenly and secure it properly with retaining
straps. Adjust the tyre pressure
and vehicle speed according to
the load conditions. Check and
retighten the straps frequently.
Do not drive faster than 75 mph.
The permissible roof load is
75 kg for the 3-door / 5-door
Page 99 of 341

Storage97hatchback and 4-door saloon, for
the Sports tourer it is 100 kg. The
roof load is the combined weight
of the roof rack and the load.
Page 100 of 341

98Instruments and controlsInstruments and
controlsControls ....................................... 99
Steering wheel adjustment ........99
Steering wheel controls .............99
Heated steering wheel ...............99
Horn ......................................... 100
Windscreen wiper/washer .......100
Rear window wiper/washer .....102
Outside temperature ................102
Clock ....................................... 103
Power outlets ........................... 104
Cigarette lighter .......................105
Ashtrays .................................. 105
Warning lights, gauges and indi‐ cators ......................................... 106
Instrument cluster ....................106
Speedometer ........................... 106
Odometer ................................ 106
Trip odometer .......................... 106
Tachometer ............................. 106
Fuel gauge .............................. 107
Fuel selector ............................ 107
Engine coolant temperature gauge ..................................... 107
Service display ........................ 108Control indicators ....................109
Turn signal ............................... 112
Seat belt reminder ...................112
Airbag and belt tensioners .......112
Airbag deactivation ..................112
Charging system .....................113
Malfunction indicator light ........113
Service vehicle soon ...............113
Brake and clutch system .........113
Operate pedal .......................... 113
Electric parking brake ..............113
Electric parking brake fault ......114
Antilock brake system (ABS) ...114
Upshift ..................................... 114
Power steering ........................ 114
Lane departure warning ..........114
Ultrasonic parking assist .........115
Electronic Stability Control off . 115
Electronic Stability Control and Traction Control system .........115
Traction Control system off .....115
Preheating ............................... 115
Diesel particle filter ..................115
Tyre pressure monitoring system .................................... 116
Engine oil pressure ..................116
Low fuel ................................... 116
Immobiliser .............................. 117
Reduced engine power ...........117
Exterior light ............................ 117High beam............................... 117
High beam assist .....................117
Adaptive forward lighting .........117
Fog light ................................... 117
Rear fog light ........................... 117
Low washer fluid ......................117
Cruise control .......................... 117
Adaptive cruise control ............117
Vehicle detected ahead ...........118
Door open ................................ 118
Information displays ...................118
Driver Information Centre ........118
Graphic-Info-Display, Colour- Info-Display ............................ 122
Smartphone controller .............124
Vehicle messages ......................124
Warning chimes .......................127
Battery voltage ........................ 127
Trip computer ............................. 128
Vehicle personalisation ..............130
OnStar® system ........................135