Settings VAUXHALL CORSA 2014.5 Infotainment system
[x] Cancel search | Manufacturer: VAUXHALL, Model Year: 2014.5, Model line: CORSA, Model: VAUXHALL CORSA 2014.5Pages: 177, PDF Size: 2.97 MB
Page 12 of 177

12Introduction
When the Infotainment system is
switched on, the last selected volume
is set.
If the volume is muted (set to zero),
the \ symbol is shown in the top line
of all main menus.
Speed compensated volume
When speed compensated volume is
activated, see "Volume settings"
below, the volume is adapted
automatically to make up for the road and wind noise as you drive.
Adjusting the volume of traffic
announcements (TA)
The volume of traffic announcements
can be adjusted during an
announcement using the X knob.
When the announcement is finished
or cancelled the volume is
automatically reset to the original
setting.
Further details on the TA function
3 20 and 3 22.Adjusting the volume of voice
commands (navigation)
The volume of voice commands can
be adjusted while a command is
announced using the X knob, or via
the navigation setup menu, see
"Volume settings" below.
The adjusted setting is stored by the
Infotainment system, and will be
automatically used for all future voice command announcements, until the
setting is changed again.
Adjusting the volume of AUX input
sources
The relative volume level of external
audio sources, e.g. a portable CD
player, can be adjusted via the audio
setup menu, see "Volume settings"
below.
Adjusting the volume of phone audio
The volume of phone audio can be
adjusted during a phone call using the
X knob.The adjusted setting is stored by the
Infotainment system and will be
automatically used for all future
phone calls until the setting is
changed again.
Notice
When the volume of phone audio is
changed the volume of the ring tone is changed simultaneously.
Modes of operation
Radio
Press the FM-AM button to open the
AM , FM1 or FM2 menus or to change
between these menus.
Detailed description of the radio
functions 3 20.
Audio players
Press the MEDIA button to open the
CD , CD MP3 , iPod , USB , AUX or
BLUETOOTH AUDIO menus (if
available) or to change between
these menus.
Detailed description of: ■ CD player functions 3 26
■ AUX input functions 3 30
Page 15 of 177
Introduction15
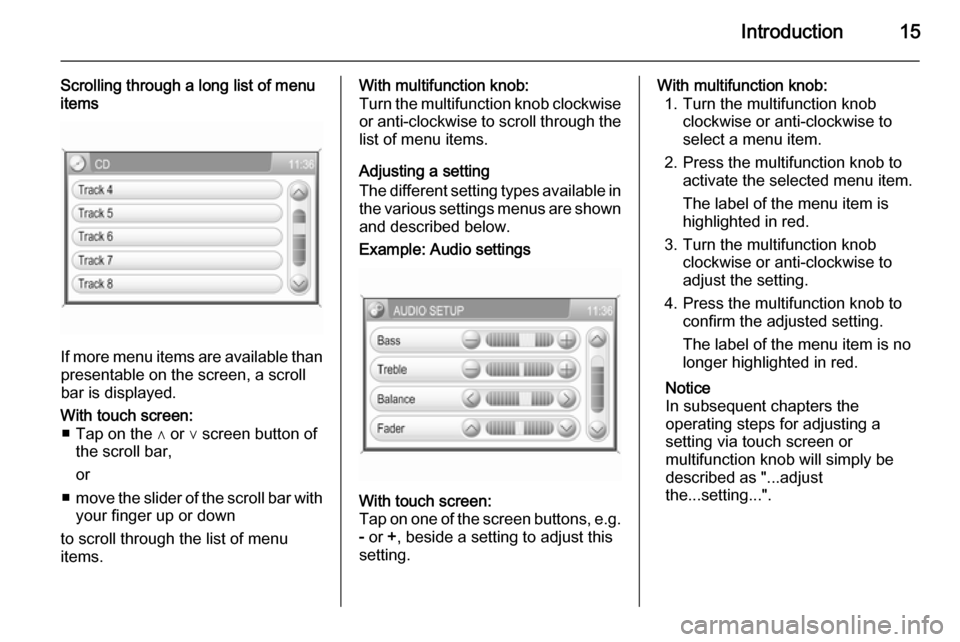
Scrolling through a long list of menu
items
If more menu items are available than
presentable on the screen, a scroll
bar is displayed.
With touch screen: ■ Tap on the ∧ or ∨ screen button of the scroll bar,
or
■ move the slider of the scroll bar with
your finger up or down
to scroll through the list of menu
items.With multifunction knob:
Turn the multifunction knob clockwise or anti-clockwise to scroll through the
list of menu items.
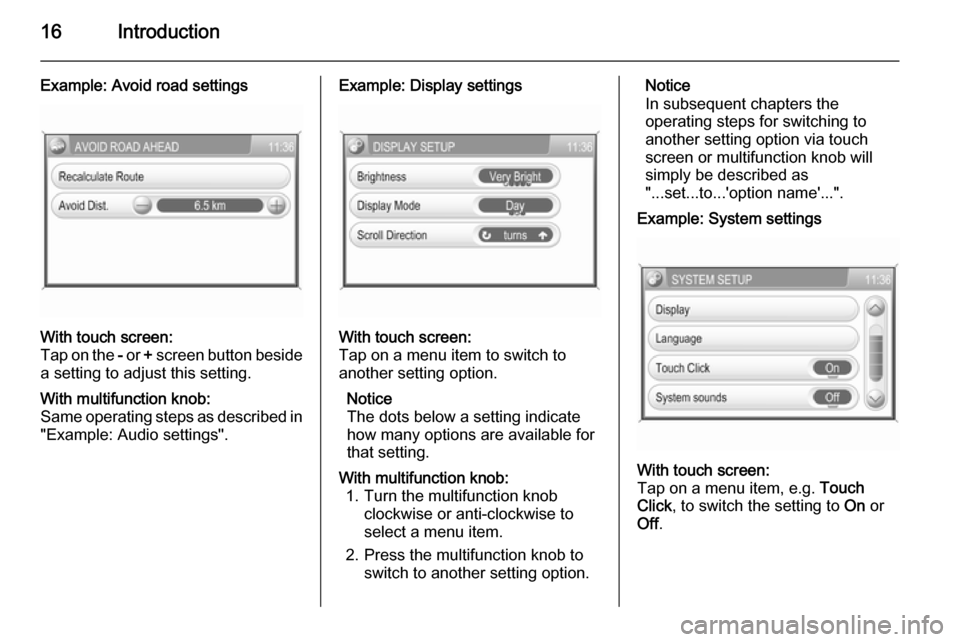
Adjusting a setting
The different setting types available in the various settings menus are shownand described below.Example: Audio settingsWith touch screen:
Tap on one of the screen buttons, e.g.
- or +, beside a setting to adjust this
setting.With multifunction knob: 1. Turn the multifunction knob clockwise or anti-clockwise to
select a menu item.
2. Press the multifunction knob to activate the selected menu item.
The label of the menu item is
highlighted in red.
3. Turn the multifunction knob clockwise or anti-clockwise to
adjust the setting.
4. Press the multifunction knob to confirm the adjusted setting.
The label of the menu item is no
longer highlighted in red.
Notice
In subsequent chapters the
operating steps for adjusting a
setting via touch screen or
multifunction knob will simply be
described as "...adjust
the...setting...".
Page 16 of 177
16Introduction
Example: Avoid road settingsWith touch screen:
Tap on the - or + screen button beside
a setting to adjust this setting.With multifunction knob:
Same operating steps as described in
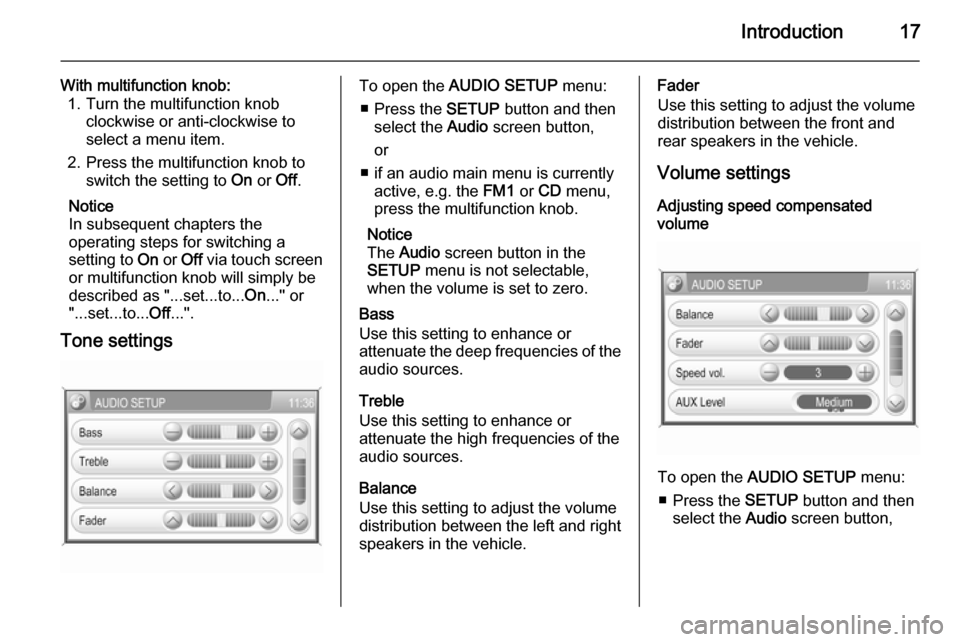
"Example: Audio settings".Example: Display settingsWith touch screen:
Tap on a menu item to switch to
another setting option.
Notice
The dots below a setting indicate
how many options are available for that setting.With multifunction knob: 1. Turn the multifunction knob clockwise or anti-clockwise to
select a menu item.
2. Press the multifunction knob to switch to another setting option.Notice
In subsequent chapters the
operating steps for switching to
another setting option via touch
screen or multifunction knob will
simply be described as
"...set...to...'option name'...".Example: System settingsWith touch screen:
Tap on a menu item, e.g. Touch
Click , to switch the setting to On or
Off .
Page 17 of 177
Introduction17
With multifunction knob:1. Turn the multifunction knob clockwise or anti-clockwise to
select a menu item.
2. Press the multifunction knob to switch the setting to On or Off.
Notice
In subsequent chapters the
operating steps for switching a
setting to On or Off via touch screen
or multifunction knob will simply be
described as "...set...to... On..." or
"...set...to... Off...".
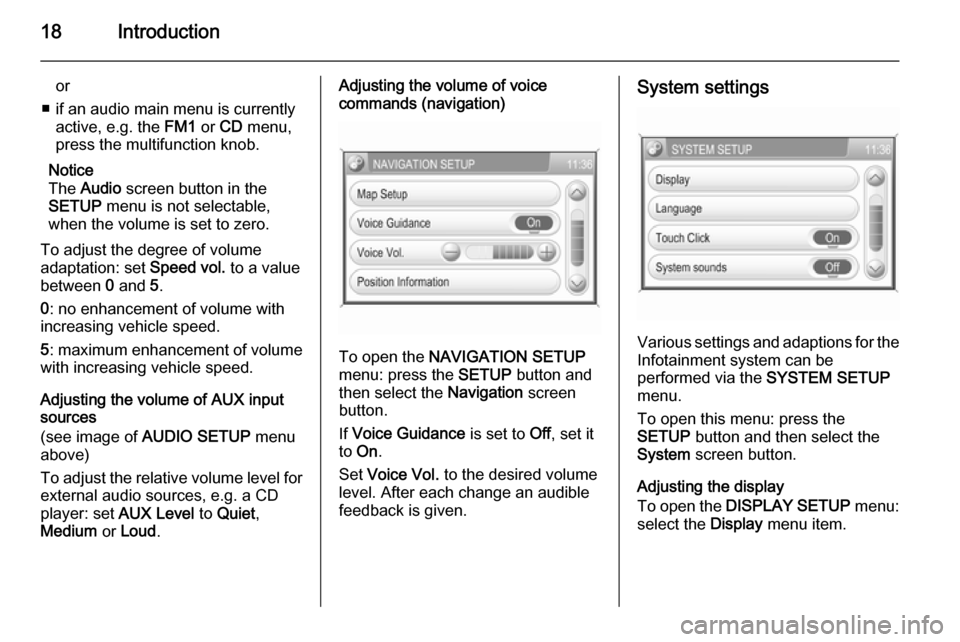
Tone settingsTo open the AUDIO SETUP menu:
■ Press the SETUP button and then
select the Audio screen button,
or
■ if an audio main menu is currently active, e.g. the FM1 or CD menu,
press the multifunction knob.
Notice
The Audio screen button in the
SETUP menu is not selectable,
when the volume is set to zero.
Bass
Use this setting to enhance or
attenuate the deep frequencies of the
audio sources.
Treble
Use this setting to enhance or
attenuate the high frequencies of the
audio sources.
Balance
Use this setting to adjust the volume
distribution between the left and right
speakers in the vehicle.Fader
Use this setting to adjust the volume
distribution between the front and
rear speakers in the vehicle.
Volume settings
Adjusting speed compensated
volume
To open the AUDIO SETUP menu:
■ Press the SETUP button and then
select the Audio screen button,
Page 18 of 177
18Introduction
or
■ if an audio main menu is currently active, e.g. the FM1 or CD menu,
press the multifunction knob.
Notice
The Audio screen button in the
SETUP menu is not selectable,
when the volume is set to zero.
To adjust the degree of volume
adaptation: set Speed vol. to a value
between 0 and 5.
0 : no enhancement of volume with
increasing vehicle speed.
5 : maximum enhancement of volume
with increasing vehicle speed.
Adjusting the volume of AUX input
sources
(see image of AUDIO SETUP menu
above)
To adjust the relative volume level for external audio sources, e.g. a CD
player: set AUX Level to Quiet ,
Medium or Loud .Adjusting the volume of voice
commands (navigation)
To open the NAVIGATION SETUP
menu: press the SETUP button and
then select the Navigation screen
button.
If Voice Guidance is set to Off, set it
to On .
Set Voice Vol. to the desired volume
level. After each change an audible
feedback is given.
System settings
Various settings and adaptions for the Infotainment system can be
performed via the SYSTEM SETUP
menu.
To open this menu: press the
SETUP button and then select the
System screen button.
Adjusting the display
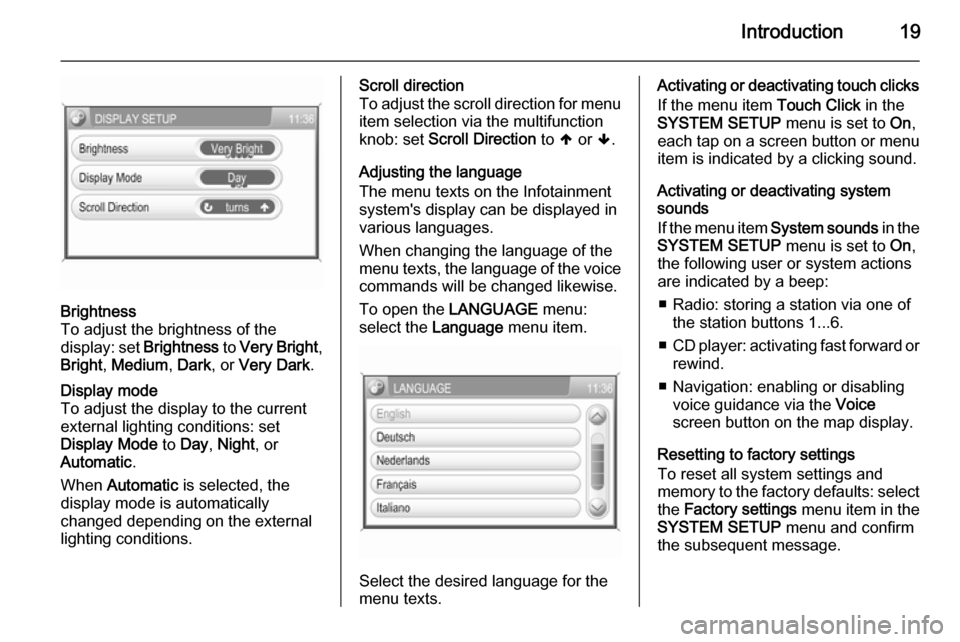
To open the DISPLAY SETUP menu:
select the Display menu item.
Page 19 of 177
Introduction19
Brightness
To adjust the brightness of the
display: set Brightness to Very Bright ,
Bright , Medium , Dark , or Very Dark .Display mode
To adjust the display to the currentexternal lighting conditions: set
Display Mode to Day , Night , or
Automatic .
When Automatic is selected, the
display mode is automatically changed depending on the external
lighting conditions.Scroll direction
To adjust the scroll direction for menu
item selection via the multifunction
knob: set Scroll Direction to [ or ].
Adjusting the language
The menu texts on the Infotainment
system's display can be displayed in
various languages.
When changing the language of the
menu texts, the language of the voice commands will be changed likewise.
To open the LANGUAGE menu:
select the Language menu item.
Select the desired language for the
menu texts.
Activating or deactivating touch clicks
If the menu item Touch Click in the
SYSTEM SETUP menu is set to On,
each tap on a screen button or menu
item is indicated by a clicking sound.
Activating or deactivating system
sounds
If the menu item System sounds in the
SYSTEM SETUP menu is set to On,
the following user or system actions
are indicated by a beep:
■ Radio: storing a station via one of the station buttons 1...6.
■ CD player: activating fast forward or
rewind.
■ Navigation: enabling or disabling voice guidance via the Voice
screen button on the map display.
Resetting to factory settings
To reset all system settings and
memory to the factory defaults: select
the Factory settings menu item in the
SYSTEM SETUP menu and confirm
the subsequent message.
Page 23 of 177
Radio23
If RDS Regional mode is activated,
only frequencies of the currently
received RDS station with the same
regional programme are considered.
If RDS Regional mode is deactivated,
also frequencies of the currently
received RDS station with different
regional programmes are considered.
Activating or deactivating
RDS Regional mode
Press the SETUP button and then
select the Radio settings screen
button.
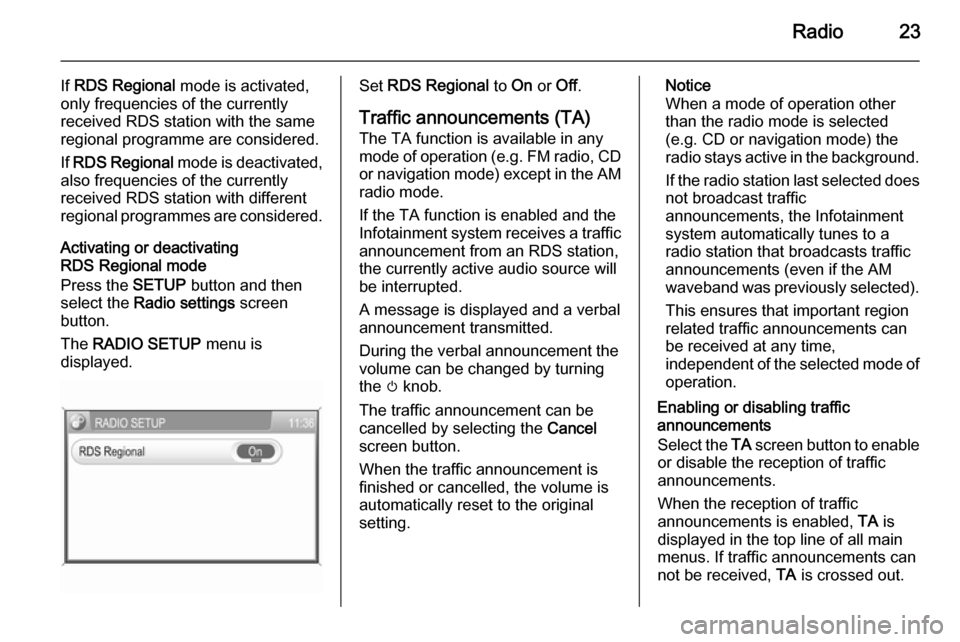
The RADIO SETUP menu is
displayed.Set RDS Regional to On or Off.
Traffic announcements (TA)
The TA function is available in any
mode of operation ( e.g. FM radio, CD
or navigation mode) except in the AM
radio mode.
If the TA function is enabled and the
Infotainment system receives a traffic announcement from an RDS station,
the currently active audio source will
be interrupted.
A message is displayed and a verbal
announcement transmitted.
During the verbal announcement the
volume can be changed by turning
the m knob.
The traffic announcement can be
cancelled by selecting the Cancel
screen button.
When the traffic announcement is
finished or cancelled, the volume is
automatically reset to the original
setting.Notice
When a mode of operation other
than the radio mode is selected
(e.g. CD or navigation mode) the
radio stays active in the background.
If the radio station last selected does
not broadcast traffic
announcements, the Infotainment
system automatically tunes to a
radio station that broadcasts traffic
announcements (even if the AM
waveband was previously selected).
This ensures that important region
related traffic announcements can
be received at any time,
independent of the selected mode of operation.
Enabling or disabling traffic
announcements
Select the TA screen button to enable
or disable the reception of traffic
announcements.
When the reception of traffic
announcements is enabled, TA is
displayed in the top line of all main
menus. If traffic announcements can
not be received, TA is crossed out.
Page 37 of 177

Navigation37
The route guidance is provided by
voice commands and a direction
arrow, as well as with the aid of a
multi-colour map display.
TMC traffic information system
and dynamic route guidance
The TMC traffic information system
receives all current traffic information from TMC radio stations. If dynamic
route guidance is active, this
information is included in the
calculation of the overall route. During
this process, the route is planned so that traffic problems related to pre-
selected criteria are avoided.
If there is a traffic problem during
active route guidance, depending on
the pre-settings, a message appears as to whether the route should be
changed.
TMC traffic information is displayed
on the map display as symbols or as
detailed text in the TRAFFIC
MESSAGES menu.
To be able to use TMC traffic
information, the system has to receive TMC stations in the relevant region.Dynamic route guidance only works if
traffic information is received via the
TMC traffic information system.
The dynamic route guidance function
can be deactivated, see chapter
"Guidance" 3 65.
Map data
All required map data is stored on an SD card provided with the
Infotainment system.
Detailed descriptions on map SD card
handling and replacement, see
chapter "Maps" 3 71
Usage Control elements and menusThe most important control elements
and menus for the navigation system
are as follows:
MAP button and map display
Press the MAP button to show the
map of the current location and the
route to follow (if route guidance is
active).
Detailed description on the
information shown on the map
display, see "Information on the map
display" below.
NAV button and NAVIGATION menu
Press the NAV button to open the
NAVIGATION menu.
Page 38 of 177
38Navigation
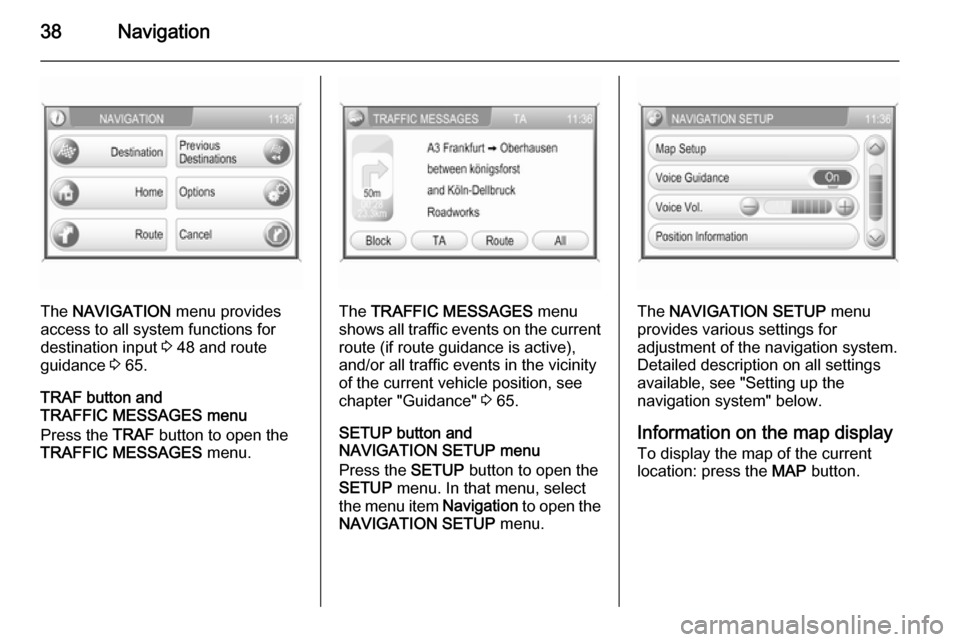
The NAVIGATION menu provides
access to all system functions for destination input 3 48 and route
guidance 3 65.
TRAF button and
TRAFFIC MESSAGES menu
Press the TRAF button to open the
TRAFFIC MESSAGES menu.The TRAFFIC MESSAGES menu
shows all traffic events on the current route (if route guidance is active),
and/or all traffic events in the vicinity
of the current vehicle position, see
chapter "Guidance" 3 65.
SETUP button and
NAVIGATION SETUP menu
Press the SETUP button to open the
SETUP menu. In that menu, select
the menu item Navigation to open the
NAVIGATION SETUP menu.The NAVIGATION SETUP menu
provides various settings for
adjustment of the navigation system. Detailed description on all settingsavailable, see "Setting up the
navigation system" below.
Information on the map display
To display the map of the current
location: press the MAP button.
Page 42 of 177
42Navigation
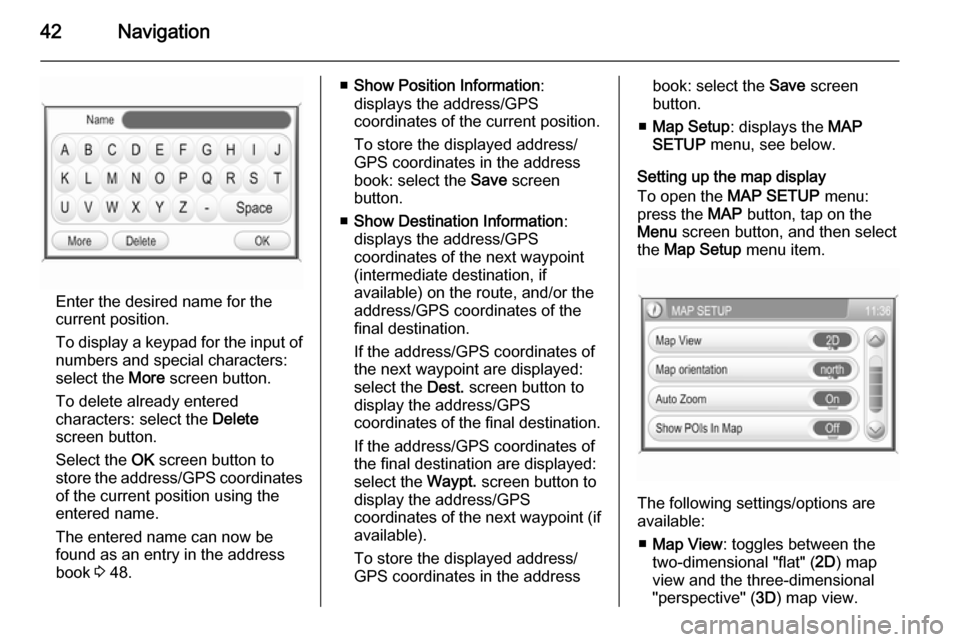
Enter the desired name for the
current position.
To display a keypad for the input of numbers and special characters:
select the More screen button.
To delete already entered
characters: select the Delete
screen button.
Select the OK screen button to
store the address/GPS coordinates of the current position using the
entered name.
The entered name can now be
found as an entry in the address
book 3 48.
■ Show Position Information :
displays the address/GPS
coordinates of the current position.
To store the displayed address/
GPS coordinates in the address
book: select the Save screen
button.
■ Show Destination Information :
displays the address/GPS
coordinates of the next waypoint
(intermediate destination, if
available) on the route, and/or the
address/GPS coordinates of the final destination.
If the address/GPS coordinates of
the next waypoint are displayed: select the Dest. screen button to
display the address/GPS
coordinates of the final destination.
If the address/GPS coordinates of the final destination are displayed:
select the Waypt. screen button to
display the address/GPS
coordinates of the next waypoint (if
available).
To store the displayed address/
GPS coordinates in the addressbook: select the Save screen
button.
■ Map Setup : displays the MAP
SETUP menu, see below.
Setting up the map display
To open the MAP SETUP menu:
press the MAP button, tap on the
Menu screen button, and then select
the Map Setup menu item.
The following settings/options are
available:
■ Map View : toggles between the
two-dimensional "flat" ( 2D) map
view and the three-dimensional
"perspective" ( 3D) map view.