open VAUXHALL GRANDLAND X 2020 Owner's Guide
[x] Cancel search | Manufacturer: VAUXHALL, Model Year: 2020, Model line: GRANDLAND X, Model: VAUXHALL GRANDLAND X 2020Pages: 283, PDF Size: 21.87 MB
Page 75 of 283
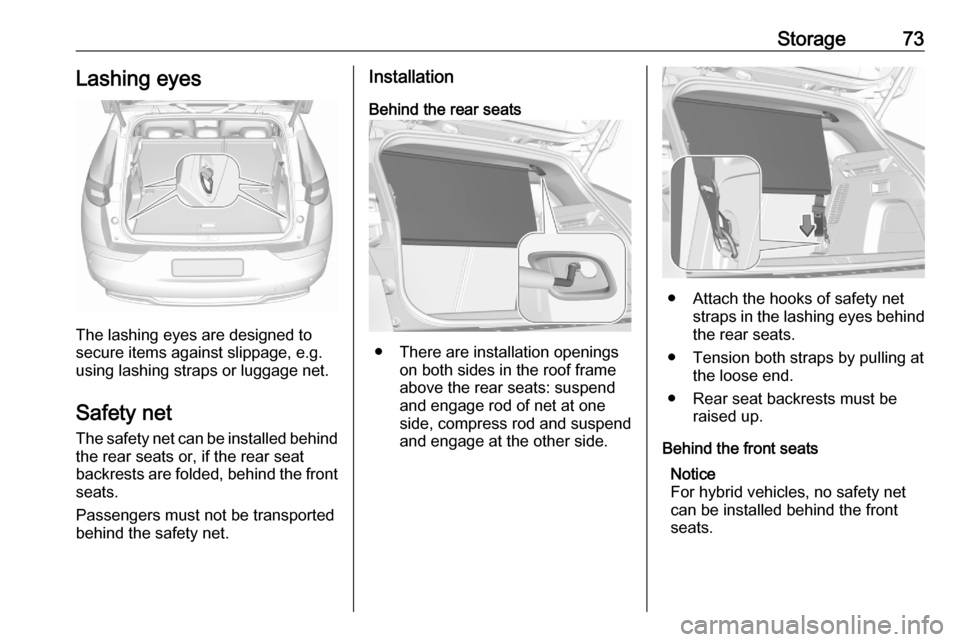
Storage73Lashing eyes
The lashing eyes are designed to
secure items against slippage, e.g.
using lashing straps or luggage net.
Safety net The safety net can be installed behind
the rear seats or, if the rear seat
backrests are folded, behind the front seats.
Passengers must not be transported
behind the safety net.
Installation
Behind the rear seats
● There are installation openings on both sides in the roof frame
above the rear seats: suspend
and engage rod of net at one side, compress rod and suspendand engage at the other side.
● Attach the hooks of safety net straps in the lashing eyes behindthe rear seats.
● Tension both straps by pulling at the loose end.
● Rear seat backrests must be raised up.
Behind the front seats Notice
For hybrid vehicles, no safety net
can be installed behind the front
seats.
Page 76 of 283

74Storage
● There are installation openingson both sides in the roof frame
above the front seats: suspend
and engage rod of net at one
side, compress rod and suspend and engage at the other side.● Attach hooks of safety net straps
to loops in the floor in front of the rear seats. To get access to the
loops, push in the perforated parts in the floor cover on both
sides.
● Tension both straps by pulling at the loose end.
● Push down head restraints and fold down rear seat backrests3 69.
Removal
Pull the flap at the tightener on both
sides to release the straps. Detach
hooks from the loops.
Unhook the safety net rods from the
installation openings in the roof
frame.
Roll up the net and secure with a
strap.
Page 78 of 283
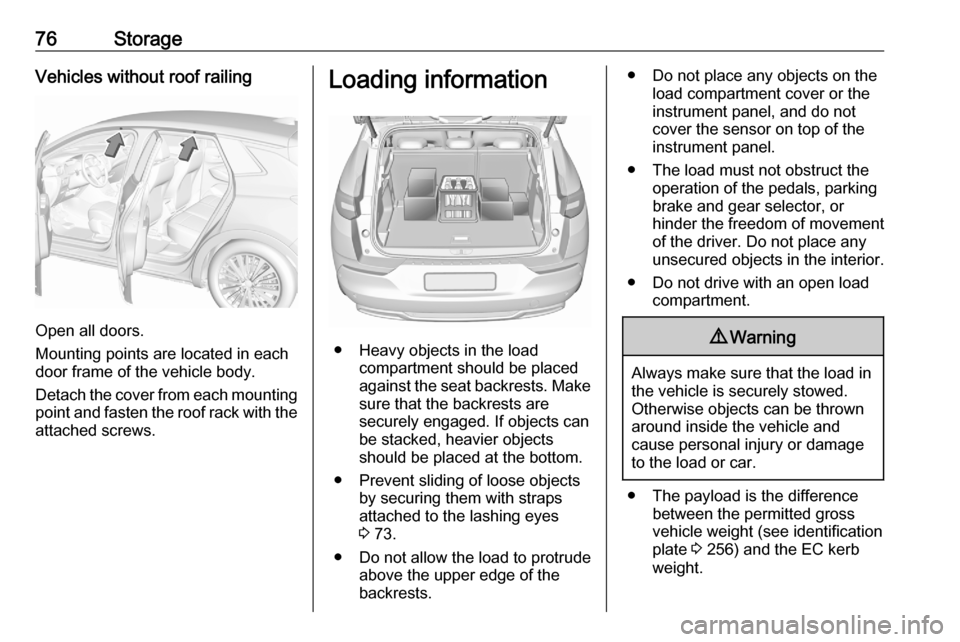
76StorageVehicles without roof railing
Open all doors.
Mounting points are located in each
door frame of the vehicle body.
Detach the cover from each mounting
point and fasten the roof rack with the attached screws.
Loading information
● Heavy objects in the load compartment should be placed
against the seat backrests. Make
sure that the backrests are
securely engaged. If objects can
be stacked, heavier objects
should be placed at the bottom.
● Prevent sliding of loose objects by securing them with straps
attached to the lashing eyes
3 73.
● Do not allow the load to protrude above the upper edge of the
backrests.
● Do not place any objects on the load compartment cover or theinstrument panel, and do notcover the sensor on top of the
instrument panel.
● The load must not obstruct the operation of the pedals, parking
brake and gear selector, or
hinder the freedom of movement of the driver. Do not place any
unsecured objects in the interior.
● Do not drive with an open load compartment.9Warning
Always make sure that the load in
the vehicle is securely stowed.
Otherwise objects can be thrown
around inside the vehicle and
cause personal injury or damage
to the load or car.
● The payload is the difference between the permitted gross
vehicle weight (see identification
plate 3 256) and the EC kerb
weight.
Page 80 of 283

78Instruments and controlsInstruments and
controlsControls ....................................... 79
Steering wheel adjustment ........79
Steering wheel controls .............79
Heated steering wheel ...............80
Horn ........................................... 80
Pedestrian safety alert ...............80
Windscreen wiper and washer ..80
Rear window wiper and washer ...................................... 82
Outside temperature ..................83
Clock ......................................... 83
Power outlets ............................. 84
Inductive charging .....................86
Cigarette lighter ......................... 87
Ashtrays .................................... 87
Warning lights, gauges and indi‐ cators ........................................... 87
Instrument cluster ......................87
Speedometer ............................. 89
Odometer .................................. 89
Trip odometer ............................ 89
Tachometer ............................... 89
Fuel gauge ................................ 90
Battery gauge ............................ 90Power indicator gauge ...............90
Engine coolant temperature gauge ....................................... 91
Engine oil level monitor .............91
Service display .......................... 91
Control indicators ......................92
Turn lights .................................. 92
Seat belt reminder .....................93
Airbag and belt tensioners .........93
Airbag deactivation ....................94
Charging system .......................94
Malfunction indicator light ..........94
Service vehicle soon .................94
Stop engine ............................... 94
System check ............................ 95
Hybrid system active .................95
Hybrid system fault ....................95
Brake and clutch system ...........95
Electric parking brake ................95
Electric parking brake fault ........95
Automatic operation of electric parking brake off ....................... 96
Antilock brake system (ABS) .....96
Gear shifting .............................. 96
Lane departure warning ............96
Lane keep assist .......................96
Electronic Stability Control and Traction Control system ...........96
Electronic Stability Control and Traction Control system off ......97Engine coolant temperature ......97
Preheating ................................. 97
Exhaust filter .............................. 97
AdBlue ....................................... 97
Deflation detection system ........98
Engine oil pressure ....................98
Low fuel ..................................... 98
Charge cord connected .............98
Autostop .................................... 98
Exterior light .............................. 98
Low beam .................................. 99
High beam ................................. 99
High beam assist .......................99
LED headlights .......................... 99
Front fog lights ........................... 99
Rear fog light ............................. 99
Rain sensor ............................... 99
Cruise control ............................ 99
Adaptive cruise control ..............99
Vehicle detected ahead .............99
Side blind spot alert ...................99
Active emergency braking .......100
Speed limiter ........................... 100
Door open ................................ 100
Displays ..................................... 100
Driver Information Centre ........100
Info Display .............................. 102
Vehicle messages ......................106
Warning chimes .......................106
Page 85 of 283
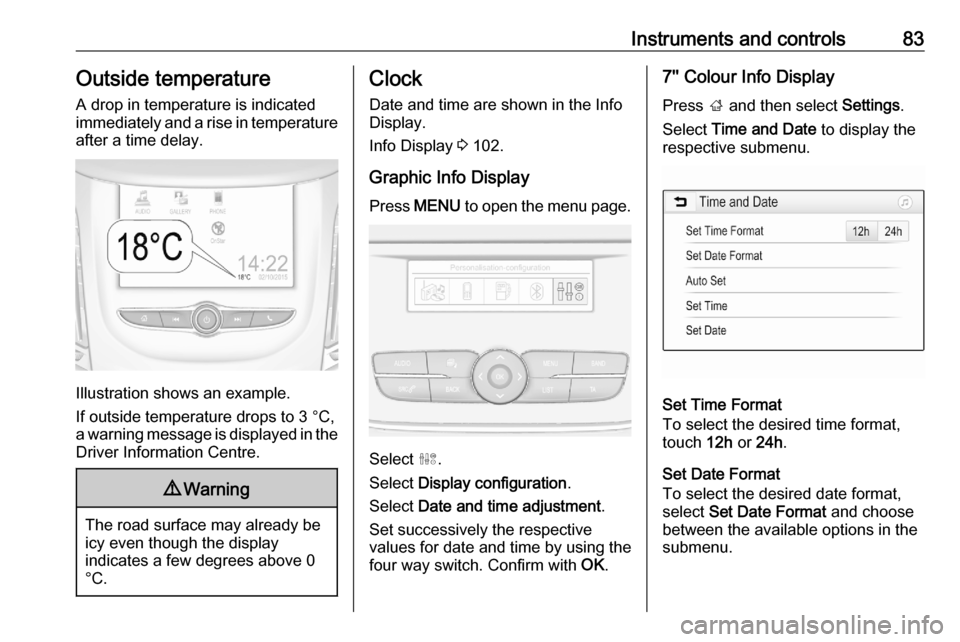
Instruments and controls83Outside temperatureA drop in temperature is indicated
immediately and a rise in temperature
after a time delay.
Illustration shows an example.
If outside temperature drops to 3 °C,
a warning message is displayed in the Driver Information Centre.
9 Warning
The road surface may already be
icy even though the display
indicates a few degrees above 0
°C.
Clock
Date and time are shown in the Info
Display.
Info Display 3 102.
Graphic Info Display Press MENU to open the menu page.
Select ˆ.
Select Display configuration .
Select Date and time adjustment .
Set successively the respective
values for date and time by using the
four way switch. Confirm with OK.
7'' Colour Info Display
Press ; and then select Settings.
Select Time and Date to display the
respective submenu.
Set Time Format
To select the desired time format,
touch 12h or 24h .
Set Date Format
To select the desired date format,
select Set Date Format and choose
between the available options in the
submenu.
Page 86 of 283
84Instruments and controlsAuto Set
To choose whether time and date are
to be set automatically or manually,
select Auto Set .
For time and date to be set
automatically, select On - RDS.
For time and date to be set manually, select Off - Manual . If Auto Set is set
to Off - Manual , the submenu items
Set Time and Set Date become
available.
Set time and date
To adjust the time and date settings, select Set Time or Set Date .
Touch + or - to adjust the settings.
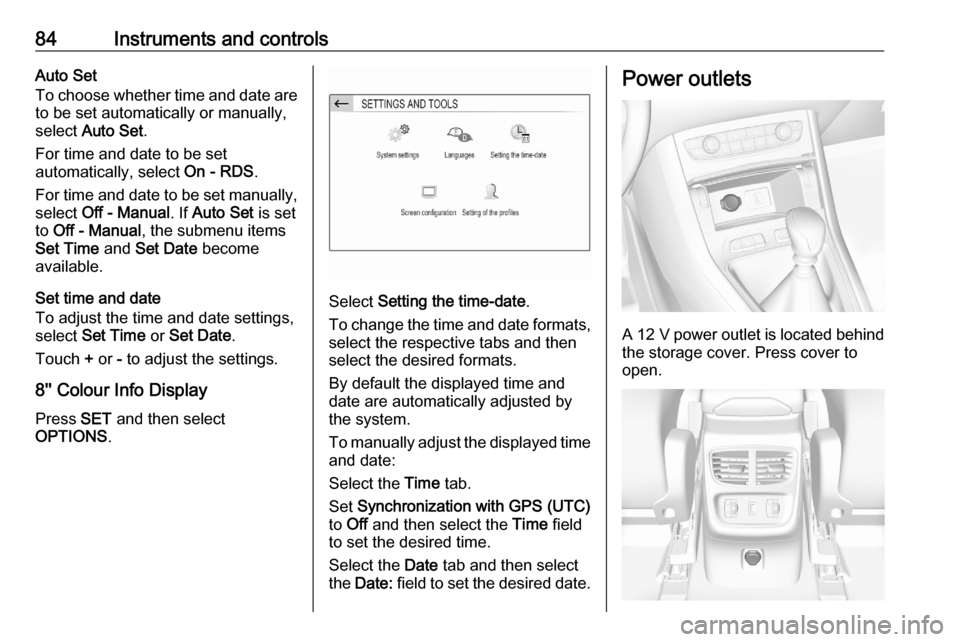
8'' Colour Info Display
Press SET and then select
OPTIONS .
Select Setting the time-date .
To change the time and date formats, select the respective tabs and then
select the desired formats.
By default the displayed time and
date are automatically adjusted by
the system.
To manually adjust the displayed time
and date:
Select the Time tab.
Set Synchronization with GPS (UTC)
to Off and then select the Time field
to set the desired time.
Select the Date tab and then select
the Date: field to set the desired date.
Power outlets
A 12 V power outlet is located behind
the storage cover. Press cover to
open.
Page 87 of 283
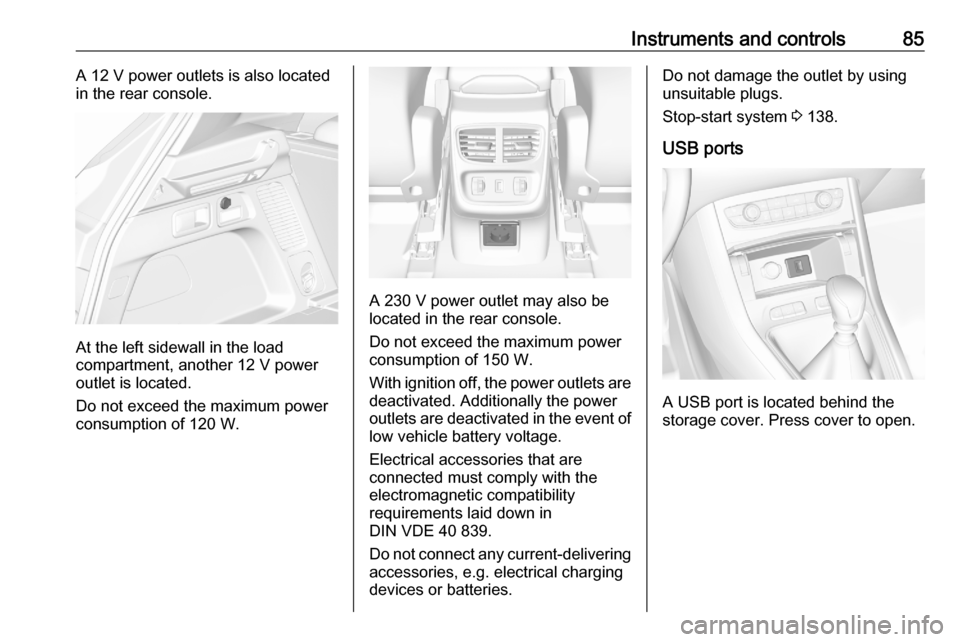
Instruments and controls85A 12 V power outlets is also located
in the rear console.
At the left sidewall in the load
compartment, another 12 V power
outlet is located.
Do not exceed the maximum power
consumption of 120 W.
A 230 V power outlet may also be
located in the rear console.
Do not exceed the maximum power
consumption of 150 W.
With ignition off, the power outlets are
deactivated. Additionally the power
outlets are deactivated in the event of
low vehicle battery voltage.
Electrical accessories that are
connected must comply with the
electromagnetic compatibility
requirements laid down in
DIN VDE 40 839.
Do not connect any current-delivering
accessories, e.g. electrical charging
devices or batteries.
Do not damage the outlet by using
unsuitable plugs.
Stop-start system 3 138.
USB ports
A USB port is located behind the
storage cover. Press cover to open.
Page 89 of 283
Instruments and controls87On some mobile devices, a back
cover with an integrated coil or a
jacket may be required to use
inductive charging.
Protective cover for the mobile device
could have impact on the inductive
charging.
In the event that the mobile device is
not charging properly, rotate it 180°
and place it on the charging device
again.
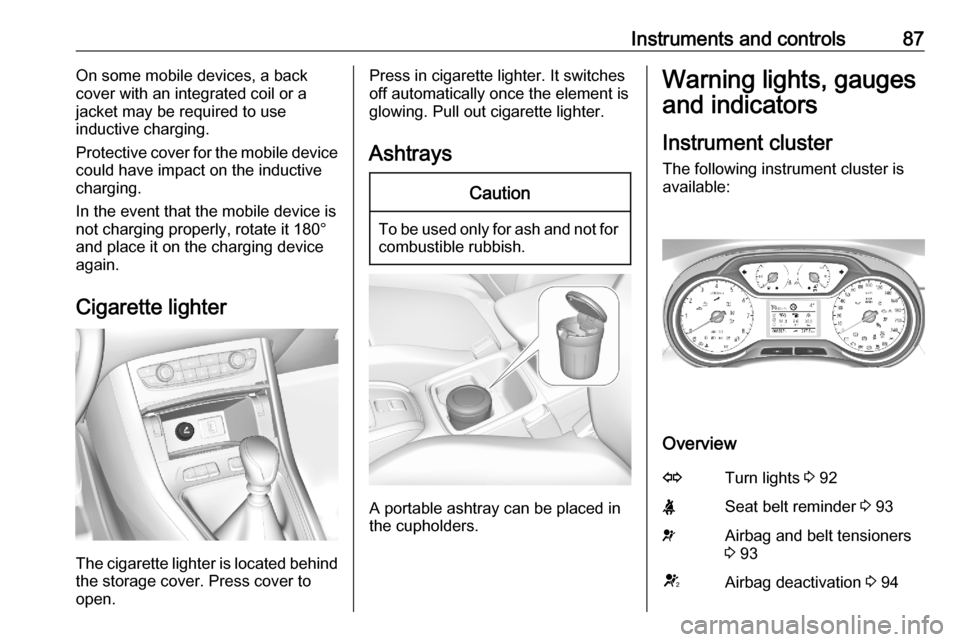
Cigarette lighter
The cigarette lighter is located behind
the storage cover. Press cover to open.
Press in cigarette lighter. It switches
off automatically once the element is
glowing. Pull out cigarette lighter.
AshtraysCaution
To be used only for ash and not for combustible rubbish.
A portable ashtray can be placed in
the cupholders.
Warning lights, gauges
and indicators
Instrument cluster
The following instrument cluster is
available:
Overview
OTurn lights 3 92XSeat belt reminder 3 93vAirbag and belt tensioners
3 93VAirbag deactivation 3 94
Page 90 of 283

88Instruments and controlspCharging system 3 94ZMalfunction indicator light
3 94CService vehicle soon
3 94STOPStop engine 3 94JSystem check 3 95RBrake and clutch system
3 95m ,
oElectric parking brake
3 95, automatic operation
of electric parking brake off
3 96EElectric parking brake fault
3 95uAntilock brake system
(ABS) 3 96RGear shifting 3 96)Lane departure warning
3 96LLane keep assist 3 96bElectronic Stability Control
and Traction Control
system 3 96W oEngine coolant tempera‐
ture high 3 97!Preheating 3 97%Exhaust filter 3 97YAdBlue 3 97wDeflation detection system
3 98IEngine oil pressure 3 98Y oLow fuel 3 98DAutostop 3 988Exterior light 3 989Low beam 3 99CHigh beam 3 99fHigh beam assist 3 99>Front fog lights 3 99øRear fog light 3 99
3 95jCharge cord connected
3 9899Electronic Stability Control
and Traction Control
system off 3 97
Page 102 of 283

100Instruments and controlsActive emergency brakingm illuminates or flashes yellow.
Illuminates
The system has been deactivated or a fault has been detected.
Additionally, a warning message is
displayed in the Driver Information
Centre.
Check the reason of the deactivation
3 172 and in case of a system fault,
seek the assistance of a workshop.
Notice
m also illuminates if the seat belts
of the front passengers are not
fastened. In this case, active
emergency braking is deactivated.
Flashes
The system is actively engaged.
Depending on the situation, the
vehicle may automatically brake
moderately or hard.
Forward collision alert 3 170.
Front pedestrian protection 3 175.Speed limiter
ß illuminates in the Driver
Information Centre when speed
limiter is active. Set speed is indicated alongside ß symbol.
Speed limiter 3 162.
Door open
h illuminates red.
A door or the tailgate is open.Displays
Driver Information Centre
The Driver Information Centre is
located in the instrument cluster.
Driver Information Centre indicates: ● overall and trip odometer
● digital speed indication
● trip / fuel information menu
● gear shift indication
● service information
● vehicle and warning messages ● driver assistance messages
● pop-up messages
● AdBlue information
● powerflow
● range autonomy
Selecting menus and functions The menus and functions can be
selected via the buttons on the
indicator lever.