open VAUXHALL GRANDLAND X 2020 Service Manual
[x] Cancel search | Manufacturer: VAUXHALL, Model Year: 2020, Model line: GRANDLAND X, Model: VAUXHALL GRANDLAND X 2020Pages: 283, PDF Size: 21.87 MB
Page 142 of 283

140Driving and operatingRestart of the engine by the driver
Vehicles with manual transmission
Depress the clutch pedal without
depressing the brake pedal to restart the engine.
Vehicles with automatic transmission The engine is restarted in the
following cases:
● brake pedal released while the selector lever in position D or M
● brake pedal released or selector lever in position N when selector
lever is moved to position D or
M
● selector lever moved to position R
Restart of the engine by the stop- start system
The selector lever must be in neutral to enable an automatic restart.
If one of the following conditions
occurs during an Autostop, the
engine will be restarted automatically
by the stop-start system:● stop-start system manually deactivated
● driver's seat belt unfastened and driver's door opened
● engine temperature too low
● charging level of vehicle battery below a defined level
● brake vacuum not sufficient
● vehicle driven at least at walking speed
● climate control system requests engine start
● air conditioning manually switched on
If an electrical accessory, e.g. a
portable CD player, is connected to
the power outlet, a brief power drop
during the restart might be noticeable.Parking9 Warning
● Do not park the vehicle on an
easily ignitable surface. The
high temperature of the
exhaust system could ignite the
surface.
● Apply the parking brake.
● If the vehicle is on a level surface or uphill slope, engage
first gear or set the selector
lever to position P. On an uphill
slope, turn the front wheels
away from the kerb.
If the vehicle is on a downhill
slope, engage reverse gear or
set the selector lever to position
P . Turn the front wheels
towards the kerb.
● Close the windows.
● Switch off the engine.
● Remove the ignition key from the ignition switch or switch off
ignition on vehicles with power
Page 143 of 283
Driving and operating141button. Turn the steering wheeluntil the steering wheel lock is
felt to engage.
● For hybrid vehicles, make sure READY is not illuminated in the
instrument cluster.
● Lock the vehicle.
● Activate the anti-theft alarm system.
● The engine cooling fans may run
after the engine has been
switched off 3 213.
Caution
After running at high engine
speeds or with high engine loads,
operate the engine briefly at a low load or run in neutral for
approx. 30 seconds before
switching off, in order to protect
the turbocharger.
Notice
In the event of an accident with airbag deployment, the engine is
switched off automatically if the
vehicle comes to a standstill within a
certain time.
In countries with extreme low
temperatures it may be necessary to park the vehicle without applied
parking brake. Make sure to park the
vehicle on a level surface.Engine exhaust9 Danger
Engine exhaust gases contain
poisonous carbon monoxide,
which is colourless and odourless and could be fatal if inhaled.
If exhaust gases enter the interior
of the vehicle, open the windows.
Have the cause of the fault
rectified by a workshop.
Avoid driving with an open load
compartment, otherwise exhaust
gases could enter the vehicle.
Exhaust filter
Automatic cleaning process
The exhaust filter system filters soot particles out of the exhaust gases.
The start of saturation of the exhaust
filter is indicated by the temporary
illumination of % or C ,
accompanied by a message in the
Driver Information Centre.
Page 147 of 283
Driving and operating145event, park the vehicle in a space
with a higher ambient temperature
until AdBlue is liquified.
Notice
When unscrewing the protective cap
from the filler neck, ammonia fumes
may emerge. Do not inhale as the
fumes have a pungent smell. The
fumes are not harmful by inhalation.
The AdBlue tank should be filled
completely. This must be done if the
warning message regarding
prevention of an engine restart is
already displayed.
The vehicle must be parked on a level surface.
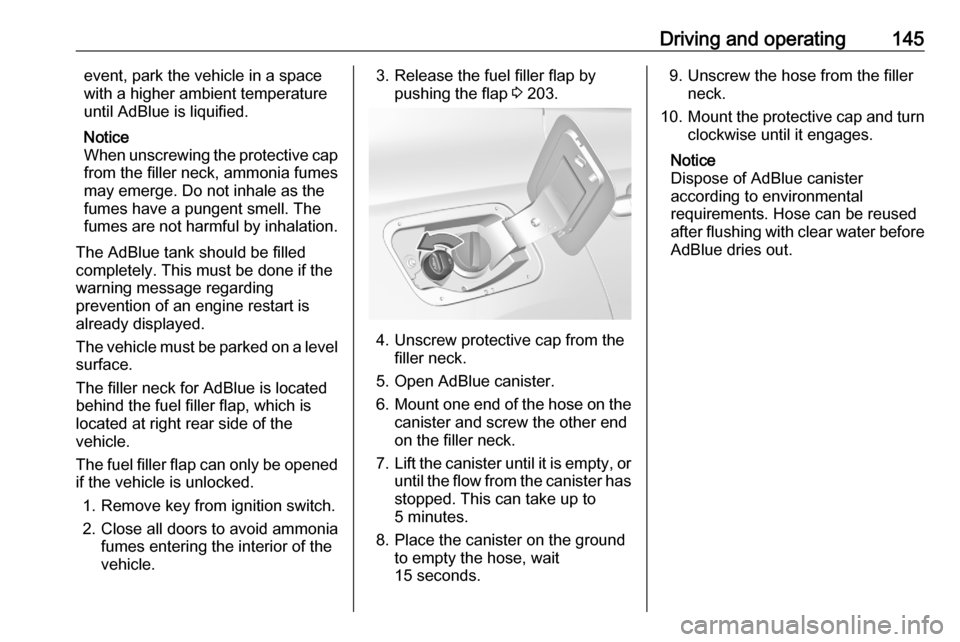
The filler neck for AdBlue is located behind the fuel filler flap, which is
located at right rear side of the
vehicle.
The fuel filler flap can only be opened
if the vehicle is unlocked.
1. Remove key from ignition switch.
2. Close all doors to avoid ammonia fumes entering the interior of the
vehicle.3. Release the fuel filler flap by pushing the flap 3 203.
4. Unscrew protective cap from the
filler neck.
5. Open AdBlue canister.
6. Mount one end of the hose on the
canister and screw the other end
on the filler neck.
7. Lift the canister until it is empty, or
until the flow from the canister has stopped. This can take up to
5 minutes.
8. Place the canister on the ground to empty the hose, wait
15 seconds.
9. Unscrew the hose from the filler neck.
10. Mount the protective cap and turn
clockwise until it engages.
Notice
Dispose of AdBlue canister
according to environmental
requirements. Hose can be reused
after flushing with clear water before
AdBlue dries out.
Page 169 of 283
Driving and operating167opened and the driver's seat belt is
unfastened, then the electric parking
brake is applied automatically to hold
the vehicle. Control indicator m will
illuminate. To release electric parking
brake, press the accelerator pedal.
Electric parking brake 3 153.9 Warning
When the system is deactivated or
cancelled, the vehicle will no
longer be held at a stop and can
start moving. Be always prepared
to manually apply the brake to hold the vehicle stationary.
Do not leave the vehicle while it is
being held at a stop by adaptive
cruise control. Always move
selector lever to park position P
and switch off the ignition before
leaving the vehicle.
Setting the following distance
When adaptive cruise control detects
a slower moving vehicle in the driving path, it will adjust the vehicle speed tomaintain the following distance
selected by the driver.
The following distance can be set to
close (1 bar), normal (2 bars) or far (3 bars).
If the engine is running and the
adaptive cruise control is enabled
(grey), you can modify the following
distance setting:
Press Ö, the current setting is shown
in the Driver Information Centre.
Press Ö again to change the following
distance: The new setting is
displayed in the Driver Information
Centre.
The selected following distance is
indicated by full bars in the adaptive
cruise control page.9 Warning
The driver accepts full
responsibility for the appropriate
following distance based on traffic, weather and visibility conditions.
Following distance must be
adjusted or the system switched
off when required by the prevailing
conditions.
Detecting the vehicle ahead
If the system detects a vehicle in the
driving path, the adaptive cruise
control symbol displayed in the Driver
Information Centre changes: - is
changed to w.
Deactivation of the functionality
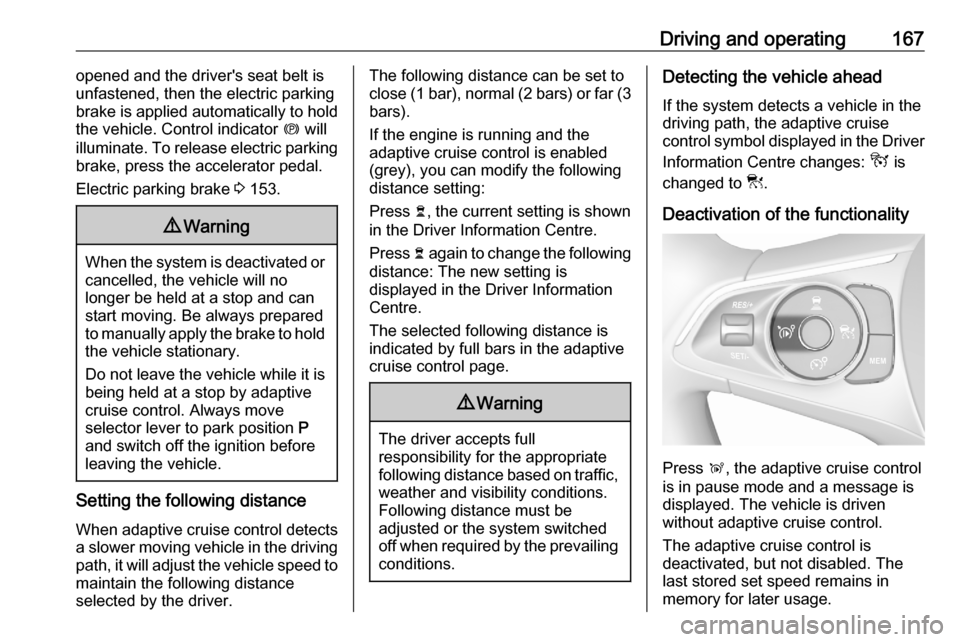
Press Ñ, the adaptive cruise control
is in pause mode and a message is
displayed. The vehicle is driven
without adaptive cruise control.
The adaptive cruise control is
deactivated, but not disabled. The
last stored set speed remains in
memory for later usage.
Page 185 of 283
Driving and operating183● after a prolonged stop of thevehicle during a manoeuvre
● if the Electronic Stability Control is triggered
● if the speed of the vehicle exceeds the stated limit
● when the driver interrupts movement of the steering wheel
● after four manoeuvre cycles (a manoeuvre cycle consists of one
rear move and one forward
move)
● on opening the driver's door
● if one of the front wheels encounters an obstacle
● parking manoeuvre successfully ended
Deactivation by the driver or by the
system during manoeuvring will be
indicated on the display. Additionally,
an acoustic signal sounds.
The system is switched off
automatically when towing an
electrically connected trailer, bicycle
carrier, etc.
Contact your dealer to switch off the
system for a prolonged period.Fault
In the event of a fault, a message is
displayed in the Colour Info Display, accompanied by an acoustic signal.
In the event of a fault in the power
steering, C illuminates and a
message is displayed in the Driver
Information Centre.9 Warning
Under certain circumstances,
various reflective surfaces on
objects or clothing as well as
external noise sources may cause the system to fail to detect
obstacles.
Special attention must be paid to
low obstacles which can damage
the lower part of the bumper.
Caution
Performance of the system can be reduced when sensors are
covered, e.g. by ice or snow.
Performance of the parking assist
system can be reduced due to
heavy loading.
Special conditions apply if there
are taller vehicles in the vicinity
(e.g. off-road vehicles, mini vans,
vans). Object identification and correct distance indication in the
upper part of these vehicles
cannot be guaranteed.
Objects with a very small reflection
cross-section, e.g. objects of
narrow size or soft materials, may
not be detected by the system.
Parking assist systems do not
detect objects outside the
detection range.
Notice
It is possible that the sensor detects a non-existing object caused by
echo disturbance from external
Page 190 of 283

188Driving and operatingDeactivation
Panoramic view system is
deactivated when:
● driving faster than 12 mph
● 7 seconds after disengaging reverse gear
● by pressing the icon q in the left
upper corner of the touch screen
● opening the tailgate
General information9 Warning
The panoramic view system does
not replace driver vision. It will not display children, pedestrians,
cyclists, crossing traffic, animals,
or any other objects outside of the camera view area, e. g. below the
bumper, or underneath the
vehicle.
Do not drive or park the vehicle
using only the panoramic view
system.
Always check the surrounding of
the vehicle before driving.
Displayed images may be further
or closer than they appear. The
area displayed is limited and
objects that are close to either
edge of the bumper or under the
bumper are not displayed on the
screen.
System limitations
Caution
For optimal operation of the
system, it is important to keep the
lense of the camera in the tailgate between the number plate lightsand the lense in the front grill
below the emblem always clean.
Rinse the lenses with water and
wipe with a soft cloth.
Do not clean the lenses with a
steam-jet or high-pressure jet
cleaner.
The panoramic view system may not
operate properly when:
● The surrounding is dark.
● The sun or the beam of headlights is shining directly into
the camera lenses.
● Weather limits visibility, such as fog, rain, or snow.
● The camera lenses are blocked by snow, ice, slush, mud, dirt.
● The vehicle is towing a trailer. ● The vehicle had an accident.● There are extreme temperature changes.
Rear view camera The rear view camera assists the
driver when reversing by displaying a
view of the area behind the vehicle.
The view of the camera is displayed
in the Info Display.
Page 192 of 283
190Driving and operatingSystem limitations
The rear view camera may not
operate properly when:
● the surrounding is dark
● the beam of headlights is shining
directly into the camera lenses
● weather limits visibility, such as fog, rain, or snow
● the camera lenses are blocked by snow, ice, slush, mud, dirt.Clean the lense, rinse with water,
and wipe with a soft cloth
● the tailgate will be opened
● the vehicle is towing an electrically connected trailer,
bicycle carrier, etc.
● the vehicle had a rear end accident
● there are extreme temperature changes
Lane departure warning
The lane departure warning system
observes the lane markings between
which the vehicle is driving via a front camera located at the top of thewindscreen. The system warns the
driver in the event of an unintendend
lane departure via visual and acoustic signals.
There is no lane departure warning
when the turn lights are operated and during 20 seconds after turn lights
have been switched off.9 Warning
This system is a driving aid that
cannot, in any circumstances,
replace the need for vigilance on
the part of the driver.
Activation
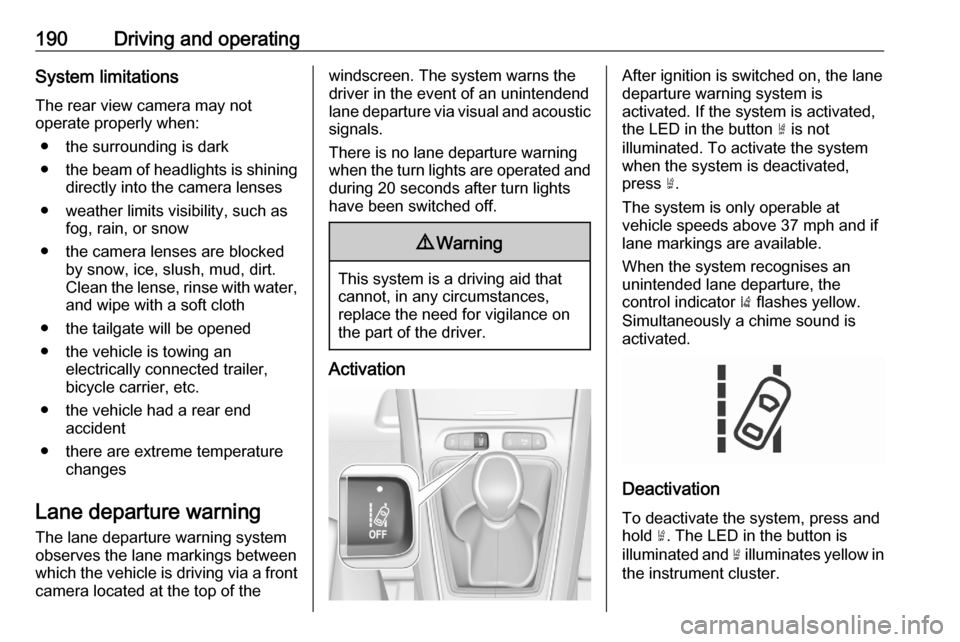
After ignition is switched on, the lane
departure warning system is
activated. If the system is activated,
the LED in the button ½ is not
illuminated. To activate the system
when the system is deactivated,
press ½.
The system is only operable at
vehicle speeds above 37 mph and if
lane markings are available.
When the system recognises an
unintended lane departure, the
control indicator ) flashes yellow.
Simultaneously a chime sound is
activated.
Deactivation
To deactivate the system, press andhold ½. The LED in the button is
illuminated and ½ illuminates yellow in
the instrument cluster.
Page 197 of 283
Driving and operating195Charging at domestic electricaloutlets
Start charging9 Warning
Only use a domestic electrical
outlet which is properly grounded and protected by a 30 mA
differential switch.
Only use a domestic electrical
outlet protected by a circuit
breaker adapted to the amperage
of the electrical circuit.
Have a qualified electrician check
the electrical installation to be
used. The installation has to be in
compliance with national
standards and compatible with the vehicle.
When using a dedicated domestic electrical outlet, have it installed
by a qualified electrician.
Make sure that the electrical
outlet, the plug and the cable do
not support the weight of the
control box.
9 Warning
Do not carry out any works in the
engine compartment during
charging.
The vehicle can be charged at
domestic electrical outlets. Charging
an empty high voltage battery at a
domestic electrical outlet takes
approx. 7 hours.
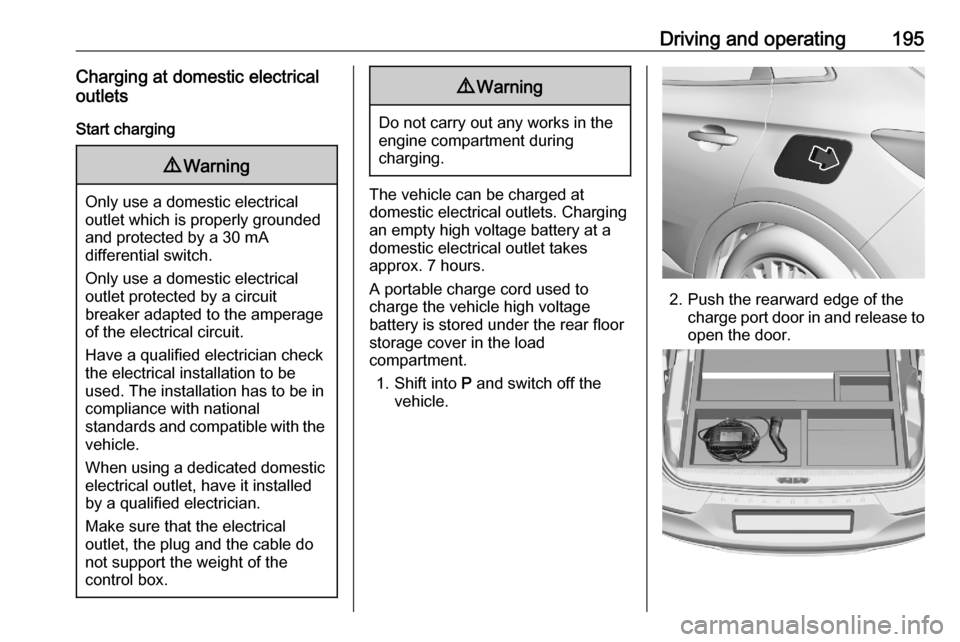
A portable charge cord used to charge the vehicle high voltage
battery is stored under the rear floor
storage cover in the load
compartment.
1. Shift into P and switch off the
vehicle.
2. Push the rearward edge of the charge port door in and release to
open the door.
Page 198 of 283
196Driving and operating3. Open the tailgate. Lift the rearfloor storage cover and remove
the charge cord.
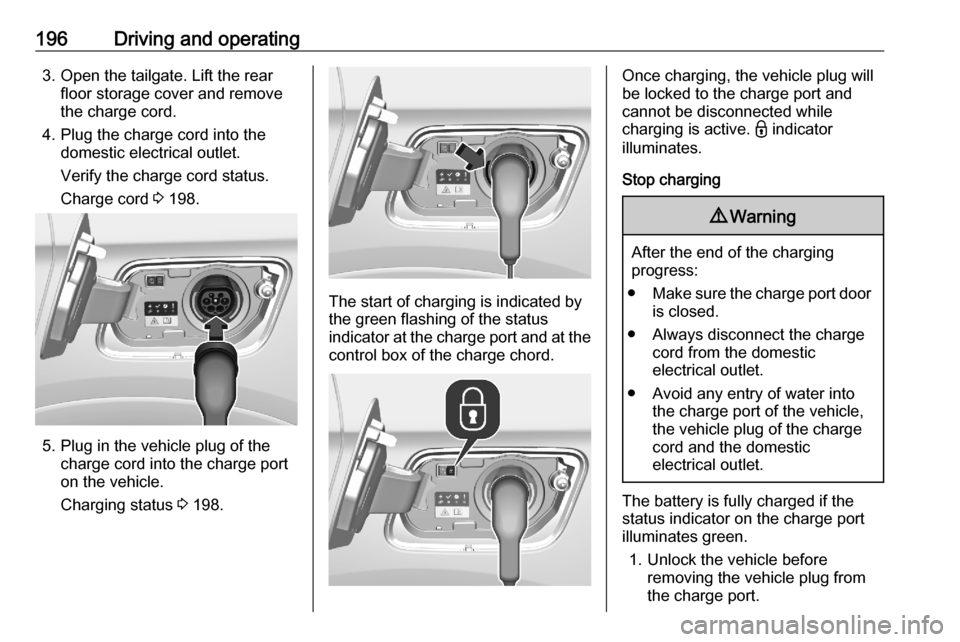
4. Plug the charge cord into the domestic electrical outlet.
Verify the charge cord status.
Charge cord 3 198.
5. Plug in the vehicle plug of the
charge cord into the charge port
on the vehicle.
Charging status 3 198.
The start of charging is indicated by
the green flashing of the status
indicator at the charge port and at the
control box of the charge chord.
Once charging, the vehicle plug will
be locked to the charge port and cannot be disconnected while
charging is active. - indicator
illuminates.
Stop charging9 Warning
After the end of the charging
progress:
● Make sure the charge port door
is closed.
● Always disconnect the charge cord from the domestic
electrical outlet.
● Avoid any entry of water into the charge port of the vehicle,the vehicle plug of the charge
cord and the domestic
electrical outlet.
The battery is fully charged if the status indicator on the charge port
illuminates green.
1. Unlock the vehicle before removing the vehicle plug from
the charge port.
Page 200 of 283

198Driving and operating
The status indicator illuminates blue
indicating that programmable
charging is active.
Charging status
If the vehicle is plugged in and the
ignition is switched off, the charging status indicator indicates the
following:
● Illuminates white: welcome lighting when charge port door isopened
● Illuminates green: charging complete
● Flashes green: high voltage battery charging
● Illuminates red: charging fault ● Illuminates blue: programmable charging active
Programmable charging 3 197.
A charging fault has occured if the
vehicle is plugged in and the charging status indicator is off.
Further charging status indicators are located on the control box of the
charge cord. 3 198.
Charge cord9 Danger
There is a risk of electric shock
that may cause personal injury or
death.
Do not use the charge cord if any part of the charge cord is
damaged.
Do not open or remove the charge cord cover.
Service by qualified personnel
only. Connect the charge cord to a
properly grounded outlet with
cords that are not damaged.