bc button VAUXHALL GRANDLAND X 2020 Workshop Manual
[x] Cancel search | Manufacturer: VAUXHALL, Model Year: 2020, Model line: GRANDLAND X, Model: VAUXHALL GRANDLAND X 2020Pages: 283, PDF Size: 21.87 MB
Page 158 of 283
156Driving and operatingRide control systems
Electronic Stability Control and Traction Control system
Electronic Stability Control (ESC)
improves driving stability when
necessary, regardless of the type of
road surface or tyre grip.
As soon as the vehicle starts to
swerve (understeer / oversteer),
engine output is reduced and the wheels are braked individually.
ESC operates in combination with the traction control system. It prevents
the driven wheels from spinning.
The traction control system is a
component of the ESC.
The traction control system improves
driving stability when necessary, regardless of the type of road surface
or tyre grip, by preventing the driven
wheels from spinning.
As soon as the driven wheels starts to spin, engine output is reduced and
the wheel spinning the most is brakedindividually. This considerably
improves the driving stability of the
vehicle on slippery road surfaces.
ESC and traction control system are
operational after each engine start as soon as the control indicator b
extinguishes.
When ESC and traction control
system operate, b flashes.
9 Warning
Do not let this special safety
feature tempt you into taking risks
when driving.
Adapt speed to the road
conditions.
Control indicator b 3 96.
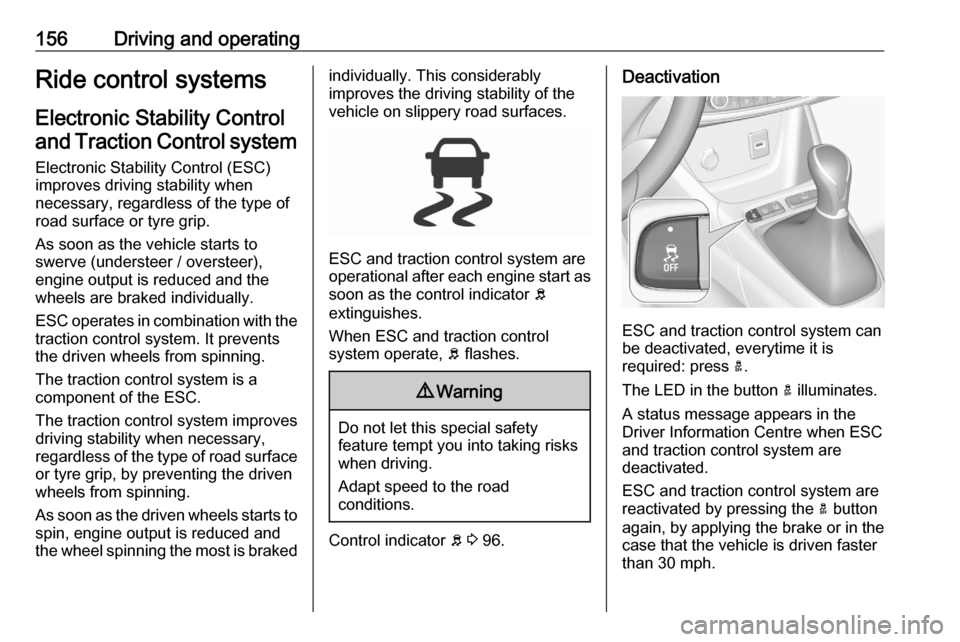
Deactivation
ESC and traction control system can
be deactivated, everytime it is
required: press a.
The LED in the button a illuminates.
A status message appears in the
Driver Information Centre when ESC
and traction control system are
deactivated.
ESC and traction control system are
reactivated by pressing the a button
again, by applying the brake or in the case that the vehicle is driven faster
than 30 mph.
Page 159 of 283
Driving and operating157The LED in the button a extinguishes
when ESC and traction control
system are reactivated.
ESC and traction control system are
also reactivated the next time the
ignition is switched on.
Fault
If there is a fault in the system, the control indicator b illuminates
continuously and a message appears in the Driver Information Centre. The
system is not operational.
Have the cause of the fault remedied by a workshop.
Selective ride controlCaution
The vehicle is designed to drive
principally on-road, but it also
enables driving off-road
occasionally.
However, do not drive on terrain
where the vehicle could be
damaged due to obstacles, such
as stones among others and on
terrain with steep inclines and
poor grip.
Do not cross waters.Caution
When driving off-road, sudden
motion and manoeuvres can
cause a collision or losing control.
Selective ride control is designed to
optimise traction in low-grip
conditions (snow, mud and sand).
It adapts to the terrain by acting on the
front wheels, in doing so this saves
the weight normally associated with a more conventional four wheel drive
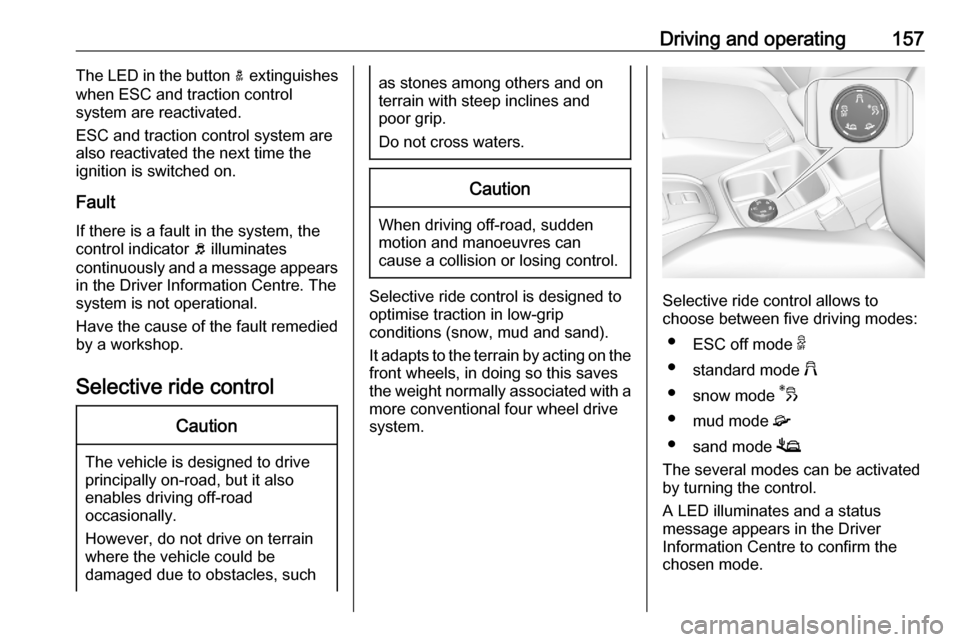
system.Selective ride control allows to
choose between five driving modes:
● ESC off mode 9
● standard mode 2
● snow mode 3
● mud mode 4
● sand mode 1
The several modes can be activated
by turning the control.
A LED illuminates and a status
message appears in the Driver
Information Centre to confirm the
chosen mode.
Page 160 of 283
158Driving and operatingESC off mode 9
The ESC and Traction Control are
deactivated in this mode.
A LED in the button a illuminates.
ESC and Traction Control are
reactivated automatically from
30 mph or everytime the ignition is
switched on.
Standard mode 2
This mode is calibrated for a low level of wheel spin, based on the different
types of grip generally encountered in normal day to day driving.
Everytime the ignition is switched off,
the system is automatically reset to
this mode.
Snow mode 3
This mode adapts to the grip
conditions encountered by each
wheel when starting.
When advancing, the system
optimises wheel spin to guarantee the best acceleration based on theavailable traction. Recommended in
cases of deep snow and steep
inclines.
This mode is active up to a speed of
30 mph.
Mud mode 4
This mode allows considerable wheel
spin at start-up for the wheel with the
least grip, this removes mud and re- establishes traction.
Simultaneously, the wheel with the
most grip is provided with the most
torque possible.
This mode is active up to a speed of 50 mph.
Sand mode 1
This mode allows a small amount of
simultaneous wheel spin on the two
drive wheels, enabling the vehicle to
advance and reduce the risk of
sinking.
This mode is active up to a speed of
75 mph.Caution
Do not use the other modes on
sand as the vehicle may become
stuck.
Sport mode
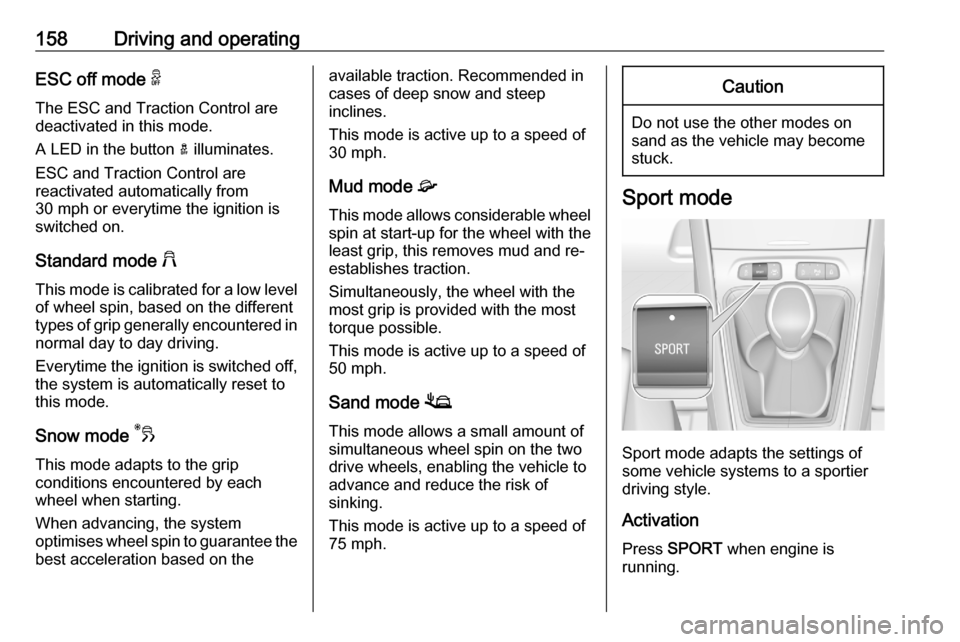
Sport mode adapts the settings of
some vehicle systems to a sportier
driving style.
Activation
Press SPORT when engine is
running.
Page 161 of 283

Driving and operating159LED in the button illuminates when
sport mode is active and a status
message appears in the Driver
Information Centre.
Deactivation Briefly press SPORT. Sport mode is
deactivated the next time the ignition
is switched on.Driver assistance
systems9 Warning
Driver assistance systems are
developed to support the driver
and not to replace the driver's
attention.
The driver accepts full
responsibility when driving the
vehicle.
When using driver assistance
systems, always take care
regarding the current traffic
situation.
Cruise control
The cruise control can store and
maintain speeds above 25 mph.
Additionally at least the third gear
must be engaged on manual
transmission, on automatic
transmission position D or the second
or a higher gear in position M must be
selected.
The cruise control can store and
maintain speeds above 40 km/h.
Additionally at least the third gear
must be engaged on manual
transmission, on automatic
transmission position D or the second
or a higher gear in position M must be
selected.
Deviations from the stored speeds
may occur when driving uphill or
downhill.
The system maintains the vehicle
speed at the preset speed by the
driver, without any action on the
accelerator pedal.
The preset speed can be exceeded
temporarily by pressing the
accelerator pedal firmly.
The status and preset speed is
displayed in the Driver Information Centre.
Do not use the cruise control if it is not advisable to maintain a constant
speed.
Control indicator m 3 99.
Page 167 of 283
Driving and operating1659Warning
The complete driver attention is
always required while driving with adaptive cruise control. The driver stays fully in control of the vehicle
because the brake pedal, the
accelerator pedal and the button
Ñ have priority over any adaptive
cruise control operation.
Switching on the system
Press C, the symbol C is indicated in
the Driver Information Centre. The system is still not active.
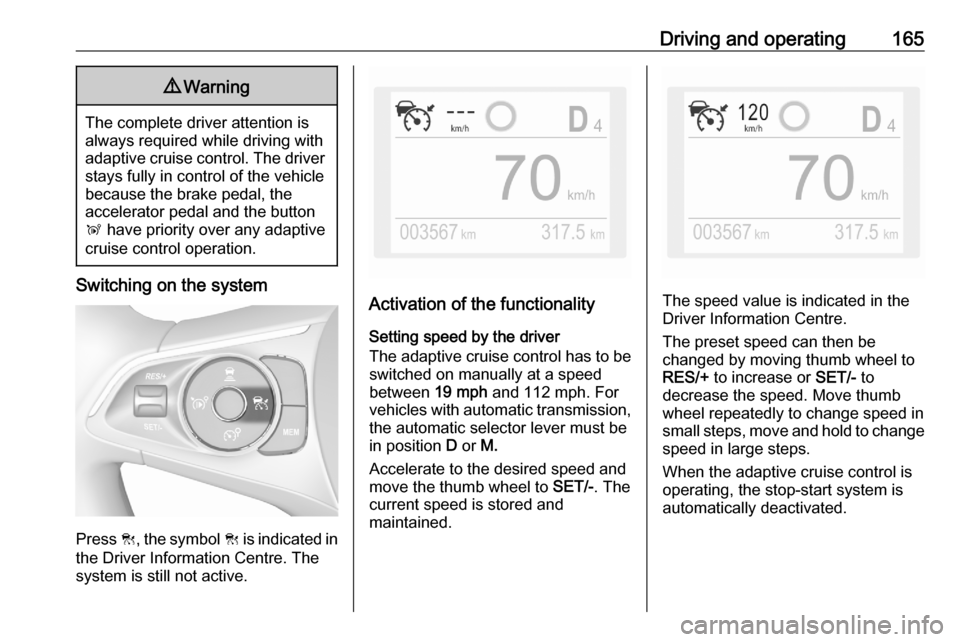
Activation of the functionality
Setting speed by the driver
The adaptive cruise control has to be switched on manually at a speed
between 19 mph and 112 mph. For
vehicles with automatic transmission, the automatic selector lever must be
in position D or M.
Accelerate to the desired speed and
move the thumb wheel to SET/-. The
current speed is stored and
maintained.The speed value is indicated in the
Driver Information Centre.
The preset speed can then be
changed by moving thumb wheel to
RES/+ to increase or SET/- to
decrease the speed. Move thumb wheel repeatedly to change speed in
small steps, move and hold to change
speed in large steps.
When the adaptive cruise control is
operating, the stop-start system is
automatically deactivated.
Page 175 of 283

Driving and operating173The driver must always be ready
to take action and apply the brakes
and steer to avoid collisions.
Functionality
If equipped only with front camera the
active emergency braking operates in
forward gear in the range between
3 mph and 53 mph. With radar sensor
and front camera active emergency
braking operates in forward gear in the range between 3 mph and87 mph.
A precondition is that forward collision alert with front camera system is not
deactivated in the vehicle
personalisation menu and the seat
belts of the front passengers are
fastened 3 107.
The system includes: ● brake preparation system
● emergency automatic braking ● forward looking brake assist
● intelligent brake assist (only with radar sensor)
● forward collision alert
● front pedestrian protection
Brake preparation system
When approaching a vehicle ahead
or a pedestrian so quickly that a
collision is likely, the brake
preparation system slightly
pressurises the brakes. This reduces
the response time, when braking is
requested.
Emergency automatic braking
After activation of brake preparation
system and just before the imminent
collision, this function automatically
applies limited braking to reduce the
impact speed of the collision or
prohibit a crash. If active emergency
braking is applied, m flashes in the
instrument cluster. Depending on the
situation, the vehicle may
automatically brake moderately or
hard. Front automatic braking can
only occur if a vehicle ahead is
detected. On vehicles with front
pedestrian protection, front automatic
braking can also occur when a
pedestrian ahead is detected.
Forward collision alert 3 170
Front pedestrian protection 3 175Emergency automatic braking may
slow the vehicle to a complete stop to try to avoid a potential crash. If this
happens, emergency automatic
braking may engage the electric
parking brake to hold the vehicle at a
stop. To release press the electric
parking brake button or firmly press
the accelerator pedal.9 Warning
Emergency automatic braking is
an emergency crash preparation
feature and is not designed to
avoid crashes. Do not rely on the
system to brake the vehicle.
Emergency automatic braking will
not brake outside of its operating speed range and only responds to
detected vehicles and
pedestrians.
Forward looking brake assist
In addition to the brake preparation
system and emergency automatic
braking, the forward looking brake
assist function makes the brake assist more sensitive. Therefore, pressing
Page 179 of 283
Driving and operating177The system is ready to operate when
the LED in the parking assist button
¼ is not illuminated.
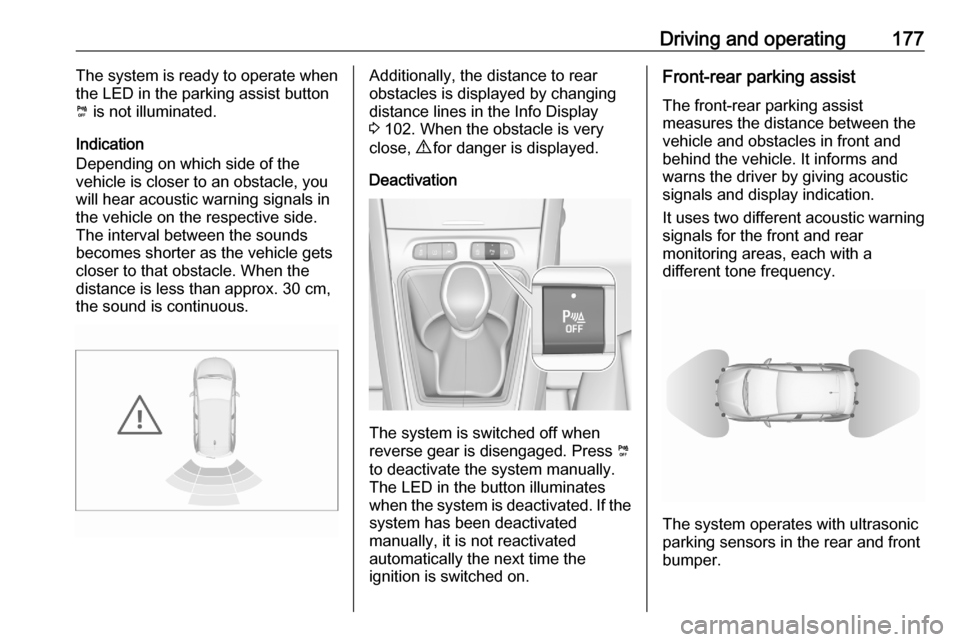
Indication
Depending on which side of the
vehicle is closer to an obstacle, you will hear acoustic warning signals inthe vehicle on the respective side.
The interval between the sounds
becomes shorter as the vehicle gets
closer to that obstacle. When the
distance is less than approx. 30 cm,
the sound is continuous.Additionally, the distance to rear
obstacles is displayed by changing
distance lines in the Info Display
3 102. When the obstacle is very
close, 9 for danger is displayed.
Deactivation
The system is switched off when
reverse gear is disengaged. Press ¼
to deactivate the system manually.
The LED in the button illuminates
when the system is deactivated. If the
system has been deactivated
manually, it is not reactivated
automatically the next time the
ignition is switched on.
Front-rear parking assist
The front-rear parking assist
measures the distance between the
vehicle and obstacles in front and
behind the vehicle. It informs and
warns the driver by giving acoustic
signals and display indication.
It uses two different acoustic warning
signals for the front and rear
monitoring areas, each with a
different tone frequency.
The system operates with ultrasonic
parking sensors in the rear and front
bumper.
Page 180 of 283
178Driving and operatingActivation
In addition to the rear parking assist,
the front parking assist is triggered
when an obstacle is detected in front
and the speed of the vehicle is below 6 mph.
The system is ready to operate when
the LED in the parking assist button
¼ is not illuminated.
When the system is deactivated, the
LED in the button illuminates.
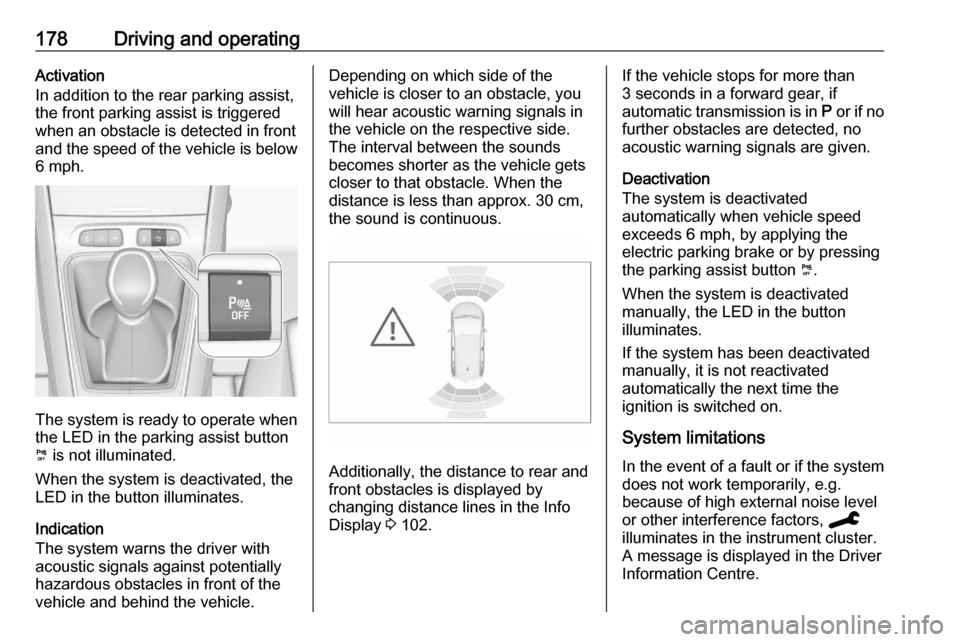
Indication
The system warns the driver with
acoustic signals against potentially
hazardous obstacles in front of the
vehicle and behind the vehicle.
Depending on which side of the
vehicle is closer to an obstacle, you
will hear acoustic warning signals in the vehicle on the respective side.
The interval between the sounds
becomes shorter as the vehicle gets
closer to that obstacle. When the
distance is less than approx. 30 cm,
the sound is continuous.
Additionally, the distance to rear and
front obstacles is displayed by
changing distance lines in the Info
Display 3 102.
If the vehicle stops for more than
3 seconds in a forward gear, if
automatic transmission is in P or if no
further obstacles are detected, no
acoustic warning signals are given.
Deactivation
The system is deactivated
automatically when vehicle speed
exceeds 6 mph, by applying the
electric parking brake or by pressing
the parking assist button ¼.
When the system is deactivated
manually, the LED in the button
illuminates.
If the system has been deactivated
manually, it is not reactivated
automatically the next time the
ignition is switched on.
System limitations In the event of a fault or if the system does not work temporarily, e.g.
because of high external noise level
or other interference factors, C
illuminates in the instrument cluster.
A message is displayed in the Driver Information Centre.
Page 184 of 283
182Driving and operatingExiting a parallel parking slot
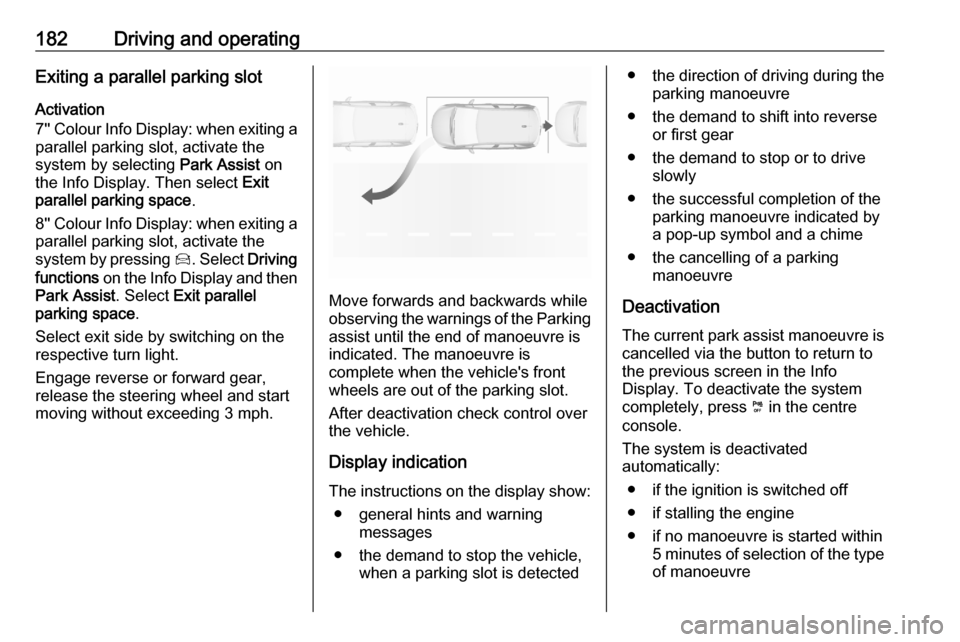
Activation
7'' Colour Info Display: when exiting a parallel parking slot, activate the
system by selecting Park Assist on
the Info Display. Then select Exit
parallel parking space .
8'' Colour Info Display: when exiting a parallel parking slot, activate the
system by pressing Í. Select Driving
functions on the Info Display and then
Park Assist . Select Exit parallel
parking space .
Select exit side by switching on the
respective turn light.
Engage reverse or forward gear,
release the steering wheel and start
moving without exceeding 3 mph.
Move forwards and backwards while
observing the warnings of the Parking
assist until the end of manoeuvre is
indicated. The manoeuvre is
complete when the vehicle's front
wheels are out of the parking slot.
After deactivation check control over
the vehicle.
Display indication The instructions on the display show: ● general hints and warning messages
● the demand to stop the vehicle, when a parking slot is detected
●the direction of driving during the
parking manoeuvre
● the demand to shift into reverse or first gear
● the demand to stop or to drive slowly
● the successful completion of the parking manoeuvre indicated by
a pop-up symbol and a chime
● the cancelling of a parking manoeuvre
Deactivation The current park assist manoeuvre is
cancelled via the button to return to
the previous screen in the Info
Display. To deactivate the system
completely, press ¼ in the centre
console.
The system is deactivated
automatically:
● if the ignition is switched off
● if stalling the engine
● if no manoeuvre is started within 5 minutes of selection of the typeof manoeuvre
Page 192 of 283
190Driving and operatingSystem limitations
The rear view camera may not
operate properly when:
● the surrounding is dark
● the beam of headlights is shining
directly into the camera lenses
● weather limits visibility, such as fog, rain, or snow
● the camera lenses are blocked by snow, ice, slush, mud, dirt.Clean the lense, rinse with water,
and wipe with a soft cloth
● the tailgate will be opened
● the vehicle is towing an electrically connected trailer,
bicycle carrier, etc.
● the vehicle had a rear end accident
● there are extreme temperature changes
Lane departure warning
The lane departure warning system
observes the lane markings between
which the vehicle is driving via a front camera located at the top of thewindscreen. The system warns the
driver in the event of an unintendend
lane departure via visual and acoustic signals.
There is no lane departure warning
when the turn lights are operated and during 20 seconds after turn lights
have been switched off.9 Warning
This system is a driving aid that
cannot, in any circumstances,
replace the need for vigilance on
the part of the driver.
Activation
After ignition is switched on, the lane
departure warning system is
activated. If the system is activated,
the LED in the button ½ is not
illuminated. To activate the system
when the system is deactivated,
press ½.
The system is only operable at
vehicle speeds above 37 mph and if
lane markings are available.
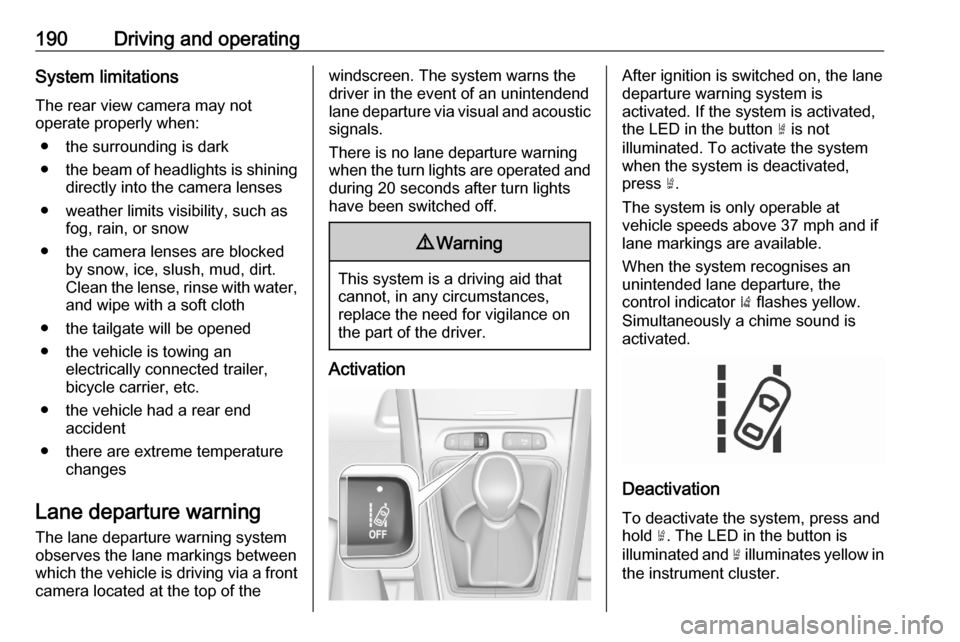
When the system recognises an
unintended lane departure, the
control indicator ) flashes yellow.
Simultaneously a chime sound is
activated.
Deactivation
To deactivate the system, press andhold ½. The LED in the button is
illuminated and ½ illuminates yellow in
the instrument cluster.