bc button VAUXHALL GRANDLAND X 2020 Repair Manual
[x] Cancel search | Manufacturer: VAUXHALL, Model Year: 2020, Model line: GRANDLAND X, Model: VAUXHALL GRANDLAND X 2020Pages: 283, PDF Size: 21.87 MB
Page 194 of 283

192Driving and operating● the vehicle is not connected to atrailer or an electric bicycle carrier
● normal driving behaviour (system
detects dynamic driving style, i.e. pressure on the brake or
accelerator pedal)
● roads with poor lane markings
● no spare wheel is used
● the driver needs to be active during the correction
● the vehicle is not driven in a tight
corner
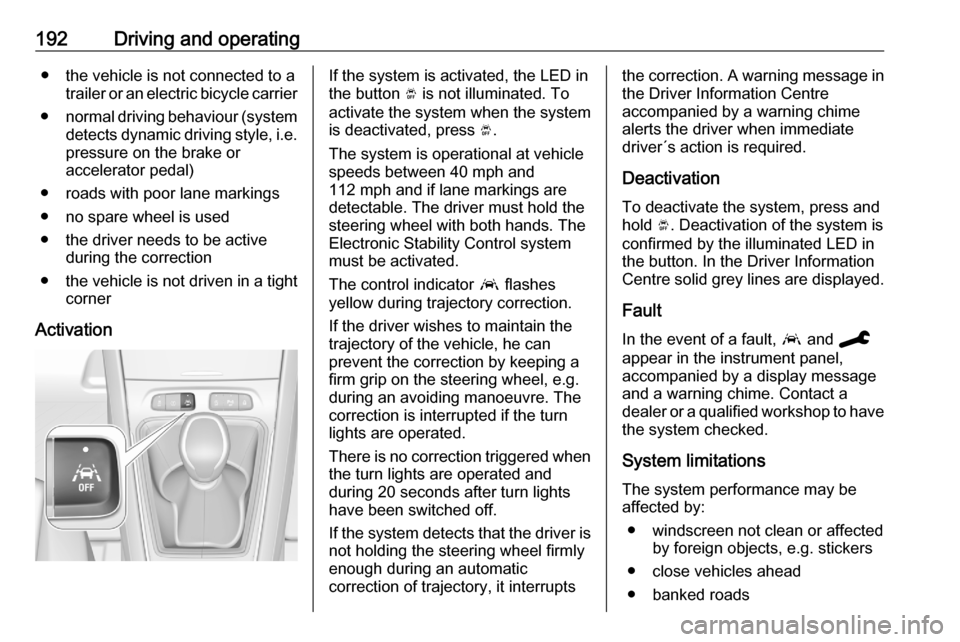
ActivationIf the system is activated, the LED in
the button Ó is not illuminated. To
activate the system when the system
is deactivated, press Ó.
The system is operational at vehicle
speeds between 40 mph and
112 mph and if lane markings are
detectable. The driver must hold the
steering wheel with both hands. The Electronic Stability Control system
must be activated.
The control indicator a flashes
yellow during trajectory correction.
If the driver wishes to maintain the
trajectory of the vehicle, he can
prevent the correction by keeping a
firm grip on the steering wheel, e.g.
during an avoiding manoeuvre. The correction is interrupted if the turn
lights are operated.
There is no correction triggered when
the turn lights are operated and
during 20 seconds after turn lights
have been switched off.
If the system detects that the driver is not holding the steering wheel firmly
enough during an automatic
correction of trajectory, it interruptsthe correction. A warning message in
the Driver Information Centre
accompanied by a warning chime
alerts the driver when immediate
driver´s action is required.
Deactivation
To deactivate the system, press and
hold Ó. Deactivation of the system is
confirmed by the illuminated LED in
the button. In the Driver Information
Centre solid grey lines are displayed.
Fault
In the event of a fault, a and C
appear in the instrument panel,
accompanied by a display message
and a warning chime. Contact a
dealer or a qualified workshop to have
the system checked.
System limitations
The system performance may be affected by:
● windscreen not clean or affected by foreign objects, e.g. stickers
● close vehicles ahead
● banked roads
Page 221 of 283

Vehicle care219Within one minute after switching off
ignition, operate the wiper lever to
position the wiper blades vertically on
the windscreen.
Lift the wiper arm until it stays in the
raised position, press button to
disengage the wiper blade and
remove.
Attach the wiper blade slightly angled
to the wiper arm and push until it
engages.
Lower wiper arm carefully.
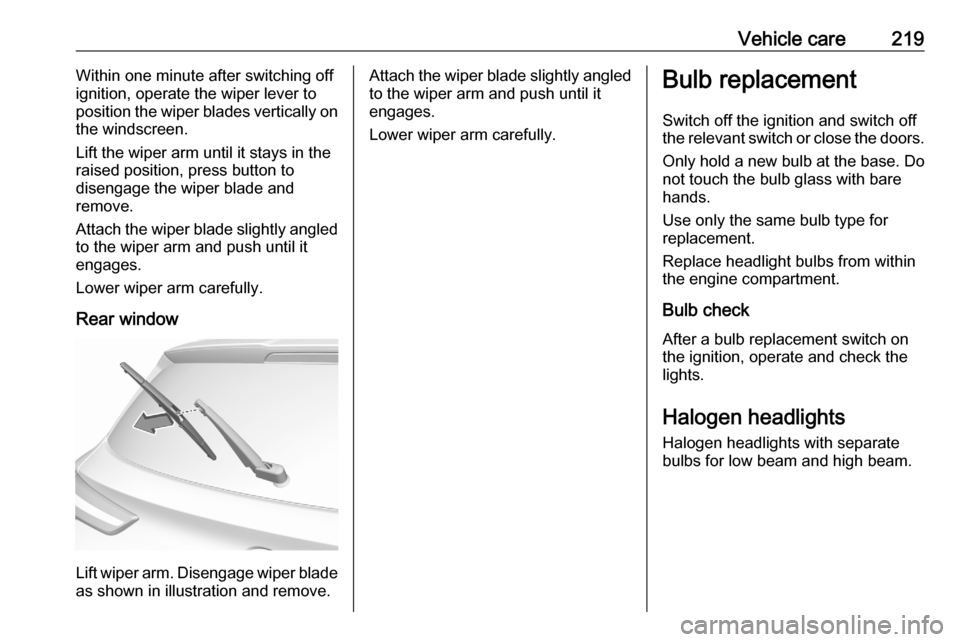
Rear window
Lift wiper arm. Disengage wiper blade as shown in illustration and remove.
Attach the wiper blade slightly angled
to the wiper arm and push until it
engages.
Lower wiper arm carefully.Bulb replacement
Switch off the ignition and switch off
the relevant switch or close the doors.
Only hold a new bulb at the base. Do not touch the bulb glass with bare
hands.
Use only the same bulb type for
replacement.
Replace headlight bulbs from within
the engine compartment.
Bulb check
After a bulb replacement switch on
the ignition, operate and check the
lights.
Halogen headlights Halogen headlights with separate
bulbs for low beam and high beam.
Page 238 of 283

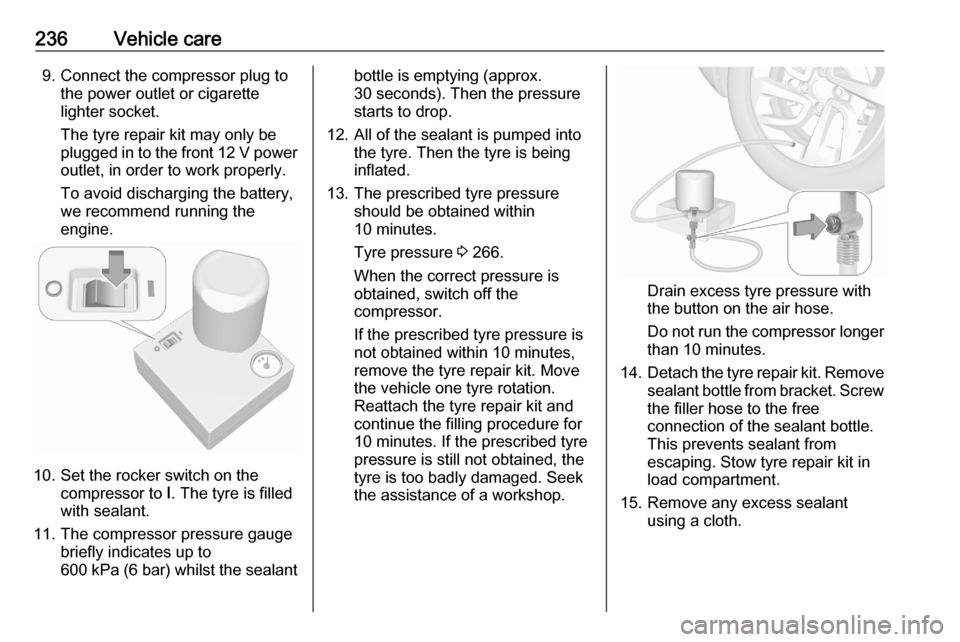
236Vehicle care9. Connect the compressor plug tothe power outlet or cigarette
lighter socket.
The tyre repair kit may only be
plugged in to the front 12 V power
outlet, in order to work properly.
To avoid discharging the battery,
we recommend running the
engine.
10. Set the rocker switch on the compressor to I. The tyre is filled
with sealant.
11. The compressor pressure gauge briefly indicates up to
600 kPa (6 bar) whilst the sealant
bottle is emptying (approx.
30 seconds). Then the pressure
starts to drop.
12. All of the sealant is pumped into the tyre. Then the tyre is being
inflated.
13. The prescribed tyre pressure should be obtained within
10 minutes.
Tyre pressure 3 266.
When the correct pressure is
obtained, switch off the
compressor.
If the prescribed tyre pressure is
not obtained within 10 minutes,
remove the tyre repair kit. Move
the vehicle one tyre rotation.
Reattach the tyre repair kit and
continue the filling procedure for 10 minutes. If the prescribed tyre
pressure is still not obtained, the
tyre is too badly damaged. Seek
the assistance of a workshop.
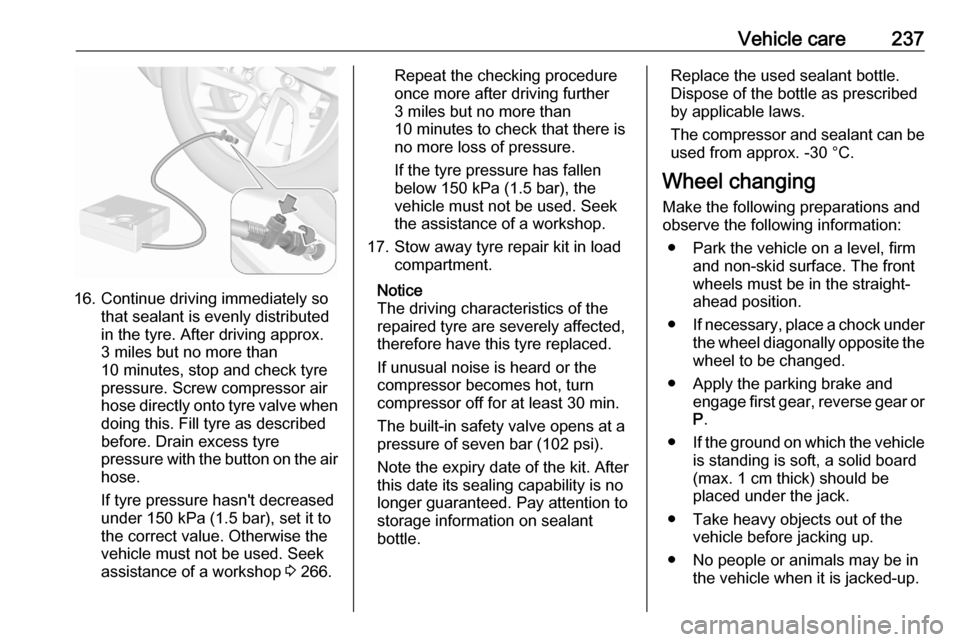
Drain excess tyre pressure with
the button on the air hose.
Do not run the compressor longer
than 10 minutes.
14. Detach the tyre repair kit. Remove
sealant bottle from bracket. Screw the filler hose to the free
connection of the sealant bottle.
This prevents sealant from
escaping. Stow tyre repair kit in
load compartment.
15. Remove any excess sealant using a cloth.
Page 239 of 283

Vehicle care237
16. Continue driving immediately sothat sealant is evenly distributed
in the tyre. After driving approx.
3 miles but no more than
10 minutes, stop and check tyre
pressure. Screw compressor air
hose directly onto tyre valve when
doing this. Fill tyre as described
before. Drain excess tyre
pressure with the button on the air
hose.
If tyre pressure hasn't decreased
under 150 kPa (1.5 bar), set it to
the correct value. Otherwise the
vehicle must not be used. Seek
assistance of a workshop 3 266.
Repeat the checking procedure
once more after driving further
3 miles but no more than
10 minutes to check that there is
no more loss of pressure.
If the tyre pressure has fallen
below 150 kPa (1.5 bar), the
vehicle must not be used. Seek
the assistance of a workshop.
17. Stow away tyre repair kit in load compartment.
Notice
The driving characteristics of the repaired tyre are severely affected,
therefore have this tyre replaced.
If unusual noise is heard or the
compressor becomes hot, turn
compressor off for at least 30 min.
The built-in safety valve opens at a
pressure of seven bar (102 psi).
Note the expiry date of the kit. After
this date its sealing capability is no
longer guaranteed. Pay attention to
storage information on sealant
bottle.Replace the used sealant bottle. Dispose of the bottle as prescribed
by applicable laws.
The compressor and sealant can be used from approx. -30 °C.
Wheel changing
Make the following preparations and
observe the following information:
● Park the vehicle on a level, firm and non-skid surface. The front
wheels must be in the straight- ahead position.
● If necessary, place a chock under
the wheel diagonally opposite the
wheel to be changed.
● Apply the parking brake and engage first gear, reverse gear orP .
● If the ground on which the vehicle
is standing is soft, a solid board
(max. 1 cm thick) should be
placed under the jack.
● Take heavy objects out of the vehicle before jacking up.
● No people or animals may be in the vehicle when it is jacked-up.
Page 281 of 283

279Outside temperature ....................83
Overrun cut-off ........................... 138
P Panoramic view system ..............185
Parking ................................ 19, 140
Parking assist ............................ 176
Parking brake ............................ 153
Parking heater ............................ 130
Parking lights ............................. 119
Particulate filter ........................... 141
Pedestrian safety alert ..................80
Performance .............................. 263
Performing work ........................213
Power button .............................. 135
Power indicator gauge ..................90
Power outlets ............................... 84
Power seat adjustment ................48
Power windows ............................ 39
Preheating ................................... 97
Programmable charging .............197
Puncture ..................................... 239
Q
Quickheat ................................... 130
R Radio Frequency Identification (RFID) ..................................... 274
Radio remote control ...................21
Rain sensor .................................. 99REACH....................................... 270
Reading lights ............................ 120
Rear floor storage cover ..............72
Rear fog light ...............99, 118, 221
Rear seats .................................... 51
Rear view camera ...................... 188
Rear window wiper and washer ..82
Recommended fluids and lubricants ........................ 254, 258
Refuelling ................................... 203
Regenerative braking .................155
Registered trademarks ...............270
Reversing lights .........................119
Ride control systems ..................156
Roadside assistance ..................110
Roller blinds ................................. 42
Roof .............................................. 42
Roof load ...................................... 76
Roof rack ..................................... 75
S Safety net .................................... 73
Seat adjustment ............................. 7
Seat belt ........................................ 8
Seat belt reminder .......................93
Seat belts ..................................... 51
Seat heating ................................. 50
Seat heating, rear .....................51
Seat position ................................ 45
Selective catalytic reduction .......142Selective ride control ..................157
Selector lever.............................. 147
Service ............................... 132, 250
Service display ............................ 91
Service information ....................250
Service vehicle soon .................... 94
Side airbag system ......................58
Side blind spot alert ..............99, 184
Sidelights .................................... 112
Side turn lights ........................... 224
Software update ......................... 270
SOS ............................................ 110
Spare wheel ............................... 239
Speed limiter....................... 100, 162
Speedometer ............................... 89
Sport mode ................................ 158
Starting and operating ................134
Starting off ................................... 17
Starting the engine ....................136
Steering ...................................... 134
Steering wheel adjustment ......9, 79
Steering wheel controls ...............79
Stop engine .................................. 94
Stop-start system........................ 138
Storage ......................................... 68
Storage compartments .................68
Sunvisor lights ........................... 120
Sun visors .................................... 42
Symbols ......................................... 4
System check ............................... 95