display VAUXHALL INSIGNIA 2015.5 User Guide
[x] Cancel search | Manufacturer: VAUXHALL, Model Year: 2015.5, Model line: INSIGNIA, Model: VAUXHALL INSIGNIA 2015.5Pages: 331, PDF Size: 9.08 MB
Page 40 of 331
38Keys, doors and windows
This function can be activated or
deactivated in the Vehicle
personalisation.
Select the relevant setting in Settings,
I Vehicle in the Colour-Info-Display.
Colour-Info-Display 3 118.
Vehicle personalisation 3 122.
The settings are automatically stored
for the key being used 3 23.
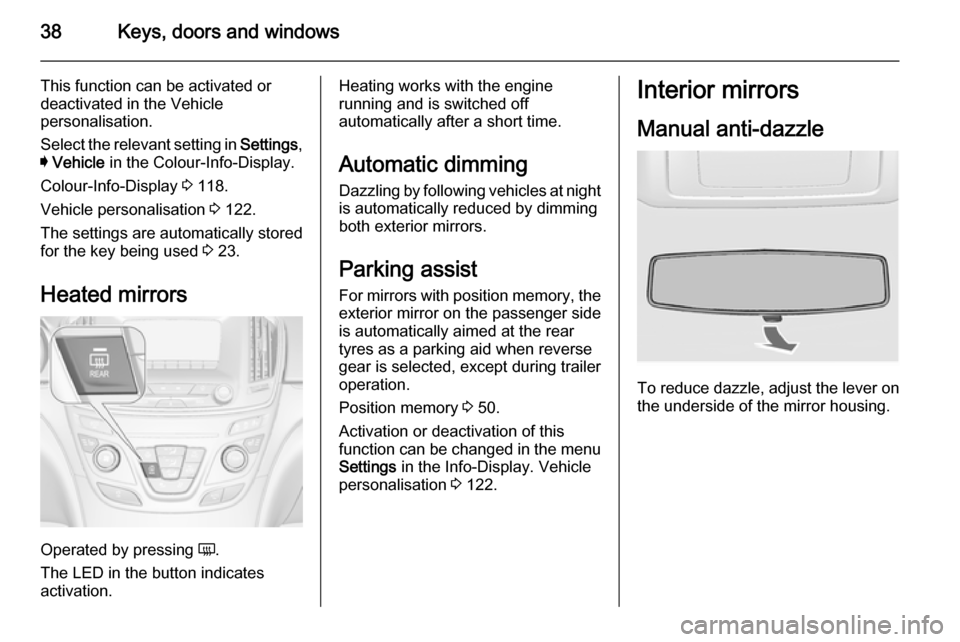
Heated mirrors
Operated by pressing Ü.
The LED in the button indicates
activation.
Heating works with the engine
running and is switched off
automatically after a short time.
Automatic dimming Dazzling by following vehicles at nightis automatically reduced by dimming
both exterior mirrors.
Parking assist
For mirrors with position memory, the exterior mirror on the passenger side
is automatically aimed at the rear
tyres as a parking aid when reverse
gear is selected, except during trailer
operation.
Position memory 3 50.
Activation or deactivation of this
function can be changed in the menu Settings in the Info-Display. Vehicle
personalisation 3 122.Interior mirrors
Manual anti-dazzle
To reduce dazzle, adjust the lever on the underside of the mirror housing.
Page 43 of 331
Keys, doors and windows41
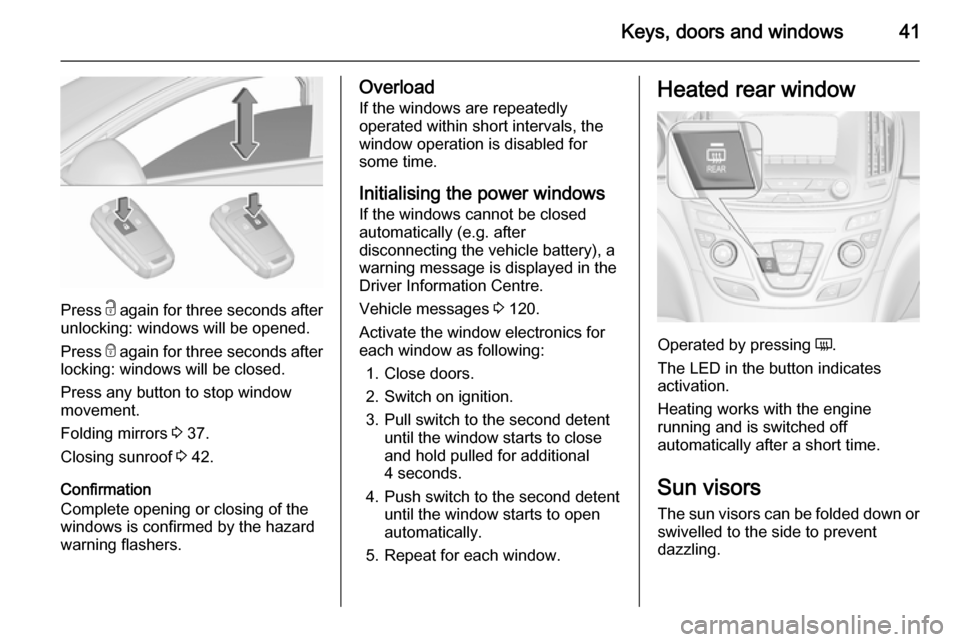
Press c again for three seconds after
unlocking: windows will be opened.
Press e again for three seconds after
locking: windows will be closed.
Press any button to stop window
movement.
Folding mirrors 3 37.
Closing sunroof 3 42.
Confirmation
Complete opening or closing of the
windows is confirmed by the hazard
warning flashers.
Overload
If the windows are repeatedly
operated within short intervals, the window operation is disabled for
some time.
Initialising the power windows If the windows cannot be closed
automatically (e.g. after
disconnecting the vehicle battery), a
warning message is displayed in the
Driver Information Centre.
Vehicle messages 3 120.
Activate the window electronics for
each window as following:
1. Close doors.
2. Switch on ignition.
3. Pull switch to the second detent until the window starts to close
and hold pulled for additional
4 seconds.
4. Push switch to the second detent until the window starts to open
automatically.
5. Repeat for each window.Heated rear window
Operated by pressing Ü.
The LED in the button indicates
activation.
Heating works with the engine
running and is switched off
automatically after a short time.
Sun visors The sun visors can be folded down orswivelled to the side to prevent
dazzling.
Page 49 of 331
Seats, restraints47Front seats
Seat position9 Warning
Only drive with the seat correctly
adjusted.
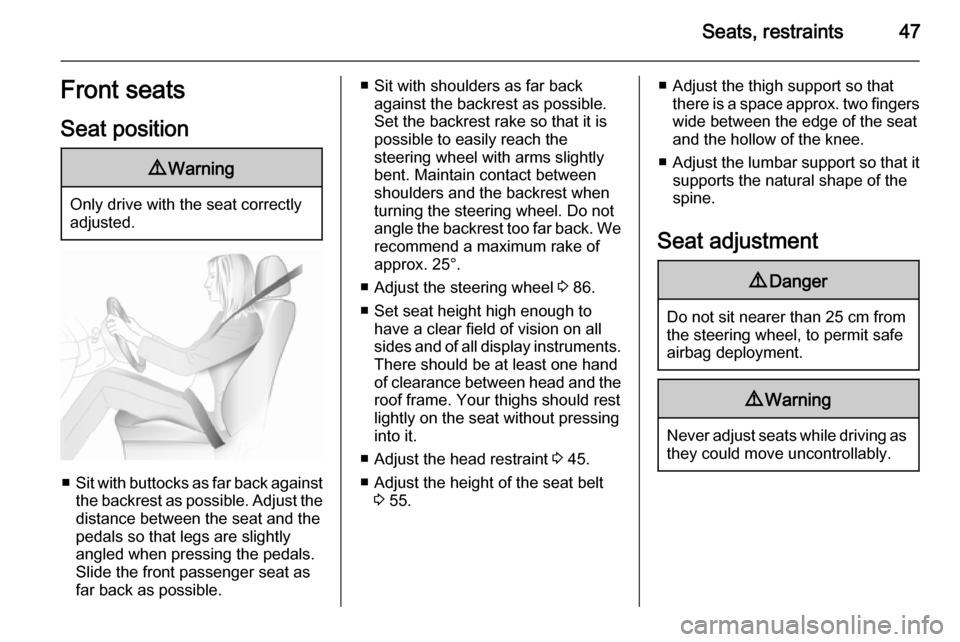
■ Sit with buttocks as far back against
the backrest as possible. Adjust the distance between the seat and the
pedals so that legs are slightly
angled when pressing the pedals.
Slide the front passenger seat as
far back as possible.
■ Sit with shoulders as far back against the backrest as possible.
Set the backrest rake so that it is possible to easily reach the
steering wheel with arms slightly bent. Maintain contact between
shoulders and the backrest when
turning the steering wheel. Do not
angle the backrest too far back. We recommend a maximum rake of
approx. 25°.
■ Adjust the steering wheel 3 86.
■ Set seat height high enough to have a clear field of vision on allsides and of all display instruments.
There should be at least one hand
of clearance between head and the
roof frame. Your thighs should rest
lightly on the seat without pressing
into it.
■ Adjust the head restraint 3 45.
■ Adjust the height of the seat belt 3 55.■ Adjust the thigh support so that
there is a space approx. two fingers
wide between the edge of the seat
and the hollow of the knee.
■ Adjust the lumbar support so that it
supports the natural shape of the
spine.
Seat adjustment9 Danger
Do not sit nearer than 25 cm from
the steering wheel, to permit safe
airbag deployment.
9 Warning
Never adjust seats while driving as
they could move uncontrollably.
Page 54 of 331
52Seats, restraints
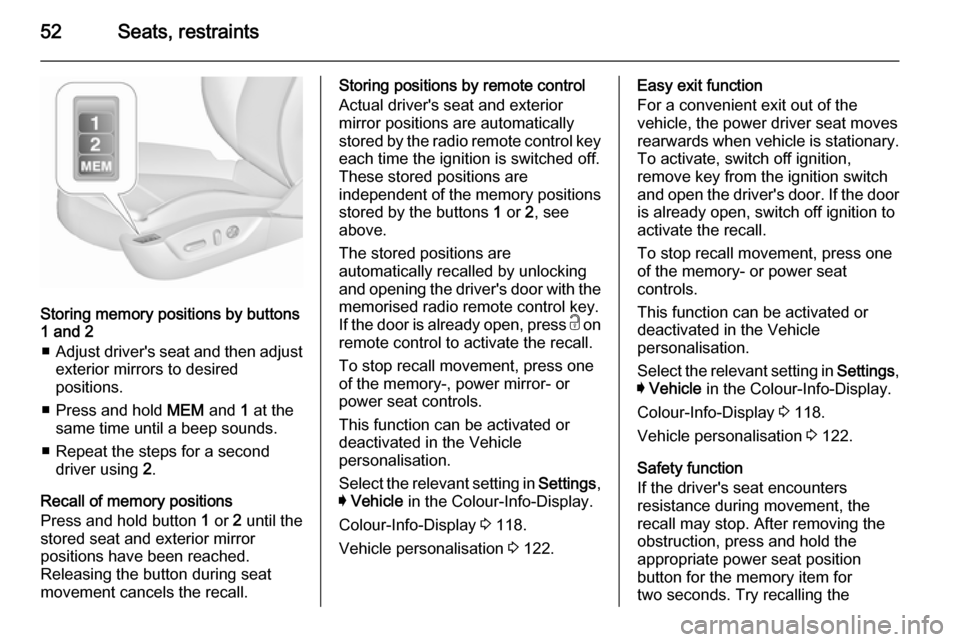
Storing memory positions by buttons
1 and 2
■ Adjust driver's seat and then adjust
exterior mirrors to desired
positions.
■ Press and hold MEM and 1 at the
same time until a beep sounds.
■ Repeat the steps for a second driver using 2.
Recall of memory positions
Press and hold button 1 or 2 until the
stored seat and exterior mirror
positions have been reached.
Releasing the button during seat
movement cancels the recall.
Storing positions by remote control
Actual driver's seat and exterior
mirror positions are automatically
stored by the radio remote control key
each time the ignition is switched off.
These stored positions are
independent of the memory positions
stored by the buttons 1 or 2, see
above.
The stored positions are
automatically recalled by unlocking and opening the driver's door with the
memorised radio remote control key.
If the door is already open, press c on
remote control to activate the recall.
To stop recall movement, press one
of the memory-, power mirror- or
power seat controls.
This function can be activated or
deactivated in the Vehicle
personalisation.
Select the relevant setting in Settings,
I Vehicle in the Colour-Info-Display.
Colour-Info-Display 3 118.
Vehicle personalisation 3 122.Easy exit function
For a convenient exit out of the
vehicle, the power driver seat moves
rearwards when vehicle is stationary. To activate, switch off ignition,
remove key from the ignition switch and open the driver's door. If the door
is already open, switch off ignition to
activate the recall.
To stop recall movement, press one
of the memory- or power seat
controls.
This function can be activated or
deactivated in the Vehicle
personalisation.
Select the relevant setting in Settings,
I Vehicle in the Colour-Info-Display.
Colour-Info-Display 3 118.
Vehicle personalisation 3 122.
Safety function
If the driver's seat encounters
resistance during movement, the
recall may stop. After removing the
obstruction, press and hold the
appropriate power seat position
button for the memory item for
two seconds. Try recalling the
Page 88 of 331
86Instruments and controlsInstruments and
controlsControls ....................................... 86
Warning lights, gauges and indi‐
cators ........................................... 95
Information displays ...................111
Vehicle messages ...................... 120
Vehicle personalisation ..............122Controls
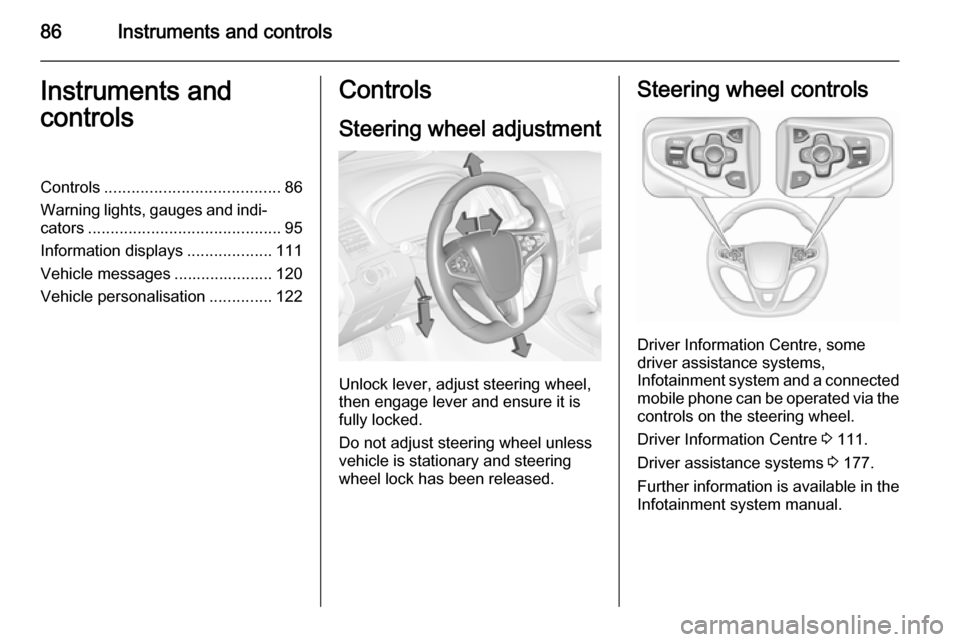
Steering wheel adjustment
Unlock lever, adjust steering wheel,
then engage lever and ensure it is fully locked.
Do not adjust steering wheel unless
vehicle is stationary and steering
wheel lock has been released.
Steering wheel controls
Driver Information Centre, some
driver assistance systems,
Infotainment system and a connected
mobile phone can be operated via the controls on the steering wheel.
Driver Information Centre 3 111.
Driver assistance systems 3 177.
Further information is available in the
Infotainment system manual.
Page 91 of 331
Instruments and controls89
Adjustable sensitivity of the rain
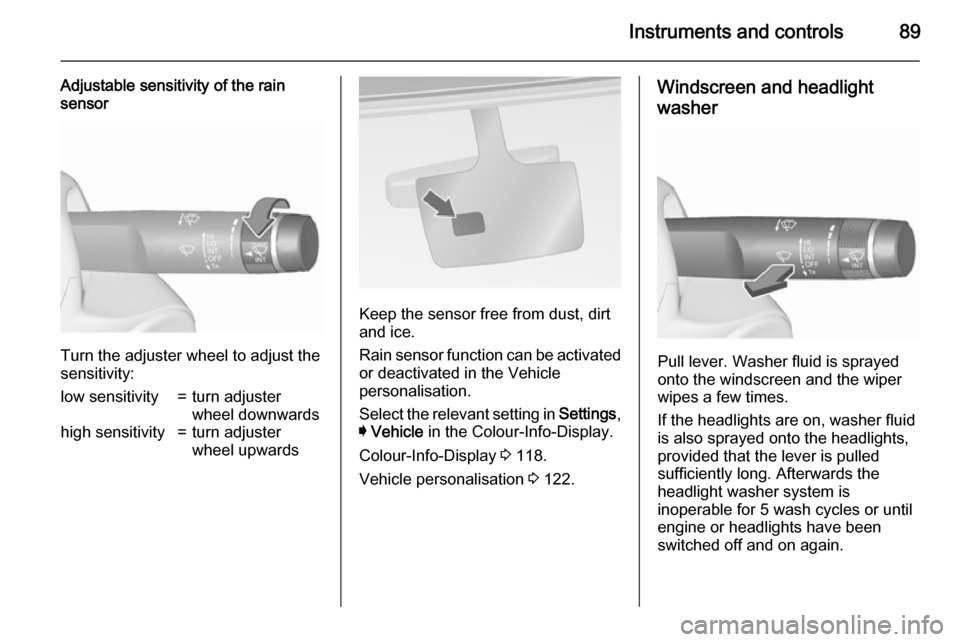
sensor
Turn the adjuster wheel to adjust the
sensitivity:
low sensitivity=turn adjuster
wheel downwardshigh sensitivity=turn adjuster
wheel upwards
Keep the sensor free from dust, dirt
and ice.
Rain sensor function can be activated or deactivated in the Vehicle
personalisation.
Select the relevant setting in Settings,
I Vehicle in the Colour-Info-Display.
Colour-Info-Display 3 118.
Vehicle personalisation 3 122.
Windscreen and headlight
washer
Pull lever. Washer fluid is sprayed
onto the windscreen and the wiper
wipes a few times.
If the headlights are on, washer fluid is also sprayed onto the headlights,
provided that the lever is pulled
sufficiently long. Afterwards the
headlight washer system is
inoperable for 5 wash cycles or until
engine or headlights have been
switched off and on again.
Page 92 of 331
90Instruments and controlsRear window wiper/washer
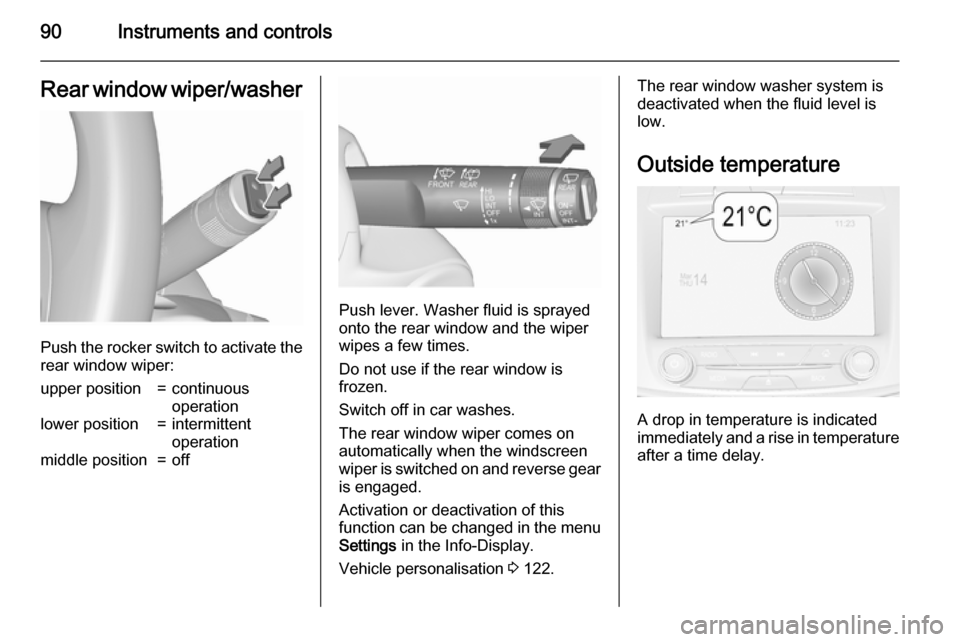
Push the rocker switch to activate therear window wiper:
upper position=continuous
operationlower position=intermittent
operationmiddle position=off
Push lever. Washer fluid is sprayed
onto the rear window and the wiper
wipes a few times.
Do not use if the rear window is
frozen.
Switch off in car washes.
The rear window wiper comes on
automatically when the windscreen
wiper is switched on and reverse gear
is engaged.
Activation or deactivation of this
function can be changed in the menu Settings in the Info-Display.
Vehicle personalisation 3 122.
The rear window washer system is
deactivated when the fluid level is
low.
Outside temperature
A drop in temperature is indicated
immediately and a rise in temperature
after a time delay.
Page 93 of 331

Instruments and controls91
If outside temperature drops to 3 °C,
a warning message is displayed in the Driver Information Centre.
9 Warning
The road surface may already be
icy even though the display
indicates a few degrees above 0
°C.
Clock
Time is shown in the
4.2" Colour-Info-Display.
Date and time are shown in the
8" Colour-Info-Display.
Colour-Info-Display operation 3 118
4.2'' Display
Operate the display by the buttons
below the display.
Press ; and then select the
Settings icon by turning and pressing
MENU .
Select Time menu page.
Set time
Select the 'Set Time' menu item to
enter the respective submenu.
Select the 'Auto Set' screen button at the bottom of the screen. Activate
either 'On - RDS' mode or 'Off -
Manual' mode.
If 'Off - Manual' mode is selected,
adjust hours and minutes by turning
and pressing MENU.
Repeatedly select the 12-24 Hr
screen button at the bottom of the
screen to choose a time mode.
If 12-hour mode is selected, a third
column for AM and PM setting is
displayed. Select the desired option.In 'On - RDS Mode' the RDS signal of
most VHF transmitters automatically
sets the time. RDS time
synchronisation can take a few
minutes. Some transmitters do not
send a correct time signal. In such
cases, it is recommended to switch off automatic time synchronisation.
Return to homepage by pressing ;.
For further information, see Infotainment system manual
8'' Display
Press ; and then select the
Settings icon. Inputs can be done
directly by the finger on the touch screen icons.
Select 'Time and Date' menu page.
Set time
Select the 'Set Time' menu item to
enter the respective submenu.
Page 94 of 331
92Instruments and controls
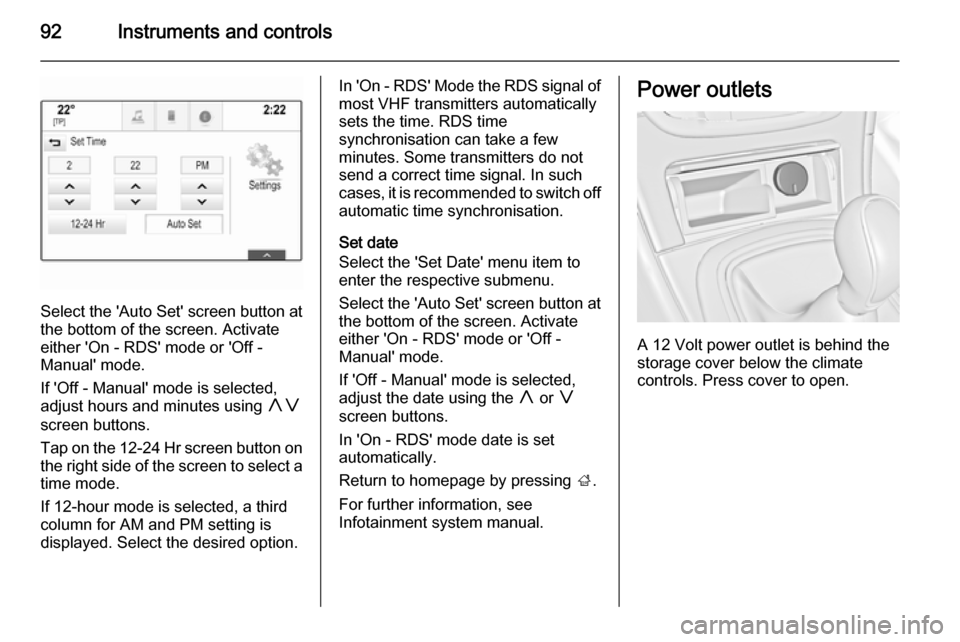
Select the 'Auto Set' screen button at
the bottom of the screen. Activate
either 'On - RDS' mode or 'Off -
Manual' mode.
If 'Off - Manual' mode is selected,
adjust hours and minutes using hg
screen buttons.
Tap on the 12-24 Hr screen button on
the right side of the screen to select a time mode.
If 12-hour mode is selected, a third
column for AM and PM setting is
displayed. Select the desired option.
In 'On - RDS' Mode the RDS signal of
most VHF transmitters automatically
sets the time. RDS time
synchronisation can take a few
minutes. Some transmitters do not send a correct time signal. In suchcases, it is recommended to switch off
automatic time synchronisation.
Set date
Select the 'Set Date' menu item to
enter the respective submenu.
Select the 'Auto Set' screen button at the bottom of the screen. Activate
either 'On - RDS' mode or 'Off -
Manual' mode.
If 'Off - Manual' mode is selected,
adjust the date using the h or g
screen buttons.
In 'On - RDS' mode date is set
automatically.
Return to homepage by pressing ;.
For further information, see
Infotainment system manual.Power outlets
A 12 Volt power outlet is behind the
storage cover below the climate
controls. Press cover to open.
Page 97 of 331

Instruments and controls95Warning lights, gauges
and indicators
Instrument cluster
Depending on the version, three
instrument clusters are available:
■ Baselevel
■ Midlevel
■ Uplevel
Uplevel instrument cluster can be
displayed as Sport mode or Tour
mode.