navigation VAUXHALL MOKKA 2014 Infotainment system
[x] Cancel search | Manufacturer: VAUXHALL, Model Year: 2014, Model line: MOKKA, Model: VAUXHALL MOKKA 2014Pages: 221, PDF Size: 4.66 MB
Page 126 of 221
126Navigation
destinations), see regarding
descriptions on address input or
selection above.
After entering or selecting the desired destination address, the Navigation
menu is displayed.
Select Store.
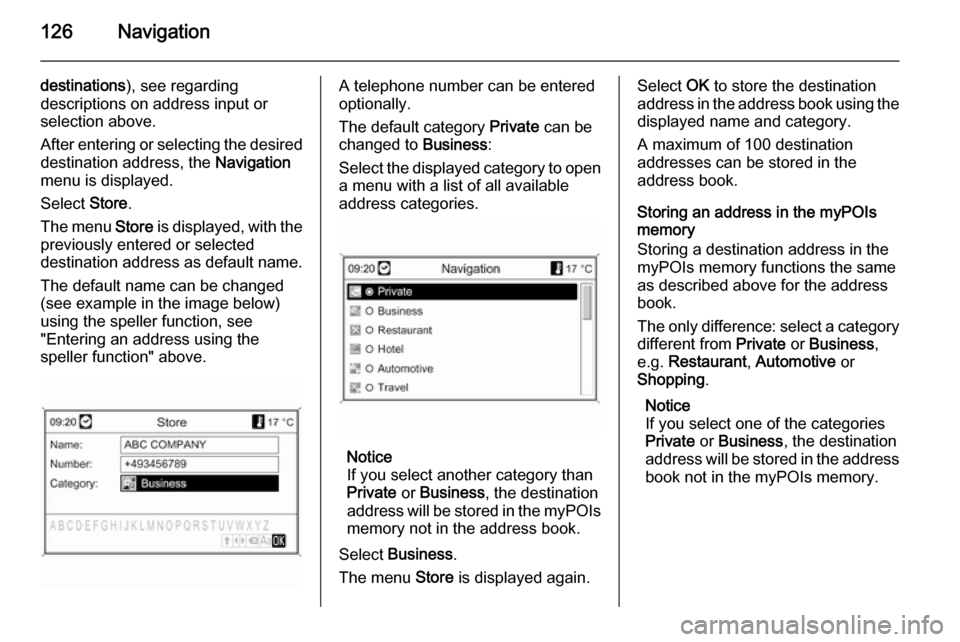
The menu Store is displayed, with the
previously entered or selected
destination address as default name.
The default name can be changed
(see example in the image below)
using the speller function, see
"Entering an address using the
speller function" above.A telephone number can be entered
optionally.
The default category Private can be
changed to Business:
Select the displayed category to open a menu with a list of all available
address categories.
Notice
If you select another category than
Private or Business , the destination
address will be stored in the myPOIs
memory not in the address book.
Select Business .
The menu Store is displayed again.
Select OK to store the destination
address in the address book using the displayed name and category.
A maximum of 100 destination
addresses can be stored in the
address book.
Storing an address in the myPOIs
memory
Storing a destination address in the
myPOIs memory functions the same
as described above for the address
book.
The only difference: select a category
different from Private or Business ,
e.g. Restaurant , Automotive or
Shopping .
Notice
If you select one of the categories
Private or Business , the destination
address will be stored in the address
book not in the myPOIs memory.
Page 127 of 221
Navigation127
Editing or deleting a stored
address Address data (including the categoryand telephone number) stored in the
address book or myPOIs memory can
be edited or entirely deleted at any time.
Editing or deleting an address book
entry
Press the DEST / NAV button, select
Address book , select the desired
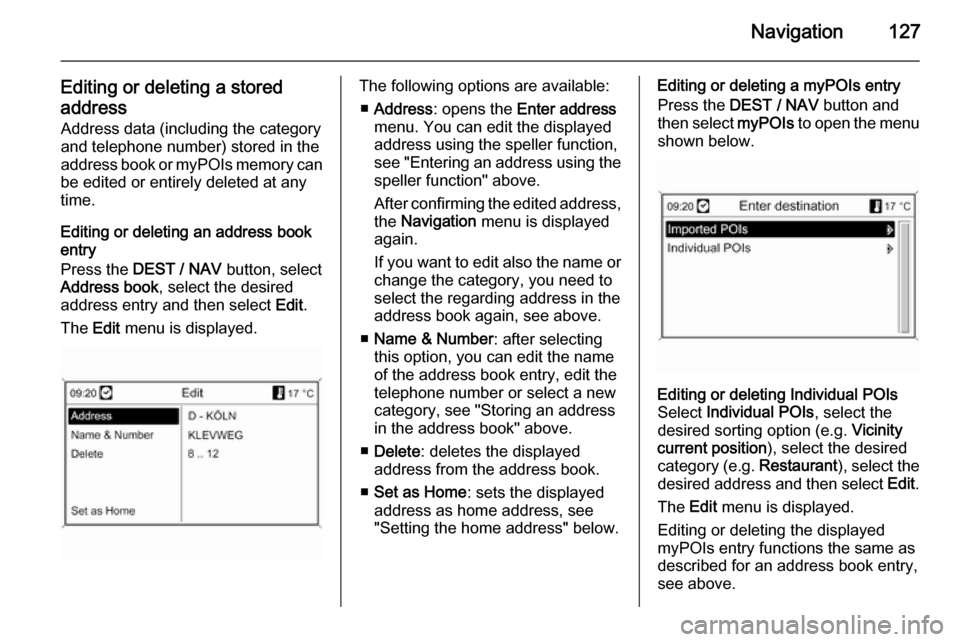
address entry and then select Edit.
The Edit menu is displayed.The following options are available:
■ Address : opens the Enter address
menu. You can edit the displayed address using the speller function,
see "Entering an address using the speller function" above.
After confirming the edited address,
the Navigation menu is displayed
again.
If you want to edit also the name or
change the category, you need to
select the regarding address in the
address book again, see above.
■ Name & Number : after selecting
this option, you can edit the name
of the address book entry, edit the
telephone number or select a new
category, see "Storing an address
in the address book" above.
■ Delete : deletes the displayed
address from the address book.
■ Set as Home : sets the displayed
address as home address, see
"Setting the home address" below.Editing or deleting a myPOIs entry
Press the DEST / NAV button and
then select myPOIs to open the menu
shown below.Editing or deleting Individual POIs
Select Individual POIs , select the
desired sorting option (e.g. Vicinity
current position ), select the desired
category (e.g. Restaurant), select the
desired address and then select Edit.
The Edit menu is displayed.
Editing or deleting the displayed
myPOIs entry functions the same as
described for an address book entry,
see above.
Page 128 of 221
128Navigation
Notes on Imported POIs
Imported points of interest (POIs
downloaded from a USB drive)
cannot be edited directly.
If you want to edit the address data of an imported POI:
■ You first need to store the address in the address book or as an
individual point of interest. Then
you can edit the address data of the regarding address book entry ormyPOIs entry (selectable via
Individual POIs ).
■ Or you can import updated address
data from a USB drive, see
"Exporting and importing POI data"
in chapter "Usage" above.
It is also not possible to directly
remove the address data of individual
imported points of interest from the
myPOIs memory.
If you want to remove individual
imported POIs:
Import updated POI data to the
Infotainment system that do not
contain the address data of the POIs
which you want to be removed.To remove all imported POIs of a
certain category: import an empty POI
data file of the regarding category.
Descriptions on importing POI data,
see "Exporting and importing POI
data" in chapter "Usage" above.
Deleting all imported POIs at once:
Press the CONFIG button, select
Navigation settings and then select
Delete all imported POIs .
Setting the home address Before you can set an address as
home address, you need to store this
address in the address book or
myPOIs memory, see corresponding
descriptions above.
Setting an address book entry as
home address
Press the DEST / NAV button, select
Address book , select the desired
address entry, select Edit and then
select Set as Home .
The displayed address is set as new
home address and displayed as first
option in the Enter destination menu.Setting a myPOIs entry as home
address
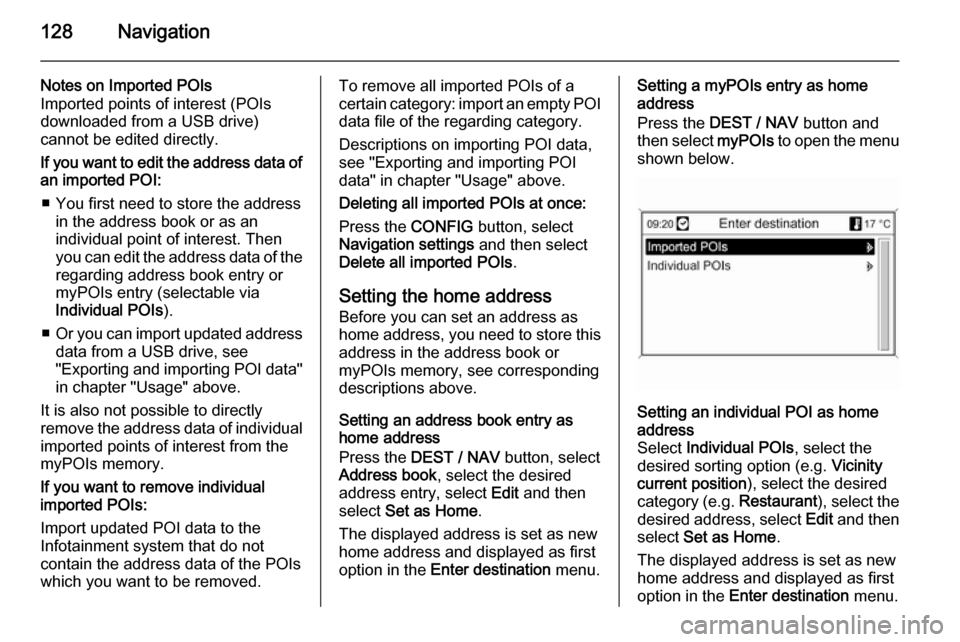
Press the DEST / NAV button and
then select myPOIs to open the menu
shown below.Setting an individual POI as home
address
Select Individual POIs , select the
desired sorting option (e.g. Vicinity
current position ), select the desired
category (e.g. Restaurant), select the
desired address, select Edit and then
select Set as Home .
The displayed address is set as new
home address and displayed as first
option in the Enter destination menu.
Page 129 of 221
Navigation129
Notes on Imported POIs
Imported points of interest (POIs
downloaded from a USB drive)
cannot be set as home address
directly.
If you want to set the address of an imported POI as home address:
You first need to store the address in
the address book or as an individual
point of interest.
Then you can set the address data of the regarding address book entry or
myPOIs entry (selectable via
Individual POIs ) as home address.
Guidance Press the NAV button and then the
multifunction knob to display the navigation main menu.
Depending on whether the route guidance is currently inactive or
active, different menu options are
available.Functions with route guidance
inactive
Start navigation
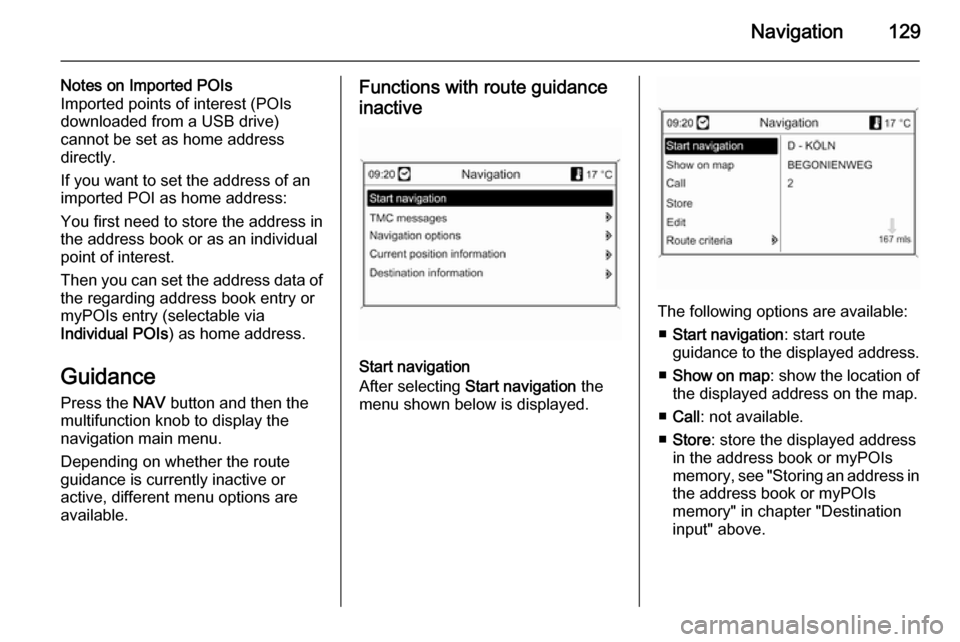
After selecting Start navigation the
menu shown below is displayed.
The following options are available:
■ Start navigation : start route
guidance to the displayed address.
■ Show on map : show the location of
the displayed address on the map.
■ Call : not available.
■ Store : store the displayed address
in the address book or myPOIs
memory, see "Storing an address in
the address book or myPOIs
memory" in chapter "Destination
input" above.
Page 130 of 221
130Navigation
■Edit : change/edit the displayed
address, see "Editing or deleting a
stored address" in chapter
"Destination input" above.
■ Route criteria : set/change criteria
for route calculation, see
"Navigation options" below.
TMC messages
Information on TMC, see chapter
"Dynamic guidance" 3 105.
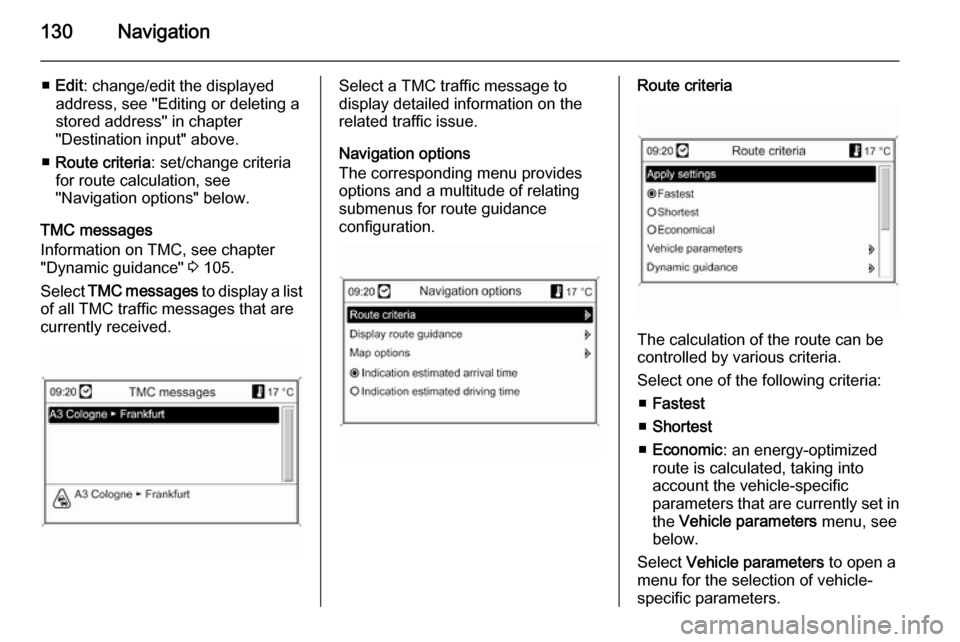
Select TMC messages to display a list
of all TMC traffic messages that are
currently received.Select a TMC traffic message to
display detailed information on the
related traffic issue.
Navigation options
The corresponding menu provides
options and a multitude of relating submenus for route guidance
configuration.Route criteria
The calculation of the route can be
controlled by various criteria.
Select one of the following criteria: ■ Fastest
■ Shortest
■ Economic : an energy-optimized
route is calculated, taking into
account the vehicle-specific
parameters that are currently set in the Vehicle parameters menu, see
below.
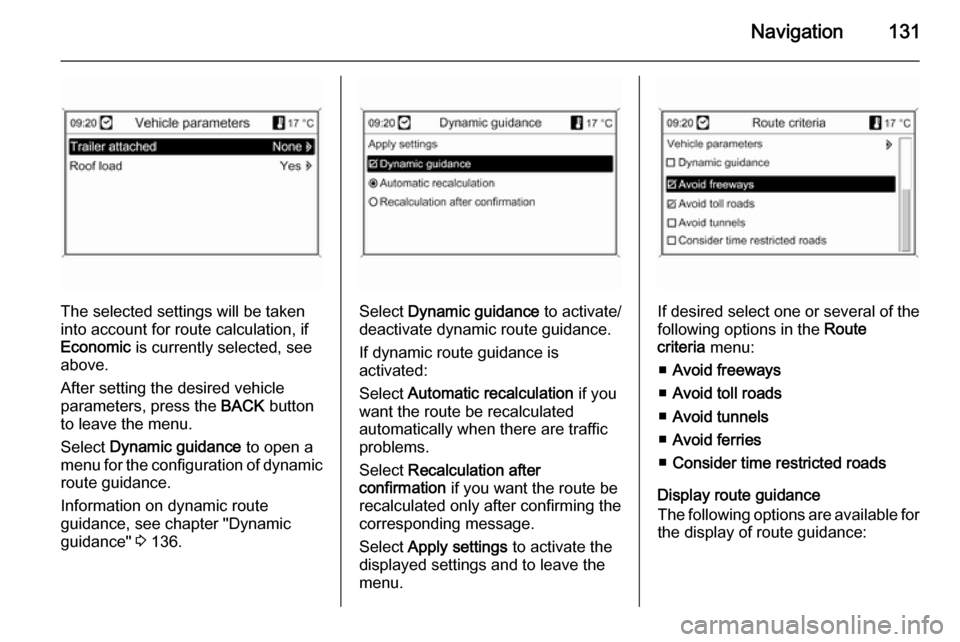
Select Vehicle parameters to open a
menu for the selection of vehicle- specific parameters.
Page 131 of 221
Navigation131
The selected settings will be taken
into account for route calculation, if
Economic is currently selected, see
above.
After setting the desired vehicle
parameters, press the BACK button
to leave the menu.
Select Dynamic guidance to open a
menu for the configuration of dynamic route guidance.
Information on dynamic route
guidance, see chapter "Dynamic
guidance" 3 136.Select Dynamic guidance to activate/
deactivate dynamic route guidance.
If dynamic route guidance is
activated:
Select Automatic recalculation if you
want the route be recalculated
automatically when there are traffic
problems.
Select Recalculation after
confirmation if you want the route be
recalculated only after confirming the
corresponding message.
Select Apply settings to activate the
displayed settings and to leave the menu.If desired select one or several of the
following options in the Route
criteria menu:
■ Avoid freeways
■ Avoid toll roads
■ Avoid tunnels
■ Avoid ferries
■ Consider time restricted roads
Display route guidance
The following options are available for
the display of route guidance:
Page 132 of 221
132Navigation
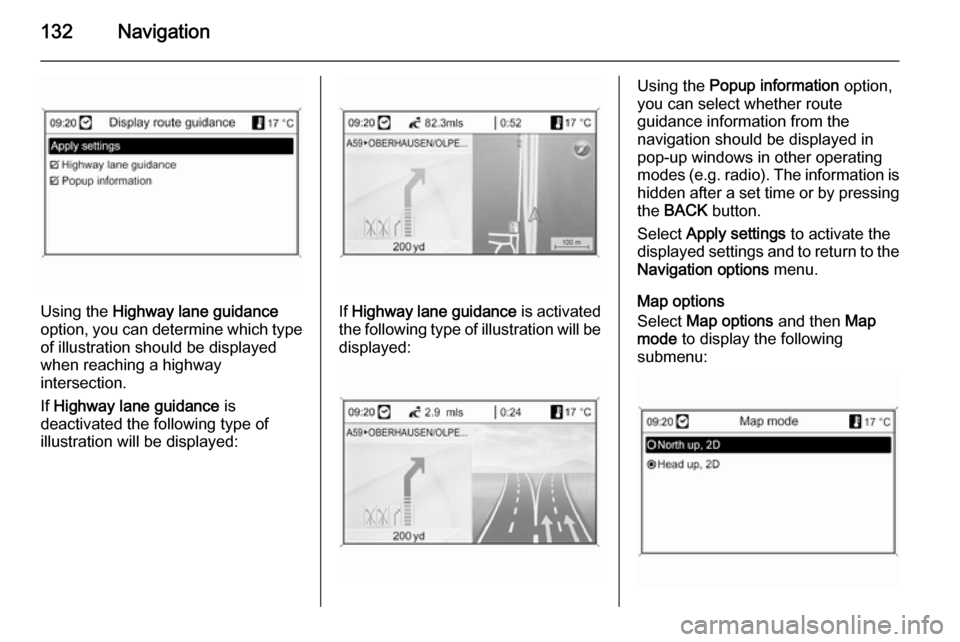
Using the Highway lane guidance
option, you can determine which type of illustration should be displayed
when reaching a highway
intersection.
If Highway lane guidance is
deactivated the following type of
illustration will be displayed:If Highway lane guidance is activated
the following type of illustration will be displayed:
Using the Popup information option,
you can select whether route
guidance information from the
navigation should be displayed in pop-up windows in other operating
modes ( e.g. radio). The information is
hidden after a set time or by pressing
the BACK button.
Select Apply settings to activate the
displayed settings and to return to the Navigation options menu.
Map options
Select Map options and then Map
mode to display the following
submenu:
Page 133 of 221
Navigation133
Select between map orientation north
up and head up on the map display.
Select Map options and then Show
POIs on map to open a submenu with
various options to define whether and
which points of interest should be
displayed on the map.
When User defined is selected the
type of points of interest can be
defined that should be displayed,
e.g. restaurant, hotel, public places,
etc.
Display of arrival time or driving time
After selecting the option Indication
estimated driving time or Indication
estimated arrival time in the menu
Navigation options , the
corresponding time is shown in the
top line on the route guidance screen.
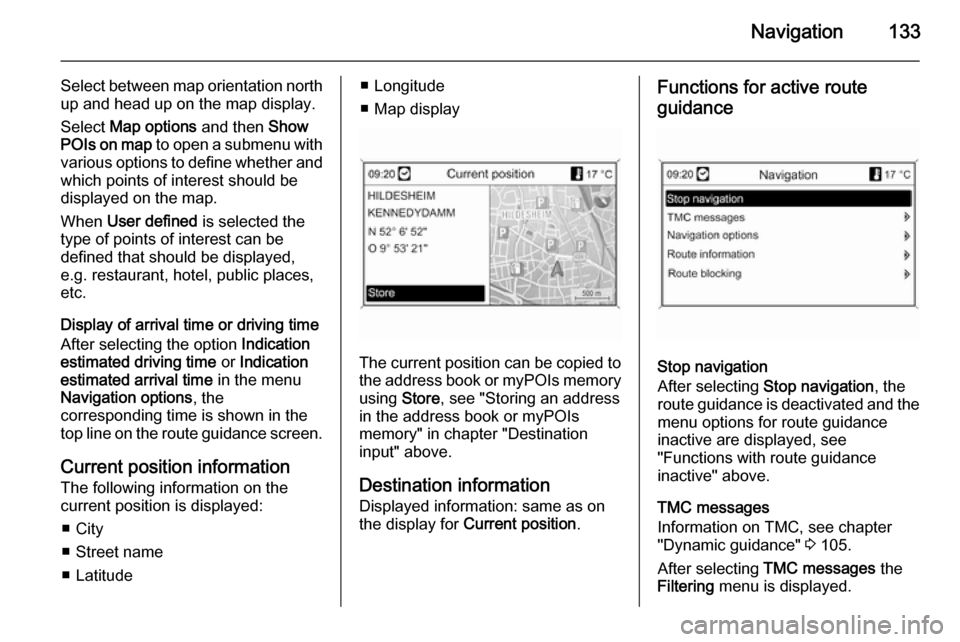
Current position information
The following information on the
current position is displayed:
■ City
■ Street name
■ Latitude■ Longitude
■ Map display
The current position can be copied to the address book or myPOIs memory
using Store, see "Storing an address
in the address book or myPOIs memory" in chapter "Destination
input" above.
Destination information Displayed information: same as on
the display for Current position .
Functions for active route
guidance
Stop navigation
After selecting Stop navigation , the
route guidance is deactivated and the
menu options for route guidance
inactive are displayed, see
"Functions with route guidance
inactive" above.
TMC messages
Information on TMC, see chapter
"Dynamic guidance" 3 105.
After selecting TMC messages the
Filtering menu is displayed.
Page 134 of 221
134Navigation
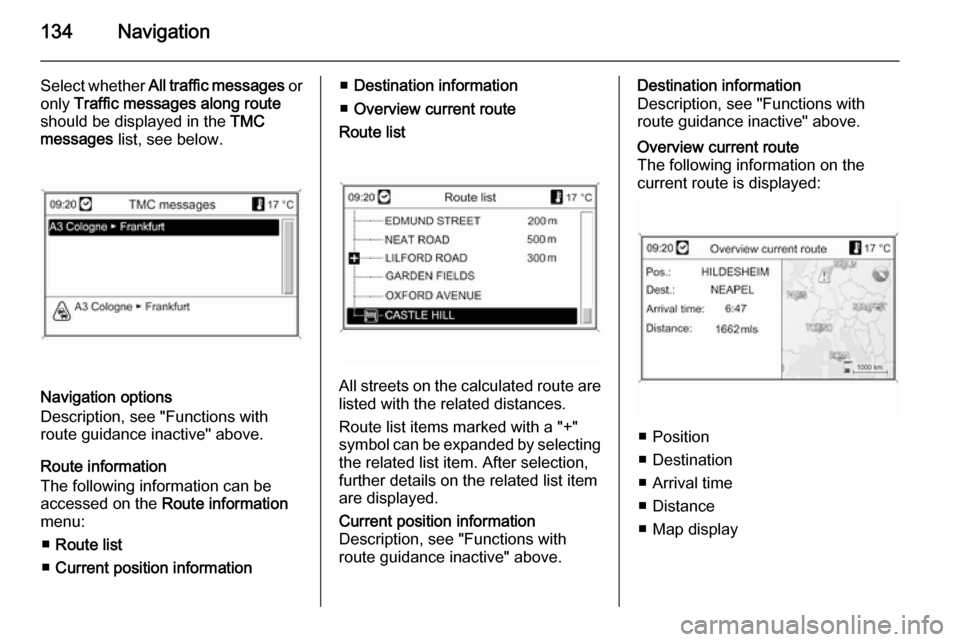
Select whether All traffic messages or
only Traffic messages along route
should be displayed in the TMC
messages list, see below.
Navigation options
Description, see "Functions with
route guidance inactive" above.
Route information
The following information can be
accessed on the Route information
menu:
■ Route list
■ Current position information
■Destination information
■ Overview current route
Route list
All streets on the calculated route are
listed with the related distances.
Route list items marked with a "+"
symbol can be expanded by selecting the related list item. After selection,
further details on the related list item
are displayed.
Current position information
Description, see "Functions with
route guidance inactive" above.Destination information
Description, see "Functions with
route guidance inactive" above.Overview current route
The following information on the
current route is displayed:
■ Position
■ Destination
■ Arrival time
■ Distance
■ Map display
Page 135 of 221
Navigation135
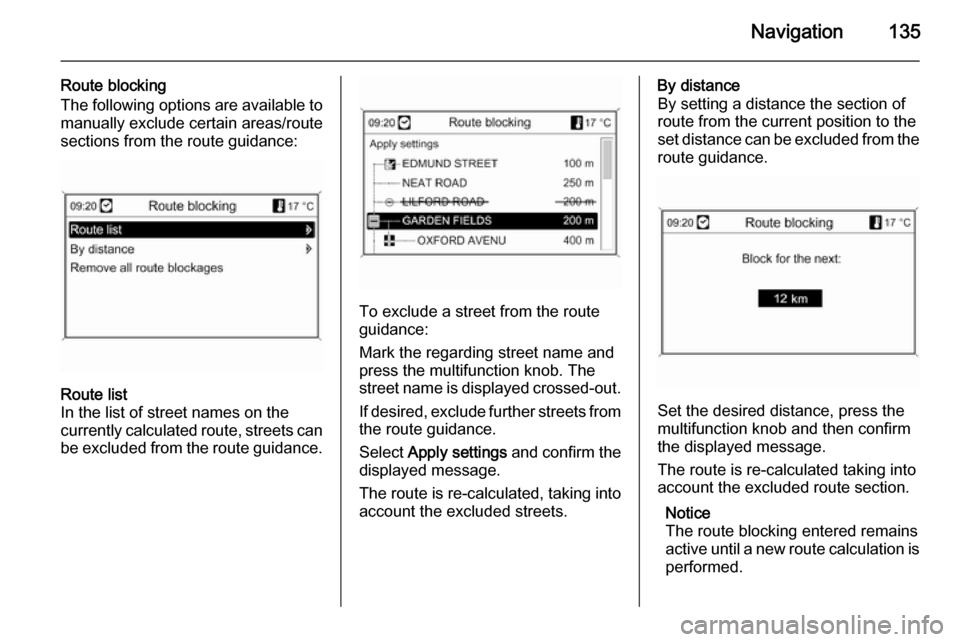
Route blocking
The following options are available to manually exclude certain areas/route
sections from the route guidance:Route list
In the list of street names on the
currently calculated route, streets can
be excluded from the route guidance.
To exclude a street from the route
guidance:
Mark the regarding street name and
press the multifunction knob. The
street name is displayed crossed-out.
If desired, exclude further streets from
the route guidance.
Select Apply settings and confirm the
displayed message.
The route is re-calculated, taking into account the excluded streets.
By distance
By setting a distance the section of
route from the current position to the
set distance can be excluded from the
route guidance.
Set the desired distance, press the
multifunction knob and then confirm
the displayed message.
The route is re-calculated taking into
account the excluded route section.
Notice
The route blocking entered remains
active until a new route calculation is
performed.