Input VAUXHALL MOKKA X 2017 Infotainment system
[x] Cancel search | Manufacturer: VAUXHALL, Model Year: 2017, Model line: MOKKA X, Model: VAUXHALL MOKKA X 2017Pages: 155, PDF Size: 2.85 MB
Page 16 of 155
16Basic operationTo confirm your input, select the
respective confirmation screen
button.
Autocomplete function
If a character sequence has been
entered once, it is stored within the
system and may be recalled by the autocomplete function.
As soon as one character (letter or
digit) is entered, the autocomplete
function becomes active. Every
additional character entered is
considered in the matching process, reducing the list of autocomplete
matches.
Select o next to the characters
entered to display a list of all
autocomplete matches.
Notice
Above the o screen button, the
number of available options is
displayed. It changes according to
the number of matches found.
Select the respective list item. The
keyboard is redisplayed with the
respective list entry shown in the
entry field.Editing text
To place the cursor, touch the
respective position within the text.
Enter your changes.
Depending on the application, select
╳ to delete one entered character.
Touch and hold ╳ to delete all
characters.
Select the respective confirmation
screen button to confirm an input.
Mixed case characters
In most cases, only capital letters may be entered.
If mixed case character recognition is
available, an additional Shift screen
button is displayed.
To activate the shift function and
capitalise one letter, select Shift.
The function is automatically
deactivated after one letter has been
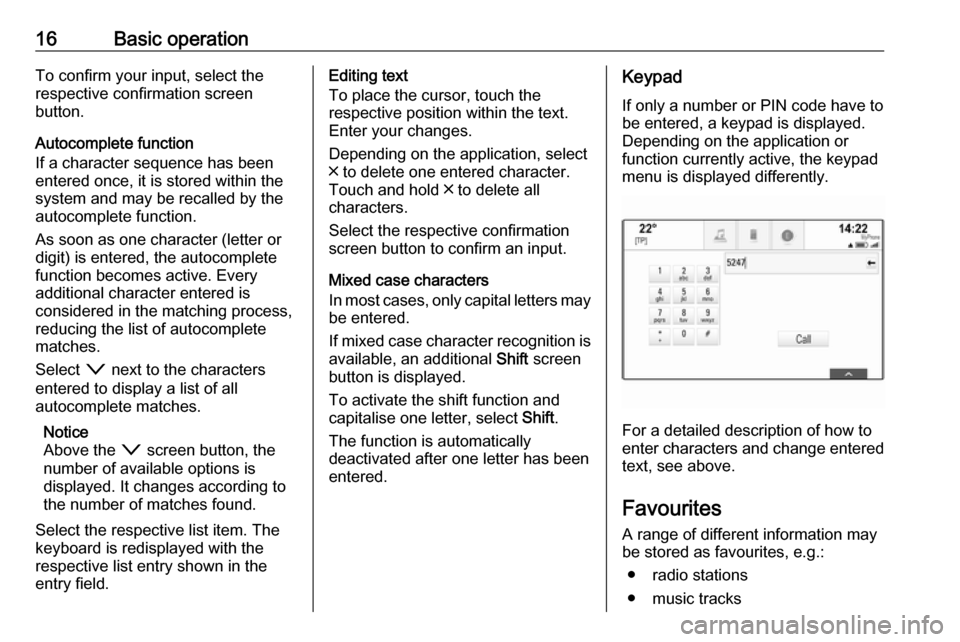
entered.Keypad
If only a number or PIN code have to
be entered, a keypad is displayed.
Depending on the application or
function currently active, the keypad
menu is displayed differently.
For a detailed description of how to
enter characters and change entered text, see above.
Favourites
A range of different information may
be stored as favourites, e.g.:
● radio stations
● music tracks
Page 26 of 155
26Basic operationNotice
If date information is automatically
provided, this menu item is not
available.
Select Auto Set at the bottom of the
screen. Activate either On - RDS or
Off - Manual .
If Off - Manual is selected, adjust the
date by touching n or o.
Clock display
Select Clock Display to enter the
respective submenu.
To turn off the digital clock display in
the menus, select Off.
Language Press ; and select SETTINGS on
the Home screen.
Scroll through the list and select
Language .
Notice
The language currently active is
marked with 9.
Scroll through the list and select the
desired language.Valet mode
If valet mode is activated, all vehicle
displays are locked and no changes
may be performed within the system.
Notice
Vehicle-related messages and the
rear backup camera remain
enabled.
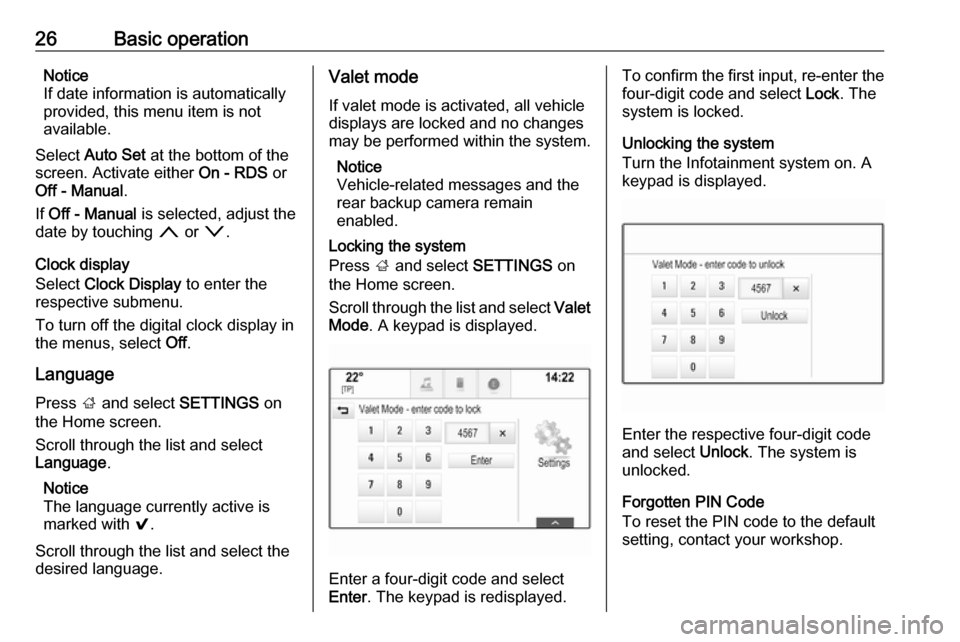
Locking the system
Press ; and select SETTINGS on
the Home screen.
Scroll through the list and select Valet
Mode . A keypad is displayed.
Enter a four-digit code and select
Enter . The keypad is redisplayed.
To confirm the first input, re-enter the
four-digit code and select Lock. The
system is locked.
Unlocking the system
Turn the Infotainment system on. A
keypad is displayed.
Enter the respective four-digit code
and select Unlock. The system is
unlocked.
Forgotten PIN Code
To reset the PIN code to the default
setting, contact your workshop.
Page 30 of 155

30RadioTouch the Direct Tune field and then
enter the desired frequency. Confirm your input.
Station lists In the station lists, all receivable radio stations within the current reception
area are available for selection.
To display the station list of the
waveband currently active, select
BROWSE in the interaction selector
bar.
The station list is displayed.
Notice
The currently received station is
highlighted.
Scroll through the list and select the
desired list item.
Category lists
Numerous RDS 3 30 and DAB
3 31 stations broadcast a PTY
code, which specifies the type of
programme transmitted (e.g. news).
Some stations also change the PTY
code depending on the content which is currently transmitted.
The Infotainment system stores these
stations, sorted by programme type in
the corresponding category list.
Notice
The Categories list item is only
available for the FM and the DAB wavebands.
Select MENU in the interaction
selector bar to display the respective waveband menu and select
Categories .
A list of programme type categories
currently available is displayed.
Select the desired category. A list of
stations is displayed transmitting a
programme of the selected type.
Select the desired station.Updating the station list
If the stations stored in a waveband-
specific station list can no longer be
received, select Update Station List .
Notice
If a waveband-specific station list is
updated, the corresponding
category list is also updated.
Updating Station List is displayed on
the screen until the search has been
completed.
Radio data system (RDS)
RDS is a service of FM stations that considerably improves the finding of
the desired station and its fault-free
reception.
Advantages of RDS ● On the display, the programme name of the station appears
instead of its frequency.
● During a station search, the Infotainment system tunes in to
RDS stations only.
Page 39 of 155

External devices39SettingsInternet connection
Press ; and then select SHOP.
Choose the settings tab to display the
settings menu and then select the
networks menu item.
Activate the desired network.
Info
To display information on the app shop, press ; and then select
SHOP . Choose the settings tab to
display the settings menu and then
select the info menu item.
Terms of use and privacy notice
To display the terms of use or the
privacy notice, press ; and then
select SHOP. Choose the settings
tab. Select the desired menu item.
If desired, you can send the texts to
your email account.
Select E-Mail on the bottom of the
screen. Enter your email address and confirm your input. The respective
text is forwarded to your email
account.Reset user
To delete all registration data
entered, press ; and then select
SHOP . Choose the settings tab to
display the settings menu and then
reset all user-specific settings.
Page 40 of 155

40NavigationNavigationGeneral information.....................40
Usage .......................................... 41
Destination input ..........................47
Guidance ..................................... 53General information
The navigation system will reliably guide you to your destination.
The current traffic situation is taken
into account in the route calculation.
For this purpose, the Infotainment
system receives traffic
announcements in the current
reception area via RDS-TMC.
The navigation system cannot,
however, take into account traffic
incidents, traffic regulations changed
at short notice and hazards or
problems that arise suddenly (e.g.
road works).Caution
The usage of the navigation
system does not release the driver
from the responsibility for a
correct, vigilant attitude in road
traffic. The relevant traffic
regulations must always be
followed. If a navigation instruction contradicts traffic regulations, the
traffic regulations always apply.
Functioning of the navigation
system
The position and movement of the
vehicle are detected by the navigation
system using sensors. The travelled
distance is determined by the
vehicle's speedometer signal, turning
movements on bends by a gyro
sensor. The position is determined by the GPS (Global Positioning System)
satellites.
By comparing the sensor signals with the digital maps, it is possible to
determine the position with an
accuracy of approx. 10 metres.
The system will also work with poor
GPS reception. However, the
accuracy of the determination of the
position will be reduced.
After the entry of the destination
address or point of interest (nearest
petrol station, hotel, etc.), the route is
calculated from the current location to
the destination selected.
Route guidance is provided by voice
output and an arrow, as well as with
the aid of a multi-colour map display.
Page 46 of 155
46Navigationuser defined POIs can be
downloaded to the Infotainment
system.
For each POI, you need to define the GPS coordinates (longitude and
latitude values) of the respective
location and a descriptive name.
After downloading the POI data to the Infotainment system, you will find the
respective POIs as selectable
destinations in the My POIs menu,
see "POIs entry" in chapter
"Destination input" 3 47.
Creating a text file with POI data
Create a text file (e.g. by using a
simple text editor software) with an arbitrary name and the file
extension .poi, e.g. "TomsPOIs.poi".
Notice
Character encoding UTF-8
(Unicode) needs to be selected
when storing the text file. Otherwise
the POI data may not be imported
correctly to the system.
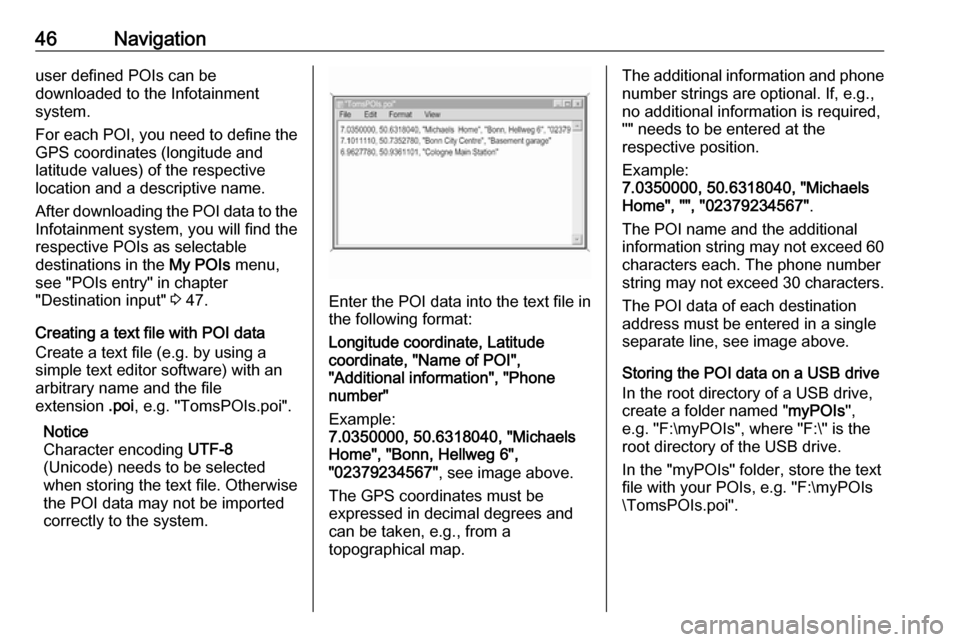
Enter the POI data into the text file in the following format:
Longitude coordinate, Latitude
coordinate, "Name of POI",
"Additional information", "Phone
number"
Example:
7.0350000, 50.6318040, "Michaels
Home", "Bonn, Hellweg 6",
"02379234567" , see image above.
The GPS coordinates must be
expressed in decimal degrees and
can be taken, e.g., from a
topographical map.
The additional information and phone
number strings are optional. If, e.g., no additional information is required,
"" needs to be entered at the
respective position.
Example:
7.0350000, 50.6318040, "Michaels
Home", "", "02379234567" .
The POI name and the additional
information string may not exceed 60 characters each. The phone number
string may not exceed 30 characters.
The POI data of each destination
address must be entered in a single
separate line, see image above.
Storing the POI data on a USB drive
In the root directory of a USB drive,
create a folder named " myPOIs",
e.g. "F:\myPOIs", where "F:\" is the
root directory of the USB drive.
In the "myPOIs" folder, store the text
file with your POIs, e.g. "F:\myPOIs
\TomsPOIs.poi".
Page 47 of 155

Navigation47Organising the POI data in several
subfolders
Optionally, you can organise the text
files in several randomly named
subfolders (max. depth of subfolder
structure: 2).
Examples: F:\myPOIs\AnnsPOIs or
F:\myPOIs\MyJourney\London,
where F:\ is the root directory of the
USB drive.
Notice
In a folder only subfolders or only POI files may be stored. A mixture of
both will not be imported correctly to the system.
After downloading individual POI data
organised in that way to the
Infotainment system (see download description further below), the My
POIs menu will show a list of
selectable submenus.
After selecting a submenu, further
submenus or the related list of
imported POI categories will be
displayed.Downloading the POI data to the
Infotainment system
Connect the USB device with your
user defined POI data to the USB port
3 34 of the Infotainment system.
A message is displayed that prompts
you to confirm the download.
After confirmation, the POI data will
be downloaded to the Infotainment system.
The downloaded POIs are then
selectable as destinations via the My
POIs menu, see "POIs entry" in
chapter "Destination input" 3 47.
Destination input The navigation application provides
different options to set a destination
for route guidance.
Press ; and select NAV on the Home
screen to display the navigation map.
Select DESTINATION in the
interaction selector bar and then
select one of the different address
entry options.
One-shot destination entry
Touch the entry field in the top line of
the menu. A keyboard is displayed.
For a detailed description on the
keyboards 3 15.
Enter an address or search term and
confirm your input.
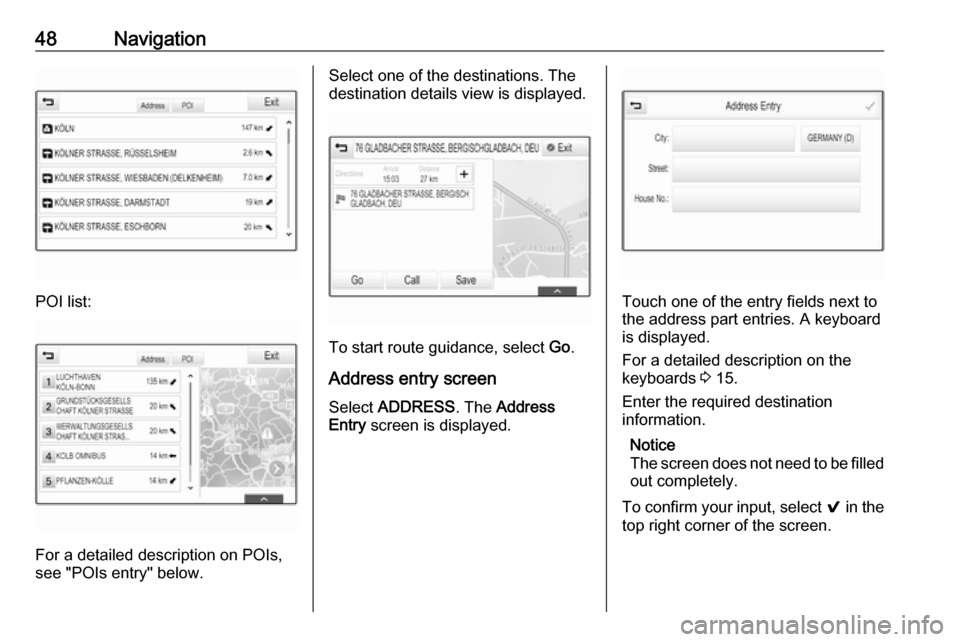
Two lists with possible destinations
are created. To switch between the
list tabs, touch Address or POI in the
top line of the screen.
Address list:
Page 48 of 155
48Navigation
POI list:
For a detailed description on POIs,
see "POIs entry" below.
Select one of the destinations. The
destination details view is displayed.
To start route guidance, select Go.
Address entry screen
Select ADDRESS . The Address
Entry screen is displayed.
Touch one of the entry fields next to
the address part entries. A keyboard
is displayed.
For a detailed description on the
keyboards 3 15.
Enter the required destination
information.
Notice
The screen does not need to be filled out completely.
To confirm your input, select 9 in the
top right corner of the screen.
Page 49 of 155
Navigation49If there is more than one destination
possible according to the information
entered, a list of all matching
destinations found is displayed.
Select the desired address.
The destination details view is
displayed.
To start route guidance, select Go.
Crossroad entry screen
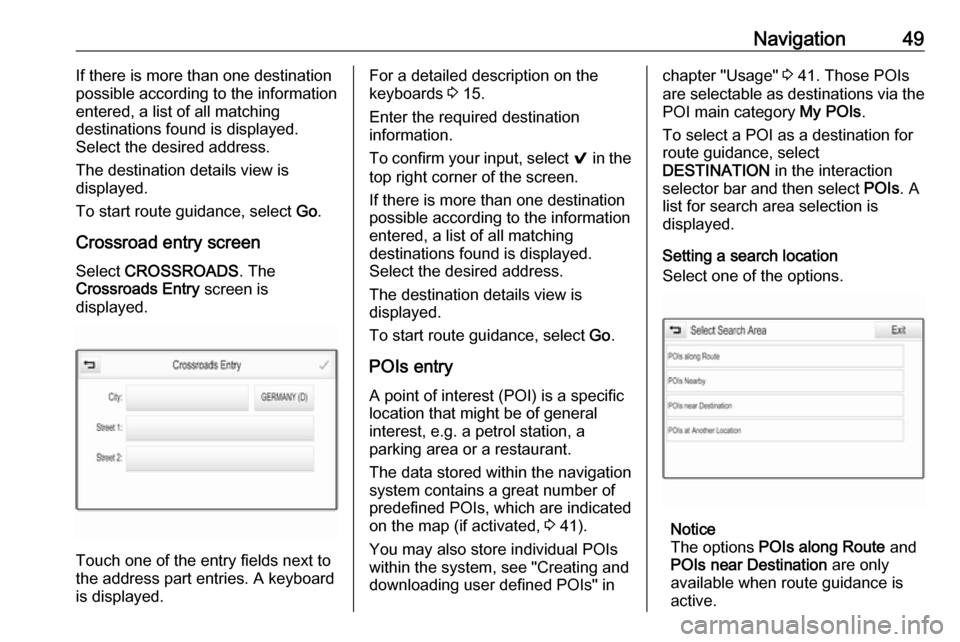
Select CROSSROADS . The
Crossroads Entry screen is
displayed.
Touch one of the entry fields next to
the address part entries. A keyboard
is displayed.
For a detailed description on the
keyboards 3 15.
Enter the required destination
information.
To confirm your input, select 9 in the
top right corner of the screen.
If there is more than one destination
possible according to the information
entered, a list of all matching
destinations found is displayed.
Select the desired address.
The destination details view is
displayed.
To start route guidance, select Go.
POIs entry
A point of interest (POI) is a specific
location that might be of general interest, e.g. a petrol station, a
parking area or a restaurant.
The data stored within the navigation
system contains a great number of
predefined POIs, which are indicated
on the map (if activated, 3 41).
You may also store individual POIs
within the system, see "Creating and downloading user defined POIs" inchapter "Usage" 3 41. Those POIs
are selectable as destinations via the
POI main category My POIs.
To select a POI as a destination for
route guidance, select
DESTINATION in the interaction
selector bar and then select POIs. A
list for search area selection is
displayed.
Setting a search location
Select one of the options.
Notice
The options POIs along Route and
POIs near Destination are only
available when route guidance is active.
Page 50 of 155
50NavigationIf POIs at Another Location is
selected, a keyboard is displayed.
For a detailed description on the
keyboards 3 15.
Enter the desired location and
confirm your entry.
A list of POI categories is displayed.
Searching POIs via categories
Select one of the main categories in
the list. A list with subcategories is
displayed.
To display all POIs available in the
respective main category, select List
All . Scroll through the list and select
the desired POI.
To display all POIs within one
subcategory, select the respective
subcategory. Scroll through the list
and select the desired POI.
The destination details view is
displayed.
For more information on the POI
selected, touch Info in the top right
corner of the screen.
To start route guidance, select Go.Searching POIs via name input
To search for a particular POI, a
category or a specific location, select
Spell Name in the POI main
categories list or in one of the
subcategory lists. A keyboard is
displayed.
For a detailed description on the keyboards 3 15.
Enter the desired name or category.
Select 9 to confirm your input. The
destination details view is displayed.
For more information on the POI
selected, touch Info in the top right
corner of the screen.
To start route guidance, select Go.
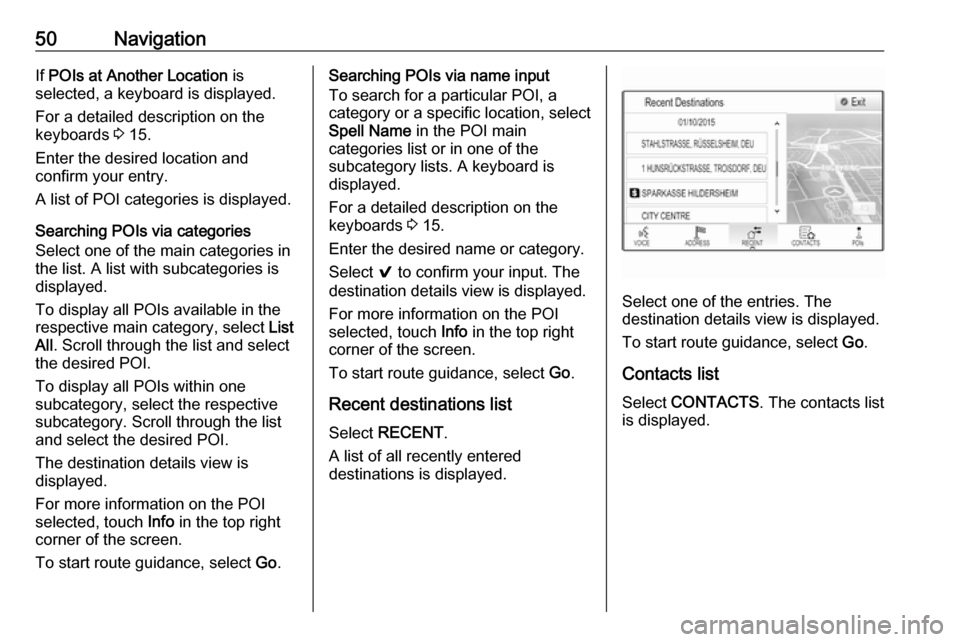
Recent destinations list Select RECENT .
A list of all recently entered
destinations is displayed.
Select one of the entries. The
destination details view is displayed.
To start route guidance, select Go.
Contacts list Select CONTACTS . The contacts list
is displayed.