ECU VAUXHALL MOVANO_B 2016.5 Owner's Manual
[x] Cancel search | Manufacturer: VAUXHALL, Model Year: 2016.5, Model line: MOVANO_B, Model: VAUXHALL MOVANO_B 2016.5Pages: 239, PDF Size: 5.64 MB
Page 21 of 239

Keys, doors and windows19Keys, doors and
windowsKeys, locks ................................... 19
Keys .......................................... 19
Car Pass .................................... 19
Radio remote control .................20
Door locks ................................. 21
Manual door locks .....................21
Central locking system ..............21
Power door locks .......................24
Automatic locking ......................25
Child locks ................................. 25
Doors ........................................... 26
Sliding door ............................... 26
Rear doors ................................. 29
Vehicle security ............................ 31
Anti-theft locking system ...........31
Anti-theft alarm system ..............31
Immobiliser ................................ 32
Exterior mirrors ............................ 33
Convex shape ........................... 33
Manual adjustment ....................33
Electric adjustment ....................33
Folding mirrors .......................... 34
Heated mirrors ........................... 34Interior mirrors............................. 35
Manual anti-dazzle ....................35
Windows ...................................... 35
Windscreen ............................... 35
Manual windows ........................35
Power windows ......................... 35
Rear windows ............................ 36
Heated rear window ..................37
Sun visors .................................. 37
Roof ............................................. 38
Glass panel ............................... 38Keys, locks
Keys Replacement keys
The key number is specified in the
Car Pass or on a detachable tag.
The key number must be quoted
when ordering replacement keys as it
is a component of the immobiliser system.
Locks 3 197.
Lock cylinders
Designed to free-wheel if they are forcefully rotated without the correct
key or if the correct key is not fully
inserted. To reset, turn cylinder with
the correct key until its slot is vertical,
remove key and then re-insert it. If the
cylinder still free-wheels, turn the key through 180° and repeat operation.
Car Pass
The Car Pass contains security
related vehicle data and should
therefore be kept in a safe place.
Page 23 of 239
Keys, doors and windows21Reattach both halves of cover
ensuring it engages correctly.
Replace screw and tighten.
Door locks
Anti-theft security lock
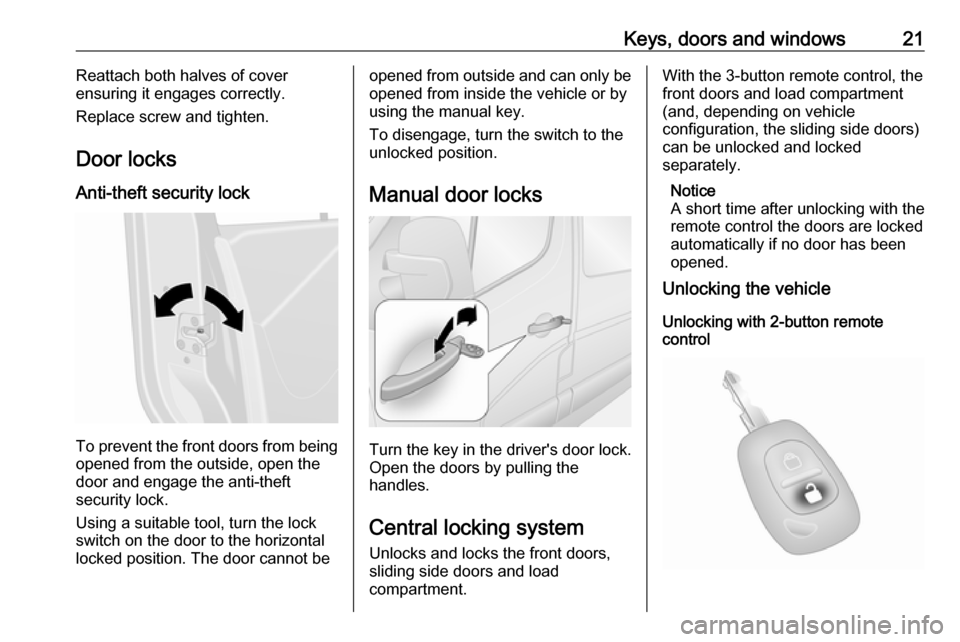
To prevent the front doors from being opened from the outside, open the
door and engage the anti-theft
security lock.
Using a suitable tool, turn the lock
switch on the door to the horizontal locked position. The door cannot be
opened from outside and can only be
opened from inside the vehicle or by
using the manual key.
To disengage, turn the switch to the
unlocked position.
Manual door locks
Turn the key in the driver's door lock.
Open the doors by pulling the
handles.
Central locking system
Unlocks and locks the front doors,
sliding side doors and load
compartment.
With the 3-button remote control, the front doors and load compartment
(and, depending on vehicle
configuration, the sliding side doors)
can be unlocked and locked
separately.
Notice
A short time after unlocking with the
remote control the doors are locked
automatically if no door has been
opened.
Unlocking the vehicle
Unlocking with 2-button remote
control
Page 27 of 239
Keys, doors and windows25Warning lights in the appropriate
doors remain illuminated.
To unlock, press 0 side of switch.
Fault
In the event of a fault in the system,
the warning light alongside the switch
remains illuminated and an audible warning will sound.
Check the doors are manually
unlocked (interior door lock switches).
If necessary, have the cause of the
fault remedied by a workshop.
Automatic lockingAutomatic locking after driving off
Depending on version, this security
feature can be configured to
automatically lock all doors and the
load compartment as soon as the
vehicle is driven.
Activation
With the ignition switched on, press
and hold the central locking switch e
for approx. 5 seconds. An audible
signal confirms activation.
LED in switch illuminates when the
vehicle is locked.
Deactivation
With the ignition switched on, press
and hold e for approx. 5 seconds. An
audible signal confirms deactivation.
Child locks9 Warning
Use the child locks whenever
children are occupying the rear
seats.
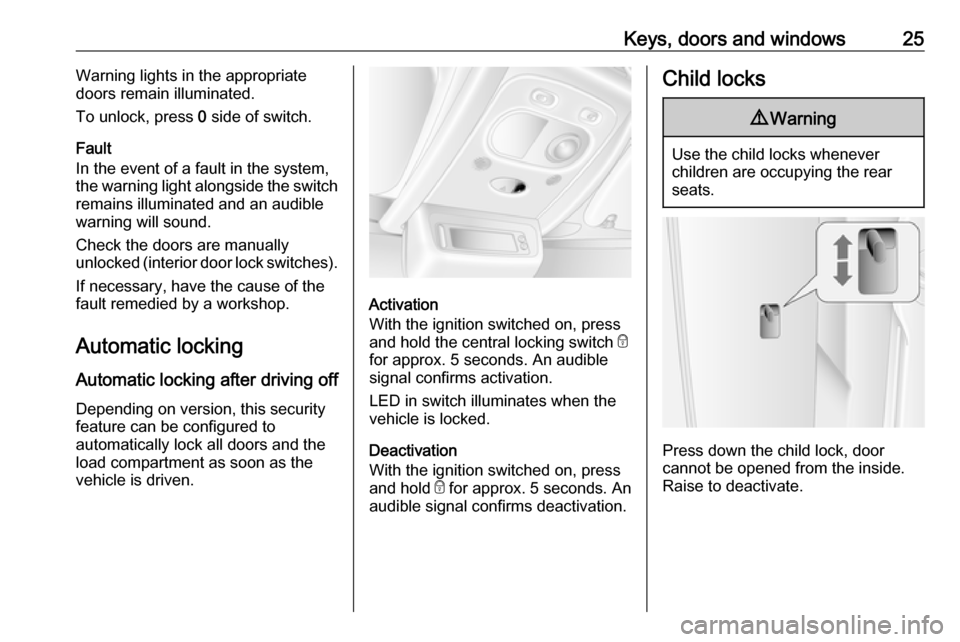
Press down the child lock, door
cannot be opened from the inside.
Raise to deactivate.
Page 28 of 239
26Keys, doors and windowsDoors
Sliding door
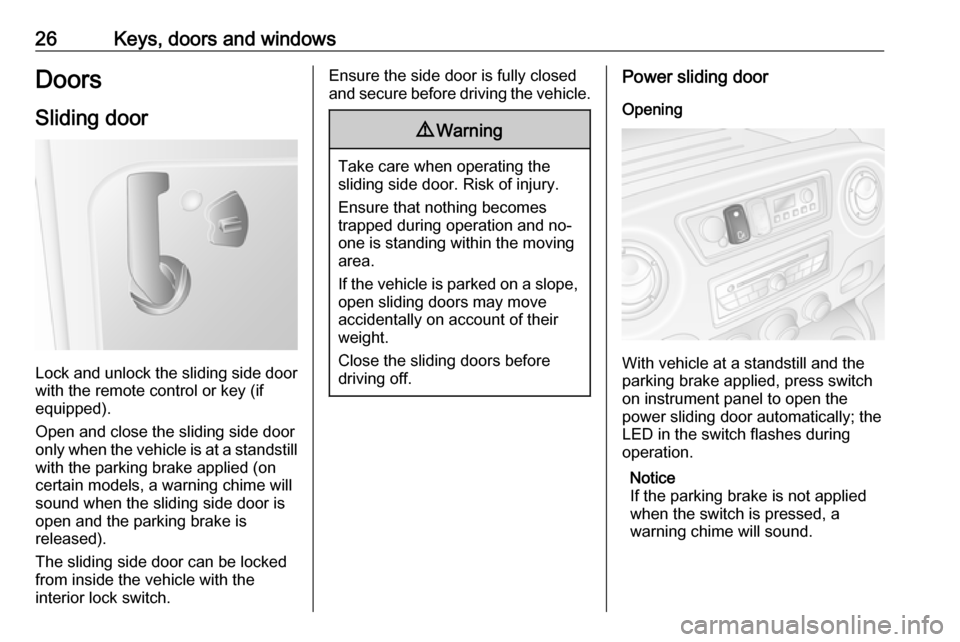
Lock and unlock the sliding side door
with the remote control or key (if
equipped).
Open and close the sliding side door
only when the vehicle is at a standstill with the parking brake applied (on
certain models, a warning chime will
sound when the sliding side door is
open and the parking brake is
released).
The sliding side door can be locked
from inside the vehicle with the
interior lock switch.
Ensure the side door is fully closed
and secure before driving the vehicle.9 Warning
Take care when operating the
sliding side door. Risk of injury.
Ensure that nothing becomes
trapped during operation and no-
one is standing within the moving
area.
If the vehicle is parked on a slope,
open sliding doors may move
accidentally on account of their
weight.
Close the sliding doors before
driving off.
Power sliding door
Opening
With vehicle at a standstill and the
parking brake applied, press switch
on instrument panel to open the
power sliding door automatically; the
LED in the switch flashes during
operation.
Notice
If the parking brake is not applied
when the switch is pressed, a
warning chime will sound.
Page 32 of 239
30Keys, doors and windows
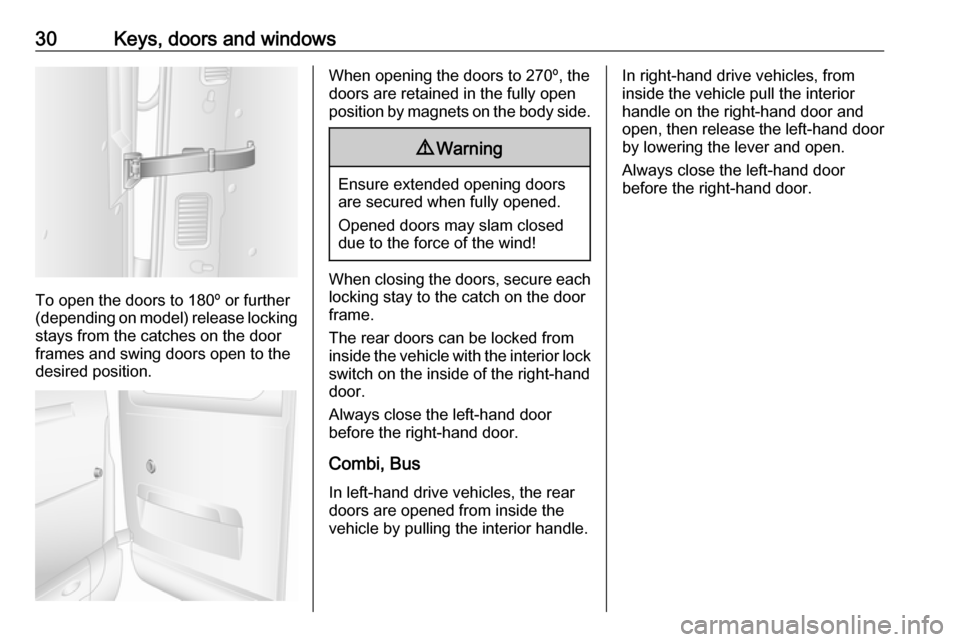
To open the doors to 180º or further
(depending on model) release locking
stays from the catches on the door
frames and swing doors open to the
desired position.
When opening the doors to 270º, the doors are retained in the fully open
position by magnets on the body side.9 Warning
Ensure extended opening doors
are secured when fully opened.
Opened doors may slam closed due to the force of the wind!
When closing the doors, secure each
locking stay to the catch on the door
frame.
The rear doors can be locked from
inside the vehicle with the interior lock
switch on the inside of the right-hand
door.
Always close the left-hand door
before the right-hand door.
Combi, Bus In left-hand drive vehicles, the rear
doors are opened from inside the
vehicle by pulling the interior handle.
In right-hand drive vehicles, from
inside the vehicle pull the interior
handle on the right-hand door and
open, then release the left-hand door by lowering the lever and open.
Always close the left-hand door
before the right-hand door.
Page 33 of 239

Keys, doors and windows31Vehicle security
Anti-theft locking system9 Warning
Do not use the system if there are
people in the vehicle! The doorscannot be unlocked from the
inside.
The system deadlocks the doors. All
doors must be closed or the system
cannot be activated.
Notice
The anti-theft locking system cannot be activated when the hazard
warning lights or sidelights are
switched on.
Activation and deactivation are not
possible with the central locking
switch.
Activation
Press e twice within 3 seconds.
Hazard warning lights flash
five times as confirmation.
Deactivation Unlock the doors by pressing c on the
remote control.
Anti-theft alarm system The anti-theft alarm system is
operated in conjunction with the
central locking system.
It monitors:
● doors, tailgate, bonnet
● passenger compartment
● load compartment
● ignition
● interruption of alarm siren power supply
Activation
All doors and the bonnet must be
closed.
Press e to activate anti-theft alarm
system. Hazard warning lights flash
twice to confirm activation.
Page 42 of 239
40Seats, restraintsDepending on version, head
restraints can also be tilted forwards
or backwards. Push or pull the lower
part of the head restraint to adjust.
Notice
Approved accessories may only be
attached to the front passenger seat head restraint if the seat is not in use.
Removal
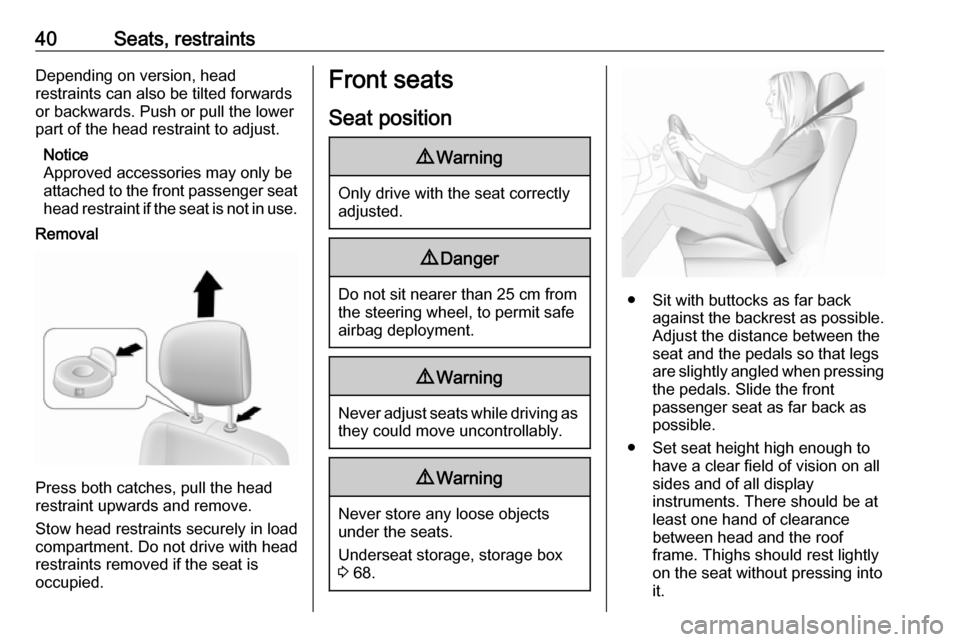
Press both catches, pull the head
restraint upwards and remove.
Stow head restraints securely in load
compartment. Do not drive with head
restraints removed if the seat is
occupied.
Front seats
Seat position9 Warning
Only drive with the seat correctly
adjusted.
9 Danger
Do not sit nearer than 25 cm from
the steering wheel, to permit safe
airbag deployment.
9 Warning
Never adjust seats while driving as
they could move uncontrollably.
9 Warning
Never store any loose objects
under the seats.
Underseat storage, storage box 3 68.
● Sit with buttocks as far back
against the backrest as possible.
Adjust the distance between the
seat and the pedals so that legs
are slightly angled when pressing
the pedals. Slide the front
passenger seat as far back as
possible.
● Set seat height high enough to have a clear field of vision on allsides and of all display
instruments. There should be at
least one hand of clearance
between head and the roof
frame. Thighs should rest lightly on the seat without pressing into
it.
Page 48 of 239
46Seats, restraintsRear seats
Rear seat access
Depending on version, to facilitate
access to the rear seats, pull release lever and fold the seat backrest
forwards.
9 Warning
Ensure that the backrest returns to
its correct position and the seat
belt buckles are fastened
securely.
Fastening seat belt 3 49.
Removable rear seats9 Warning
Never remove the rear seats while
driving as they could move
uncontrollably.
Removal
On some variants, the cargo area can be increased by removing the rear
seats.
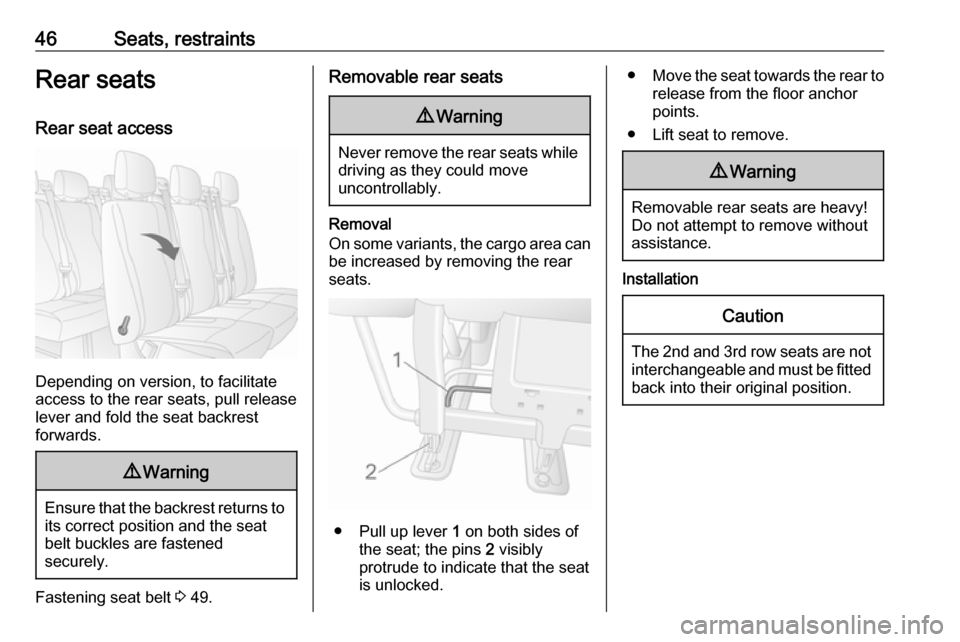
● Pull up lever 1 on both sides of
the seat; the pins 2 visibly
protrude to indicate that the seat
is unlocked.
● Move the seat towards the rear to
release from the floor anchor
points.
● Lift seat to remove.9 Warning
Removable rear seats are heavy!
Do not attempt to remove without assistance.
Installation
Caution
The 2nd and 3rd row seats are not
interchangeable and must be fitted
back into their original position.
Page 49 of 239
Seats, restraints47
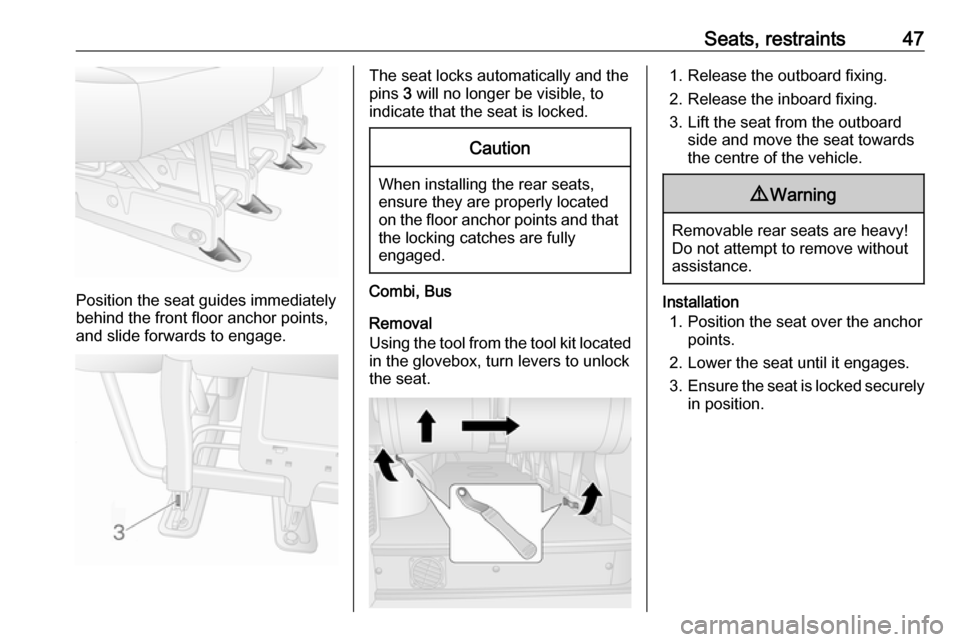
Position the seat guides immediately
behind the front floor anchor points,
and slide forwards to engage.
The seat locks automatically and the
pins 3 will no longer be visible, to
indicate that the seat is locked.Caution
When installing the rear seats, ensure they are properly located
on the floor anchor points and that the locking catches are fully
engaged.
Combi, Bus
Removal
Using the tool from the tool kit located
in the glovebox, turn levers to unlock
the seat.
1. Release the outboard fixing.
2. Release the inboard fixing.
3. Lift the seat from the outboard side and move the seat towards
the centre of the vehicle.9 Warning
Removable rear seats are heavy!
Do not attempt to remove without assistance.
Installation
1. Position the seat over the anchor points.
2. Lower the seat until it engages.
3. Ensure the seat is locked securely
in position.
Page 55 of 239

Seats, restraints53HR: NIKADA nemojte koristiti sustav
zadržavanja za djecu okrenut prema
natrag na sjedalu s AKTIVNIM
ZRAČNIM JASTUKOM ispred njega,
to bi moglo dovesti do SMRTI ili
OZBILJNJIH OZLJEDA za DIJETE.
SL: NIKOLI ne nameščajte otroškega
varnostnega sedeža, obrnjenega v
nasprotni smeri vožnje, na sedež z
AKTIVNO ČELNO ZRAČNO
BLAZINO, saj pri tem obstaja
nevarnost RESNIH ali SMRTNIH
POŠKODB za OTROKA.
SR: NIKADA ne koristiti bezbednosni
sistem za decu u kome su deca
okrenuta unazad na sedištu sa
AKTIVNIM VAZDUŠNIM
JASTUKOM ispred sedišta zato što
DETE može da NASTRADA ili da se
TEŠKO POVREDI.
MK: НИКОГАШ не користете детско
седиште свртено наназад на
седиште заштитено со АКТИВНО
ВОЗДУШНО ПЕРНИЧЕ пред него,
затоа што детето може ДА ЗАГИНЕ или да биде ТЕШКО ПОВРЕДЕНО.
BG: НИКОГА не използвайте
детска седалка, гледаща назад,
върху седалка, която е защитеначрез АКТИВНА ВЪЗДУШНА
ВЪЗГЛАВНИЦА пред нея - може да
се стигне до СМЪРТ или
СЕРИОЗНО НАРАНЯВАНЕ на
ДЕТЕТО.
RO: Nu utilizaţi NICIODATĂ un scaun
pentru copil îndreptat spre partea din
spate a maşinii pe un scaun protejat de un AIRBAG ACTIV în faţa sa;
acest lucru poate duce la DECESUL
sau VĂTĂMAREA GRAVĂ a
COPILULUI.
CS: NIKDY nepoužívejte dětský
zádržný systém instalovaný proti
směru jízdy na sedadle, které je
chráněno před sedadlem AKTIVNÍM
AIRBAGEM. Mohlo by dojít k
VÁŽNÉMU PORANĚNÍ nebo ÚMRTÍ
DÍTĚTE.
SK: NIKDY nepoužívajte detskú
sedačku otočenú vzad na sedadle
chránenom AKTÍVNYM AIRBAGOM,
pretože môže dôjsť k SMRTI alebo
VÁŽNYM ZRANENIAM DIEŤAŤA.
LT: JOKIU BŪDU nemontuokite atgal
atgręžtos vaiko tvirtinimo sistemos
sėdynėje, prieš kurią įrengta AKTYVI
ORO PAGALVĖ, nes VAIKAS GALI
ŽŪTI arba RIMTAI SUSIŽALOTI.LV: NEKĀDĀ GADĪJUMĀ
neizmantojiet uz aizmuguri vērstu bērnu sēdeklīti sēdvietā, kas tiek
aizsargāta ar tās priekšā uzstādītu
AKTĪVU DROŠĪBAS SPILVENU, jo
pretējā gadījumā BĒRNS var gūt
SMAGAS TRAUMAS vai IET BOJĀ.
ET: ÄRGE kasutage tahapoole
suunatud lapseturvaistet istmel, mille
ees on AKTIIVSE TURVAPADJAGA
kaitstud iste, sest see võib
põhjustada LAPSE SURMA või
TÕSISE VIGASTUSE.
MT: QATT tuża trażżin għat-tfal li
jħares lejn in-naħa ta’ wara fuq sit
protett b’AIRBAG ATTIV quddiemu;
dan jista’ jikkawża l-MEWT jew
ĠRIEĦI SERJI lit-TFAL.
Beyond the warning required by
ECE R94.02, for safety reasons a
forward-facing child restraint system
must only be used subject to the
instructions and restrictions in the
table 3 58.
The airbag label may be located on
both sides of the front passenger sun
visor.