VOLKSWAGEN GOLF 1993 1H / 3.G Owner's Manual
Manufacturer: VOLKSWAGEN, Model Year: 1993, Model line: GOLF, Model: VOLKSWAGEN GOLF 1993 1H / 3.GPages: 156, PDF Size: 6.36 MB
Page 21 of 156
Downloaded from www.Manualslib.com manuals search engine ----------------------------------CONTROLS AND EQUIPMENT
•
I 81H-143 I
Function
The Airbag System is so designed that it wil l
be triggered during a serious frontal colli
s lon.
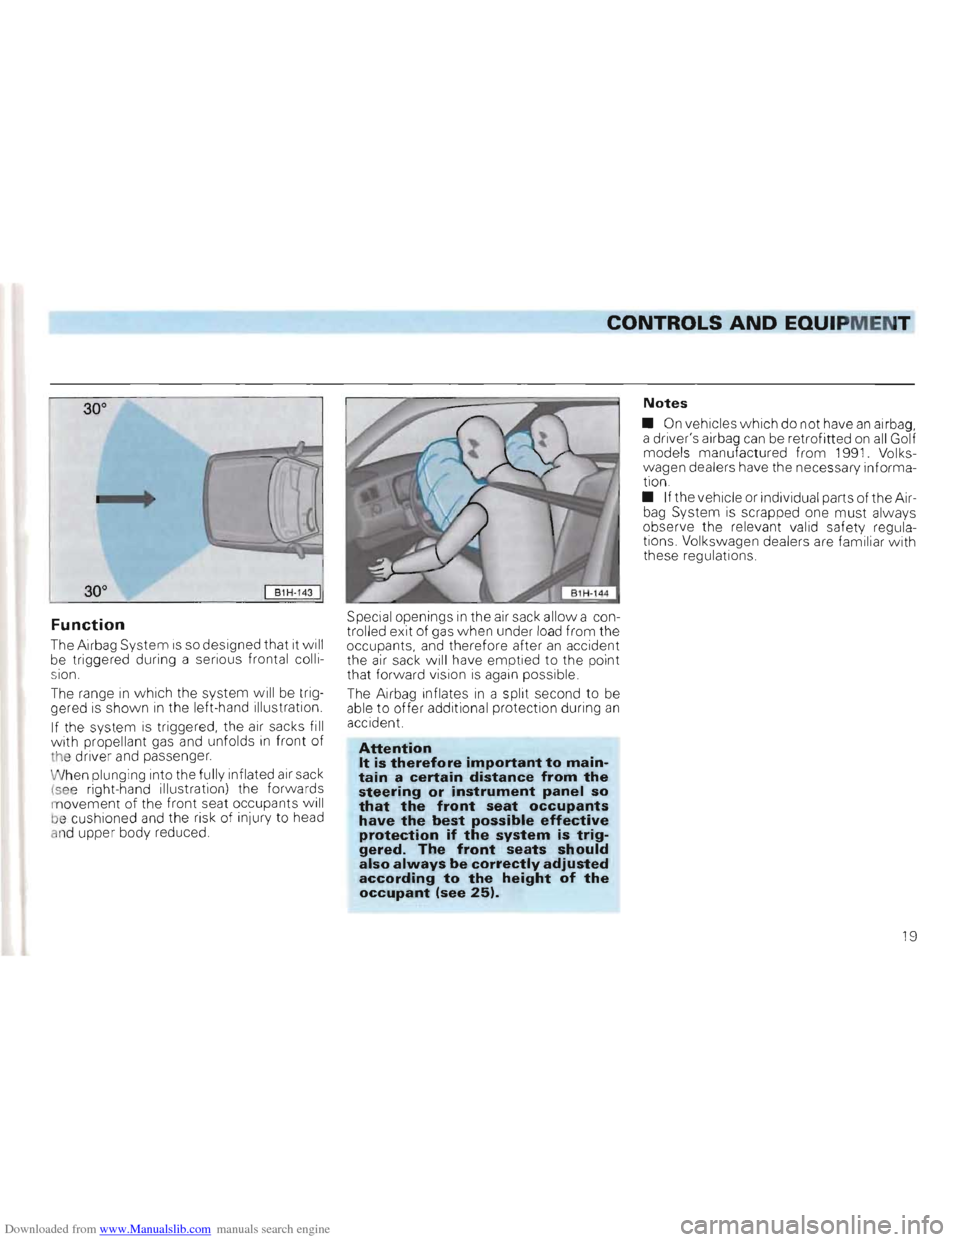
The range in which the system will be trig
gered is shown in the left- hand illustrat ion .
If the system
is triggered, the air sacks fill
w ith prop ellant gas and unfolds in front of
t he driver and passenger.
W hen plunging into the full y inflated air sack
(
see right-hand illustration) the forwards
m ovement of the fron t se at occupants will
b e cushioned and the risk of in
jur y to head
a n d upper body reduced. Special
openings
in the air sack allow a con
trolled exit of gas when unde r load from the
occupants, and therefore after
an accident
the air sac k will have emptied to the point
that forward vision is again possible
The Airbag inflates
in a split second to be
able to offer add itional protection during an acc ident.
Attention It is therefore important to maintain a certain distance from the steering or instrument panel so that the front seat occupants have the best possible effective protection if the system is triggered. The front seats should also always be correctly adjusted according to the height of the occupant (see 25).
Notes
• On vehicles which do not have an airbag, a driver'S airbag can be retrofitted on all G olf
models manufactured from 1991. Volks
w agen dealers
have the necessary informa
tion .
• If the vehicle or individual parts of the Air
bag System
is scrap ped one must always
observe the relevant va lid safet y regula
tions. Volkswagen dealers are familiar w ith
these regulations.
19
Page 22 of 156
Downloaded from www.Manualslib.com manuals search engine CONTROLS AND EQUIPMENT
Attention A child seat in which the child sits with its back to the direction of travel may only be used if the passenger-side Airbag has been deactivated. Serious injuries could otherwise occur to the child. Ask your Volkswagen dealer about the conversion.
As soon as the child seat is no longer needed, the passenger-side Airbag should again be made operational.
Attention
• The steering wheel paddedplate and the padded surface of the airbag module on the passenger side of dash panel must not be bonded or covered or reworked in any other way. It must only be cleaned with a dry cloth or a cloth damped with water.
• No modifications of any kind may be undertaken on the parts of the Airbag System. • All work on the Airbag System as well as removing and installing system parts due to other repair work e.g. removing steering wheel) should only be carried out by Volkswagen dealers.
• The protective function of the Airbag System is only sufficient for one accident. If the Airbag is activated, the system must be exchanged. • No other persons, animals or articles should be carried between the front-seat occupants and the effective range of the Airbag.
• If you sell the vehicle, please pass on this Instruction Manual to the new owner.
20
Page 23 of 156
Downloaded from www.Manualslib.com manuals search engine CONTROLS AND EQUIPMENT
Safety for children
Children under 12 years of age should normally travel on the rear seat1). Depending upon their age, height and weight, they must be protected with either a child restraint system or the seat belt provided. For reasons of safety, the child restraint system should be fitted in the middle of the bench seat or behind the passenger seat.
Attention Children under 1.50 m (5') tall must not use normal seat belts without the child restraint system. This could cause injury to the stomach and neck.
Ob serv e any statutor y regulation s to th e conrary .
Only officially approved ch ild restraint sys
te ms w hich are suitable for the child should
be used.
T he
ECE-R 21 standard 44 app lies to child re
straint systems. This categorizes restraint
systems Into four classes:
Cla ss 0: 0-10 kg
(approx to 9 months)
C lass 1 9
-18 kg
(approx . 8 m onths to 4 years)
Class
2: 15-25 kg
(approx. 3 to 7 yea rs)
Class 3: 22 -36 kg
(approx 6 to 12 years)
Child
restraint systems tested according to
ECE-R standard 44 are clearly marked w ith
the ECE-R test mark 44 (capital E in a Circle,
with test number below) .
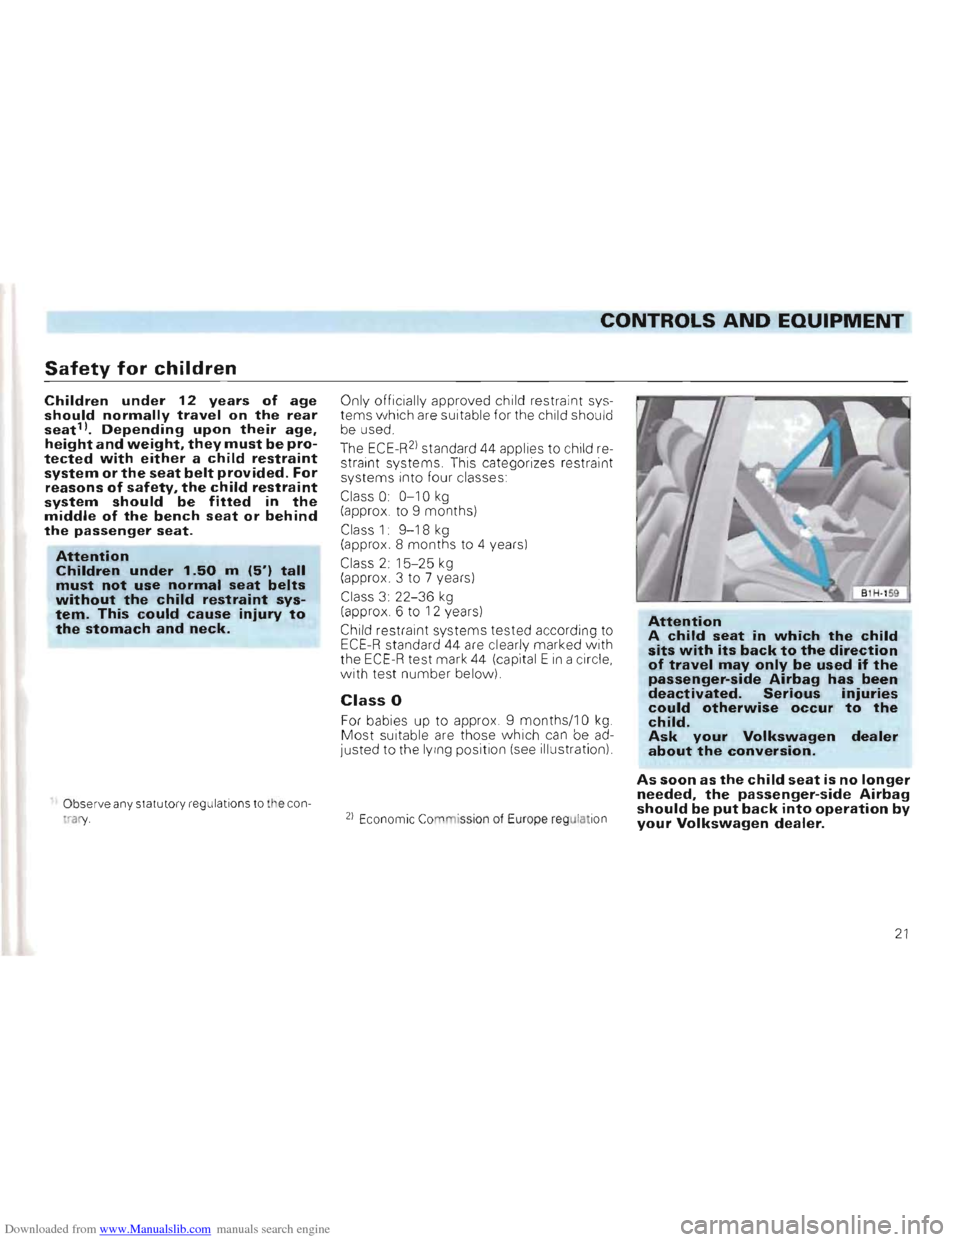
Class 0
For babies up to app rox . 9 months/10 kg Most suitable are those which can be ad
Justed to the lY ing position (see Illustration)
2) Econom ic Co mission of Europe regulat ion
Attention A child seat in which the child sits with its back to the direction of travel may only be used if the passenger-side Airbag has been deactivated. Serious injuries could otherwise occur to the child. Ask your Volkswagen dealer about the conversion.
As soon as the child seat is no longer needed, the passenger-side Airbag should be put back into operation by your Volkswagen dealer.
21
Page 24 of 156
Downloaded from www.Manualslib.com manuals search engine CONTROLS AND EQUIPMENT
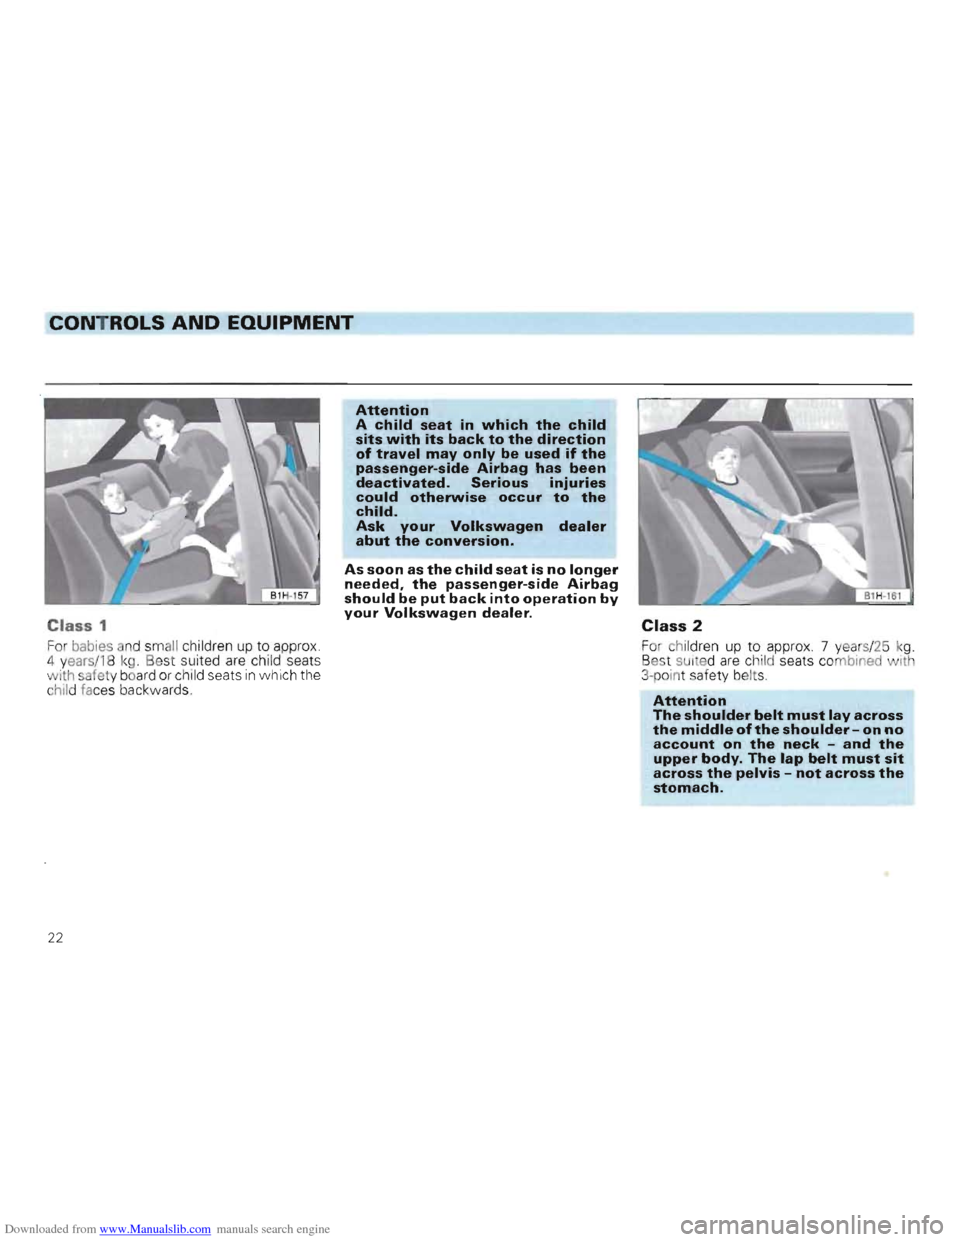
Class 1
For babies an d sm all children up to approx.
4 years/ 18 kg. Best sui ted are child seats with safety board or chi ld seats in which the
c hild faces backwards.
Attention A child seat in which the child sits with its back to the direction of travel may only be used if the passenger-side Airbag has been deactivated. Serious injuries could otherwise occur to the child. Ask your Volkswagen dealer abut the conversion.
A s soon as the child seat is no longer needed, the passenger-side Airbag should be put back into operation by your Volkswagen dealer. Class 2
Fo children up to approx . 7 year s/2 5 kg. Best sU it e d are chil d seats co mbined with 3-point safe ty be lt s .
Attention The shoulder belt must lay across the middle of the shoulder -on no a ccount on the neck -and the upper body. The lap belt must sit across the pelvis -not across the stomach.
22
Page 25 of 156
Downloaded from www.Manualslib.com manuals search engine CONTROLS AND EQUIPM ENT
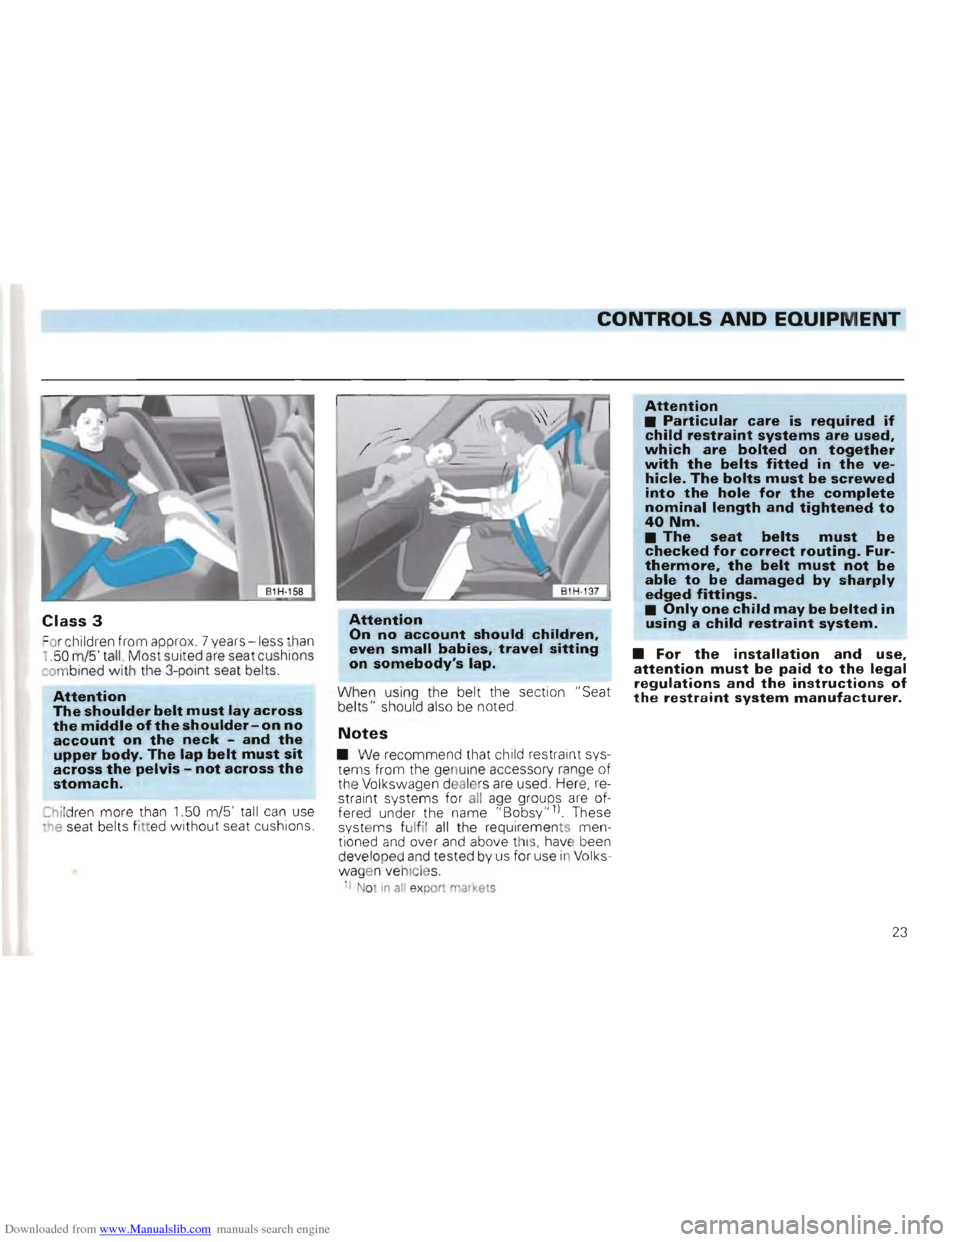
Cla ss 3
=o r c h ild ren from approx . 7 years -les s than i .50 m/5' tall. Most suited are seat cushions
co mbined with the 3-po int seat belts.
Attention The shoulder belt must lay across the middle of the shoulder-on no account on the neck -and the upper body. The lap belt must sit across the pelvis -not across the stomach.
Child ren more than 1.50 m/5' tall can use "lle seat belt s fitted without seat cushions.
Attention
On no account should children,
even small babies, travel sitting
on somebody's lap.
When using the belt the section "Seat
belts" should also be noted.
Notes
• We recommend that child restraint sys
tems from the genuine access ory range of
th e Volkswag en dealer s are used. Here, re
straint systems for all age groups are of
f e red under the name "Bobsy"ll. These
syst ems fu lfil all the requirem ent s mentioned and over and ab ove this, hav e been
develope d and tested by us for use ill Volks
wag en ve hicl es.
I) Not in all e xport market s
Attention • Particular care is required if child restraint systems are used, which are bolted on together with the belts fitted in the v ehicle. The bolts must be screwed into the hole for the complete nominal length and tightened to 40Nm. • The seat belts must be checked for correct routing. Furthermore, the belt must not be able to be damaged by sharply edged fittings. • Only one child may be belted in u sing a child restraint system.
• For the installation and use, atte ntio n must b e paid to t he legal
regulations and the instruction s of the restraint system manufactu rer.
23
Page 26 of 156
Downloaded from www.Manualslib.com manuals search engine CONTROLS AND EQUIPMENT
Head restraints*
B1H-168 I
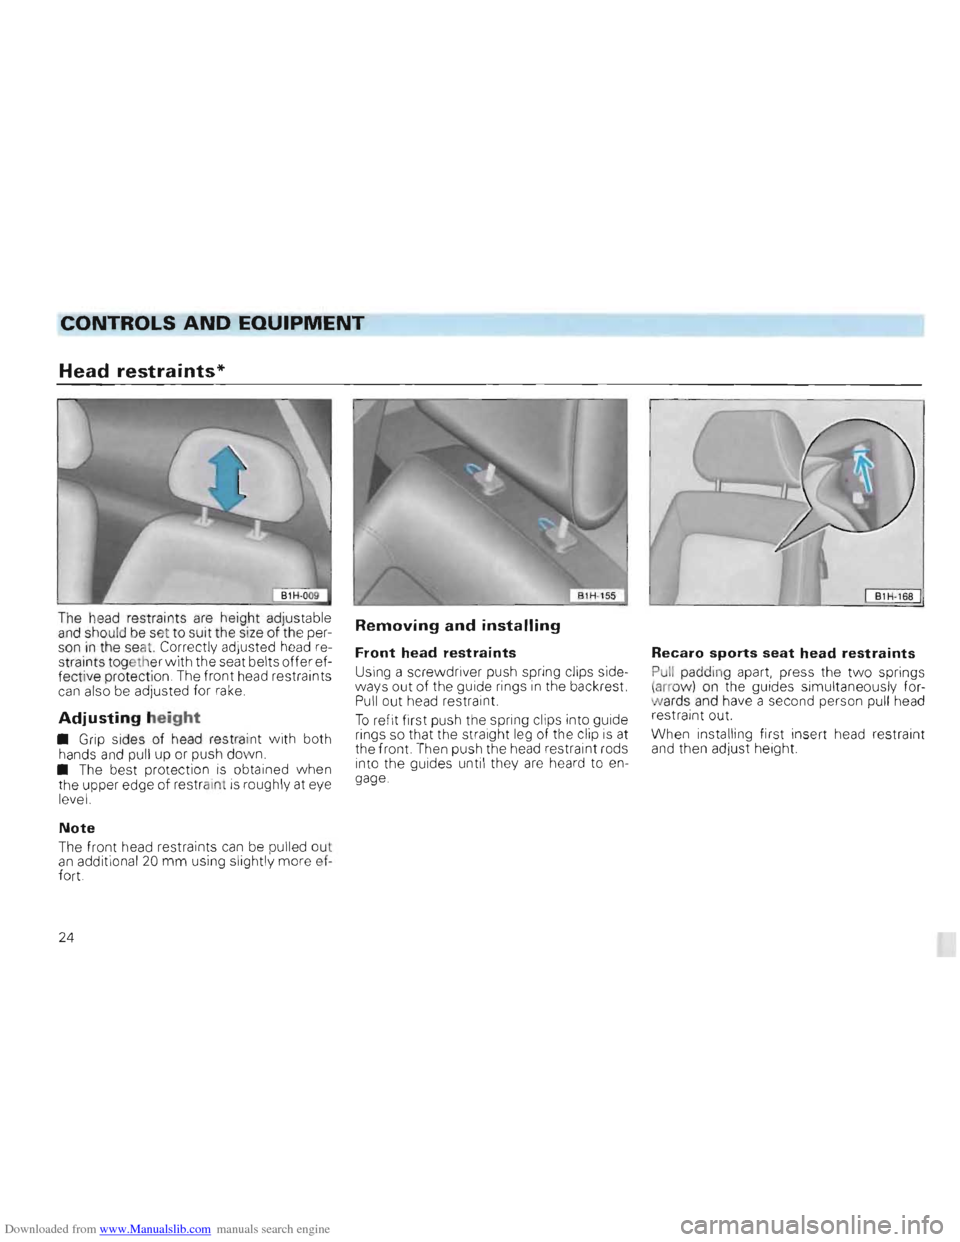
The head restraints are height adjustable and should be set to suit the size of the per
son in the seat. Correctly adjusted head re
straints togeth er with the seat belts offer ef
fective prot ection . The f
ront head restraints can also be adjuste d for rake.
Adjusting height
• Grip sides of head restraint with both
hands and pul l up or push dow n. • The best protection is obtained when
the upper edge of res traint is roughly at eye
l evel.
Note
Th e fr ont head restra ints can be pulled ou t an additional 20 mm using slightly more ef
fort.
Removing and installing
Front head restraints
Using a screwdri ver push spring clips side
ways out of the guide rings in the backrest. Pull out head restraint.
T o refit first push the spring clips into guide
rings so that the straight leg of the clip
is at
the front. Then push the head restraint rods
into the guides until they are heard to en
gage.
Recaro sports seat head restraints
Pull paddi ng apart, press the two springs (arr ow) on the guides simultaneous ly fo rw ards and have a second person pul l head
restraint out.
When installing f
irst insert head restraint and then adjust height.
24
Page 27 of 156
Downloaded from www.Manualslib.com manuals search engine CONTROLS AND EQUIPMENT
Front seats
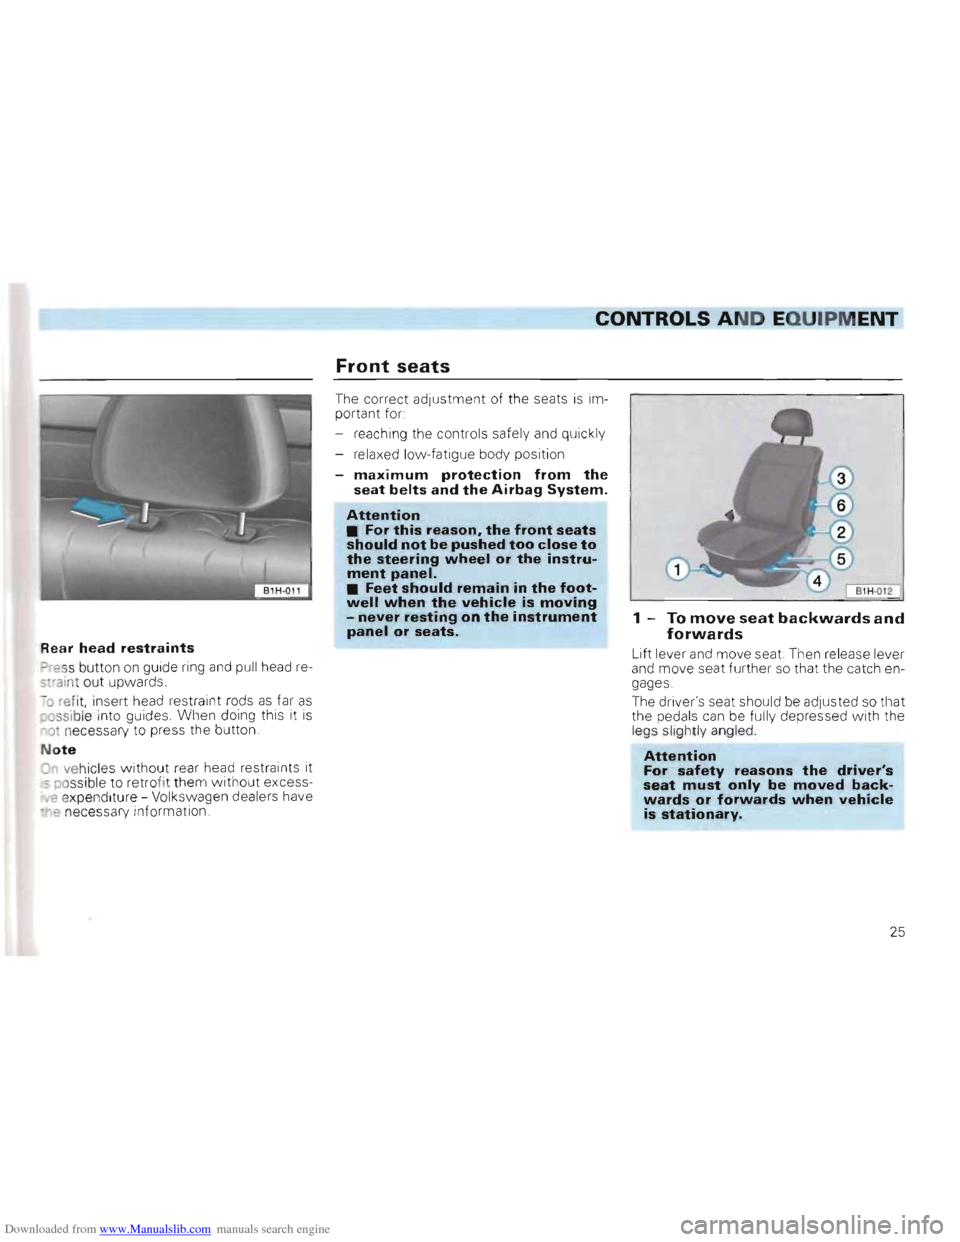
Rear hea d restraints
=>ress button on guide ring and pull head re
s-rai nt out upwards.
-0 refit, insert head restra int ro ds as far as os sible into guides. When doing this it is ~ot necessary to press the button .
N
ote
On ve hicles without rear head restra ints it 5 possibl e to r etrofit t hem without excess-
e expenditure -Vol kswagen dealers have
-'"'e n ecessary information. The
correc t adjustment of the seats
is im
portant for
- reaching the controls safely and quick
ly
- rela xed low-fatigue body po sition
-maximum protection from the seat belts and the Airbag System_
Attention • For this reason, the front seats should not be pushed too close to the steering wheel or the instrument panel. • Feet should remain in the footwell when the vehicle is moving -never resting on the instrument panel or seats_
I B1H-012 I
1 -To move seat backwards and forwards
Lift lever and move seat. Then release lever
and move seat fu rther so that the catch engages
The driver's seat
should be adjusted so that
the peda ls can be fully depr essed with the
legs slightly angled.
Attention For safety reasons the driver's seat must only be moved backwards or forwards when vehicle is stationary_
25
Page 28 of 156
Downloaded from www.Manualslib.com manuals search engine CONTROLS AND EQUIPMENT
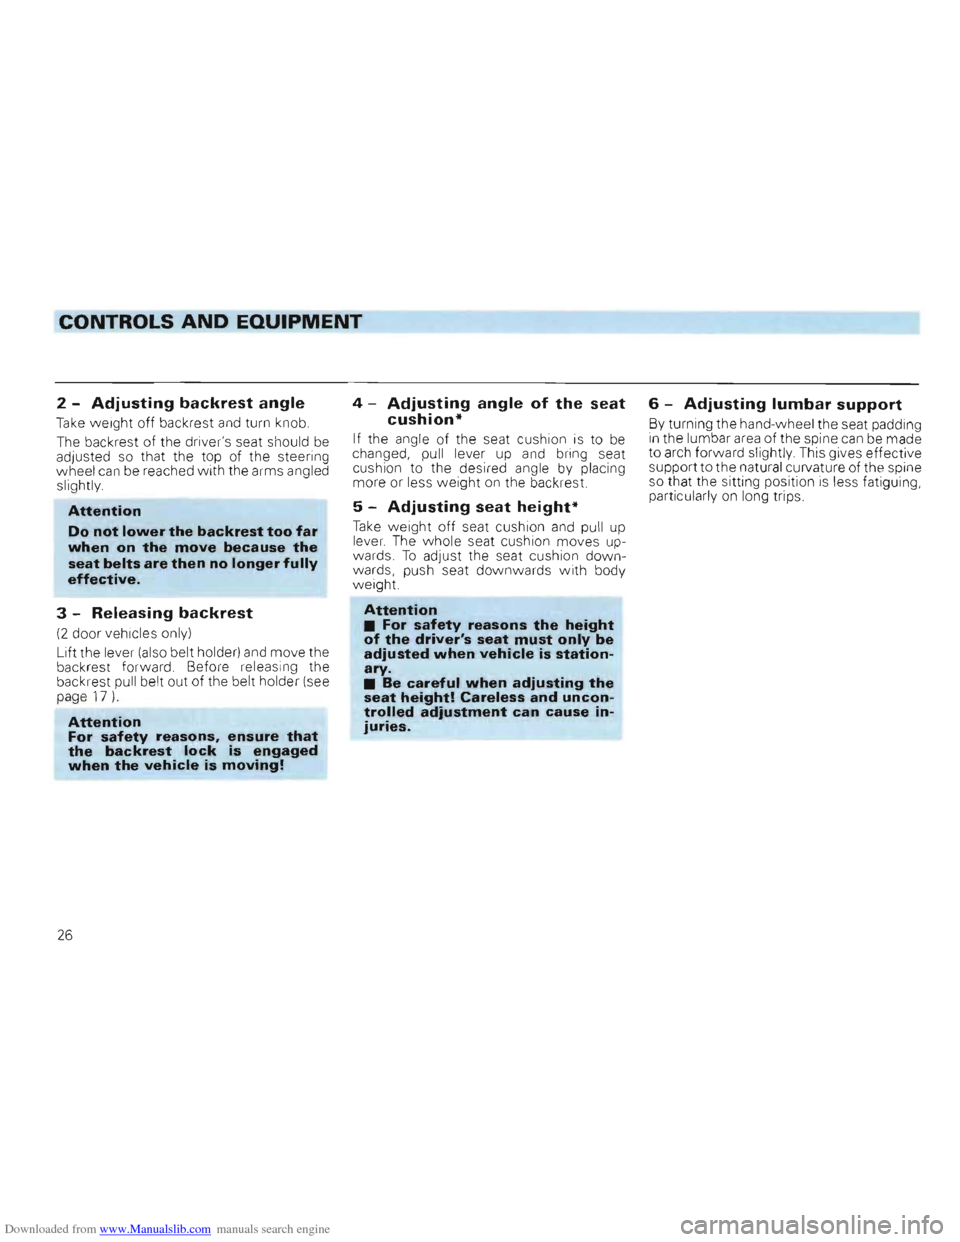
2 -Adjusting backrest angle
Take weight off back rest and turn knob.
The backrest of the driv er's seat shou ld be adjusted so that the top of the steerin g
whee l can be reached with the arms angled slightly.
Attention
Do not lower the backrest too far
when on the move because the seat belts are then no longer fully effective.
3 -Releasing backrest
(2 door vehicl es only)
Lif t the
lever (also belt holder) and move the
back rest forward. Before releasing the
backrest pull
belt out of the belt holder (see
page 17).
Attention For safety reasons, ensure that the backrest lock is engaged when the vehicle is moving!
4 -Adjusting angle of the seat
cushion*
If the angle of the seat cushion is to be changed, pull lever up and bring seat
cushion to the desired angle by placing
mo
re or less weight on the backrest.
5 -Adjusting seat height*
Take weight off seat cushion and pull up lever. The whole seat cushion moves up
war ds. To adjust the seat cushion down
w ards, push seat downwards with body
weight.
Attention • For safety reasons the height of the driver's seat must only be adjusted when vehicle is stationary. • Be careful when adjusting the seat height! Careless and uncontrolled adjustment can cause injuries.
6 -Adjusting lumbar support
By turn ing the hand-wheel the seat padding in the lumbar area of the spine can be made
to arch forward slightly. This gives effective
support to the natura l curvatu re of the spine
so that t
he sitting position is less fatigui ng ,
particul arly on long trips
26
Page 29 of 156
Downloaded from www.Manualslib.com manuals search engine CONTROLS AND EQUIPMENT ----------------------------------~~~--
Rear seat
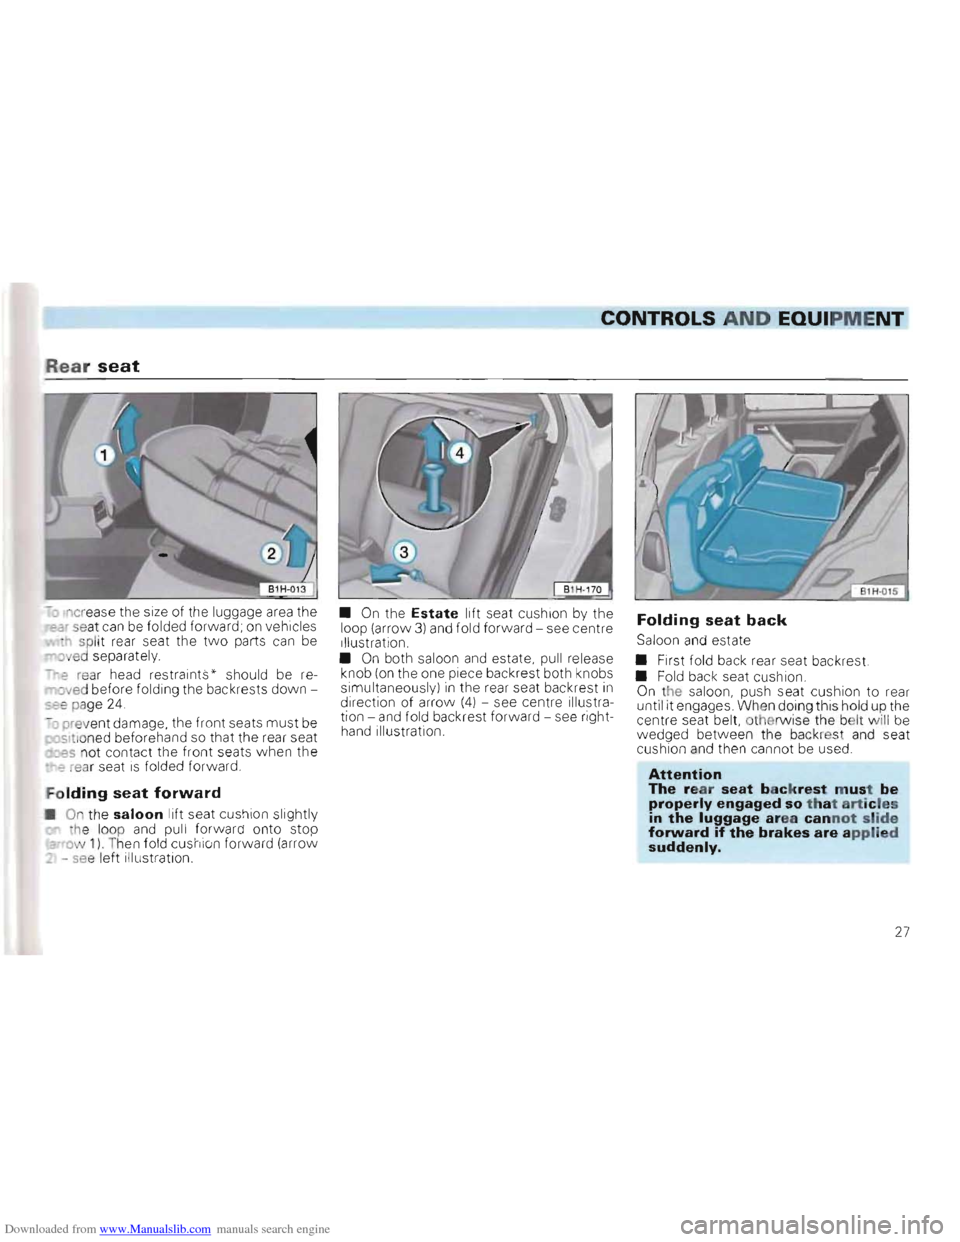
-ncr ease the size of the luggage area the ar seat can be folded forward; on vehi cles
- h sp li t rear seat the two parts can be ov ed separately.
~r-e rear head restraints " should be re~oved before folding the backrests downsee page 24.
-0 pr ev ent damage, the front seats must be sltio ned beforehand so that the rear seat _~s not contact the front seats w hen the -r-2 rear seat is fo lded forward.
Folding seat forward
On the saloon lift seat cushion slightly
t h e loo p and pull forwar d onto stop :::-ow 1) T hen fold cushion forward (arrow
_ -se e left illust ration. •
On the Estate lift
seat cushion by the
l oop (arrow 3) and fold forward -see centre
Illustrat ion. • On both saloon and estate, pu ll release
knob (on the one piece back rest both knobs
simultaneous ly) in the rear seat back rest in direction of arrow (4) -see centre illustra
tion -and fold back rest forward -see flght
hand illustration.
Folding seat back
Sa loon and estate
• First fold back rear seat backrest.
•
Fold back seat cushion. On the saloo n, push seat cushion to rear
unti l it engages When doing this hold up the
centre seat belt, othe rwise the belt w ill b e
wedged between the backre s and seat
cushion and then cannot be used.
Attention The rear seat backrest m ust be properly engaged so tha t articles in the luggage area cannot slide forward if the brakes are applied suddenly.
27
Page 30 of 156
Downloaded from www.Manualslib.com manuals search engine CONTROLS AND EQUIPMENT
Luggage compartment
In the interests of good handling ensure that
the load (persons and luggage) is distributed
e ven ly. Heavy items should always be car
ried as near to the rear axle as possible or
better still, between the axles. The permissible axle and gross weights must on no account be exceeded see page 143.
Attention • It should be noted that when transporting heavy items the handling will change due to the displacement of the centre of gravity. Driving style and speed must be altered to suit. • The load must be stowed so that no items of luggage can fly forward if brakes are applied suddenly.
One should ensure that
- the heater element
wires in the rear window are not damaged by articles rubbing
against them and
- the ventilation slots
in the luggage com
partment side trim * are not co vered .
Attention
Never drive with the tailgate not properly closed as exhaust gas
can then be drawn into the vehicle interior.
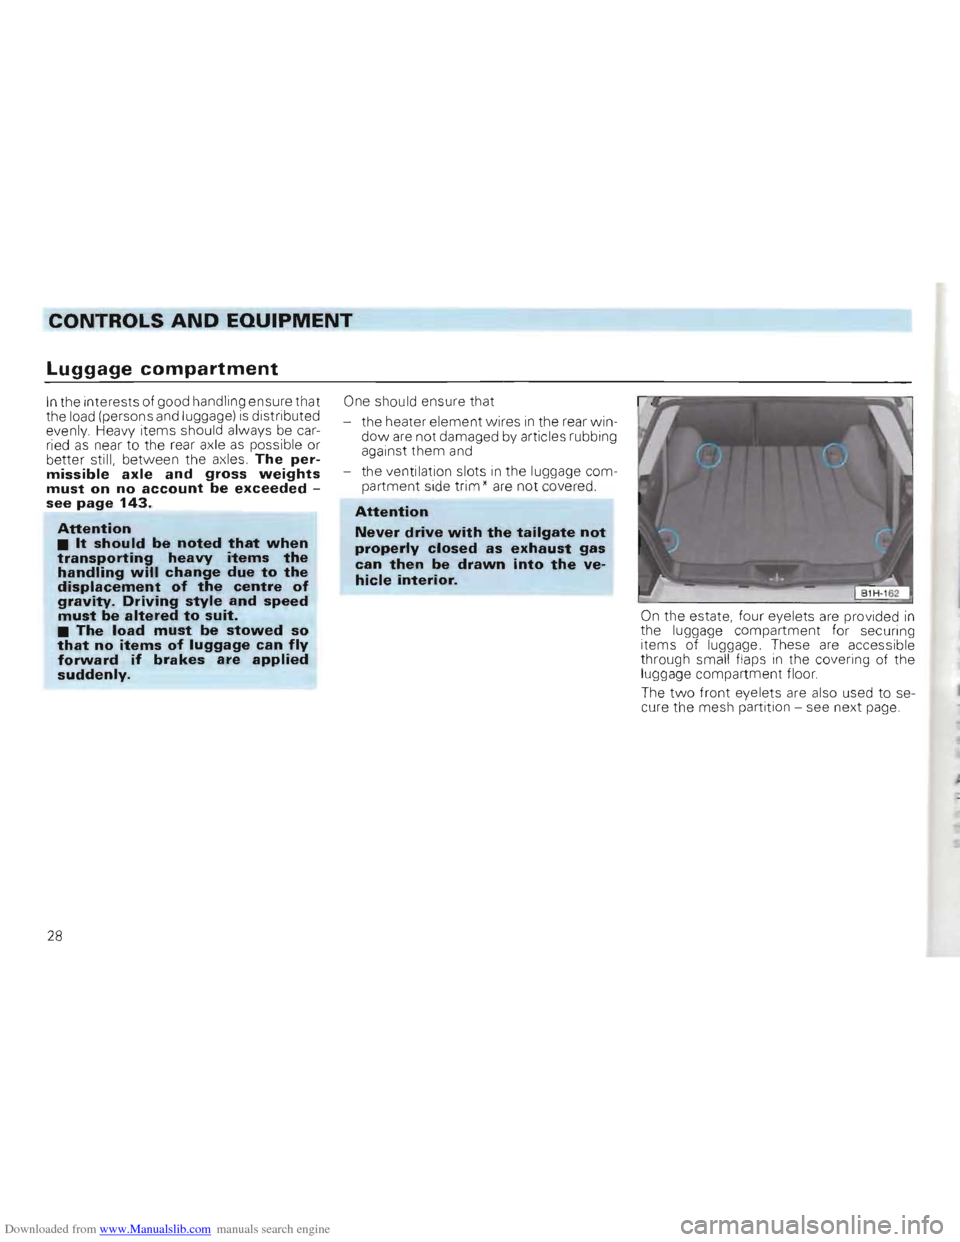
On the estate , four eye lets are provided in the luggage compartment fo r secur ing
items of luggage. These are accessib le
thr ough small flaps in the covering of the luggage compartment floor.
The
two front eyelets are also used to se
cure the mesh partition -see next page.
28