tailgate VOLKSWAGEN GOLF 1993 1H / 3.G Owners Manual
[x] Cancel search | Manufacturer: VOLKSWAGEN, Model Year: 1993, Model line: GOLF, Model: VOLKSWAGEN GOLF 1993 1H / 3.GPages: 156, PDF Size: 6.36 MB
Page 9 of 156
Downloaded from www.Manualslib.com manuals search engine Central locking system*
When one of the front doors is locked or un
lock ed w ith the key, all the other doors, the
tank flap and -depending on the position of
h e tailgate lock cylinder -the tailgate as w el l, are locked or unlocked by the central locking system
T he centra l locking system
is equipped with
a safe mechanism: Once the vehicle has been locked fr om the outside, the door lock Ing knobs on the inside are also blocked
a ft er approx. 12 seconds. This makes
b reaking in d ifficult.
W hen
unlocking, all the locking knobs
m ove upwards .
I f the key is held at the open position on
ve
h icles with electr ic win dows, all windows
wi ll open.
W hen
locking all door locking knobs must
m ove downwards. If this does not happen,
o p
en the door concer ned again and lock by pre ssing the locking knob down .
On ve hicles equipped w ith electric w inows/ele ctri c s liding roof, w indows/ele ctri c
s liding roof w hich hav e been left open can be automatically closed when the doors are
l o cked . T o do this one only need s to hold the
e y
in the lock ing position, until all windows and the sliding roof are completely closed.
The doors can also be locked by pushing down the locking knobs. However, the
s fe system IS not activated when th is is done. When the driver's door is locked all the other doors are locked as well. The
driv er
's door canno t be locked by pres
s ing the locking knob down as long as the
door is open. This is to prevent you from
locking yourself out.
Notes
• If you lock the car using the ignition key and with the driver' s door open, get into the
car and shut the door, all doors are locked.
They cannot be opened from the inside or
from the outs ide. As soon as the ignition is swit ched on, the door s are unlocked .
• If the ce ntral loc king shou ld fail , all locks
apart from the tank flap can be operated
manually.
Releasing tank flap manually, see Page 82.
Attention • When the vehicle is locked from outside, no-one should remain in the vehicle -especially not children -because the doors can no longer be opened from the inside. This applies particularly where the vehicle has electric windows, because then the windows cannot be opened either see page 10. • If the locking knob in the driver's door is pushed down, all the other doors are automatically locked as well. • Locking the doors can prevent them from bursting open in an extraordinary accident situation. Locked doors also prevent persons entering the vehicle forcibly e.g. at traffic lights. However, in an emergency, they make it more difficult for outside help to open the doors.
7
Page 10 of 156
Downloaded from www.Manualslib.com manuals search engine CONTROLS AND EQUIPMENT
Anti-theft warning
system*
Tailgate
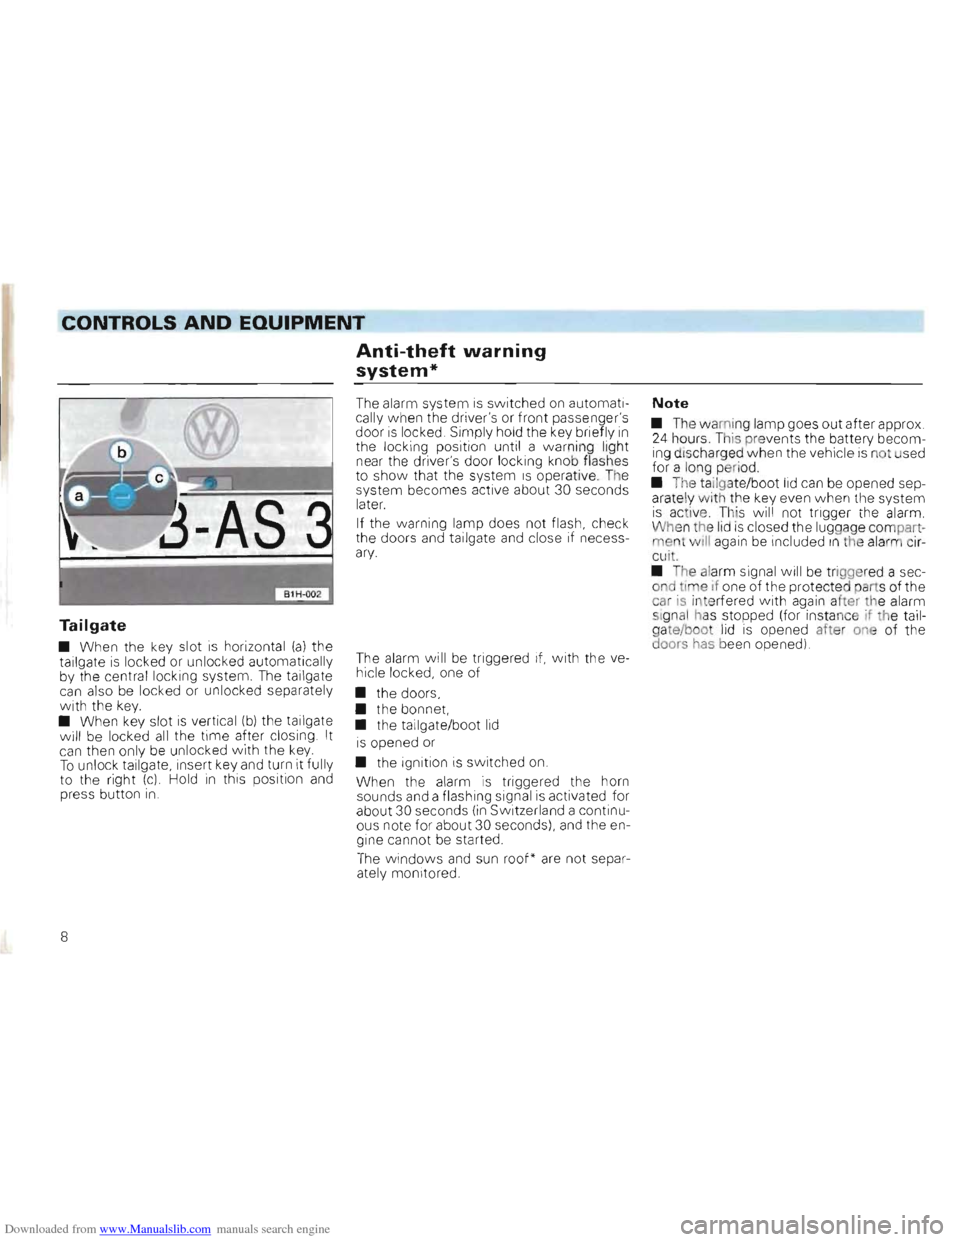
• When the key slot is horizont al (a) the
tailgate is locked or unloc ked automatically
by the central locking system. The tallgate can also be locked or unloc ked separately with the key. • When key slot is vertical (b) the tailgate
will be locke d all the time after closing . It can the n only be unlocked with the key. To unlock tailgate , insert key and turn It fully
to the right (c) Hold in this position and press button in .
The alarm system is switched on automatically when the driver's or front passenger's door is locked. Simply hold the key briefly in the locking position until a warni ng light
near the driver's door locking knob flashes
t o show that the system IS operative. The
system becomes active about 30 seconds
lat
er.
If the warning lamp does not flash, check
the doors and tailgate and close if necessary.
The alarm will be triggered if, with the ve
hicle locked, one of
• the doors,
• the bonnet,
• the tailgate/boot
lid
is opened or
• the ignition is switched
on.
When the alarm is triggered the horn
sounds and a flashi ng signal is activated for
about 30 seconds (in Switz erland a continu
ous note for about 30 seconds), and the en
gine cannot be started .
The windows and sun roof* are not separ
ately monitored .
Note
• The wa mi ng lamp goes out after approx . 24 hours. T hiS pre ven ts the battery becom
ing disc harged when the vehicle is not used for a long peri od
• The
tailgate/boo t lid can be opened sep
arate ly wi th the key even w hen the system is active . This wi ll not trigger the alarm .
Whe n the lid is closed the luggag e compartment wili again be included In the alarm circu it.
•
The alarm signal will be triggered a sec
ond time if one of the protecte d part s of the
car
is inte rfered w ith again aher th e alarm
si gnal has stopped (for insta nce if the tailgate/boo t lid is opened after one of the
doors has been opened)
8
Page 12 of 156
Downloaded from www.Manualslib.com manuals search engine CONTROLS AND EQUIPMENT
Boot lid
To open the tailgate when key slot is hori
zontal, press the lock cylinder and lift tail
gate.
To close, pull tailgate down, the best way
to do this is to grip in the recess in the inner
tailgate trim, swing it down and slam it to
gently . The tailgate is locked when the key
slot is vertical (with central locking horizontal)
Attention • After closing the tailgate always pull up on it to make sure that it is properly closed -otherwise it could open suddenly when vehicle is moving, even though the key has been turned in lock. • The tailgate must always be fully closed when vehicle is moving, otherwise exhaust gas will be drawn into the vehicle interior!
Electric windows*
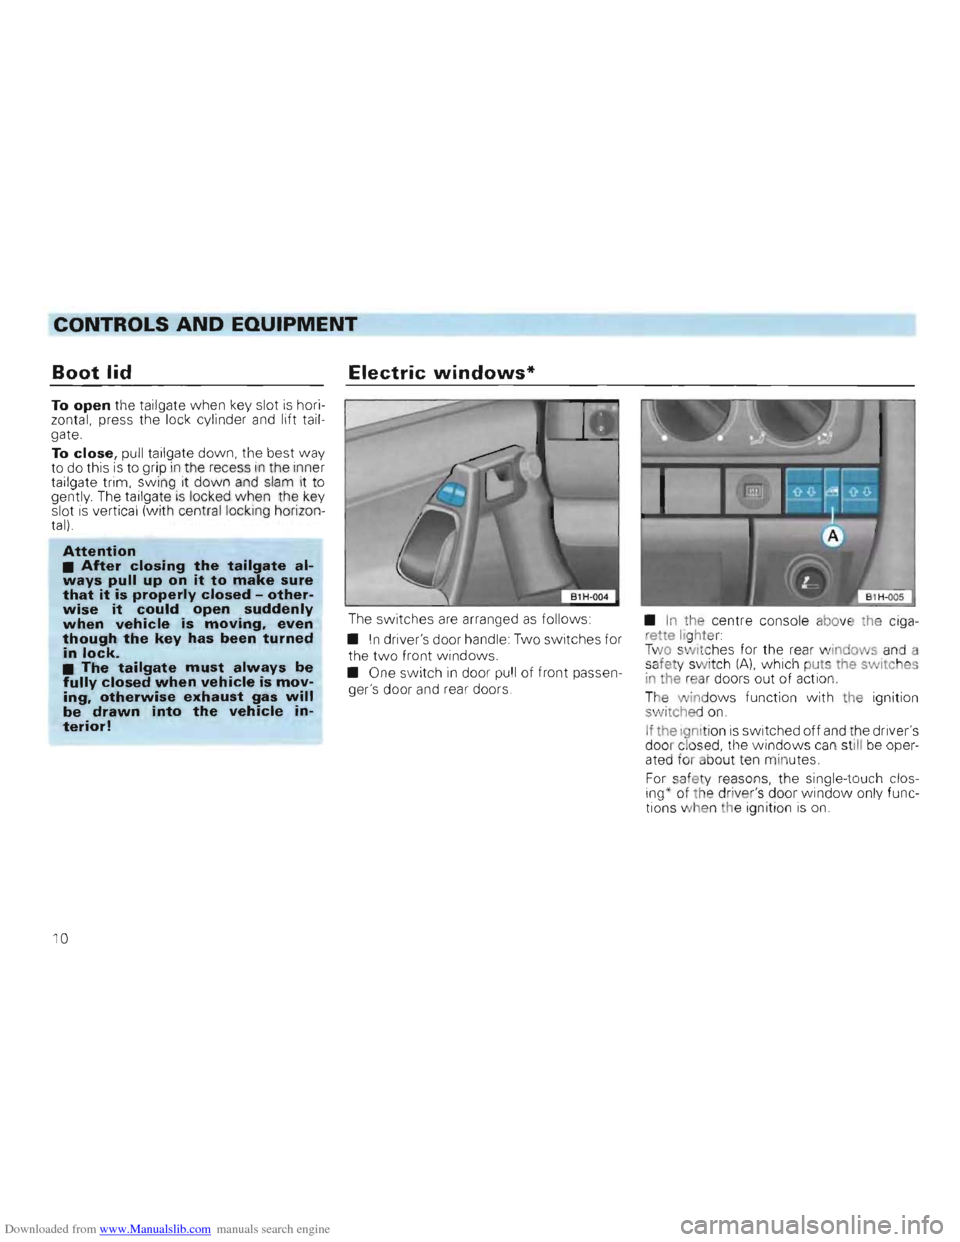
The switches are arranged as follows:
•
In driver's door handle: Two switches for
the
two front windows.
• One switch
in door pull of front passen
ger's door and rear doors. •
In the
centre console above th e ciga
r ette lig h ter:
Tw o sw it c hes for the rear windows and a
safety switch (A), which pu ts the switc hes
I n the re ar doors out of act ion.
T he win
dows function with th e ignition
switche d on.
If the ign ition is switche d off and the driver's
doo r clos ed, th e wi ndows can st ill be oper
ated for ab out ten minutes.
For saf
ety reaso ns, the single- to uch clo sing~ of the dr iv e r's door window only functions whe n the ignition is on.
10
Page 30 of 156
Downloaded from www.Manualslib.com manuals search engine CONTROLS AND EQUIPMENT
Luggage compartment
In the interests of good handling ensure that
the load (persons and luggage) is distributed
e ven ly. Heavy items should always be car
ried as near to the rear axle as possible or
better still, between the axles. The permissible axle and gross weights must on no account be exceeded see page 143.
Attention • It should be noted that when transporting heavy items the handling will change due to the displacement of the centre of gravity. Driving style and speed must be altered to suit. • The load must be stowed so that no items of luggage can fly forward if brakes are applied suddenly.
One should ensure that
- the heater element
wires in the rear window are not damaged by articles rubbing
against them and
- the ventilation slots
in the luggage com
partment side trim * are not co vered .
Attention
Never drive with the tailgate not properly closed as exhaust gas
can then be drawn into the vehicle interior.
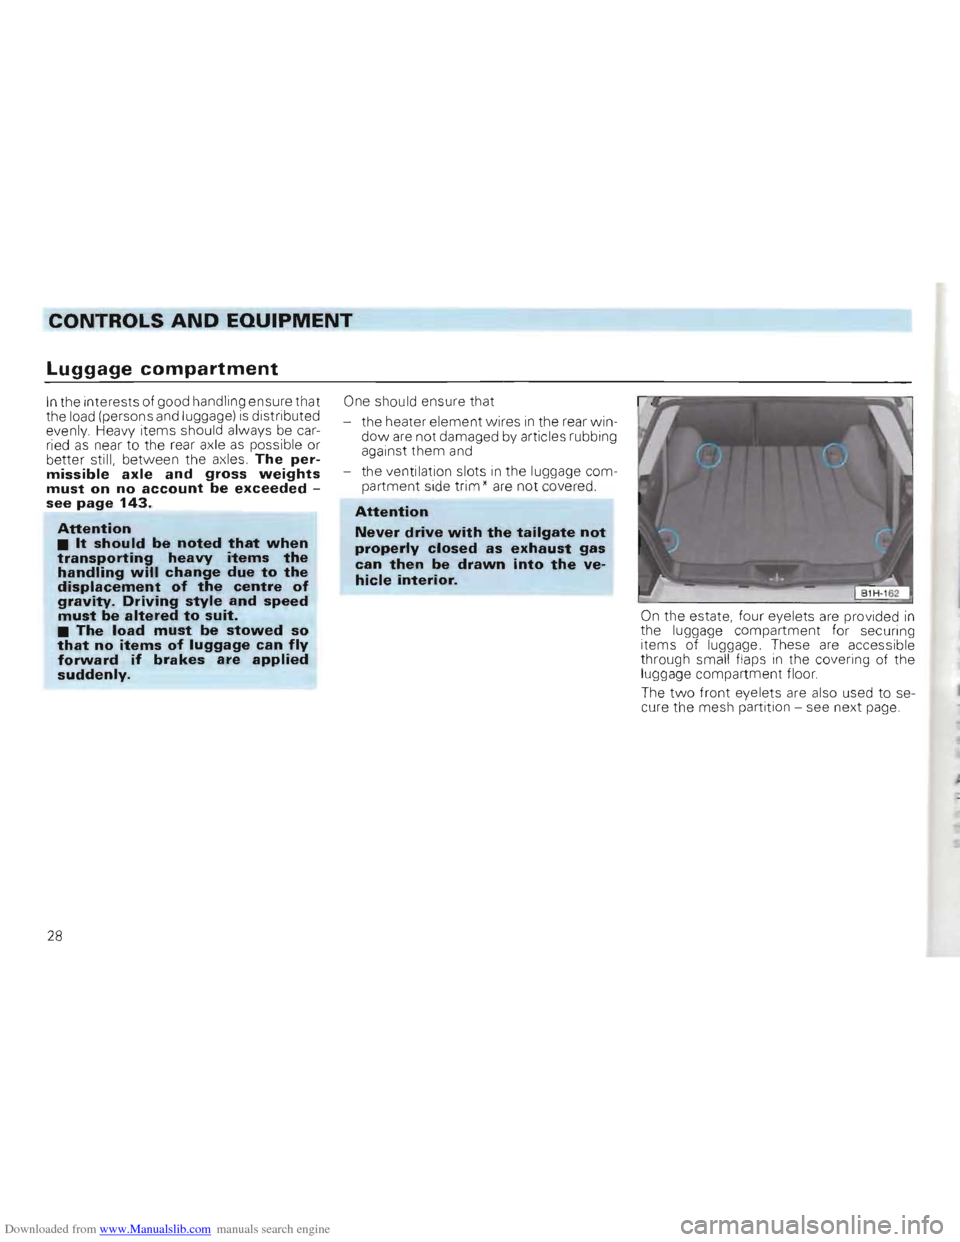
On the estate , four eye lets are provided in the luggage compartment fo r secur ing
items of luggage. These are accessib le
thr ough small flaps in the covering of the luggage compartment floor.
The
two front eyelets are also used to se
cure the mesh partition -see next page.
28
Page 32 of 156
Downloaded from www.Manualslib.com manuals search engine CONTROLS AND EQUIPMENT
Luggage compartment cover / Folding/sliding cover*
Articles of clothing can be placed on the luggage compartment cover.
Attention Do not place heavy hard articles on the luggage compartment cover or folding/sliding cover they could endanger the vehicle occupants or damage the folding/sliding cover if the brakes are applied suddenly_
Furthermore, the heater element wires in
the heated rear window could be damaged
by articles rubbing against them.
The folding/s liding cover
can be pushed to
gether to the front or rear .
When the tailgate of the saloo n is opened ,
the luggage compartment cover is also
lifted .
If large items of lug gag e are to be carried,
the cover
can be removed:
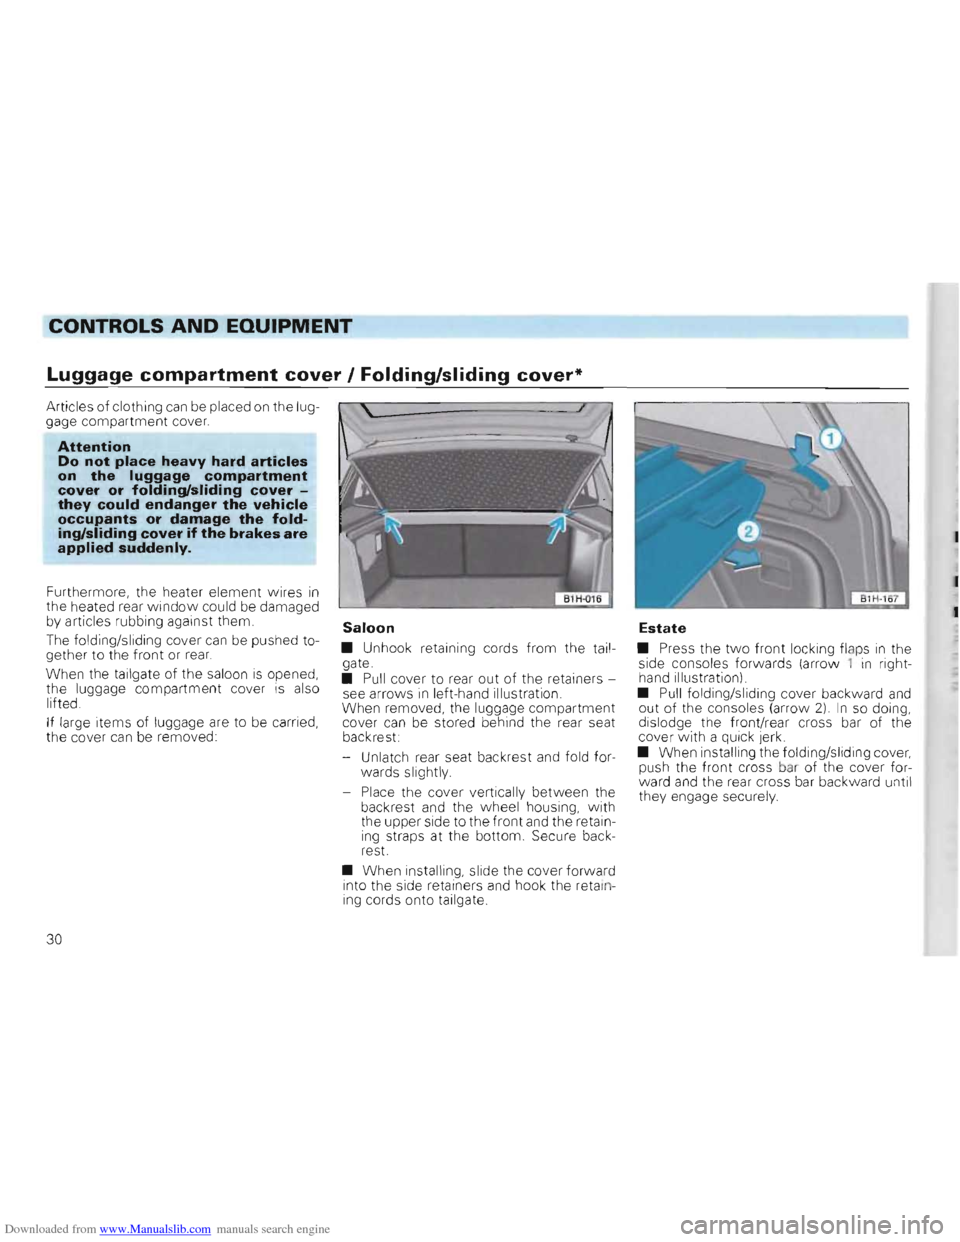
Saloon
• Unhook retaining cords fro m the tailgate.
• Pull cover to rear out of the retainers
see arrow s in left-hand illustration.
When removed, the luggag e co mpartment
cover
can be stored behind the rear seat
backrest:
- Unlat
ch rear seat backrest and fold for
wards slightly.
- Place the cove r vertically between the back rest and the wheel housing, with the upper side to the front and the retain
ing straps at the bottom. Secu re back
r est.
• When installing , slide the cover forward
into the side retainers and hook the retain
ing cords onto tailgate.
Estate
• Press the two front locking flaps in the
side consoles forwards (arrow 1 in right
hand illus tration).
•
Pull fo lding/sliding cover backward and out of the consoles (arrow 2) I n so doing,
dislodge th e front/ rear cross bar of the
cover with a qUi ck jerk.
• When
installing the folding/s liding cover, push the front cross bar of the cover for
ward and the rear cross ba r backward un til
the y engage securely.
30
Page 69 of 156
Downloaded from www.Manualslib.com manuals search engine CONTROLS AND EQUIPMENT
Interior lights
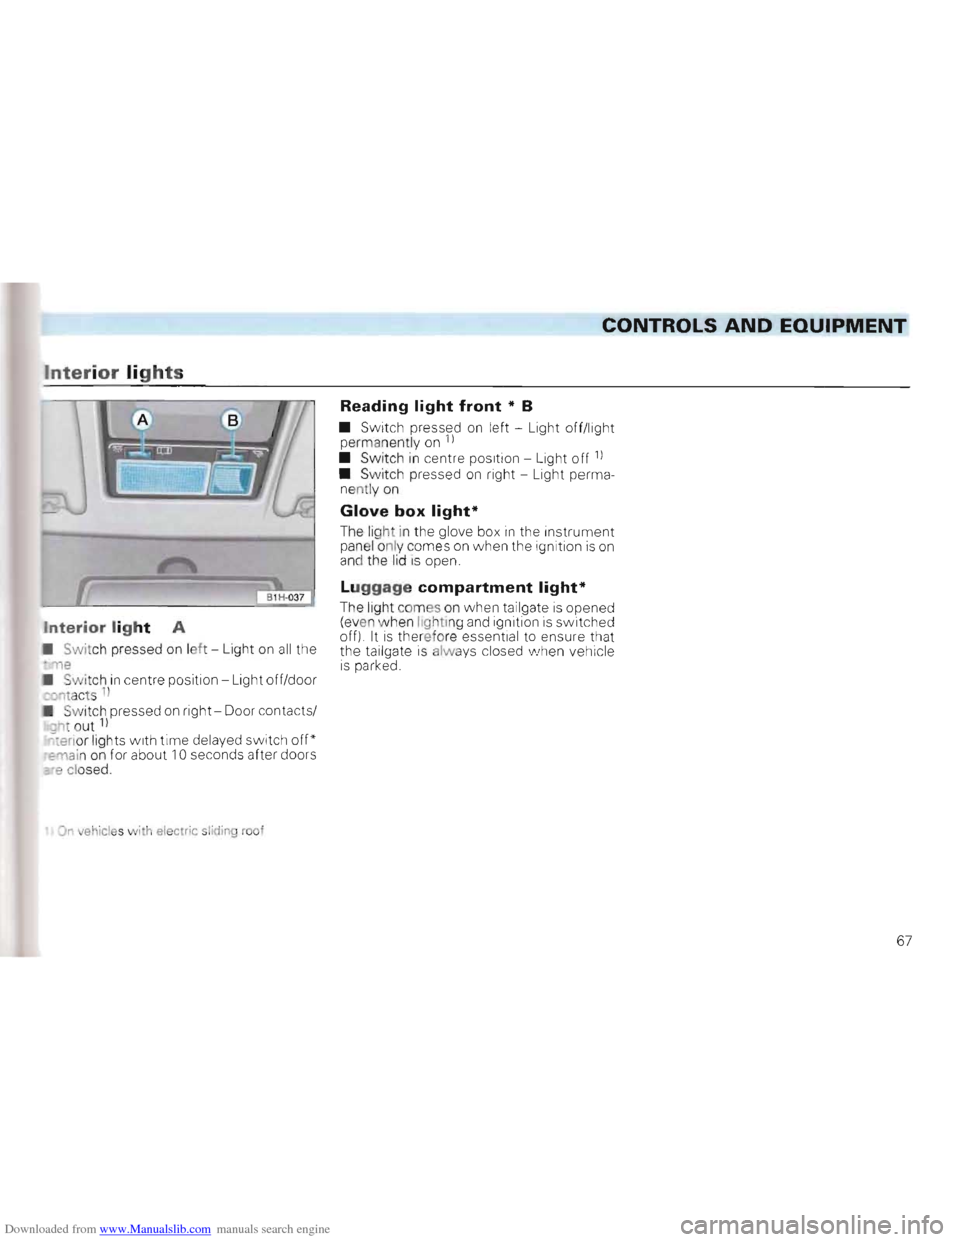
nterior lig h t A
Switch pr essed on leh -Light on all the "TIe SWitc h in centre position -Light off/door
:O'1t acts ]) Sw itch pressed on right -Door contacts/ 9"t out 1) ter io r lights with time delayed switch off"' E'TIain on for about 10 seconds after doors co e closed.
On veh ic le s with electric sliding roof
Reading light front * B
• Switch press ed on left -Light off/light
per manently on 1 )
• Switch in centre position -Light off 1)
• SWitch pressed on right -Light perma
n e ntly on
Glove box light*
The ligh t in the glove box in the instrument
pane l o nly com es on when the ignition is on and the lid I S open.
L uggage compartment light*
The light comes on when tailgate is opened
(ev en w hen li g hti ng and ignition is switched off) It is there for e essential to ensure that
the tailgate is always closed INhen vehicle is parked.
67
Page 72 of 156
Downloaded from www.Manualslib.com manuals search engine CONTROLS AND EQUIPMENT
Roof rack I roof railing
When loads are to be carried on the roof, the
following should be noted:
• As the
rain channels are moulded into
the roof for streamlining reasons, the nor
mal type of roof rack cannot be used . To avoid ri sks we advise that on ly the cross
bars provided by the factory are used .
• These cross bars
are the basis for a com
plete roof load carrying system For safety
reasons when carrying luggage , bicycles,
surf boards, skis and boats , the appropriate
special adapters are required .
All the components of this syste m are avail
able from
Volkswagen dealers.
• Any damage which may occur to the vehicle as a result of using other roof load carrying systems or by incorrect fitting will not be covered by the warranty.
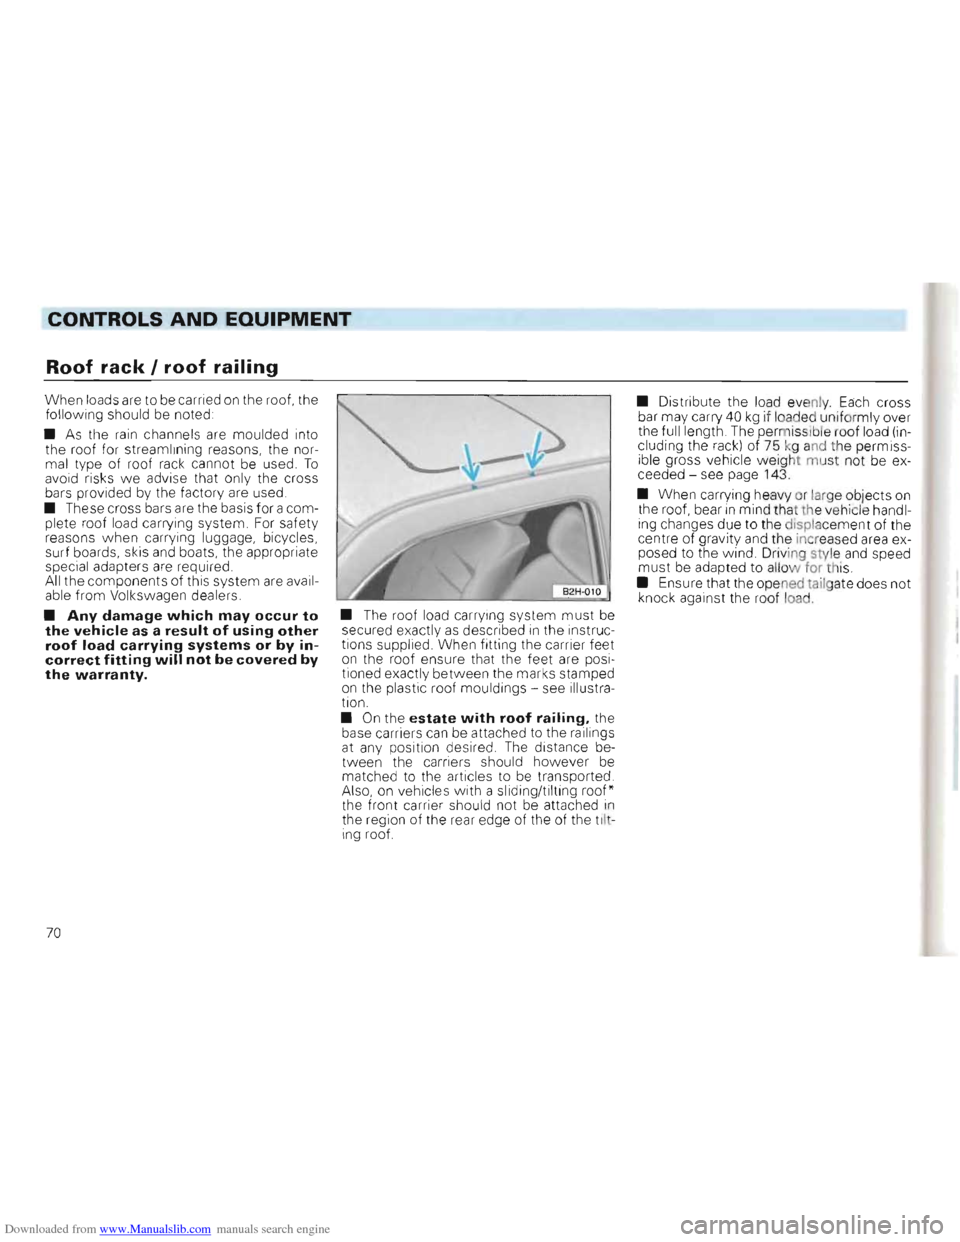
• The roof load ca rrying system must be
secured exactly as described in the instruc
tions supplied. When fitting the carrier feet
on the roof ensure that the feet are posi
tioned exactly between the marks stamped
on t
he plastic roof mou ldings -see illustra
tion.
•
On the estate with roof railing, the
base carriers can be attached to the ra ilings
at any position desired. The distance be
t w een the carriers should however be matched to the articles to be transported .
Also, on v e h icles with a sliding/ti lting roof*
the front ca rrier should not be attached in the region of the rear edge of the of the tilt
ing roof. •
Distribute the load eve
nly. Each cross
bar may carry 40 kg if loaded uniformly over
the full length . The permissibl e roo f load (in
cluding the rack) of 75 kg and the permiss
i ble gross vehicle weig ht m ust not be ex
ceeded -see page 143.
• When carrying heavy or lar ge objects on the roof, bear in mind tha t the veh icle handl
ing changes due to the displa cement of the
centre of gravity and the inc reased area e
xposed to the wind. Driving style and speed
m ust be adapted to allo w for thiS .
•
Ensu re that the ope ned tailgate does not
knock agai nst the roof load .
70
Page 84 of 156
Downloaded from www.Manualslib.com manuals search engine GENERAL MAINTENANCE
Fuel
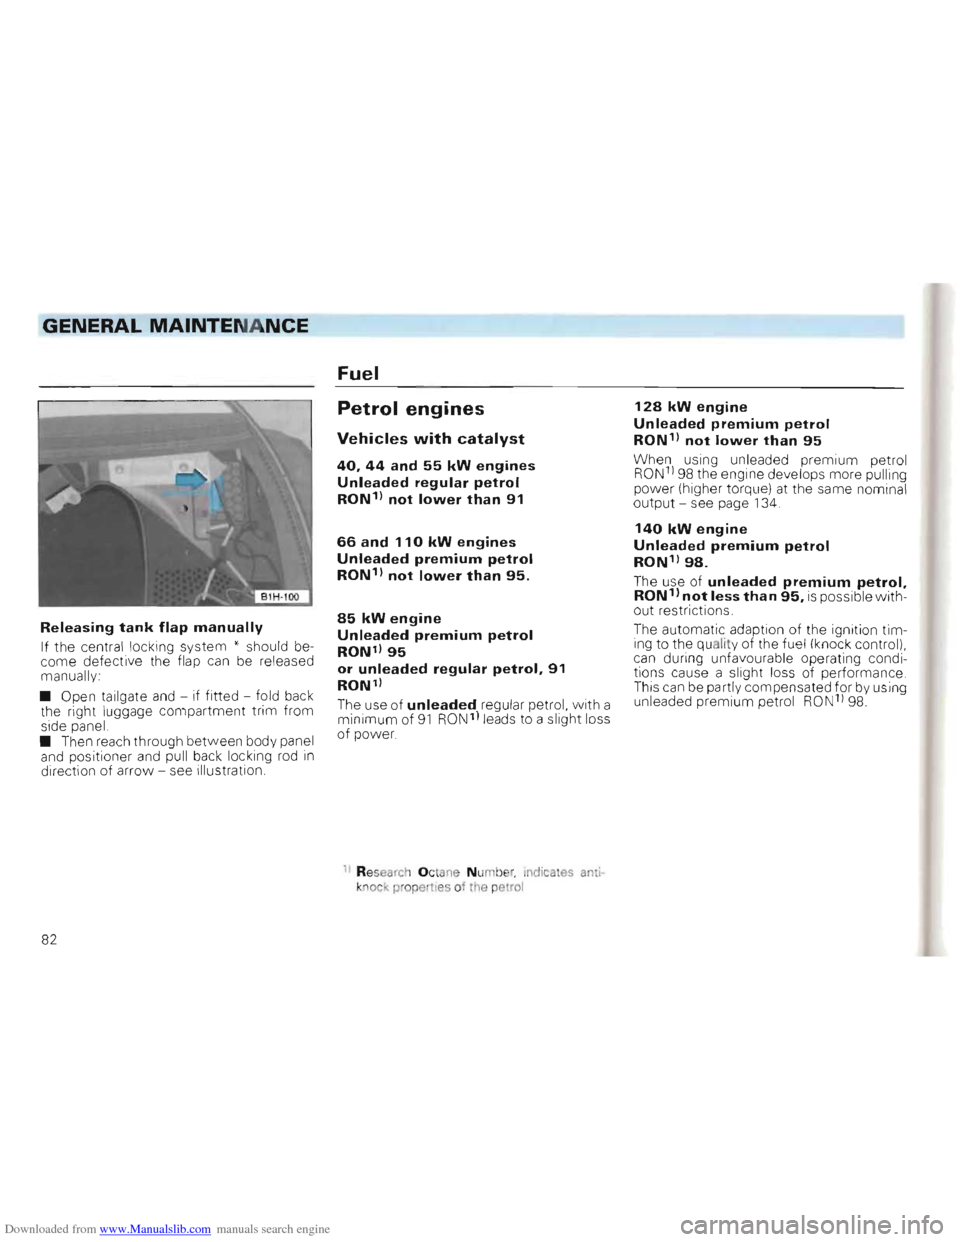
Releasing tank flap manually
If the central locking system * should become defective the flap can be released
manually :
• Open tailgate and -if
fitted -fold back
t he righ t luggage compartment trim from
side panel.
• Then reach through bet
ween body panel
and positioner and pull back loc king rod In directio n of arrow - see Illustration .
Petrol engines
Vehicles with catalyst
40. 44 and 55 kW engines
Unleaded regular petrol
RON1) not lower than 91
66 and 110 kW engines
Unleaded premium petrol
RON1) not lower than 95.
85 kW engine
Unleaded premium petrol
RON') 95
or unleaded regular petrol. 91
RON')
The use of unleaded regular petrol, with a
min imum of 91 RON ') leads to a slight loss
o f power
11 Re se arch O ctane Num b r, indicates anti
k nock properties of the pe rol
128 kW engine
Unleaded premium petrol
RON1) not lower than 95
When u sing un leaded premium petrol RON1) 98 the engine develops more pulling power (higher torque) at the same nominal output -see page 134.
140 kW engine
Unleaded premium petrol
RON') 98.
The use
of unleaded premium petrol. RON1) not less than 95. is possible without restrictions.
The automatic adaption
of the ignition tim
ing to the quality of the fuel (knock control),
can during unfavou rable operating condi
tions cause a s
light loss of performance
This can be partly compensated for by uS ing
un lead ed prem ium petro l RONlI 98 .
82
Page 127 of 156
Downloaded from www.Manualslib.com manuals search engine DO-lT-YOURSELF
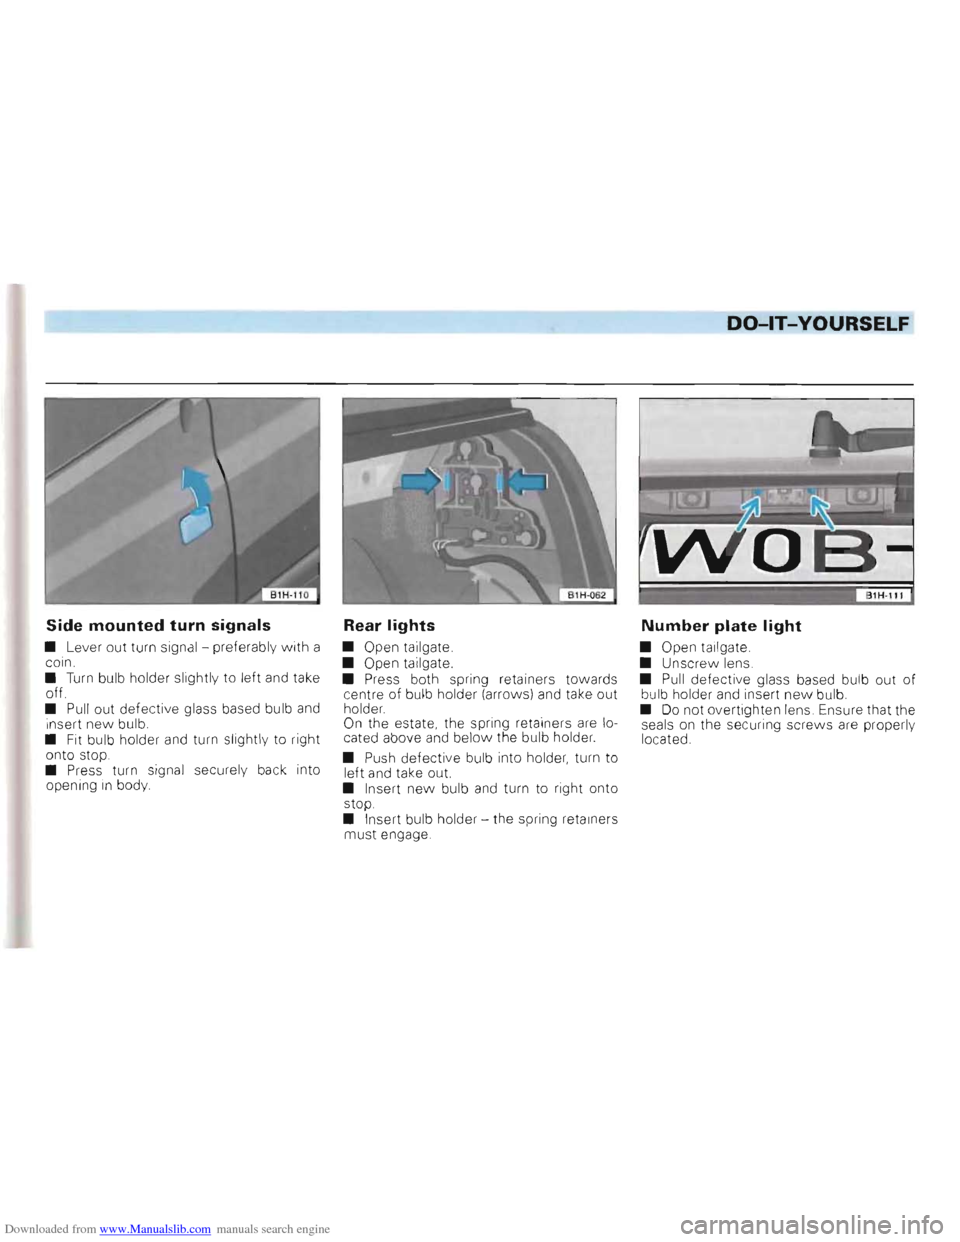
Side mounted turn signals
• Lever out turn signa l - preferab ly with a
coin.
•
Turn bulb holder slightly to left and take off.
• Pull out defective glass based bu lb and i nsert new bulb.
• Fit bulb holder and turn slightly to right
onto stop.
• Press turn signal securel y
back into
openin g in body
Rear lights
• Open tailgate.
• Open tailgate.
• Press both spring retainers towards
centre of bulb holder (arrows)
and take out
holder.
On the estate , the spring retainers are lo
cated above and below the bulb holder.
•
Push defecti ve bulb into holder , turn to
left and take out.
• Insert
new bulb and turn to right onto
stop .
•
Inser t bulb holder -the spring retainers
mus t engage.
Number plate light
• Open tailgate.
• Unscrew lens.
•
Pull defective glass based bulb out of bu lb holder and insert new bu lb.
• Do not overtighten lens . Ensure that the
seals on the secur ing screws are properly
located .
Page 153 of 156
Downloaded from www.Manualslib.com manuals search engine s
21 72 25 13
51 25
28
32
2 40 2 2 50 65
109 77
:; savin g temporary spare wheel 114
113 , 114
102 39
71 36
35
35
38 66
50
-~ - € ;estJn g 80 ; '19 w ith four wheel drive. 79 e .. tyr es. 107 - _ '3 mg tyre s 107
- - • hams 79
. e vheel . . 107
s -artin g 130
9 .. 1~
T Tailgate 10
Technical Data ............. . 134
Telephone 111 Temperature regulation
- Air conditioner ............. . 59
- Climatronic 62
- Heating and
ventilation. 56
Temporary spare wheel. 113 114
The fi rst 1500 km / 1000 miles 71 Thermotronic
56
Tilting roof . . .. .... . ... . .
65
Tool kit .
113
Tow start ing 77,130 Tow ing ....... . 130 Towing eye .......... .
129
Trailer tow ing 77
Trailer w eights
..... ..... . . . .... . 144
Tread depth. . ... . . .. . . . ..... .
106
T rip meter 39 Trip recorder ... . ... .
39
Trolley Jack 131 Turn signal lever . 53
Turn signals ...... . . 48
, 124 , 125
Two way radios 111 Type plate 147
Tyre pressures ... . ... . . 141 Tyres 105
- Condition .. 106 -Inflation pressure 105
- Running in . . . . . . . . . . 105
ALPHABETICAL INDEX
U
Unbalanced w heels. . . .. . . . . . ... 106
Underseal ....... .. . . . . 89
Unleaded fuel 82
V
V-belts
102
Vehicle data sticker
147
Vehicle hoist
131 Vehicle identification data 147
Vehicle identification number. 147
Vehicle literature 2 Vehicle tools 113,114
Vent i lation 56, 58, 64
151