VOLKSWAGEN GOLF MK6 2012 Owners Manual
Manufacturer: VOLKSWAGEN, Model Year: 2012, Model line: GOLF MK6, Model: VOLKSWAGEN GOLF MK6 2012Pages: 516, PDF Size: 105.12 MB
Page 421 of 516
Checklist (continued)
12. Never touch the glass
of the light bulb with your bare hands. Fingerprints can cloud the out er surface of the light bulb when heated , affecting the lighting power, clouding the reflector, and reduc ing
the bright ness .
1 3 . Always make sure tha t the new bulb works .
cor
rectly ; the connection plug may not be complete ly seated ; the corresponding fuse may be burned
out ; or the bulb may be bad .
14. Always have the headlights adjusted by an authorized Volkswage n dealer or an author ized Vol ks
wagen Facility after a headlight bulb has been replaced.
Disregarding the safety-related checklist may
lead to accidents and serious personal injuries.
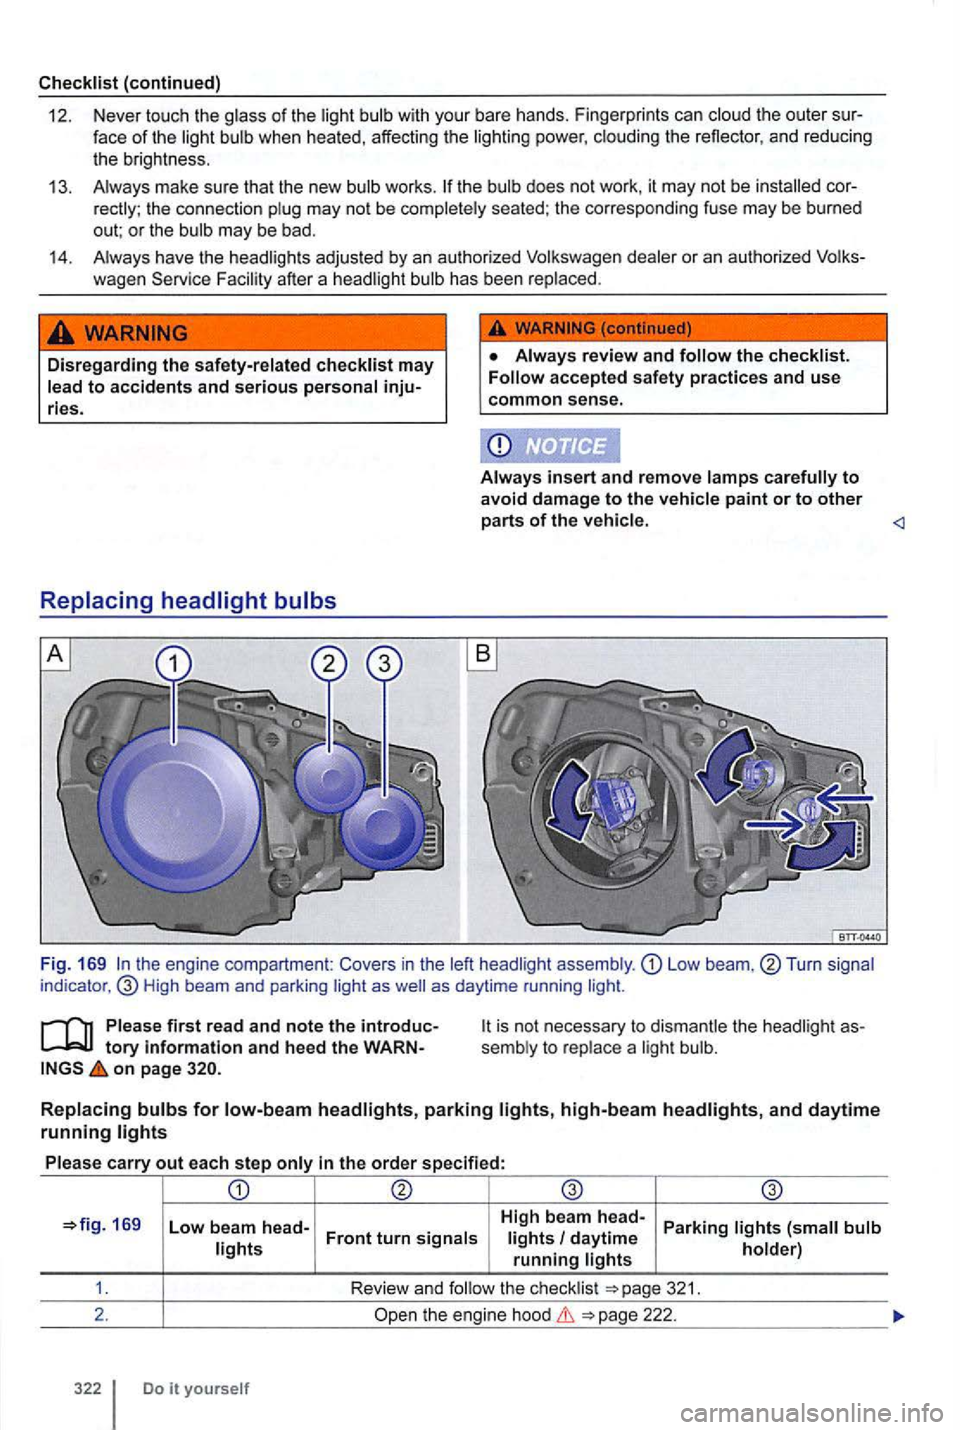
Replacing headlight bulbs
the checklist. Follow accepted safety practices and use common sense .
Always insert and remove lamps carefully to avoid damage to the vehicle paint or to other parts of the vehicle.
on page
169 Low be am head- High
beam head-
Parking
321.
2 .
the engine hood
Do
Page 422 of 516
Please carry out each step only in the order specified:
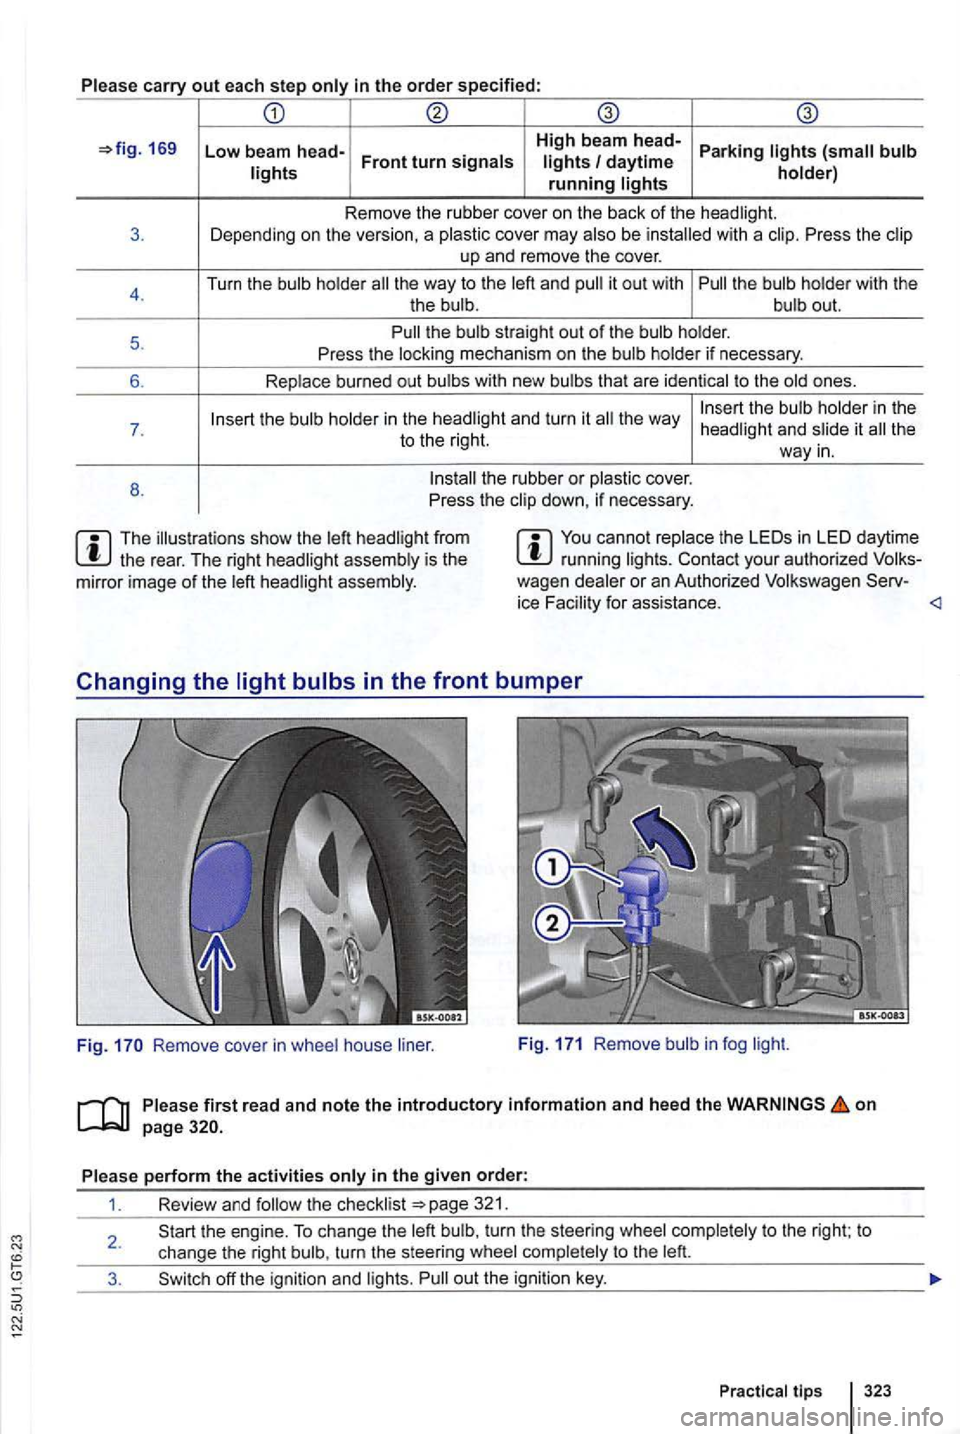
169 Low beam head-High beam head-Parking lights
the way to the left and it out w ith
the way
the rear. The right headlig ht assembly is th e
mirror image of the left headlig ht assembly.
in LED daytime your authori zed wagen dealer or an Authorized Volkswagen ice Facility for assistance.
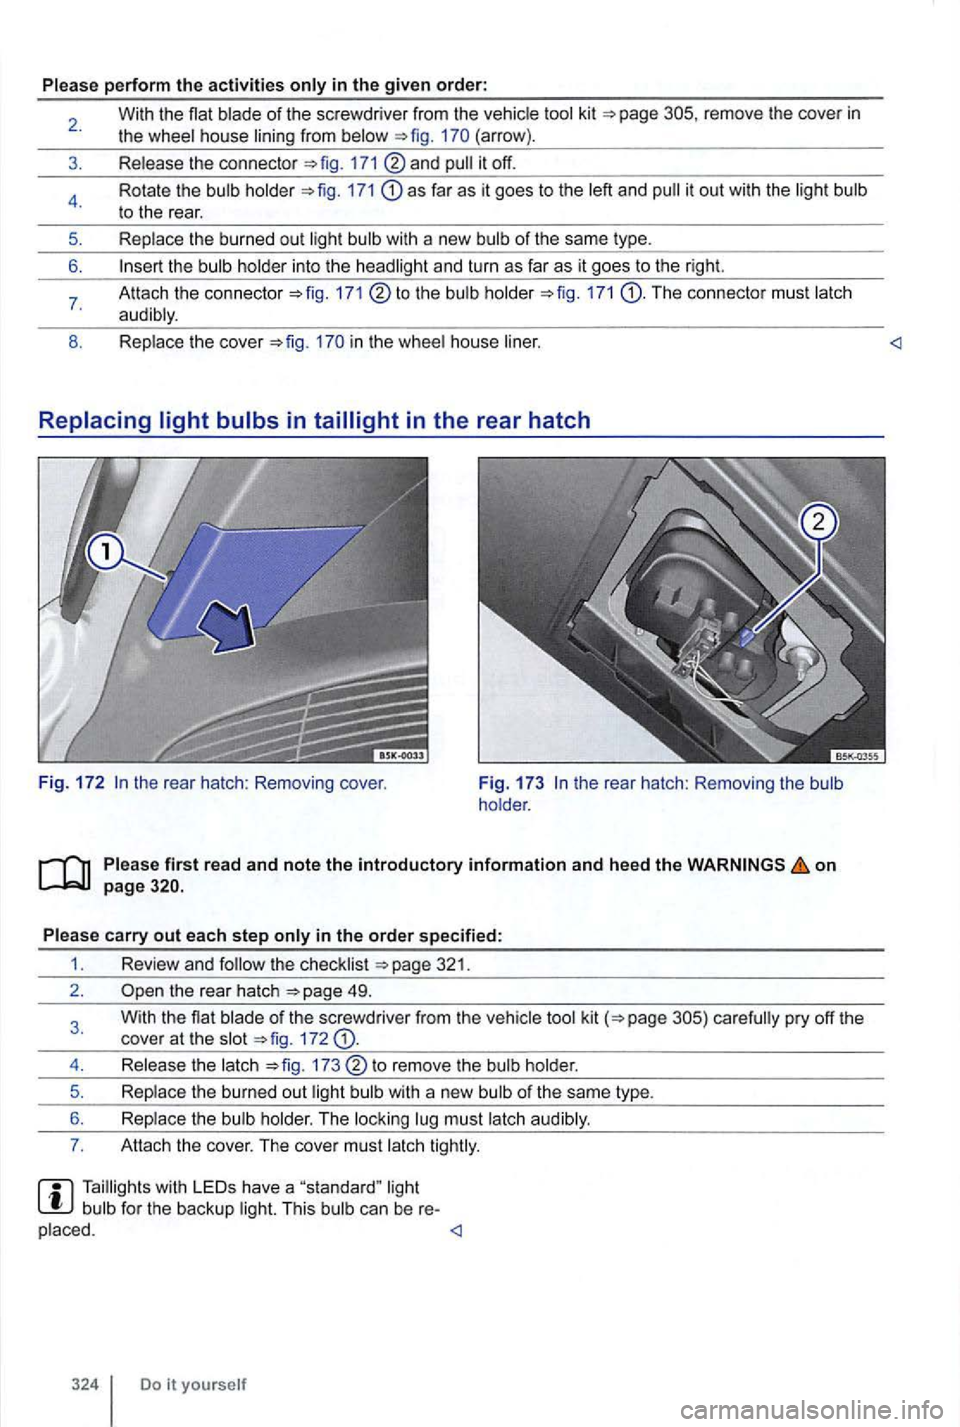
Remove cover in wheel house liner. Fi
g. 171 Remove bulb in fog light.
on page
321.
2.
323
Page 423 of 516
Please perform the activities
remove the cove r in the wheel house lining from (arrow) .
Release the connecto r
and
171 as far as it goes to the left and
the bulb holder into the headlight and turn as far as it goes to the right.
Attach the connector to the bulb holder The connecto r mus t latch
audibly .
Replace
the cover in the whee l house
F ig. 172 the rear hatch : Removing the bulb
ho lder.
Please first read and note the introductory information and heed the on page
in the order specified:
1 . Review and
the rear hatch
of the screwdriver from the vehicle tool kit 172
Release the latch to remove the bulb holder.
Replace the burned out light bulb with a new bulb
of the same type.
Replace the
bulb holder . The locking lug must latch audib ly .
Attach th e cover . The cover must latch
Do it yourself
Page 424 of 516
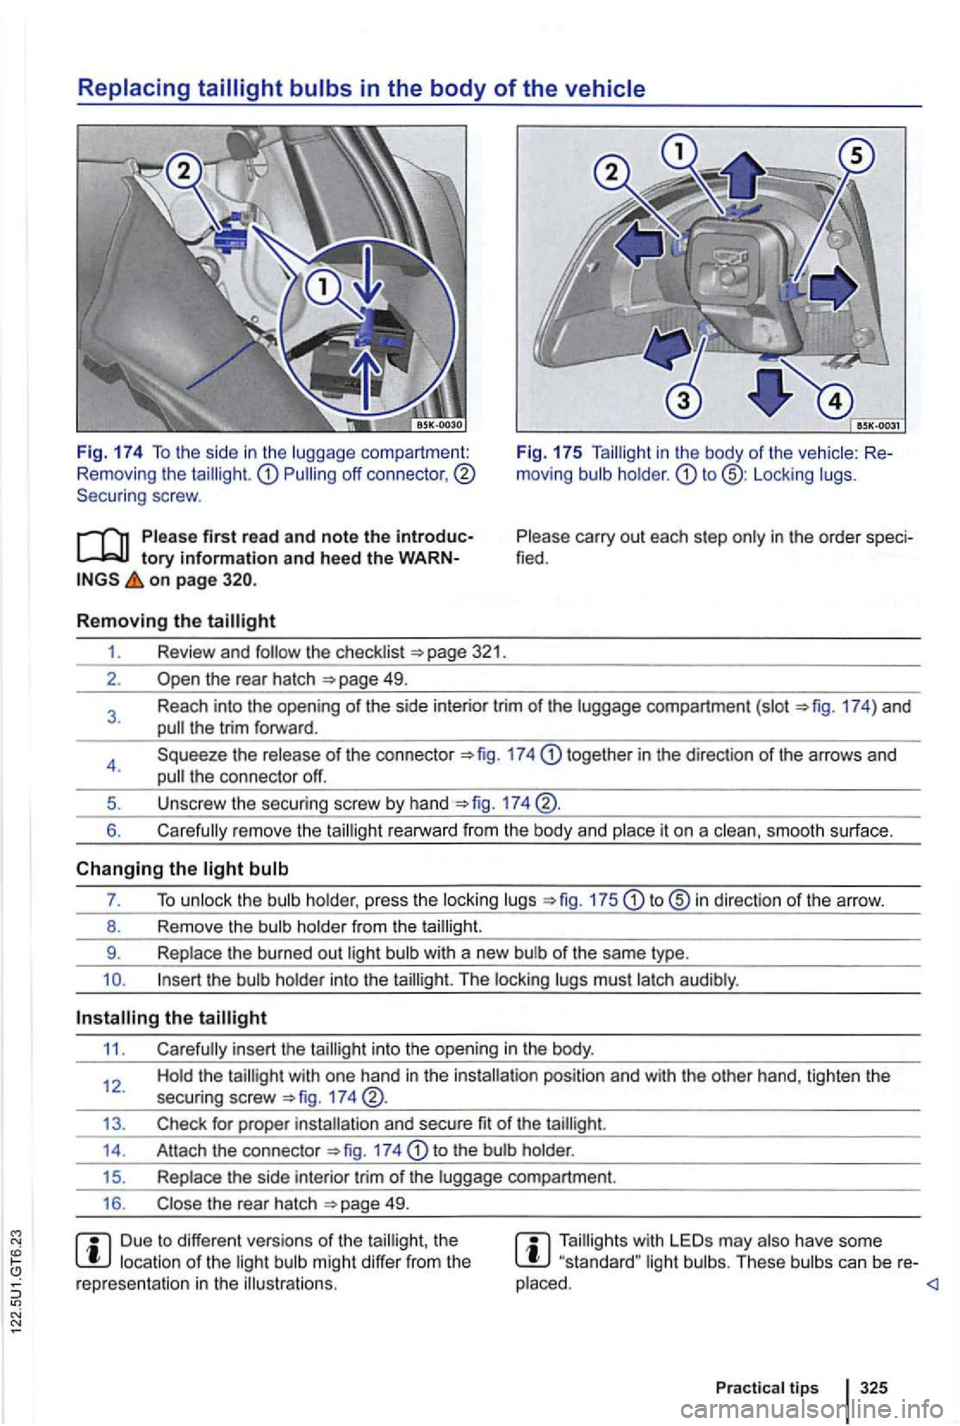
Replacing
moving Locking lugs.
on page 320.
Please carry out each step only in the order fied .
Removing the
1. Review and follow the checklist 321.
2 .
17 4) and the trim forwa rd .
4. Squeeze the release of the connector 17 4 together in the direction of the arrows and the connector off.
5. Unsc rew the securing screw by hand 174
6 . remove th e taillight rearward from the body and place it on a clean, smooth surface.
7. To unlock the 175 to in direction of the arrow.
8. Remove the bulb holder from the taillight.
9. R eplace the burned out light bulb with a new of the same type.
Insert the holder into the The locking must latch audibly .
the
11.
174
13.
14 . Attach the connector 174 to the
49.
Due to different versions of the taillight, the location of the light might differ from the
r epresen tation in the illu strat ions . li ght bulbs . These bulbs can be re-
placed .
Page 425 of 516
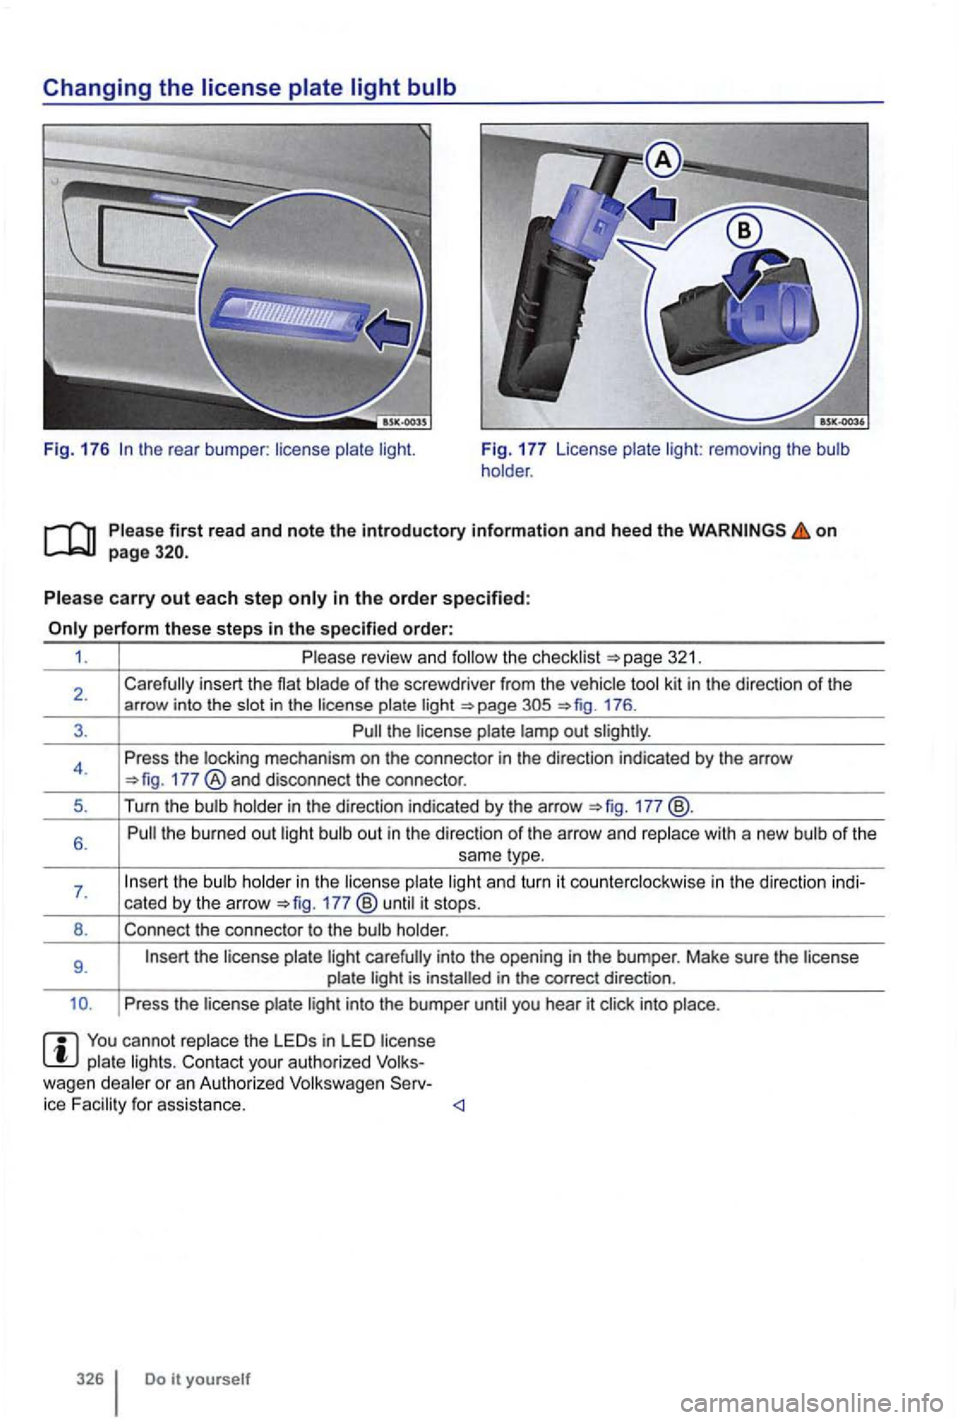
Changing the
the rear bumper : license plate light. Fig. 177 License plate light: removing the bulb
holder .
P le a se
first read and note the introductory information and heed the on page
in the order s p ecified :
17 6.
3 .
177 ®and disconnec t th e connector.
5. Turn the holder in the direc tion indicated by the arrow 177 @.
6.
the bulb ho lder in the lice nse plate light and turn it co unterc lockw ise in th e direction ind i-
cated by the arrow 177 until it stops.
8. Connect the connector to the bulb holder .
9. the license plate light carefully into the opening in the bumper . Make sure the license
plate light is installed in the correct direction.
Press the license plate
cannot replace the in LED license plate lights. Contact your authorized Volks
wagen dealer or an Author ized Volkswagen ice
Do it yourself
Page 426 of 516
Jump-starting
this sect ion find inform atio n about:
U sing jum per cables . . . . . . . . . . . . . . . . . . . . . 328
your eng ine does not start because the
the battery acid
l evel indicator window on the vehicle battery before
jump -starting
with gasoline engines , the cross -sec tion of the jumper
cable wire must be at least
assistance systems 195
Prepara tions for worki ng i n the engine compa rt
ment 222
Vehicle battery
Working on the batterie s or the electrical syste m in your vehicle can cause serious acid burns, fires , or electrical shock.
Never lean over a vehicl e battery. Always
w ea r protective gloves and eye protection. To
r educe your risk o f injury, never tilt the bat
t e rie s; acid could spill out through the vents and burn you.
A highly explosive mixture of gases is give n off when the battery being charged.
you an y battery acid,
g et medical attention immediately .
work on the batterie s or the e lectrica l system in your vehicle can cause serious acid burns, fires, or electrical shocks. Always
read and heed the
Never jump-start a vehicle with a t hawed or frozen vehicle battery. The battery can explode. A d ead battery can freeze at tempera
tures around +32
A batt ery that is frozen or was frozen , but has since thawed, must be replaced.
Wh en the vehicle battery is jump-s ta rted ,
i t give s off hydrogen gas, which is highly ex
plosive! Always keep fire, s park s, open flame,
an d smoking mater ials far aw ay from vehicle batteries. Neve r use a telephon e while connecting or disconnecting jumper ca
bl es.
Practica l tips
Page 427 of 516
{continued)
the non-insulated parts of the
battery clamps to touch.
the jumper cable attached to the positive battery terminal to contact metal parts of the vehicle.
Using jumper cables
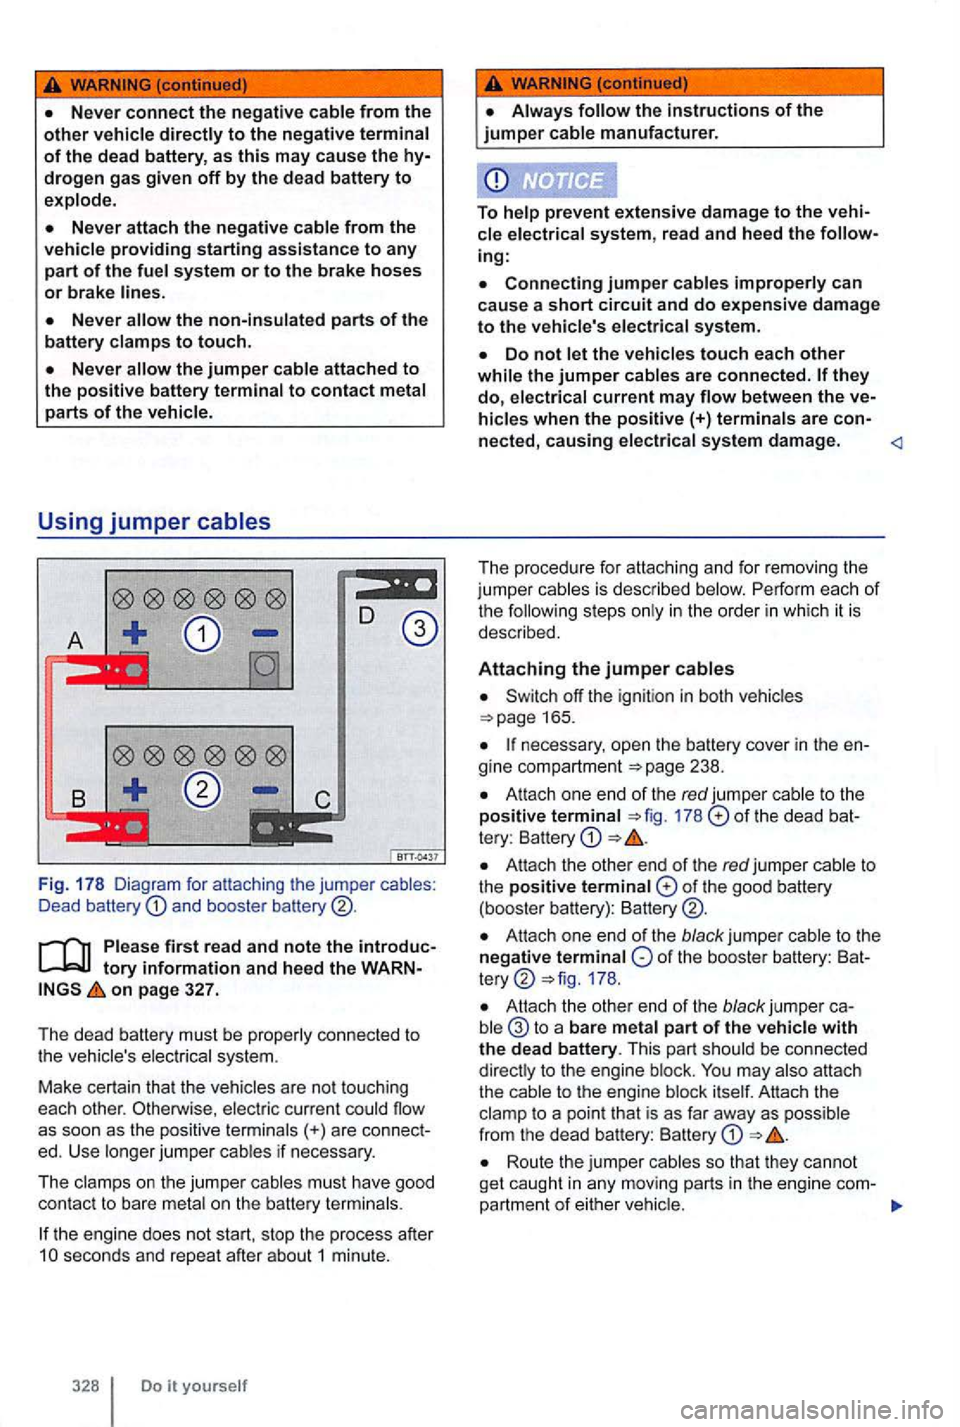
Fig . 17 8 Diagram for attaching the jumper cables:
Dead battery and booste r
on page 327.
The dead battery must be properly connected to
the vehicle's electr ical system .
Make ce
rtain tha t the vehicles are not touchi ng
each other. Otherwise , electric curr ent could flow
as soo n as the positive terminal
s(+) are connec t
ed. Use longer jumper cables if necessary .
Th e clamps on the jumper cables must have good
con tac t to bare metal on
the battery termina ls.
the engine does not start, stop the process after seconds and repeat after about1 minute.
cle electrical system, read and heed the
Connecting jumper cable s improperly can
ca use a short circuit and do ex pen sive dama ge to the vehicle's electrical system .
Switch off the ignition in both vehicles 165.
necessary , open the battery cover in the
At tach one end of the red jumper cable to t he
po sitive terminal 178 of the dead tery : Battery
Attach the othe r end of the red ju mper cable to the positive terminal of the good battery
(booster battery):
Atta ch one end of the black jump er of the booste r battery: 178 .
Attach the other end of the black jumper to a bare meta l part of the vehicle with the dead battery. This part shou ld be connected
dire ctly to the eng ine blo ck.
Route the jumper cables so that they cannot
ge t ca ught in any moving parts in the engine com-
partment of e ith er vehic le.
Page 428 of 516
the engine
the engine of the vehicle with the good
battery that is providing help and let it run at idle
speed .
Turn on the ignition of the vehicle with the dead
b attery. the engine starts, wait 2 to 3 minutes
the engine does
not start within about seconds , turn off the tion and wait at least 1 minute ; then try again .
Removing the jumper cables
Before you remove the jumper cables. swi tch
off the headlights (if they are on) .
the vehic le with the dead batte ry , switc h on
t he heater fa n and the rea r window defroster. This
he lps
to m in im ize voltage spikes when the cables
a re disconnected.
With the engine running , remove the jumper
nected .
Disconnect the black (- ) cab le f rom the vehicle
wit h the dead battery .
Disconnec t the black (-) cable from the other
vehicle (vehicle with the good battery) .
Disconnect the red(+) cable from the other
Disconnect the red (+ ) cable from the vehicle
with the dead battery .
Close the battery cover.
Improper use of jumper cables when starting a vehicle with a dead battery can
cause the battery to explode , leading to
Always wear proper eye protection. Never
lean over the vehicle battery.
Attach the jumper cables in the correct
Never connect the negative cable from the
vehicle providing starting assistance to parts of the fuel system or to the brake hoses or brake lines.
Never
sistance.
Avoid electrostatic discharge in the may cause the hydrogen gas escaping from the vehicle battery to ignite.
Never jump-start a vehicle with a battery
that is damaged or frozen or that was frozen
and has thawed. The battery can explode.
Always the instructions of the jumper cable manufacturer.
Never connect the negati ve cable from the other vehicle directly to the negative terminal of the dead battery . The hydrogen gas from
the battery is explosive.
Never short out the battery terminals by connecting the positive(+) and negative
Practical tips 329
Page 429 of 516
Towing
this sectio n you 'll find informat ion about:
T owing on a comme rc ia l tow truc k . . . . . . . . . .
Tips on towing .......................... 33 1
Installing the front tow ing eye . . . . . . . . . . . . . . 332
Installing th e rear towing eye . . . . . . . . . . . . . . 333 Driving tips towing 333
Exterior views
295
WARNING
Never tow a vehicle without any electrical
power.
denly engage and you would not be able to steer of control the vehicle. trol of the vehicle, crash , and seriously injure yourself and others.
Towing on a
on page
To help avoid damaging th e vehicle , h ave it towed
o n ly by a professional towing company. Read and
heed the following
information:
General information
N ever let the vehic le be towed at speeds above
km).
Towing a vehicle changes the way it handles
and brakes . To help reduce the risk of an cident and serious personal injury, note the following:
ed:
-
will have to use considerably more
force to turn the steering wheel because
the power steering is not working.
stalling and removing the towing eye and the cover for the threaded hole behind the bumper.
Towing manual transmission vehicles
Release the parking brake .
the transm ission into Neutral (N).
necessary, the vehicle can also be towed with the rea r wheels off the grou nd
Towing automatic transmission vehicles
Release the parking brake.
the transm issio n into Neutral (N).
Tow the vehicle only with its fron t wheels off the
gro und
Page 430 of 516

When not to tow your
there is in the tr ansmission be
cause of damage to you r it must be moved
with the drive wheels off the ground . The vehicle
can only be towed if its ignition is switched on and
i ts electrica l system is operating. the following
situat ions, the vehicle cannot be towed at
the front and rear whee ls can not turn .
the vehic le battery is dead {because the elec
troni c steering column lock engages and cannot be
r e leased).
you have to tow an automatic transmission
vehic le more than 30
first read and note the introduc
on page
Towing eye; tow rope or tow bar
A towing eye is included in your vehic le 's tool kit. This can be inserted in a threaded hole in the front
bumper and used when your vehicl e is being tow
ed by ano ther vehicle.
The tow rope should be flexib le enough to he lp
protect both vehicles from damage. Use a synthet
ic fiber rope or similar rope .
Attach the tow rope or tow bar only
to the towing
eye in the vehic le
For the towed vehic le, note the following :
Put the transmission in Neu tral (N) .
Do not tow faster than 30 mph (50 km/h). The
drive rotates while the i
s being towe d with its rear wheels off the ground. This can damage the automatic transmission .
can
Do not tow more than 30 miles (50 km).
When a commerc ial towing truck is being used,
the must be towed with the front
wheels
transmiss ion fluid ha s out of the trans
mission.
the re is in the transmissio n be
cause of damage to your vehicle, it must be moved
w ith the drive whee ls off the ground.
the front and rear whee ls cannot turn.
When the vehicle battery is dead , since the
steering may remain disabl ed, and it may not be
poss ib le to rele ase the electronic steering column
lock.
you have to tow an auto matic transmiss ion
veh icle mor e than 30 miles (50 km).
A veh icle can be towed only if the electronic steer ing column lock is r e leased. case of a
power system,
the engine may have to be jump-started in order to release the electronic steering column lock .