Abs engine VOLKSWAGEN PASSAT 1997 B3, B4 / 3.G Service Repair Manual
[x] Cancel search | Manufacturer: VOLKSWAGEN, Model Year: 1997, Model line: PASSAT, Model: VOLKSWAGEN PASSAT 1997 B3, B4 / 3.GPages: 369, PDF Size: 12.33 MB
Page 265 of 369
Downloaded from www.Manualslib.com manuals search engine 47-24
Note:
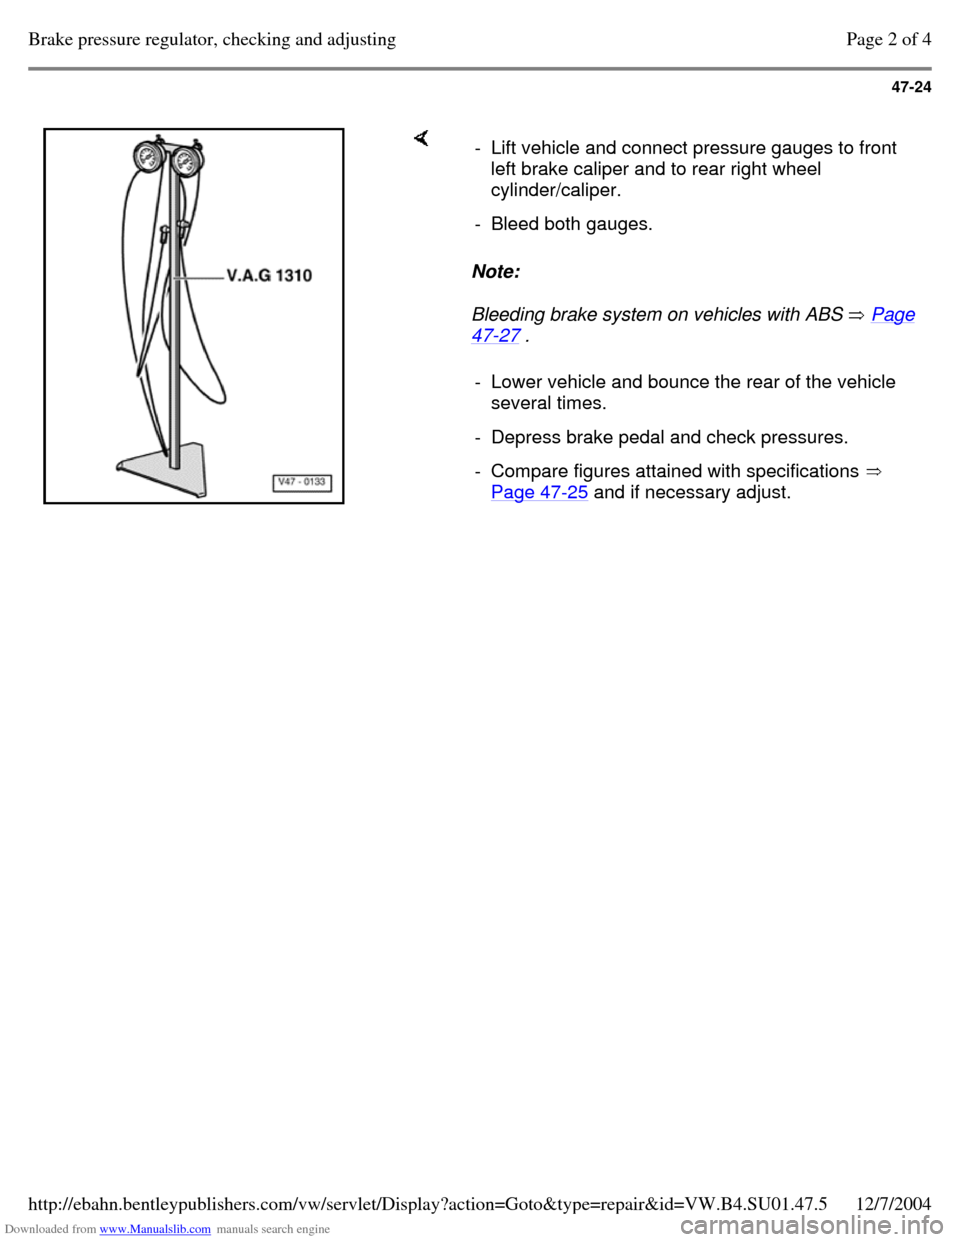
Bleeding brake system on vehicles with ABS Page 47-27 . - Lift vehicle and connect pressure gauges to front
left brake caliper and to rear right wheel
cylinder/caliper.
- Bleed both gauges. - Lower vehicle and bounce the rear of the vehicle
several times.
- Depress brake pedal and check pressures. - Compare figures attained with specifications
Page 47-25 and if necessary adjust. Page 2 of 4Brake pressure regulator, checking and adjusting12/7/2004http://ebahn.bentleypublishers.com/vw/servlet/Display?action=Goto&type=repair&id=VW.B4.SU01.47.5
Page 268 of 369
Downloaded from www.Manualslib.com manuals search engine 47-27
Brake system, bleeding
Brake system, bleeding (vehicles with
and without ABS, ABS/EDL)
Changing brake fluid
Repair Manual, Maintenance
Note:
Bleeding the brake system on vehicles with
ABS, ABS/EDL is performed as for vehicles
with conventional braking systems.
Only use new brake fluid conforming to US
standard FMVSS 116 DOT 4.
Genuine VW/Audi brake fluid conforms to this
specification.
Brake fluid is poisonous. Also due to its
corrosive effect brake fluid must not come into
contact with paintwork.
Brake fluid is hygroscopic, which means it
absorbs moisture from the ambient air and
should always be stored in air tight containers.
Rinse off spillages using plenty of water. Repair Manual, Brake System On Board Diagnostic (OBD), Repair Group 01 Page 1 of 3Brake system, bleeding12/7/2004http://ebahn.bentleypublishers.com/vw/servlet/Display?action=Goto&type=repair&id=VW.B4.SU01.47.6
Page 269 of 369

Downloaded from www.Manualslib.com manuals search engine 47-28
Brake system, bleeding (with pressure
bleeder VAS 5234)
Opening the hydraulic unit bleed screws on
vehicles with ABS, ABS/EDL is not permitted! Bleeding sequence
Note: - Connect VAS 5234 Brake filler and bleeder unit. - Open bleeder screws in the specified order and
bleed brake calipers and wheel cylinders.
1 - Right rear wheel cylinder/brake caliper 2 - Left rear wheel cylinder/brake caliper 3 - Right front brake caliper 4 - Left front brake caliper On vehicles with brake pressure regulator move
the regulator lever when bleeding rear brakes. Depress the brake pedal several times during
bleeding. Page 2 of 3Brake system, bleeding12/7/2004http://ebahn.bentleypublishers.com/vw/servlet/Display?action=Goto&type=repair&id=VW.B4.SU01.47.6
Page 270 of 369
Downloaded from www.Manualslib.com manuals search engine 47-29
Brake system, bleeding (without
pressure bleeder)
Opening the hydraulic unit bleed screws on
vehicles with ABS, ABS/EDL is not permitted!
- Build-up brake pressure in brake system by
pumping the brake pedal.
- Attach bleeder bottle hose and open bleeder
screw.
- With brake pedal held down, close bleeder
screw.
- Repeat operation until no air is present. Bleeding sequence Page 47-28 Changing brake fluid
Repair Manual, Maintenance Page 3 of 3Brake system, bleeding12/7/2004http://ebahn.bentleypublishers.com/vw/servlet/Display?action=Goto&type=repair&id=VW.B4.SU01.47.6
Page 285 of 369
Downloaded from www.Manualslib.com manuals search engine 48-15
Power steering gear, removing and
installing
When working on the power assisted steering
gear:
Absolute cleanliness is required when working
on the power steering.
Thoroughly clean connections and immediate
vicinity before loosening.
Place parts on a clean surface and cover if not
re-installing immediately.
Do not use fluffy cloths. Only unpack parts immediately prior to
installation.
Only use genuine packed parts. Vehicles with four wheel drive observe installing heat shield. Page 15 of 99Steering12/7/2004http://ebahn.bentleypublishers.com/vw/servlet/Display?action=Goto&type=repair&id=VW.B4.SU01.48.1
Page 313 of 369
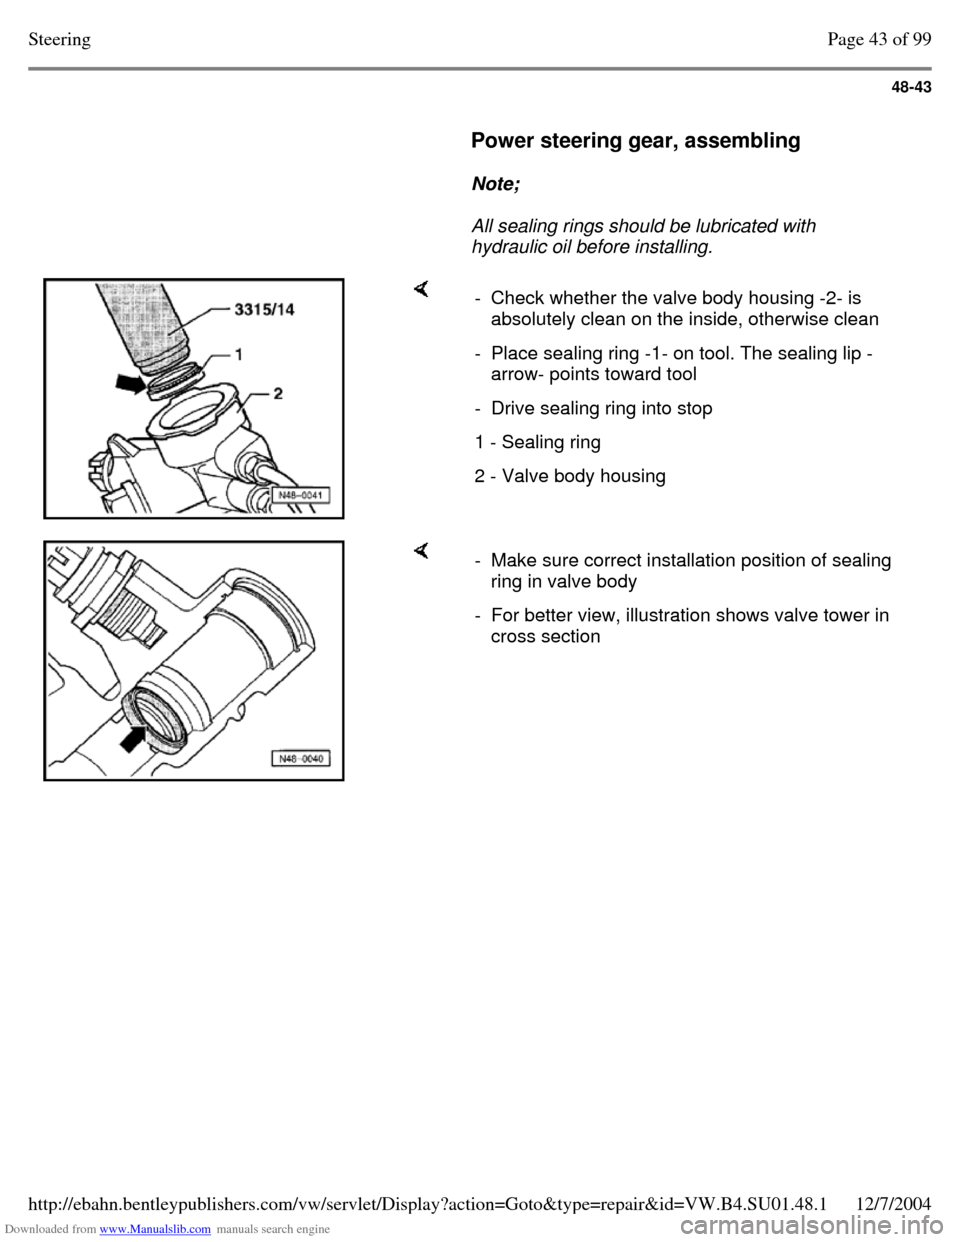
Downloaded from www.Manualslib.com manuals search engine 48-43
Power steering gear, assembling
Note;
All sealing rings should be lubricated with
hydraulic oil before installing. - Check whether the valve body housing -2- is
absolutely clean on the inside, otherwise clean
- Place sealing ring -1- on tool. The sealing lip -
arrow- points toward tool
- Drive sealing ring into stop 1 - Sealing ring 2 - Valve body housing - Make sure correct installation position of sealing
ring in valve body
- For better view, illustration shows valve tower in
cross section Page 43 of 99Steering12/7/2004http://ebahn.bentleypublishers.com/vw/servlet/Display?action=Goto&type=repair&id=VW.B4.SU01.48.1