check engine VOLKSWAGEN UP! 2021 Owner´s Manual
[x] Cancel search | Manufacturer: VOLKSWAGEN, Model Year: 2021, Model line: UP!, Model: VOLKSWAGEN UP! 2021Pages: 211, PDF Size: 5.98 MB
Page 101 of 211
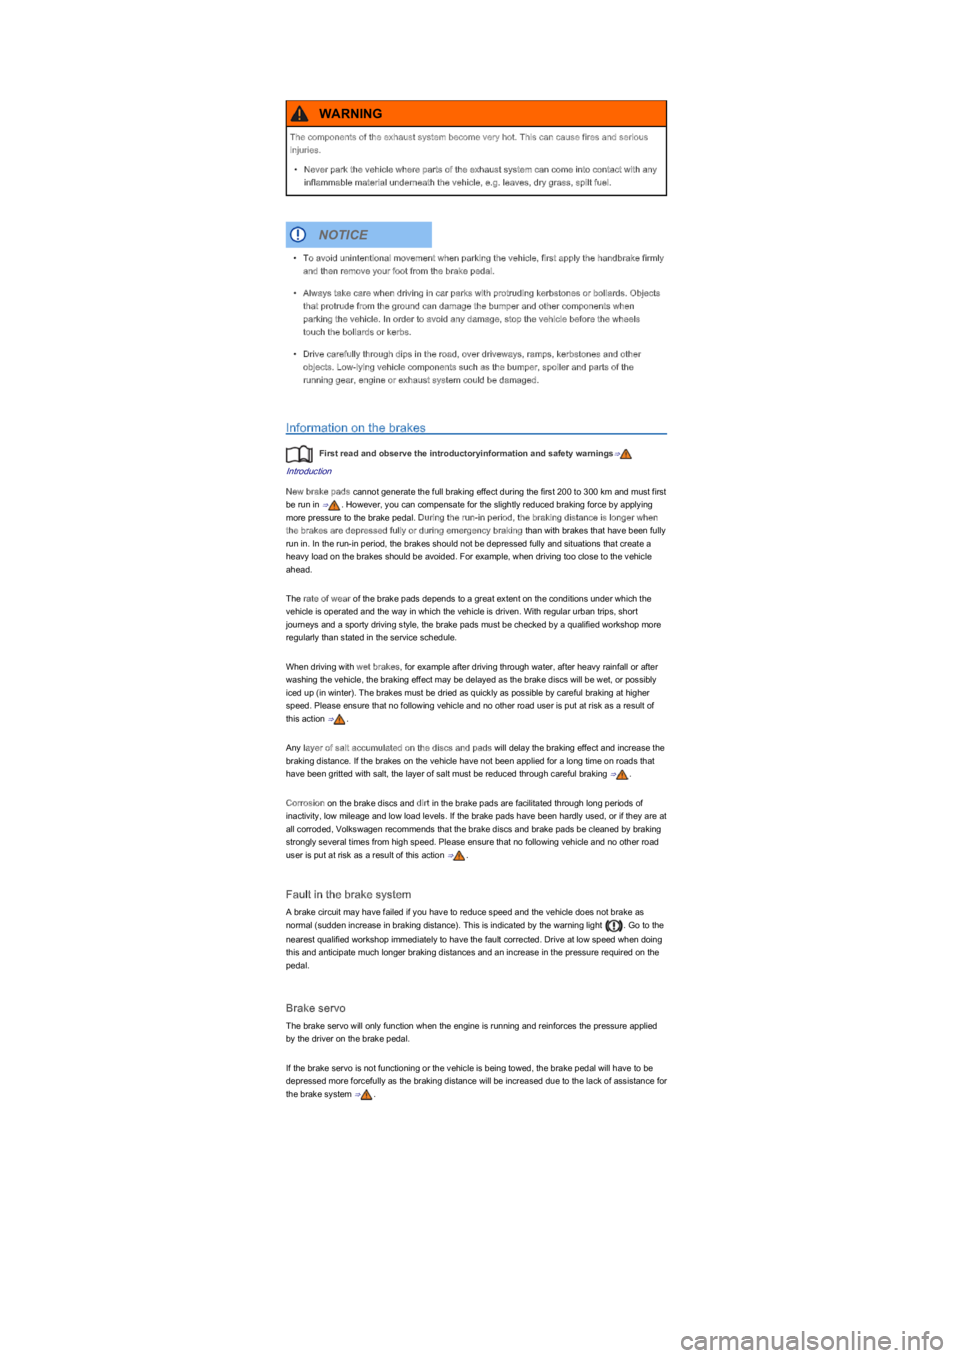
Information on the brakes
First read and observe the introductoryinformation and safety warnings⇒
Introduction
New brake pads cannot generate the full braking effect during the first 200 to 300 km and must first
be run in ⇒. However, you can compensate for the slightly reduced braking force by applying
more pressure to the brake pedal. During the run-in period, the braking distance is longer when
the brakes are depressed fully or during emergency braking than with brakes that have been fully
run in. In the run-in period, the brakes should not be depressed fully and situations that create a
heavy load on the brakes should be avoided. For example, when driving too close to the vehicle
ahead.
The rate of wear of the brake pads depends to a great extent on the conditions under which the
vehicle is operated and the way in which the vehicle is driven. With regular urban trips, short
journeys and a sporty driving style, the brake pads must be checked by a qualified workshop more
regularly than stated in the service schedule.
When driving with wet brakes, for example after driving through water, after heavy rainfall or after
washing the vehicle, the braking effect may be delayed as the brake discs will be wet, or possibly
iced up (in winter). The brakes must be dried as quickly as possible by careful braking at higher
speed. Please ensure that no following vehicle and no other road user is put at risk as a result of
this action ⇒.
Any layer of salt accumulated on the discs and pads will delay the braking effect and increase the
braking distance. If the brakes on the vehicle have not been applied for a long time on roads that
have been gritted with salt, the layer of salt must be reduced through careful braking ⇒.
Corrosion on the brake discs and dirt in the brake pads are facilitated through long periods of
inactivity, low mileage and low load levels. If the brake pads have been hardly used, or if they are at
all corroded, Volkswagen recommends that the brake discs and brake pads be cleaned by braking
strongly several times from high speed. Please ensure that no following vehicle and no other road
user is put at risk as a result of this action ⇒.
Fault in the brake system
A brake circuit may have failed if you have to reduce speed and the vehicle does not brake as
normal (sudden increase in braking distance). This is indicated by the warning light . Go to the
nearest qualified workshop immediately to have the fault corrected. Drive at low speed when doing
this and anticipate much longer braking distances and an increase in the pressure required on the
pedal.
Brake servo
The brake servo will only function when the engine is running and reinforces the pressure applied
by the driver on the brake pedal.
If the brake servo is not functioning or the vehicle is being towed, the brake pedal will have to be
depressed more forcefully as the braking distance will be increased due to the lack of assistance for
the brake system ⇒.
The components of the exhaust system become very hot. This can cause fires and serious
injuries.
•Never park the vehicle where parts of the exhaust system can come into contact with any
inflammable material underneath the vehicle, e.g. leaves, dry grass, spilt fuel.
WARNING
•To avoid unintentional movement when parking the vehicle, first apply the handbrake firmly
and then remove your foot from the brake pedal.
•Always take care when driving in car parks with protruding kerbstones or bollards. Objects
that protrude from the ground can damage the bumper and other components when
parking the vehicle. In order to avoid any damage, stop the vehicle before the wheels
touch the bollards or kerbs.
•Drive carefully through dips in the road, over driveways, ramps, kerbstones and other
objects. Low-lying vehicle components such as the bumper, spoiler and parts of the
running gear, engine or exhaust system could be damaged.
NOTICE
Page 102 of 211
If the front brake pads are tested, the rear brake pads should be tested at the same time.
Regularly check the thickness of the brake pads through the openings in the rims or from the
underside of the vehicle. If necessary, remove the wheels to carry out a comprehensive check.
Volkswagen recommends using a Volkswagen dealership for this purpose.
Brake assist systems
First read and observe the introductoryinformation and safety warnings⇒
Introduction
The brake assist systems ESC, ABS, EBV, BAS, TCS, TC and EDL will only function when the
engine is running. They make a considerable contribution to active driving safety.
Electronic stability control (ESC)
The ESC helps to reduce the risk of skidding and to improve driving stability by braking individual
wheels in certain driving situations. The ESC detects critical driving situations such as oversteer,
understeer and wheelspin. The system supports the stabilisation process for the vehicle by targeted
braking or by reducing engine torque.
ESC has its limitations. It is important to realise that ESC cannot overcome the laws of physics.
ESC will not be able to assist in every situation faced by a driver. For example, ESC will not be able
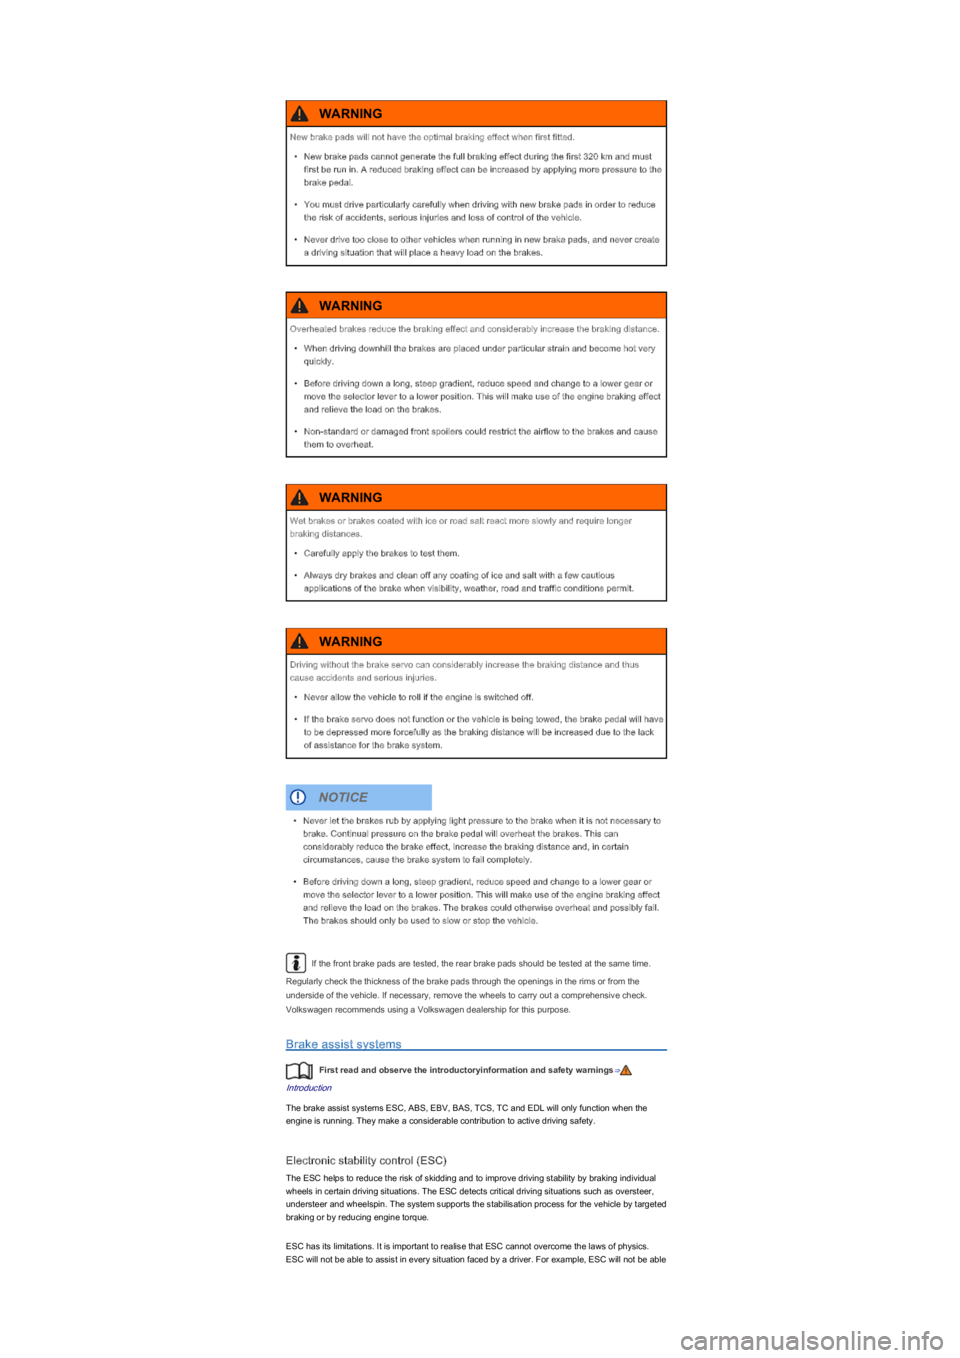
New brake pads will not have the optimal braking effect when first fitted.
•New brake pads cannot generate the full braking effect during the first 320 km and must
first be run in. A reduced braking effect can be increased by applying more pressure to the
brake pedal.
•You must drive particularly carefully when driving with new brake pads in order to reduce
the risk of accidents, serious injuries and loss of control of the vehicle.
•Never drive too close to other vehicles when running in new brake pads, and never create
a driving situation that will place a heavy load on the brakes.
WARNING
Overheated brakes reduce the braking effect and considerably increase the braking distance.
•When driving downhill the brakes are placed under particular strain and become hot very
quickly.
•Before driving down a long, steep gradient, reduce speed and change to a lower gear or
move the selector lever to a lower position. This will make use of the engine braking effect
and relieve the load on the brakes.
•Non-standard or damaged front spoilers could restrict the airflow to the brakes and cause
them to overheat.
WARNING
Wet brakes or brakes coated with ice or road salt react more slowly and require longer
braking distances.
•Carefully apply the brakes to test them.
•Always dry brakes and clean off any coating of ice and salt with a few cautious
applications of the brake when visibility, weather, road and traffic conditions permit.
WARNING
Driving without the brake servo can considerably increase the braking distance and thus
cause accidents and serious injuries.
•Never allow the vehicle to roll if the engine is switched off.
•If the brake servo does not function or the vehicle is being towed, the brake pedal will have
to be depressed more forcefully as the braking distance will be increased due to the lack
of assistance for the brake system.
WARNING
•Never let the brakes rub by applying light pressure to the brake when it is not necessary to
brake. Continual pressure on the brake pedal will overheat the brakes. This can
considerably reduce the brake effect, increase the braking distance and, in certain
circumstances, cause the brake system to fail completely.
•Before driving down a long, steep gradient, reduce speed and change to a lower gear or
move the selector lever to a lower position. This will make use of the engine braking effect
and relieve the load on the brakes. The brakes could otherwise overheat and possibly fail.
The brakes should only be used to slow or stop the vehicle.
NOTICE
Page 105 of 211
Before using a particular brake fluid, check that the specifications printed on the container
correspond to the vehicle requirements.
Brake fluid that is compliant with VW standard 501 14 is available from Volkswagen dealerships.
If this brake fluid is not available and it is necessary to use another high-quality brake fluid instead,
brake fluid that is compliant with DIN ISO 4925 CLASS 4 or US standard FMVSS 116 DOT 4 can
be used.
Not all brake fluids that are compliant with DIN ISO 4925 CLASS 4 or US standard FMVSS 116
DOT 4 have the same chemical composition. Some of these brake fluids may contain chemicals
that can damage or destroy brake system components over time.
Volkswagen therefore recommends the use of brake fluid that is compliant with
VW standard 501 14 to ensure sustained optimal operation of the brake system.
Brake fluid that is compliant with VW standard 501 14 fulfils the requirements of DIN ISO 4925
CLASS 4 or US standard FMVSS 116 DOT 4.
Brake fluid level
The brake fluid level must always be between the MIN and MAX marking on the brake fluid
container or above the MIN marking ⇒.
The brake fluid level cannot be checked accurately in all models as engine components may
partially conceal the brake fluid container. If the brake fluid level cannot be read exactly, please
proceed to a qualified workshop.
The brake fluid level drops slightly when the vehicle is being used as the brake pads wear and the
brakes are automatically adjusted.
Changing the brake fluid
The brake fluid must be changed as indicated in the service schedule ⇒BookletService schedule,.
The brake fluid should be changed by a qualified workshop. Volkswagen recommends using a
Volkswagen dealership for this purpose. Only brake fluid that conforms with the required
specification should be used.
Brake fluid can pollute the environment. Any spilt service fluids must be cleaned up and
disposed of properly.
Brake failure or reduced braking effect can be caused by the brake fluid level being too low or
by brake fluid that is too old or unsuitable.
•The brake system and brake fluid level must be checked regularly.
•The brake fluid should be changed regularly, according to the service schedule
⇒BookletService schedule,.
•Heavy use of the brakes may cause a vapour lock if the brake fluid is left in the system for
too long. Vapour locks reduce levels of braking power, considerably increase braking
distance and can cause the brake system to fail completely.
•Please ensure that the correct brake fluid is used. Only use brake fluid that is explicitly
compliant with VW standard 501 14.
•Any other brake fluid or a low-quality one can affect the functioning of the brakes and
reduce their effectiveness.
•If a brake fluid compliant with VW standard 501 14 is not available, use a high-quality
brake fluid compliant with DIN ISO 4925 CLASS 4 or the US standard FMVSS 116 DOT 4,
but only in exceptional circumstances.
•The refilled brake fluid must be new.
WARNING
Brake fluid is toxic.
•In order to reduce the risk of poisoning, never use bottles or other containers to store
brake fluid. These containers could encourage other people to drink out of them, even if
they are labelled otherwise.
•Brake fluid must always be stored in its original sealed container and kept out of the reach
of children.
WARNING
Brake fluid that has leaked or been spilt can damage the vehicle paintwork, plastic parts and
tyres. Brake fluid that has leaked or been spilt should be cleaned off the vehicle paintwork and
other components immediately.
NOTICE
Page 108 of 211
Avoid unnecessary loads
The lighter the vehicle, the more economical and environmentally-friendly it is. An extra weight of
100 kg can increase fuel consumption by up to 0.3 l/100 km.
Remove all unnecessary objects and loads from the vehicle.
Remove any unnecessary special equipment and accessories
The more aerodynamic a vehicle, the lower its fuel consumption. Special equipment and
accessories, such as roof carriers or bicycle carriers, make the vehicle less aerodynamic.
You should therefore remove any special equipment and luggage carriers that are not in use,
especially if you are going to be driving at high speeds.
Steering
Introduction
This chapter contains information on the followingsubjects:
⇒ Warning and indicator lamps
⇒ Information on steering
Depending on its equipment level the vehicle may have power steering.
The power steering is not hydraulic. It is an electromechanical system. The advantage of this
steering system is that no hydraulic hoses, hydraulic oil, pumps, filter or other parts are required.
The electromechanical system reduces fuel consumption. A hydraulic system requires constant oil
pressure in the system, whereas an electromechanical steering system only needs an energy
supply while steering.
The power steering provided by the electromechanical steering system automatically adjusts to the
vehicle speed, steering wheel torque and steering wheel angle. The electromechanical steering
only functions when the engine is running.
Additional information and warnings:
•Starting and stopping the engine ⇒ Starting and stopping the engine
•Battery ⇒ Vehicle battery
•Tow-starting and towing ⇒ Tow-starting and towing
Warning and indicator lamps
First read and observe the introductoryinformation and safety warnings⇒
Introduction
Lit upPossible causeSolution
The electromechanical steering is faulty
or not working.
The steering should be checked by a
qualified workshop as soon as possible.
Electromechanical steering function
reduced.
The steering should be checked by a
qualified workshop as soon as possible.
If the yellow warning lamp remains off after
the ignition has been restarted and you have
driven a short distance, you do not need to
consult a qualified workshop.
The vehicle battery has been
disconnected and reconnected.
Drive a short distance at a speed of
15 – 20 km/h (9 – 12 mph).
Several warning and indicator lamps will light up briefly as a functional check when the ignition is
switched on. They will go out soon afterwards.
If the power steering is not working, the steering wheel is difficult to turn, which makes it
difficult to steer the vehicle.
•The power steering only functions when the engine is running.
•Never allow the vehicle to roll if the engine is switched off.
•Never remove the vehicle key from the ignition lock when the vehicle is in motion. The
steering lock may be activated and you will no longer be able to steer the vehicle.
WARNING
Page 110 of 211
Indicator lamps
First read and observe the introductoryinformation and safety warnings⇒
Introduction
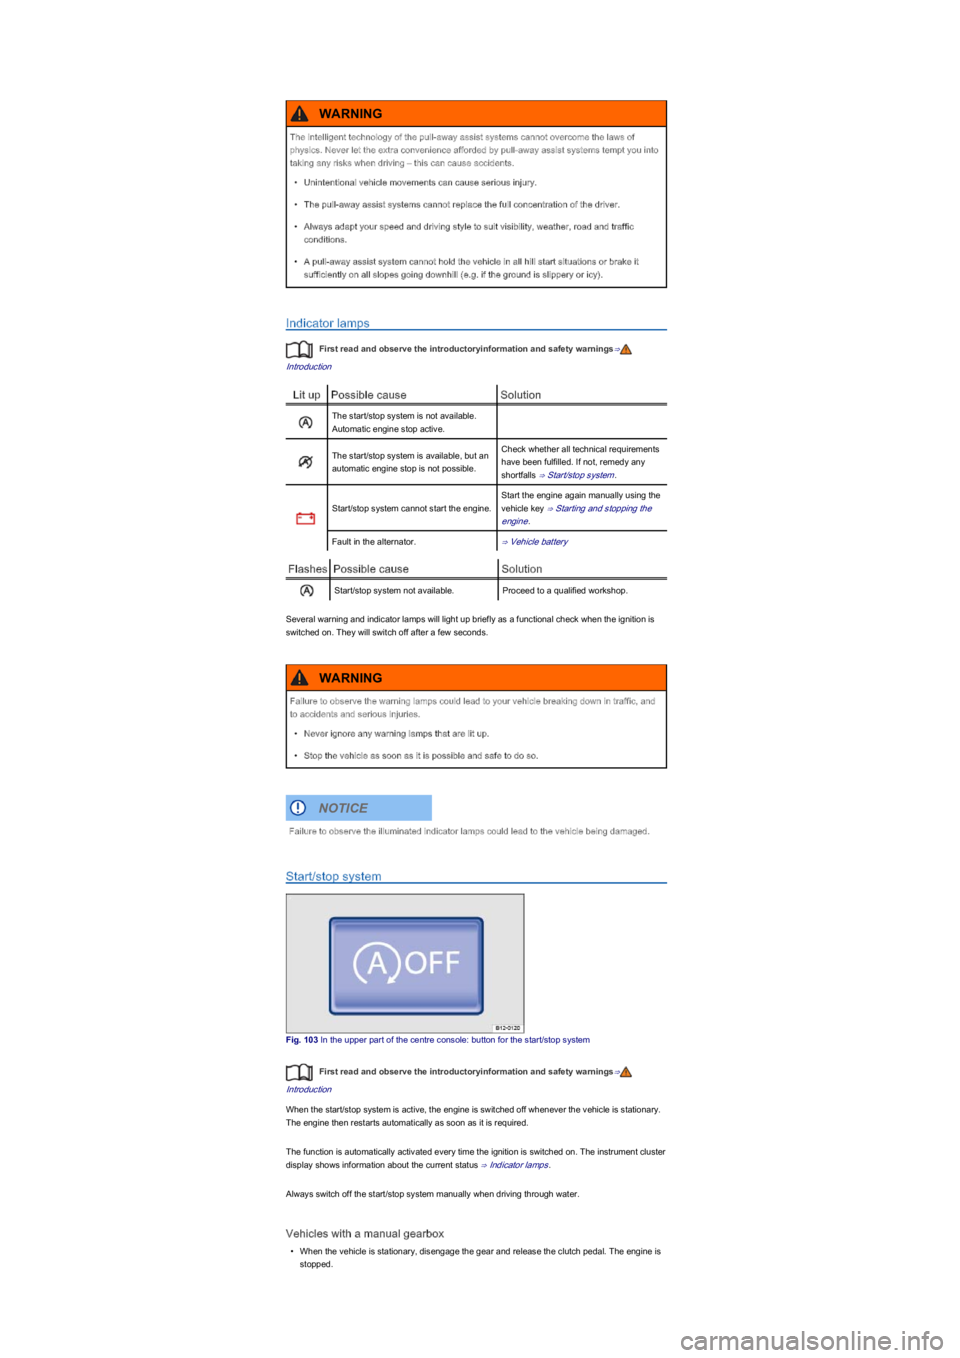
Lit upPossible causeSolution
The start/stop system is not available.
Automatic engine stop active.
The start/stop system is available, but an
automatic engine stop is not possible.
Check whether all technical requirements
have been fulfilled. If not, remedy any
shortfalls ⇒ Start/stop system.
Start/stop system cannot start the engine.
Start the engine again manually using the
vehicle key ⇒ Starting and stopping the
engine.
Fault in the alternator.⇒ Vehicle battery
FlashesPossible causeSolution
Start/stop system not available.Proceed to a qualified workshop.
Several warning and indicator lamps will light up briefly as a functional check when the ignition is
switched on. They will switch off after a few seconds.
Start/stop system
Fig. 103 In the upper part of the centre console: button for the start/stop system
First read and observe the introductoryinformation and safety warnings⇒
Introduction
When the start/stop system is active, the engine is switched off whenever the vehicle is stationary.
The engine then restarts automatically as soon as it is required.
The function is automatically activated every time the ignition is switched on. The instrument cluster
display shows information about the current status ⇒ Indicator lamps.
Always switch off the start/stop system manually when driving through water.
Vehicles with a manual gearbox
•When the vehicle is stationary, disengage the gear and release the clutch pedal. The engine is
stopped.
The intelligent technology of the pull-away assist systems cannot overcome the laws of
physics. Never let the extra convenience afforded by pull-away assist systems tempt you into
taking any risks when driving – this can cause accidents.
•Unintentional vehicle movements can cause serious injury.
•The pull-away assist systems cannot replace the full concentration of the driver.
•Always adapt your speed and driving style to suit visibility, weather, road and traffic
conditions.
•A pull-away assist system cannot hold the vehicle in all hill start situations or brake it
sufficiently on all slopes going downhill (e.g. if the ground is slippery or icy).
WARNING
Failure to observe the warning lamps could lead to your vehicle breaking down in traffic, and
to accidents and serious injuries.
•Never ignore any warning lamps that are lit up.
•Stop the vehicle as soon as it is possible and safe to do so.
WARNING
Failure to observe the illuminated indicator lamps could lead to the vehicle being damaged.
NOTICE
Page 121 of 211
•If vehicles are travelling towards you in the same lane.
•If the surrounding vehicles are very dirty and therefore not very reflective.
•If there is a lot of dust.
Air conditioning system
Heating, ventilating, cooling
Introduction
This chapter contains information on the followingsubjects:
⇒ Controls
⇒ General information on the heating and fresh air system
⇒ Information on the air conditioning system
⇒ Vents
⇒ Air recirculation mode
Dust and pollen filter
The dust and pollen filter reduces the level of impurities in the outside air entering the vehicle.
The dust and pollen filter must be changed regularly to avoid impairing the performance of the air
conditioning system.
The dust and pollen filter must be changed more frequently than stated in the service schedule if
the efficiency of the filter declines prematurely due to the vehicle being used in areas with high
levels of air pollution.
Additional information and warnings:
•Exterior views ⇒ Exterior views
•Volkswagen information system ⇒ Volkswagen information system
•Windscreen wiper/washer ⇒ Windscreen wiper and washer
•Cleaning and caring for the vehicle exterior ⇒ Caring for and cleaning the vehicle exterior
If the cooling system is switched off, the outside air that is drawn into the vehicle is not
dehumidified. To prevent the windows misting over, Volkswagen recommends that you leave the air
conditioning (compressor) switched on. Press the button. The indicator lamp in the button
must light up.
Maximum heat output, which is needed to defrost the windows as quickly as possible, is only
available when the engine has reached its operating temperature.
Poor visibility through all windows increases the risk of collisions and accidents, which can
cause serious injuries.
•Always ensure that all windows are free of ice, snow and mist to ensure good visibility.
•Maximum heat output, which is needed to defrost the windows as quickly as possible, is
only available when the engine has reached its operating temperature. Do not start your
journey until you have good visibility.
•Always ensure that the heating and fresh air system or the air conditioning system and the
heated rear window are used correctly in order to have good visibility.
•Never use the air recirculation mode for an extended period. If the cooling system is
switched off, the windows can mist up very quickly in air recirculation mode and reduce
visibility considerably.
•Always switch off the air recirculation mode when it is not required.
WARNING
Stale air can quickly cause tiredness and lack of concentration in the driver, which in turn can
cause collisions, accidents and serious injuries.
•Never switch off the blowers or switch on the air recirculation mode for an extended period
as this prevents fresh air from entering the vehicle interior.
WARNING
•Switch off the air conditioning system if you suspect that it has been damaged. This can
help to prevent further damage. The air conditioning system should be checked by a
qualified workshop.
•Repairs to the air conditioning system require specialist knowledge and special tools.
Volkswagen recommends using a Volkswagen dealership for this purpose.
NOTICE
Page 123 of 211
General information on the heating and fresh air system
First read and observe the introductoryinformation and safety warnings⇒
Introduction
The required interior temperature cannot be lower than the outside temperature as the heating and
fresh air system cannot cool or dehumidify the air.
Settings for optimal road visibility
•Set blower ⇒ Fig. 112② to level 1 or 2.
•Open and position all vents on the dash panel ⇒ Vents.
•Turn the air distribution controller ⇒ Fig. 112③ to the defrost position.
Information on the air conditioning system
First read and observe the introductoryinformation and safety warnings⇒
Introduction
The cooling system for the vehicle interior only works when the engine is running and the blower is
switched on.
The air conditioning system operates most effectively with the windows and the electric panorama
sliding and tilting glass roof closed. However, if the vehicle has heated up after standing in the sun
for some time, the air inside can be cooled more quickly by opening the windows and the electric
panorama sliding and tilting glass roof for a short time.
Settings for optimal road visibility
Switching the cooling system on not only reduces the temperature of the vehicle interior, but also
the humidity. This improves comfort for the vehicle occupants and prevents the windows from
misting when the outside humidity is high.
•Switch off air recirculation mode ⇒ Air recirculation mode.
•Set the blowers to the required level.
•Open and position all vents on the dash panel ⇒ Vents.
•Turn the air distribution controller to the defrost position.
•Press the button to switch the cooling system on. The indicator lamp in the button
lights up.
The cooling system cannot be switched on
The following criteria may prevent the cooling system from being switched on:
•The engine is not running.
•The blower is switched off.
•The air conditioning system fuse has blown.
•The ambient temperature is lower than approximately +2℃ (+36°F).
•The compressor has been temporarily switched off because the coolant temperature is too high.
•There is a different fault in the vehicle. The air conditioning system should be checked by a
qualified workshop.
Things to note
If the humidity and temperature outside the vehicle are high, condensation can drip off the
evaporator in the cooling system and form a pool underneath the vehicle. This is normal and does
not indicate a leak.
The windscreen may mist up after starting the engine due to residual humidity in the air
conditioning system. Switch the defrost function on in order to clear the windscreen of condensation
or mist as quickly as possible.
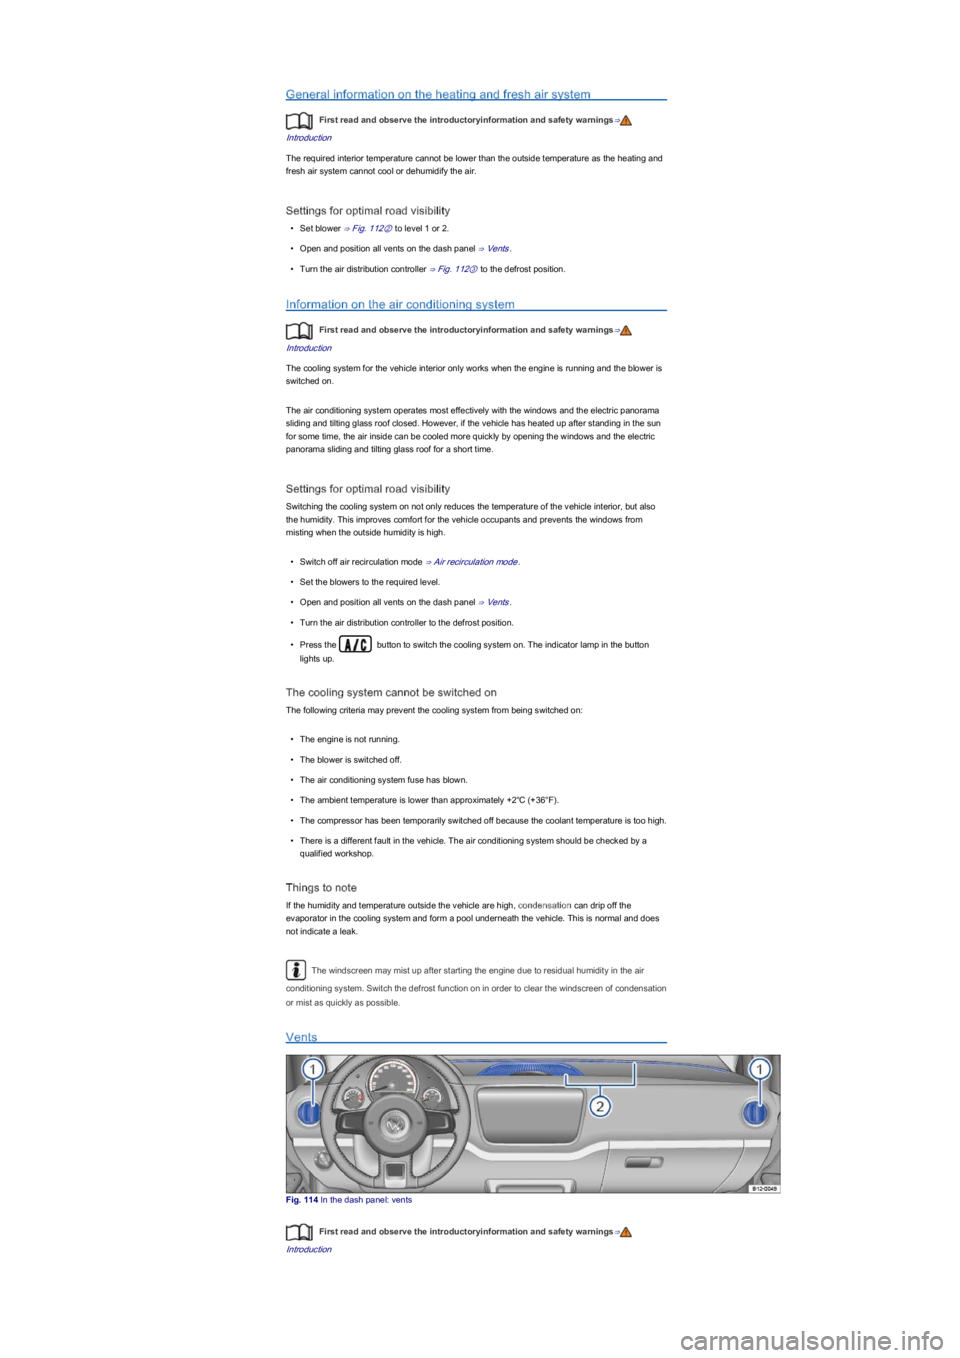
Vents
Fig. 114 In the dash panel: vents
First read and observe the introductoryinformation and safety warnings⇒
Introduction
Page 126 of 211
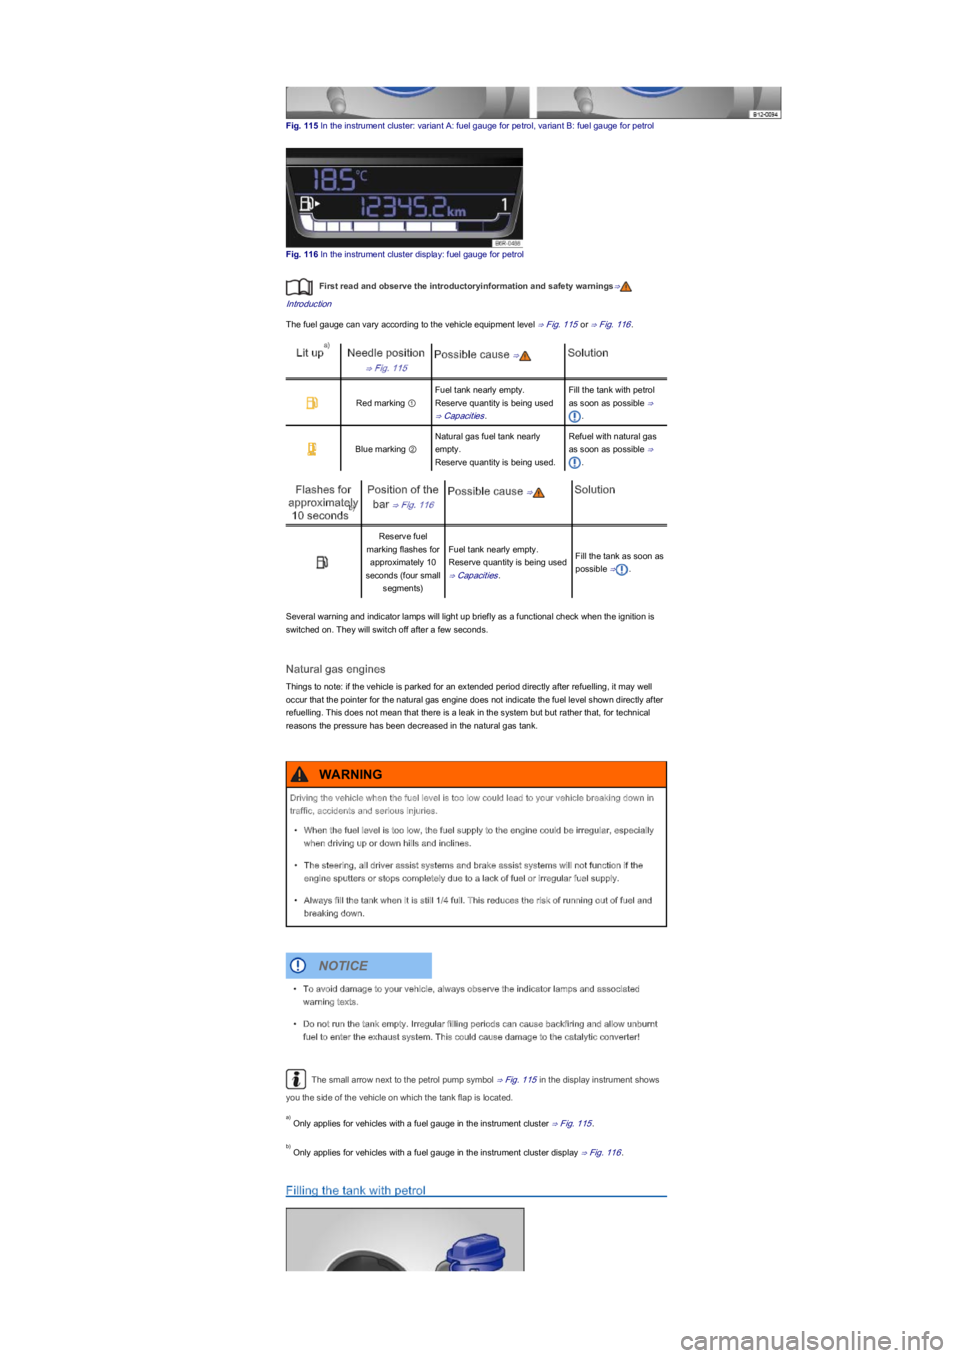
Fig. 115 In the instrument cluster: variant A: fuel gauge for petrol, variant B: fuel gauge for petrol
Fig. 116 In the instrument cluster display: fuel gauge for petrol
First read and observe the introductoryinformation and safety warnings⇒
Introduction
The fuel gauge can vary according to the vehicle equipment level ⇒ Fig. 115 or ⇒ Fig. 116.
Lit upNeedle position
⇒ Fig. 115
Possible cause ⇒Solution
Red marking ①
Fuel tank nearly empty.
Reserve quantity is being used
⇒ Capacities.
Fill the tank with petrol
as soon as possible ⇒
.
Blue marking ②
Natural gas fuel tank nearly
empty.
Reserve quantity is being used.
Refuel with natural gas
as soon as possible ⇒
.
Flashes for
approximately
10 seconds
Position of the
bar ⇒ Fig. 116
Possible cause ⇒Solution
Reserve fuel
marking flashes for
approximately 10
seconds (four small
segments)
Fuel tank nearly empty.
Reserve quantity is being used
⇒ Capacities.
Fill the tank as soon as
possible ⇒.
Several warning and indicator lamps will light up briefly as a functional check when the ignition is
switched on. They will switch off after a few seconds.
Natural gas engines
Things to note: if the vehicle is parked for an extended period directly after refuelling, it may well
occur that the pointer for the natural gas engine does not indicate the fuel level shown directly after
refuelling. This does not mean that there is a leak in the system but but rather that, for technical
reasons the pressure has been decreased in the natural gas tank.
The small arrow next to the petrol pump symbol ⇒ Fig. 115 in the display instrument shows
you the side of the vehicle on which the tank flap is located.
Only applies for vehicles with a fuel gauge in the instrument cluster ⇒ Fig. 115.
Only applies for vehicles with a fuel gauge in the instrument cluster display ⇒ Fig. 116.
Filling the tank with petrol
a)
b)
Driving the vehicle when the fuel level is too low could lead to your vehicle breaking down in
traffic, accidents and serious injuries.
•When the fuel level is too low, the fuel supply to the engine could be irregular, especially
when driving up or down hills and inclines.
•The steering, all driver assist systems and brake assist systems will not function if the
engine sputters or stops completely due to a lack of fuel or irregular fuel supply.
•Always fill the tank when it is still 1/4 full. This reduces the risk of running out of fuel and
breaking down.
WARNING
•To avoid damage to your vehicle, always observe the indicator lamps and associated
warning texts.
•Do not run the tank empty. Irregular filling periods can cause backfiring and allow unburnt
fuel to enter the exhaust system. This could cause damage to the catalytic converter!
NOTICE
a)
b)
Page 128 of 211
Switch off the engine, ignition and the mobile telephone before filling the tank and leave them
switched off during the process ⇒.
Please read and follow the instructions for the natural gas refuelling system.
The vehicle is not constructed for use with Liquefied Natural Gas (LNG) ⇒. Before refilling with
natural gas check that you are using the correct fuel ⇒ Fuel.
Opening the tank cap
The gas filler neck is located under the tank flap next to the petrol filler neck.
•The tank flap is at the rear of the vehicle on the right.
•Open the tank cap by the moulding to the rear.
Filling the tank
At very high ambient temperatures, the overheating protection function for the natural gas refuelling
system could switch off automatically.
•Remove the cap ⇒ Fig. 118① from the gas filler neck ②.
•Place the filler coupling for the refuelling system on the gas filler neck. Please refer to natural
gas refuelling system operating manual.
•The fuel tank is full when the compressor for the refuelling system switches off automatically.
•To end the refuelling procedure press the stop button on the refuelling system.
Closing the tank cap
•Check whether seal ⇒ Fig. 118③ on the gas filler neck has slipped onto the filler coupling.
Place the seal back in the gas filler neck as necessary.
•Push the cap ① onto the gas filler neck.
•Close the tank flap. The tank flap must be flush with the vehicle bodywork.
The filling couplings for the natural gas refuelling systems can be of various different
designs. Please ask for assistance from trained personnel if you are unsure of how to use the
system.
Noises which you may hear while refuelling are normal and do not indicate that the system is
malfunctioning.
The natural gas system in your vehicle is suitable for use with small compressors (slow fill)
and large compressors (fast fill).
Capacities
First read and observe the introductoryinformation and safety warnings⇒
Introduction
Fuel tank capacity
Petrol enginesapprox 35.0 l, of which 4.0 l reserve.
Natural gas engineNatural gas: approx. 11.0 kg of which reserve approx. 1.5 kg.
Petrol: approx. 10.0 l of which reserve approx. 5.0 l
Checks when filling the tank
First read and observe the introductoryinformation and safety warnings⇒
Introduction
Checklist
Never carry out any work on the engine or in the engine compartment if you are not familiar with
the necessary procedures and the general safety requirements or if the correct operating
Natural gas is highly explosive and inflammable. Failure to refuel properly with natural gas
could result in accidents, serious burns and other injuries.
•Lock the fuel filler nozzle correctly before refuelling natural gas. Stop refuelling
immediately if you start to smell gas.
WARNING
Your vehicle is not suitable for use with Liquefied Natural Gas and must not be filled up or
driven with Liquefied Natural Gas. Liquefied Natural Gas can cause an explosion in the
natural gas tank and serious injuries as a consequence.
WARNING
Page 129 of 211
Windscreen washer fluid level Windscreen wiper and washer
Engine oil level Engine oil
Engine coolant level Coolant
Brake fluid level Braking, stopping and parking
Tyre pressure Wheels and tyres
equipment, service fluids and unsuitable tools are not available ⇒ Preparation for working in the
engine compartment! The work should be carried out by a qualified workshop if you are
uncertain. Please ensure that the following are checked regularly, preferably every time you fill
the tank:
Vehicle lighting necessary for traffic safety:
- Turn signals
- Side lights, dipped beam headlights and main beam headlights
- Tail light cluster
- Brake lights
- Rear fog light ⇒ Lights
Information on changing bulbs ⇒ Changing bulbs.
Fuel
Introduction
This chapter contains information on the followingsubjects:
⇒ Petrol
⇒ Natural gas
Different engines require different fuels. The factory-fitted sticker on the inside of the tank flap
indicates the fuel type that is required for your particular vehicle.
Volkswagen recommends using low-sulphur or sulphur-free fuels, to help reduce fuel consumption
and prevent damage to the engine.
If the engine is not running smoothly or begins to judder, this can indicate poor or inadequate fuel
quality, e.g. water in the fuel. If these symptoms appear, reduce the vehicle speed immediately and
drive to the nearest qualified workshop at medium engine speeds, avoiding high engine loading. If
these symptoms occur immediately after the vehicle has been refuelled, switch the engine off as
soon as it is safe to do so and seek expert assistance. This can help to prevent further damage.
Additional information and warnings:
•⇒BookletService schedule,
•Filling the tank ⇒ Filling the tank
•Engine management and exhaust system ⇒ Engine management system and exhaust
purification system
Petrol
First read and observe the introductoryinformation and safety warnings⇒
Introduction
Petrol types
Vehicles with a petrol engine must be run on unleaded petrol in compliance with the European
standard EN 228 or DIN 51626-1 ⇒. Fuels with a maximum ethanol content of 10% (E10) can
be used for refuelling.
Petrol types are categorised according to their octane number, e.g. 91, 95, 98 or 99 RON (RON =
Research Octane Number). The vehicle may be filled with petrol that has a higher octane number
Incorrect handling of fuel can cause explosions, fire and serious burns and injuries.
•Fuel is highly explosive and inflammable.
•Never handle fuel near open flames, sparks or glowing matter (e.g. cigarettes).
•Keep naked flames, hot parts and sparks at a safe distance.
•Switch off your mobile telephone or two-way radio when dealing with fuel. Electromagnetic
radiation can generate sparks which can in turn start a fire.
•Avoid electrostatic discharge and electromagnetic radiation in the direct vicinity of fuels.
•Never spill fuel in the vehicle or in the luggage compartment.
•Comply with any relevant safety information and legislation concerning the handling of
fuels.
WARNING