door lock VOLVO S40 2008 Owners Manual
[x] Cancel search | Manufacturer: VOLVO, Model Year: 2008, Model line: S40, Model: VOLVO S40 2008Pages: 239, PDF Size: 5.94 MB
Page 4 of 239
Park assist (Option/accessory)162
5 Contents
09 Maintenance and servicing
Volvo maintenance200
Maintaining your car201
Hood203
Engine compartment204
Engine oil205
Fluids206
Wiper blades208
Battery209
Replacing bulbs211
Fuses220
10 Audio
Audio functions 230
Radio functions235
Sirius satellite radio (option or
retailer-installed accessory)237
CD player/CD changer (option)
241
Audio menu245
11 Specifications
Label information248
Dimensions and weights250
Engine oil253
Engine specifications255
Electrical system256
Volvo programs259
5 -
cont. Contents
12 Index
Index 260
6 Introduction
General information
Shiftlock (automatic transmission)
When your car is parked, the gear selector is locked in the Park ( P) position. To release the selector from this position,
turn the ignition key to position II (or start the engine), depress the brake pedal, press the button on the front side of the
gear selector and move the selector from Park ( P).
Keylock (automatic transmission)
When the ignition is switched off, the gear selector must be in the Park ( P) position before the key can be removed
from the ignition switch.
Anti-lock Brake System (ABS)
The ABS system in your car performs a self -diagnostic test when the vehicle first reaches the speed of approximately
12 mph (20 km/h). The brake pedal will pulsate several times and a sound may be audible from the ABS control
module. This is normal.
Fuel filler door
Press the button on the light switch panel when the car is at a standstill to open the fuel filler door.
Fuel filler cap
ProCarManuals.com
Page 20 of 239
In Canada
Volvo Cars of Canada Corp.
National Customer Service 175 Gordon Baker Road North York, Ontario M2H 2N7
1-800-663-8255
WARNING
No objects that add to the total weight on the seat should be placed on the front passenger's seat. If a child is
seated in the front passenger's seat with any additional weight, this extra weight could cause the OWS system to
enable the airbag, which might cause it to deploy in the event of a collision, thereby injuring the child.
The seat belt should never be wrapped around an object on the front passenger's seat. This could interfere with the
OWS system's function.
The front passenger's seat belt should never be used in a way that exerts more pressure on the passenger than
normal. This could increase the pressure exerted on the weight sensor by a child, and could result in the airbag being
enabled, which might cause it to deploy in the event of a collision, thereby injuring the child.
WARNING
Keep the following points in mind with respect to the OWS system. Failure to follow these instructions could
adversely affect the system's function and result in serious injury to the occupant of the front passenger's seat:
The full weight of the front seat passenger should always be on the seat cushion. The passenger should never lift
him/herself off the seat cushion using the armrest in the door or the center console, by pressing the feet on the floor,
by sitting on the edge of the seat cushion, or by pressing against the backrest in a way that reduces pressure on the
seat cushion. This could cause OWS to disable the passenger's side front airbag.
Do not place any type of object on the front passenger's seat in such a way that jamming, pressing, or squeezing
occurs between the object and the front seat, other than as a direct result of the correct use of the Automatic Locking
Retractor/Emergency Locking Retractor (ALR/ELR) seat belt (see page 32
).
No objects should be placed under the front passenger's seat. This could interfere with the OWS system's function.
24 01 Safety
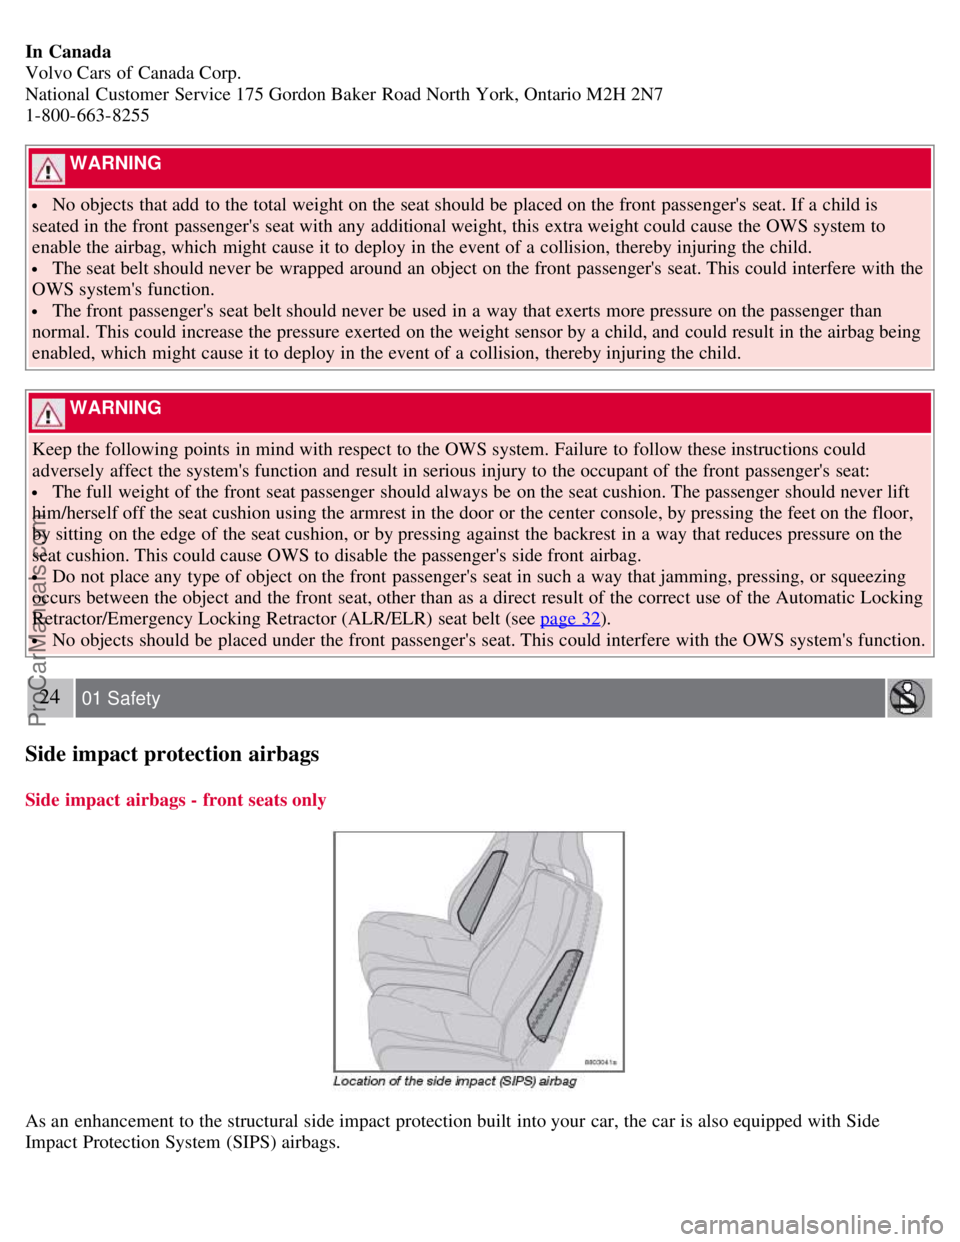
Side impact protection airbags
Side impact airbags - front seats only
As an enhancement to the structural side impact protection built into your car, the car is also equipped with Side
Impact Protection System (SIPS) airbags.
ProCarManuals.com
Page 27 of 239
Do not use child safety seats or child booster cushions/backrests in the front passenger's seat. We also recommend
that children under 4 feet 7 inches (140 cm) in height who have outgrown these devices sit in the rear seat with the
seat belt fastened.
Keep vehicle doors and trunk locked and keep keys out of a child's reach. Unsupervised children could lock
themselves in an open trunk and risk injury. Children should be taught not to play in vehicles.
On hot days, the temperature in the trunk or vehicle interior can rise very quickly. Exposure to these high
temperatures for even a short period of time can cause heat-related injury or death. Small children are particularly at
risk.
32 01 Safety
Child safety
Automatic Locking Retractor/Emergency Locking Retractor (ALR/ELR)
To make child seat installation easier, each seat belt (except for the driver's belt) is equipped with a locking mechanism
to help keep the seat belt taut.
When attaching the seat belt to a child seat:
Attach the seat belt to the child seat according to the child seat manufacturer's instructions.
Pull the seat belt out as far as possible.
Insert the seat belt latch plate into the buckle (lock) in the usual way.
Release the seat belt and pull it taut around the child seat.
A sound from the seat belt retractor will be audible at this time and is normal. The belt will now be locked in place.
This function is automatically disabled when the seat belt is unlocked and the belt is fully retracted.
WARNING
Do not use child safety seats or child booster cushions/backrests in the front passenger's seat. We also recommend
that children who have outgrown these devices sit in the rear seat with the seat belt properly fastened.
Volvo's recommendations
Why does Volvo believe that no child should sit in the front seat of a car? It's quite simple really. A front airbag is a
very powerful device designed, by law, to help protect an adult.
Because of the size of the airbag and its speed of inflation, a child should never be placed in the front seat, even if he
or she is properly belted or strapped into a child safety seat. Volvo has been an innovator in safety for over seventy-
five years, and we'll continue to do our part. But we need your help. Please remember to put your children in the back
seat, and buckle them up.
Volvo has some very specific recommendations:
Always wear your seat belt.
Airbags are a SUPPLEMENTAL safety device which, when used with a three-point seat belt can help reduce
serious injuries during certain types of accidents. Volvo recommends that you do not disconnect the airbag system in
your vehicle.
Volvo strongly recommends that everyone in the vehicle be properly restrained.
Volvo recommends that ALL occupants (adults and children) shorter than 4 feet 7 inches (140 cm) be seated in the
back seat of any vehicle with a front passenger side airbag.
Drive safely!
ProCarManuals.com
Page 40 of 239
47 02 Instruments and controls
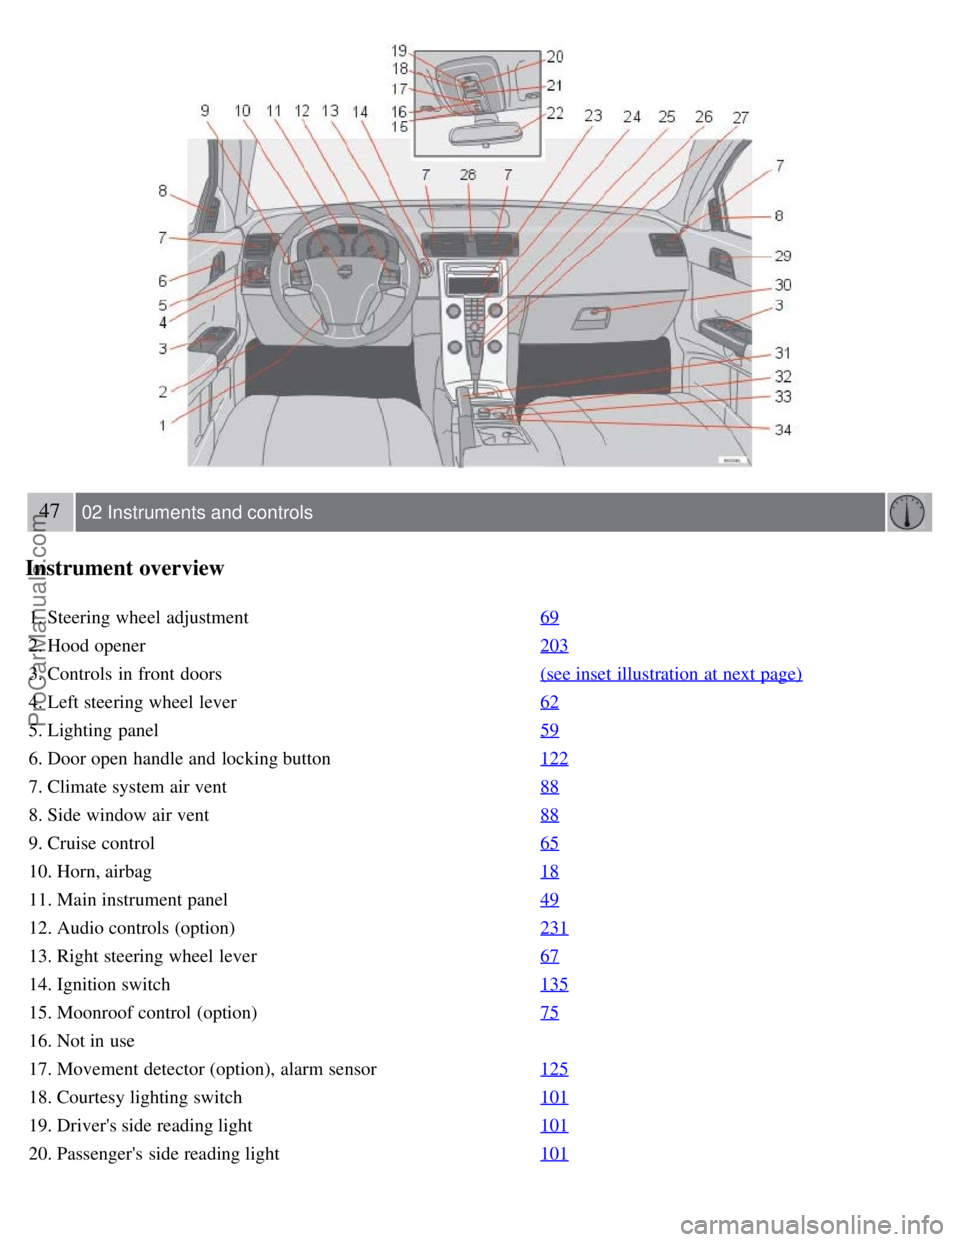
Instrument overview
1. Steering wheel adjustment69
2. Hood opener203
3. Controls in front doors(see inset illustration at next page)
4. Left steering wheel lever62
5. Lighting panel59
6. Door open handle and locking button122
7. Climate system air vent88
8. Side window air vent88
9. Cruise control65
10. Horn, airbag18
11. Main instrument panel49
12. Audio controls (option)231
13. Right steering wheel lever67
14. Ignition switch135
15. Moonroof control (option)75
16. Not in use
17. Movement detector (option), alarm sensor125
18. Courtesy lighting switch101
19. Driver's side reading light101
20. Passenger's side reading light101
ProCarManuals.com
Page 41 of 239
21. Seat belt reminder and Occupant Weight Sensor indicator54
22. Rear-view mirror73
23. Display for climate control, personal settings,and audio system77/230
24. Audio system 230
25. Controls for personal settings and audio system77/230
26. Controls for climate system 89/92
27. Gear selector, manual 139 -140
Gear selector, automatic141
28. Hazard warning flashers69
29. Door open handle, and locking button122
30. Glove compartment104/123
31. Parking brake 70
32. 12-volt socket58
33. Not in use
34. Not in use
48 02 Instruments and controls
Instrument overview
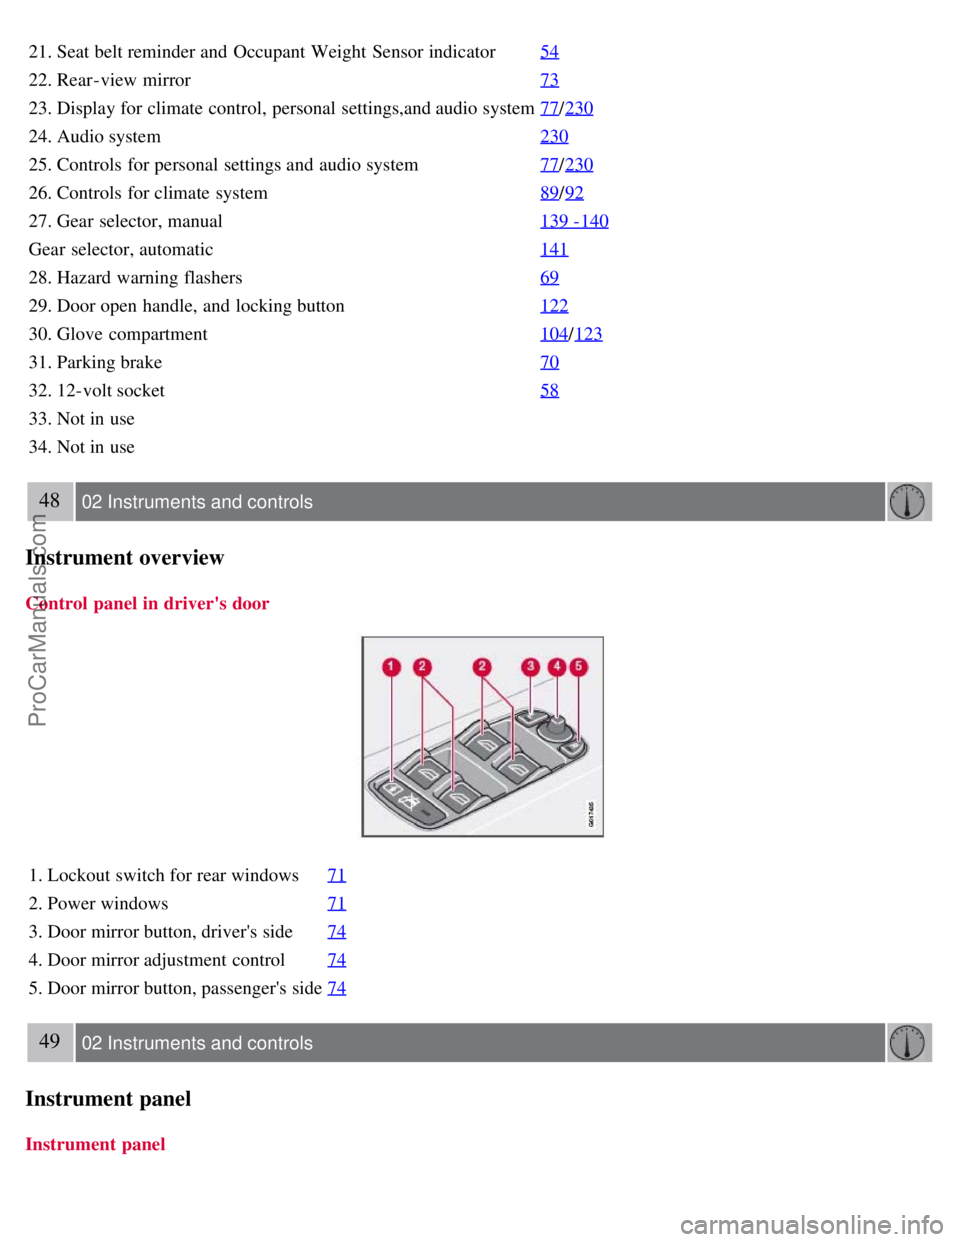
Control panel in driver's door
1. Lockout switch for rear windows71
2. Power windows71
3. Door mirror button, driver's side74
4. Door mirror adjustment control74
5. Door mirror button, passenger's side74
49 02 Instruments and controls
Instrument panel
Instrument panel
ProCarManuals.com
Page 53 of 239
NOTE
To make it easier to read the odometer, trip odometer, clock, and ambient temperature, these gauges illuminate when
the vehicle is unlocked and when the key has been removed from the ignition switch. The lighting will go out when
the vehicle is locked.
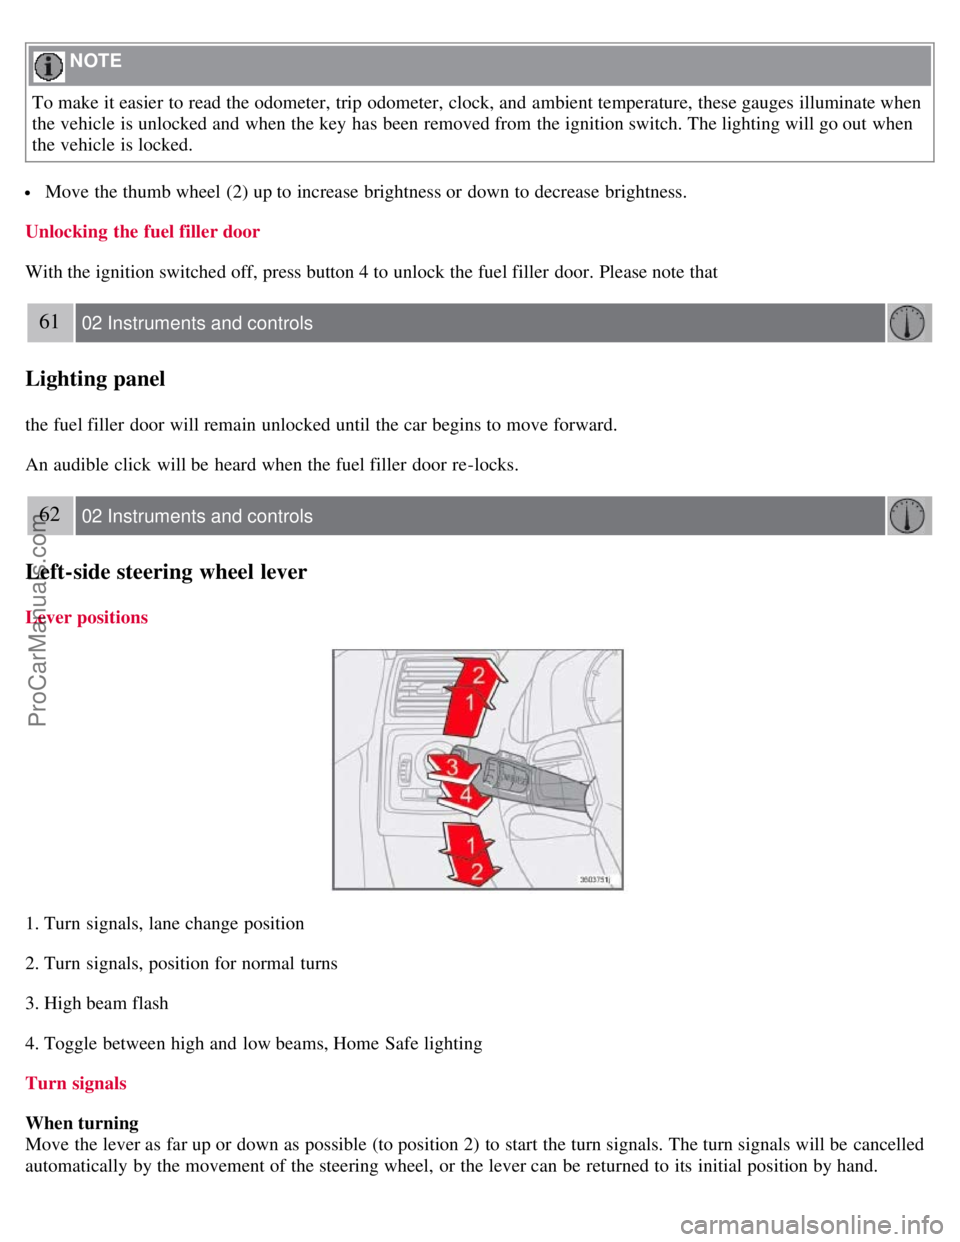
Move the thumb wheel (2) up to increase brightness or down to decrease brightness.
Unlocking the fuel filler door
With the ignition switched off, press button 4 to unlock the fuel filler door. Please note that
61 02 Instruments and controls
Lighting panel
the fuel filler door will remain unlocked until the car begins to move forward.
An audible click will be heard when the fuel filler door re-locks.
62 02 Instruments and controls
Left-side steering wheel lever
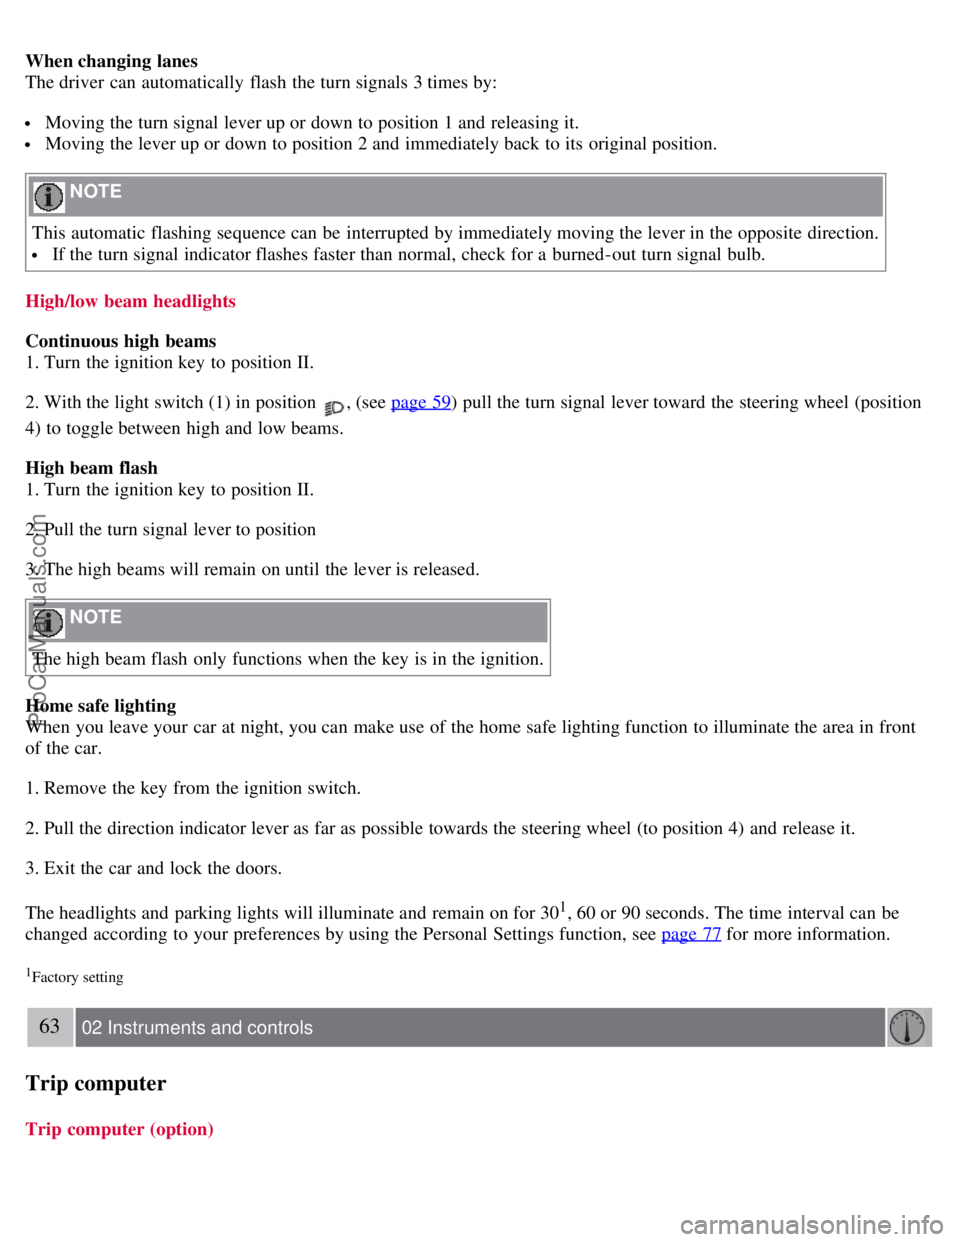
Lever positions
1. Turn signals, lane change position
2. Turn signals, position for normal turns
3. High beam flash
4. Toggle between high and low beams, Home Safe lighting
Turn signals
When turning
Move the lever as far up or down as possible (to position 2) to start the turn signals. The turn signals will be cancelled
automatically by the movement of the steering wheel, or the lever can be returned to its initial position by hand.
ProCarManuals.com
Page 54 of 239
When changing lanes
The driver can automatically flash the turn signals 3 times by:
Moving the turn signal lever up or down to position 1 and releasing it.
Moving the lever up or down to position 2 and immediately back to its original position.
NOTE
This automatic flashing sequence can be interrupted by immediately moving the lever in the opposite direction.
If the turn signal indicator flashes faster than normal, check for a burned-out turn signal bulb.
High/low beam headlights
Continuous high beams
1. Turn the ignition key to position II.
2. With the light switch (1) in position
, (see page 59) pull the turn signal lever toward the steering wheel (position
4) to toggle between high and low beams.
High beam flash
1. Turn the ignition key to position II.
2. Pull the turn signal lever to position
3. The high beams will remain on until the lever is released.
NOTE
The high beam flash only functions when the key is in the ignition.
Home safe lighting
When you leave your car at night, you can make use of the home safe lighting function to illuminate the area in front
of the car.
1. Remove the key from the ignition switch.
2. Pull the direction indicator lever as far as possible towards the steering wheel (to position 4) and release it.
3. Exit the car and lock the doors.
The headlights and parking lights will illuminate and remain on for 30
1, 60 or 90 seconds. The time interval can be
changed according to your preferences by using the Personal Settings function, see page 77
for more information.
1Factory setting
63 02 Instruments and controls
Trip computer
Trip computer (option)
ProCarManuals.com
Page 63 of 239
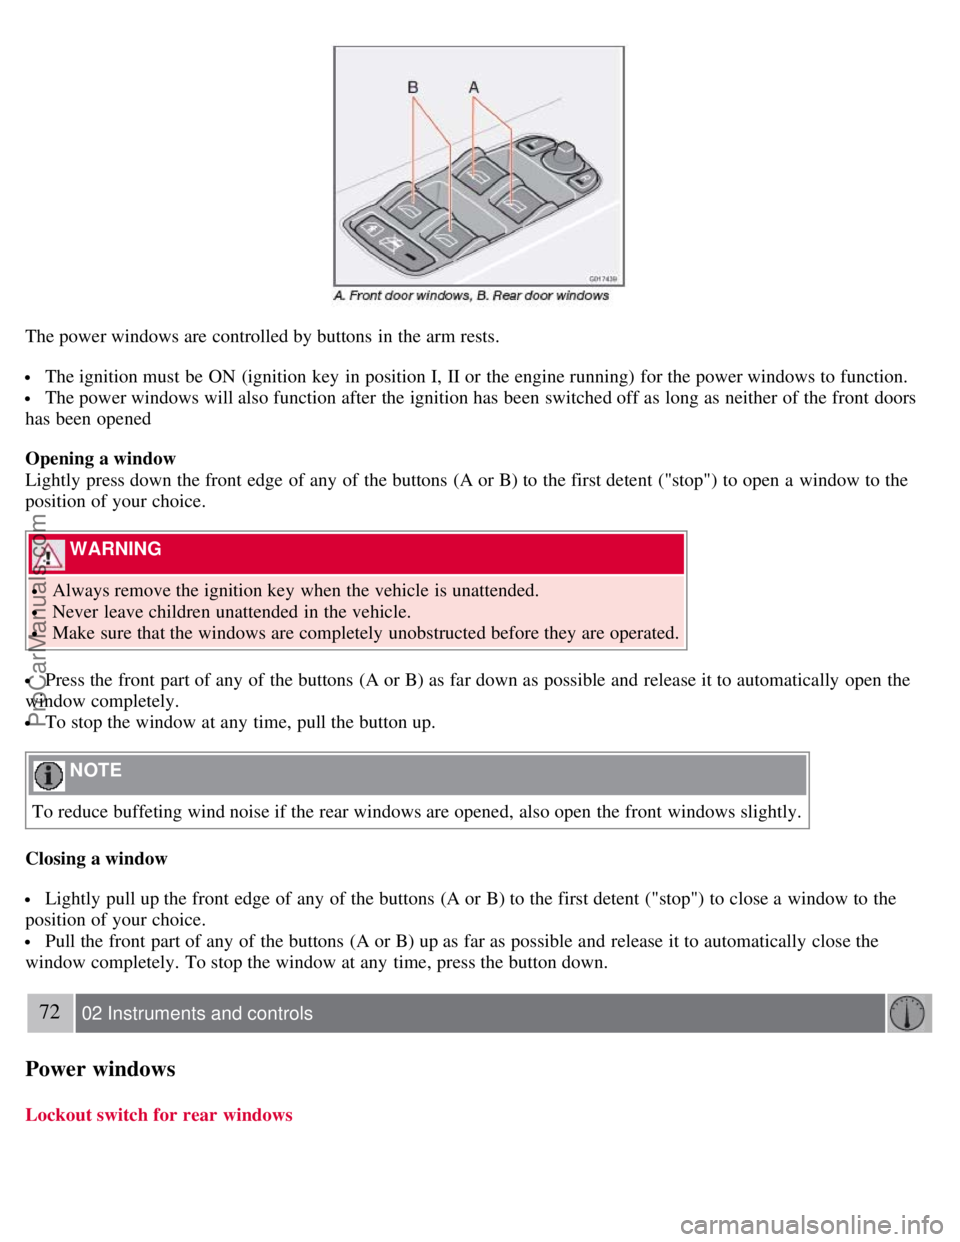
The power windows are controlled by buttons in the arm rests.
The ignition must be ON (ignition key in position I, II or the engine running) for the power windows to function.
The power windows will also function after the ignition has been switched off as long as neither of the front doors
has been opened
Opening a window
Lightly press down the front edge of any of the buttons (A or B) to the first detent ("stop") to open a window to the
position of your choice.
WARNING
Always remove the ignition key when the vehicle is unattended.
Never leave children unattended in the vehicle.
Make sure that the windows are completely unobstructed before they are operated.
Press the front part of any of the buttons (A or B) as far down as possible and release it to automatically open the
window completely.
To stop the window at any time, pull the button up.
NOTE
To reduce buffeting wind noise if the rear windows are opened, also open the front windows slightly.
Closing a window
Lightly pull up the front edge of any of the buttons (A or B) to the first detent ("stop") to close a window to the
position of your choice.
Pull the front part of any of the buttons (A or B) up as far as possible and release it to automatically close the
window completely. To stop the window at any time, press the button down.
72 02 Instruments and controls
Power windows
Lockout switch for rear windows
ProCarManuals.com
Page 71 of 239
To access the menu and adjust settings:
1. Press MENU (B).
2. Scroll to "Car Settings" using the menu navigation control (E).
3. Press ENTER (D).
4. Select an alternative using the menu navigation control (E).
5. Confirm your selection by pressing ENTER.
To exit the menu:
Press EXIT (C).
Available settings
Clock adjust
To set the time:
1. Use the number keys or the up/down arrow keys on the navigation control (E) to change the hour or minute.
2. Select hour(s) or minute(s) to be changed with the left/right arrow keys.
3. Press ENTER to start the clock.
NOTE
If you are currently using the 12-hour time setting, use the up/down arrow keys to select AM/PM after the minute-
setting has been adjusted.
Lock confirmation light
When the car is locked/unlocked with the remote control, the direction indicators can be selected to flash to confirm
the action. The alternatives On/Off are available for both locking and unlocking.
78 02 Instruments and controls
Personal settings
Autolock
When the car starts to move, the doors and trunk can be locked automatically. The alternatives On/Off are available.
NOTE
Pulling the handle twice on a door unlocks and opens that door.
Unlock
There are two alternatives for unlocking:
1. Global (All doors) - unlocks all doors and the trunk with one press on the remote control.
2. Two Step (Two-stage unlocking) - This alternative unlocks the driver's door with one press on the remote control. A
second press unlocks the passenger's door and the trunk.
ProCarManuals.com
Page 72 of 239
Operating side windows
The following alternatives can be selected for opening and/or closing all side windows at the same time by pressing
and holding the Lock/Unlock switch in either of the front doors (see also page 122
for additional information) 1.
Auto close all windows On/Off
Auto open all windows On/Off
1This menu alternative also makes it possible to open all side windows by pressing and holding the Unlock button on the remote control for several
seconds.
NOTE
The ignition key must be in position I or higher (see page 135
) before all side windows can be opened/closed using
the switches in the front doors.
Approach lighting
This alternative determines the length of time for which the car's lights will remain on when the Approach light button
on the central locking system's remote control is pressed. Intervals of 30/60/90 seconds may be selected. See page 113
for more information.
Home safe lighting
This alternative determines the length of time for which the car's lights will remain on when the high beam lever on the
steering column is pulled toward the wheel with the ignition switched off. Intervals of 30/60/90 seconds may be
selected. See page 62
for information on using this function.
Information
VIN number - The VIN (Vehicle Identification Number) is the car's unique identity number.
Number of Keys - the number of keys registered for the car is displayed here.
Climate functions
Blower speed in AUTO mode - the blower speed can be set to AUTO mode in models equipped with ECC. Choose
between "Low", "Normal" and "High".
Timer for recirculation - when the timer is active, the air recirculates in the car for 3-12 minutes depending on the
ambient temperature. Select On/Off depending on whether the recirculation timer is to be active or not.
Keyless locking and unlocking (option as available)
The following alternatives can be selected for locking and unlocking the doors and trunk:
All doors - all doors are locked or unlocked at the same time.
Doors on the same side - front and rear doors on the same side are unlocked together.
Both front doors - both front doors are unlocked together.
One front door - either of the front doors can be unlocked separately2.
2Factory default
79 02 Instruments and controls
Personal settings
Reset to factory settings
Use this alternative to return to the default climate system settings.
ProCarManuals.com