ECO mode VOLVO S60 2007 Owner's Manual
[x] Cancel search | Manufacturer: VOLVO, Model Year: 2007, Model line: S60, Model: VOLVO S60 2007Pages: 200, PDF Size: 4.03 MB
Page 130 of 200
Maximum permissible inflation pressure: the greatest amount of air pressure that should ever be put in the tire.
This limit is set by the tire manufacturer.
Recommended tire inflation pressure: inflation pressure, established by Volvo, which is based on the type of tires
that are mounted on a vehicle at the factory. This inflation pressure is affected by the number of occupants in the
vehicle, the amount of cargo, and the speed at which the vehicle will be driven for a prolonged period. This
information can be found on the tire inflation placard(s) located on the driver's side B-pillar or on the inside of the fuel
filler door on Canadian models, and in the tire inflation table in this chapter.
Cold tires : The tires are considered to be cold when they have the same temperature as the surrounding (ambient)
air. This temperature is normally reached after the vehicle has been parked for at least 3 hours.
pg. 153 Wheels and tires
Vehicle loading
Properly loading your vehicle will provide maximum return of vehicle design performance.
Before loading your vehicle, familiarize yourself with the following terms for determining your vehicle's weight
ratings, with or without a trailer, from the vehicle's Federal/ Canadian Motor Vehicle Safety Standards
(FMVSS/CMVSS) label, and the vehicle's tire information placard:
Curb weight
The weight of the vehicle including a full tank of fuel and all standard equipment. It does not include passengers,
cargo, or optional equipment.
Capacity weight
All weight added to the curb weight, including cargo and optional equipment. When towing, trailer hitch tongue load
is also part of cargo weight.
NOTE: For trailer towing information, please refer to the section "Towing a trailer" on page 131
.
Permissible axle weight
The maximum allowable weight that can be carried by a single axle (front or rear). These numbers are shown on the
Federal/Canadian Motor Vehicle Safety Standards (FMVSS/ CMVSS) label. The total load on each axle must never
exceed its maximum permissible weight.
Gross vehicle weight (GVW)
The vehicle's curb weight + cargo + passengers.
NOTE:
The location of the various labels in your vehicle can be found on page 199.
A table listing important weight limits for your vehicle can be found on page 201.
Steps for Determining Correct Load Limit
- Locate the statement "the combined weight of occupants and cargo should never exceed XXX pounds'' on your
vehicle's placard.
- Determine the combined weight of the driver and passengers that will be riding in your vehicle.
- Subtract the combined weight of the driver and passengers from XXX kilograms or XXX pounds.
- The resulting figure equals the available amount of cargo and luggage load capacity. For example, if the Ô'XXX''
amount equals 1400 lbs. and there will be five 150 lb. passengers in your vehicle, the amount of available cargo and
luggage load capacity is 650 lbs. (1400- 750 (5 x 150) = 650 lbs.)
- Determine the combined weight of luggage and cargo being loaded on the vehicle. That weight may not safely
exceed the available cargo and luggage load capacity calculated in Step 4.
- If your vehicle will be towing a trailer, load from your trailer will be transferred to your vehicle. Consult this
1
ProCarManuals.com
Page 149 of 200
Synthetic oil is not used when the oil is changed at the normal maintenance intervals except at owner request and at
additional charge. Please consult your Volvo retailer.
Checking and adding oil
The oil level should be checked every time the vehicle is refueled. This is especially important during the period up to
the first scheduled maintenance service.
The vehicle should be parked on a level surface when the oil is checked.
If the engine is warm, wait for at least 10-15 minutes after the engine has been switched off before checking the oil.
Checking the oil
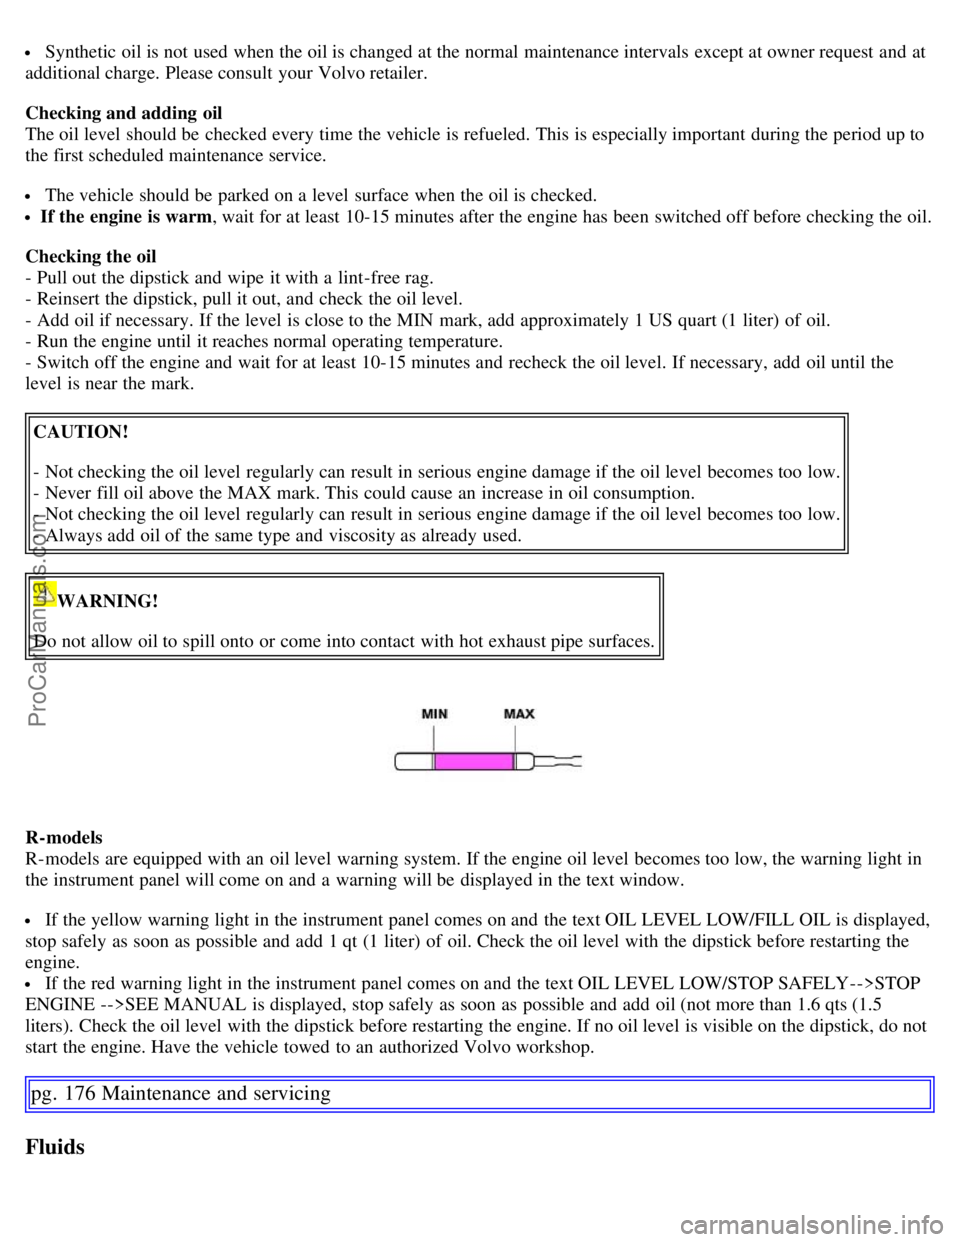
- Pull out the dipstick and wipe it with a lint-free rag.
- Reinsert the dipstick, pull it out, and check the oil level.
- Add oil if necessary. If the level is close to the MIN mark, add approximately 1 US quart (1 liter) of oil.
- Run the engine until it reaches normal operating temperature.
- Switch off the engine and wait for at least 10-15 minutes and recheck the oil level. If necessary, add oil until the
level is near the mark.
CAUTION!
- Not checking the oil level regularly can result in serious engine damage if the oil level becomes too low.
- Never fill oil above the MAX mark. This could cause an increase in oil consumption.
- Not checking the oil level regularly can result in serious engine damage if the oil level becomes too low.
- Always add oil of the same type and viscosity as already used.
WARNING!
Do not allow oil to spill onto or come into contact with hot exhaust pipe surfaces.
R-models
R-models are equipped with an oil level warning system. If the engine oil level becomes too low, the warning light in
the instrument panel will come on and a warning will be displayed in the text window.
If the yellow warning light in the instrument panel comes on and the text OIL LEVEL LOW/FILL OIL is displayed,
stop safely as soon as possible and add 1 qt (1 liter) of oil. Check the oil level with the dipstick before restarting the
engine.
If the red warning light in the instrument panel comes on and the text OIL LEVEL LOW/STOP SAFELY-->STOP
ENGINE -->SEE MANUAL is displayed, stop safely as soon as possible and add oil (not more than 1.6 qts (1.5
liters). Check the oil level with the dipstick before restarting the engine. If no oil level is visible on the dipstick, do not
start the engine. Have the vehicle towed to an authorized Volvo workshop.
pg. 176 Maintenance and servicing
Fluids
ProCarManuals.com
Page 179 of 200
DualDisc: The audio side of a DualDisc (combined CD/DVD) does not meet CD specifications and may not play in
your audio system.
Do not put tape or labels on the disc itself.
Volvo does not recommend the use of plastic outer rings on the disc.
Condensation may occur on discs/optical components of the changer in cold winter weather. The disc can be dried
with a clean, lint-free cloth. Optical components in the CD changer may, however, take up to one hour to dry off.
Never attempt to play a disc which is damaged in any way.
When not in use, the discs should be stored in their covers. Avoid storing discs in excessive heat, direct sunlight or
dusty locations.
1. T5 and R- models: six speakers
pg. 213 Specifications
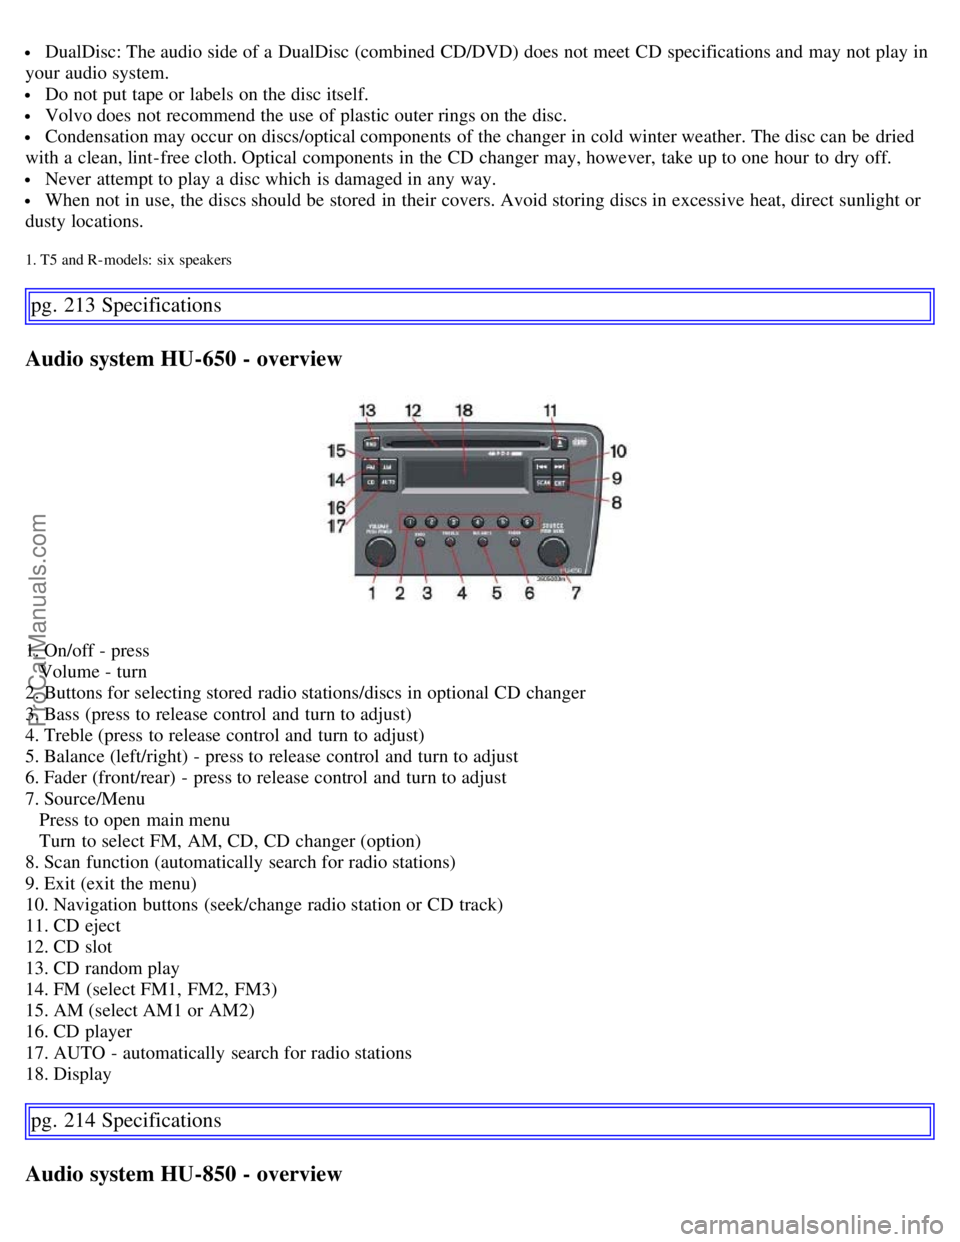
Audio system HU-650 - overview
1. On/off - press
Volume - turn
2. Buttons for selecting stored radio stations/discs in optional CD changer
3. Bass (press to release control and turn to adjust)
4. Treble (press to release control and turn to adjust)
5. Balance (left/right) - press to release control and turn to adjust
6. Fader (front/rear) - press to release control and turn to adjust
7. Source/Menu
Press to open main menu
Turn to select FM, AM, CD, CD changer (option)
8. Scan function (automatically search for radio stations)
9. Exit (exit the menu)
10. Navigation buttons (seek/change radio station or CD track)
11. CD eject
12. CD slot
13. CD random play
14. FM (select FM1, FM2, FM3)
15. AM (select AM1 or AM2)
16. CD player
17. AUTO - automatically search for radio stations
18. Display
pg. 214 Specifications
Audio system HU-850 - overview
ProCarManuals.com
Page 182 of 200
Selecting a sound source
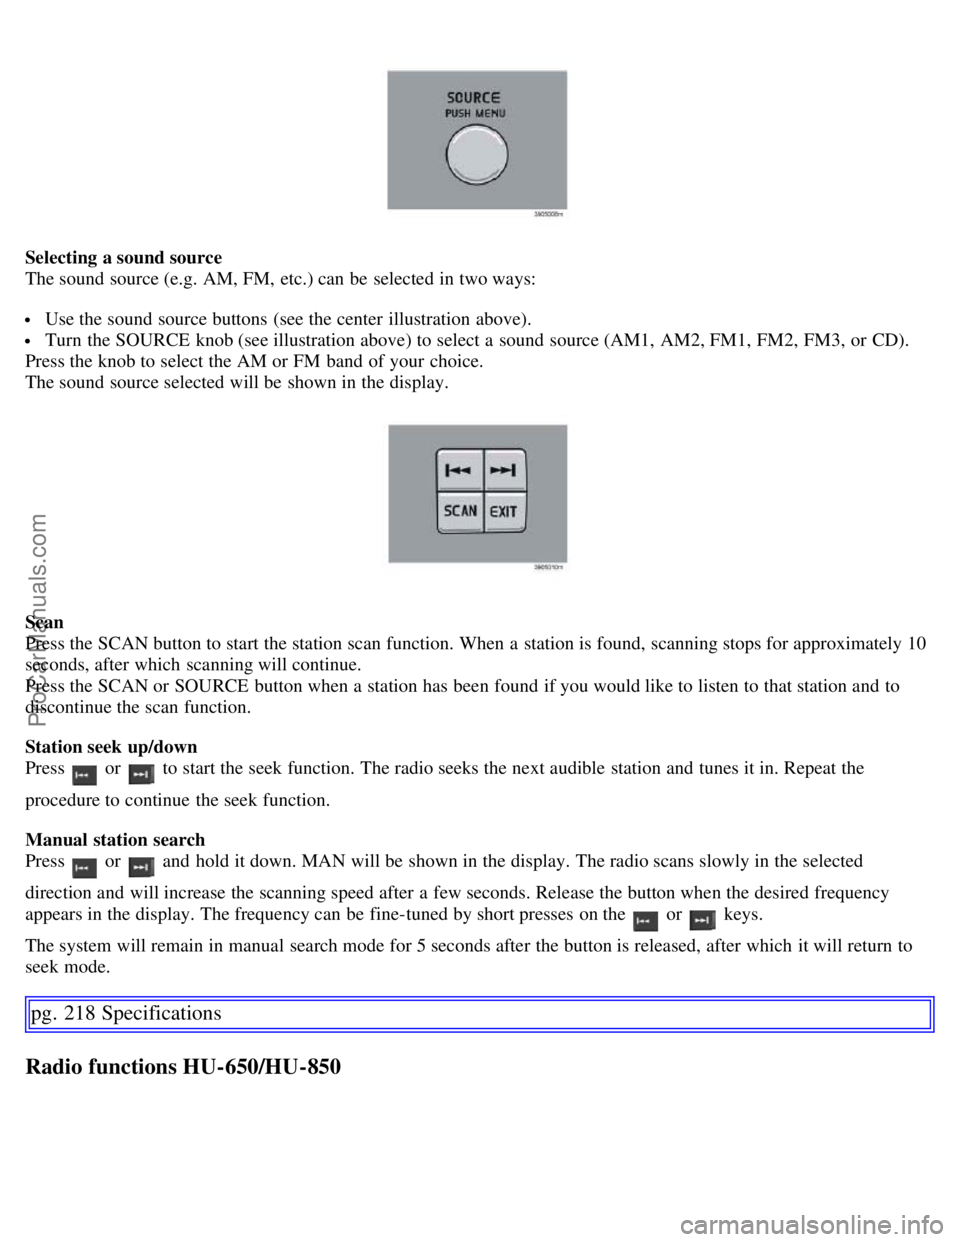
The sound source (e.g. AM, FM, etc.) can be selected in two ways:
Use the sound source buttons (see the center illustration above).
Turn the SOURCE knob (see illustration above) to select a sound source (AM1, AM2, FM1, FM2, FM3, or CD).
Press the knob to select the AM or FM band of your choice.
The sound source selected will be shown in the display.
Scan
Press the SCAN button to start the station scan function. When a station is found, scanning stops for approximately 10
seconds, after which scanning will continue.
Press the SCAN or SOURCE button when a station has been found if you would like to listen to that station and to
discontinue the scan function.
Station seek up/down
Press
or to start the seek function. The radio seeks the next audible station and tunes it in. Repeat the
procedure to continue the seek function.
Manual station search
Press
or and hold it down. MAN will be shown in the display. The radio scans slowly in the selected
direction and will increase the scanning speed after a few seconds. Release the button when the desired frequency
appears in the display. The frequency can be fine-tuned by short presses on the
or keys.
The system will remain in manual search mode for 5 seconds after the button is released, after which it will return to
seek mode.
pg. 218 Specifications
Radio functions HU-650/HU-850
ProCarManuals.com
Page 183 of 200
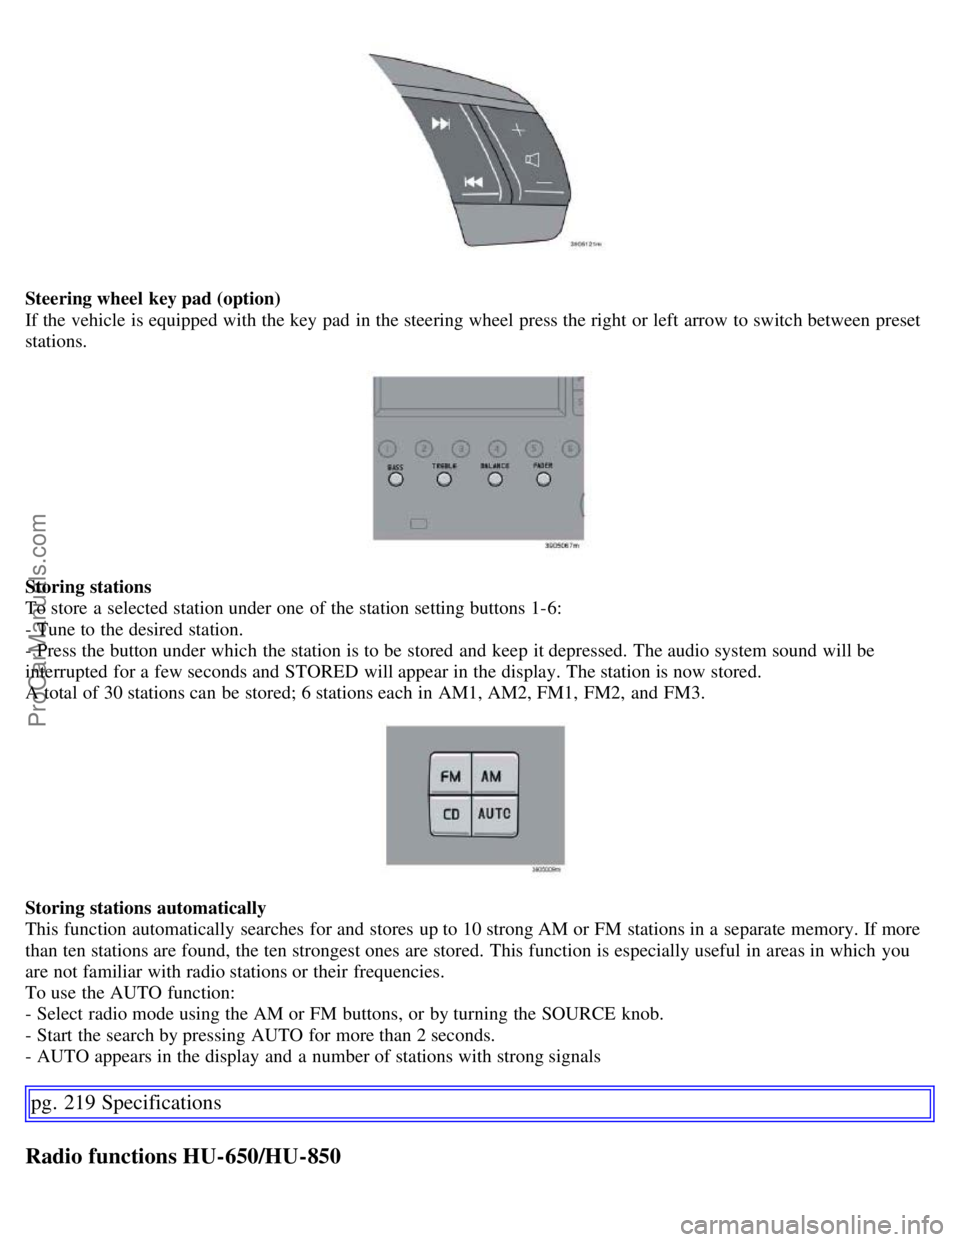
Steering wheel key pad (option)
If the vehicle is equipped with the key pad in the steering wheel press the right or left arrow to switch between preset
stations.
Storing stations
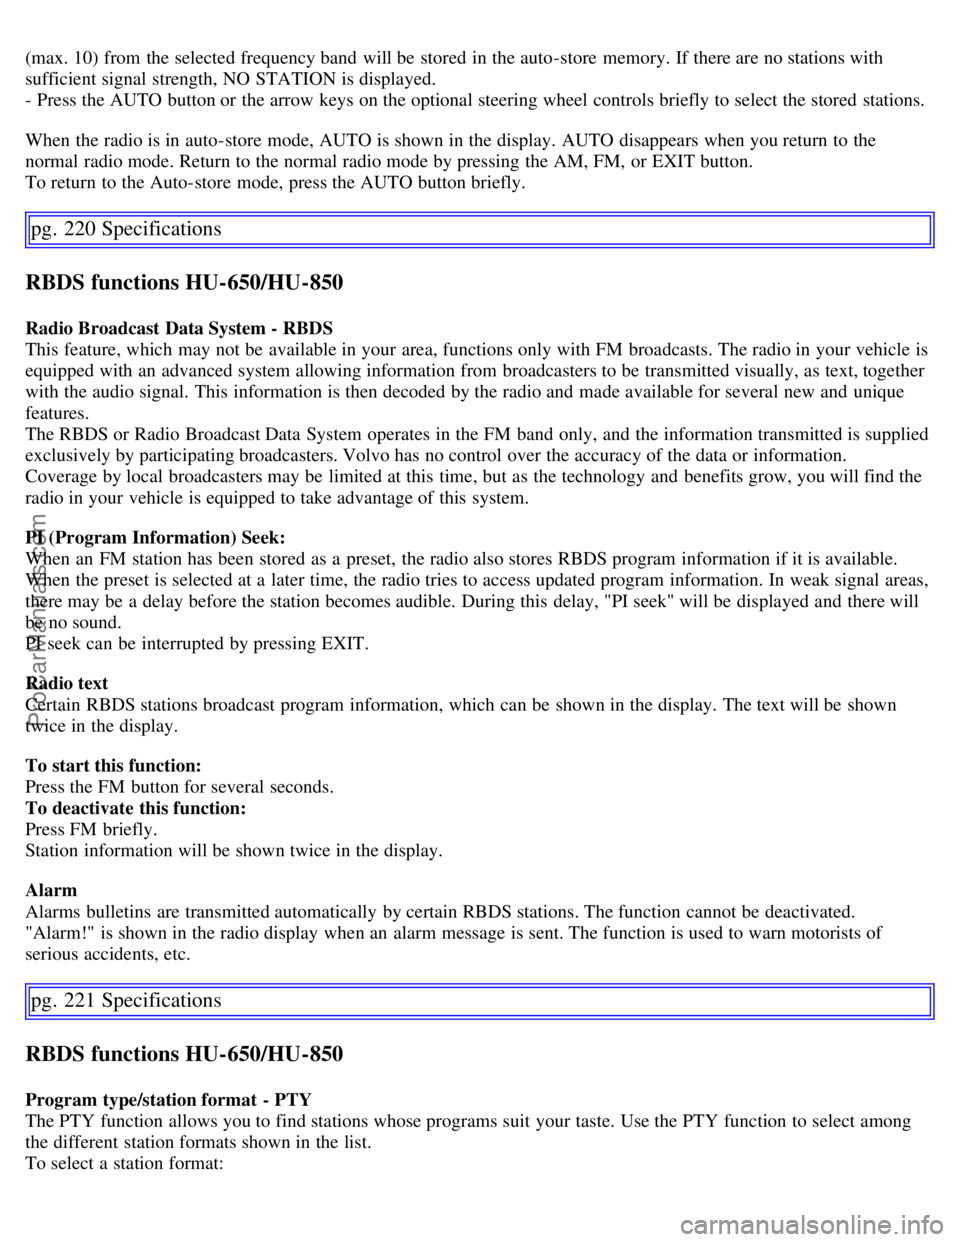
To store a selected station under one of the station setting buttons 1-6:
- Tune to the desired station.
- Press the button under which the station is to be stored and keep it depressed. The audio system sound will be
interrupted for a few seconds and STORED will appear in the display. The station is now stored.
A total of 30 stations can be stored; 6 stations each in AM1, AM2, FM1, FM2, and FM3.
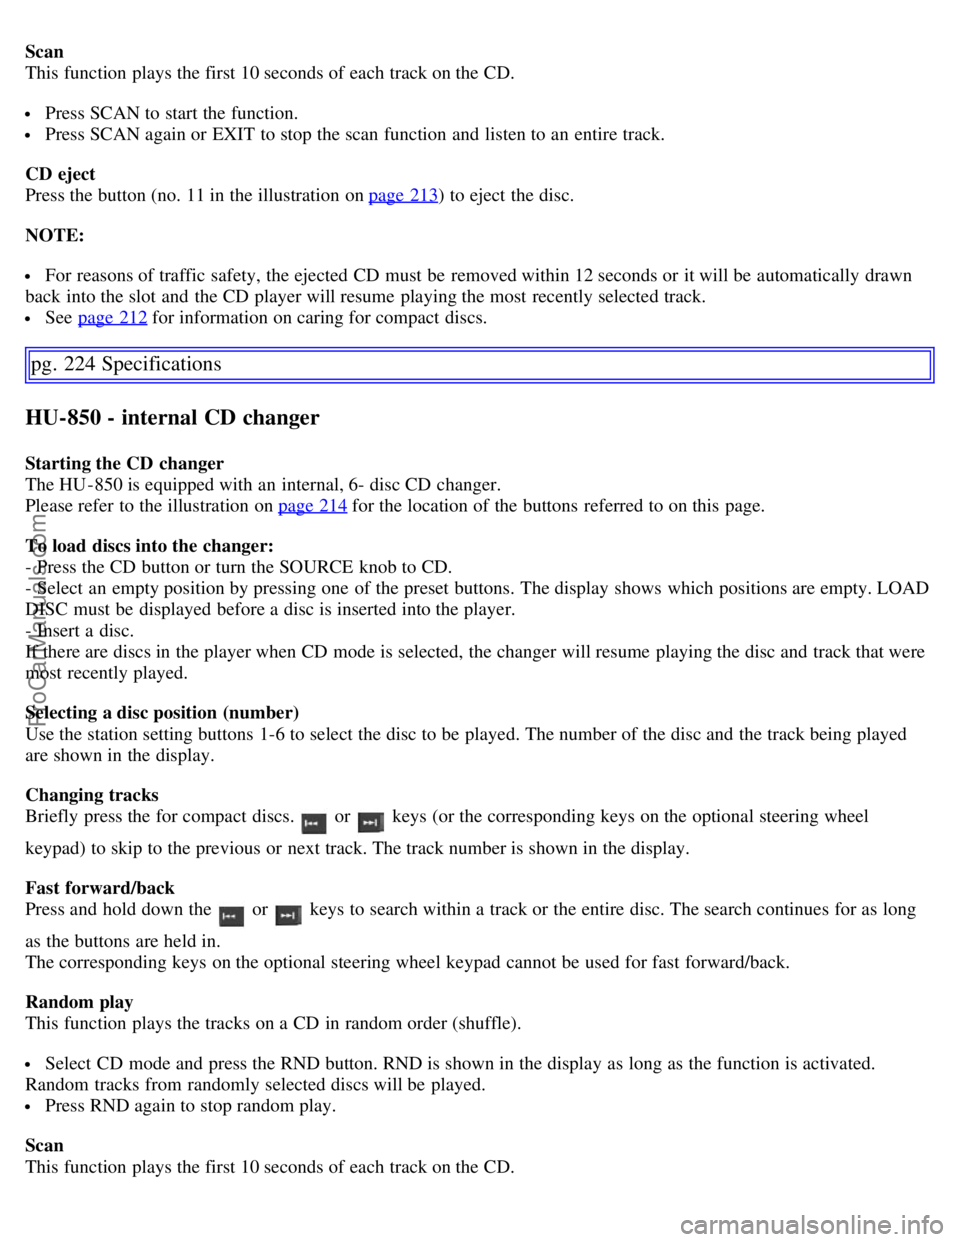
Storing stations automatically
This function automatically searches for and stores up to 10 strong AM or FM stations in a separate memory. If more
than ten stations are found, the ten strongest ones are stored. This function is especially useful in areas in which you
are not familiar with radio stations or their frequencies.
To use the AUTO function:
- Select radio mode using the AM or FM buttons, or by turning the SOURCE knob.
- Start the search by pressing AUTO for more than 2 seconds.
- AUTO appears in the display and a number of stations with strong signals
pg. 219 Specifications
Radio functions HU-650/HU-850
ProCarManuals.com
Page 184 of 200
(max. 10) from the selected frequency band will be stored in the auto-store memory. If there are no stations with
sufficient signal strength, NO STATION is displayed.
- Press the AUTO button or the arrow keys on the optional steering wheel controls briefly to select the stored stations.
When the radio is in auto-store mode, AUTO is shown in the display. AUTO disappears when you return to the
normal radio mode. Return to the normal radio mode by pressing the AM, FM, or EXIT button.
To return to the Auto-store mode, press the AUTO button briefly.
pg. 220 Specifications
RBDS functions HU-650/HU-850
Radio Broadcast Data System - RBDS
This feature, which may not be available in your area, functions only with FM broadcasts. The radio in your vehicle is
equipped with an advanced system allowing information from broadcasters to be transmitted visually, as text, together
with the audio signal. This information is then decoded by the radio and made available for several new and unique
features.
The RBDS or Radio Broadcast Data System operates in the FM band only, and the information transmitted is supplied
exclusively by participating broadcasters. Volvo has no control over the accuracy of the data or information.
Coverage by local broadcasters may be limited at this time, but as the technology and benefits grow, you will find the
radio in your vehicle is equipped to take advantage of this system.
PI (Program Information) Seek:
When an FM station has been stored as a preset, the radio also stores RBDS program information if it is available.
When the preset is selected at a later time, the radio tries to access updated program information. In weak signal areas,
there may be a delay before the station becomes audible. During this delay, "PI seek" will be displayed and there will
be no sound.
PI seek can be interrupted by pressing EXIT.
Radio text
Certain RBDS stations broadcast program information, which can be shown in the display. The text will be shown
twice in the display.
To start this function:
Press the FM button for several seconds.
To deactivate this function:
Press FM briefly.
Station information will be shown twice in the display.
Alarm
Alarms bulletins are transmitted automatically by certain RBDS stations. The function cannot be deactivated.
"Alarm!" is shown in the radio display when an alarm message is sent. The function is used to warn motorists of
serious accidents, etc.
pg. 221 Specifications
RBDS functions HU-650/HU-850
Program type/station format - PTY
The PTY function allows you to find stations whose programs suit your taste. Use the PTY function to select among
the different station formats shown in the list.
To select a station format:
ProCarManuals.com
Page 187 of 200
Scan
This function plays the first 10 seconds of each track on the CD.
Press SCAN to start the function.
Press SCAN again or EXIT to stop the scan function and listen to an entire track.
CD eject
Press the button (no. 11 in the illustration on page 213
) to eject the disc.
NOTE:
For reasons of traffic safety, the ejected CD must be removed within 12 seconds or it will be automatically drawn
back into the slot and the CD player will resume playing the most recently selected track.
See page 212 for information on caring for compact discs.
pg. 224 Specifications
HU-850 - internal CD changer
Starting the CD changer
The HU -850 is equipped with an internal, 6- disc CD changer.
Please refer to the illustration on page 214
for the location of the buttons referred to on this page.
To load discs into the changer:
- Press the CD button or turn the SOURCE knob to CD.
- Select an empty position by pressing one of the preset buttons. The display shows which positions are empty. LOAD
DISC must be displayed before a disc is inserted into the player.
- Insert a disc.
If there are discs in the player when CD mode is selected, the changer will resume playing the disc and track that were
most recently played.
Selecting a disc position (number)
Use the station setting buttons 1-6 to select the disc to be played. The number of the disc and the track being played
are shown in the display.
Changing tracks
Briefly press the for compact discs.
or keys (or the corresponding keys on the optional steering wheel
keypad) to skip to the previous or next track. The track number is shown in the display.
Fast forward/back
Press and hold down the
or keys to search within a track or the entire disc. The search continues for as long
as the buttons are held in.
The corresponding keys on the optional steering wheel keypad cannot be used for fast forward/back.
Random play
This function plays the tracks on a CD in random order (shuffle).
Select CD mode and press the RND button. RND is shown in the display as long as the function is activated.
Random tracks from randomly selected discs will be played.
Press RND again to stop random play.
Scan
This function plays the first 10 seconds of each track on the CD.
ProCarManuals.com
Page 188 of 200
Press SCAN to start the function.
Press SCAN again or EXIT to stop the scan function and listen to an entire track. Scan only works on the selected
disc.
CD eject
This function makes it possible to eject a single disc, or to eject all of the discs in the changer.
Press the eject button briefly to eject the disc that is currently playing.
A longer press (more than two seconds) starts the process of ejecting all of the discs in the changer.
NOTE:
The EJECT ALL function can only be used while the vehicle is at a standstill and will be cancelled if the vehicle
begins to move.
For reasons of traffic safety, you have 12 seconds in which to remove the ejected disc. After that, the disc
automatically reinserts into the player, and the CD player will resume playing the most recently selected track.
See page 212 for information on caring for compact discs.
pg. 225 Specifications
External CD changer (option)
External CD changer
The optional 10-CD changer is mounted in the cargo compartment.
Please refer to the illustration on pages 214
and 218 for the location of the buttons referred to on this page.
Turn the SOURCE knob to select the external CD changer.
To load discs into the changer:
- Slide the cover on the CD change open.
- Press the eject button on the CD changer.
- Pull the magazine out of the changer and insert the disc(s).
- Press the magazine back into the changer and slide the cover back into place.
If there are discs in the player when CD mode is selected, the changer will resume playing the disc and track that were
most recently played.
Selecting a disc position (number)
Use the station setting buttons 1-6 to select the disc to be played. Continue to press button 6 to select discs 7-10.
The number of the disc and the track being played are shown in the display.
Changing tracks
Briefly press the
or keys (or the corresponding keys on the optional steering wheel keypad) to skip to the
previous or next track. The track number is shown in the display.
ProCarManuals.com
Page 189 of 200
Fast forward/back
Press and hold down the
or keys to search within a track or the entire disc. The search continues for as long
as the buttons are held in.
The corresponding keys on the optional steering wheel keypad cannot be used for fast forward/back.
Random play
This function plays the tracks on a CD in random order (shuffle).
Select CD mode and press the RND button. RND is shown in the display as long as the function is activated.
Random tracks from randomly selected discs will be played.
Press RND again to stop random play.
Scan
This function plays the first 10 seconds of each track on the CD.
Press SCAN to start the function.
Press SCAN or EXIT to stop the scan function and listen to an entire track.
Scan only works on the selected disc.
pg. 226 Specifications
Dolby Surround Pro Logic II - HU-850 only
Dolby Surround Pro Logic II
Dolby Surround Pro Logic II is a further development of the previous version of the system and provides enhanced
sound quality. The improved sound is particularly apparent to passengers in the rear seat.
Dolby Surround Pro Logic II, together with a center speaker in the dashboard, offers you a sound experience very
close to a live performance. The normal left-right stereo channels are divided to left-center -right. In addition, surround
sound is produced by the rear speakers. This surround sound mirrors the ambience of a concert hall.
NOTE:
Dolby Surround Pro Logic II is optimized for CD mode.
When listening to FM radio stations, Dolby Surround Pro Logic II functions best in areas with strong reception. If
reception is weak, selecting 2 or 3- channel stereo may provide better sound quality.
3 channel stereo is recommended for AM and FM broadcasts.
Dolby Surround Pro Logic II and the Dolby icon are trademarks of Dolby Laboratories Licensing Corporation.
Dolby Pro Logic II Surround System is manufactured under license from Dolby Laboratories Licensing Corporation.
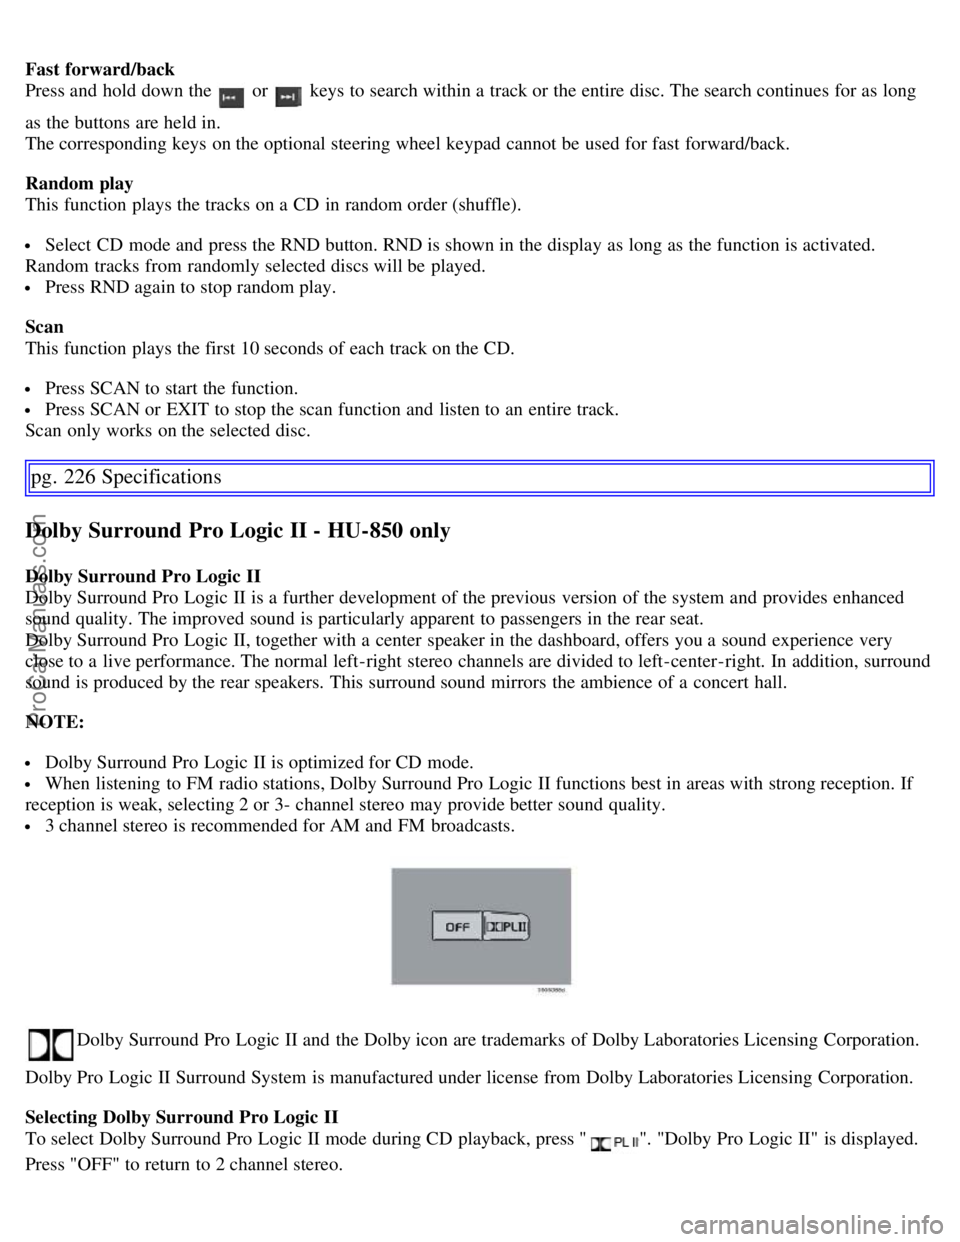
Selecting Dolby Surround Pro Logic II
To select Dolby Surround Pro Logic II mode during CD playback, press "
". "Dolby Pro Logic II" is displayed.
Press "OFF" to return to 2 channel stereo.
ProCarManuals.com
Page 192 of 200
HomeLink® surface, keeping the indicator light in view. For placement questions, contact HomeLink® toll-free 1-
800-355-3515 (Internet: www.HomeLink.com).
- Using two hands, push and hold both your hand -held transmitter's button and the transceiver button you wish to
program.
The indicator light will flash first slowly, then rapidly. Rapid flashing tells you the HomeLink® button has been
successfully programmed. Release both buttons.
- If you are programming a rolling code-equipped device (e.g., garage door opener or entry door lock), refer to
"Programming rolling codes" on the next page to complete the programming process.
Repeat the third and fourth steps to program the other two transceiver buttons. If, after several attempts, you are unable
to successfully train the HomeLink® Universal Transceiver to learn your hand -held transmitter's signal, contact
HomeLink® toll-free 1-800-355-3515 (Internet: www.HomeLink.com
)
pg. 230 Specifications
HomeLink® Universal Transceiver (option)
WARNING!
If you use HomeLink® to open a garage door or gate, be sure no one is near the gate or door while it is in motion.
Do not use the HomeLink® Universal Transceiver with any garage door opener that lacks safety "stop" and
"reverse" features as required by federal safety standards. (This includes any garage door opener model
manufactured before April 1, 1982) A garage door opener that cannot "detect" an object, signalling the door to
"stop" and "reverse" does not meet current federal safety standards. Using a garage door opener without these
features increases the risk of serious injury or death. For more information on this matter, call toll-free
1-800-355-3515
(Internet: www.HomeLink.com
).
NOTE: Canadian residents:
During programming, your hand -held transmitter may automatically stop transmitting. To successfully train
HomeLink®, continue to hold the HomeLink® button. At the same time, repeatedly press and hold your handheld
transmitter's button at two-second intervals until HomeLink® has learned your transmitter's code. The HomeLink®
indicator light will flash first slowly, and then rapidly to indicate that the button has been successfully programmed.
Determining if your garage door uses a rolling code
Determine, in one of the following ways, if your garage door uses a rolling code system and is manufactured after
1996:
Refer to the garage door opener owner's manual for verification.
If your hand -held transmitter appears to program the HomeLink® Universal Transceiver but the programmed button
does not activate the garage door, your garage door opener may have a rolling code.
Press the programmed HomeLink® button. If the garage door opener has the rolling code feature, the HomeLink®
indicator light flashes rapidly and then glows steadily after approximately 2 seconds.
To train a rolling code garage door opener, follow these instructions after programming the desired transceiver
button according to "Programming the transceiver." The help of a second person may make training easier.
- Locate the training button on the garage door opener motor head unit. The location and color of the training button
may vary. If you encounter difficulty, refer to the garage door opener owner's manual or call toll-free 1-800-355-3515
(Internet: www.HomeLink.com
).
- Press the "training" button on the garage door opener motor head unit until the "training" light comes on.
- Press and release the programmed HomeLink® button. Press and release the programmed HomeLink® button a
second time to complete the training process.
Some garage door openers may require you to do this procedure a third time to complete the training.
ProCarManuals.com